“Hi Al, A carry on from last week with speakers and sounds to my class 37`s, and new speaker and sound added to my Deltic ..unfortunately it has come back with problems with the prop shaft so unable to run…
as you see Dave gets a lot of problems to sort out as well… all part of the fun with Model Railways.
John’s been in touch with his U shaped model train layout:
“AL,
Well, finally got started on my HO layout after 10 years of planning in my head, and some on paper.
The eventual layout will be “U” shaped and be 15′ X 11″ or so. I’ve started building it in sections in my shop, but the main portions will be built in place. It will be Appalachian mountain railroading, Virginia and Kentucky, in no particular time period. Coal mines in the mountains, and factories in the cities.
My goal is to have the railroad look like God made the landscape first, and then people built railroads instead of the other way around, with all the engineering problems the real railroad guys had.
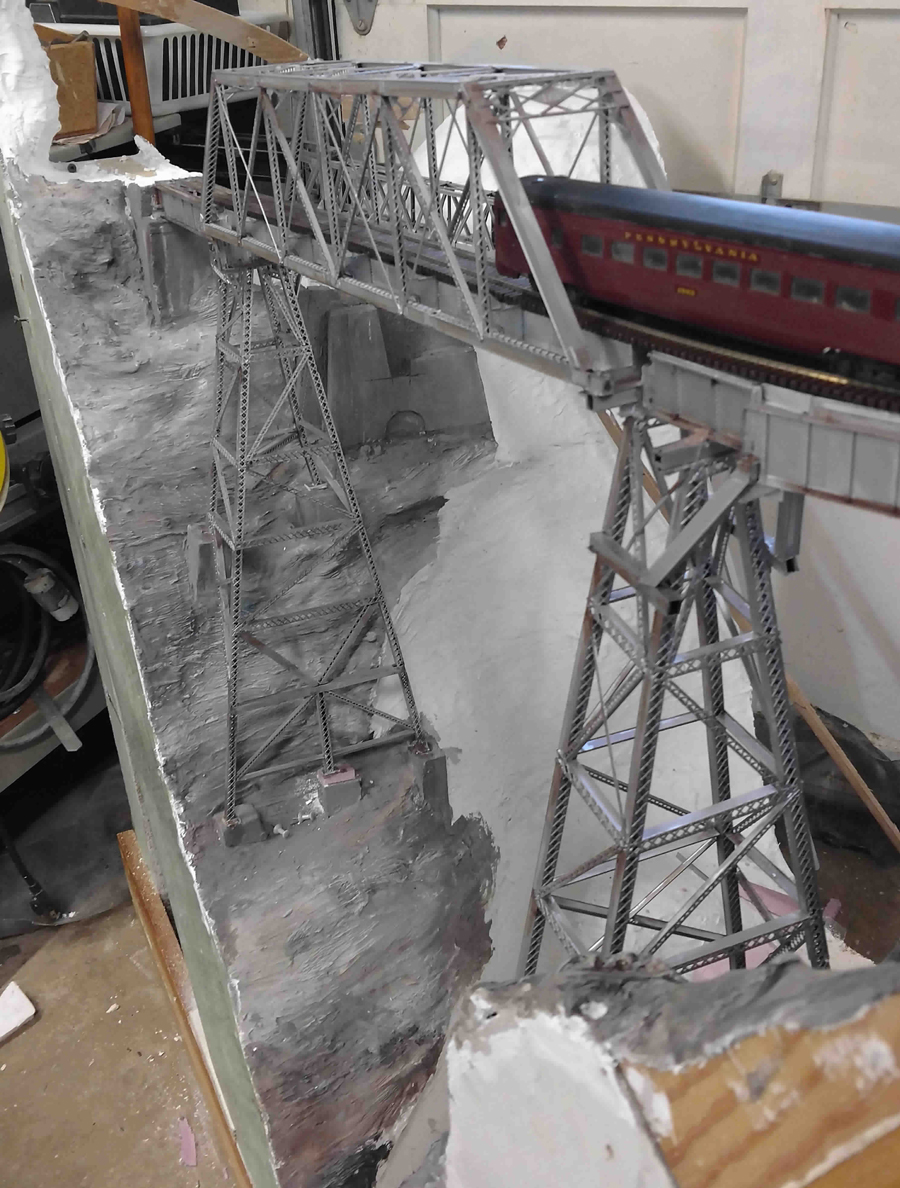
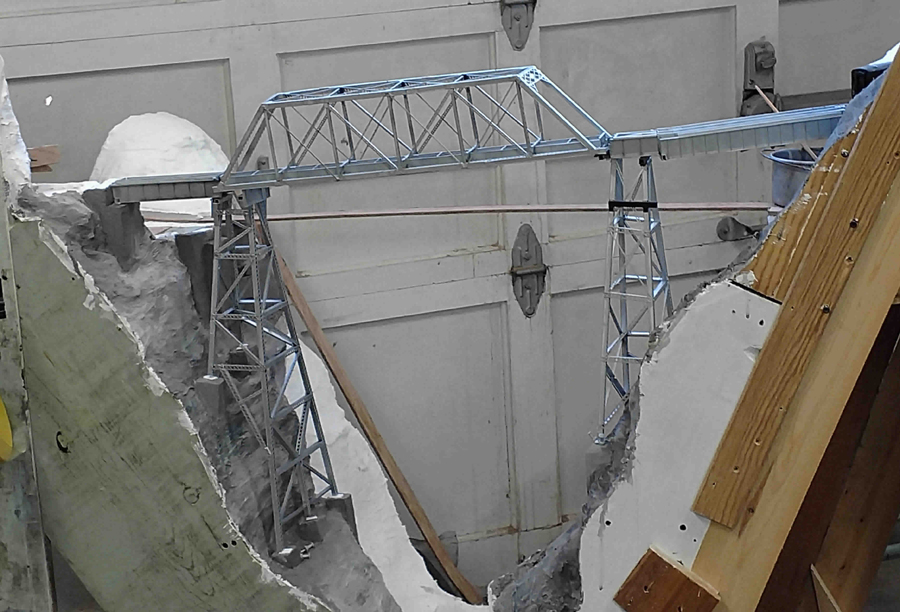
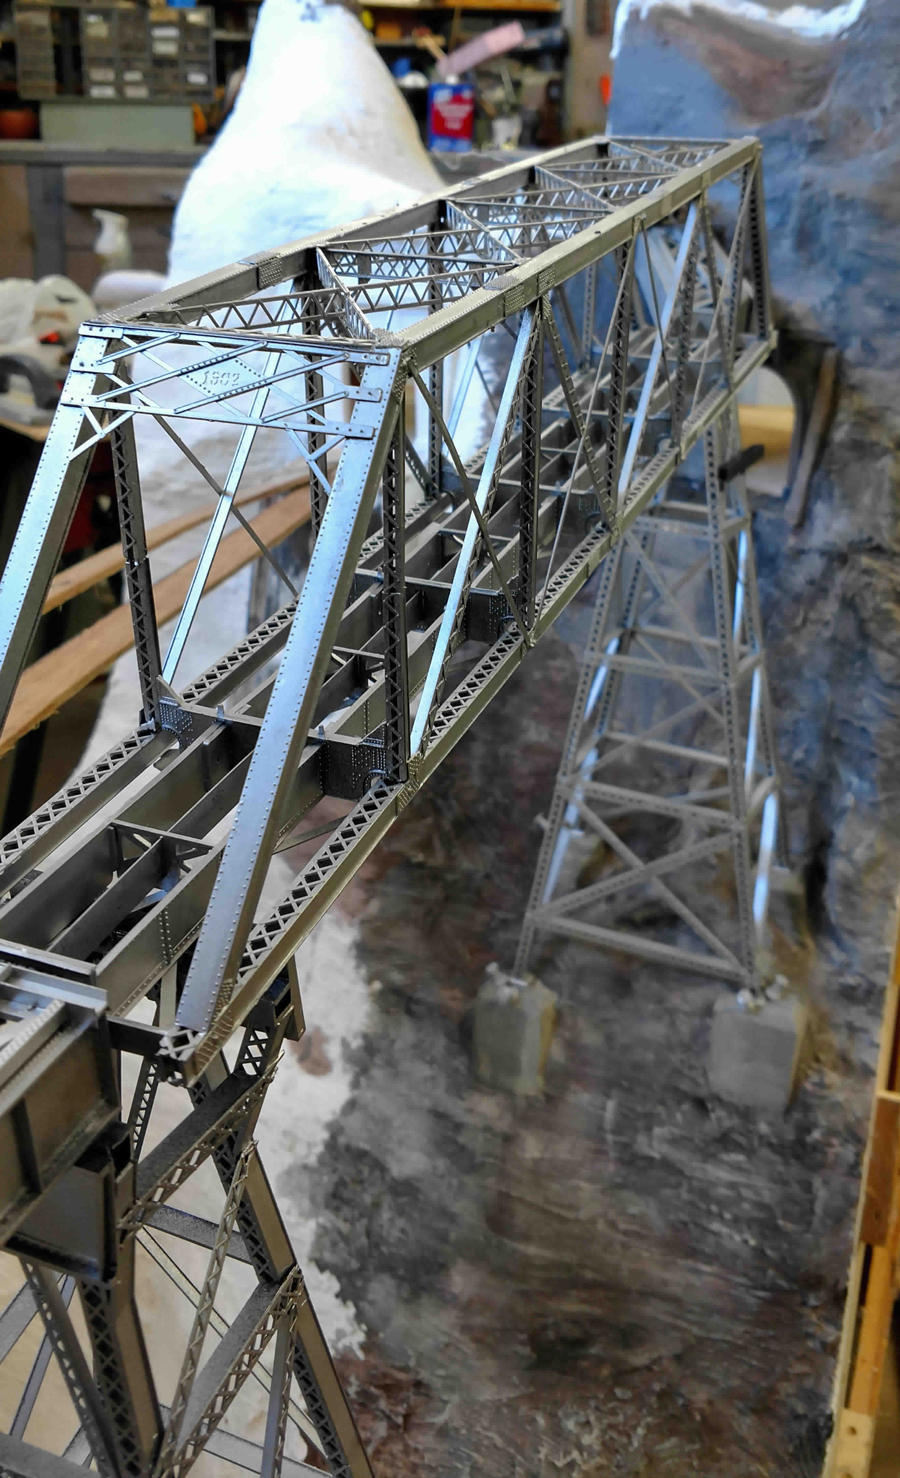
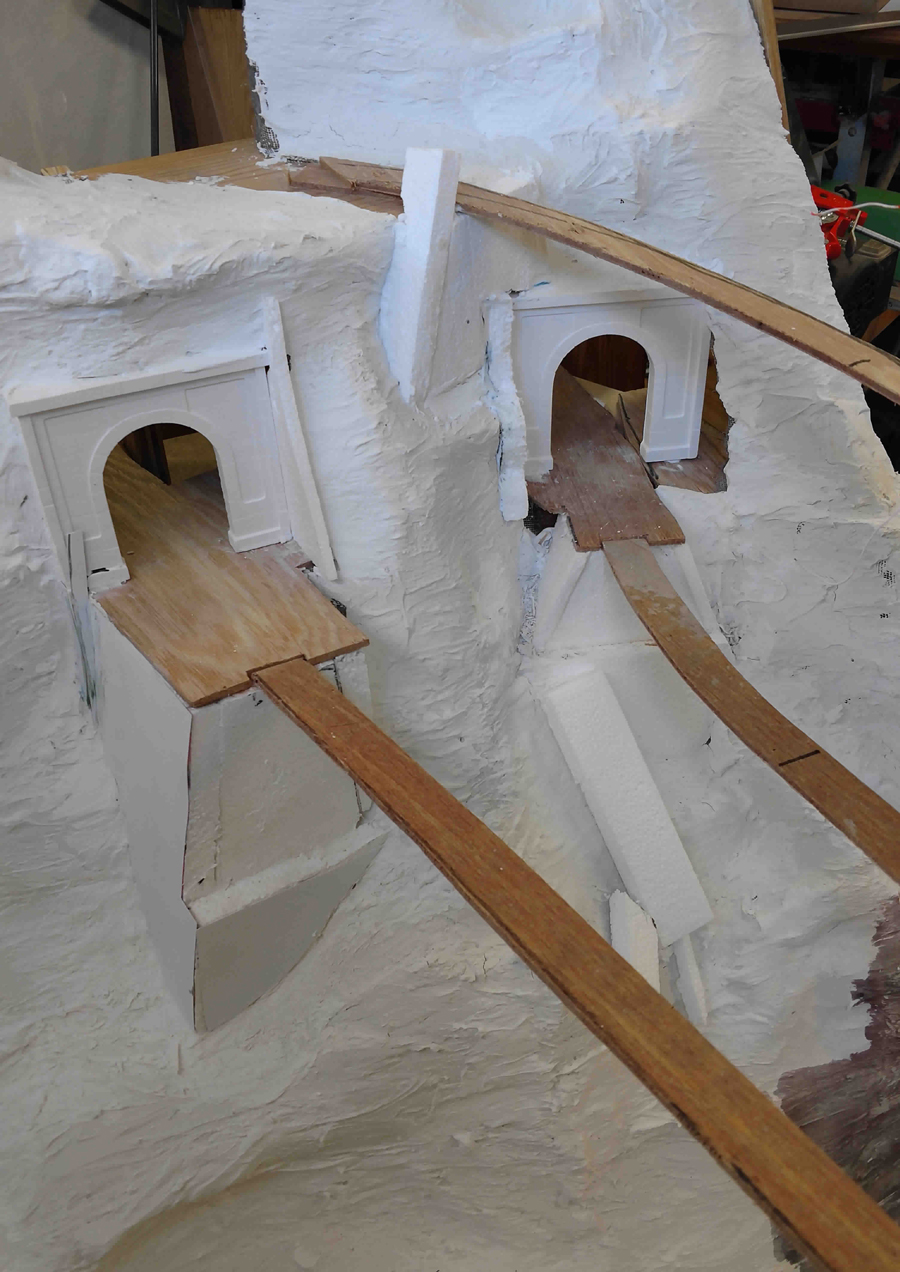
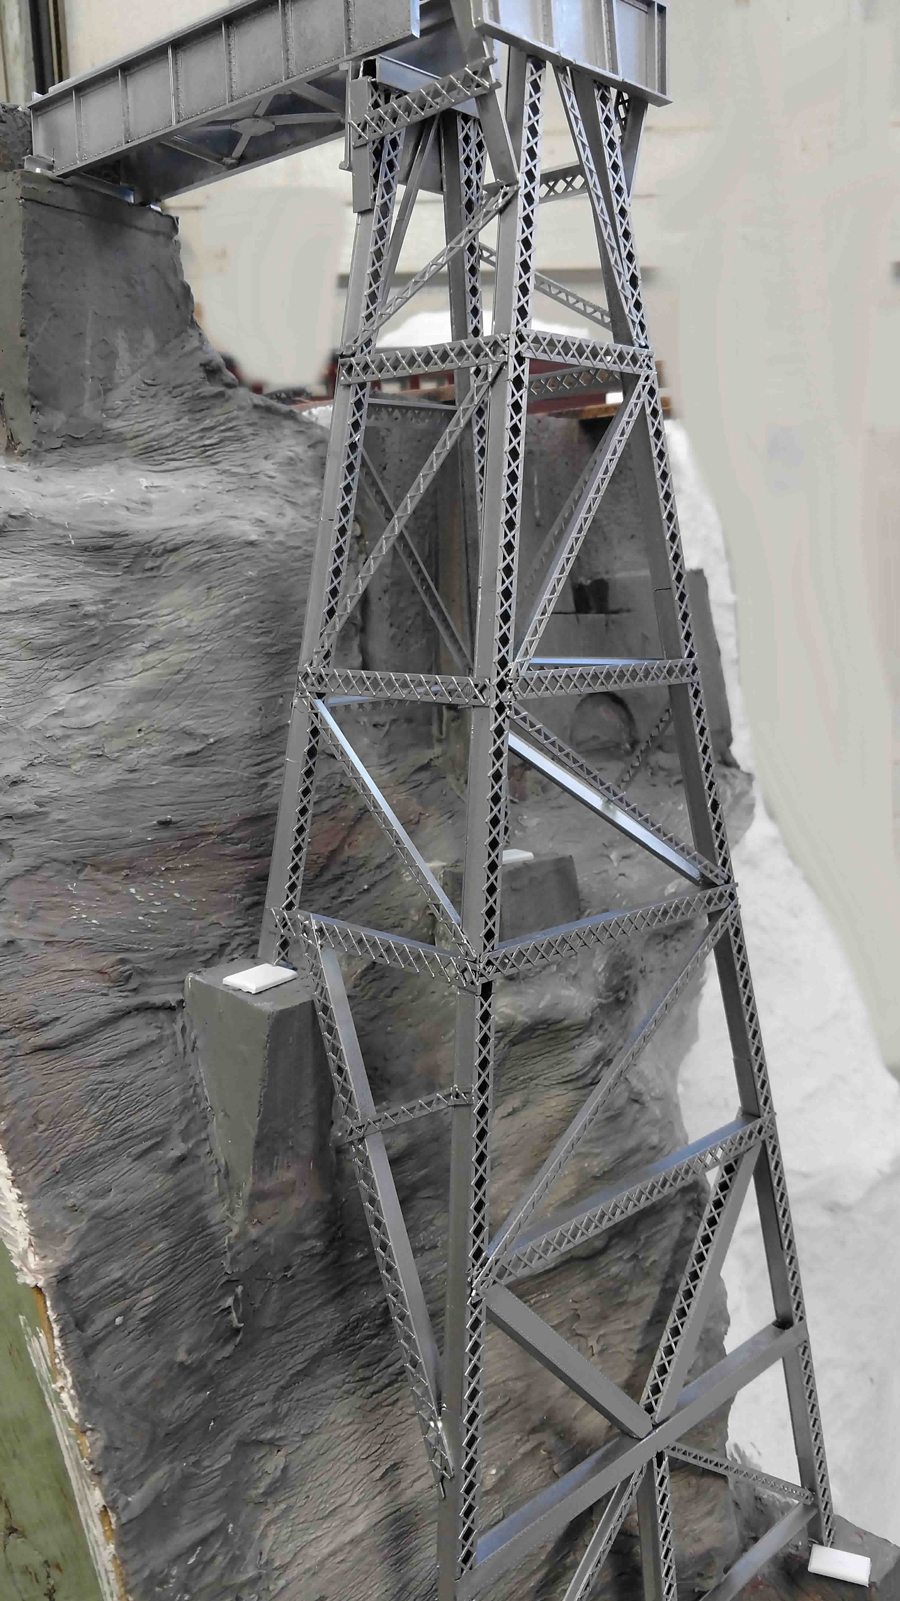
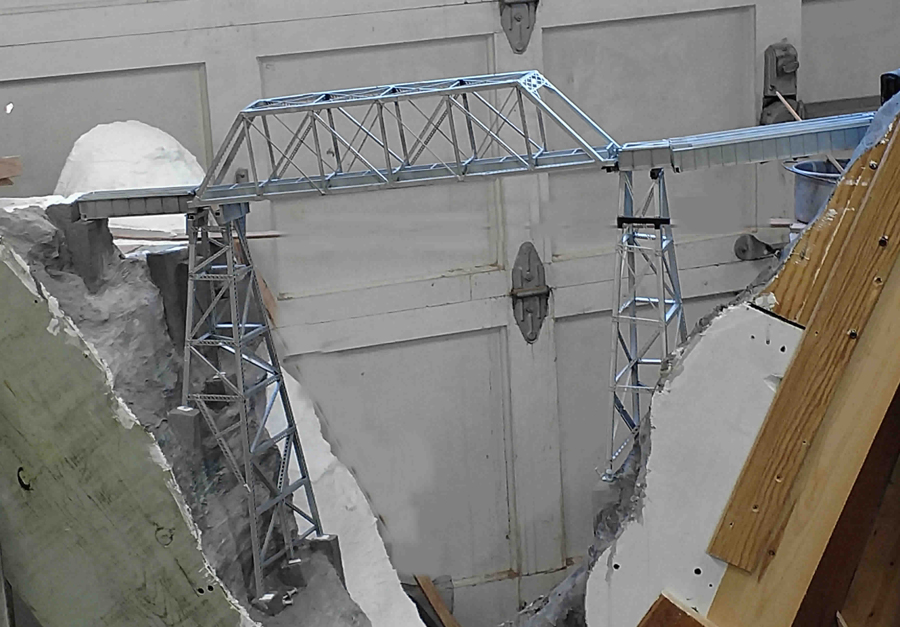
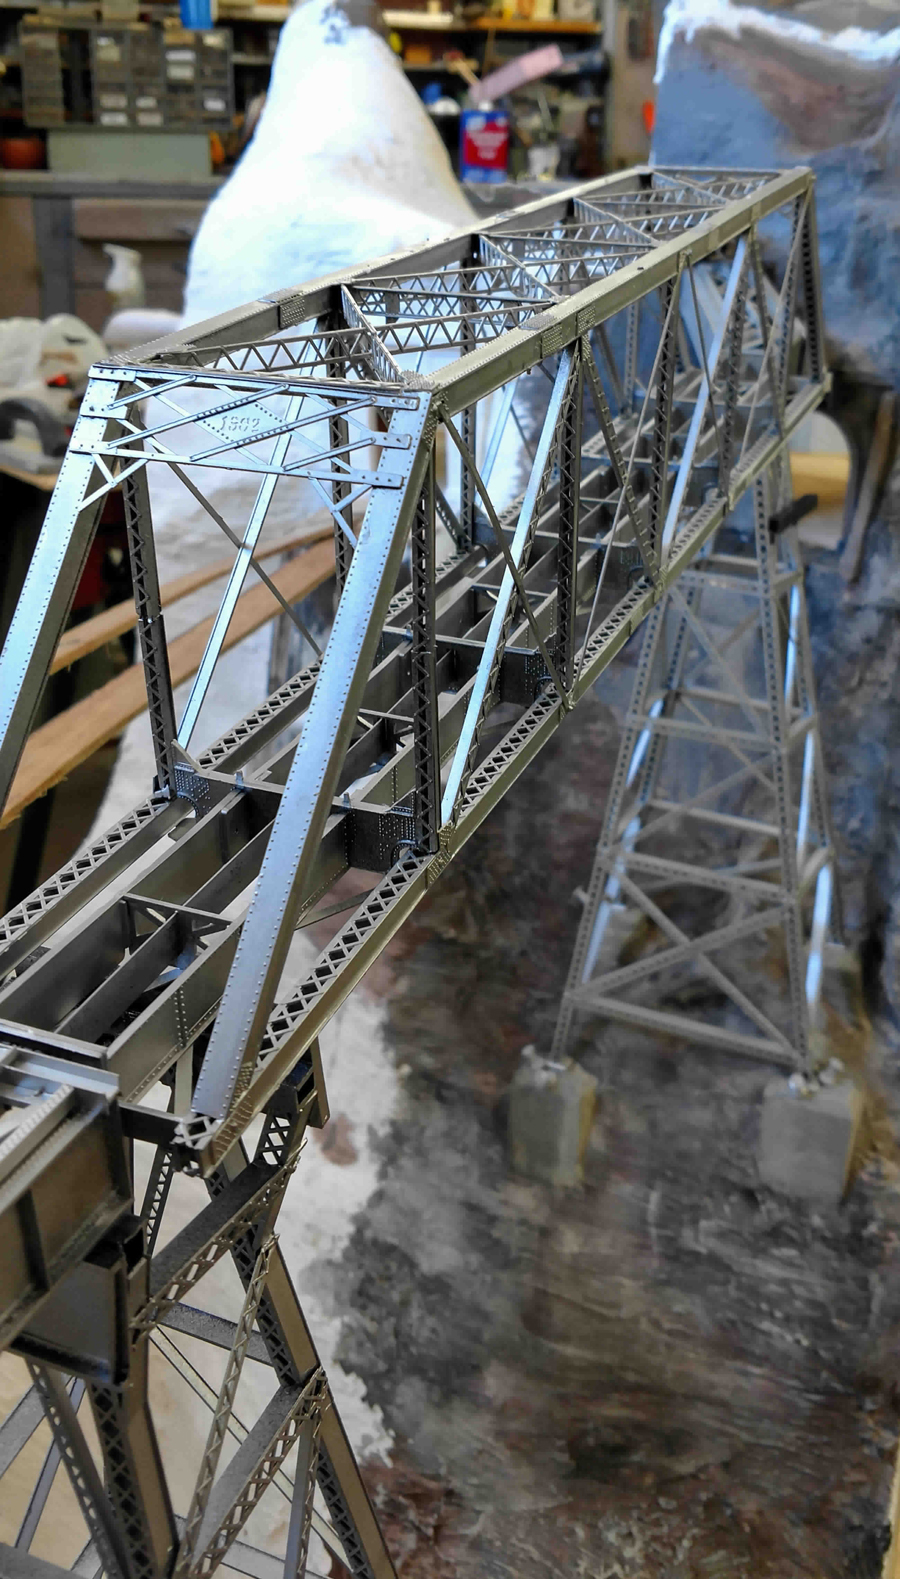
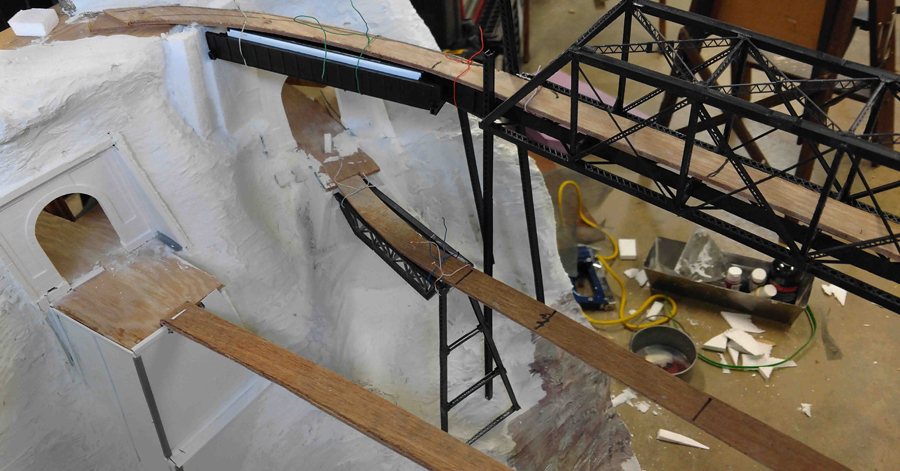
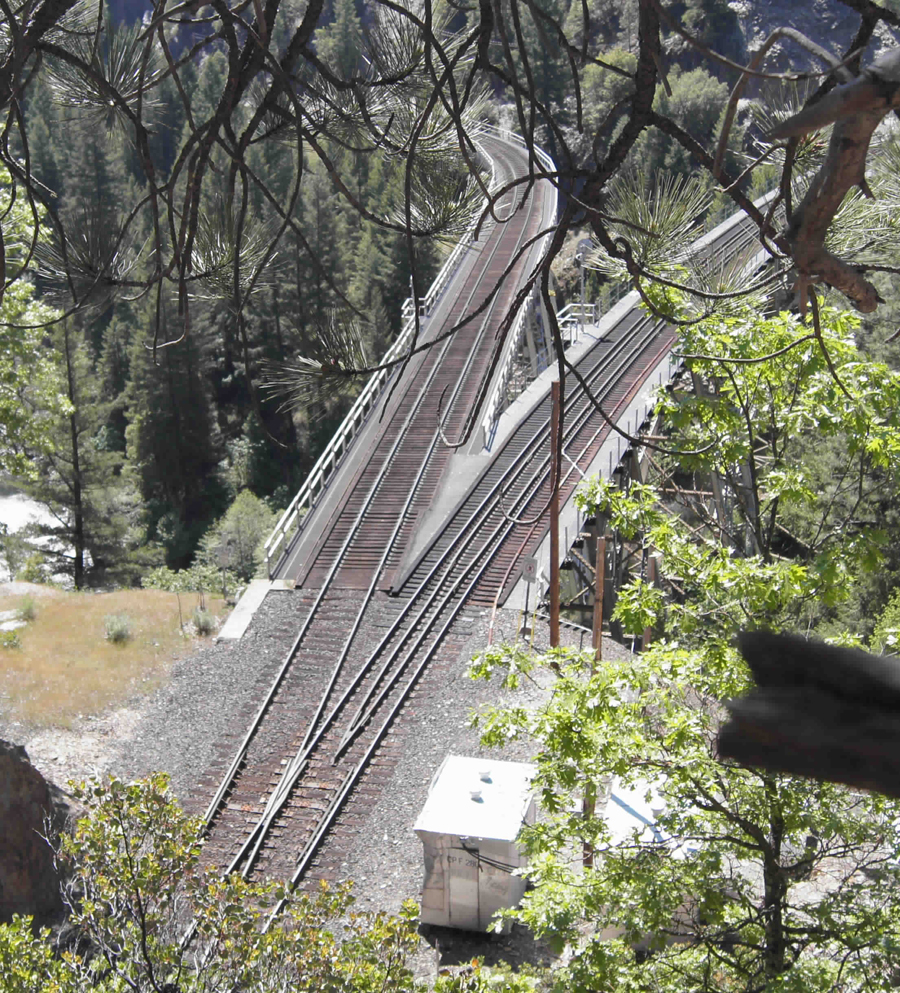
So far I have started on what I think will be a center-piece of the scenery, a valley which goes from 40″ high to nearly the floor, and three bridges which go across it. So far 1 bridge is 90% done. My inspiration for this first module is the American iconic railroad scene known as “the Keddie Y” in Keddie, California at the end of the beautiful Feather River canyon– a picture attached. I’ve been there a few times and it’s an engineering marvel.
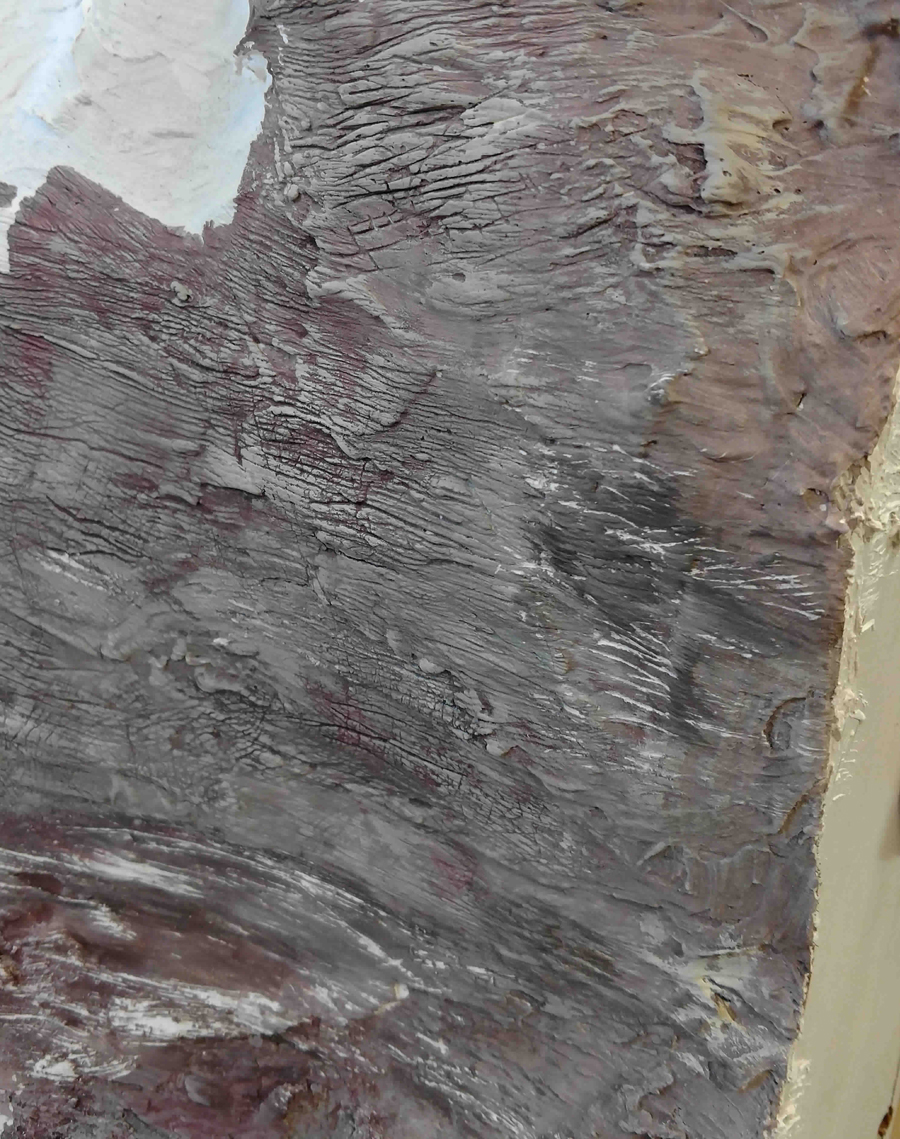
The tracks are nearly ready to be secured to bridge 1, but no landscaping, trees, bushes, dirt etc. is done yet. The scenery is hard-shell plaster, actually dry-wall compound, over “recycled” metal window screen
If you are interested, I’ll be sure to send you more as the module is completed, I’m on travel for a few months, so the updates may be slow in coming.
Regards,
John,
Baltimore, MD”
Now on to Bob:
“Hi Al
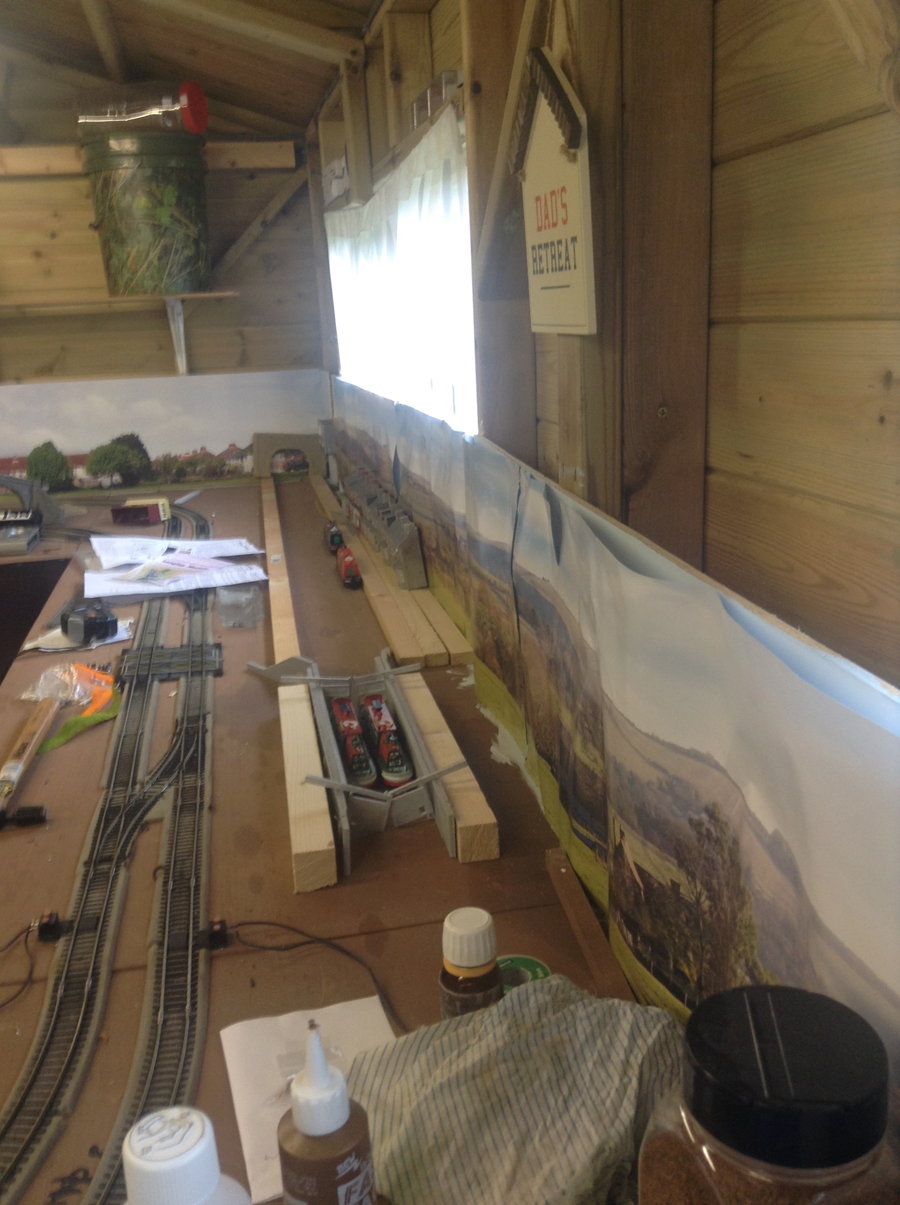
This is my first post. I have been building my first railway in Hornby 00 and am looking for ideas on how to build a canal scene with lock. I have purchased the lock walls with the double gates from Langley Models. However my imagination for model building is not good so I am looking for help from your readers.
Here are a couple of photos of where I’m at. It’s building the lock I’m struggling with. How to build around it to show the different levels. Hope someone can help.
regards
Bob”
A big thanks to Bob, Steve and to John for sharing his U shaped model train layout.
(When it comes to U shaped layouts, I always think of Brian’s: U shaped layout.
Loved the imagination behind John’s layout – can’t wait to see the updates.
That’s all for today folks. Keep ’em coming.
And don’t forget the Beginner’s Guide if you want to get going on your own layout.
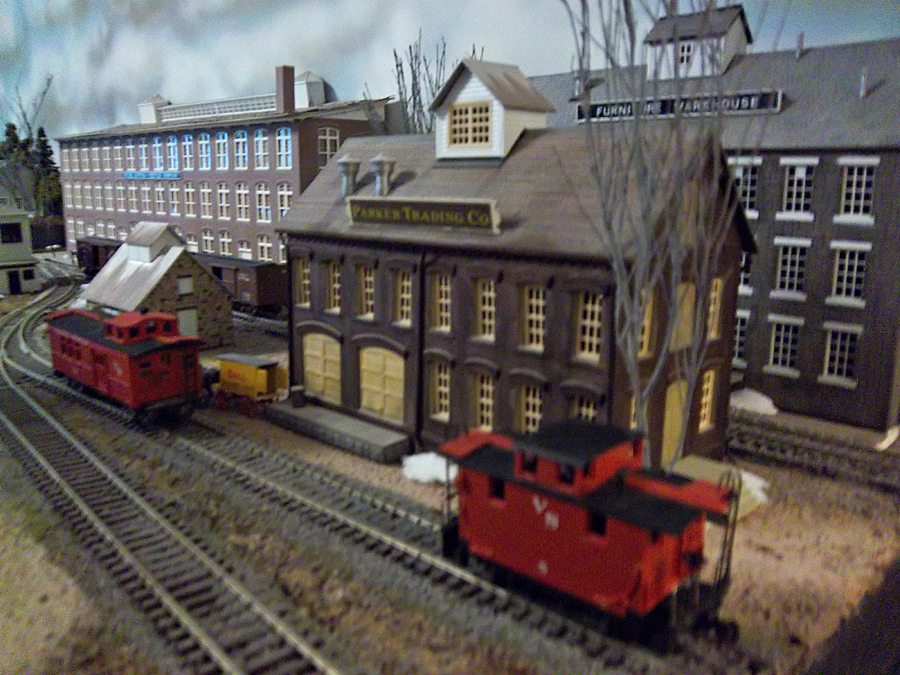
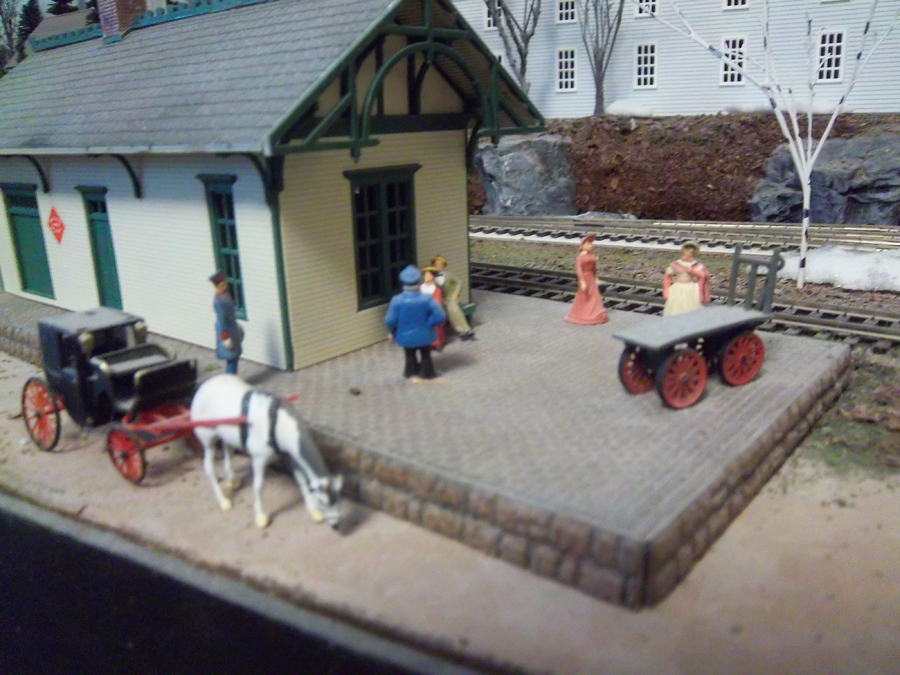
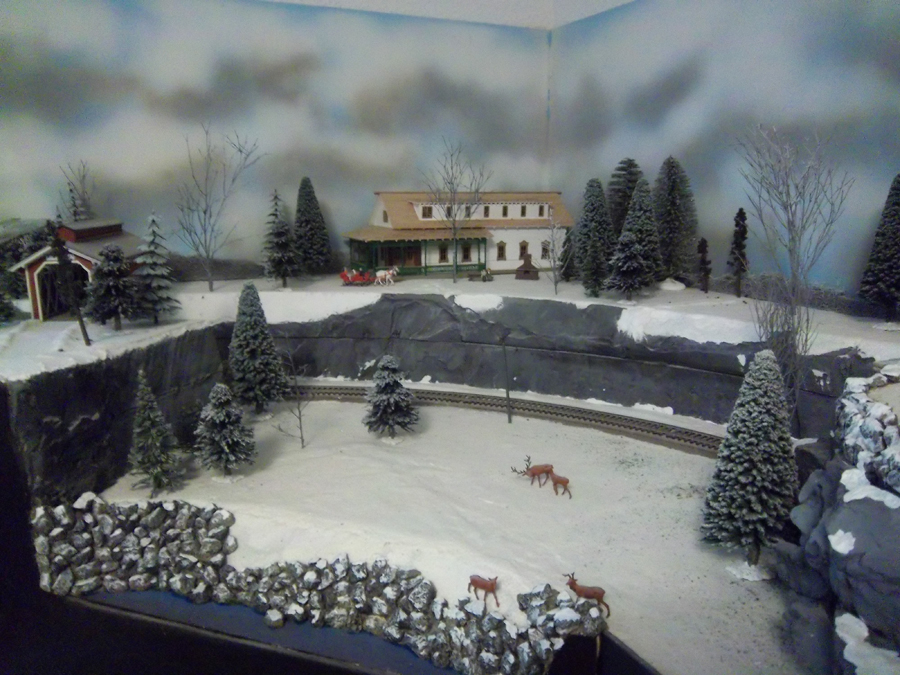
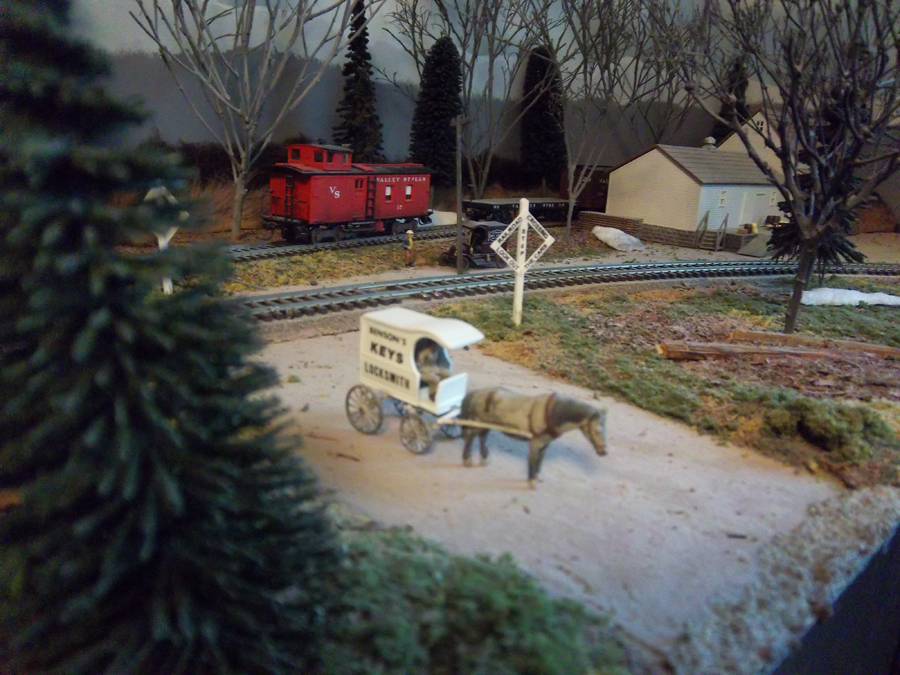
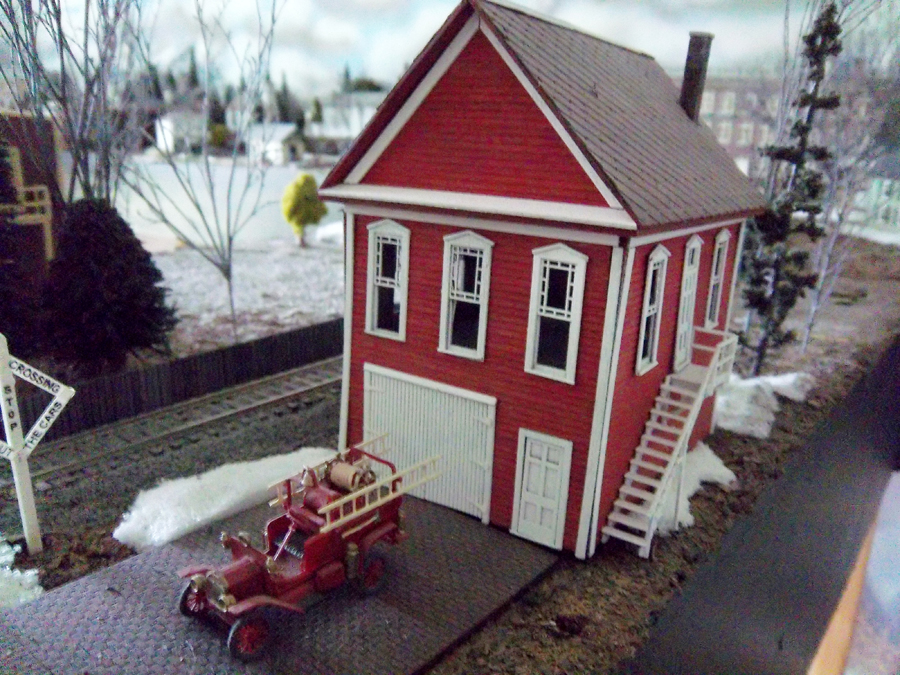
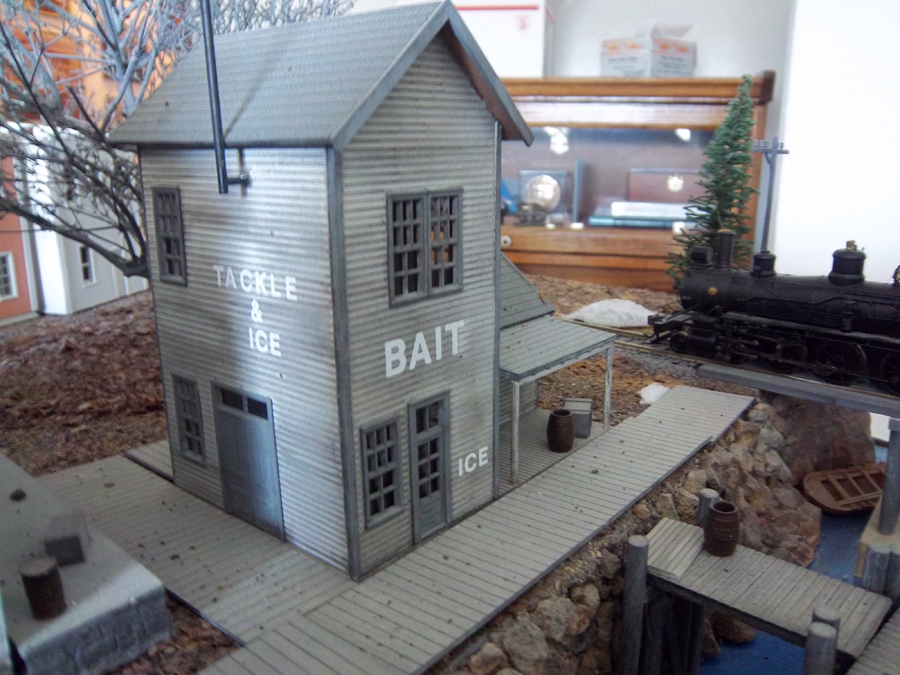
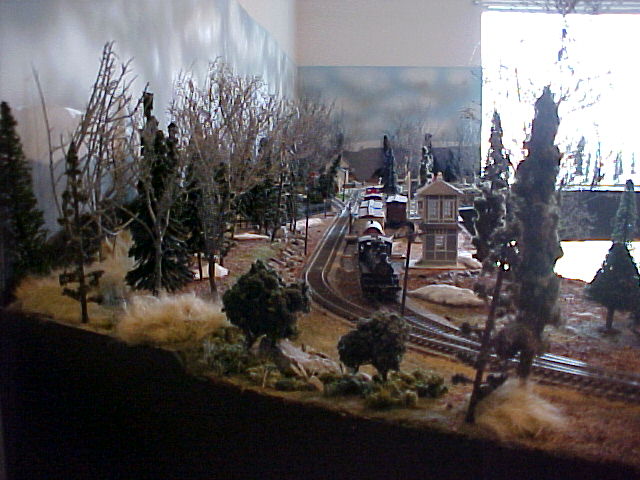
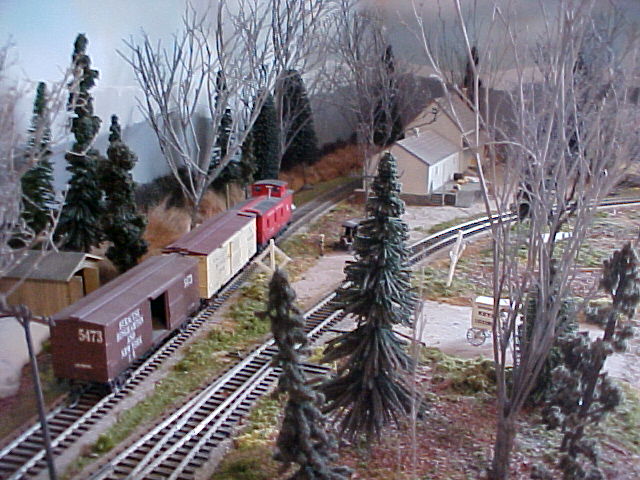
William has been in touch and added to the New England themed HO scale layouts on the blog:
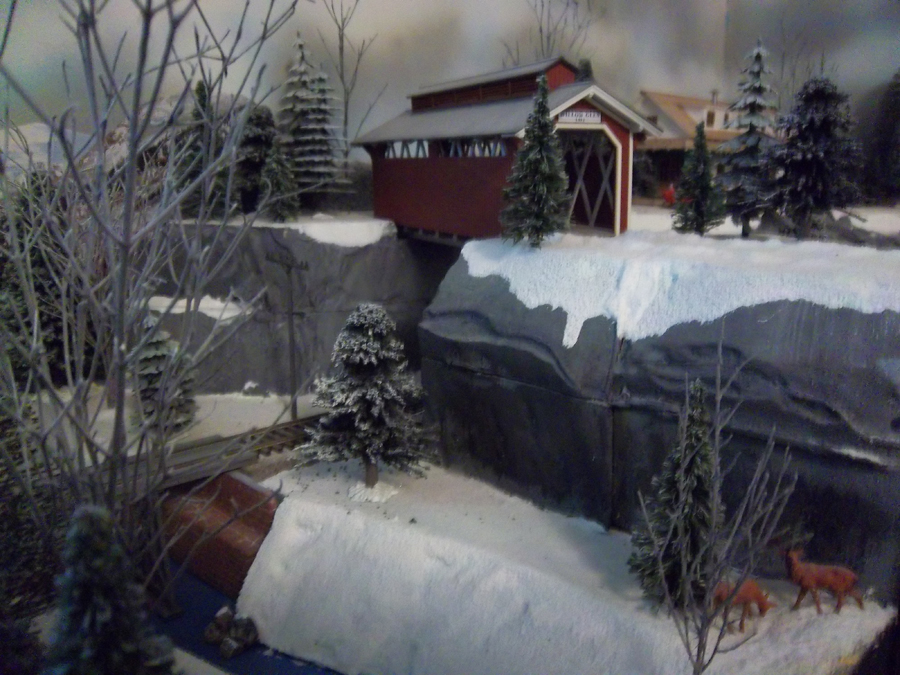
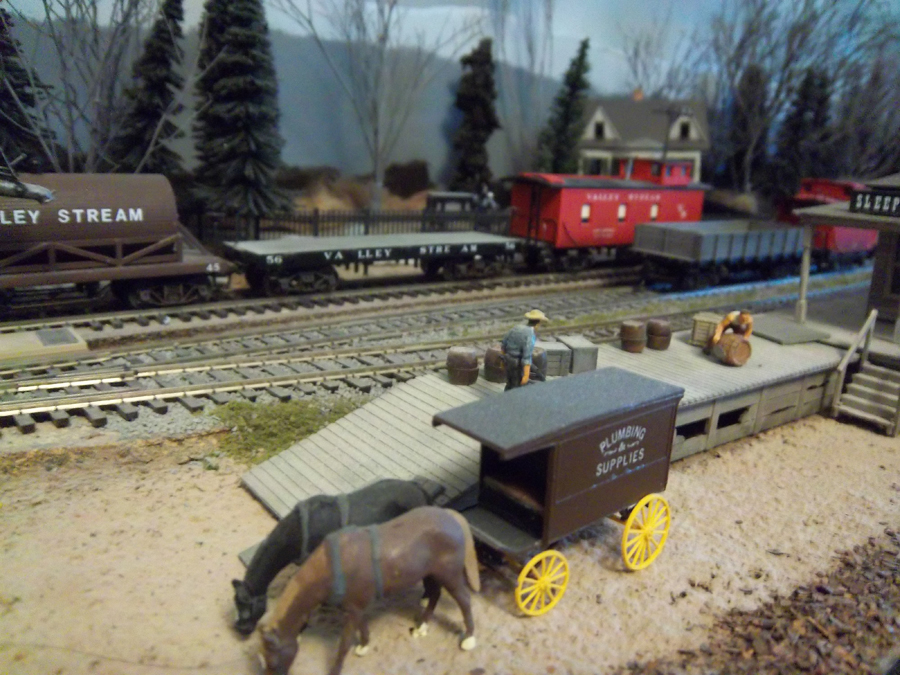
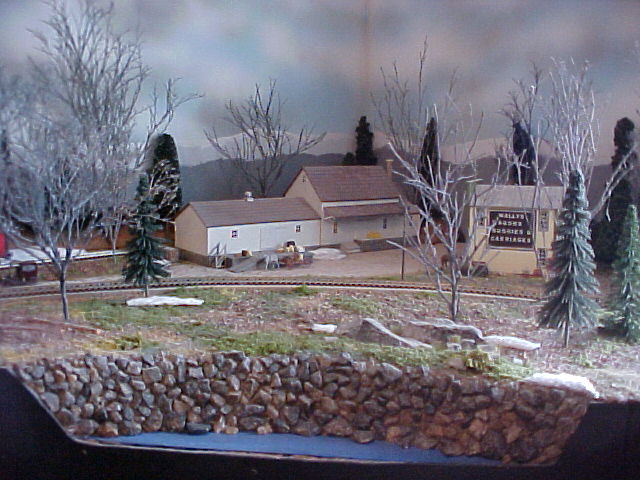
“The Valley Stream Railroad scale is HO.
The time period would be between 1900-1910, it’s late fall and winter is just around the corner in New England.
I have been a train buff for as long back as I can remember and a modeler most of my life.
The layout is in a small bedroom, around the room single track with several sidings and a couple of passing’s.
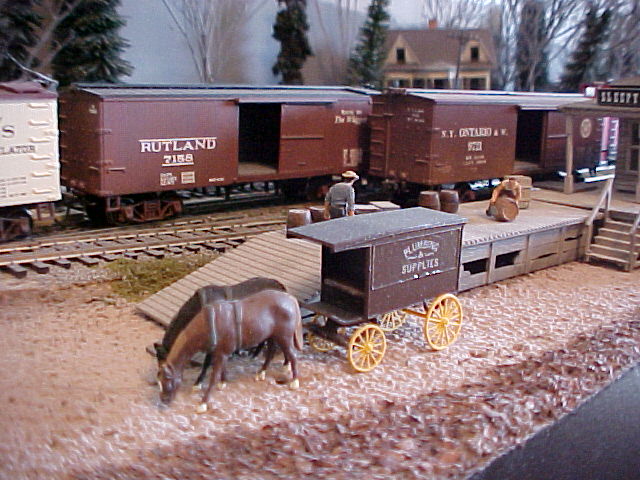
All the locomotives are steam with sound. A couple of friends helped me with the bench work and the wiring.
The bench work was built 2′ x 4′ sections with 2 x 2 legs, 1/2” plywood on the top, and topped off with a cut up 4 x 8 sheet of 4 inch thick foam.
The foam was excellent when it comes to scenery and it diminishes any sound along with the road bed. The Valley Stream is my own private railroad name as I did not want to follow any prototype railroad. Free lance is very satisfying for me.
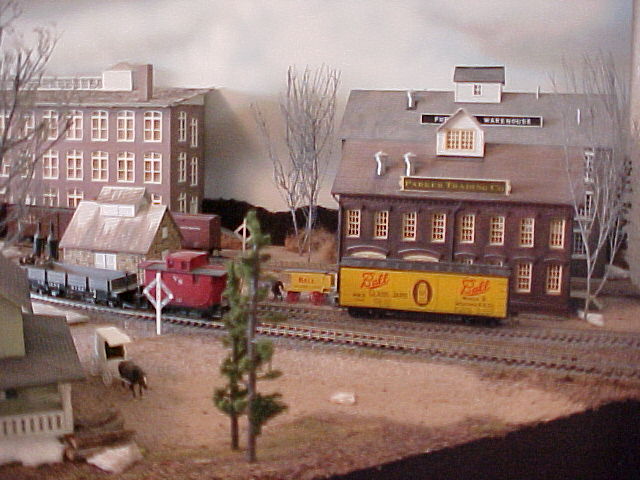
Scenery is what I love to do thus the simple loop around for the railroad. Most of the building are kits or were “kit bashed”. Since space was limited the large building against the back drop were cut down the center and spliced end to end. Most of the structures I was building before I started the layout.
There was no great track layout just my own sketches and drawings. I just knew what I wanted to do and what I wanted it to look like. The track is code 70 for a more realistic look for the steam power. The rocks were pebbles from the road., the winter trees were made from twigs in the yard along with the use of. a glue pot then spray painted (time and patience on the trees).
Since the base board was 4″ foam planting all the trees was easy. I used sifted real dirt with white glue for some scenes, Woodland Scenics material,the snow piles are crushed white foam, lots of cellu clay (papier mache) mixed with water vermiculite (mineral) for the ground and embankments. The back drop I painted using spray paint and the effect was just what I wanted……………..cold and cloudy.
A friend of mine mentioned the layout to the local news paper and they came over to see it and take pictures. In December the layout and I were on the front page of Sundays paper. The railroad was also filmed and put on the local news. Needless to say it’s been fun to have that to share with others.
The railroad will probably never be entirely finished as the details seem to be endless. Hope you enjoy the photos.
William”
New England themed HO scale layouts:
A huge thanks to William adding to the New England themed HO scale layouts. We’ve had a nice run of scenery pics over the last few days. Let’s keep ’em coming.
And don’t forget the Beginner’s Guide if you want to start tinkering on your own layout.