Model train scratch building – Brian’s

Brian’s been in touch with more of his model train scratch building:

“Hi Al

I get asked on a regular basis how do I assemble my structures.

Here is how I produce my kits (or scratch built models) with the accessories that I use.

I only use Cyanoacrylate (super glue) on the metal models. Plastic glue on plastic models and Alcolin quick dry wood glue for the wooden structures.

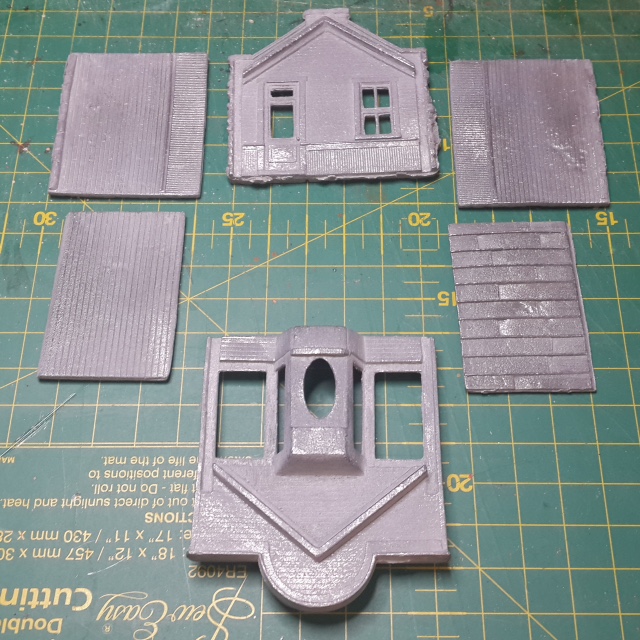
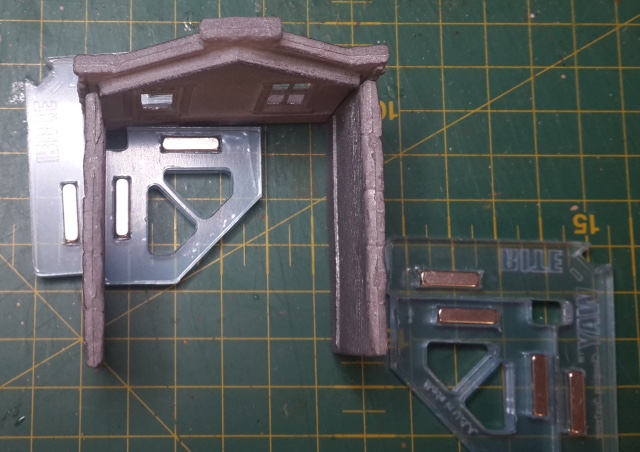
I clean up all the castings (note: this one has not had all the flash removed and is used as a demo model for this article).

I wash them in vinegar (or pool acid) and then in warm soapy water. Let them air dry and avoid touching them with fingers. (Oil on skin etc) This affects the super glue and will not glue the parts together.

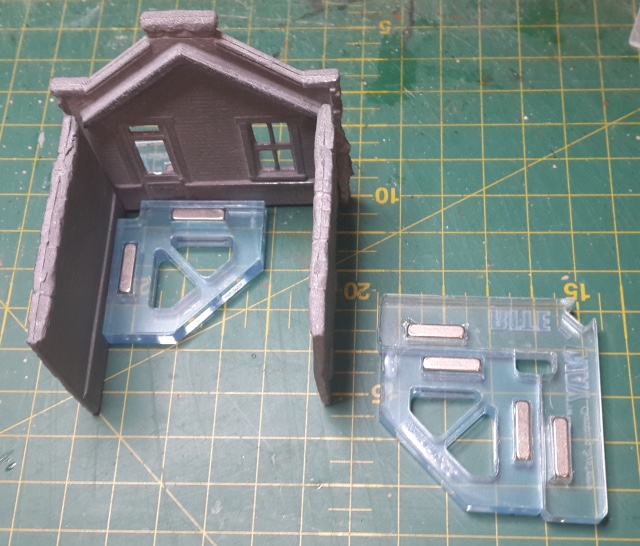
I use Rite-Clamps (magnetic and available online from Micro-Mark) in the USA. They are the best thing since sliced bread. Very powerful magnets in them. Easy to use.

I also use the good old elastic band method to hold the whole building together sometimes when there is not enough space inside the structure for the inner clamps as seen above.

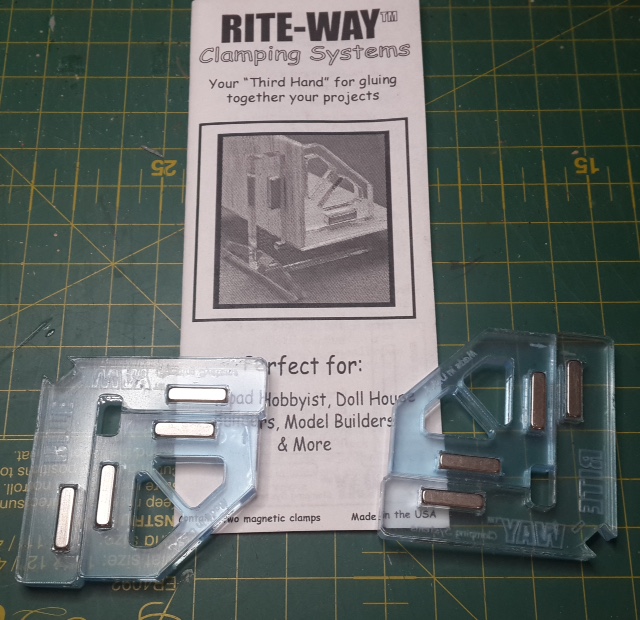
Photo of the Rite-Clamp and instructions.

The set comes with supports to hold the items for glueing as seen below.

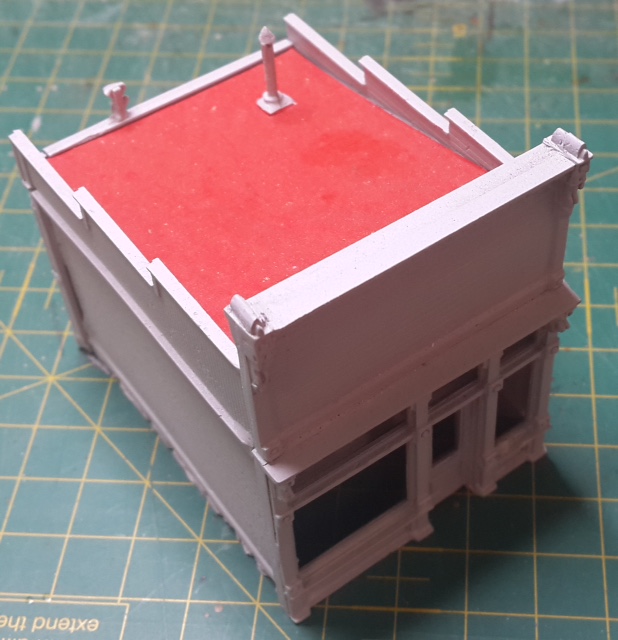
Assembled building which has been sprayed with a base coat of grey primer. Roof painted red by hand.

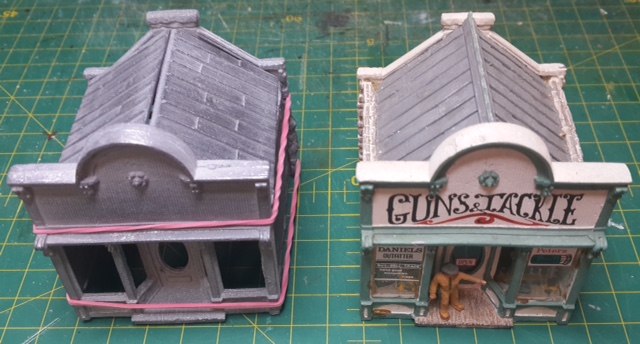
Self explanatory photo with a finished building alongside.

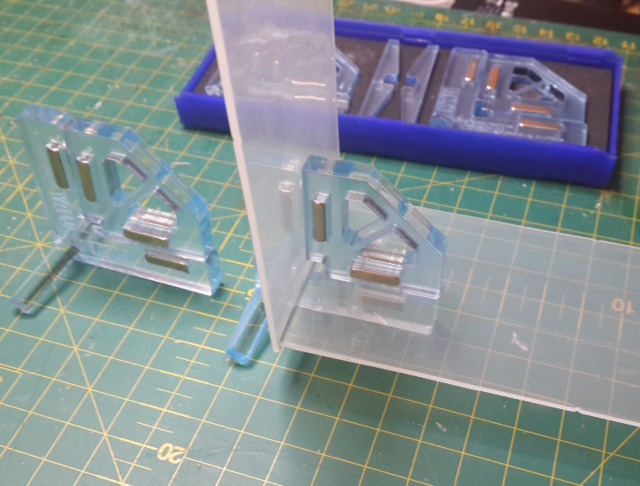
Another example of using two sets of Rite-Clamps on a wooden scratch built engine house. If building a lot of buildings I would suggest buying two sets of Rite-Clamps giving you four to be able to assemble the whole structure as shown below to get the feel of it before glueing it together. (The blue color is before removing the protective plastic covering as it eventually wears off after extended use)

I hope that this is helpful in constructing future model railroad structures, be them made of metal, plastic or wood!!!

Kind regards

Brian

CEO of the HOn3 Cascade Creek Lumber company.”

model train scratch building

model train scratch building

clamps for model train building

clamps for model train building

model train scratch building


clamps for model train building

clamps for model train building

model train scratch building

model train scratch building

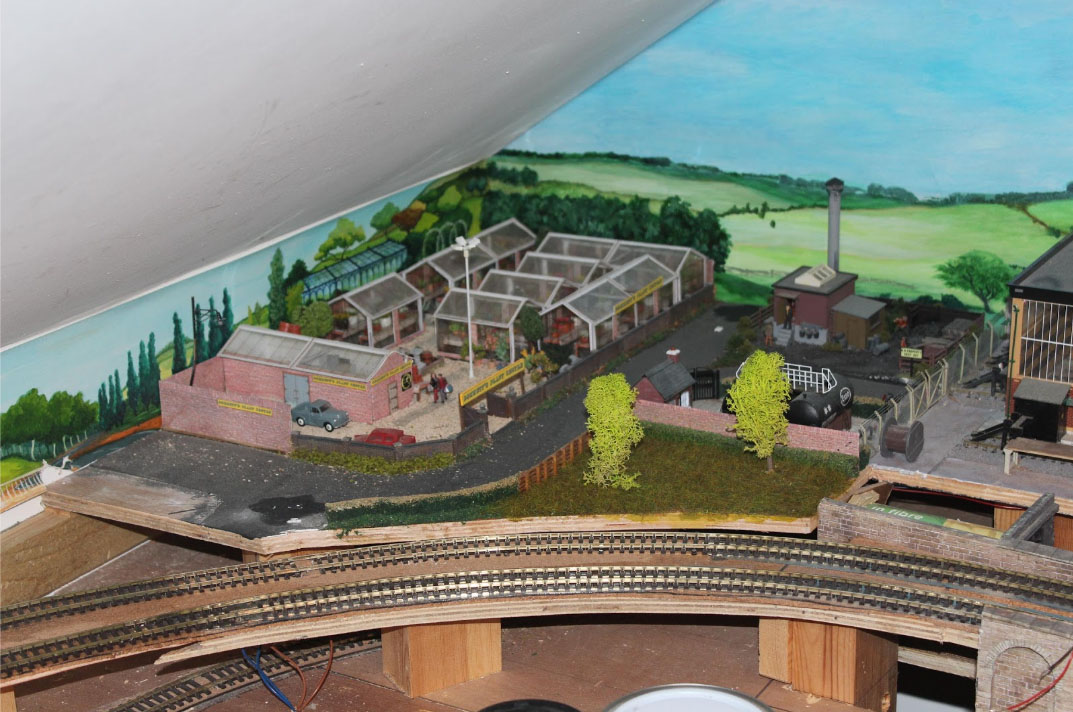
And here’s Brian’s top shelf train running (sorry it’s portrait not landscape):


Latest ebay cheat sheet is here.

A huge thanks to Brian, for sharing his model train scratch building tips.He is also one of the Hall of Fame members.

And of course, as a Hall of Fame member, he’s had a good shufty through the Beginner’s Guide too.

Some of his buildings really are stunning. His pics reminded me of Mike’s: Model railroad scratch building.

That’s all this time folks.

Please do keep ’em coming.

Best

Al

PS Latest ebay cheat sheet is here.

PPS More HO scale train layouts here if that’s your thing.


Model train market

Mike’s been in touch with his model train market:

“Hi Al,

About a year ago, you published some pics and explanation on the start of my layout. A year down the line, I thought you might like an update. I hope you like it enough to publish it.

Before I get into that, though, I would like to remark on how useful your blog is.

I am about to make some rocks for a bit of the layout that I won’t later be able to get to easily – I am trying to lay the majority of the track before doing the scenery where possible – and was considering the best way to do it when I read Eddie’s recent blog about using expanding foam.

This reminded me that when I first started, some 2 years ago, I had some expanding foam & put it aside for just this purpose but had completely forgotten about it! Thanks Eddie.

So onto my layout. Considering the limited amount of time I can spend on it, I am quite happy with the progress I am making.

I have had a train running to test all the track I have laid, using a borrowed ECOS 50200 but now have my own & am starting to programme for real.

As I don’t have the time to edit the video, like some of your contributors such as Dave – I really admire his work & wish he lived nearer me – it is in its raw state but hopefully OK.

I have also attached again the track plan, as I don’t think you included it last time.

On a personal note, I am still fighting the cancer & am reasonably well at the moment, although it has spread a bit & I am having a new course of treatment. I will win!

Anyone else out there with cancer, always keep your chin up & stay positive.

Mike”

model train market

A close up of one of the stalls

model train market

The Diesel Yard with Coach Washer

OO scale station

Frederick St Station

OO scale garden centre

The Garden Centre & Pumphouse

model train track plan

Track Plan

Thanks for the good work you do.

Mike”

Latest ebay cheat sheet is here.

I’m only human, so I love to hear that the site is helping folk. A huge thanks to Mike for sharing his model train market. I also thought it was an inspirational narrative too, keep up the fight!

That’s all this time, folks. I leave you with the news that the Beginner’s Guide now comes with a paypal option, which some of you have been asking for.

Keep ’em coming.

Best

Al


Model train duck under

Dangerous Dave has been in touch again with he’s model train duck under.

If he’s new to you, you can see more about him in the Hall of Fame.

“Hi Al,

Well after the video showing how i have problems getting under my layout to access the middle , and I used the mechanics trolley to get under there , I have now come up with a far better solution ..think this will appeal to a lot of the older members who have problems getting down on there knees ..this now is my answer

At least it should bring a smile to a few faces

Regards

Dave”

model train duck under

Latest ebay cheat sheet is here.

There are quite a few post on the blog now that also use the mechanic’s creeper chair to get ‘in’ their layout, or just to get under it and do some wiring without putting thier back’s out.

This one springs to mind – and it’s a fab layout too:

Kato Unitrack HO.

And then there’s Joe’s. I remember Joe’s better than anybody elses, because he made his, with some model railroad ingenuity. I’m not joking, have a look at it, it’s brilliant:

How to wire model train for DCC.

There’s quite a few more on the blog, but you get the idea. And what’s the big takeaway of all this?

Make your benchwork too low, and you can’t get under it and working on your layout is painful. Make it too high and you can’t reach anything on it, and the little peeps can’t enjoy your beautiful layout.

A big thanks to Dave for sharing his model train duck under. He was also kind enough to go through the Beginner’s Guide too.

That’s all for today folks.

Please do keep ’em coming.

Best

Al

PS Latest ebay cheat sheet is here.

PPS More HO scale train layouts here if that’s your thing.