Remarkably, he’s also mailed me saying the below layout has already been broken up for the next one. Can’t wait to see it.
“Hi Al
I know this is maybe too soon after my other updates but will be the final update from Wensdale in this format.
Why? you ask, well Dangerous Dave summed it up brilliantly with his recent ‘access to layout video’. Crawling under a low board to get to the centre of the layout is a literal pain as you get older, so I have decided that I must agree that more access makes for more enthusiasm so my future layout will follow the walls with access right around the layout. But more of that in the future.
Wensdale New Town by nacht was taken late one evening so there was a bit of low light coming through the windows that allowed me to put on all 169 lights, believe me the wiring would drive you mad. The lights are controled by two old twin track Gaugemaster controls that are at least 30 years old but still do the job. Unable to use the tripod effectively this video is taken hands on, so to speak so expect some jerks along the way, especially when I realised some of the lights weren’t switched on.The trains are running smoothly and quite slowly for those who hate fast trains.
I would also like to thank you for your kind comments for my last two updates on this layout and of course Al for showing them and keeping up this great site. I will see what I can devise for my new layout and keep Al updated with any hints and tips I come across along the way as I will be starting totally from scratch.
After spending time under the layout wiring, I started to think about the backdrop.
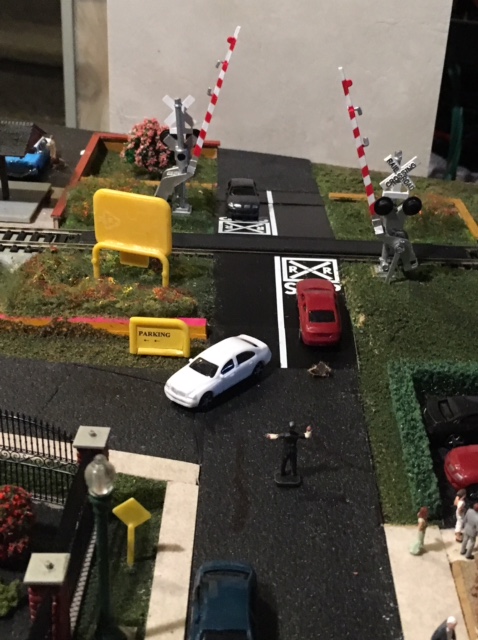
The easiest (I think) is to do mountains. The problem is that I have a street which terminates at the center of the back of the layout (see photo). Where is it going to go?
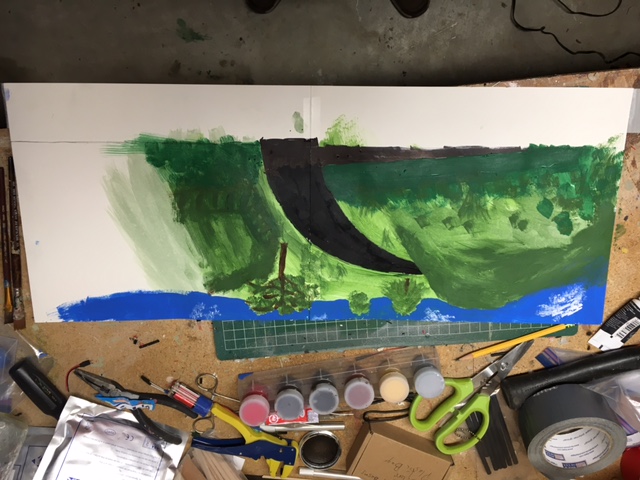
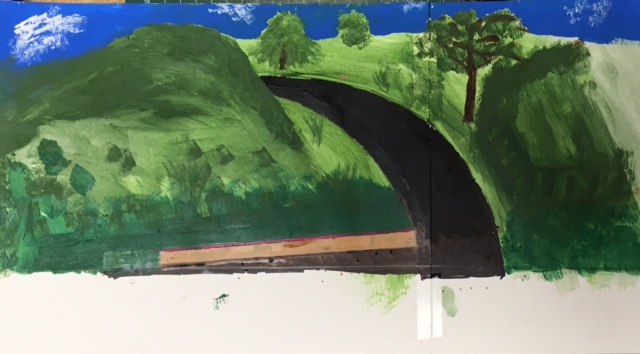
I got some of my granddaughters’ drawing paper and taped it to the back of the layout. I then drew a freehand road continuation, curving it to the left. I then used the edge of my paint palette to draw curved lines. I drew a hill in front of the curve.
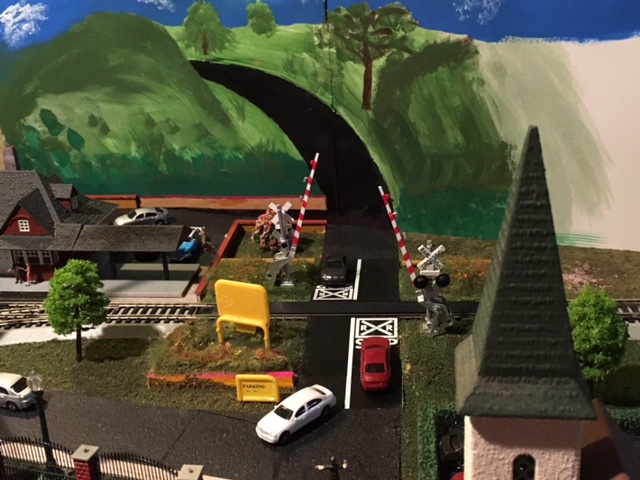
There are two perspective issues. One is the parking lot and wall at the station. The other is the road. Using trial and error I adjusted everything until I got something I could live with.
I’ll have to transfer the scene to the Masonite backdrop. I’m not sure whether to try to paint the entire backdrop or to buy a backdrop and integrate the road into it. Any comments are welcome.
Jack”
A huge thanks to Eric and Jack. Just goes to show a layout is never finished – because when it is, that’s when the new one starts to take shape in the back of your head.
So come and join the fun with the Beginner’s Guide if you’re still sat there on your hands.