Trix HO scale layout

Hans has been in touch with his Trix HO scale layout:

“Hi, Al I am in the midst of creating a fantasy model railroad, built a few in my earlier life, 84 years old now and again starting modelling, like the creation of it, letting my mind working things out, have a look at how far I have come for now.

My name is Hans-Juergen and I live in Edmonton,Alberta,Canada.

Also would like to thank you for all the e-mails. It is always with anticipation to open your e mail.

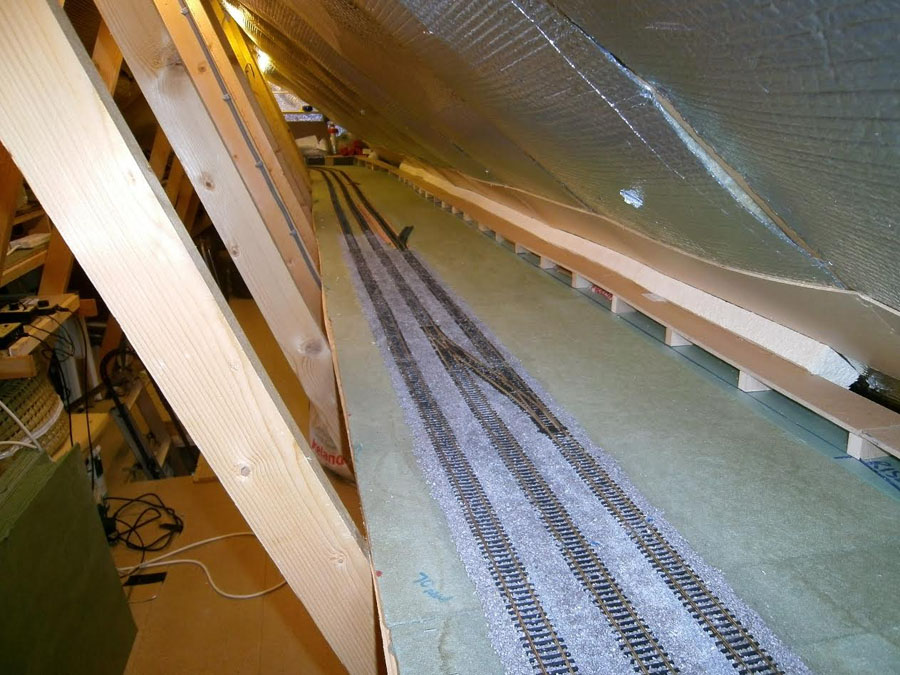
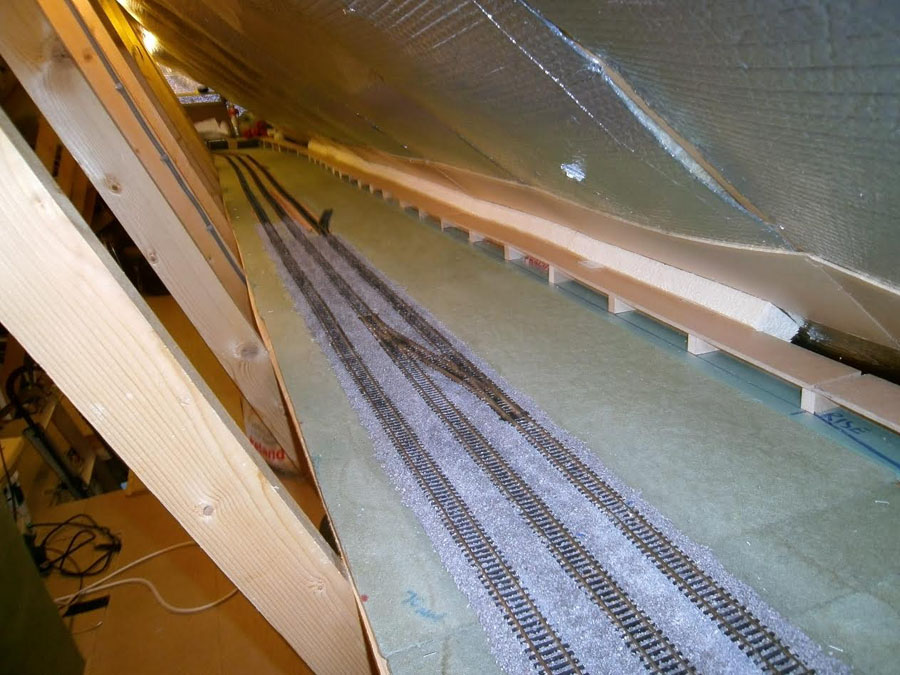
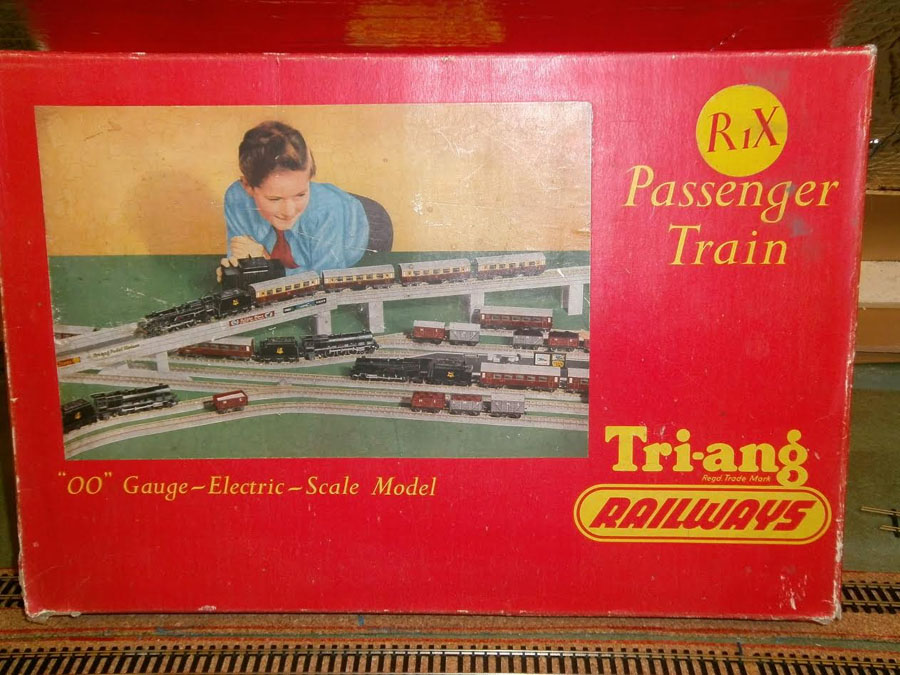
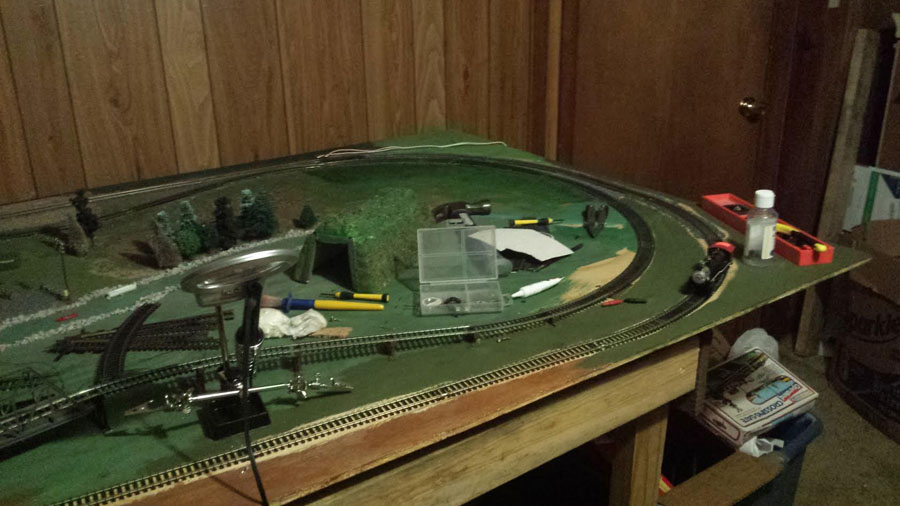
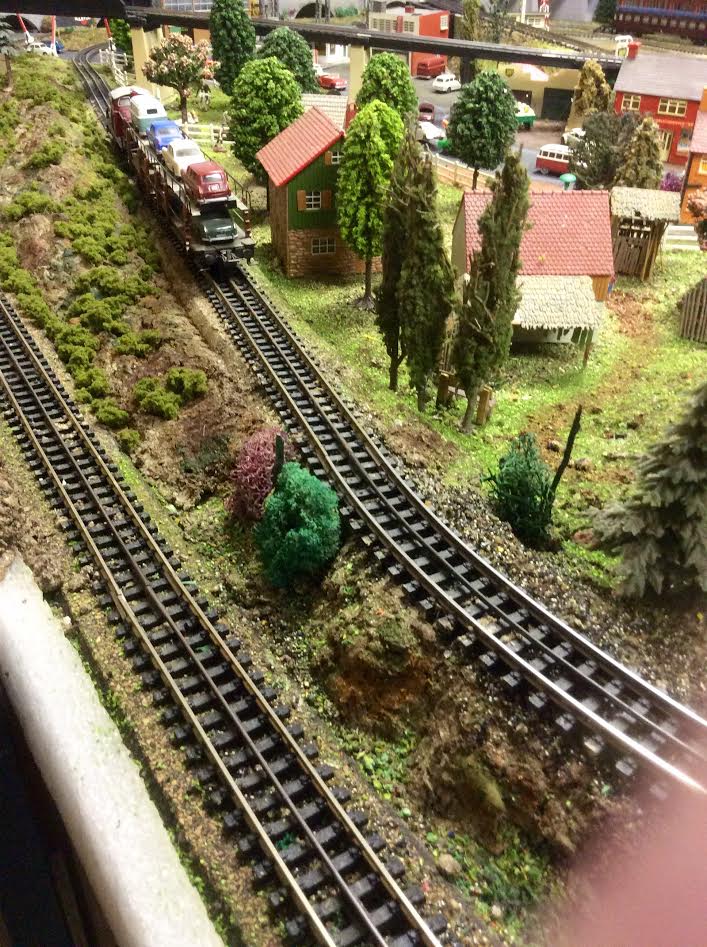
My layout is HO gauge, Trix-express system. Very old and now, only available from Maerklin.

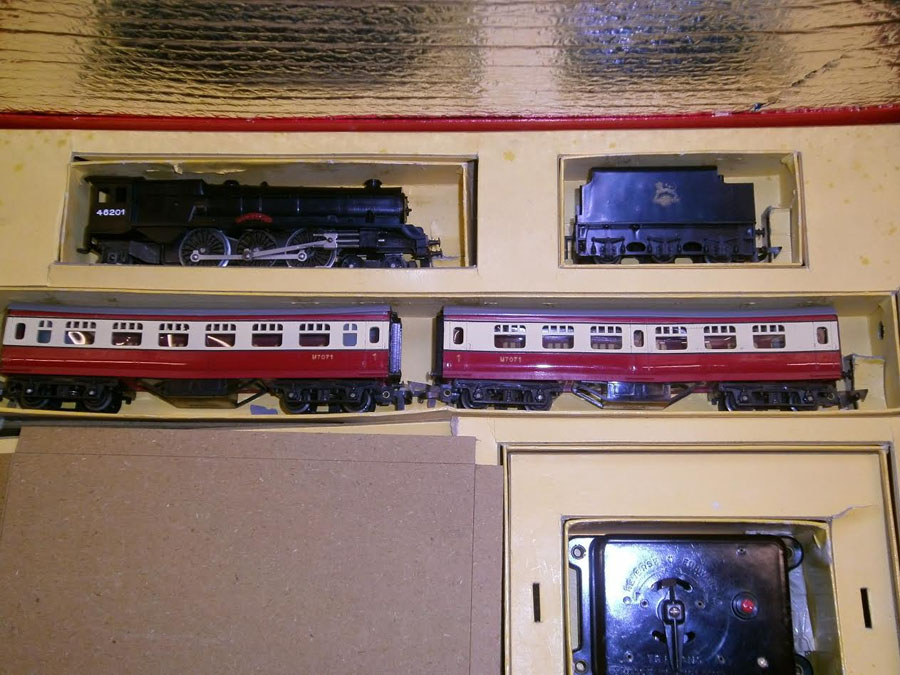
The rolling stock is out of circulation, especially the coaches are rare now, I think.

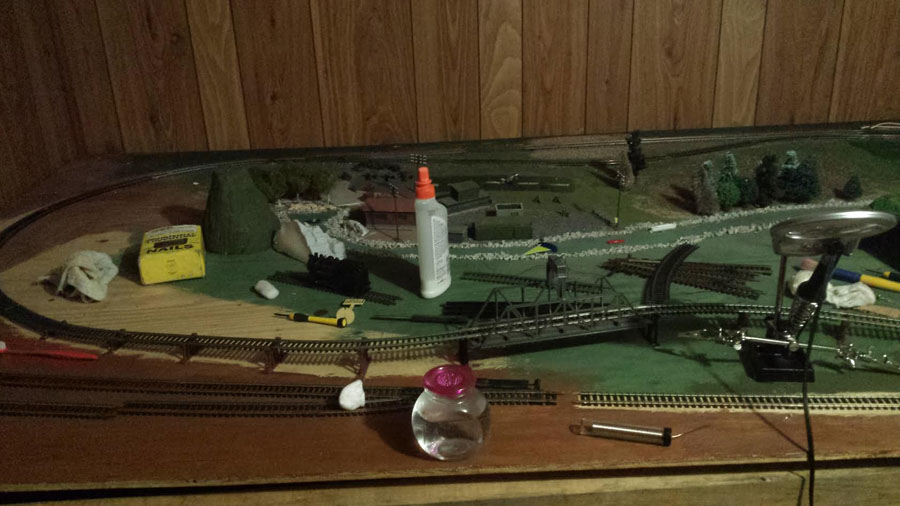
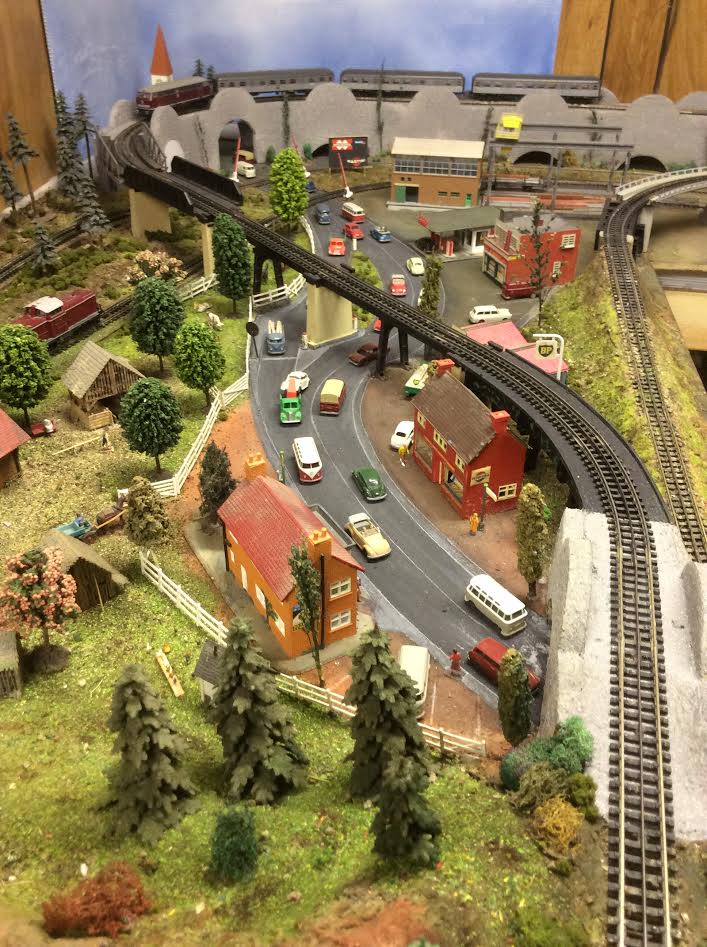
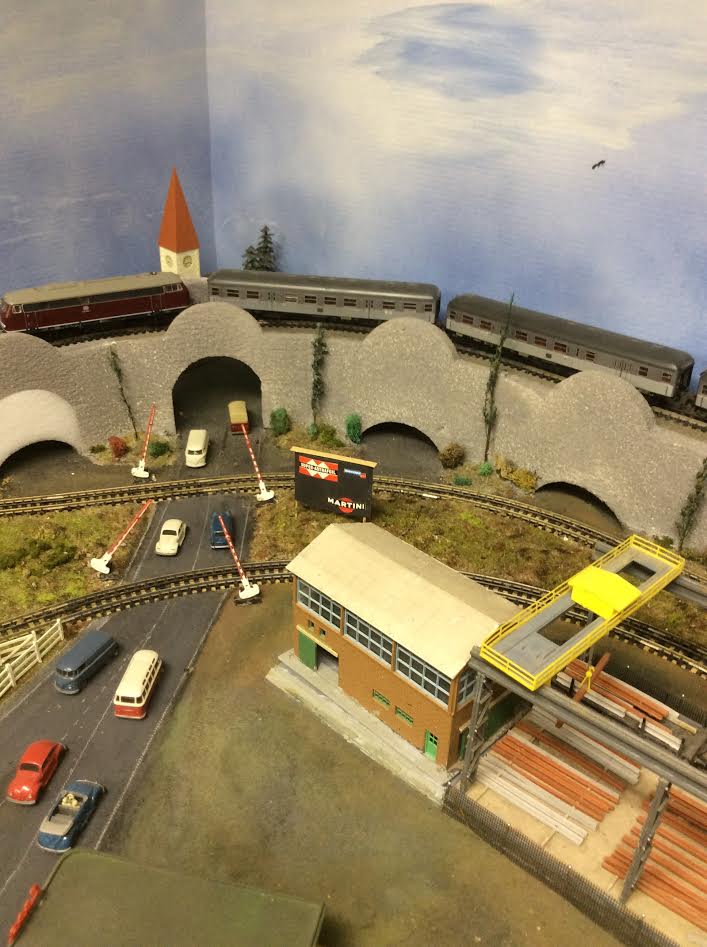
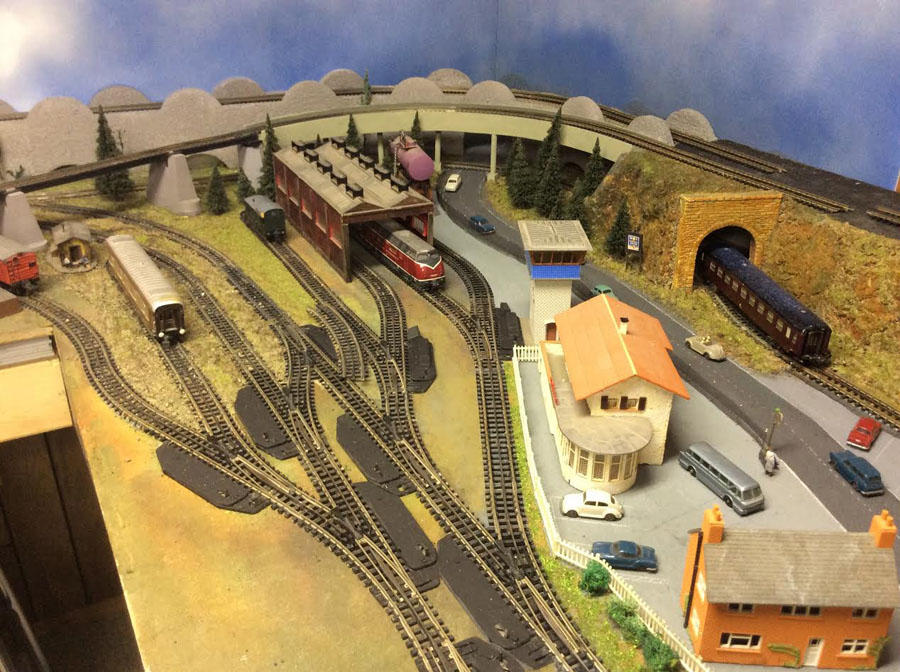
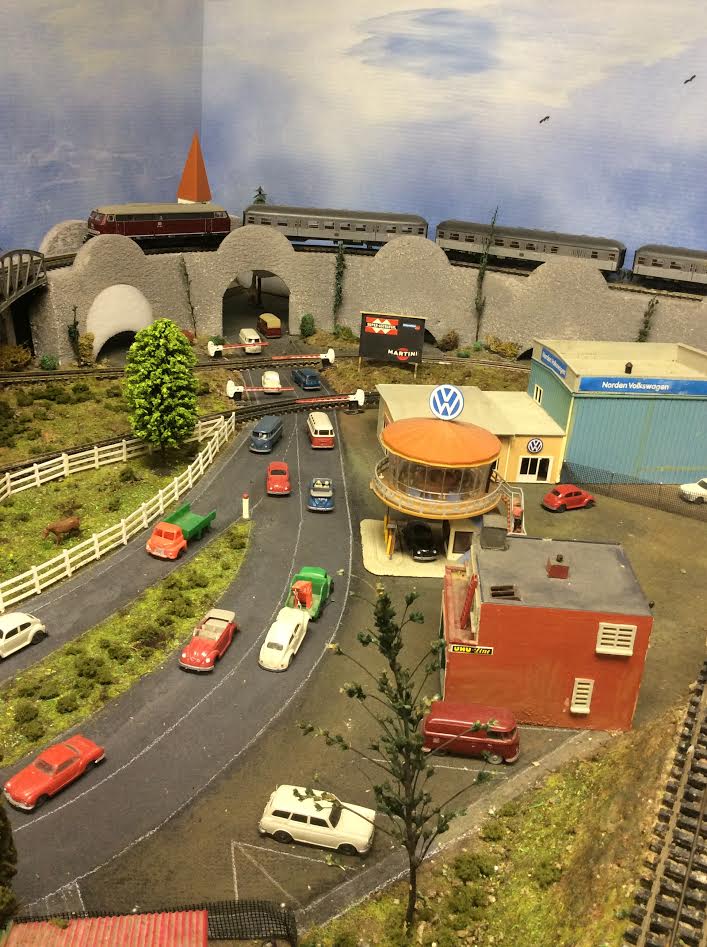
I try to keep expenses to the minimal. Seem to find a lot of useful items here and there, always see items and wonder if I could use them somehow. The back concrete arches are made from door protectors for Automobile shipments.

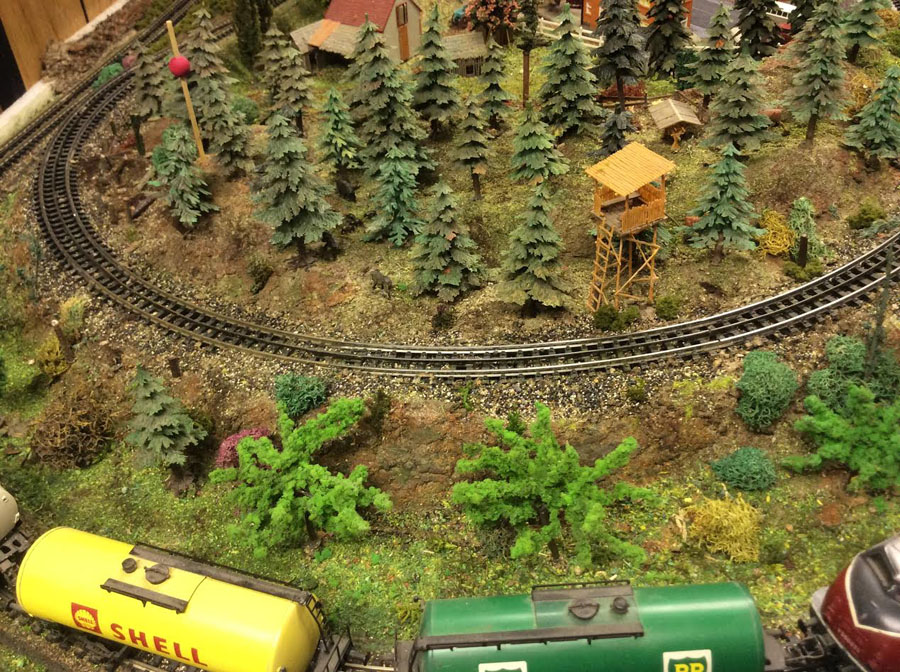
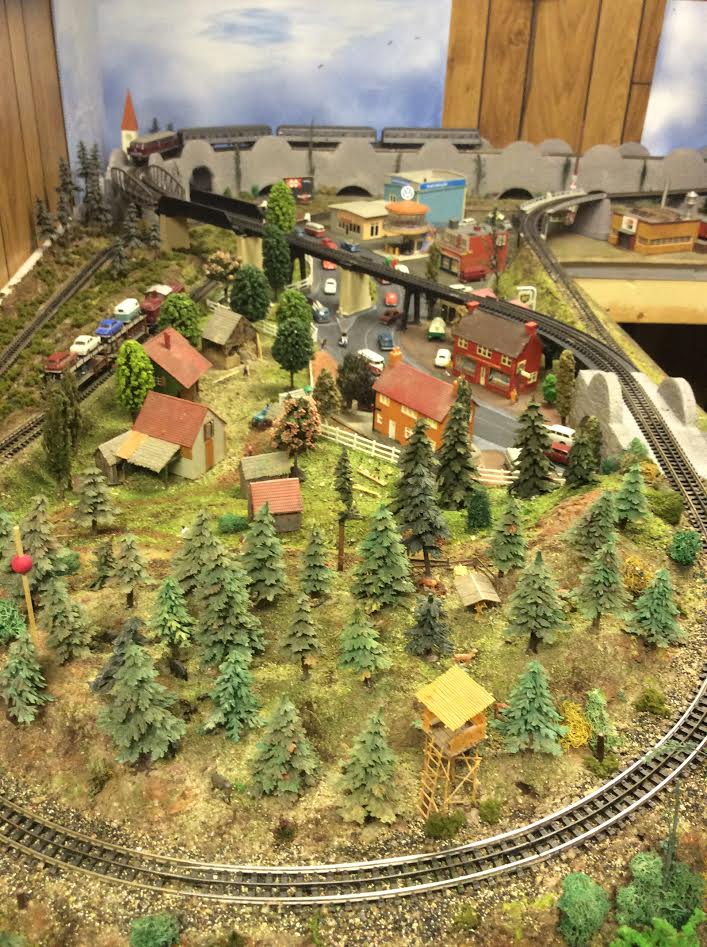
Some of the trees, like Elm and Lombardi poplars are made from weed seed pods etc.

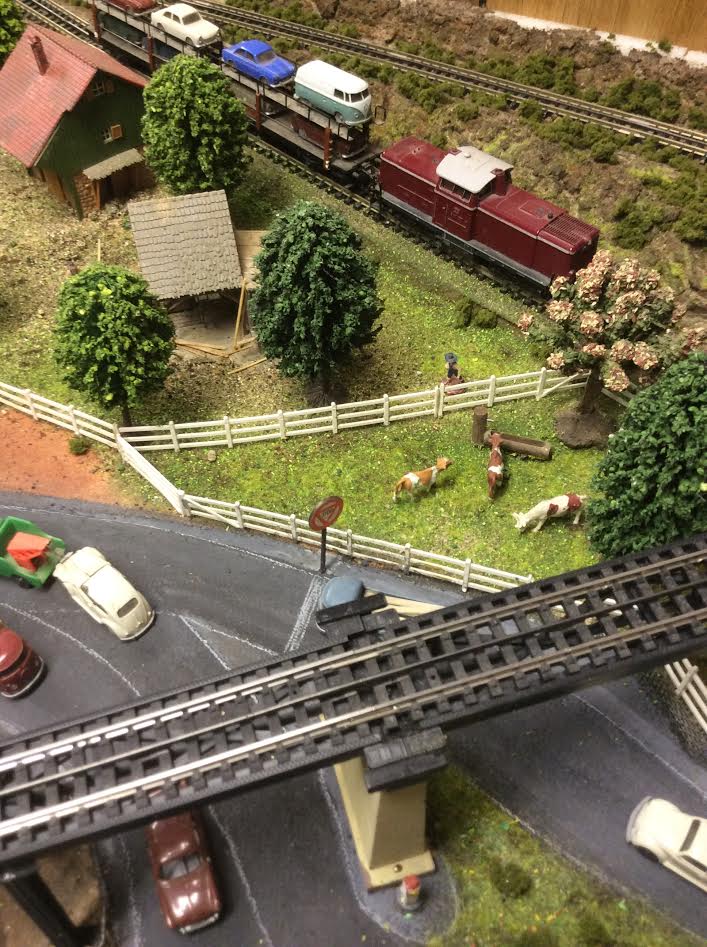
Fences are made from mesh and the post are pins one gets buying a shirt.Terrain is made mixing wallpaper glue powder with insulation material.The resulting paste is used to create berms and such.

Balsawood is used to build overpasses, of course lots of stuff is bought in hobby shops. This report will be the it for now, till I will have gone ahead with more model construction.

Best wishes to all modellers.

Hans”

Trix HO scale layout forrest

Trix HO scale layout raised track

Trix HO scale layout passenger cars

Trix HO scale layout houses


Trix HO scale layout:

Trix HO scale layout freight train

Trix HO scale layout freight train

model train track plan

model train car transporter

model railroad

model railroad sidings

HO model railroad

HO scale cars model railroad

A huge thanks to Hans for sharing his Trix HO scale layout – I loved it. And only 84 years young too. Hans touched on so many things I love about this hobby.

So here’s my call to my arms: are you still sitting on the armchair, reading, and musing that one day, you too, will start on your layout?

So many are. And sadly, so many don’t.

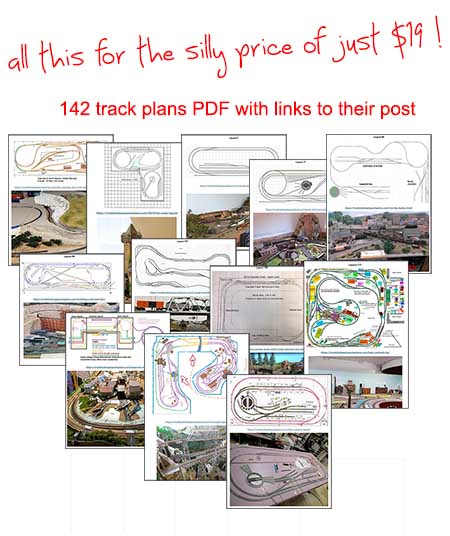
So take the first step with the Beginner’s Guide and 142 track plans, for just $19.

You’ll also be directly supporting the blog and be helping to keep the show on the road.

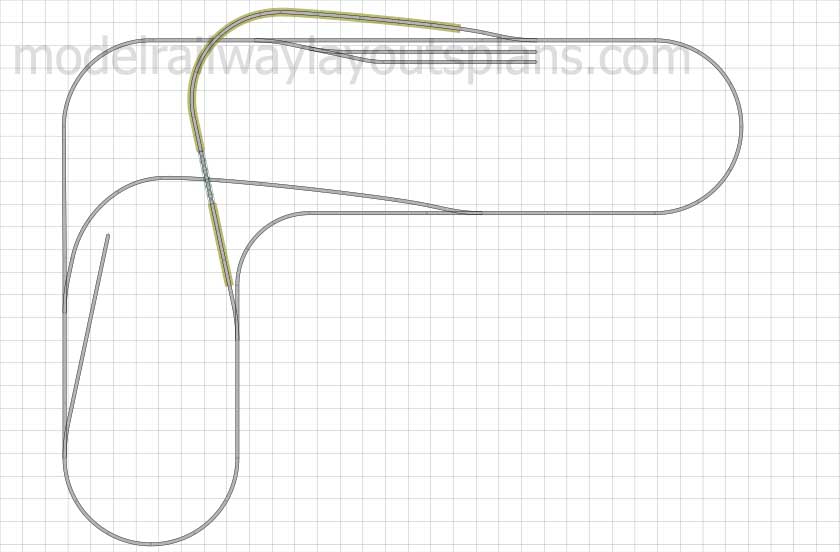
(In fact, Hans’s track plan is in the Track plans PDF.)

Of course, I’m a tad biased, and I make no secret of that (thankfully the Hall of Fame members all give it their stamp of approval).

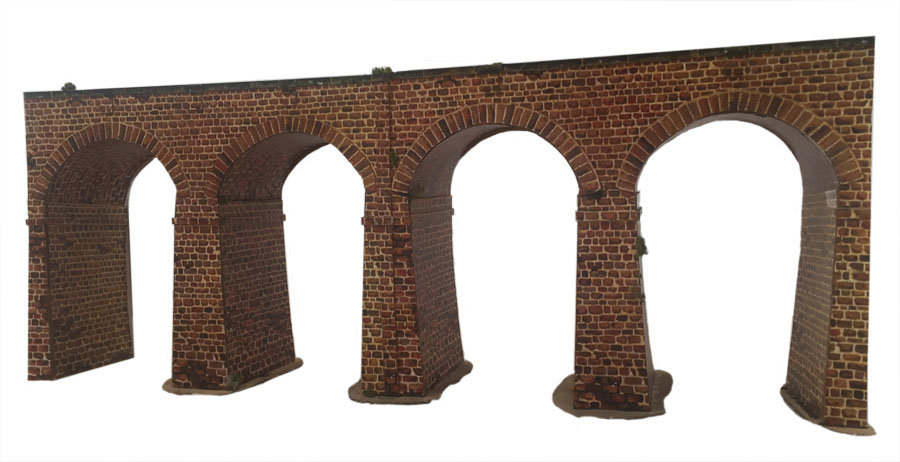
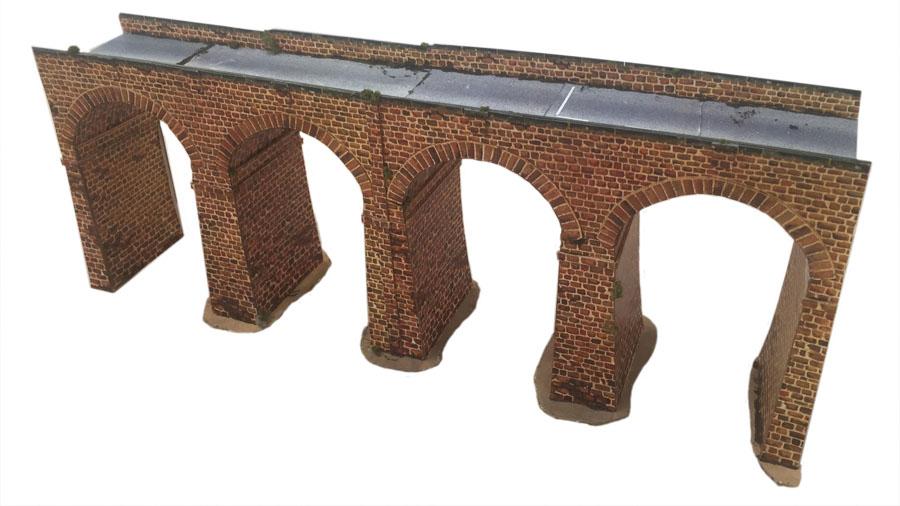
So what else what can we do? Another great first step is any of the ‘print out’ scenery buildings – like the viaduct for example.

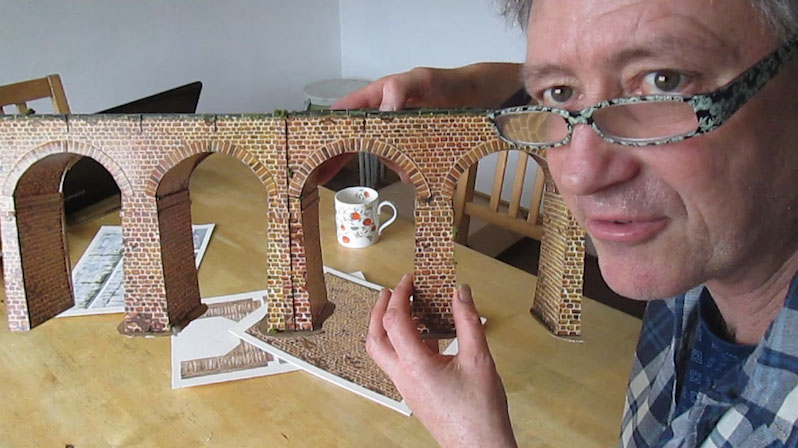
Again, I’m biased, but here’s the thing: you can feel the enthusiasm in Hans’ write up, and I know you can see the enthusiasm in any of John’s ‘how to’ videos, so what about you?

Right now – this very minute – is the perfect time to take that first step. Come and join the club! Doing and tinkering is a lot more fun than just watching.

To be honest, there are a lot down sides to running this blog. Once it started to grow, costs grew (It’s been going since 2011), and you need rhino skin to fend off all the bitter twisted folk that send rather unpleasant emails.

But do you know what makes it all worth while? Do you know why I dearly want to carry on the with the blog?

Waking up and getting emails like Han’s – that’s why. And he’s 84 years young too.

There are two ways you can help the blog keep going:

You can:

1. Buy the track plans PDF and Beginner’s Guide here.

2. Or you can dive straight into membership here. Stay as long or as little as you like.

(You can cancel directly with the payment provider at any time, or just mail me and I’ll do it for you. There’s no fuss or questions.)

I don’t want to bore everyone with the money side of running the blog, so I’m going to back off from that side now, and take stock and decide what needs to be done. I promise to keep you up updated.

Best

Al

142 track plans PDF


That’s all this time folks.

Keep ’em coming.

Best

Al

Faller HO viaduct

John’s very kindly been busy again with the latest print out scenery range – which got me thinking about the Faller HO viaduct.

The Faller HO viaduct is about $60, and you can’t easily kit bash it to suit your layout.

But what about the printable buildings / scenery range? Could they be up to scratch?

Well, have a look at what John’s done.

Course, I’m biased, but it’s stunning stuff – and I think John proves that when you see the viaduct, it looks very good indeed.

Don’t just take my word for it, though, have a look:

I know John moves them about quite a bit, so here are some stills (pics are clickable):

Faller HO viaduct printable building

Faller HO viaduct printable building

Faller HO viaduct printable building

It’s hard to believe they are made from print outs, and they’ve just been stuck together – but that’s exactly what they are:

Faller HO viaduct printable building

They are made at HO scale – just reduce the print by 54% for N scale. If you want to print for O scale they enlarge really well – but you need a printer that can handle the larger sizes.

To grab your viaduct and wooden tunnel, just click here.

So there you go – the Faller HO viaduct is around $60, but the printable one with tons of other buildings is just $29.

Compare John’s pics with Andrew’s pics of a kit: Model railway road viaduct construction.

Please do send me pics of your models – and please leave a comment below, I’d love to know your thoughts on them.

That’s all this time folks.

Please do keep ’em coming.

Best

Al

And there’s the Silly Discount bundle too.

Trains in the attic

Trains in the attic has always been a dream for Eddie, and now it’s coming true:

“Hi Al,

I Promised I would send in the initial photos of my attic layout. So here they are for what they are worth.

I have always wanted to construct a layout ever since I was a boy.

Unfortunately I never ever got round to it. Life took over: growing up, career, marriage, kids.

My career definitely took over, and I was seldom at home, I do not know how my wife put up with it…

Now I have retired I have decided to put the effort in to achieve my childhood dream, a full blown attic layout.

I commenced over 18 months ago, and I must admit, not full time. I probably would have been further on if I had.

I have been learning as I go, and also making many mistakes as I go…

The site you manage is invaluable to me. I have learned a lot from it, and still have a lot to learn. Some of the postings of other layouts are fantastic and are a great source of inspiration.

Maybe one day I can reach these dizzy heights???

My layout runs the length of the attic, down both sides, meeting at each end. It is 25 feet in length by 2 feet wide, the end sections are6 and a half feet by 3 feet.

It is situated between the roof trusses at waist height, and the baseboard is made of chipboard interlocking flooring I had left over when I floored the attic. I used some 2 by 2 strapping underneath the boards for extra middle support.

I covered the baseboard in compressed fibre board underlay, the type used for flooring.

It is still in its very early stages. I have three main lines laid and powered. They do a complete circuit of the layout, one is for freight, the other two are passenger. Eventually I will have a mainline station, a country station and a freight yard. Just dreams at the moment…

One problem I do have, is the slope of the roof will make it difficult to have a backdrop. I have racked my brains but cannot come up with a solution. Maybe some of the users can offer some suggestions?

It is DCC apart from the raised section that will run around the outer edges. This is going to be DC as I have acquired an old Triang ‘ Princess Elizabeth’ train set ( the same type as was given as a Christmas present as a boy in 1958…) sadly that went missing over the years. I bought this one on Ebay and I was in seventh heaven when it arrived.

It appears to have a serial number on the box which could indicate the date of manufacture ‘R1X100953’ to me that could indicate 10th of September 1953? I wonder if some of your users could verify that, although it is probably wishful thinking on my part….

I did think about converting it to DCC, but I was advised against it. Thankfully I took that advice. I will keep it in its original state. The only thing I have replaced is the magnet.

Keep up the good work Al. It is invaluable to me.

Regards

Eddie”

Trains in the attic

Trains in the attic


Trains in the attic:

traing model train

traing model train

triang instructions

Now on to Joe:

“Alastair,

Good morning sir, I would like to take the time to say that I really enjoy seeing all if the emails and I learn new things every time I receive them.

I am fairly new to the hobby (I started in 2011) and I am currently working on my second layout attempted my first one ended up beige down due to space needed, it is a 4 x 6 layout in my spare room in the basement. Here are some pics, hope you enjoy.

Joe”

model train layout

model train layout


“Learning from experience: My wife wanted an HO layout, so I built, in the basement, an 8 x 16 foot table for her trains. ( I do n-gauge)

I put fluorescent lights overhead. In time, the fluorescent lights needed replacements, etc., and I found I could not service them without clambering over the layout table. That precluded installing scenery and additional trackage.

The solution was to install LED lighting. LEDs last “forever”, so there is no need to climb up on the table.

Erik”


“Info re soldering- actually most irons today come with electroplated tips and not solid copper. Filing them will destroy them. If your tip gets dirty (usually baked on carbon from flux), get a block of salammoniac (flux salt) and break some up and rubs your iron tip in it when hot- then do same with a bit of solder.

Mike”


“Dear Alistair,

I have a couple more tricks that may interest you. My first is a money saver. Contractors fitted a new updated alarm system in the offices where I was working. The old wire was the same thickness as telephone wire but it is multicore strands and not just a single metal core. It is therefore much more flexible and for very fine work you can separate the strands and use them individually.

It is a bit fiddly but it works. The contractors were throwing all the old wire in a skip and I got permission to ‘help myself. I have miles of it, all different colours and it cost me nothing. If any modellers have a friend who works for an alarm company, there is no harm in asking.

My 2nd idea is Using R/C micro helicopters as part of your layout. I have built a Heliport using a Superquick cardboard bus station converted as a plane hanger. I made a cardboard landing pad and wired in tiny 1.44mm LEDS around the landing circle and the ‘H’ in the middle for landings and take offs after dark. It adds another dimension to a layout and looks brilliant in the dark.

I bought my helis through Aliexpress from China and even found mini 4 rotor hover fighter aircraft. At 66 years old I am just a big kid. They are cheap as chips usually with free postage from there. They add really good fun and my Grandson (7 years old) is a better pilot than me – Bugger!!!

Regards

Doug”


“Alastair

I guess I would say that best model railroad tip would be to run bus wires. Years ago we would put the track together hook up the transformer and hoped for the best. Often we were disappointed because of poor electrical contact.

I have found that running bus wires under the layout and dropping down feeder wires every few feet makes electrical contact more reliable, and trains run much better without hesitation – important if you are running trains in the attic!

Keep up this great site

Dickie”


A big thanks to Eddie for sharing his trains in the attic. Thanks to Dickie, Mike, Doug and Joe too.

Actually before I go, when it comes to trains in the attic, Dave’s layout springs to mind:

Dave’s loft layout.

That’s all this time, folks.
Please do keep ’em coming.

And if you feel like making a start on your layout, the Beginner’s Guide is here.

Best

Al

PS Latest ebay cheat sheet is here