Model train room ideas – Linda’s

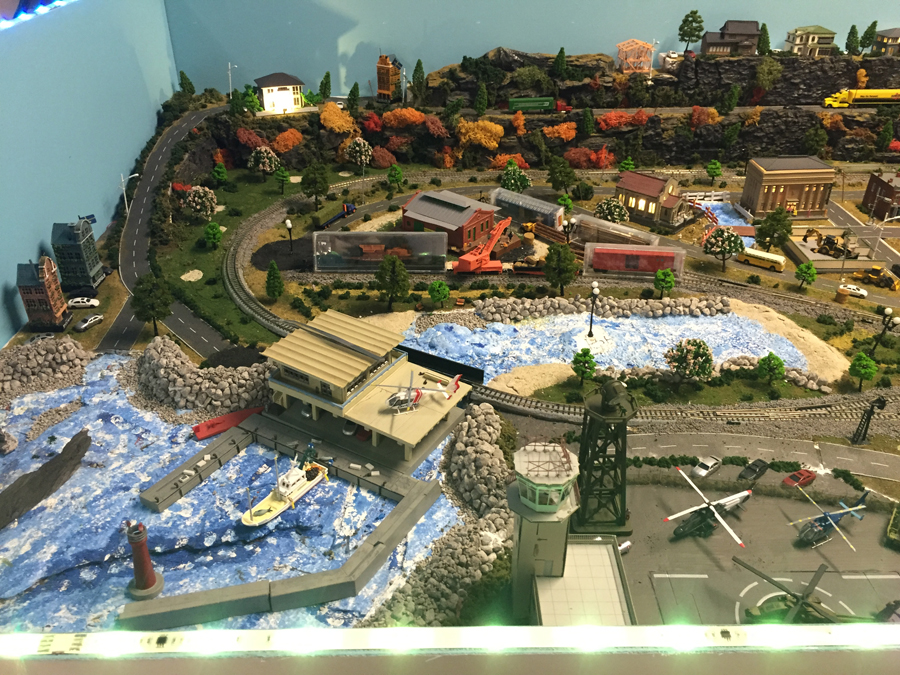
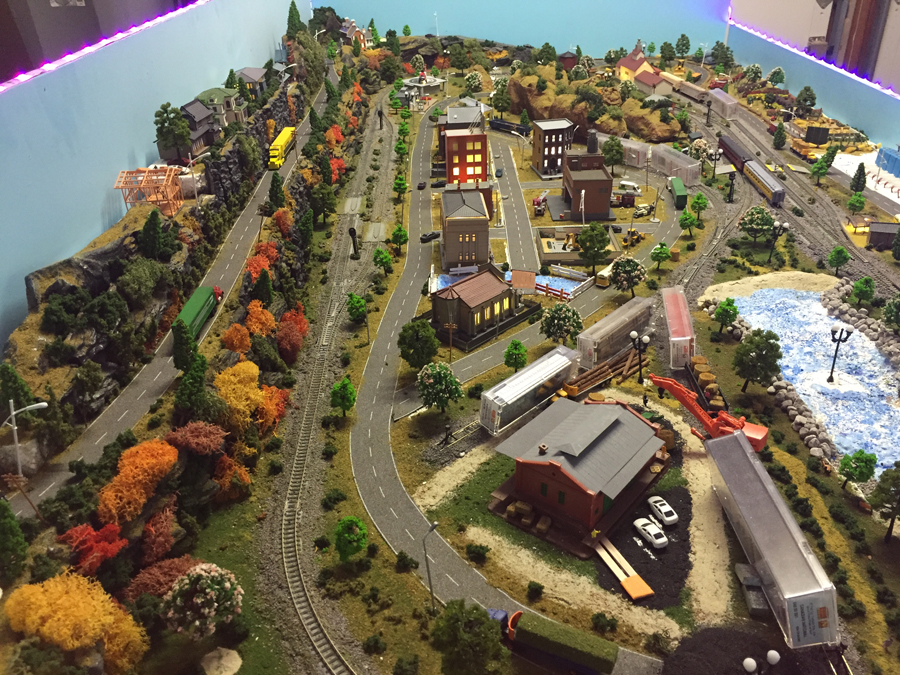
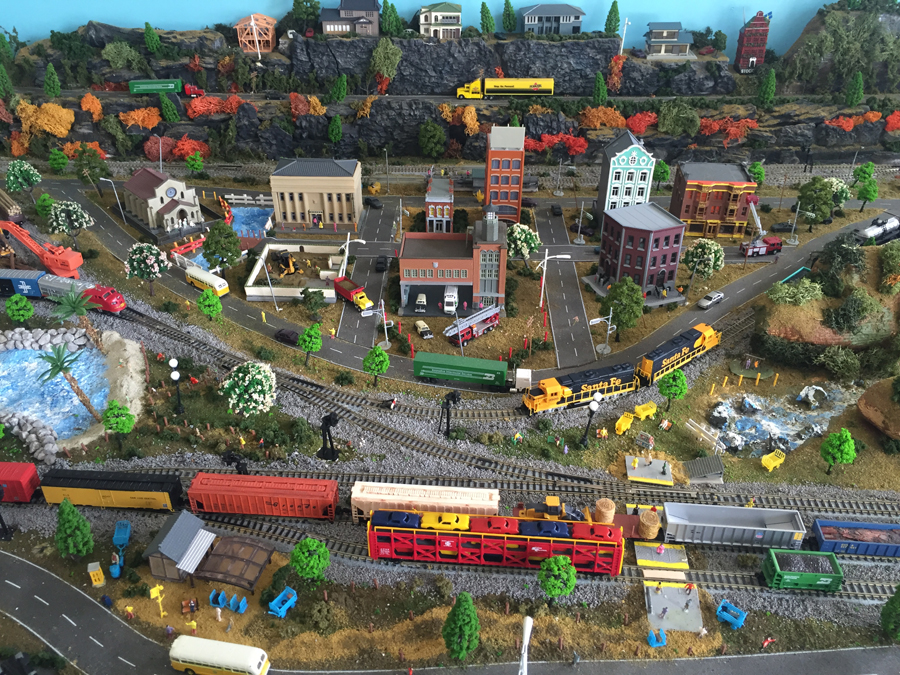
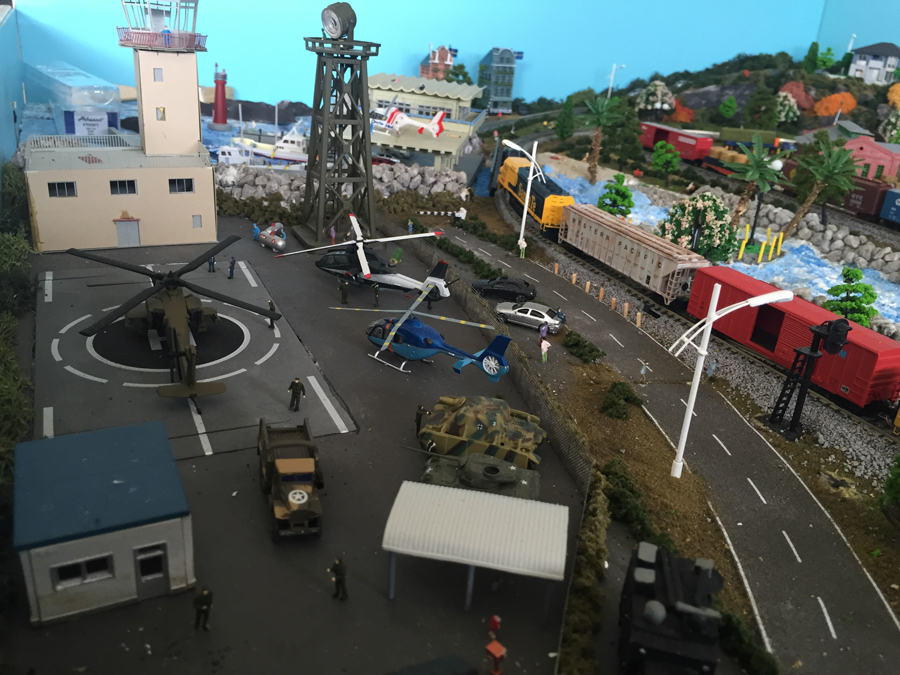
Linda has been in touch with some very good model train room ideas:

“Hi Al,

Have been enjoying all the input from everyone on your site. Great ideas and layouts.

I wanted to send you my first three “Train” projects while figuring out how to start our layout.

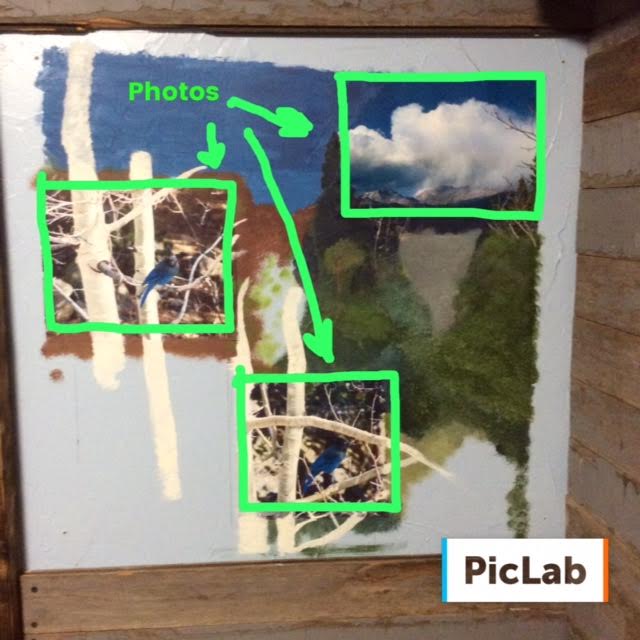
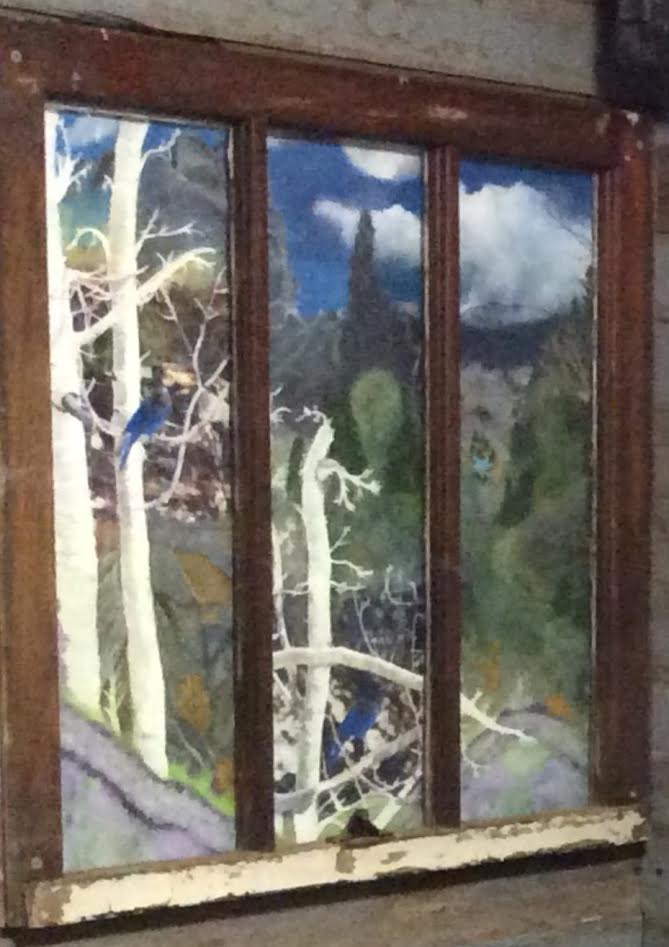
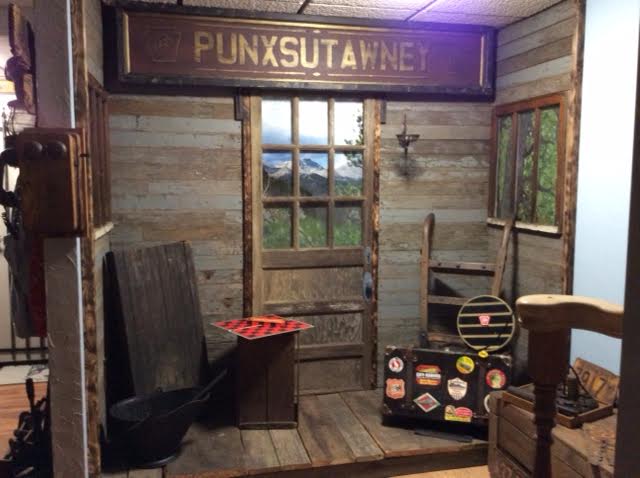
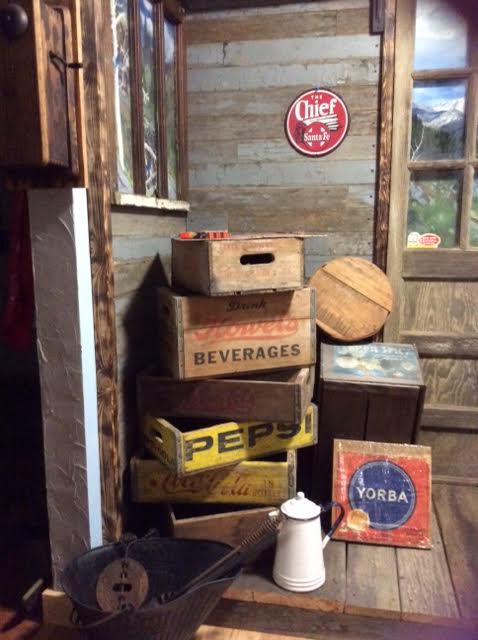
First, we had purchased a sign from the Punxsutawney, PA, USA. train depot. This was special for us because my Mom was born and raised in a little town just south of there.

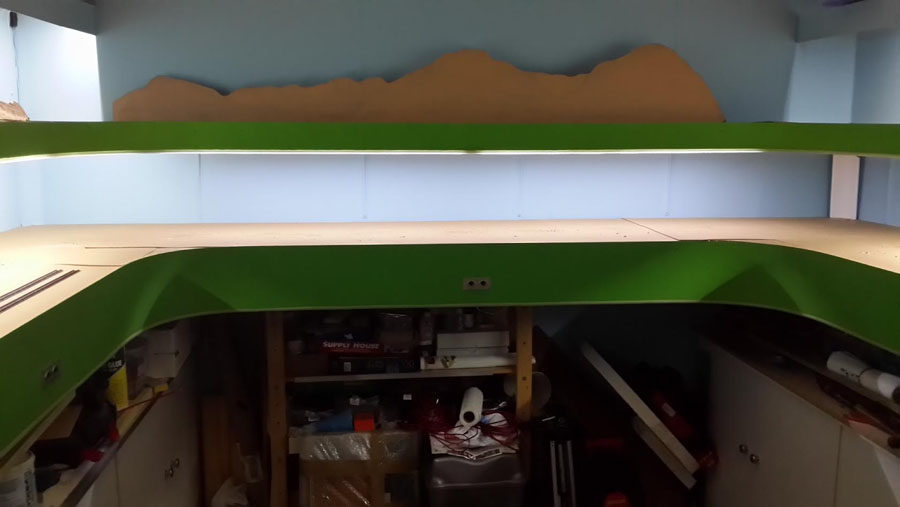
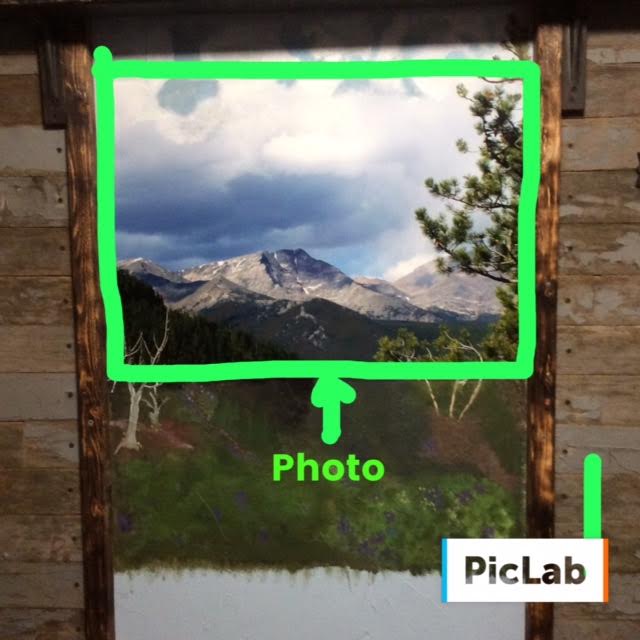
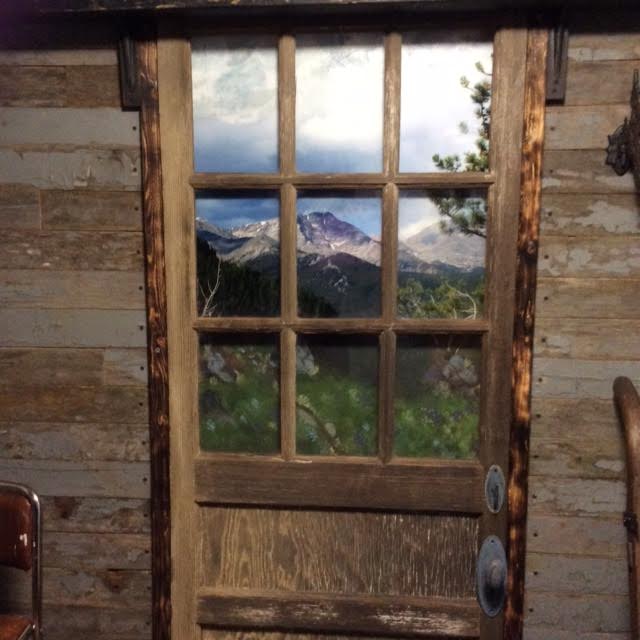
I had an area about 3 ft x 8 ft at the bottom of the stairway in the basement. I dug out a door I saved from an old chicken coup, three old windows and some old reclaimed wood. Then started building my Depot.

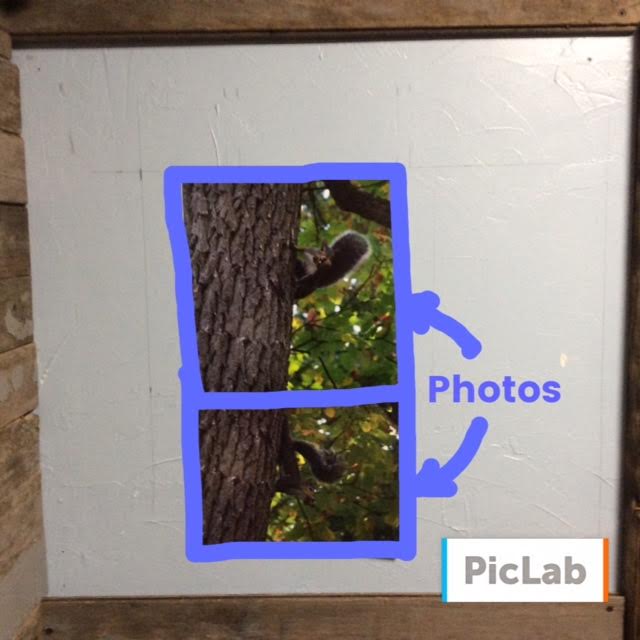
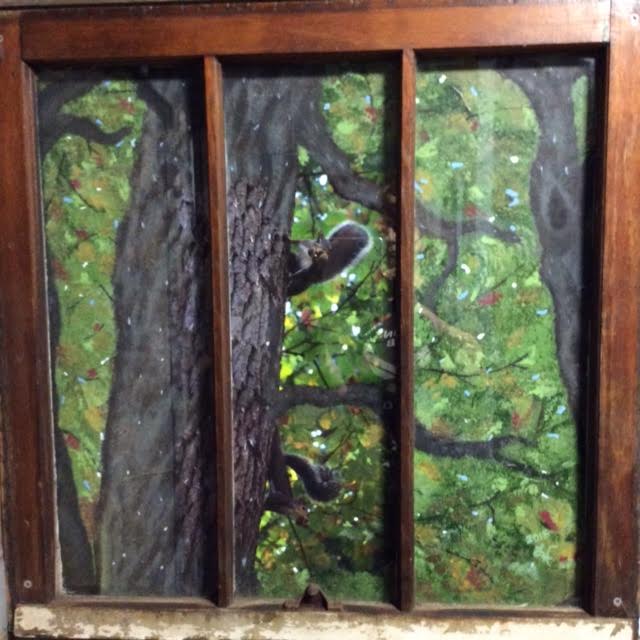
I had blown up pictures of mountains and Stellar BlueJay from our Colorado trip, and local squirrels then arranged them behind where the windows and door would go. I then painted around them all to fill in the spaces. What fun building and decorating. Here are some pics.

Linda”

Model train room ideas

Model train room ideas

Model train room ideas


Model train room ideas:

Model train room ideas

Model railroad theme

Model railroad theme

Model railroad theme

Model railroad theme

“Al–I do a lot of modeling with flex track and use nails to secure the track to the layout.

I reuse the rails for newer layouts but I found by the continual cutting to the new lengths, the small nail holes in the plastic ties are never where I need them.

I don’t have a small enough drill bit to drill new holes but I found a great solution: Straighten a large paper clip, heat one end over a candle, and using a pair of pliers (so you don’t burn your fingers), plunge it into the tie in any location you want.

The hot clip melts a perfect size hole almost immediately with no muss or fuss.

Regards,

Terry

Idaho USA”


“Mr A.

I found if there is something missing on your layout, look at it. Think of your options to what would fit and not be over or under powered. Then research it to see if it would look right. Example make a sketch, put a picture there or something close to it which you’ve laying around. It doesn’t have to be perfect. All you’re doing is getting a visual idea some solid positioning.

Then either build your idea into a reality to fit the location and fill the open and or missing piece-area or get what you feel would be right from your locate hobby store.

Example: the other day saw an article about building your own telephone-utility poles in the Model Railroader magazine. The individual used both house hold an pre made items.

I choose to make mine all from scratch matrrials purchased at local craft store. I ‘m building over 50 poles using his rough deminsions plus 4 open span truss bridges. Glue and all materials were less than $30.00 USD and have a lot left over for who knows what?
Happy railroading

Chris”


I can’t tell you how much I loved Linda’s model train room ideas – brilliant, just brilliant.

It reminded me of this post too:

How big does a model train room need to be?.

Please do let us know what you think too in the comments below.

Thanks to Terry, Chris and Linda.

I really enjoyed putting this post together for you – hope you liked it.

That’s all for today folks.

Please do keep ’em coming.

And if today is the day you get started on your layout, the Beginner’s Guide is here.

Best

Al

PS Latest ebay cheat sheet is here.

PPS More HO scale train layouts here if that’s your thing.


Model train set up advice

Rod’s been in touch again with some sound model train set up advice.

Anyone who has toiled over creating a layout will read his piece below and nod in agreement.

And if you haven’t taken the plunge yet, read Rod’s words again and again before you start. Then keep going back to them.

“Dear Al,

My Diano Marina layout was in the Cardiff exhibition last weekend and this has borne in on me a few things that I think it’s too late to worry about now, but which I wish I’d thought to plan in to the design at the time of building.

Firstly, access: we’re all getting older and frailer, but at least three potential operators have such trouble getting down under the baseboards (or at least getting up again once inside) that having the controls inside the doughnut was a serious problem for them.

I have seen layouts that have a lifting section to let you in, and there’s a place on mine where I could have done this (major reconstruction job now, so not really an option) and as even I am now starting to get sore joints and back it would have paid dividends.

Secondly, section breaks: I hate wiring work and so I left a few block sections to end just at handy baseboard joints which reduced the cross-baseboard-joint wire connections required (yay!) but means operators who rarely see the layout have to remember not just which line their train is on and which signal to stop at, but whether the train can then be isolated by the switch on the control panel or only by the points ahead of it.

Since I’ve done my best to blend in the baseboard joints scenicly, it isn’t that easy to tell whether the loco has passed the block joint. We had a few runaway trains because of this. That bit of extra wiring work would have been well worthwhile.

Third, lighting: although we were in a sort of conservatory extension, and it was plenty light during the day, when the sun went in it was very obvious we lacked an overhead lighting rig.

The baseboard legs are only 2″x 1″ so I don’t want to add the weight of a whole pelmet structure, even if I was willing to spare the time and cost of making it, but I should have planned it in.

The street and platform lights I added recently were much appreciated and it leaves me regretting I didn’t make provision for internal lighting when I was making the buildings.

Finally, wiring again: like Topsy it just growed, and although I have kept lists of what wire goes to what pin of each plug terminal (better than nothing) I had no overall schematic or determined colour scheme, so when you look under a baseboard it is a daunting mass of wire, mostly red, white and yellow, running in all directions, and you wonder where to start when looking for a fault. Having a clear system and record would have helped.

Hope this assists someone to avoid my mistakes. The photos show the layout in situ, with several friends inside trying to work out why nothing’s moving, and my wife Sue outside talking to the public to prevent them distracting the operators: secondly, an E636 on the propane tanks standing just over an electrically crucial baseboard joint which is 3″ past the bridge abutment; and finally an EMU passing the campground, with one lonely streetlight visible but none in any of the buildings. The big pink monster in particular has all solid floors and no interiors except in the penthouses. Oops.

Rod”

model train set up advice bridge

model train set up advice track

model train set up advice wiring

Sound model train set up advice from Rod. You can see more of his fantastic layout here.


And now on to Brian. I love his stuff – I have no idea how he gets so much character in to his scenes – but I find them stunning. Also, for some reason I’m real sucker for dock yard scenes. Anyway,

I hope you enjoy it as much as I did.

“Hi Al

A few photos of my soon to be constructed harbor on the lower level of my new layout.

First pic of my 9 building wharf from my old layout placed in its new position.

Second pic of ‘engineers’ sorting out a problem on my contractors barge at wharf side.

Third pic is of the captain looking out ahead for a good fishing spot for the next catch.

Next lot of pics is the barge berthed at the quayside while ‘repairs’ are being carried.

Last pic shows LED strip lights have been placed under all the levels which lights up the shelves in the proper areas on the double deck HO scale layout.

Will keep you posted on the progress.

All the best

Brian”

model train harbor

model railroad harbor

model train docks

model train harbor

HO scale barge

6-railroad-barge

7-railroad-bare

You can see more of Brian’s layout in the Hall of Fame. And if you fancy making your buildings just like his, have a look at his ‘how to’ here.

That’s all this time folks.

A big thanks to Rod for sharing his model train set up advice.

Please do keep them coming – just mail me!

And if Rod and Brian have got you chomping at the bit to get started, don’t forget the Beginner’s Guide is here.

Best

Al

PS Latest ebay cheat is here. HO stuff going silly at the mo.


Fun things to do with a model railroad

Mark’s been in touch with some fun things to do with a model railroad:

“Hi Al.

Although there are serious railroad modelers, the average modeler should try not to take everything they do too seriously.

Model Railroading is FUN……so have some! No model railroad clubs in your area? Build your own!

Attached is a photo of the HO scale model railroad club on my HO layout. This group shown is currently planning to build an N scale layout INSIDE the HO structure. Calculations show that a standard size 55-foot RS-1 Diesel Locomotive would be approx. 3/16” or about 1.1mm in length!

Now we just need to calculate tie length, rail height, etc.

If all this seems to be a little daunting, you can always just do a little painting of your layout!

Mark”

fun things to do with a model railroad painter

fun things to do with a model railroad club

fun things to do with a model railroad close up

“Here is a tip to your followers: Whenever you throw away an old power tool or appliance, always cut the power cord off and set it aside. First, nobody else will hurt themselves by trying to re-use the item. Second, now you have a replacement plug for something else when the plug fails or is damaged. Or by putting a female connector on the bare end you get a short extension cord to fill in the gap ( Dutchman ).

I recently threw out an old Carbon Monoxide Detector, but saved the cord. It included a small transformer/rectifier that produces 12 Volt DC. Not powerful enough for a lot of things but will energize a few LED lights for sure.

Bud”

Now on to Tom:

“I just started this layout in January this year. It’s on two 4×8 sheets off plywood and foam.

Tom”

model railroad

model railroad


model railroad

model railroad

Next, Saeid shares his N scale:

“Good Morning Al,

I live in Southern California, USA and have made a really nice N scale layout.

I love building them and have overgrown the layout and the wife constantly nags about how much space its taking. Can you help me sell this beautiful layout?

I took the layout from the Model Railroad magazine, it is made with Kato tracks, has a DCC Controllers.

It took me over 9 month to complete, working on it in the evenings after work about 3 hours.

I have over $4,500.00 invested in track, sceneries, trains, cars, table and wiring.

Regards,

Saeid”

n scale model train

n scale model train

n scale model train

n scale model train

n scale model train

n scale model train

n scale model train

I couldn’t agree with Mark more – what’s the point of this hobby if it’s not fun?

With a bit of thought, there are lots of fun things to do with a model railroad.

Mark has contributed with lots of excellent posts over the years – you can see a some of them here.

That’s all this time folks. Please do keep ’em coming.

And don’t forget the Beginner’s Guide if you want to roll your sleeves up and get stuck in.

Best

Al

PS Latest ebay cheat is here. Still going strong.