“Hi Al.
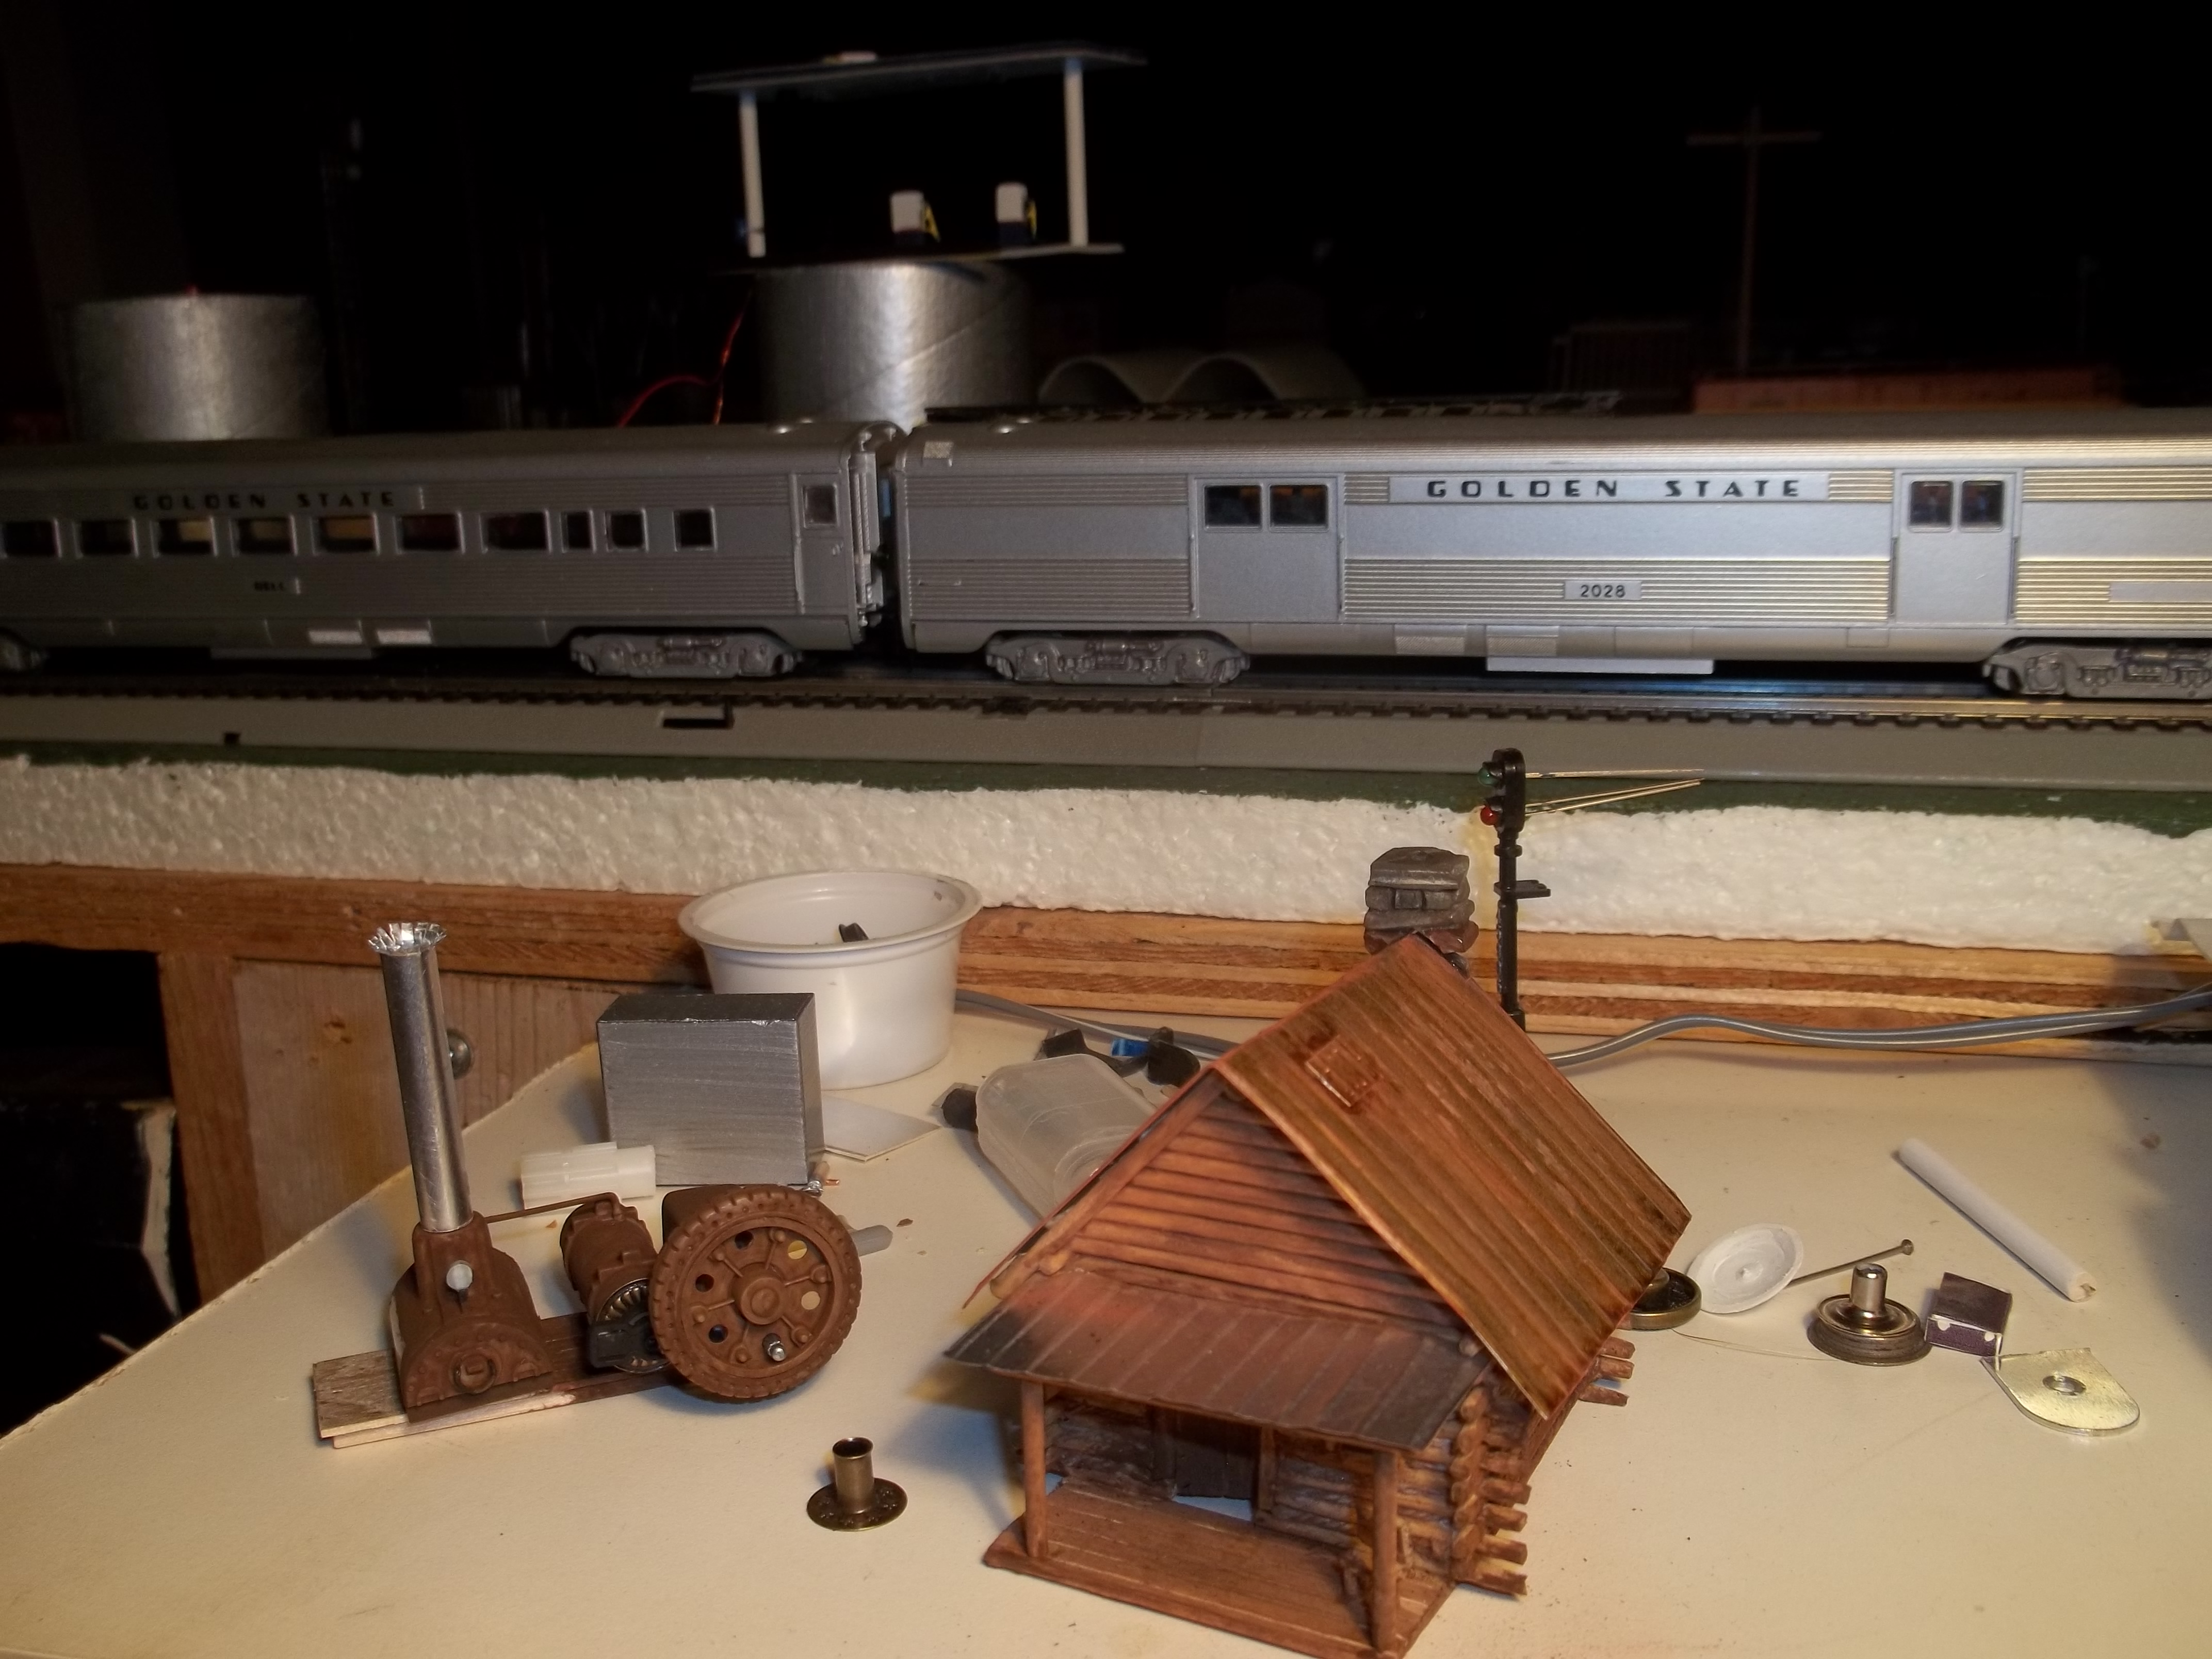
Hope everyone is doing well. How is the dog doing? I been messing with junk again. The old steam engine for farm’s or railroad is being put together with pieces of a tank model.
Have a bunch of things to put on it still. Not sure what I will do with it onece finished maybe sink it in a swamp or in a broken down shed.
The other is a log cabin deep in the wood’s. I used real stones for the chimney or fireplace. Will add black chalk around the fireplace to look like silt. It’s my first go at weathering sort of. what ya think?
Kim”
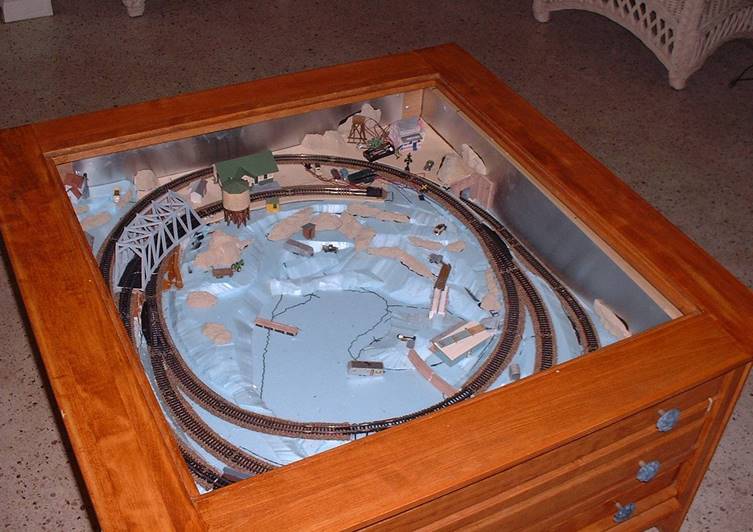
“Hi Alastair,
Here’s a tip I figured out for wiring on my N gauge layout. I am building it inside a drawer under the glass top of a 30 inch X 30 inch cocktail table in my living room.
A problem I encountered was that since I had to pull the drawer out to work on the layout it involved disconnecting a whole lot of wires, especially if I wanted to flip the drawer over to work on the underside. I went to the local computer store and purchased a couple of those flat ribbon wires they use to connect components inside computers and the receptacles to go with them.
Now I can connect and disconnect 30 wires at a time by simply unplugging one end of the flat ribbon cable.
All the wires are color coded too so it is easy to keep track of their purpose, and the ribbon is flexible enough to allow you to pull the drawer part way out and push it back in without disconnecting any of the wiring.
I’m including a photo of my layout in mid construction before I started the plaster work. I’m using a digital camera to take photographs for the perimeter of the drawer and will use my computer to print them on mat finish photo paper to glue around the drawer. Then I’ll paint the landscape to match the photo backdrops.
Bob from Florida”
“Well, seeing as how I am the least handy person on this planet, and cheap to boot, here are a couple:
Since my layout is in a permanent winter mode, I wrapped the plywood bases in white bedsheets —
It makes a a great “canvas” for laying down landscaping and a SUPERB conduit to run the wiring between the sheets and the wood – no drilling required.
The “snow” is actually a ceramic product: Duncan’s no-fire snow, available, among others, online at Amazon. You can paint or sculpt it on, and it dries to a plaster-like state.
More recently I wanted to add some ice-covered ponds, and as I dislike mixing chemicals, etc. for water effects, I went to the nearest drugstore and purchased a couple of ladies’ hand mirrors, you know, the kind they carry in their purses. I laid down some snow and partially buried them, feathering the edges with more snow.
But then I wanted a larger ice-covered swamp or pond, and here comes the cheapest solution of all: I headed to the kitchen, ripped off a good-sized sheet of food clingwrap (like Saran Wrap), painted the bedsheet in the colors I wanted to show through, and laid the wrap on top with a little landscape cement. You can make it smooth or rippled, and it looks great!
I hope these help.
Bill”
“I am new to this hobby and learn a lot by my mistakes.
The buildings you build usually are put together with super glue.
If you get super glue on your fingers and thumb, it will take days to get it off.
Solution: spend $3.00 for Nitrile disposable gloves, ten to a pack. (not latex, one size fits all.)
It will be the best 30 cents you ever spent per pair! Just throw them away when done.
Bruce
Fallbrook, California”
I just love what Bob is building there – can’t wait to see it finished. There’s been quite a number of layouts like this on the site now.
Don’t forget, to grab the Beginner’s Guide and stop dreaming and start doing. It’s a great first step.
And thank you for all the suggestions on the ebay cheat sheet too. Latest one is here.
Best
Al
PS Latest ebay cheat sheet is here.
PPS More HO scale train layouts here if that’s your thing.