How to make inclines – it’s something we all wonder about at some point.
“Hi Al.
Just wanted to inspire others on how I made my inclines for my layout on a 6’x4’ board. Might be nothing new but here goes.
First I made a hot wire cutter out of scrap wood, nichrome wire and a 4.5 Volt rechargeable battery pack. I used this to cut the incline to the gradient I wanted.
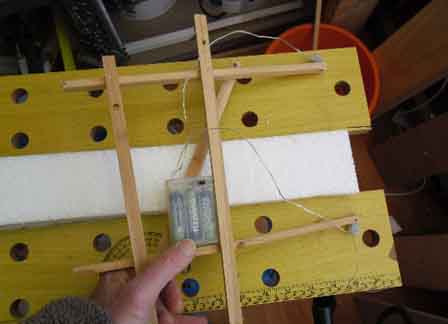
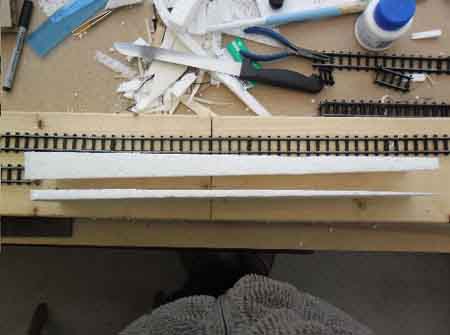
The result of the cut inclines.
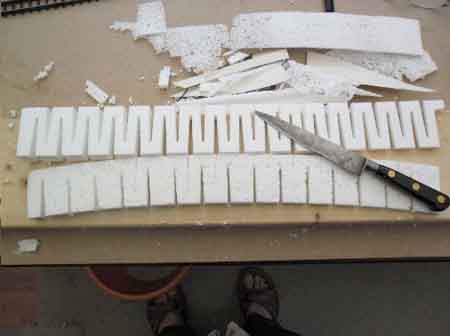
For the next step I used a woodlands scenic incline to act as the template for cutting the slots in my inclines. I use a sharp fillet knife as I’ve found it very good for cutting and shaping polystyrene. Note that wide slots only have to be cut on the inside of the radius. A simple cut is required on the outer radius
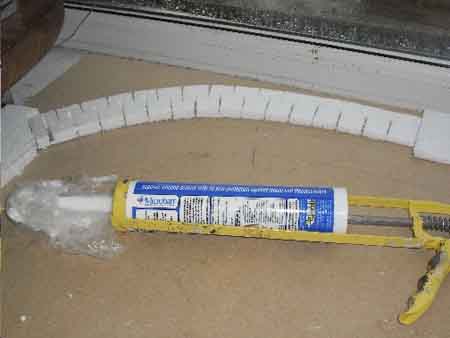
Finally I use silicone sealant to fix the incline in shape on the mdf board.
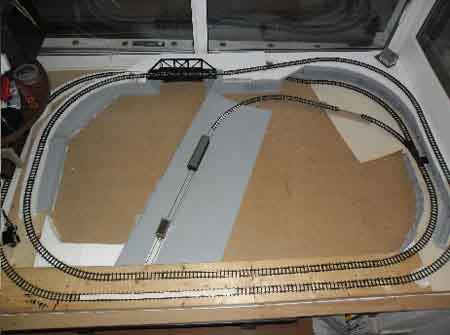
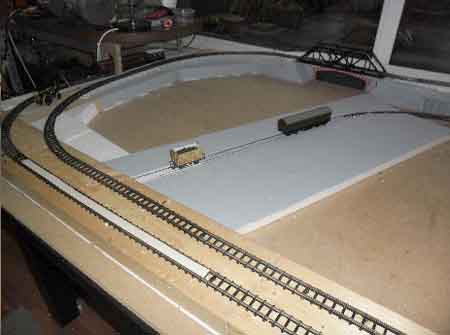
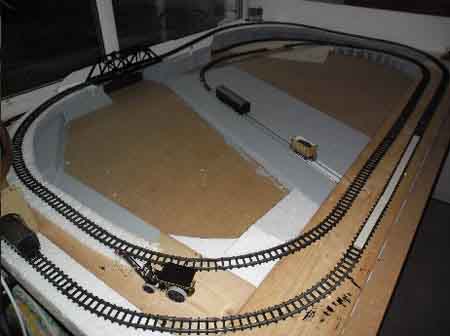
I used this process to create my layout on a 6’x4’ mdf board. The layout is basically a figure of 8 with the cross over placed to the rear. The two loops run side by side at the front at a height of 2”. The inclines to the crossover have a 1” rise and a 2” drop giving a 3” clearance with a rise gradient of 1:40. This doubles the length of track on a single controller and enables me to run two locos at a safe distance between them.
This is how to make inclines! I hope it helps with your layout.
My theme is steam on a 1930’s inland water way with barge dock and town. The photos show the finished base before the scenery covers it up.
Hope you like it.
Chris”
Thanks to Chris – a nice ‘how to’.
And when it comes to inclines, you’ll probably find Lawrence’s post very helpful too.
Bob’s incline post is also helpful when it comes working out what percentage of slope you can use.
And there’s Alan’s too:
Building model railway inclines.
That’s all for today folks.
Please do keep ’em coming.
And if you’re tired of everyone else having all the fun, the Beginner’s Guide is here.
Best
Al
PS Latest ebay cheat sheet is here.