How to weather model trains

If you’ve ever wondered how to weather your model trains, Eric has sent in this fabulous ‘how to’.

Some of you may remember the wonderful pictures Eric sent in some time ago of his ‘weathered’ trains.

Hope you like it as much as I did.


“For this third instalment in my series about weathering, I’ll explain how I weathered my « Royal Scot » , composed of my 2-3-0 green BR steam engine « Royal Scot » (Airfix) and two ex-LMS coaches from Märklin (taken from a « Hogwarts Express » train set, best known as the « Harry Potter Train »).

For those who does not know about the story, the “Harry Potter” train is in fact a well-known train that rides for tourists and train fans: the “Jacobite”, riding the Scottish rails between Fort William and Mallaigh on the line from Glasgow to the Isle of Skye, and where you’ll find the famous (or now infamous) Glenn Finann Viaduct (the curved concrete viaduct seen in the Harry Potter movies).

You’ll see here below the Airfix locomotive and the two Märklin coaches (OO Scale).
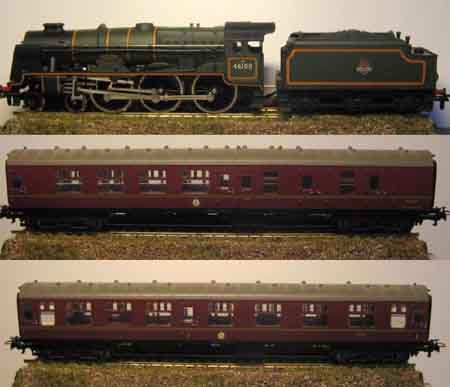
harry potter train before weathering

I wanted to depict a train riding in the late 60’s, at the end of the steam era in the Scottish Highlands, on a train from London to Skye on the old LMS lines…

The first step was to disassemble the body of the Tender from its chassis and, then, cut the wires connecting the engine to the motor in the tender (I’ll later install a small connector and a DCC decoder).

Once the engine and the tender separated, I start by brushing a coat of « Dirt » paint (8 parts of “Black Glaze” for one of “Smoke”, three of “Dark Flesh”, one of “Glossy Black” and five of “foundation White).

This mix is drybrushed on the chassis, wheels, and even on the front of the locomotive’s body (the part in black) and the steam deflectors (the Elephant Ears, as we call them) without forgetting the cab’s roof.
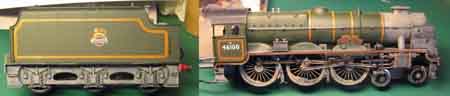
weather model train dry brush

Then I prepare a mix of « Dark Green » with a bit of my « Dirt » mix to lighten and tone it down before brushing a wash of this mix on the green parts of the locomotive and tender bodies.

The first layer wiped dry with a sponge, the next ones brushed dry with a Filbert brush, as a “Glacis” in artistic painting.
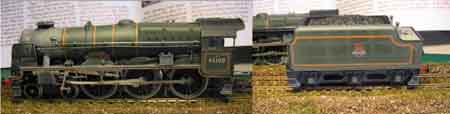
weather model train sponge

After this, I prepare my « Grime » mix (one part of « Smoke » for three of « Black Glaze ») that I brush as a « Glacis » lightly diluted on all the areas first weathered with the « Dirt » mix.
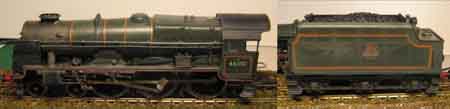
weather model trains dry brush dirt

Then I prepare my own « Rust » mix, composed of three parts of « Cavalry Brown » for one of « Burnt Umber » or of « Chocolate Brown ».

I then drybrush this mix on the locomotive’s and tender’s bodies, and also on the tender’s chassis.

As you can see, the trick with how to weather model trains is lots of dry brush work.

The Locomotive’s chassis also receive a drybrush of “Rust”, but not as heavy as on the other parts, and I mostly concentrate on the front buffers, the footsteps and some other parts of the chassis.
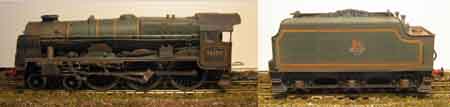
weather model trains rust

I then prepare some « fresh Rust » (one part of « Smoke » for three of « Cavalry Brown ») and highlight some of my previous rust application spots and also apply some « rust leaks » on the tender where water spills from the tank when loading or near some steam valves.

The leaks are applied with a round brush and for this diluted at a ratio of one part of paint for two parts of water.
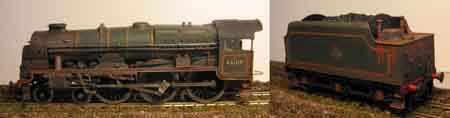
weather model trains leaks

I prepare next a mix of one part of « Black Glaze » for one part of « Foundation White ».


I brush it very lightly with a small round brush near the water tank and the valves to represent lime streaks where there are some water or steam leaks.
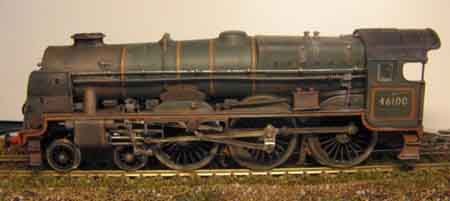
The last step is to apply a « control coat » of « Grimmy Black ».

I prepare a wash of “Black Glaze” diluted at a ratio of one part of “Black Glaze” for three of water, and brush a liberal coat of it on the entirety of the engine and the tender, being thorough especially on the wheels and the driving rods.

The last steps of the « detailing » would be first a drybrush of light grey (mix of « Black Glaze » and « Foundation White ») to highlight the details on the inside of the cab, then a brush of « Glossy Black » on the tender’s coal load to make it look more realistic, and finally applying some of this « Glossy Black » on the handrails and tubes on the engine’s body and also on the buffers (greasiest parts).

The last thing to do then will be to reconnect the locomotive to its tender and put it on the tracks to admire the final result.
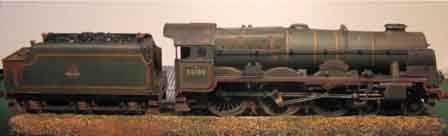
weather model trains after pic


Just amazing. A big thank you to Eric for sharing how to weather model trains. He’s also done a ‘how to’ on the carriages and the people, which I shall mail next time.

That’s all for this time folks.

Please do keep ’em coming.

And if today is the day you get started on your layout, the Beginner’s Guide is here.

Best

Al

PS More HO scale train layouts here if that’s your thing.


Need buildings for your layout? Have a look at the store.

They are great fun to make and great value too.
More railroad tips and pictures

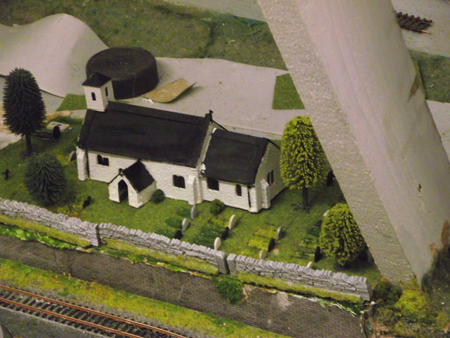
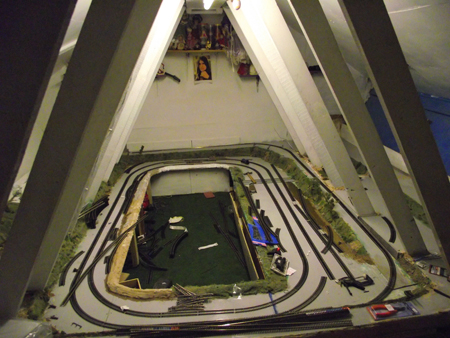
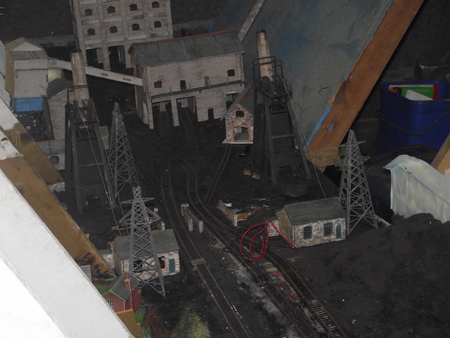
“hi Alister i have been working on my laout for a year all my pics are work in process i have many more thats if you want them the cemetry is made from ice lolly sticks i an trying to keep it as a Welsh theme.

All the best from Gwilym”


“I have just subscribed to your tip line and I want to say it is been helpful. Especially the inexpensive way of do many thing , which I have already incorporated in into my layout.

I have a 4X8 layout that has a lot of mountains and cliff on it. I am a the phase to apply plaster on my mountains and have found a low cost material and method to apply compared to the plaster rolls that cost to much for my pocket which at the end has a flat plastering look. With that smooth look you then need to apply the texture to the landscape to get the look. I have found that I can achieve both with the first application. This is how I do it:

You purchase mesh rolls 25’L X 2’W. Cut the rolls in whatever width you want. I cut mine with a metal saw blade and cut them in (3) 6” and (2) 3” rolls, which totals the total width of the mesh.

You then roll out what you want to cover and staple it in place. The mesh has a slight adhesive on one side. It will almost stick to paper, wood etc. Use masking tape at the seems that slightly overlaps the last mesh you applied. Now you have apply the mesh tape and stable it in place. I

t is time to mix up the plaster. I use easy sand 20. Easy sand 20 is a plaster compound that is use in construction finishing drywall for quick setting so that it can be sanded within the same day.

It dries in 20 to 30” before you can continue. If you want texture to your landscape mix the plaster till it is lumpy not perfectly creamy with no lumps. Note: for a smooth finish you can make it creamy and achieve a smooth finish, your preference. Also make it slightly runny kind of like thick syrup you put on pancakes. When applying it will seep through the mesh tape and form up solid in 20 to 30 minutes with NO cracks. 20 minute easy sand has a low lime content and that is what I believe doesn’t allow it to crack. Plus it is harder then regular drywall compound.

When applying it will seep down through the mesh then I start brushing it on in the direction of the mountains or the cliff you might want. With the compound lumpy it give a great rough texture for ground under trees, gravel beds, rock etc.

You can apply as many coat as you like to get the thickness you require. I have done this on my layout and it has save be a bundle. I paid about $25.00 for everything. That plastered my entire layout table. If I where to use the plaster rolls that you purchase at hobby shop I would have paid in the ball park of $100 to $125 to do the same thing.

This is how I did my mountains and cliffs. I also use the same compound when pouring rock and column molds with NO cracks.

Someone has probably already written to you about this. If they have then just disregard this e-mail. Keep sending those tips plus the pic. I think this is a great thing you are doing.

Patrick”


All good stuff – keep ’em coming.

Still getting comments on the ‘ebay cheat sheet‘ – so thanks for those. I do appreciate them. Makes it worthwhile.

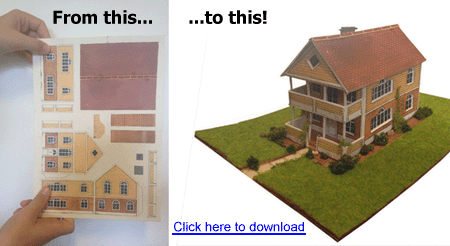
Take a look at my boy’s latest print out scenery. He’s done a house with a terrace. Course, I’m biased – but it looks superb.

Best

Al

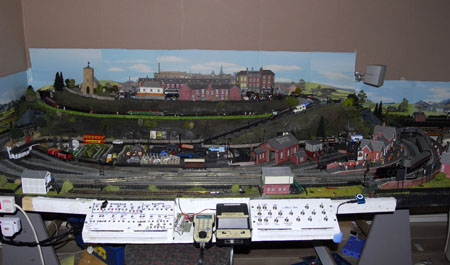
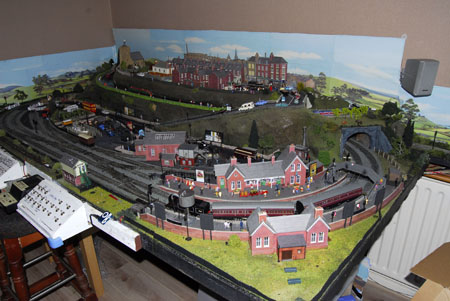
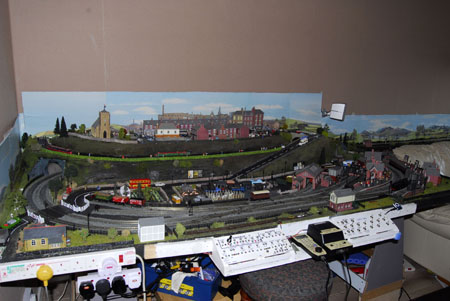
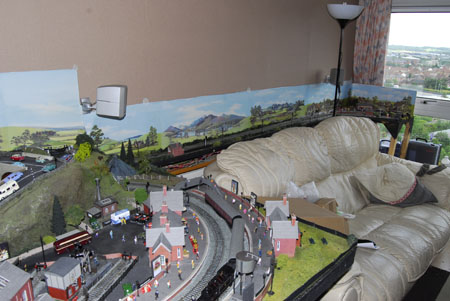
Steve’s living room railway

Steve’s been back in touch – you may remember him from his previous post – it’s the only layout around a sofa I’ve ever seen:

“Hi Alistair

I sent you some photos of my front room layout some time ago in its early stages.

Here is the completed item with local train comprising of N2 class tank loco and two suburban coaches in station.

Just minor finishing touches are required to scenery.

I have linked up a small Mp3 player to a speaker under the church and it plays a peal of bells ringing out for the wedding party at regular intervals.

There are flashing lights in the pub (like a disco).

Looks good when all lit up at night.

Steve”

model railway around sofa

model railway around sofa

model railway around sofa


Well done to Steve – I remember the original photos – he’s done a sterling job.

I love it!


“Hi Al,

See attached images, recycled tracks used for modelling.

Hope you like it.

Roberto”


That’s all for this time folks.

Please do keep ’em coming.

And if creating your own model railroad is an itch you just have to scratch, the the Beginner’s Guide is here.

Best

Al

PS More HO scale train layouts here if that’s your thing.


Need buildings for your layout? Have a look at the store.

They are great fun to make and great value too.