Roger’s climbing plants for your railroad

“Hello Al

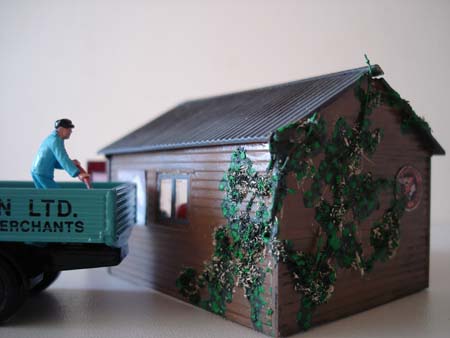
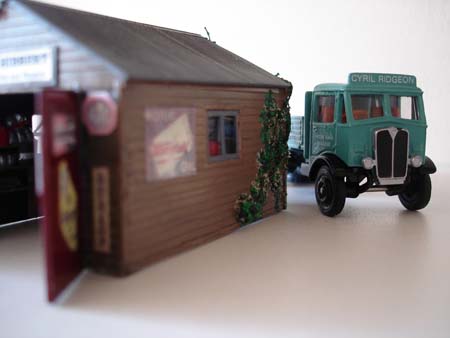
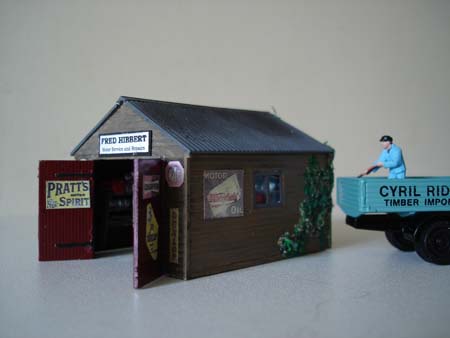
This occurred to me while I was re-building a badly made-up OO gauge house kit. I love poorly constructed and broken plastic building kits. They’re a bargain on eBay because no one wants them and you can get them for a song. Once you’ve taken them apart and re-assembled them, you’re left with lots of imperfections which are a challenge and fun to disguise. This is one way to do it – requires little or no skill – is very quick – and foolproof because even slip-ups look good. You can cover up glue marks, missing chunks of plastic, dodgy windows, broken guttering – all manner of mess. And it costs nothing.

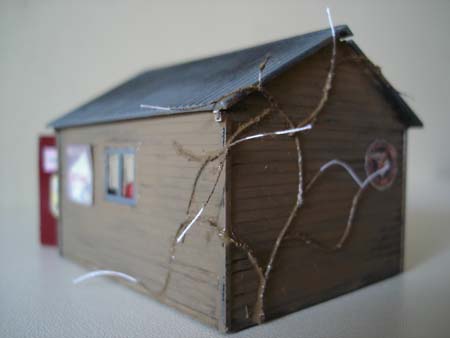
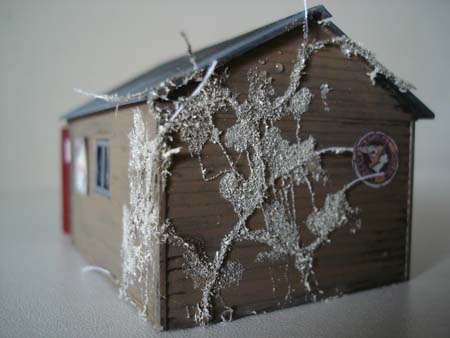
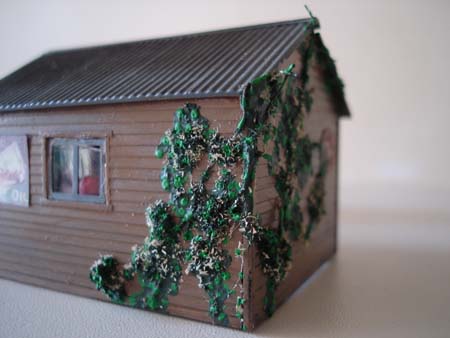
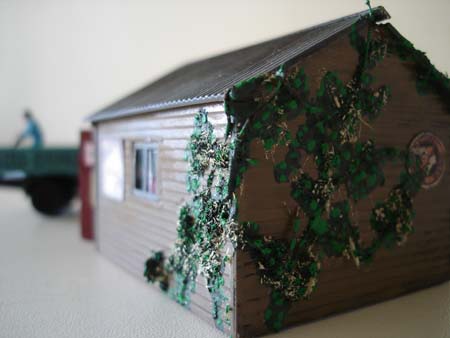
The photos can’t show the results properly because they’re two dimensional. In reality the plant is proud of the wall, falls way from it in places and has texture – really appears to be growing on it. The pictures make it look ‘painted on’ but should give an impression. Here’s the process: –

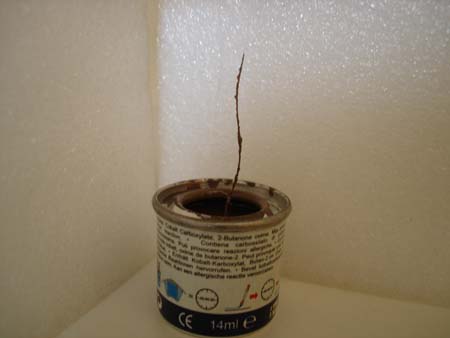
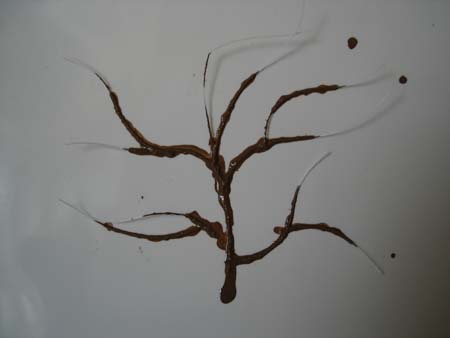
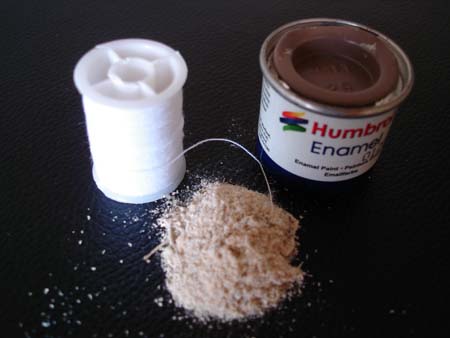
(1) – Cut a short length of thread, dip it in the dark brown paint and lay it on the wall from the bottom upwards – vertically – the root branch. If it splatters a little – great – exactly what ivy appears to do. The paint itself glues the thread to the wall. Cut more lengths of thread, dip them and lay them from the main stem outwards – up and over the roof if you like – across windows – the more haphazard the better. Gently dab them down if you wish.

– Make a little paper applicator for the sawdust.

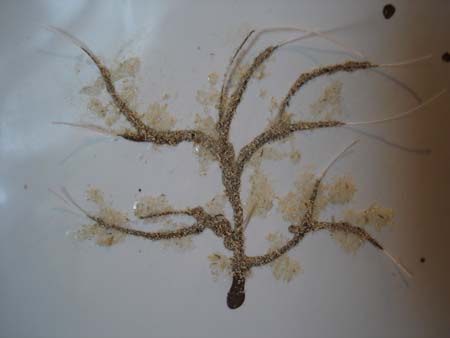
(2) – Once dry, drop blobs of glue on and around the branches, allowing plenty of brown stalk to show through. Use a matchstick to apply the glue. You’ll notice that the glue reacts with paint to give a ‘crazing’ effect and whitens – fantastic – exactly what dead ivy stalks look like.

– QUICKLY – using a the paper applicator – drop patches of sawdust into the glue – gently pat it in if you wish – leave it to dry. Just like kiddies’ glittering! You can re-apply if you want to build up the plant.

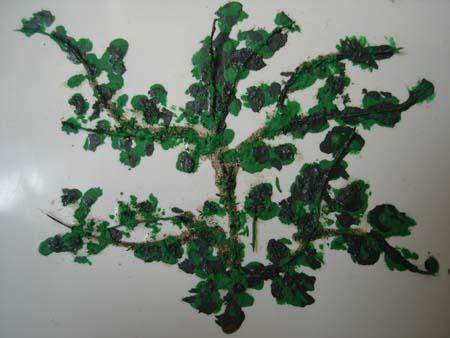
(3) – Dab blobs of green paint on and around MOST of the sawdusted areas – not all of them or you spoil the effect.

(4) – Trim off any unpainted thread ends – or dab a little green paint on them. Looks good if they stick up or fall away from the wall.

Bazinga! Tis done!

Of course you can use the same technique with tiny dabs of colour to create wisteria, climbing roses – all sorts of things. And ivy grows absolutely everywhere so it can brighten up the dullest goods yard.

Best wishes to all.

Roger.”

A big thank you to Roger. Don’t forget to leave a comment below!

And to all those still sitting on the side lines, or those just looking for inspiration, this will sort you out.

Best

Al

Steam engine with no fire!

Okay, so perhaps this is a bit off the beaten track of model railroads – but I found it interesting and thought you may too.


“Al,

Here are some pictures of a steam engine which has no firebox.

It was parked at the power plant of NCR (National Cash Register) here in Dayton.

A pressure hose was attached from the factory’s steam line to the loco. Steam was pushed into the thermos flask (the main part of the loco), and used to move it around the yard switching 2 or 3 small rolling stock cars.

–Ben”


And now dear readers, some help is needed.

Wayne has got in touch. And I thought I’d ask the collective – that’s you – on his behalf. Please post comment below!

“I read your material everyday. I print it out and have put it in a binder. If you can get some feed back on what I should do? I thought I had it figured out.

I am a novice and just getting into model railroading. Sometimes you get things that your mind cannot comprehend. A friend’s husband passed and he had HO trains and layout with accessories, some installed and others not?.

I picked it up this AM and now I have a 4 track layout on a 4×4 HO Scale board with trap door in the middle. All four tracks are separate buy can switch cars from one to the other.

There are five engines and several cars…. Bachmann and Atlas material. Enough track to build another rail system on a separate board.

There is railroad crossing with lights and signs, end of 3 track switch with lights, etc.

I have the ability to build the hills and buildings as I do scroll saw stuff. Work a lot with plastic.

Attached is a picture of the stuff I have.

1. Do I start all over and build new?
2. Do I work with what I have>
3. Or do I get creative and build around what I have?
4. Should I just start with one engine, cars and work my way up?

Wayne”


So can you help Wayne out? What would you suggest? I’m asking because I know we’ve all been there!

Oh – and don’t forget the new ebay cheat sheet”

Keep ’em coming.

Best

Al

PS Beginner’s Guide is here.


Railroad layout school project!

I got this in and thought it a fantastic story!

“I’ve been following your blog for a while now, and I am inspired by all of the tips and techniques. I am the science chair at a middle school, and I recently was awarded an educational grant from a coal company for my idea to build an HO scale model train layout. We built the entire 8’x4′ layout in my storage room. It took many class periods to complete. The majority was done by 13 year olds. I only offered my help with laying the track, electrical components, final details, and trouble shooting.

The CSX specific train dumps coal using the old Virginian TYCO hoppers that we will paint later and affix CSX decals. We cut square holes into the layout base for coal to pass through grates into a peanut butter jar, and we are currently in the process of using a coin machine motor to build a gravity loader for the next fair. With this lesson, I taught not only concepts of coal, but I focused on scale, electrical circuits, and topography. I wanted to introduce students to the hobby of model railroading that I recently became interested in myself. Anyway, we finished most of it up in time for the CEDAR coal fair, and took home 2nd place which gave me, the coordinator of the project, a $600 check! I was wondering if you’d be interested in seeing the pictures or video of the project to post? Granted, I nor my students are hobbyists. Our techniques are probably crude and rudimentary compared with others on the site. Thanks.

Garron”


“Alastair,
I have an idea on how to make realistic looking roof material and not cost an arm and a leg. A lot of model buildings have a tarpaper look to them but I prefer to use Kleenex for the true look. I know how hard it is to try to cut Kleenex’s with scissors but thanks to my wife she had the perfect solution. She does a lot of sewing and she gave me a round cut blade that has a round wheel (fabric cutter wheel) that is as sharp as any e-acto knife and when using a metal ruler for a straight cut you can slice Kleenex to any width you need. The next step would be to place it permanently to where you need it. I simply lay the individual strips where I need it and then use any brush with flat black paint needed to stick it to the roof or and other application

Lee”


Here’s Patrick’s take on Roger’s flat bed load ‘how to’.

Patrick has just used stuff from the garden:


Latest ebay cheat sheetis here.

Keep ’em coming!

Best

Al