“Below is the approximate Atlas track plan of my layout as of today.
I say approximate because I could not get the Atlas Track Planning Software to accurately display the layout. It is close enough so you can get the idea.
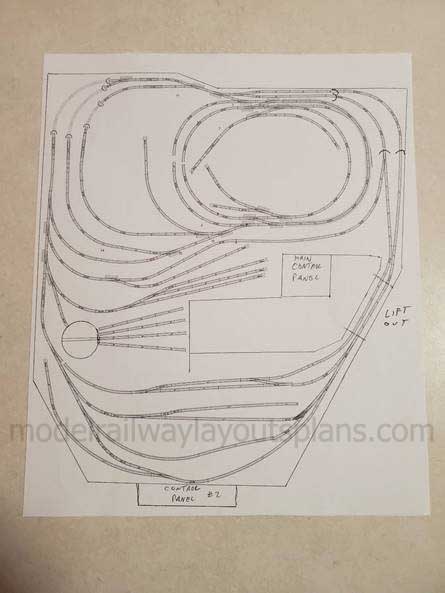
Here is what it looks like:
As the saying goes “A layout is never finished.” After all the expansions, work arounds, and problems, I am having problems just running my trains. So I have decided to scrap it all and start a new layout and this time learn from my mistakes and take my time to do it right.
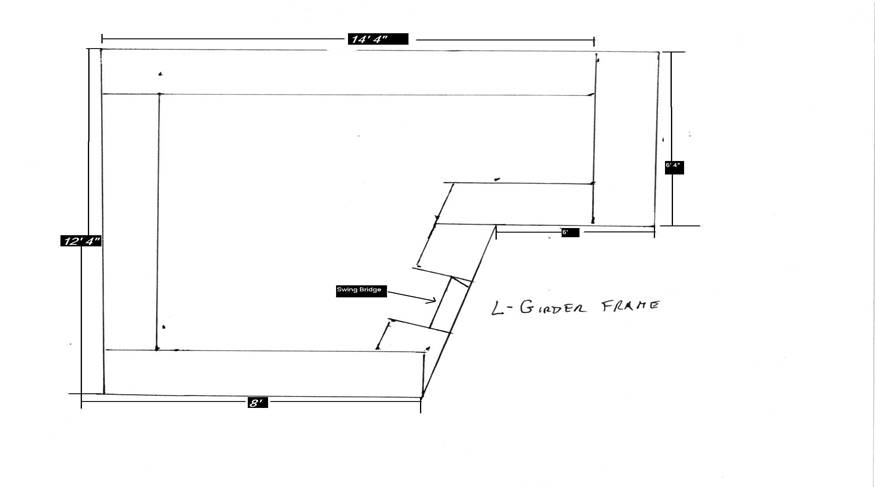
I am going to start with L-Girder framework approximately 44 inches high with 30 inch joist.
Below is the general scheme for and around the wall layout with a swing bridge approximately where the lift-out is on the current layout. The picture below shows just the perimeter L-Girder framework.
Once it is in place I will plan the trackwork and see what I can fit using minimum of 30” radius curves for the dual main lines.
It will take some time to dismantle the current layout before I can move forward. I started the current layout in January and finished the last addition of the second tunnel and the 3d clouds in October. The fun is in the doing and it is not always running the trains.
Bob, Virginia”
“Hi Al
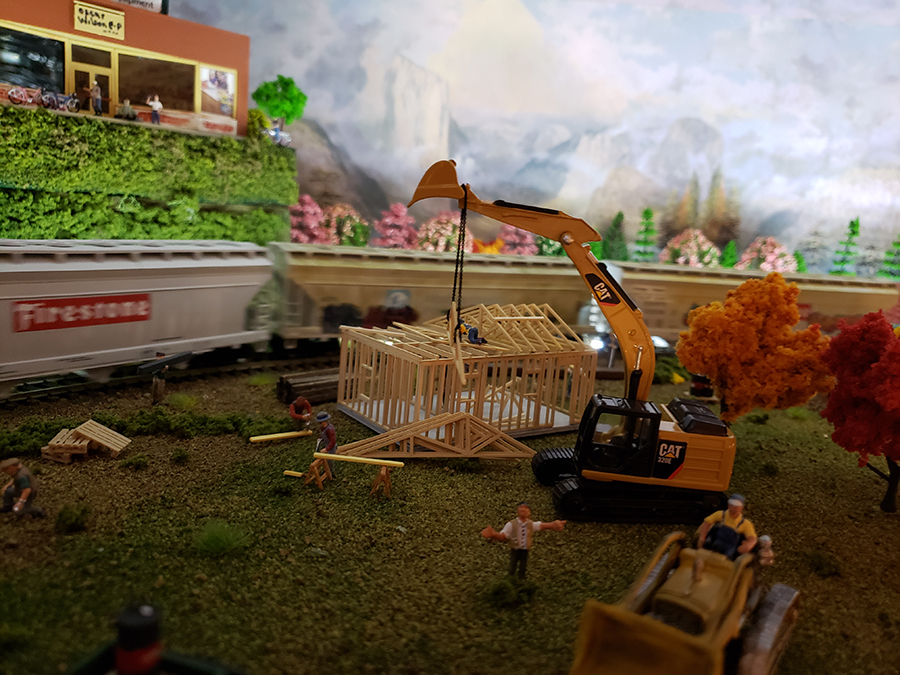
Like I promised here are some pics of each corner of the layout with “Full Time Jobs”
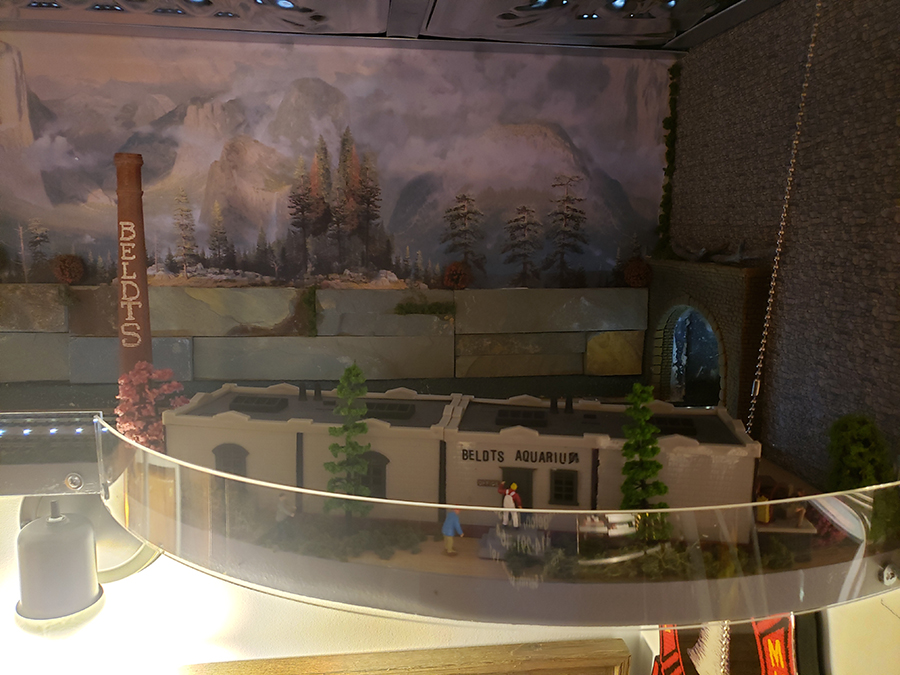
1st is a resemblance very close to the Tropical Fish Hatchery were I worked in 1971.
2nd is the Shell service station were i pumped gas and then later became one of the day mechanics from 1972 till 1981. Cars in front of station are the ones I have owned over the years.
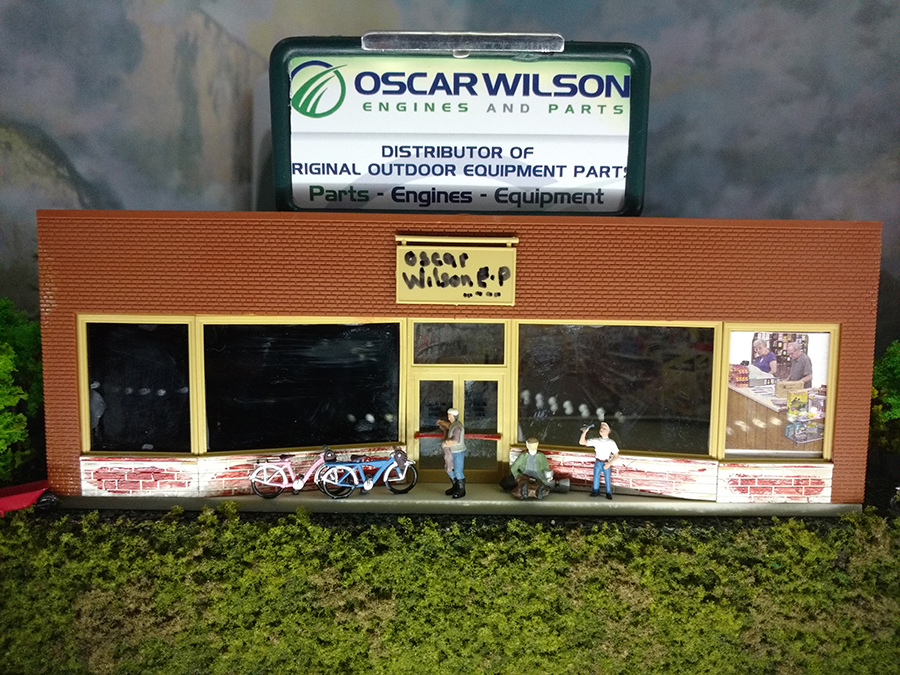
3rd is Oscar Wilson, they were a lawn mower and bike distributor for parts.
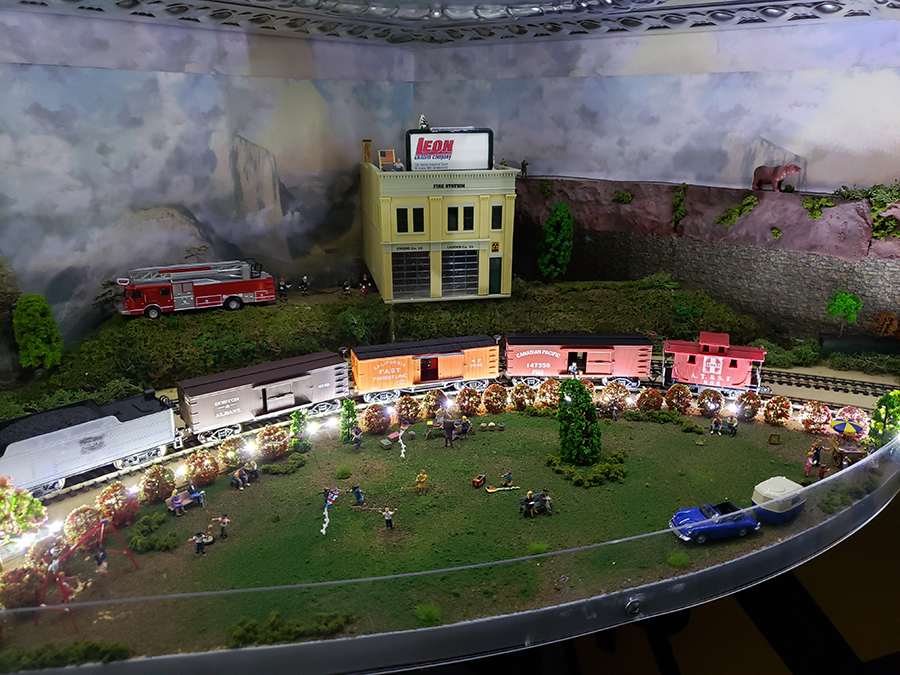
4th is the fire station not exactly the building but you all get the idea. 1981 to present.
I will throw in a few other pics and that will complete the shelf layout that runs around the ceiling.
We will continue with the lower expansion in a few days or so.
Thanks again Al
Eric the firefighter”


If you missed Eric’s first post, it’s here. And apologies, I got it wrong – Eric’s not retired yet. My mistake.
Now on to Dave:
“Hi Al..
Just uploaded this video showing (or trying to show ) the different types of Track and Points.
Also how to fit the Peco side Mounted Points Motors, have shown as best I could, not great at explaining things, but think most will get the Gist of all this…
At the end my conclusion is that using the Peco Electrofrog Points with the side Mounted Points Motor is the easiest and best Path to follow.
Regards
Dave”
Latest ebay cheat sheet is here.
A big thanks to Bob for sharing his Atlas track plan, and to Eric and Dave.
Really do love what Bob wrote:
“The fun is in the doing and it is not always running the trains.”
I couldn’t agree more – if your thing is running trains, then great. If your thing is landscaping, then that’s great too. It really doesn’t matter what your ‘thing’ is – just enjoy it whatever it may be.
That’s all for today folks – but please do keep ’em coming.
And don’t forget the Beginner’s Guide is here if today is the ‘the’ day – the day you take your first step on your model railway.
Best
Al


I started the current layout in January 2017 with a 4×6 double oval and finished the last expansion in October 2019.
Atlas track planning software seems to be really a subset of SCARM software. SCARM is free if you use less then 100 objects.
Hy Bob, I did the same thing in starting over. What I found was that flex trak allowed me to make tracks too close and too tight. So I ripped it up and started over. The main thing new I added was pre curved track for the corners which maintained the same curves in every corner. I now have a 3 track main all nicely spaced and cars roll around easily. Good luck, I believe you did the right thing.
Hi Bob, I enjoyed your comment “The fun is in the doing and it is not always running the trains.” That is true for me as well. I also can identify with you tearing it apart and starting over. I did the same thing, on a smaller scale, and in the end I was glad I did. Thanks for the post and the pictures. Looking forward to your updates! Ben in Chicago
Hi – where will I find some layout ideas/suggestions for my 1949 ‘S’ (Am. Flyer) that I will soon start building? It will be on an 8′ x 6′ board. vern
Dave’s photo backdrops add incredible depth to his scenes. Much better looking than painted backdrops to my eye anyway. Nice segue from bench work to background. Always enjoy his videos (as well as all the other videos). I had a flood a year ago and had to pack everything thing up temporarily to redo the floors in my man cave. I had a double deck tinplate setup with standard gauge on the lower level and O gauge on the upper. I just love the old stuff. Looking forward to setting it all back up. Keep the posts coming. I start every day with them. Thanks for all you do.
Hi Bob
Your track looks to me as a well drawn Gordian knot. It’s not a matter of how much rail I can lay down on a square inch. Always remember that less is better. Look at the big example. Good luck.
Joan,
I agree. I started with a 4×6 double oval with two crossovers. Then expanded to 4x6x5. That is where I should have stopped. The room wouldn’t allow anymore expansion so I moved the layout to a bigger area and kept expanding. When I move to the new room is when I should have started new.
Bob