Brian’s been back in touch with more tips on model railroad building interiors.
He’s been busy with his boat house. If you missed his first post, it’s here.
“Hi Al, I have managed to get a lot further with this kit bash since part 1.
Again, a lot of thought went into this building as every time you think thats it, a new challenge comes along and always at the wrong time. The (oops, I should have done this first and THEN the part that you have just done) kind of error that you make in trying to finish the project as it is now taking too long.
BUT, what would the fun be if it was all too easy and plain sailing.
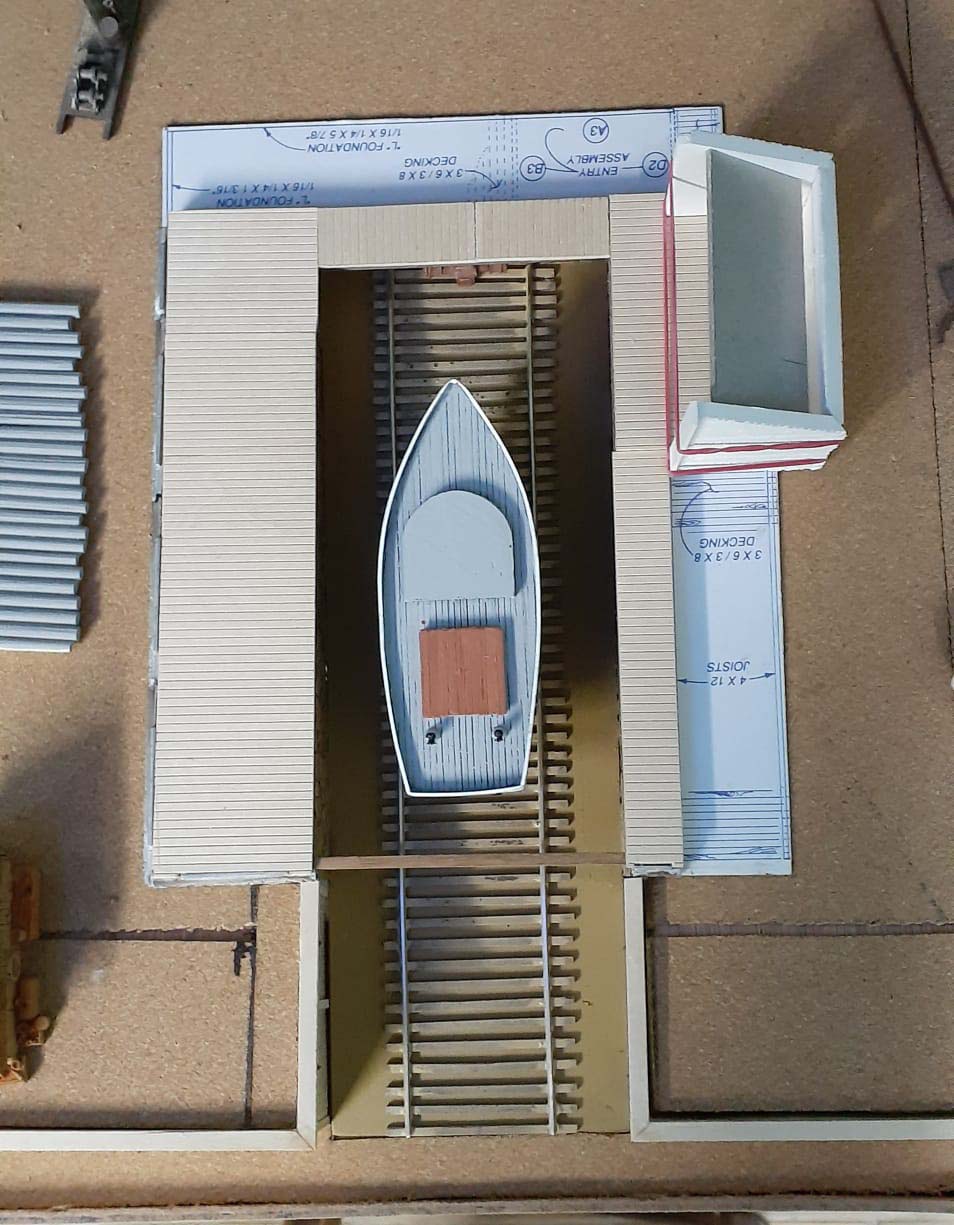
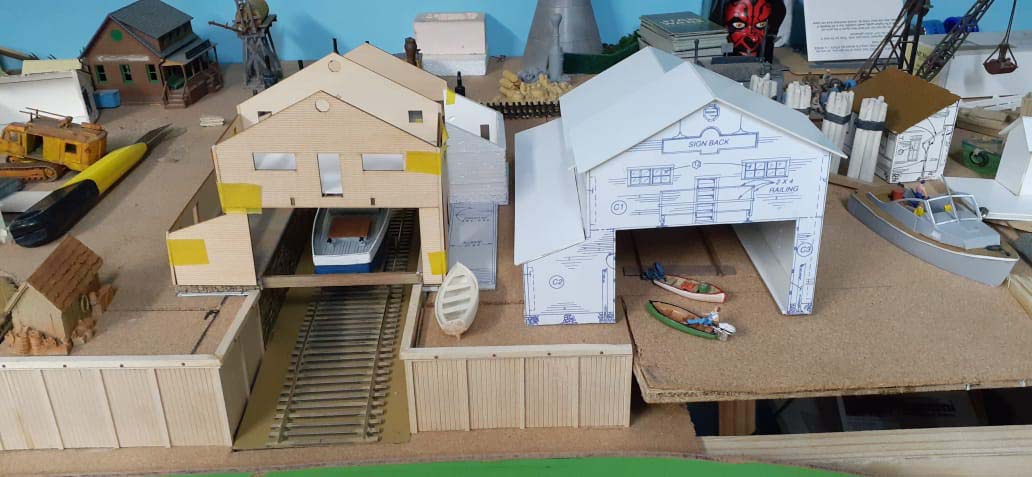
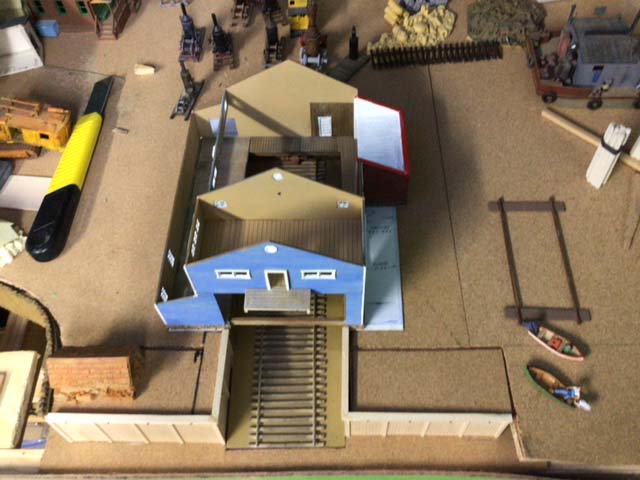
Here I am visualising on what I would like to do by detailing the interior. The HOn3 track is just to help. The correct track gauge will be fabricated at a later stage.
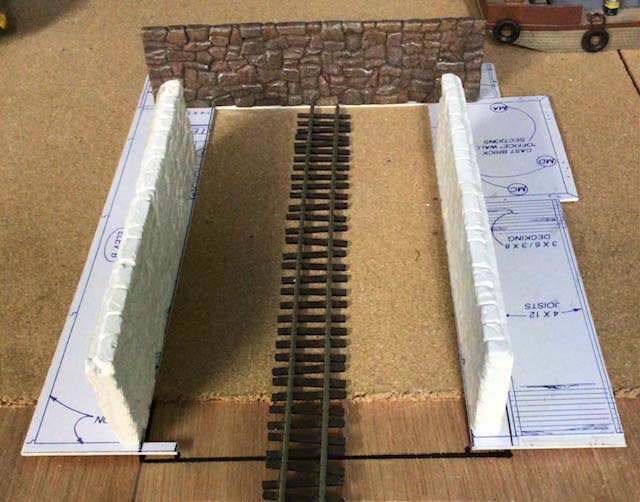
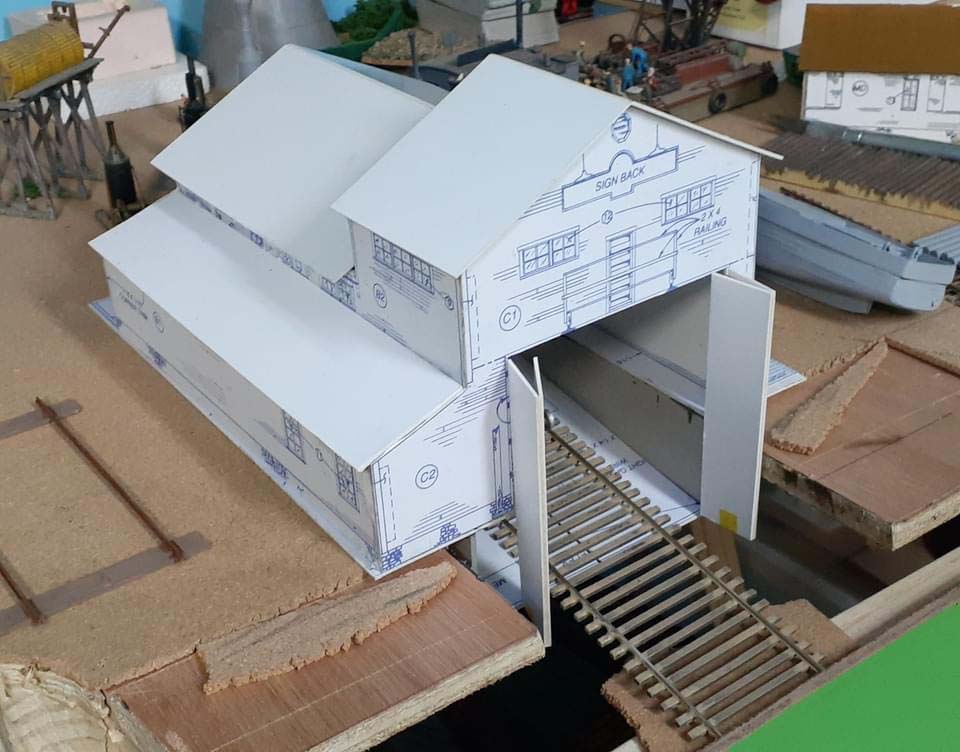
The kit does not come with any interior at all, nor do the plans tell you what is inside. The plan below are my thoughts on what the interior ‘would’ look like.
Here I have cut the sides from card stock to get an idea of where the stone wall sides will go. Currently they are level with the track base. I use this as a template to cut out the base board of the layout.
This is where I glue the photo copies of the building to card stock which stiffens up the whole building making it easier to handle.
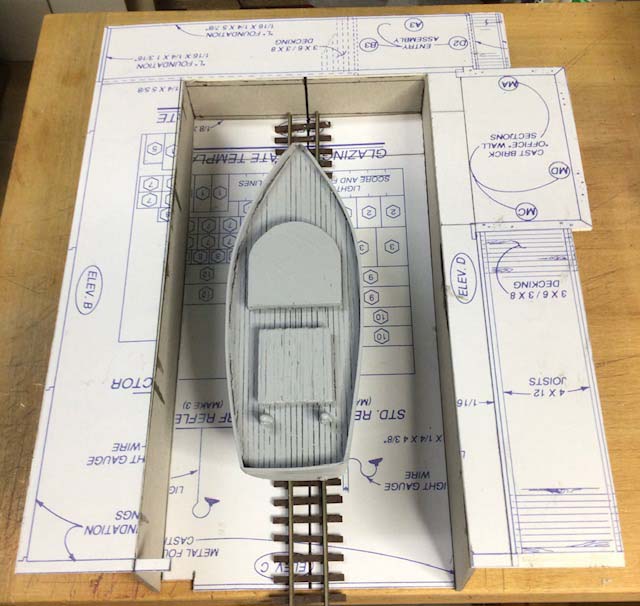
The layout base now cut out and test fitted in place. This was a very necessary step as I discovered that the hole had to be cut back a further 40mm to enable the boat track / ramp to be in the water at the front.
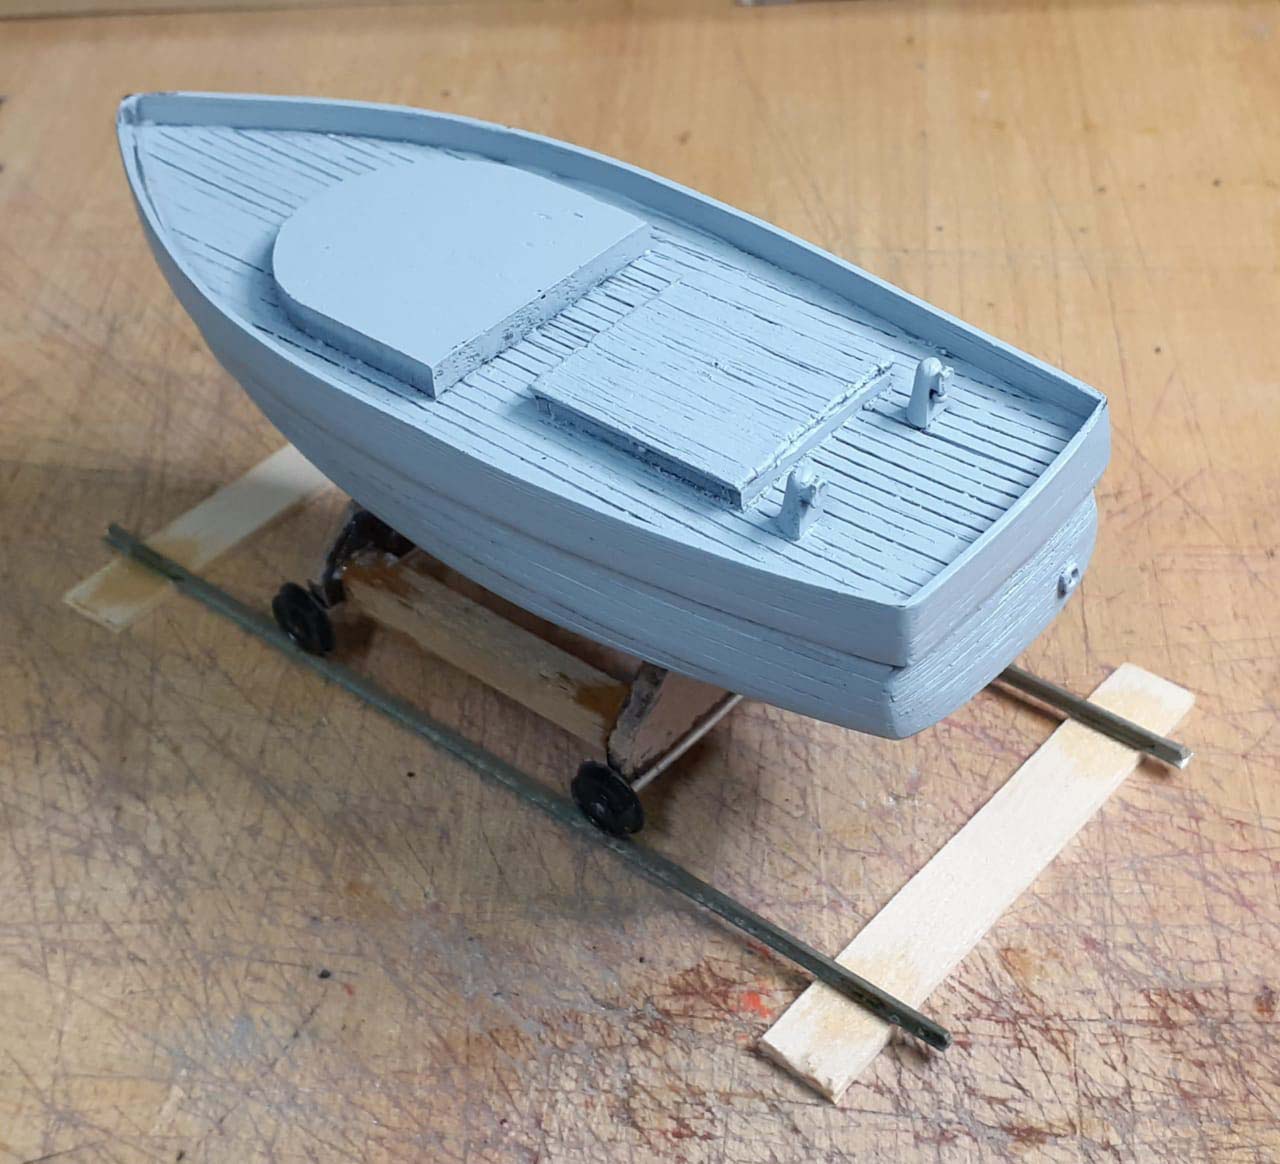
Made the boat dolly and used old rail to get the gauge for the ramp.
Another test fit to make sure there was enough clearance on either side.

This is where I realised that I had to cut the layout base back further as the rail ramp was too close to the fascia in front.
A piece of Masonite was cut to fit the area and glued to the side masonry (cast resin) walls.
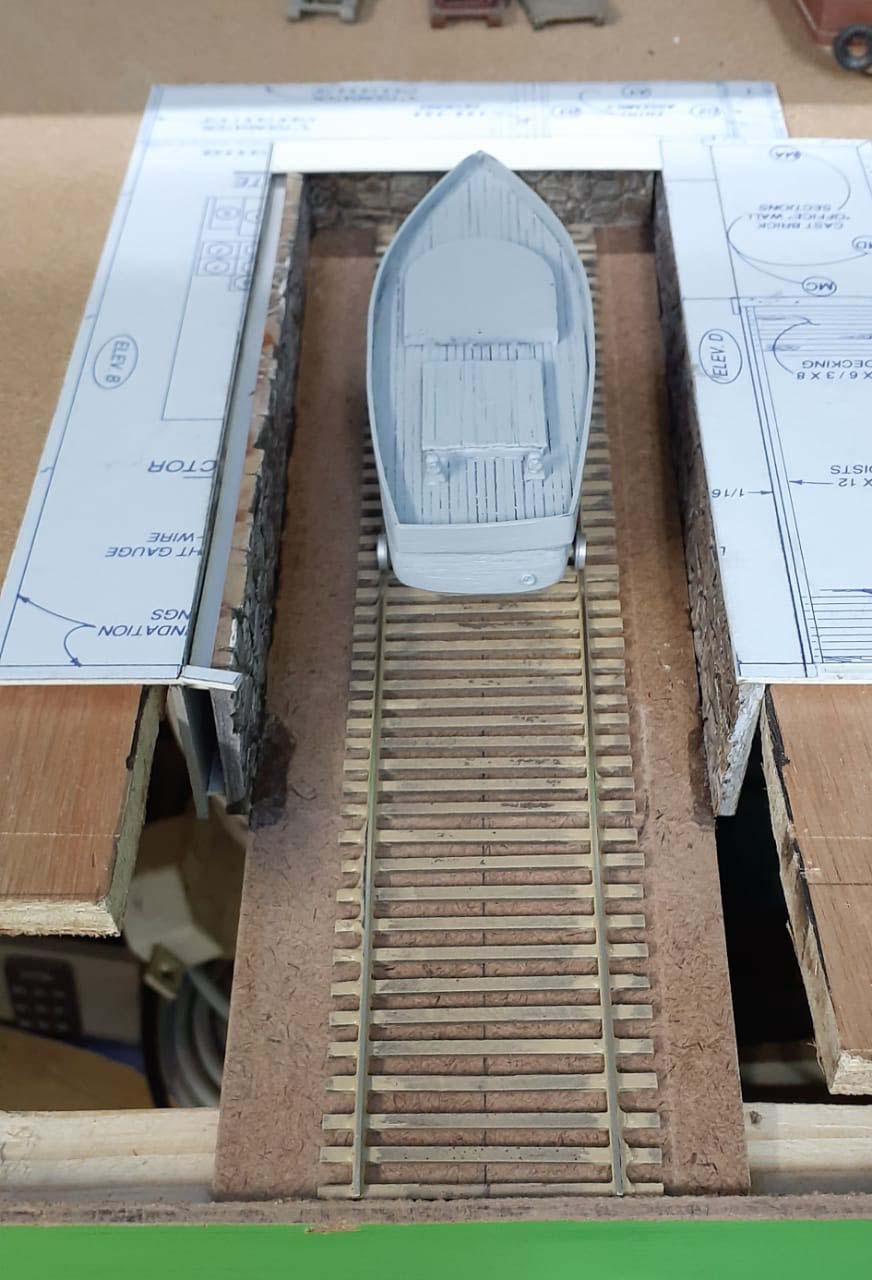
Here the building is at the correct distance from the fascia. The front outer walls are now in place giving enough room at the front for water.

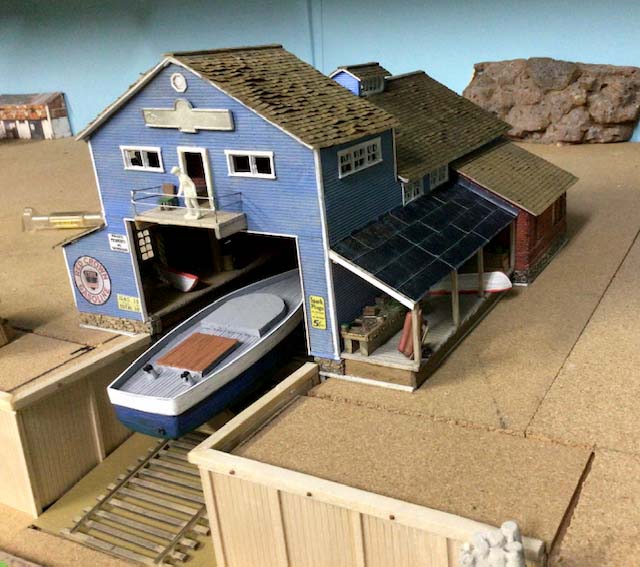
A photo of the boat on the ramp entrance. Note the nut/bolt/washer casting on the side wall.
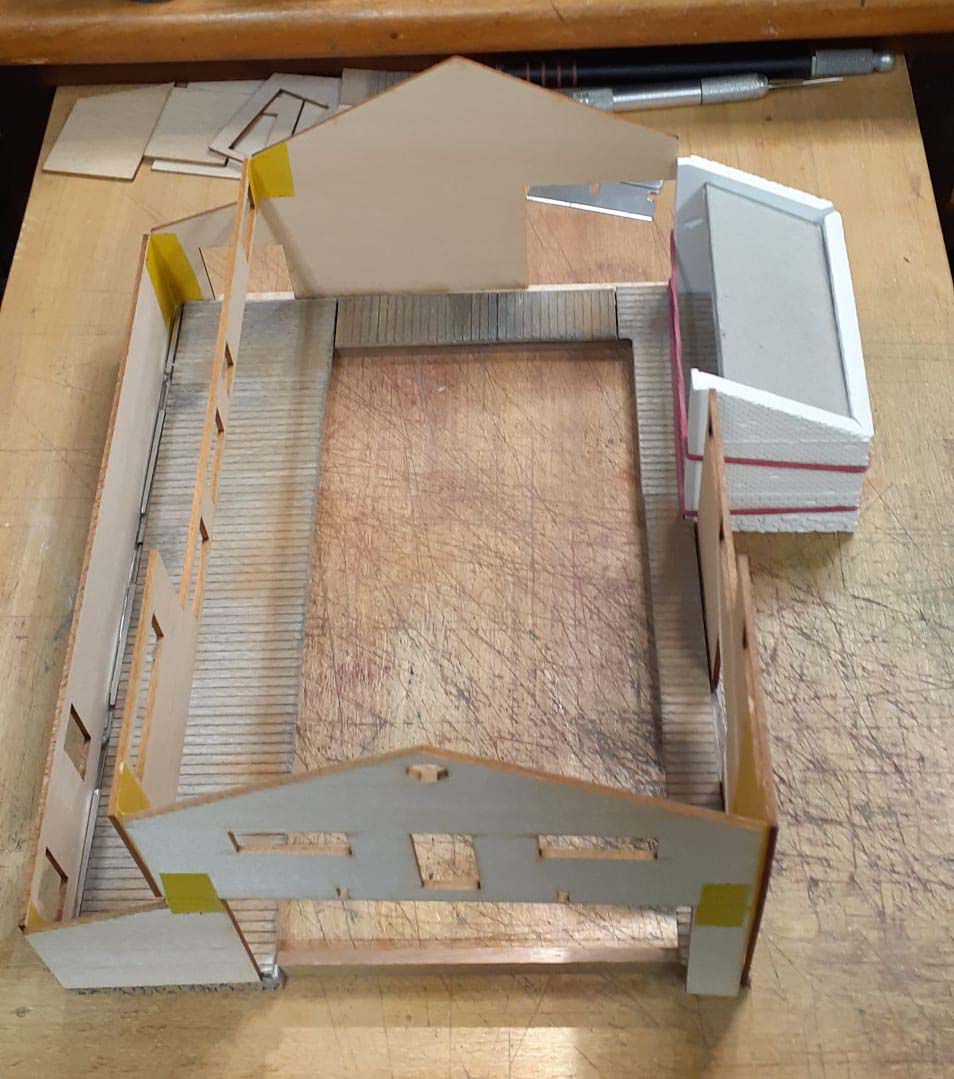
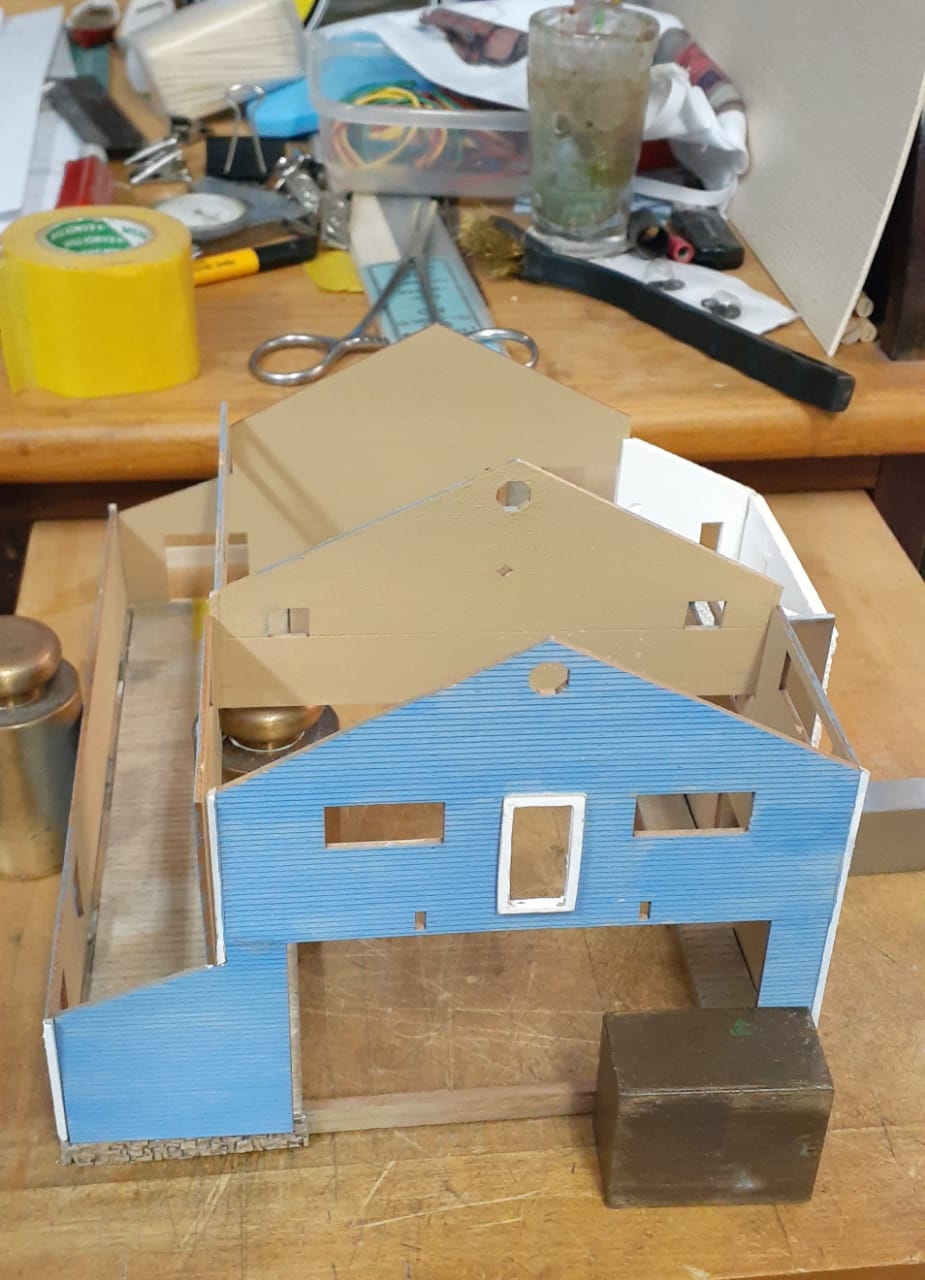
An overhead view showing the start of adding the interior work floors. The plaster cast office is held temporarily with elastic bands for placement. The wood brace in front is also temporary to keep the floor sturdy while assembling the building.
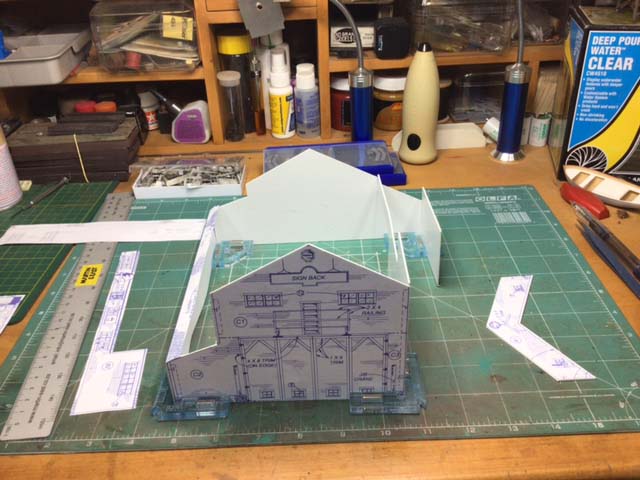
Time to start using the wood parts of the building.
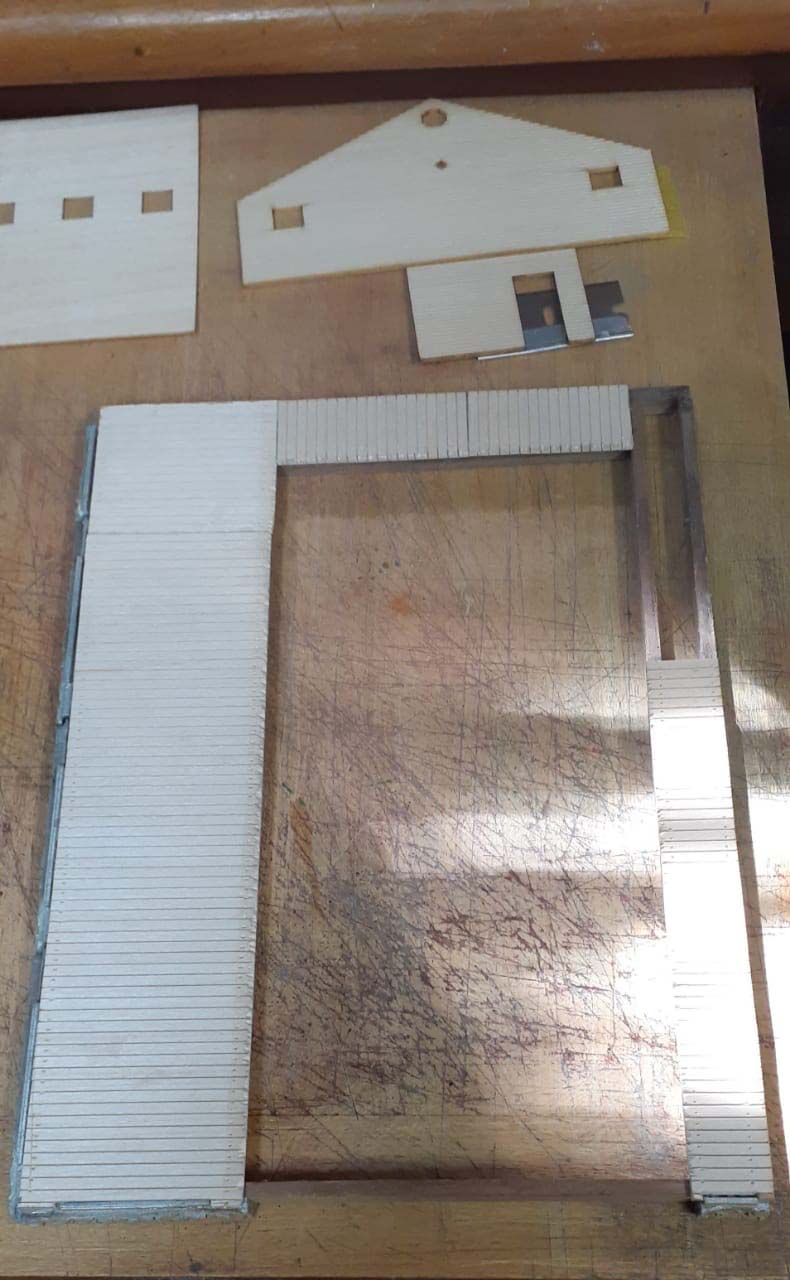
Using the Right Way corner clamps to keep things square. Masking tape is used as a temporary measure to keep the building sides upright.
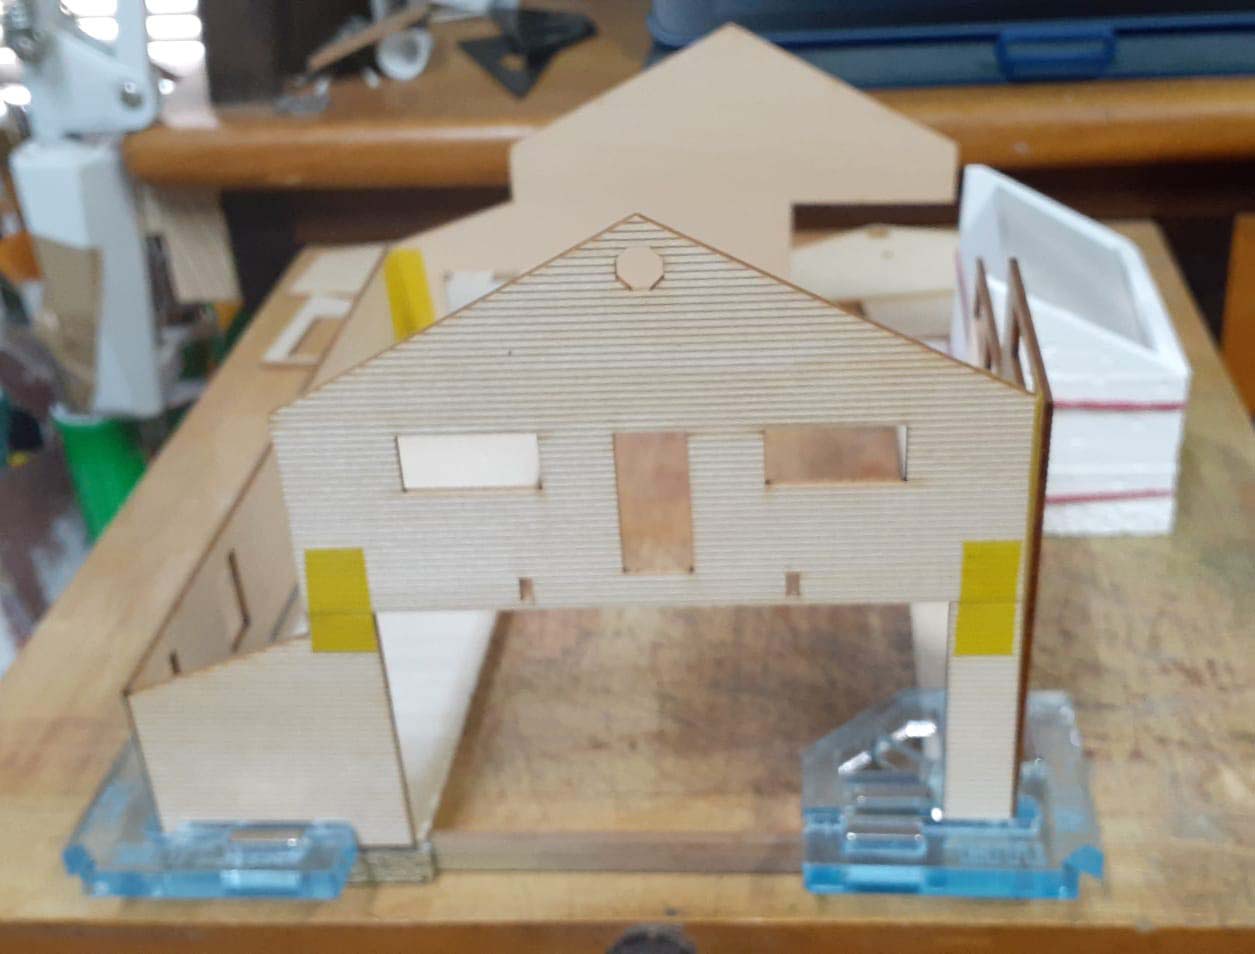
Here it is added to the base of the building to make sure that it fits properly.
It can be seen here why I use cardboard mock-ups of the buildings to be able to visualise what the final product will look like. If mistakes are made here, it is easier to cut new cardboard to fix it instead of ruining an excellent kit. (I did make a few miscalculations on the interior floors but fortunately it was card stock only)
The fun begins, choosing a paint colour and ageing it to look slightly weathered. The interior of the walls were sprayed a light sand colour before assembly. I follow the same process for all of my model railroad building interiors.
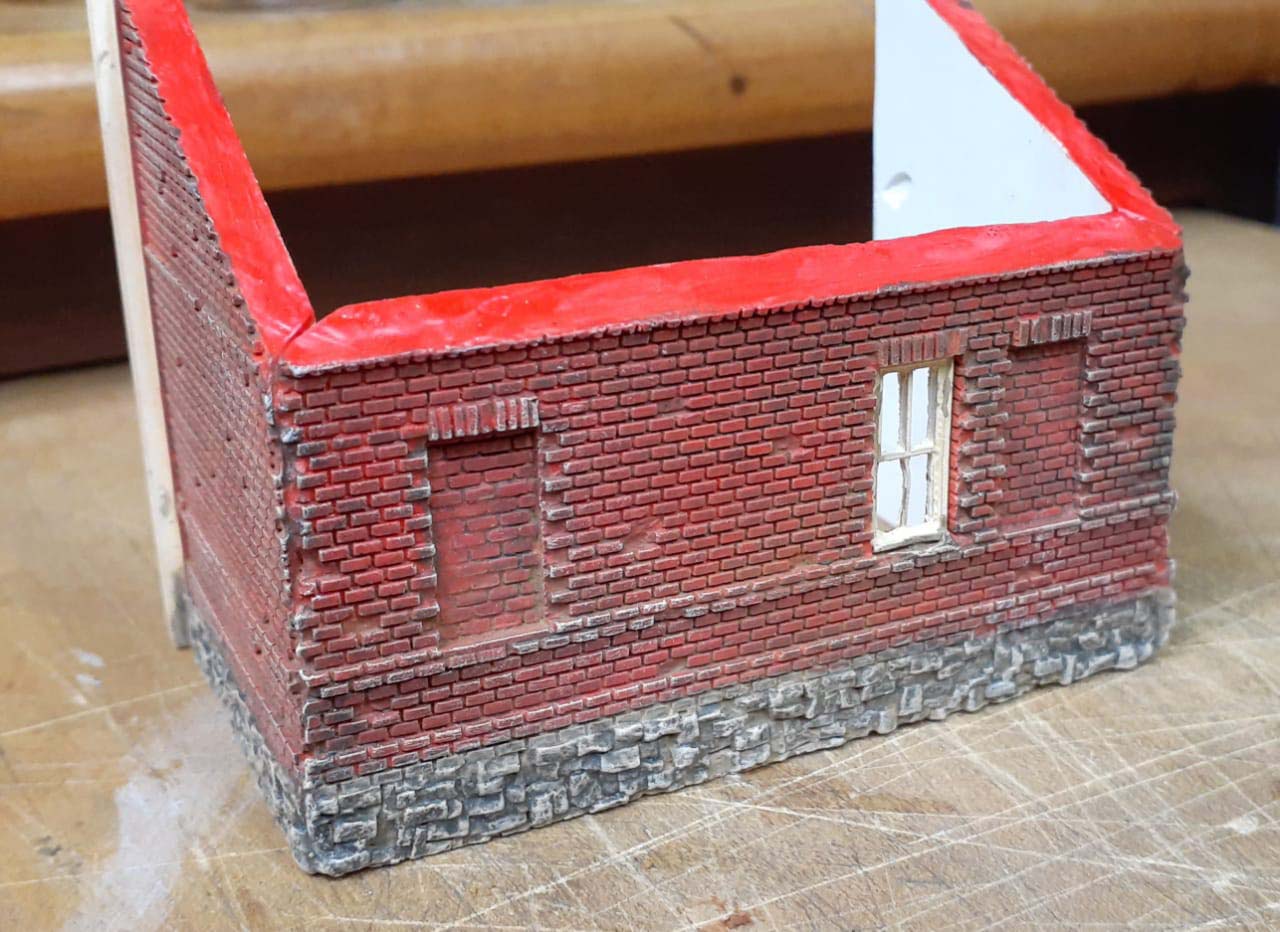
The plaster cast office painted, a black wash used over it and then all dry brushed with a very light grey acrylic paint. The stone foundation was given the same treatment.
Very happy with the progress so far.
The top office will have a full interior (to be shown in part 3). Therefore the door had to be replaced with one that was able to be opened to see partially inside.

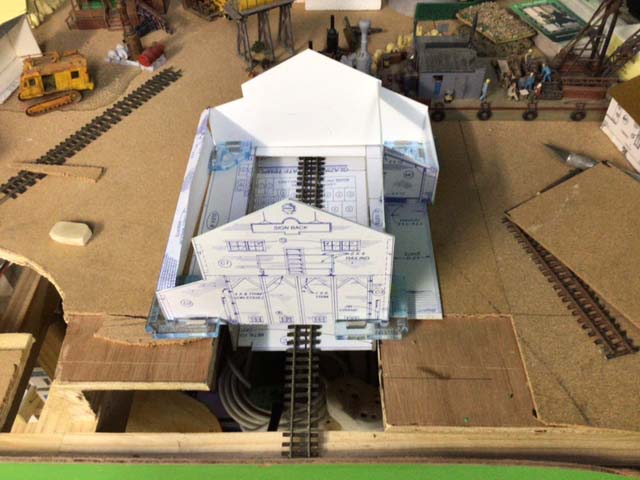
An overall view showing the interior as well as the office floor. The little building in left front is one of the many cast resin ones that I use all around the layout.
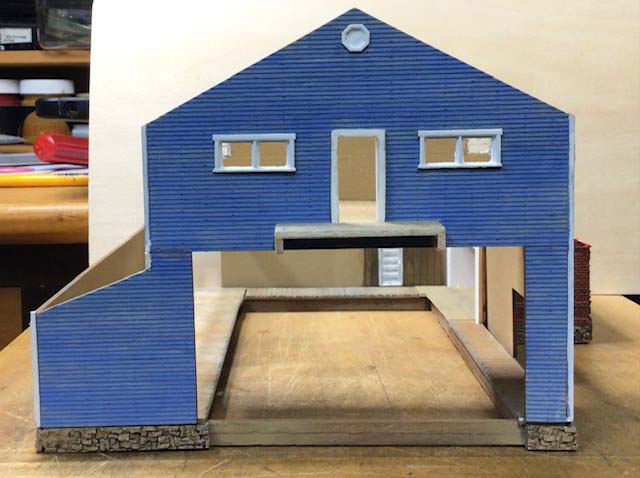
A teaser photo as of 30th June where it is all starting to come together. Until next month, keep on modeling.
Kind regards
Brian
The HOn3 guy in Knysna”
A huge thank you to Brian.
Next, Cassio:
“Hi Alaister
I send a short video showing details of my layout.
I hope you like it and share it with your followers.
hugs.
Cassio Serra
Brazil”
A big thanks to Brian for sharing his tips on model railroad building interiors. And to Cassio too.
That’s all for today folks.
Please do keep ’em coming.
And if today is the day you get started on your layout, the Beginner’s Guide is here.
Best
Al
PS Latest ebay cheat sheet is here.

Best
Al

Excellent scratch building Brian – looks very, very realistic. Looking forward to the boathouse completion photos.
Nice layout Casio. Very industrialised. Great weathering on the warehouse concrete lorry park.
Best to all
Brian, Wokingham. UK
Brian
Good job! Great narrative
Cassio
That’s a great layout! I really liked the piping at the plant. 5 guards for 4 chain gang – Hah!
All be well
George from LI, NY
Great Layout. It would be nice to see some trains running.
Beautiful work 👌🏻
Pretty neat.!!!!!
Brian…..what a great blog….the narrative, the pictures, the step-by-step and the end product was excellent……I particularly liked the exterior of the top office. Alot of great scratch modeling tips.
Cassio Serra….. nice layout….great detail on the industrial complex…….nice touch with the chain gang.
Brian’s careful modeling is always an inspiration for me to try and do better. Thank you for sharing his boat house.