Jersey Shore John has been back in touch with a fine update on building a HO scale train layout:
“Hi Al,
Time sure flies by. I was getting ready to send an update to you when I saw that I haven’t been in touch for more than two years!
I am now some 60% to 70% done with my HO scale fictional model railroad — the M&K Sub-Division of the Erie-Lackawanna Railroad.
Most of the progress has centered on scenery. And a 10′ x 15′ layout requires a lot of scenery work.
All backdrops have been installed — finally! It’s nothing fancy; just blue sky with lots of clouds. Probably too many clouds! There are some refinements to be made to better mask the seams between the backdrop sections and some repainting to be done. But it is good enough for now.
Given that the M&K is a two- to three-level layout, there needs to be plenty of hills and mountains to justify the transition between tiers.
The largest mountain installation begins on the western perimeter of the Hoboken complex and represents Bergen Hill. Bergen Hill actually exists and is on the southern end of the Palisades, a ridge of high cliffs of igneous rock that run along the Hudson River all the way up into New York State.
In real-life, neighborhoods of the cities of Jersey City and Union City occupy the top of Bergen Hill. For my purposes, though, it will be populated with trees when fully scenicked.
As I did along a portion of the Northern Branch between Marysville and Verose Valley (described in an earlier post), I have installed pieces of slate along the wall of Bergen Hill facing Hoboken to represent the Palisades.
The real Erie-Lackawanna main line (now NJ Transit) ran through Bergen Hill via tunnels. On the M&K, I had to compromise and build a curved “cut” through Bergen Hill instead. The double-track portal at the west end of what would have been the tunnel encroached on real estate that I needed for the town of Marysville.
So after spending a good deal of time trying to figure out how to save the tunnel, I begrudgingly went with the cut through the hill instead. Even though it is not an accurate representation of the real thing, I like it better because I can see trains making their way through the cut instead of being hidden by a tunnel. And the effect of the hill separating Hoboken visually from the rest of the layout enhances the illusion of distance on the railroad.
In the M&K world, Bergen Hill is part of a mountain range that runs roughly through a quarter of the layout. Further along the range, the hill accommodates portals for two other tunnels. One is at Koester Junction — named for prominent model railroader Tony Koester, who is a columnist for Model Railroader and a fellow New Jerseyan to boot — on the Northern Branch. The other, above the Koester Junction tunnel on the main line, masks the entrance to the hidden, two-track staging yard at Scranton-Chicago.
A second mountain of note is Pipe’s Peak, located at a corner of the layout on the main line just outside of Gregson/Croxton Yard. The upper portion wraps around a vertical sewage pipe. Thus the name. The M&K main line cuts through Pipe’s Peak, the base of which is below at Verose Valley. One wall of the lower portion of the mountain is removable so that I can tend to trains that might stall or derail on the portion of the Northern Branch located in a tunnel beneath the main line between Gregson/Croxton Yard and Highlands.
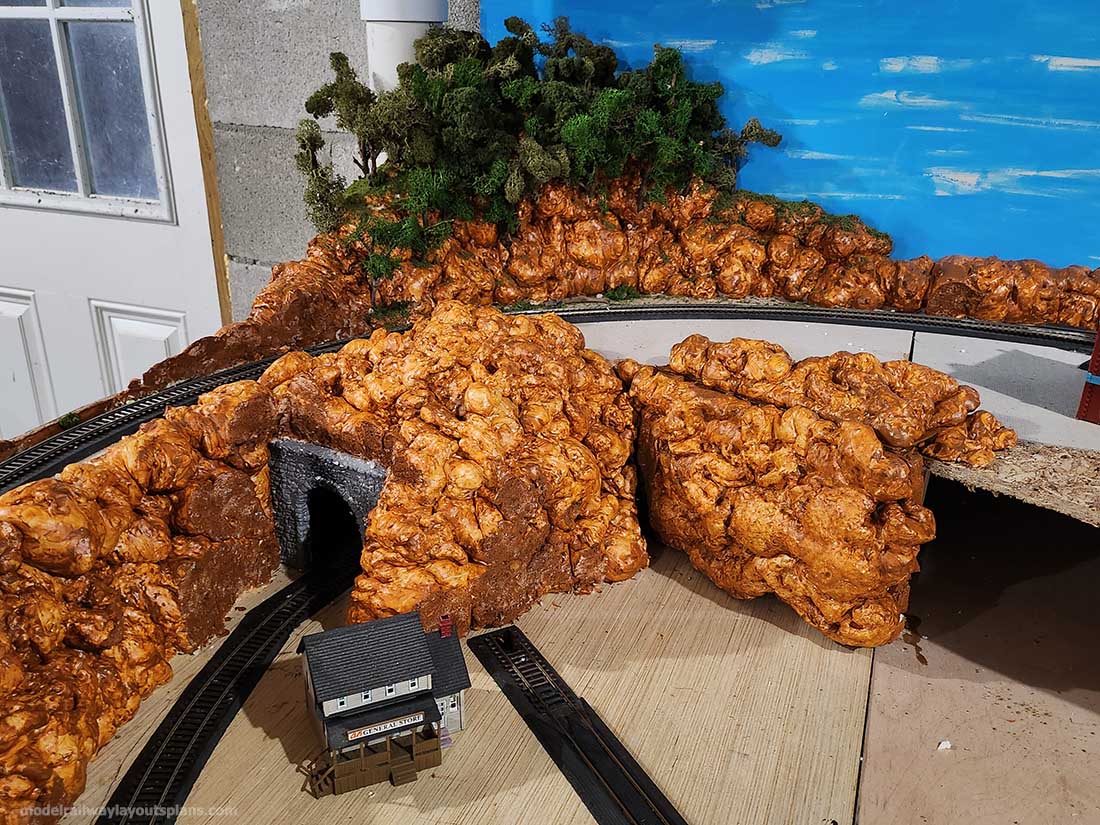
To build the mountains, I used “Great Stuff” gap filler, a foam product that expands after application during the curing process. It is available in hardware and home improvement stores. Some of the larger mountains have interior bases of styrofoam and/or cardboard so that I could get more mileage out of a can of Great Stuff.
Hoboken, the eastern terminus of the real E-L, is largely completed except for a few buildings and detailing of the overall area. My pride and joy is the Lackawanna Terminal, a Walther’s Cornerstone Series Union Station kit.
I left the front of the kit, which faces away from the layout, open so that visitors can look inside to see a detailed interior of the main waiting area of the actual terminal. To get that effect, I reduced to scale color photos of the interior of the real terminal and glued them to the model’s walls in the appropriate places. It was painstaking work and there were a lot of reprintings of photos to get the proper scale.
There is a beautiful stained glass ceiling in the real main waiting area. I used photos of that so that a visitor can look inside to see the ceiling, and also see the glass looking down at the roof. For the floor of the waiting room, I photographed a portion of the granite countertop in my kitchen, reduced that, and glued it in place. I finished it off with a Woodland Scenics shoeshine stand, benches that came with several Walther’s butterfly roof station platform kits that are installed outside of the terminal, and a bunch of seated and standing figures.
On the outside, I used photos of the actual greenish copper facade on the side of the terminal that I reduced to scale and glued those to the sides of the model. Those came out just ok. There is still some work to be done to get those to look a bit better. But, again, it is good enough for now.
The M&K Hoboken terminal complex is a condensed version of the real facility, featuring four passenger tracks served by the aforementioned Walther’s platforms versus the actual 18.
There is a two-track diesel servicing facility complete with an old Tyco sandhouse that I inherited from my father-in-law. There are several storage tracks, a run-around track, as well as a service track on the perimeter of the yard that serves a commissary and Railway Express Agency buildings.
There were several of these types of buildings on the perimeter of the real Hoboken yard along Observer Highway back in the day. I did have visions of installing a turntable in that yard area to turn around locomotives but there isn’t nearly enough room for it.
I have supplemented the buildings on the layout with building flats that I purchased online from tracksideflats.com. As many of you likely know, the flats are scale photos (with a 1/4-inch foam core backing) of actual buildings located in various U.S. cities. They provide some depth to the towns and cities located along backdrops on my layout.
I attach them to backdrops using Velcro so that I can move them elsewhere if I need to. I have made two purchases of flats and am satisfied with the quality and variety of buildings. I will be buying more in the future to fill in gaps along the backdrops in Hoboken and Highlands.
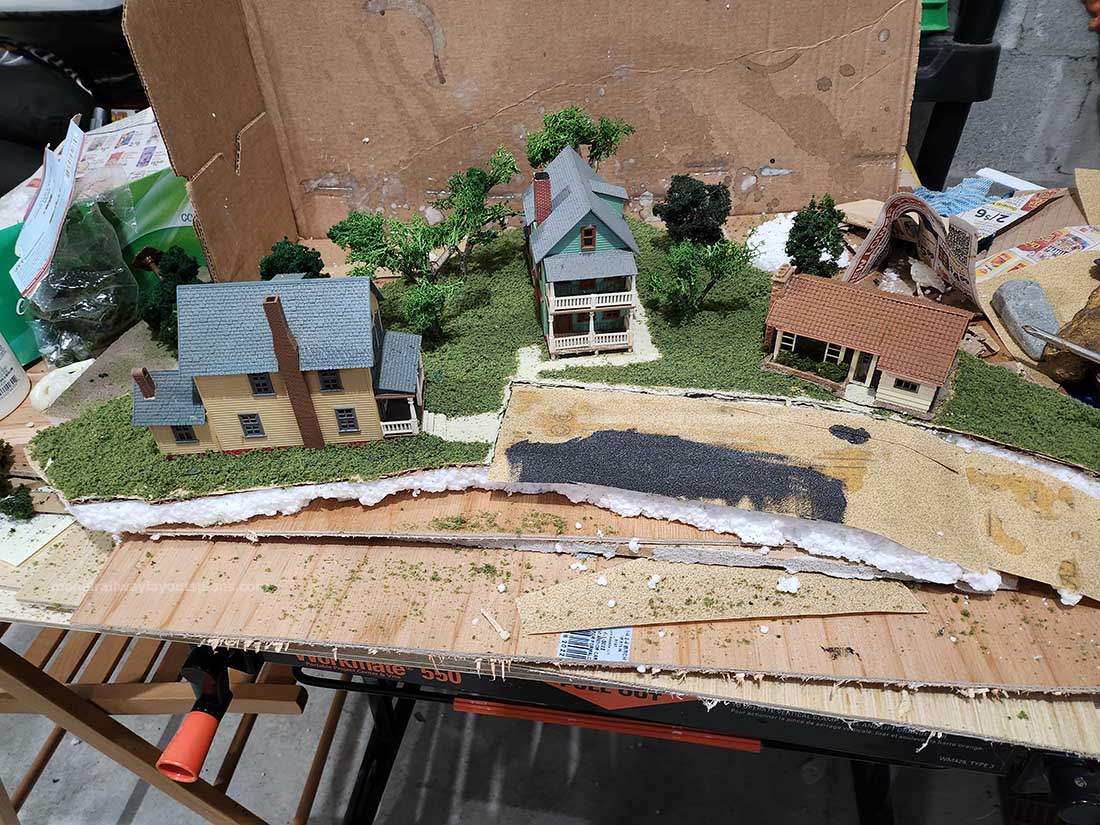
Speaking of Highlands, I did a bit of experimenting in order to fill dead space in a corner of the layout at the outskirts of the city. The area is hard to reach for scenery work so I built a removable diorama that represents a suburban neighborhood.
I constructed the diorama on a workbench using a piece of 1-inch thick styrofoam that I cut to fit the dead spot on the layout. I then glued a 1/8 inch piece of cardboard, also cut to fit, on top of the styrofoam. The edges of the cardboard simulate curbing when painted.
The cardboard is covered with medium-grade sandpaper to represent the ground. On top of that, I glued grass, painted sidewalks and “planted” trees (some store bought; some homemade) to finish off the scene. Eventually, I will be making another purchase from Woodland Scenics for figures doing various backyard activities.
Nearby, I finished laying track at Croxton Yard in the city of Gregson. Half of the yard has been in place for the last couple of years. I left the other half open to have an access hatch to reach areas along the wall. I finished it off this fall using the same construction technique as described in a previous post — 1/4-inch styrofoam on top of 1/4-inch plywood.
Since I still have some things to do in places that I can’t reach from the aisle, I designed the newly completed portion of the yard to be removable so that I still have that access hatch. I was able to configure the new part of the yard so that I could include a siding that goes away from the yard and into Gregson to serve a newspaper and, once constructed, a baking company. That will add an extra dimension to yard switching activities.
Backdrop
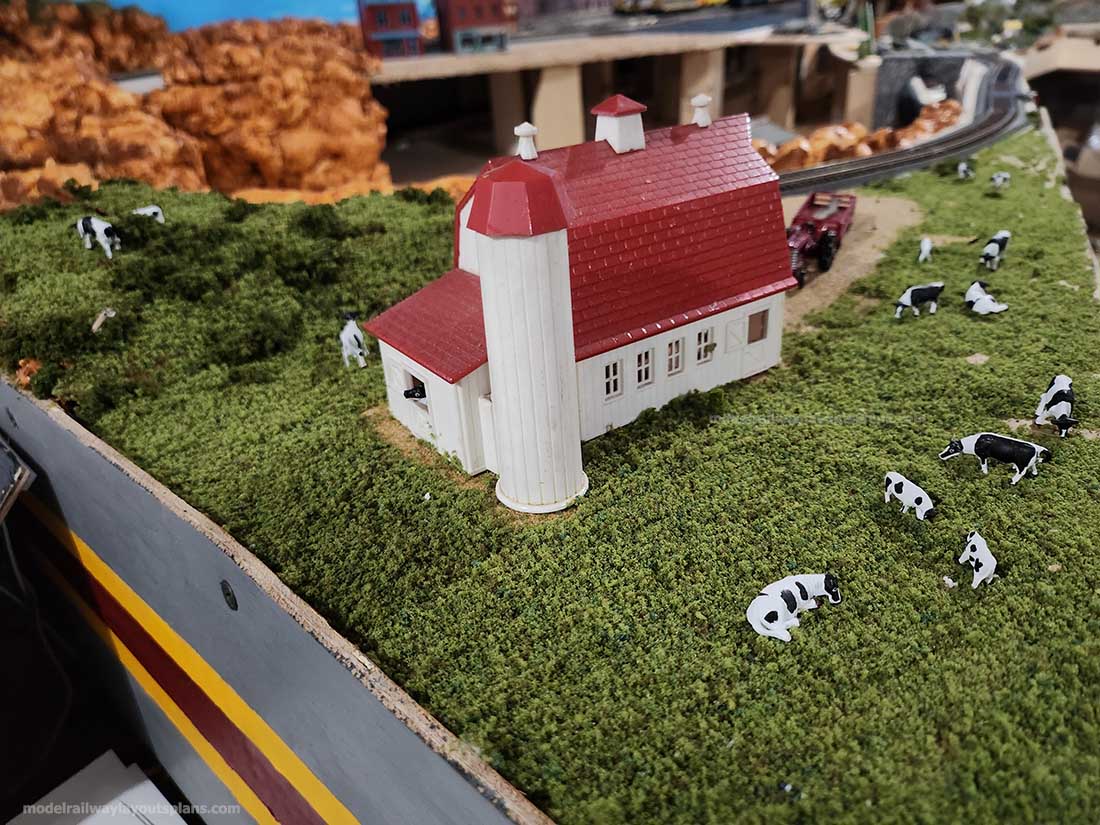
Dairy Lea Farm

Joe’s landing
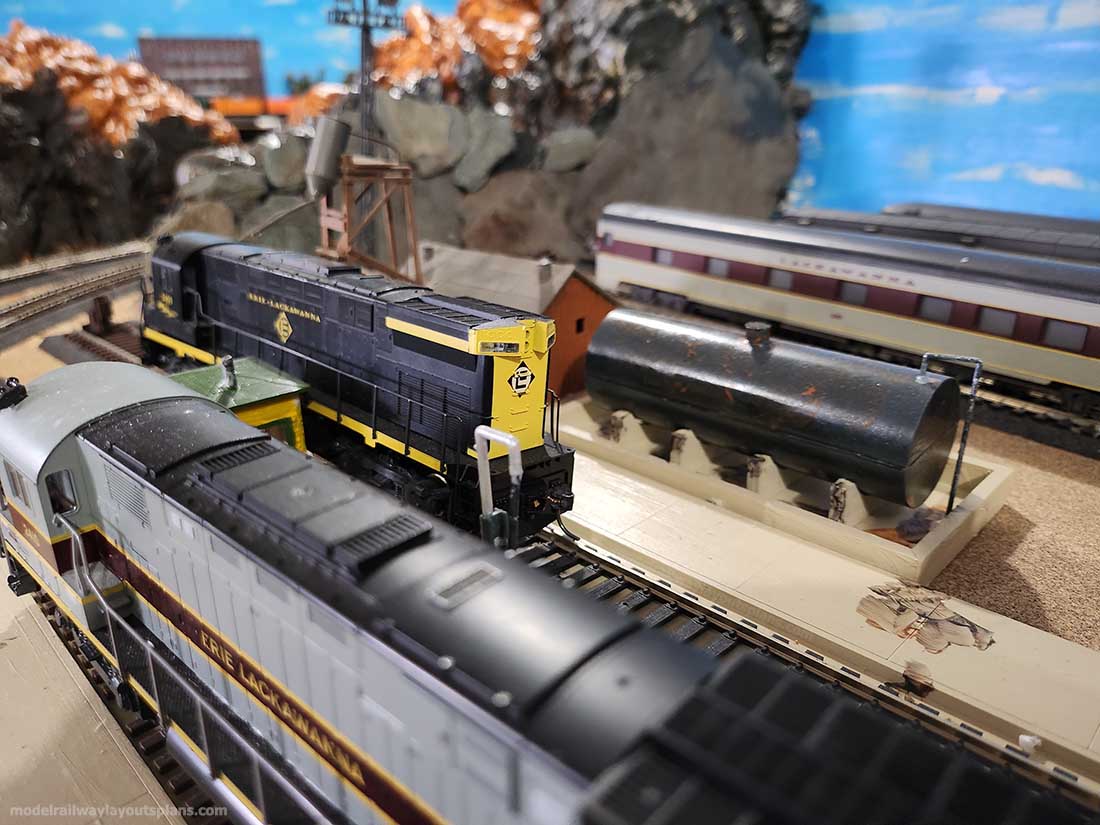
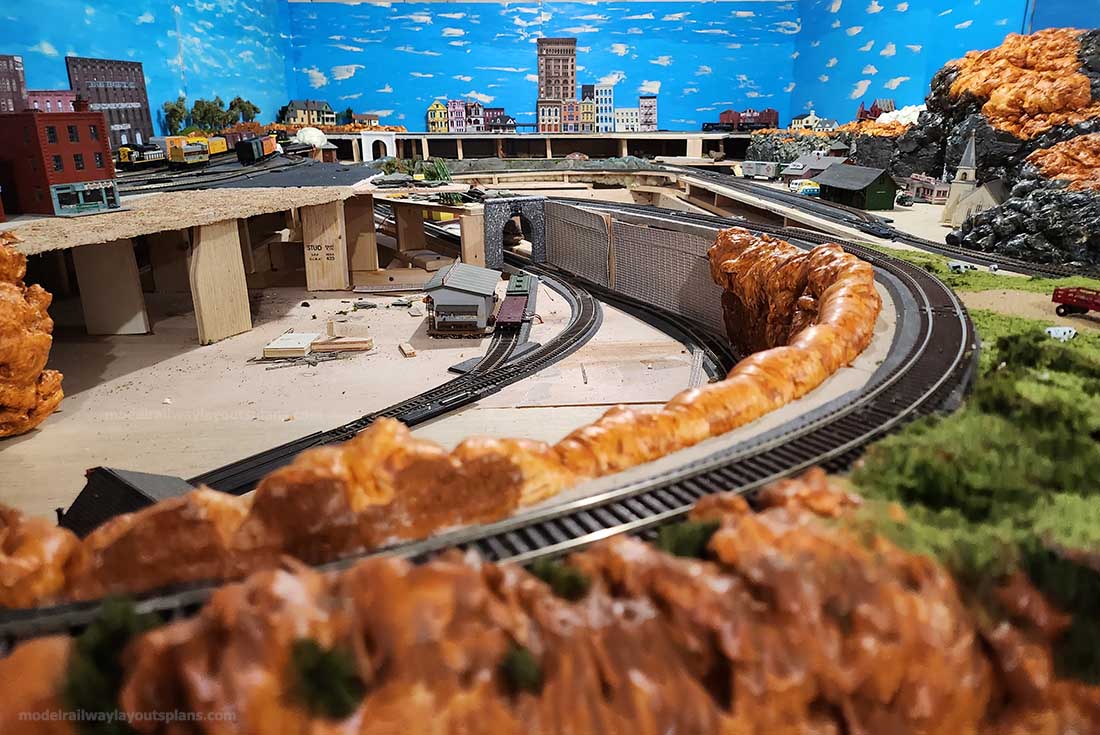
Diesel fueling facility in shadow of Bergen Hill
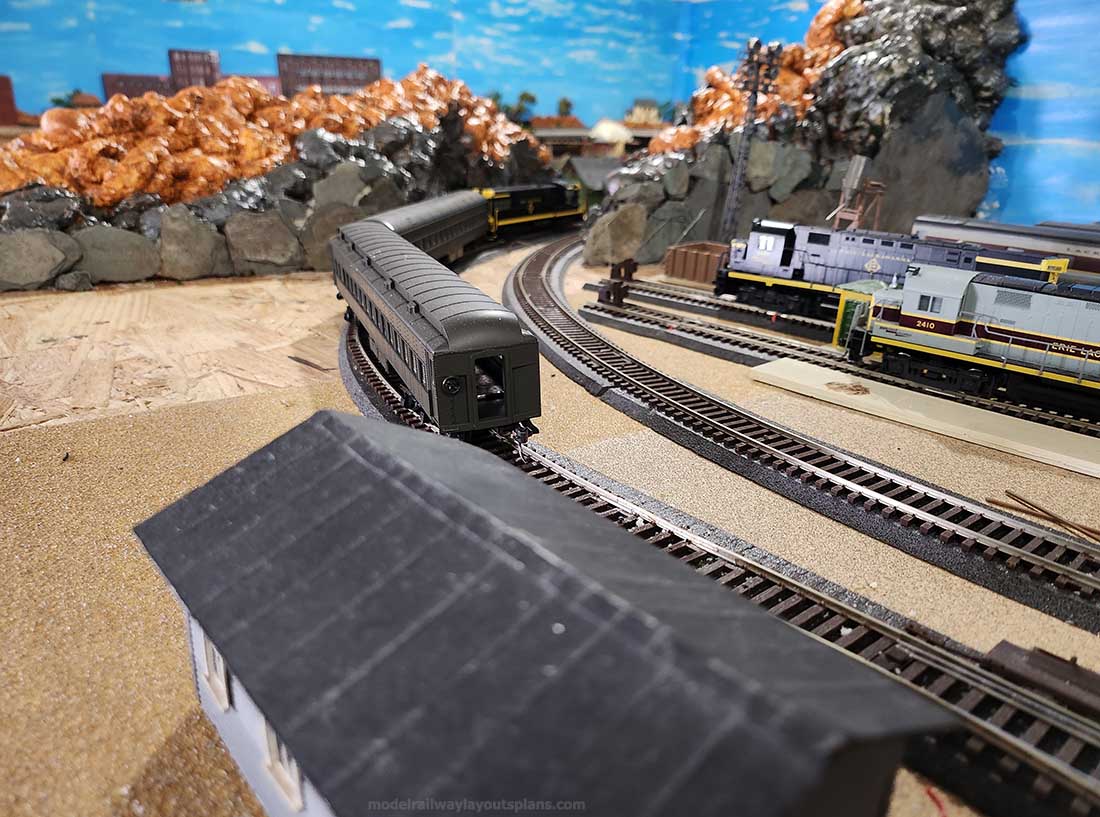
Highlands local passing through Bergen Hill Cut
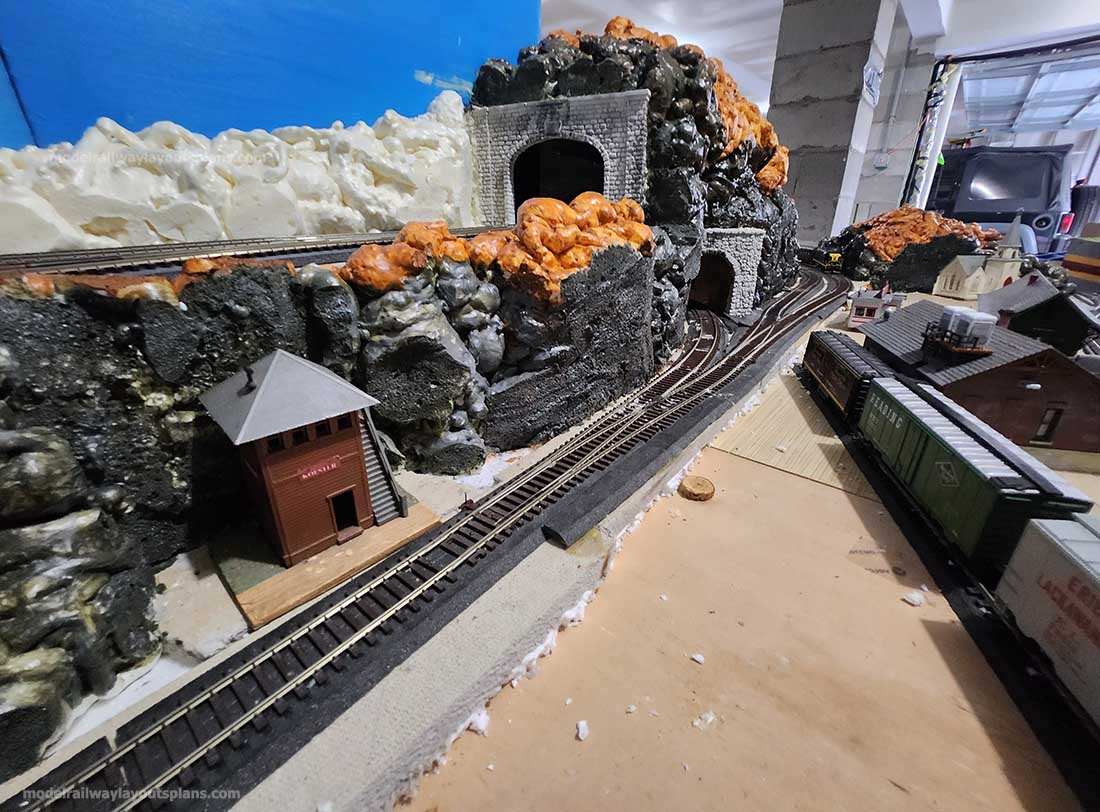
Bergen Hill mountain range with two tunnels
Pipe’s Peak
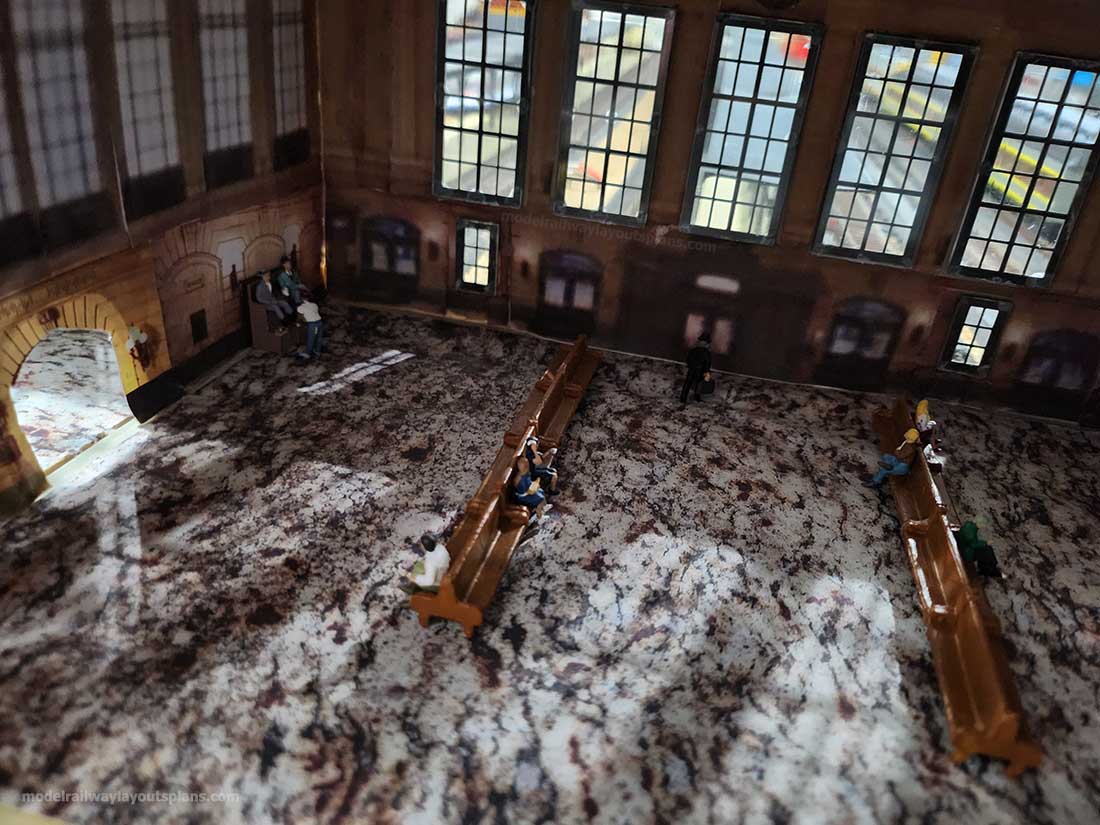
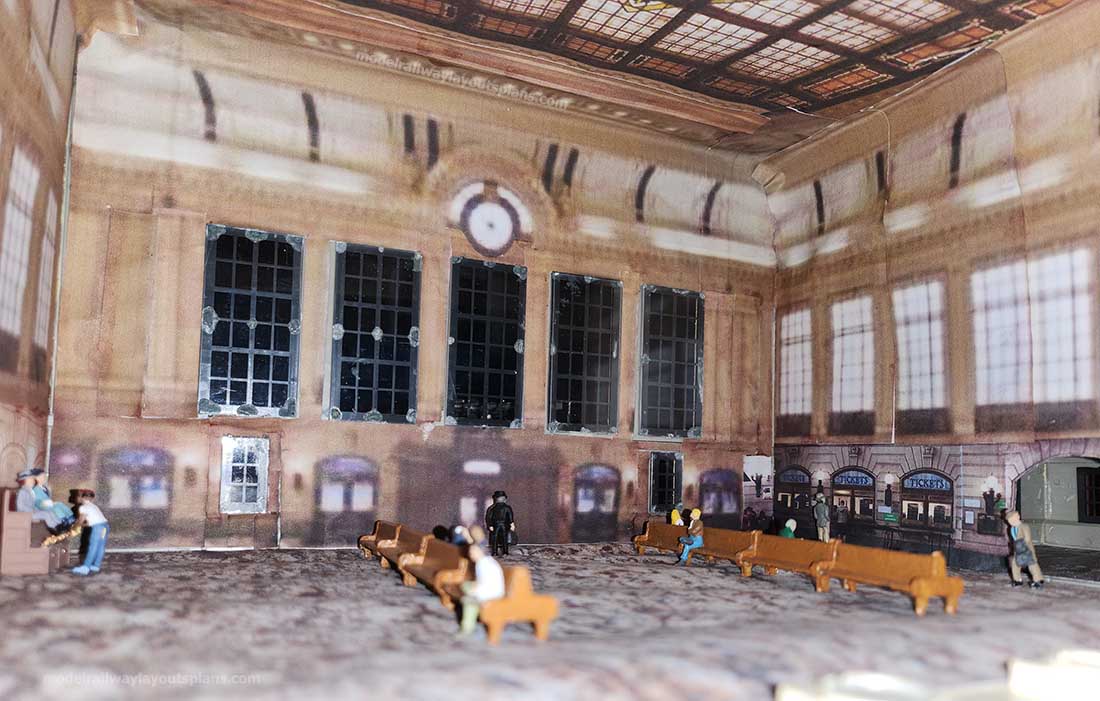
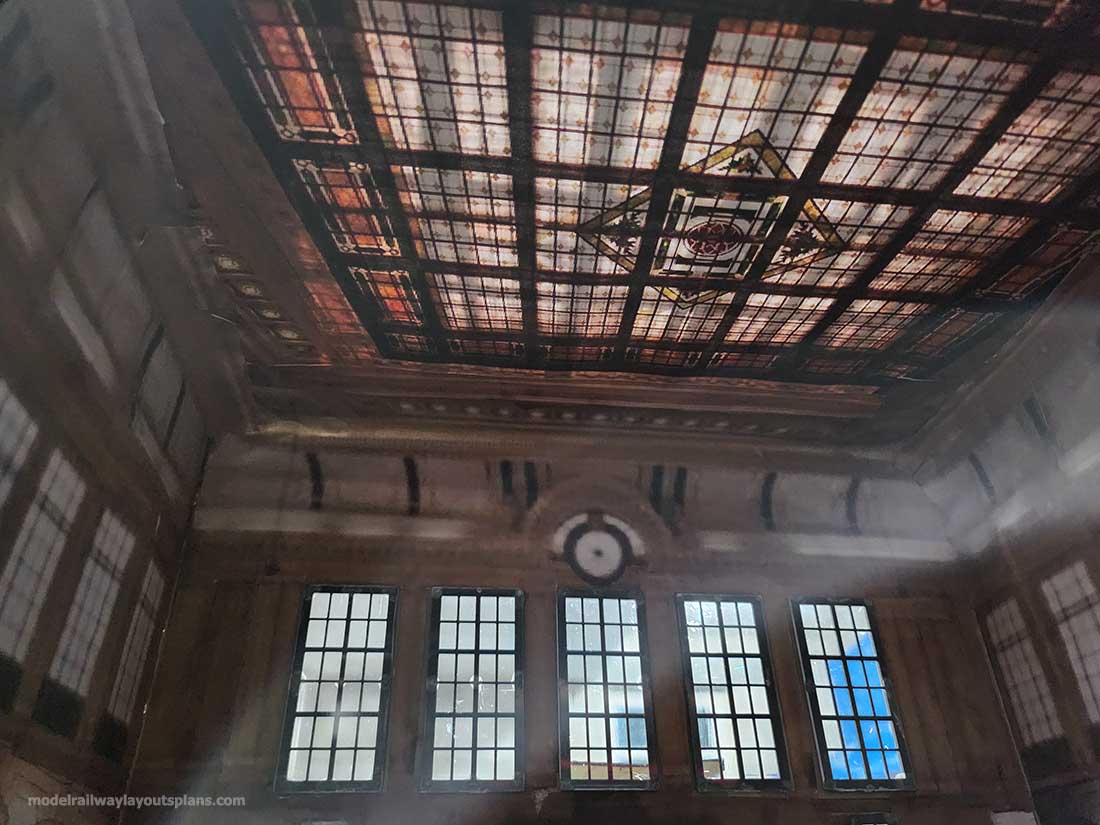
Views of Lackawanna Terminal interior and skylight
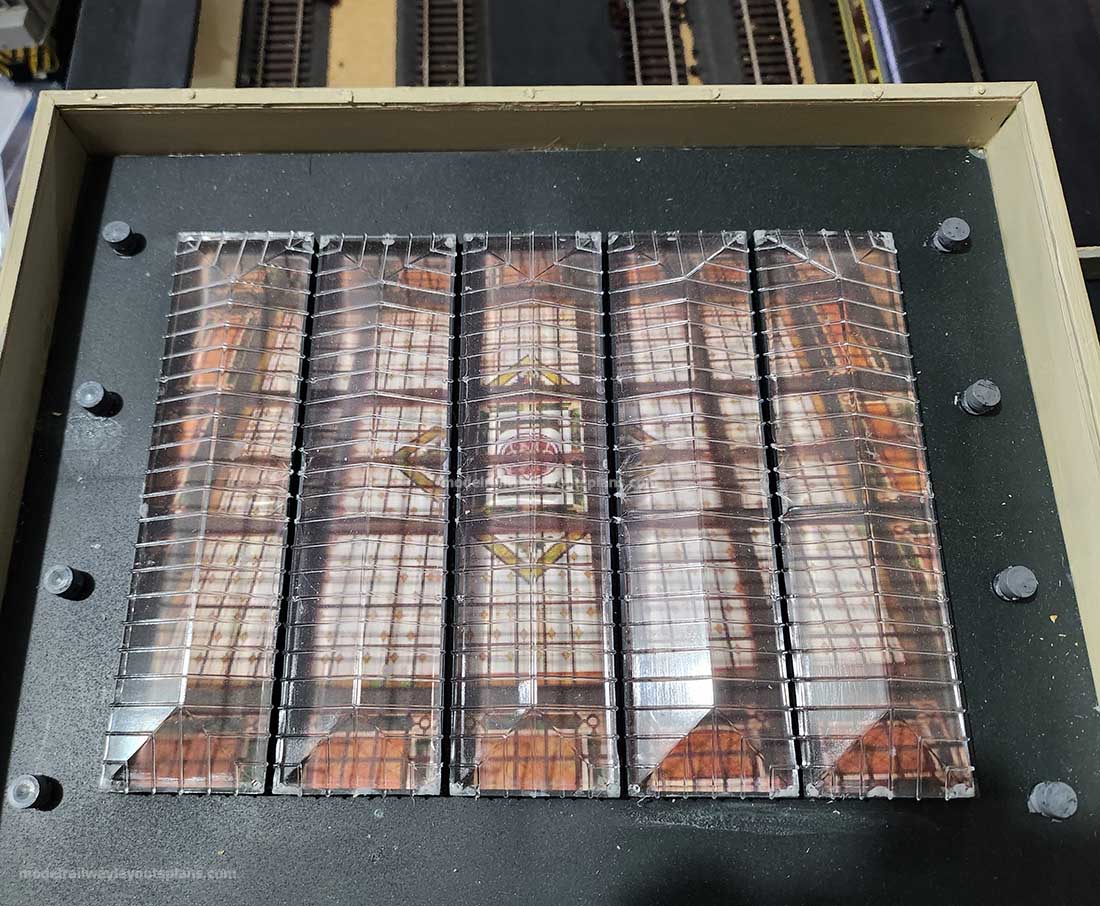
Rooftop view of Lackawanna Terminal stained glass ceiling
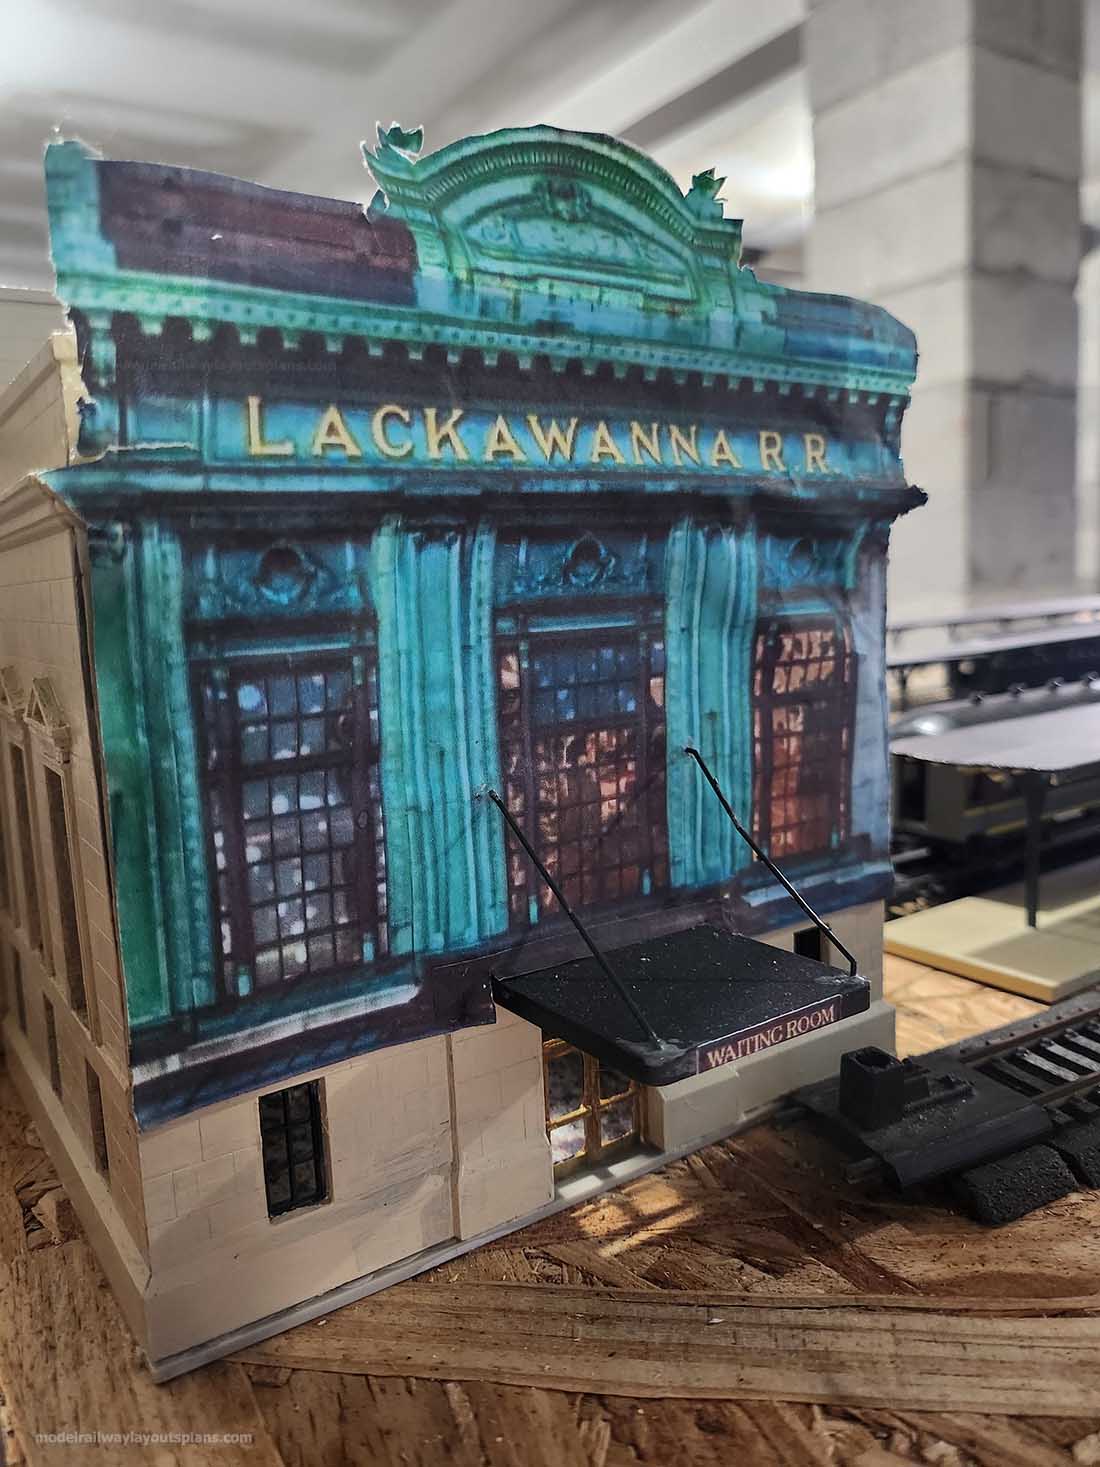
Lackawanna Terminal facade
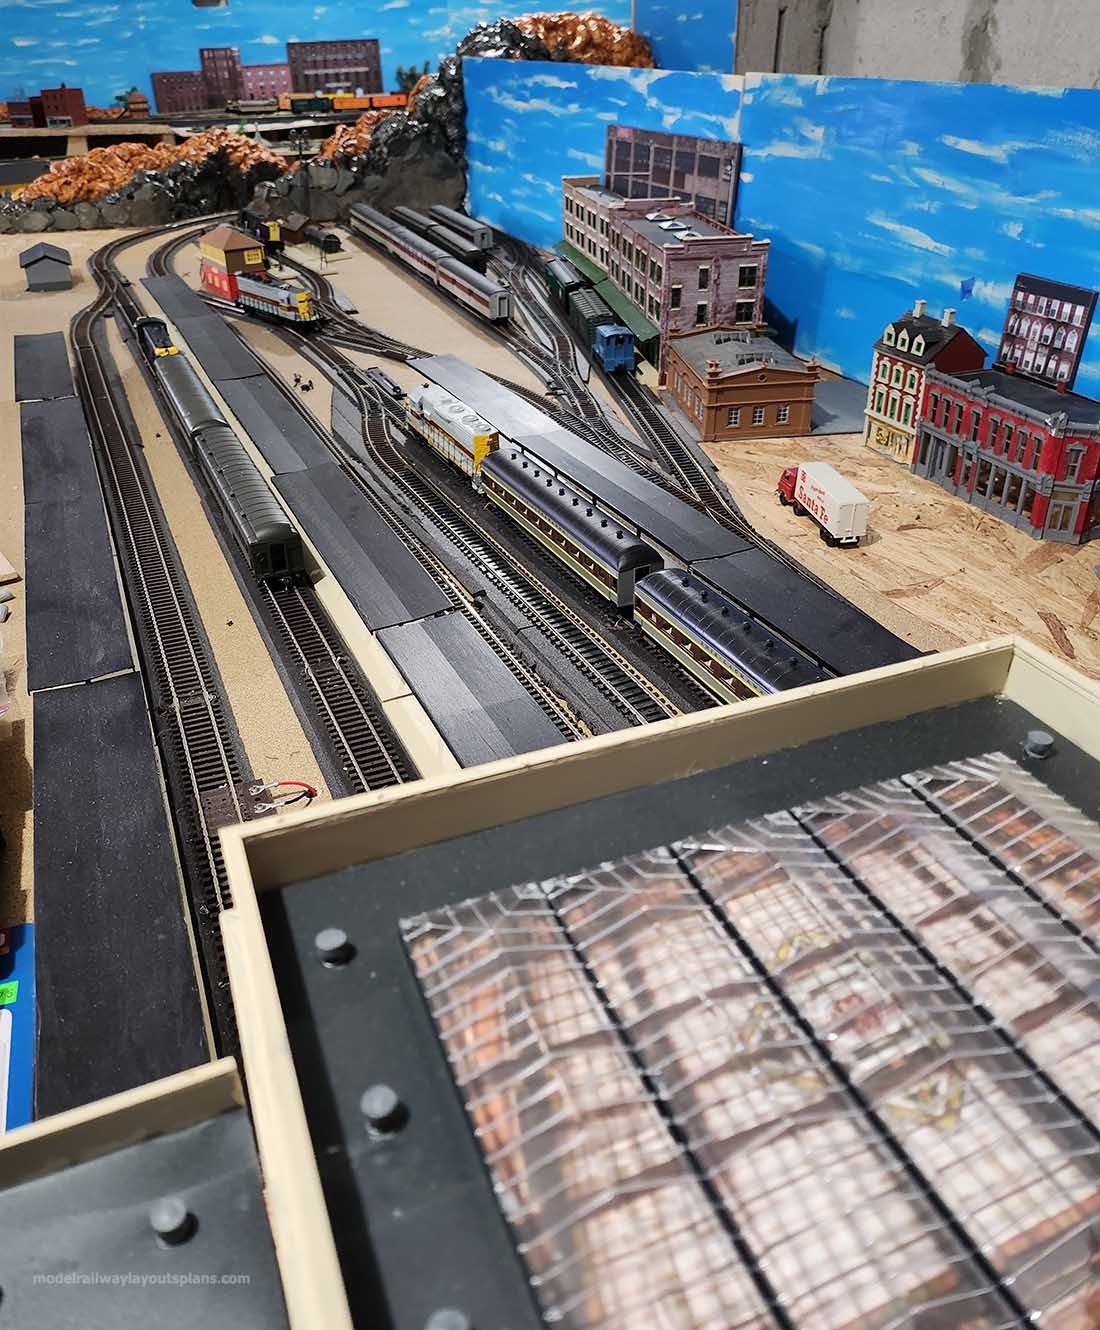
Building a ho scale train layout – Westward view of Hoboken complex
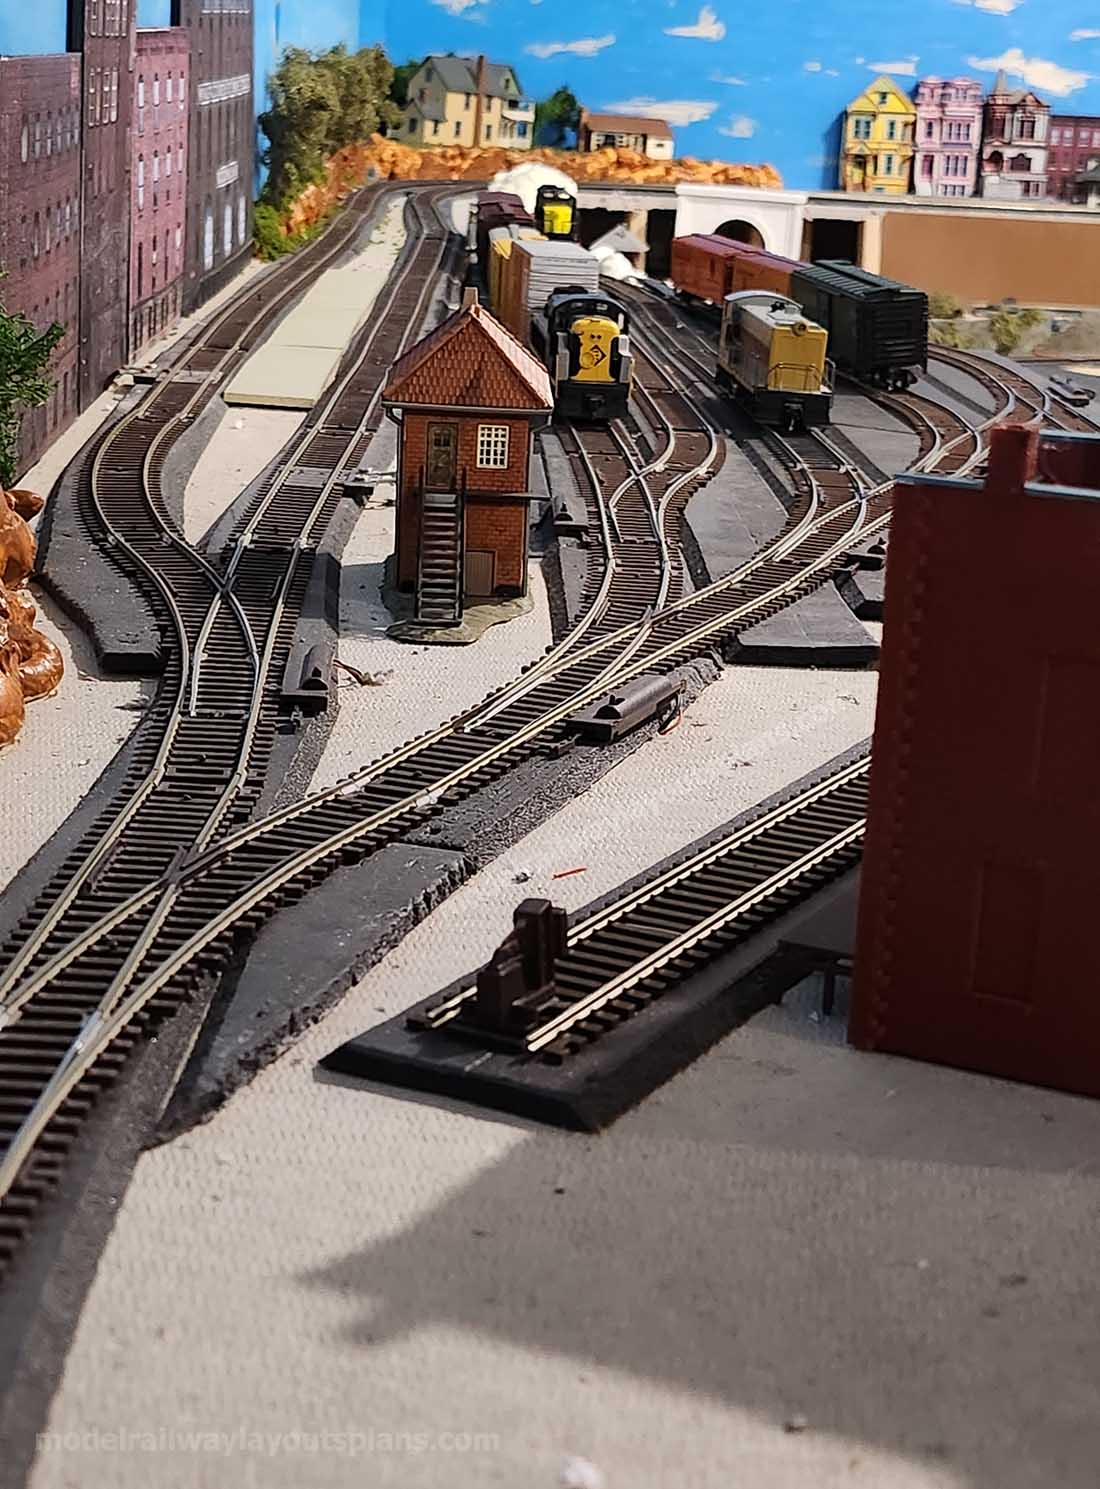
Completed Croxton Yard
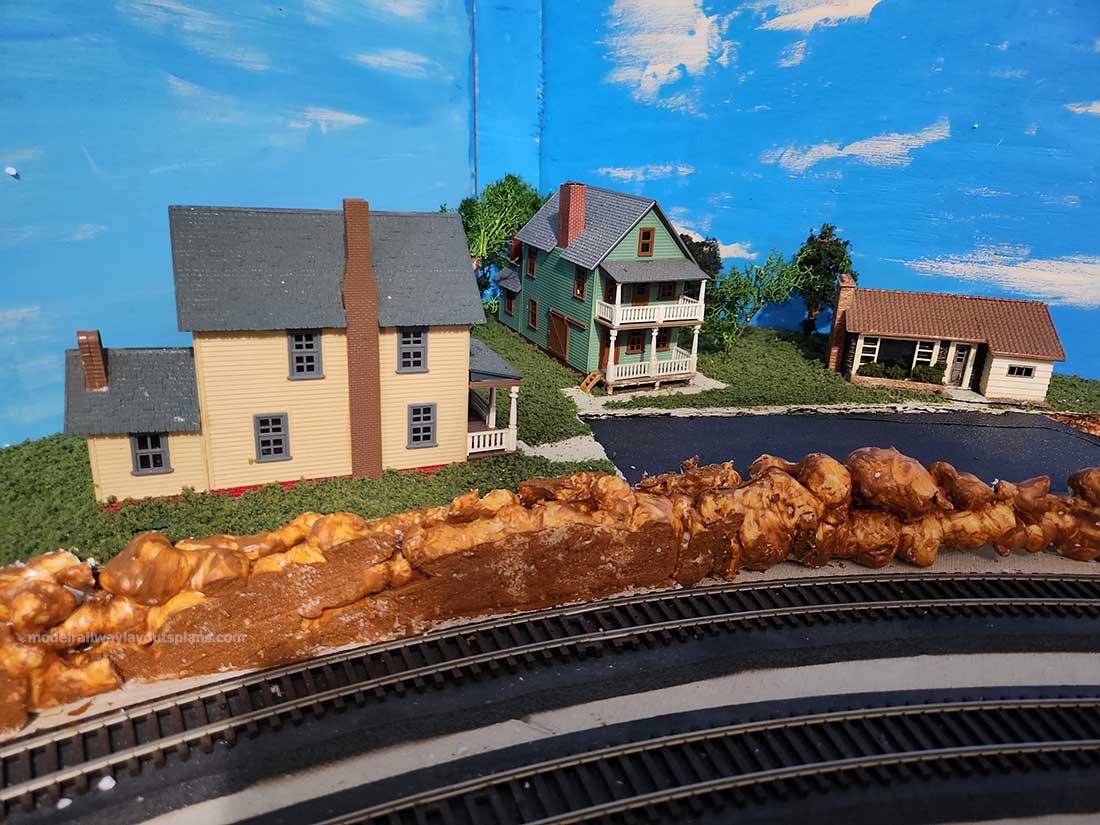
Building a ho scale train layout – completed diorama in place on the layout
Unfinished Highlands diorama.
With the onset of winter and colder weather, layout activities are now confined largely to the warm, upstairs portion of the house. I have plenty of to-do’s as far as finishing construction of some buildings and other moveable layout elements, and starting work on others.
Hopefully, by this time next year, most of the remaining visual “holes” in the layout will have disappeared.
Jersey Shore John”
A big thanks to Jersey Shore shore for his update on building a HO scale train layout.
(You can see his previous post here.)
There are some layouts that just come across as just lots of fun, and John’s certainly looks like that to me.
After all, if you’re not having fun, what’s the point?
That’s all for this time folks.
Please do keep ’em coming.
And if today is the day you stop dreaming an start doing, the Beginner’s Guide is here.
Best
Al
PS More HO scale train layouts here if that’s your thing.
Need buildings for your layout? Have a look at the Silly Discount bundle.

The interior of the Terminal is really great – outside cooper facade not bad either – I’d like to see the approach tracks to fully appreciate how the trrminal anchors things on the layout
You have kinks in your track… Switches should be assembled frost , then connect with flex track… In your I unfinished Highland Area….
Looking good! Really like your terminal station. Hope your track ballasting goes better than mine did.
Dear J.S. John, very interesting layout update. One suggestion: I would try using crinkled aluminum foil or some similar substance as a mold when spraying your expanding foam so that they look more like rocks and less like blobs of foam. Of course, the expanding foam tends to stick to almost anything, so the foil might need to stay even after the foam has set. Perhaps some cooking oil spray on the underside of the foil would eliminate that issue. I like the concept of the spray foam if it could be controlled a bit better.
BTW: I loved the Lackawanna station interior, especially the stained-glass ceiling.
Looking good! Really like your station. waterway is really cool too.
The Critic