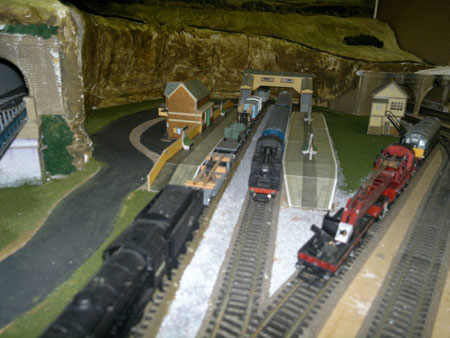
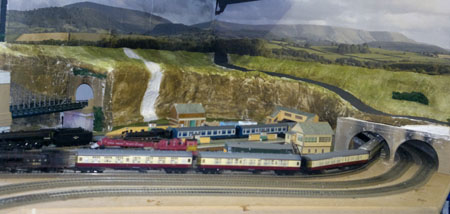
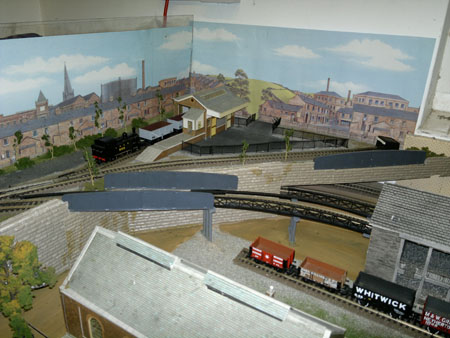
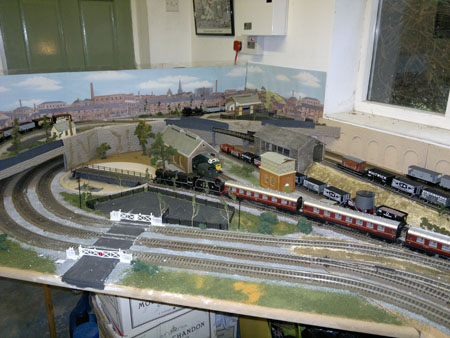
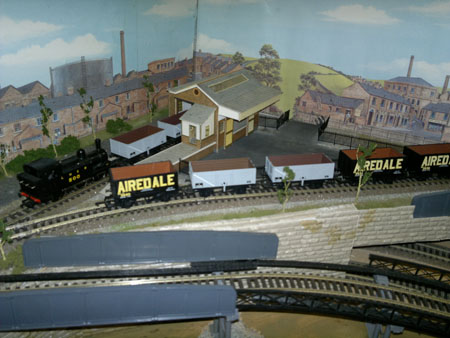
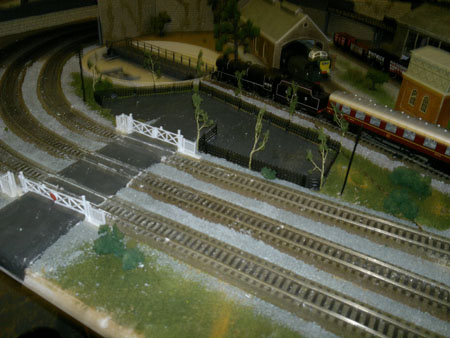
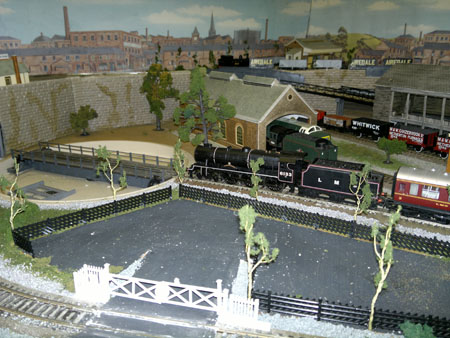
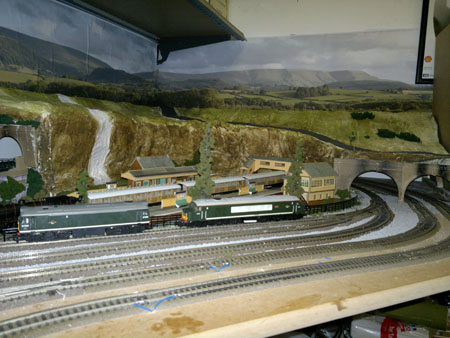
Alan’s been in touch – he sent in pics of his layout. If you’ve ever wondered about building model railway inclines, have a look at how Alan has done it:
“Dear Alastair i am not a big train modeller but every 5 or 6 years i seam to get the bug, so at Christmas I decided to start a fresh project hope you find it of some interest.
regards
Alan”
Building model railway inclines:
A superb layout – a big thank you to Alan. There’s lots of different methods when it comes to building model railway inclines, but I’m always reminded of Chris’s post:
Next up some more of your tips:
“Okay, here is a set of tips for those who make their own scenery materials.
1) For those that need to use a blender. Look about at garage sales, flea markets, swap meets and thrift stores like Salvation Army, Goodwill, Saint Vincent DePaul’s or other second-hand stores.
2) If possible, buy two blenders. That way if one burns out you have the other as a back-up or you can use them both at the same time when you have a large amount of something to process in a short time.
3) Keep your eyes open for a food dehydrator that you can use for drying wet or moist material in, like leaves, weeds and twigs for ground cover and trees, or decals and paint on your models.
4) And don’t forget looking for a good condition, but quiet hair dryer to use when drying your models or small areas of your layout.
Tip #5) You can combine tips #3 and #4 by making your own dehydrator. Find or make a fair sized box of thin wood or metal with matched grooves or wooden strip on the inside walls to hold racks made of wooden frames with screen material stapled on their bottom sides, that can slide in the grooves or on the wood strips inside the box. Then have a large enough hole in the bottom back of the box that will accept the barrel or hose of the hair dryer. The front door of the box can be made like a tray that fits over the front of the box and can be attached with a set of small hinges and a latch to secure it. When you need to dry something, place it on a rack and slide it on to the lowest level in your dehydrator, plug in the above mentioned hair dryer’s barrel or hose in the hole at the back of the box, close and latch the front door of the unit then turn on the hair dryer at lowest to medium setting. If you are drying something, remember to set the dryer on lowest heat, so as not to cause paint to bubble up or the material to be blown about.
R. Olivarez”
So then, in my ignorance, I asked, “What do you use a blender for?”
“Mr. Lee,
Easy answer about the use of blenders.
I had the need to use a blender when I was making some simple papier mache’ for a retaining wall that I needed for a light-weight layout that I am putting together. You basically tear apart egg cartons and newspaper by hand into small pieces. Put a hand full or so of the stuff in a blender, with some salted water and blend it into a pulp. Pour that into a container for temporary storage until you feel that you have enough. When I made the wall piece, I poured the mixture into a small bowl and added some white glue, stirred it well and poured it onto newspaper, laying on a flat surface. When it started to solidify, I took a fork and stroked the surface with long, soft strokes to create the impression of a rough texture. When it starts to firm-up, you could put curves into it by draping it over objects. When fully dried, carefully tear off the newspaper from around the edges. Due to the white glue, the papier mache’ will retain the desired shape. When dried and ready, it is glued in place, sealed and finished in whatever fashion as needed. You could also alter the piece by either ripping off or trimming um-needed material with a knife or scissors, until it fits in place.
You could use the homemade papier mache’ to create other things like tunnels, small hills and cliffs.
Another use for the blender. Take some dried, brittle leaves and put them into a blender, run it until the leaves have been ground to the desired consistency that you want. You then store the material in a container until needed for use as ground cover. (You could add some real dry dirt in with it.) The the same technique could be used with dried coffee grounds. It is surprising the realistic texture that you can get. Secure the material to your layout with the standard mix of water, white glue and liquid dish soap or you could use spray-on adhesive that you can get from almost any hardware store.
The reasoning for two blenders is in case one fails, you have the other as a backup. Another reason is while you maybe making your papier mache’ in one you could be using the other for making ground cover material.
R. Olivarez”
“If you have a HO gauge and you want to run fine scale OO gauge trains. The layout can be modified by relaying the curves with Hornby track, thus making possible to run big Hornby or Bach mann Branch line trains. There fore saving you the job of ripping it all up and starting again.
Paul”
“hi i just bought some telephone poles for my layout their made by lioneli wanted to mount them without damaging my brand new bauchmans grass mats the poles come with a plastic round stand the size of a quater with a hole on each side i didint want to screw on nail them down so i turned them upside down and glued on an old style thumtack with 5 min. epoxyi let them dry overnight when i mounted them they pushed into my 3/4 inch plywood easily and if you need to remove them the hole left from the thumtack is not seen so you can move them if you like.
Ron”
“Hey, I’m in a situation that I put my train up for winter & take it down for summer. I use 3 – 4 X 10
plywood boards. To give it some reality, I use green indoor-outdoor carpet for grass.Staple it on the sides & I can reuse it form year to year. The most trains I got on these boards is 18 running at once.
Tom”
“Alastair
Here is a tip that might save a fair bit for any modeler. When looking for timber/plywood for baseboards or inclines etc try your local export packer or engineering company, as export packers can have off-cuts especially softwood/plywood or OSB and engineering companies these days import components that usually come packed in plywood cases etc and it costs them to get rid of the waste timber / plywood board. Having worked for several export packers I can say that we often gave away free timber or ply to anyone who wanted to collect it. useful for building model railway inclines too
Hope this helps
Kevin”
A big thanks to Alan and all the others.
That’s all this time peeps.
Please do keep ’em coming.
And if creating your own model railroad is an itch you just have to scratch, the the Beginner’s Guide is here.
Best
Al
PS Latest ebay cheat sheet is here.
PPS More HO scale train layouts here if that’s your thing.


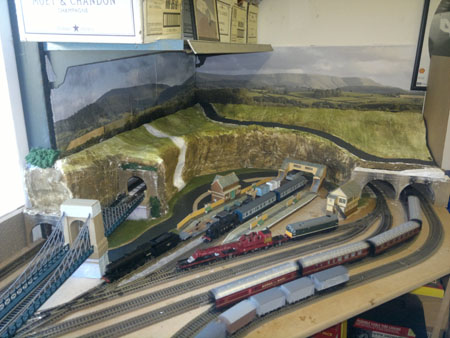
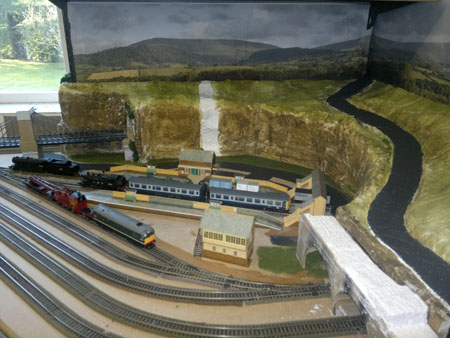
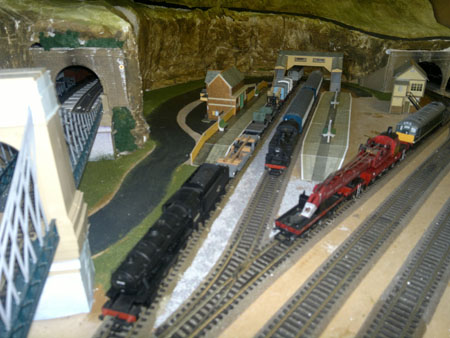
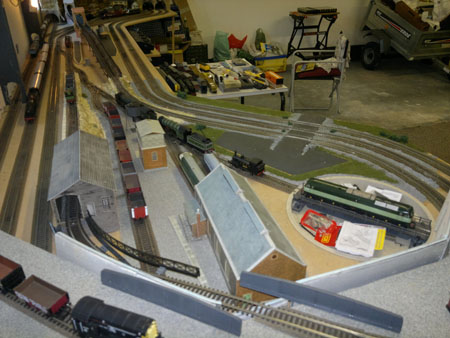
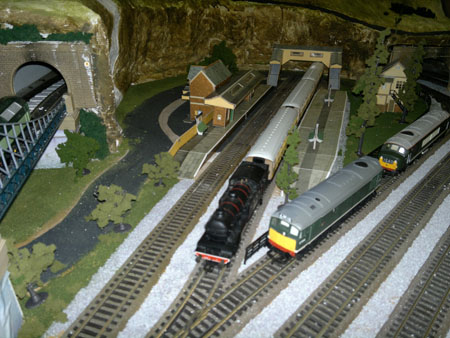
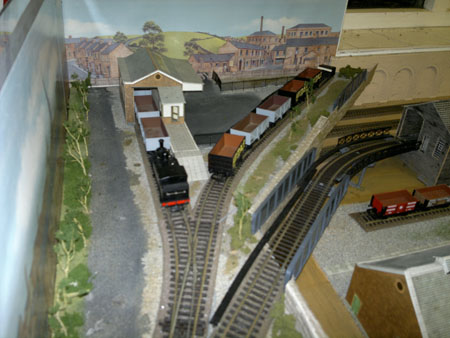

Absolutely loved your layout plan, Alan. Gives the trains a good run without ‘chasing tails’ syndrome. What are the dimensions of the baseboard (less the cut-out)? Looks like you have this in your garage?
Thanks for this. Looks like fun to run.
Best. Roger.
Very nice, I really like what you’ve been able to do in the space available to you.
A splendid layout Alan
I like the way you foreshorten the scenery by using a cliff to explain the rapid increase in height behind the station.
Cheers
Ralph
Very nice, very realistic, and very well done.
What is the length and width of this layout? I have O gauge trains and have converted HO scale ideas to fit my O gauge layouts. I like to include city and country scenes on my layouts. I didn’t see any city buildings/houses in this. Do you have plans for those?
Very nice …well done..gives me several ideas for my layout!!!!
Tom
Thanks Al,
it’s just what I was looking for, I am in the process of building my first setup and got stuck with what to do at one end of my table.
The first of your pictures answered my question.
Thanks
Allan
one time you showed how to weather track by rubbing paint on with a rag. you even gave the paints you used. I can’t seem to find it. Thanks for any help
Fascinating! what an imagination!
Paco
it looks great, a very good job well done.
The bug did you well. the layout was fantastic
Well done Alan , nice layout you have made there
Quite impressive for only getting the bug every 5 or 6 years.
Don’t stop now.
Keep up the great work.
Robert.
How do you plan on getting to any derailments that happen in or behind the tunneL?
Splendid job..I had a layout years ago, but somehow havent had the time to restore it. Definitely inspired me to move forward on getting a new thing going. Thank you
Super layout, What was the wiring like to do?? Have any diagrams to follow for my layout to build?? How long did it take you to build this layout?? What system did you use?? NCE? Digitraks? Again very nice layout. I’m just starting mine so Al thats for posting this.CL
A nice sized HO layout. Nice landscaping with not having to over doing it. Is it DCC operated? You seem to have a nack for just laying it out and building the landscaping just right. CONGRATULATIONS !!!!!!!!!!!!
Thanks.
Very nice showing the progression. Lot’s of ideas to use for my layout.
–Ben Z
very nice top class
I think that you did a great job with the space you are work with.
Would be interesting to know the timeline of these pics. Too bad there’s not a “date stamp” on each of them. Real nice work!
When these buildings are printed out how do you make them stiff enough to build? Are they then glued to some sort of board or do you have to print then onto a board directly?
Excellent layout. It’s amazing how much you were able to get into the space. I like the background – something I’m planning to add in due course.
clever use of space
Very nice
Great – looks like something that would work for me! What are the dimensions of the table and how steep is the grade at the right end? It looks like it would have to be steep to be able to cross over itself a little futher down the line?
Thanks, Bob
A dangerous suggestion for the top of the east side, (cliff area).
To keep the area from being a “Lover’s Leap”, create a small Drive-in theater or a Drive-In Restaurant up there. You could place the theater screen up against the wall that has the window in it, with a ‘Pico’ projector in the snack bar/projection building. Or if you can find a pocket media player just large enough, take the display out of it’s case and mount it as the screen with a simple frame around it to protect the back part of the display and to hide any electronics. You could actually show videos in the evenings, when you have visitors over to view the layout. If you go the way of a Drive-In Restaurant, you could mount a set of small speakers in the restaurant and wire them to a radio tuned to a station that plays music of the era and location that matches your layout. Or you could connect them to a music player that plays a pre-recorded set of your favorite tunes of the era.
just to say, superb layout…track plan makes sense…gives me the illusion of going someplace while it just doubles back ’round. thx for sharing…
Outstanding!!
He has a great layout. Thanks for the sharing.
Interesting plan design. Is the layour 12×3 meters? (or yards or feet). Do you have openings in the mountains in case of derailments? I realy like the way you blended in the backdrop scenery. Well done.
A beautiful layout!! I have 1 question and this is from a TOTAL amateur. Is the turntable just for reversing direction of engines and rolling stock?
Well I was impressed as for a periodic modeler you’ve done a great job and it’s all fitting in well together as there’s a lot to keep one busy, thanks for sharing this.
nice very nice,I like it.
VERY NICE. I DONT LIKE REVERSE LAYOUT TRACKS.
Fantastic – and shown so a beginner like me can follow the condtruction sequence.
Same question as the others – what size is the baseboard overall????
Alan your layout is much like mine with a few exceptions. I love your use of the reverse loops to provide continuos running, while able to switch simultaneously. You can also run multiple trains with passes and meets for realism. My layout is HO using 2 4’x8′ plus a 4’x8′ cap. This gives me 20′ Right 4′ down x 16′ Left x 4′ down x 4′ across x 8′ up with continuos running to a out & back loop. I would like to know how you are resolving your reverse loop issues.
Seriously Great Job !
great layout, love the suspension bridge
Lots of track packed in there. I like it.
I love the layout. Awesome display.
Very nice layout, but why do you have a turntable that goes nowhere?
Great layout! Exactly what I’m looking for! Where can I find the particulars? I’d like to use N Gauge.
Also, and just as important, where can one find the answers to some of the questions that are asked on this site? Am I missing something? ;o(
What size is the longest wall?
How do you handle a derailment in the tunnels.
Thanks Don
a great layout ,with a lot of thought gone into it. love the pictures. can use them for ideas later on . just keep going with it and please send more pictures very inspiring for beginners like me. thankyou from Caloundra Qld Australia.
Very good , how long did it take to finish
Great job Alan,I personally like to see the trains , not have them hideing in tunnels
Hi every one what a very nice layout the detail is very clear on photo,s how long did the layout take to get it the stage that it is on last pictures. I am just about to build my layout and would appreciate
some input kind regards David
Fabulous layout. I am so jealous of your talent and hope that my first attempt, coming very shortly, is a fraction as good.
Just one question and please forgive my ignorance.
The white line that comes over the cliff? Is that a finished feature? What is it meant to be? Maybe its a geographical feature that we are unfamilliar with in Australia.
There are a couple more questions, how long did it take you to go from start to finish of this great layout and did you just come up with this intriguing layout this time or has it developed over the years you have been modeling?
Sorry Alan, in my last paragraph I was asking about the track plan more specifically than the layout as a whole.
Would be most helpful to know the dimensions of the table, the layout and the gauge of the track. This is a spectacular display. A great sense of accomplishment must be yours.
very well done, thanks for sharing, what is the size of layout ?
Just beautiful, Alan. What are the dimensions of your layout?
Joe
IT TAKE A GOOD IMAGINATION TO KEEP Building these Layouts.
great layout what size is the table and what gauge is it?
WOW you did this with very little interest, I can’t help but wonder what would happen if you did take a interest.
fred
garden RR G scale.
I really like your whole layout, especially the suspension bridge with the support towers. Too bad there were not more pics of the bridge. Can you add more pics? Was it built from a kit or from scratch? Great job!
Alan ,this looks like a realnice layout ,is this ho gage
Where do you live, I’d love to “jet in” & see your layout, beautiful job.
Great job Alan. I have been a train fanatic since I got my first train set when I was about 8yr ( a Hornby Dublo) and when I was a child in Sydney my Grandmother travelled back to Cairns (Nth Qld) after a short holiday with the family there, and, they still had steam trains running from Sydney to Cairns in those days. Guess I’m showing my age, but it was only in the ’50’s. The train driver let me climb aboard the engine to have a look – well – blew me away, the heat, noise and smell of burning coal (which I still love to this day). A few years ago my uncle built a model railway underneath his house in Brisbane and I couldn’t wait for the opportunity to go down and see how it was progressing. Now I’m getting close to retirement ( couple of years), I’ve started building my layout in what used to be my office/bedroom. Having a ball! And, loving all the suggestions and ideas for layouts from this site. Cheers!
I hope to start a train layout my self and I love seeing the lay outs thy are great thanks mick
meant to ask what would be a good gauge to start would ho be good mick
Looks like good use of space but like Don, would be interested in dimensions
as it has some features I’d add to my own OO layout Coastway Central, a rough copy of Brighton SR.
Thanks!
John B.
Love the layout, can you tell me what gauge the layout is??
Thanks
I too would like to know the dimensions of your layout and whether it’s 00 or h0 scale. I’m about to start building a new layout I’ve got most of the track purchased and a lot of rolling stock and locomotives I like some of your ideas I will keep it in mind that’s for sure. You’ve done a great job allen I hope you can tell us all what scale modeling in and the particulars about your layout but his size and what gauge
Great showing of “how to”.
How do you handle accidents in/under the mountain area? I did NOT see hand space in that three track area under your depicted terrain. Most ALL trains derail and I did not see any rerailers etc. to retrack the consist.
Keep up the good work and take any comment lightly as my comment is simply a question of “How to” handle your situation as shown.
Nice looking everything so clean..but I think you need people all over, that’s one reason trains run. keep up the good work, cheers Theodore
Wow!! That’s a great train layout. I am just staring a layout myself, it’s the old Lionel 3 rail 027 gauge. I do have the Legacy cab-1L and base for it and a locomotive to run. But the more I get into wiring the trains the more I get afraid. Is there any advice you could give me? I have the old KW Trainmaster 190 that can run 2 trains at once,but I don’t think I will be able to cause my other trains are not able to run with the Legacy.
Very good for every 4 or 5 years.
great layout I assume it’s a OO gauge, however. where you’ve got a level crossing
one could put another line for a harbor and have a small dock area then you would have just about every thing that’s railway related, oh and change the locomotive to LNER (lots of cliffs on the north east side of England yeah…
Very inspirational thanks for sharing it with us.
That is pretty good going if you started over Christmas
Great layout Alan. Obviously oo/ho? Similar questions to others. What size is the base board and also what radius curves are you using. I’m just fitting out a new garden shed for a layout and this layout looks like it could answer a lot of questions about the space I have available. By the way if your loco goes of the rails in the tunnel , how do you get it out?
I am in the process of collecting all my supplies to build an 8×4 ho layout. I have foam on my table top but I was wondering if it is necessary or best to lay cork bed for the track. I notice that some modelers use it but it seems that most don’t. I haven’t seen this address before or if it was a real concern. It appears that Alan used some but not over the entire layout
Thanks so much to all who have contribute over the years and sometime in the future I hope to show my B & O, HO gauge layout of 67 square feet and modeled on Martinsburg, W.Va. and points west. At this time I have only two suggestions to add and that ismake sure your locomotives and stock run well on all sections of the tracks. Also, if space allows, forget about the 4 x 8′ table top if you are running HO and go 5 x 8,9 or 10′. It might cost a little more but you will not regret going with this size. Keep up with the good work.
AWSOME !!!!
I am also interseted in the bridge, where did it come from, kit, scratch, your head.
Lovely layout , but replies would be nice as to size and gauge of the work.
I’m not sure if the gauge of this layout was confirmed. Is it HO?
Secondly what are the dimensions of the layout and maximum radius on the curves?
Beautiful work. I’m just unpacking my trains after a move from the east to MI.
Thanks again.
Rich
What scale and dimensions?
Great layout, please can you say or any body else what to make black top roads out of. Yours look great. Thanks Tom in AZ
Hi Allen real sharp you did a hell of a job on it I see some Yellow and Blue Double-ended Diesels not quite CSX But the paint scheme suggests it Sante Fe had yellow and blue I really liked that scheme too and since the Merger of Santa Fe & Burlington Northern some of the Engienes stlll have the old style “Warbonnet” Scheme HEre in the Deep South in the USA I wish CSX would get on the stick and paint some heritage units Norfolk-Southern mixes business with pleasure but CSX is all no no play I shot one switcher i n Davenport Florida in Atlantic Coast line Purple and a AMTRAK with Heritge in Kissisimme Florida if I got those shots I was doing good
Very nice layout and very nice job! One question (noticed some one asked also) how do you get them out of the tunnel IF they derail?
Allen has a great way with modelling and grand style with the Rails I do not think I would want to be in a contest against him to build a village !
George
Awesome , looks really good.
Superb. Hopefully one day I’ll be able to build something similar when the kid’s have left home.
Alan:
Congratulations on one of the best dogbones I’ve seen in a long time! One question, how do you handle potential derailments beneath the mountain? Is this a lift-out section
This is amazing and I’d like to copy it with Pride. Assuming OO is there a derailed layout and what is the base size ?
Amazing layout! I’m just building an interest in model railroading. Your layout has inspired me to go that route even more. What gauge are you using and what are the dimensions of your layout? Again, congratulation on a superb presentation.
Great looking layout Alan. Is it 00/H0 or N Gauge? Keep up the good work mate it`s great to see.
I really enjoyed viewing you photos Alan. A great layout! Well done! Cheers Rossco Adelaide, SA
Hi Alan Awesome layout great job looks good what gauge are you using. Thank you for sharing your hard work and great ideas.
I have never seen in real life a suspension bridge just for trains. If there is such a bridge please someone post a picture. I always thought that such a bridge could not take the stress and vibration of a train rumbling over it.. I do know of Light rail and surface railways in New York using suspension bridges along with autos but these trains are light weight and short in length.
Looking good keep up the great work.
Thanks for including a track plan. I can see using this and expanding the ends a bit into a large U shaped like I am going to do
I loved it you have given me some good ideas hope to see more
That is a great layout. I can appreciate all the work that went into it. Very well
done. Norm French Broad N track club.
Has Alan come back on the scale, ie HO/OO and I take it the dimensions are 3’ x 11’ . likewise what radius curves are used.
Many thanks
Colin
I did not know there were so many train enthusiasts on this site. I have the bug to start one but I am on a retirement budget. I have one engine and several cars left over from my early highschool days. HO gauge was just coming into it’s early stage and I bought a small set. Ran it a few years but lost interest. Must have been the girls that caught me.
What do you think about N gauge vs HO?.
Love your layout. I will 😊 save it as a reference when I start mine.
Thanks for those 👍 plans.
Alan, really nice start. Is any of it running yet? wiring must be an adventure with all the hidden reverse loops. What method of control are you using for power to the tracks, DC, DCC? have you setup the reverses to switch automatically or with mechanical manual switches?
Great job Alan, I can only hope mine could be as great as yours is. Keep up the good work.
Great job Alan, Keep up the good work. Thanks for sharing.
Fantastic…well thought out!
lots of hard good work. well done.
First of all, thanks for including a track layout plan. It’s quite an efficient plan, with the two reverse loops allowing for various passenger and freight options.
Thank you for all of the tips.
very nice
Some useful information in these posts.
You’ve done a great job with the background blending in with the foreground. Very realistic. Would suggest next time you send some pictures, they be larger sized.
Jim AZ
Nice layout, especially the switch back.