Don’s been in touch with some model train tips – ignore them at your peril.
It’s very good of him to share it. He’s not alone, I often get mails like his:
“Dear Alastair,
Five years ago I started a layout in the basement of our house. It was made of plywood table sections. After completing all the tables we decided to move to a condo.
I was able to use the loft with an attached bath. Now to share all my mistakes.
1. I was able to use the tables after I arranged them as a jigsaw puzzle. This forced me to make a track plan that fit the tables. The curves were too tight. So, I widened the tables. This caused tight isles. Starting over should begin with a clean sheet of paper.
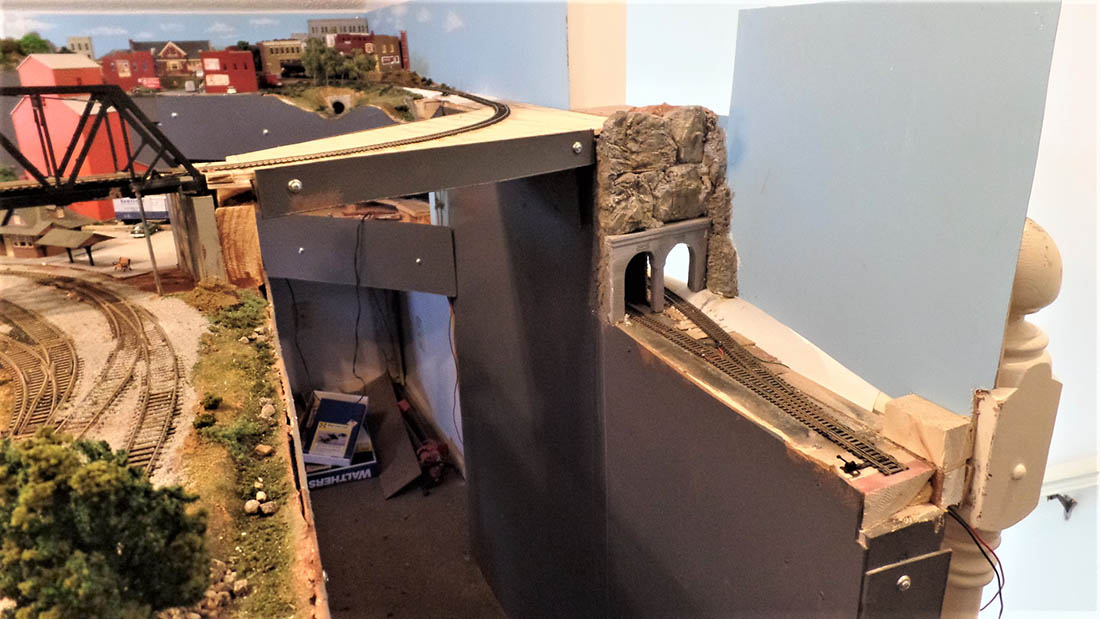
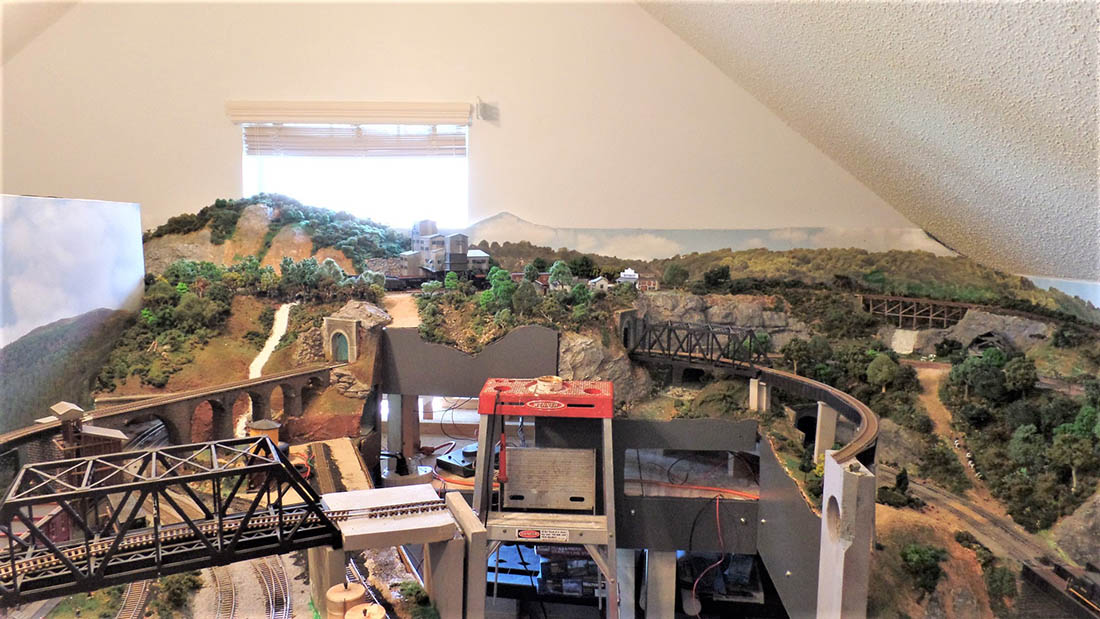
2. I decided on a mountain railroad. This allowed tracks to pass over each other. It smoothed out the plan and lengthened runs. The elevation change was 18 inches. Wiring leeds to the track were over two feet to get under the plywood table. Most switch motors were above the plywood and hidden.
I cut five inch access holes in the plywood for future access after scenery would hide them. Disaster. Putting my hand through the hole limited my view. It was dark and required temporary lighting. While they were wired before scenery, Changing to DCC took advantage of the other terminals. Don’t make a layout with elevation changes more than four inches.
3. Not knowing about DCC I bought many nice switches off Ebay. Some were even brass. While they functioned fine mechanically, many were a nightmare electrically. Because of DCC I had to replace four switches after the scenery was in. Also, DCC required more electrical drops. This required 24 inch drill bits to get from the elevated track and through the plywood.
4. Before DCC I had to limit train length because of some four degree slopes. With DCC I figured I could add helpers. One problem, helpers of different types than the lead engine ran at slightly different speeds causing a tug of war. They can be speed matched with a recorder or an oval loop. I had neither. So, limit slopes to two degrees or less.
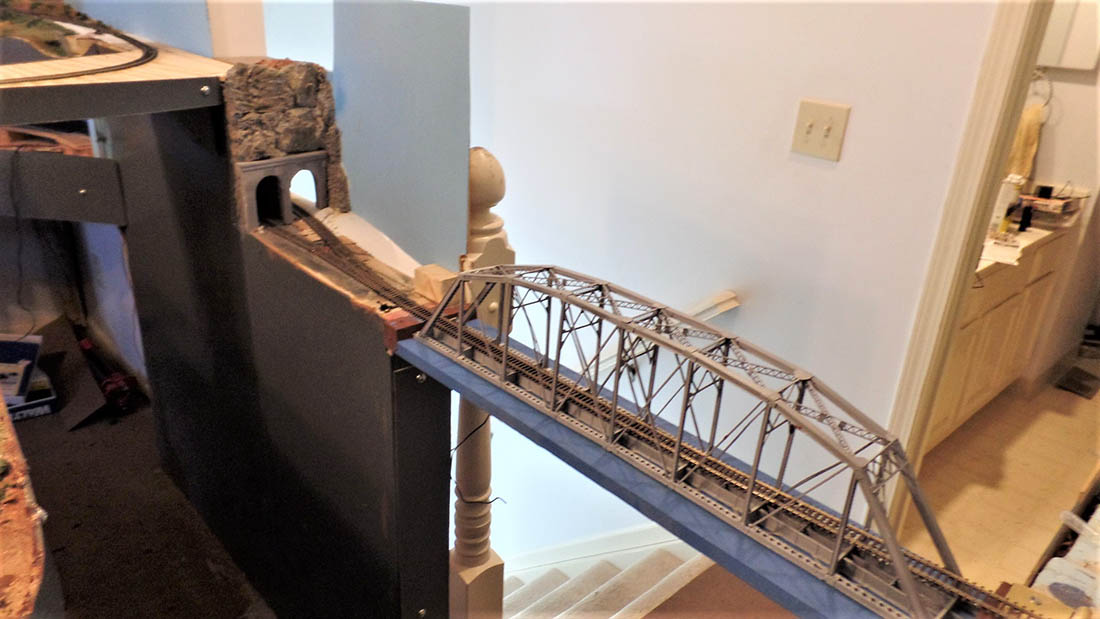
5. The last straw. Because of the elevated track, the two ends of the track didn’t match and made this a point to point railroad. I had a return loop at the low end and needed one at the high end.
I had planned for this. I was going to go through the wall into the bath and loop over the bathtub. The bathroom was not being used. We had others on the main floor. Last fall I mentioned my plan to my wife, proud of my solution. She mentioned, as a soon to be widow, she would turn the train room into a sewing room.
Plan B. I had a lift section to enter the space. I added two more to make a return loop. I am too old to duck under (76) so I was continuously moving them. Misalignments, derailments, and a lot of work. So, I am ripping it out and starting over. I wish I’d know these model train tips before!
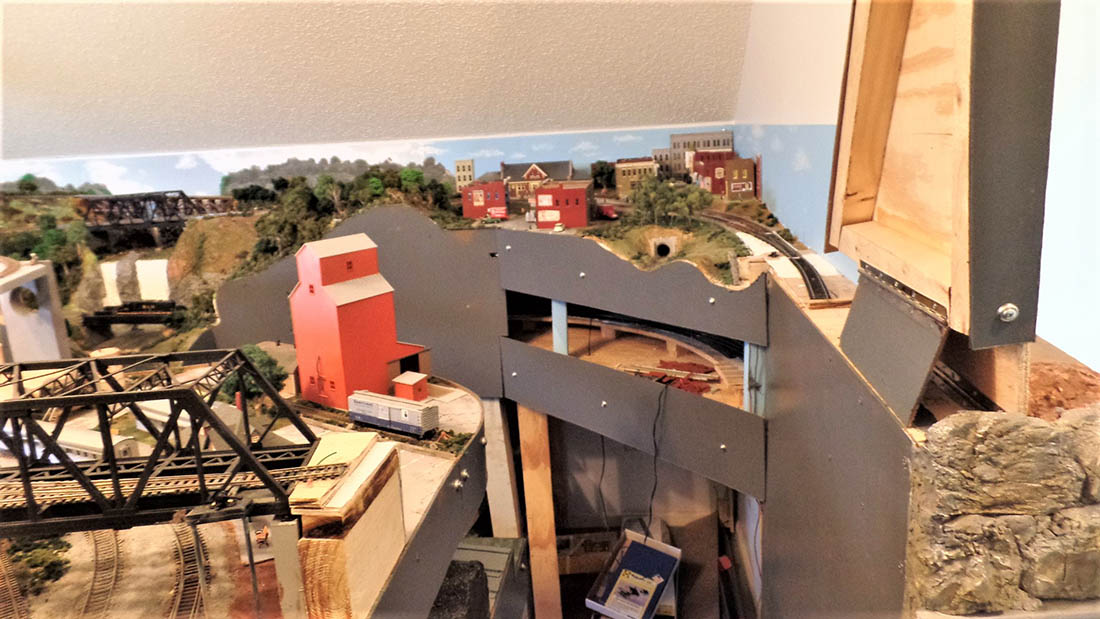
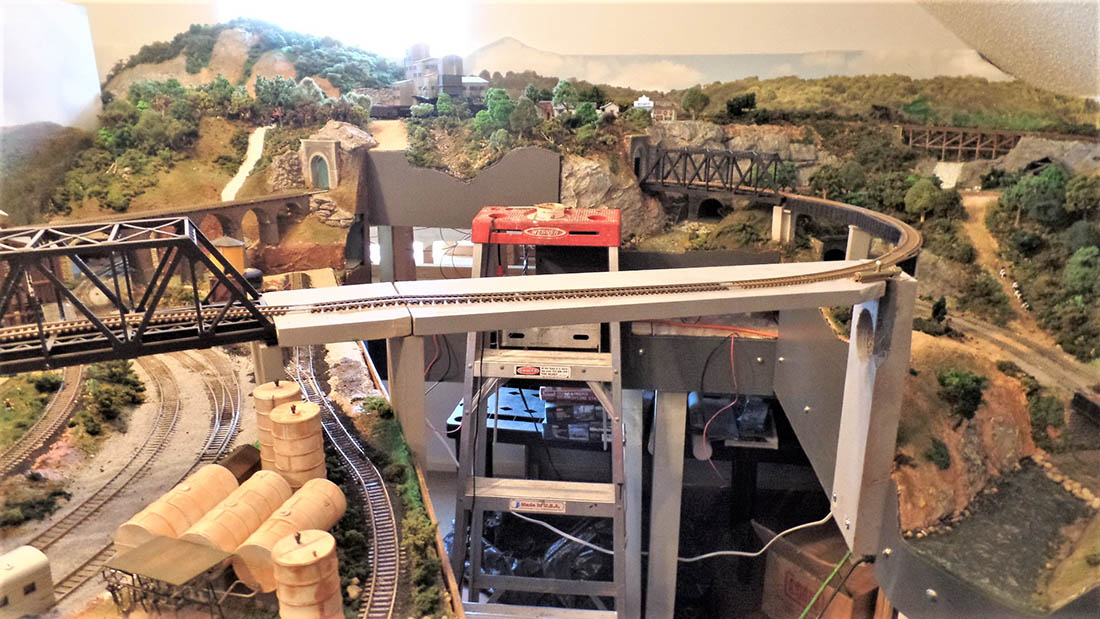
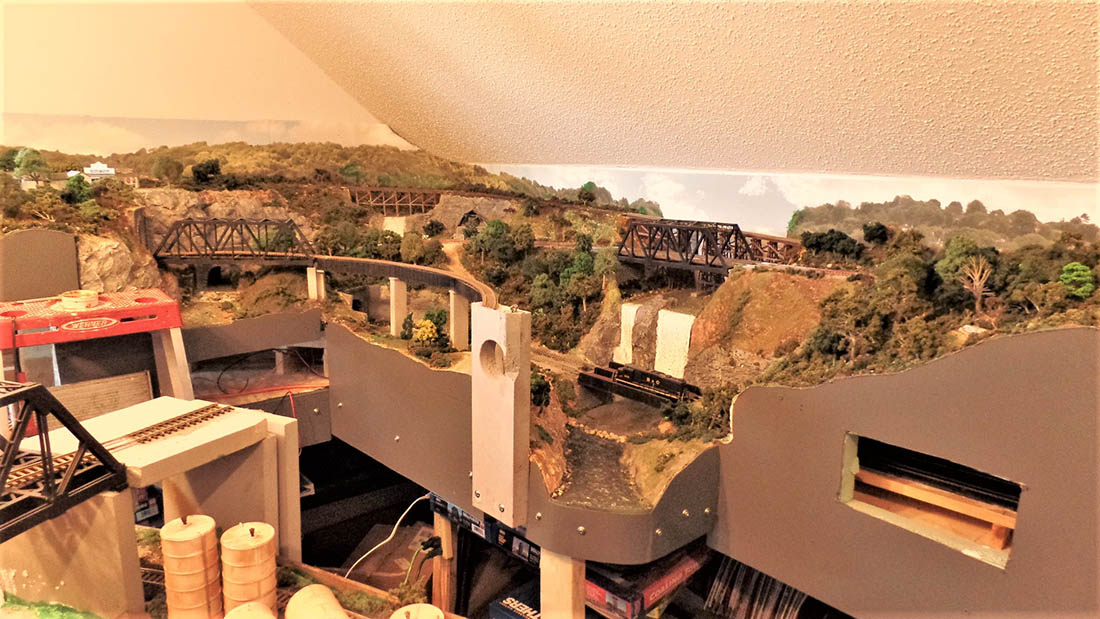
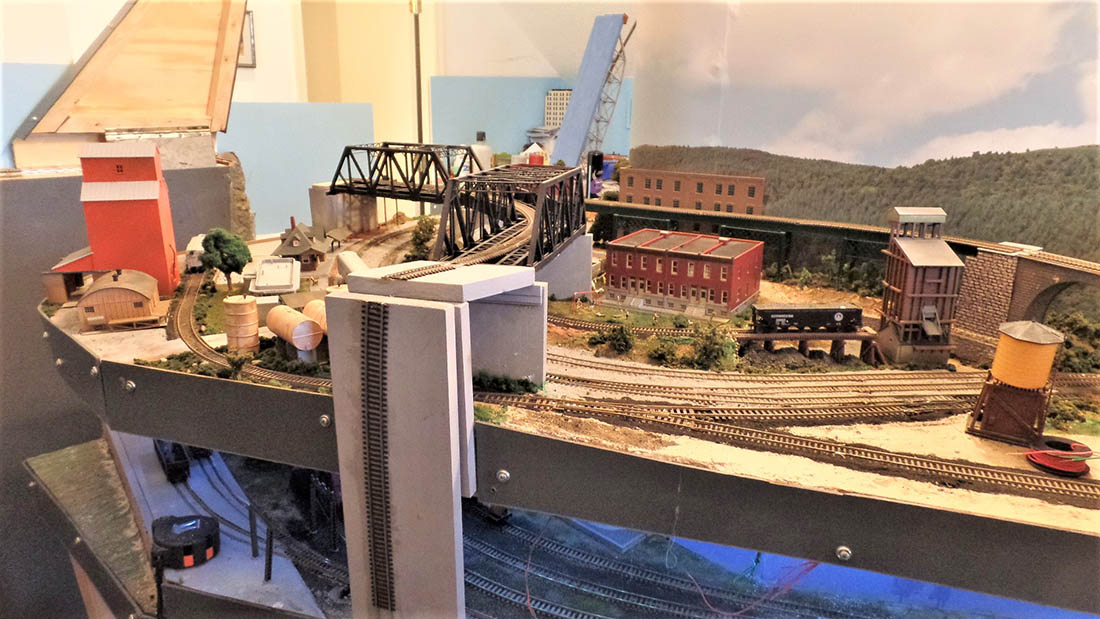
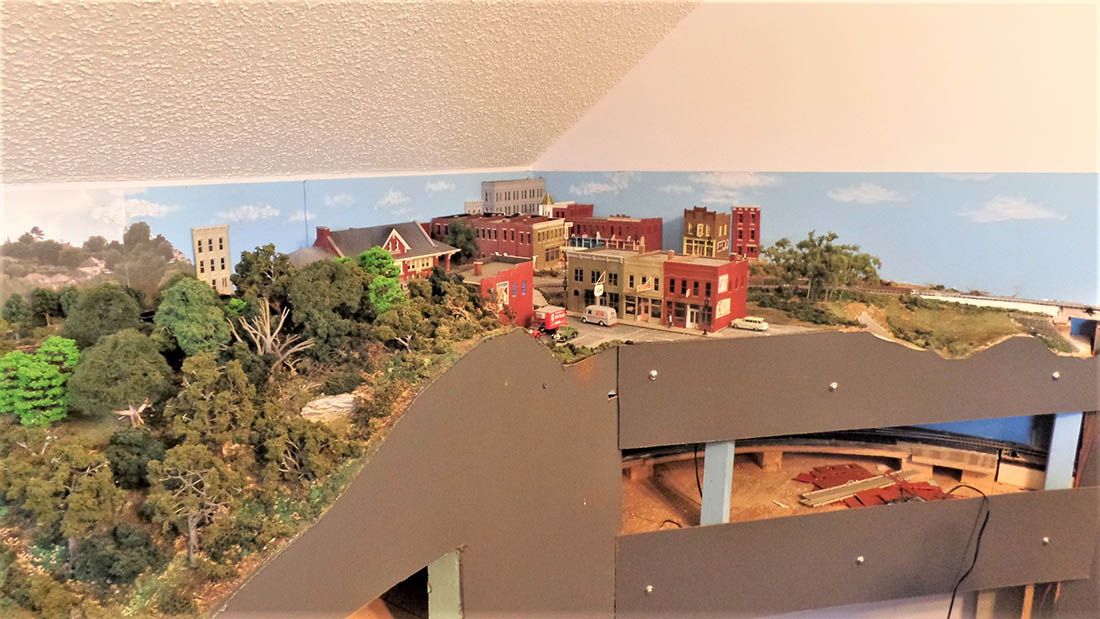
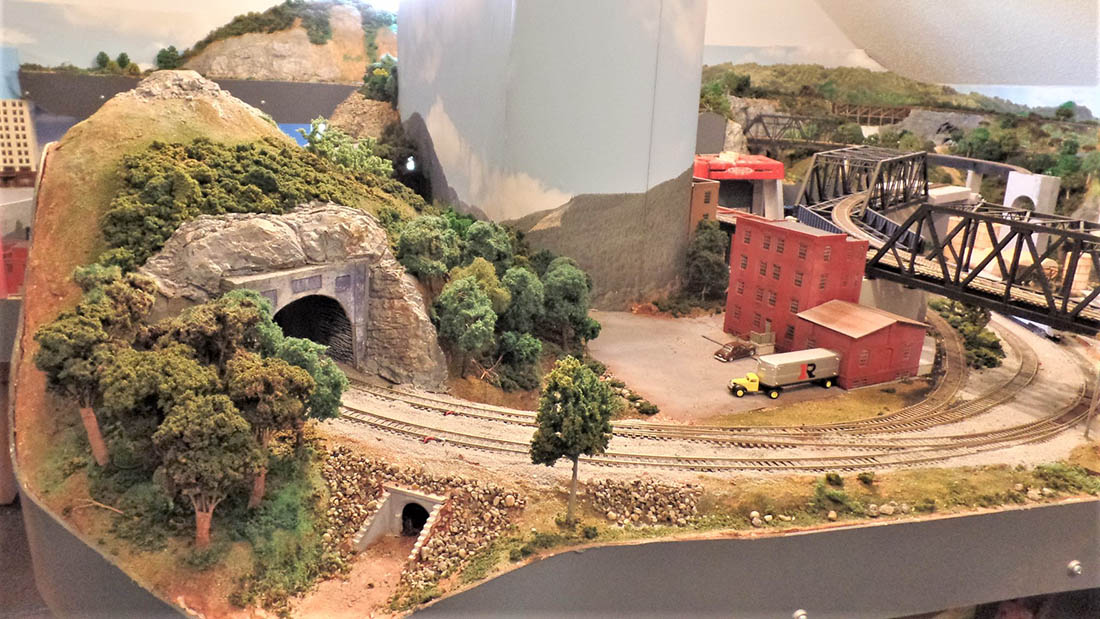
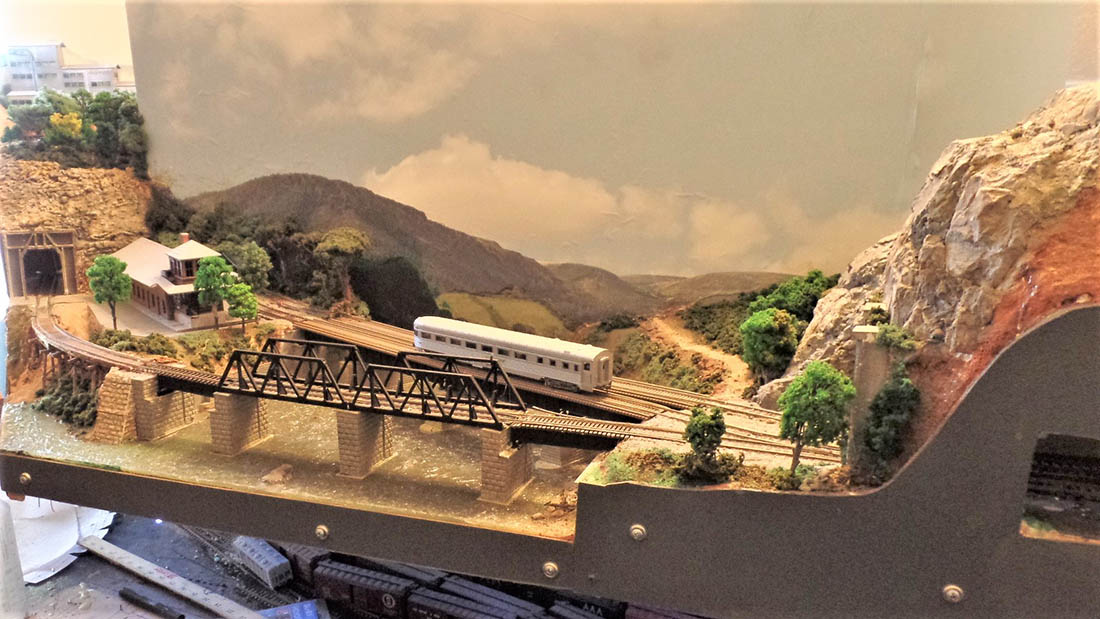
Here are final picks of a pretty but non functional layout before I start over. I hope to save some scenes in a functional plan. I will use all new track and DCC switches. No tables, max 2% slopes, no lift sections,etc.
Don”
A huge thanks to Don for sharing his model train tips.
(There’s more here if that’s your thing: Model train layout tips.
It just goes to show a little planning can go a long way, but in Don’s defence, sometimes the only way to start is to jump in with both feet. You might go wrong, but you learn quick enough.
Others plan and plan, but never ‘execute’.
Please do share your comments and thoughts on this below – I’d love to hear them.
That’s all for today folks.
Please do keep ’em coming.
And if today is the day you poke boredom in the eye, the Beginner’s Guide is here.
Best
Al
PS More HO scale train layouts here if that’s your thing.
Need buildings for your layout? Have a look at the Silly Discount bundle.

Don, you have a great space and a great looking road. I am the same age and have the same problems. I can’t run my trains either. also if I put them on display the cats knock them over. Although painful you have the opportunity to start over and remember all the fun it was building what you did over again. Take time to reconfigure you layout and keep it simple. You will be pleased.
I had similar problems here in the uk for many years until at a rail show I saw a Kata layout,as they say I never looked back ,a euruca moment.plug and play I was told if you can put a plug in a socket that’s it,I have so much time to run trains as the points or turnouts just plug and play.still a great layout don well done
Don, I attach what I think is the best lift-up sections I have seen anywhere.
I am also 76 and about to start again and I will definitely copy that method.
Good luck
https://youtu.be/X106IfTox4o
Don
You are a talented modeler so create a simpler plan. I assume you are in HO so no tight turns and if you keep the slopes to 2% you will be good. I like 1 1/2″, 8×4 hardboard insulation as your train surface, supported16″ O.C., 9″ above a light, plywood base. All wiring is above the plywood- no crazy, on your back, wiring. You can create all the hills and valleys on top of the insul board and you can keep stuff in between the joists. I found that 1 1/2″ board @ 16″ OC is strong enough and unless you really load up an area is OK for your track. Light & functional. Sweet for wiring- poke a hole, reach in and voila.
Be safe
George from LI, NY
Robert D; Easy solution for you , rid the cats, Get a dog!
Don Your solution, should cut down on the amount of Stuff you want to keep on adding to ur layout. I love the thought process but ur trying to put 2 tons of stuff in a one ton trunk.
The Critic
18 inch radius track is all I used for my layout. My GG1 and it’s long
Passenger cars don’t like elevations that are not even and 3degrees max
Use woodland scenic elevations , not cheap but cutting foam is an excuse to go flat. I’m 81 A little slow and I can get it right in 3 tries
Never complete until?
Pretty Kool.!!!!!
Don, It’s a shame that you have to start over again after creating such a beautiful layout, but as you said, it gives you the advantage of starting from a clean sheet of paper. I’ve found, however, that a computer screen is even better than paper. The small investment needed to purchase a layout CAD program pays dividends many times over. Knowing what will fit where, with what radii, slopes, etc. before you start cutting lumber is invaluable. Without CAD, I would not have been able to make my current (and still very unfinished) layout fit effectively in the space I have available with the features I wanted to incorporate. I use AnyRail and have been very pleased with it, but there are several others (such as Cadrail) out there as well. You’ll have to learn how to use the program, but it’s not difficult and the results will provide solid guidance as you begin again. Best of luck in your rebuild.
Don’t give up Don. We all experience failure along the way. Half the fun is redoing it until it matches your dream both in appearance and operation.
Don, I live in a condo as well and I have a space in the basement 12 ft by 33″. My HO train layout has 30 ” curves which are tight and I run 40 ft freight cars and a
SW 1200, which works fine, but I wish I could expand to run bigger equipment.
The fun is adding to the layout with buildings and scenery. I like you’re layout!
I love the detail of your layout. The landscape is awesome. When you do start over you will have a lot of salvage material, tress, shrubs and building/industry/mills that will hope make it easier for you to begin again. Good luck 🍀
Thank you for sharing! Anyone can say, “Here’s my layout, ain’t it grand?”, but the info you’ve provided will help many.
Short circuits, warped layout, unbelievable angles = all lessons I learned first hand.
I bet if you posted a “Hey guys, here’s my rooms dimensions”, what would you suggest?” people would love to provide plans, including multi-levelled. Layouts, as well as cat catapults.
Yikes, I would have switched to HAM radio or model airplanes long ago. Thanks Don for the education.
Learning on my first layout as well. Used a crossover on a rising grade . Also, rookie move, 3% grade in one spot, but hiding it in a tunnel. I had one miss calculation which required a tight radius. I was able to solve it using one piece of rigid Snap track, after making sure all my six axle locos, & 65’ passenger cars performed without fail, but I plan on modeling a “work crew” at that location, and I’m calling it “Dead Man’s Curve”
Don,
Thank you for sharing your wisdom. I have a 28′ x 15′ rectangular space. I decided first and foremost what was going to be the purpose/theme of the layout.
I founded the Kinzua and Tionesta Valley RR based on an historic area of northwest Penn, USA. Here is my criteria template.
Late 1950s- 1970s with shifting periods featured over time,
Road TKV, WP, Chessie/CSX, BN, and floaters
4 axle power for diesel and shays/climax steam
40′-45′ or shorter rolling stock commercial and home shopped
This made for tighter curves and 2-3% grade
deep country with steep hills terrain thick forest high scenery to rail ratio
Interchange between TKV and featured roads.
I understand what you are going through. My first adult layout I later dubbed the Spaghetti and Western, as I had so much track running everywhere. In this fun hobby all work and craft is learning. Keep up the adventure.
No duck-unders, or bridges
Some things can’t be taught – they have to be learned. And any time I learn something, it has been a good day. Keep on going, the layout looks great!!!
Some great modelling and scenery you have there Don, such a shame that it did not work. I am sure I am not alone in looking forward to seeing your rebuild so please send it to Alistair. Andrew in Oz
Hello Don. I really like the way you built your bridges in to the layout and I like your trees very much too!
Brilliant!!
Don,
First, layout looks great and i admire your efforts. I am 73 and am working on my O gauge layout, but learned the “too steep to climb” lesson on earlier layout. now I essentially have two layout – lower – freight and industry; upper – passenger with country side and towns.
Second, let my wife read your first solution to upper level return loop. She agreed with your wife completely. I could not stop laughing. thanks, Ron
Don:
Edison said something to the effect that invention is 10% inspiration and 90% perspiration. Model railroading fits this nicely. Your layout is very nice and sharing one’s mistakes takes courage and generosity. I too have experienced many shortcomings and so I have developed some simple rules to be guided by: .#1, Buy one manufacturer, I use only KATO tracks, switches , locomotives and rolling stock, quality makes a difference. #2, I dry run every “planned” layout section before adding anything in terms of scenery, buildings, etc. #3, Every building, track path, road, path, shrub, tree is removable. I often change my mind and “adjust” things. I glue down very little, so changing a curve, switch or hillside can be picked up and moved or modified without major surgery. #4, I use ANY Rail software to plan the addition in detail down to the sections of track by model number. It is a pain but time spent upfront saves hours of frustration later. Still things don’t always work as expected but cutting down the variables enables me to solve more issues quickly and have time to run the trains, Why i do this to begin with.
Happy Railroading and thank you. John H.
Sounds like a bit of forethought and planning would have gone a long way for you. I bet you can still salvage this layout with some good brainstorming!
If you can’t find a way to match the helper effort to the train engine, you could try doing what the Great Western did through the Severn Tunnel, and put the helper on the front not the rear. Alternatively, with an extra siding at the top, you could do what many railroads did and divide the train, work the front up the bank to the siding, go back down to collect the rear and shunt the two halves back together at the top. More fun, less carpentry, and you get to keep the lovely scenery.
Rod
Don, I am sorry for your troubles. It seems to be a common mistake about inclines. 3% grades seem too slow to the newcomers but it takes a great distance for model trains and the real ones to climb up very far. There are problems with grades that are too steep when going down too. What you did though was very creative and I bet you had a great time building it, as you imagined how your trains would look running through the landscapes you were creating. Most people including myself seem to go through a learning curve. Access, power to the track, curves of sufficient radius, good turnouts of the right type, and reasonable inclines are the most common errors. I will look forward to what you come up with next. Most of all, don’t get discouraged, now you have the know-how.
Rob McCrain – Farland Howe
I’m so glad to see that you are having all these problems. Going through the same thing and I’m 80 and thought I was the only one doing everything wrong. You do have a great looking layout but maybe it’s too busy for the space you have. When I start with ripping out the current layout I’ll be saving the best of the scenery things for the new one so all that building won’t go to waste. ,I’m with you, rip it out, save what you can and do it over. Should be ok since you have had all this fun doing things wrong. Me too but think of all the experience you have now. Keep us posted on what you do.
I suggest you buy the loft in the neighboring unit and expand into that
Without question this is a formatable undertaking. Biut you will have an unmathed layout wih the magnificent mountainous sceanery punctuated by bridges and overpasses which trains roll though at speed.
Keep ua posted.
exellent
I like this, scenic look really good and tracks as they should. The mismatches can be gotten used too with background and the wood ramps, bridges/crossings keep trains on time just the same.The gray fascia may be a bit conspicuous, first gray as that I’ve seen actually. Upstairs space with bath is perfect studio for this project. Probably crawl-space vs full basement with Condo? Some of those pretty spacious, often wondered with “half/height” RR built in one…
Regards, Rich
Superb! is that old red wooden grain elevator a kit? if so, source? I ask as we have an identical (& I mean identical restored one on ex-Milw (now) C.P. in Garner, IA. Would like to build a kit and donate there.
Tks!
excellent. i like it a lot.
It’s too bad you have to tear the layout apart because you made a great looking layout. Maybe you can save some of your work by switching from steep inclines to making different levels.
Robert brady. I have a dog and a cat. They’re entertaining as hell. Don’t get rid of your cats. Enjoy them. They’re probably adding to your life span.
Very ingenious, if there’s a problem , consult your local model rail road enthusiast, they will solve it .
Great layout , scenery is very realistic , nicely done indeed .
“Last fall I mentioned my plan to my wife, proud of my solution. She mentioned, as a soon to be widow, she would turn the train room into a sewing room. ”
HAHAHAHAHAHAHAH :DD
nice work
Don, you obviously have the skills now to construct a great model railroad. We’ve all made plenty of mistakes like yours, yet you still created a very nice-looking layout, despite its operating problems. I’m surprised you didn’t think of running the upper loop over the stairwell where you might not have to duck under the track. 🙂
A very impressive layout with so much detail. That layout will just dazzle the eye so very much.
This was my old layout. It was taken down and some of it was saved. Al you should have some pictures of that. I had to take it down because we went to hardwood floors.
love it