“Go the extra distance to make sure your trackwork and electricals are right!!
My biggest pet peeve is electrical and track problems. Nothing disappoints so quickly as derailments and stalls. I check my trackwork several times to make sure the gauge is correct, there are no kinks, and the railtops are smooth, as well as the inside edges where the wheels ride.
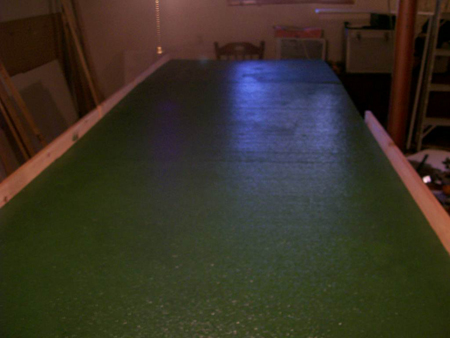
I solder all my rail joints, then use miniature files to make sure everything is smooth. I solder electrical wires to the track every yard or so. Since the layout I am building now (for my grandson) is DC and has no switches (he’s six), I wanted to make sure there was plenty of power available. I used a main bus wire, then used scotch-loks to tie the sections together. So far, it works. Still working on scenery before I give him the layout.
Soldering takes some practice. I melted a lot of ties and re-soldered several connections before I got the hang of it.
This layout is built durable, since when my grandson outgrows it (and hopefully builds a bigger and better one with my help) it will go to other small children in the family.” — Arthur.
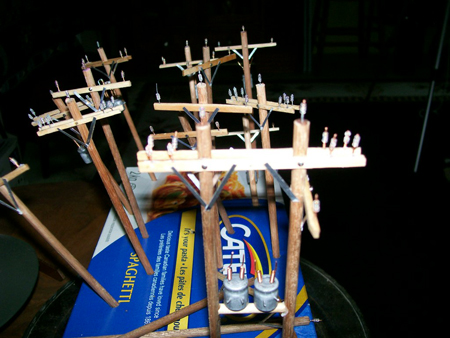
“Old capacitors, from dead electronics, make excellent power-pole transformers. Simply snip them off a circuit board, paint them flat black, glue them to the power poles in whatever arrangement you need, and solder little pieces of copper wire to the ends and bend those to join up with the wires on top.” — Connor.
“Old scrubbing brushes can be used for scenery as well.
The bristles can be used to make long grass and weeds, you can paint them green or use just as they are.
All you need to do is use PVA glue to glue them where you want them.” — Paul
“Acoustic ceiling tiles ( the type used in commercial buildings) when broken (not cut) and stained
make good rock cliffs.” – Clay and Denise
“On the use of Windscreen Wiper Blades, I find that the plastic back
(spine) makes great Corrugated Roofing ridges (apex), just the right angle (pitch) and roofing materials just fit neatly into the slot.
Just have to degloss the plastic before painting though.” – Wayne, New Zealand
“When using a 50/50 mixture of elmer’s glue and water….a few drops of liquid dish soup helps to break the surface tension of the glue and prevents the ballast glue from bubbling up.” – CC.
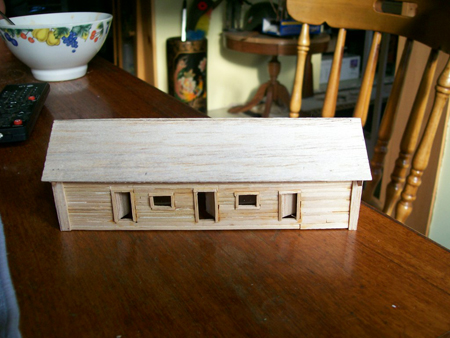
“Hi Al.Minus the firestack im done with the lumber cabin made of popsicle sticks.I tryed a few spray paints with disaster.Not good for styrofoam.Latex worked for me with styrofoam.choose green easier.payed 20$ here for the paint.
Mostly done my popcicle lumber cabin with beds table light and stove.may shingle the roof.and done this batch of insulators i got.300 color of my choice insulators for under $5 used popcicle sticks cut for the cross beam.a streight pin for the bolt.radio capacitor for transformer.i will send a picture of the parts and kit you need to make these poles. Merry Christmas everyone.
oh a quick story.I got me a new 42 inch helecopter.yesterday there was no snow in canada so i desided to fly it.well got it stuck up in a tree 50 feet.and was going to get it.well wokeup this morning to a ton of snow and no way of getting it down till spring. darnit. ” — Kim
“Here is a tip for streets.
I use Liquitex Acrylic Texture Gel with Ceramic Stucco with a small amount of black acrylic paint. I mix it a smooth ceramic tile and then apply it as needed. The paint amount and color depends on how dark or light ou would like the road to be. I’ve even made some a bit darker. After adding applying it looks like repair work was done.” – Jon
“I like to use liquid weld on buildings when I am building them. It dries very quickly but not to quickly, Can be bought at most Hobby stores, Thanks Tim”
“For barriers on highways, I use Plastruct to build them. I take one strip which is an inch & half thick, and glue it to a narrower strip, which is half an inch thick. Then I pin them in place, while I finish the highway design. When I lay the highway, I cover over the base of the barrier with my roadway material; following that with coloring and weathering, so that, when done, the barriers look right for the road.
This same process can be used to build retaining walls, and any sort of wall where you may need to have support to prevent a hill from sliding across your tracks and roads.” – Deranged Dragon 99
Course, I’m biased, but an excellent portion of tips. Thanks everyone.
Don’t forget the ‘ebay cheat sheet’ to save your dollars. Thanks for all the comments on it.
Best
Al


I like poles are they hard to make
Very good ideas. I am just starting my layout,and this will be very helpful.
Thanks a bunch.
Thanks for the tips,interesting reading, keep them coming
great tips keep them coming.
Thanks for the tips, I have been getting ideas from them.
Hi Joe.They are easy to make.insulators are $2.97 for 300.The rest of the poles are handmade.I willl take a picture of what you need to make them. and step by step and mesurments.
Brilliant tips,anything that saves money got to be good.What Arthur says about track laying and electrical connections are very true,
I like to use an old campaign door magnet as a work mat. If I drop a screw , I know where to find it.
hey guys, just commenting on what Arthur has done, just love the idea that your building it for your grandson cool mate, just a bit of advice on the use of scotch-locks, they work at first then after a while they build up calcium and other deposits at the contacts and cause no end of grief trying to find a short or worse an intermittent short. best to just solder the joint in the first place ( better than having your grandson saying it doesn’t work anymore)
hope this helps anyone thats having problems with electrical. Ian XD
when starting a layout from scratch,what id best order of construction?e.g. track layout first,scenery first, mountains first?what is best way to complete project?
loved this tip from CC
just wondered what type of soup he prefers “liquid dish” from the sound of it
[When using a 50/50 mixture of elmer’s glue and water….a few drops of liquid dish soup helps to break the surface tension of the glue and prevents the ballast glue from bubbling up]
Love the tips but I have a HUGE safety warning for one of these tips.
Acoustic tile in the past contained ASBESTOS Before 1990 in North America)! It is impossible to visually determine if something has asbestos, it must be tested for in a lab.
I have been in the environmental industry for a number of years, so I am not simply blowing smoke here.
There is no safe level of asbestos exposure, and asbestos is one of only a few substances that has 100% positively been identified as a specific cancer causing agent.
I have taken numerous asbestos courses, been to a number of asbestos seminars and am a certified asbestos abatement contractor.
Maybe you aren’t worried about it but think about the other people in your life like you wife, daughter, son, grandson or grand daughter.
Once you break open the tile, the asbestos fibers are now in the air and are being moved through your home by you and your forced air heating system.
I know I am sounding like an alarmist, but this is a big deal. Our hobby should not kill us, and the type of cancer asbestos causes is called mesothelioma, and it’s a real crappy cancer.
To put this in perspective, 65% of all Workers Compensation claims filed in North America are asbestos related! These are not 18 year old kids going in, these are people in there 40’s, 50’s, 60’s, 70, and 80’s who were exposed in their working life and are now suffering health effects.
So, unless you can 100% guarantee that the tiles are asbestos free, don’t use them.
Additionally, asbestos can be found in floor tiles, flooring glue, drywall compound and textured or ‘popcorn’ ceilings. So think about that when you remodel your train room.
When we do a remediation and test for asbestos, we get back results stating that it has 0.2% (or lower) asbestos in it and that is bad, very bad. We must follower massive safety and containment procedures, have proper documentation and disposal manifests, and air test after scrubbing the air in the area for 3 days!
This is not something to consider lightly.
Please, please, please take care with this substance.
Jeff.
I agree with Jeff and I have been working with floor and made sure it is asbestos free before you use.
Those are GREAT telephone poles.
This has been posted before, but I wish people would put the scale they are building. This would really help when they are talking about specific materials that come in only one size. I love the the tips, but sometimes there needs to be a little more info.
JIm
Love the cabin.
Hi Kim,
Love your ideas . Looks great. Ingenious idea to do with damaged electronic parts. Shack looks good also. Keel up the good work.
Best regards
Terry J. Miami, Fl.
I would love to see some train stations that people have made. I have built power poles similar to what you have except I took gold fish hook and cut off the eye of the hook and press them into aspen boards to allow line to run through the fish lines. I did four hooks (two on each side of the pole. It worked really well. Oh by the way I did keep part of the wire along with the eye of the hook for the power lines to go through.
Really liking the Popsicle Log Cabin, wicked. Also admiring the enginuity of the Power Poles. Great tips, keep them coming.
Kind regards.
John
Please take it to heart asbestos is real be very aware. So any way I now have 4’x8′ table 1st level is 22* radi with figure 8 & crossovers to two circles or 1 full circle 2nd level is 2 full sets one 22* & one 18*3ed level is 22* elevated on wooden tressels one full circle & one passing or holding 10 car. This is set # 5-6. now I have A round house & 20 more switches new set? We will see but for now while I recuperate I read your tips most of witch can be found on my set and build model trains ( very nice model trains fairly good price $15-$20) they are from tichy train group.com. Just finished my second 120 ton steam wrecking crane & I’m impressed. Just thought I would share this I love it by the way between your tips & ebay I’m ruined good work RED
for you all take notice of jeffs comments about asbestos it is all for real thanks jeff john A
Have some of the old O gauge log loaders, coal loaders and unloads, they require allot of space, barrel loaders, etc etc. Bought many years ago, getting back into train hobby, which meant empting out the attic. Anyone out there have set ups with O gauge, can you give me info on sizes on houses and size of people and cars etc.
Bumper
Concerning the insulators on the power poles, what is being used to make the insulators.
Hi
Could anyone tell me what can be substituted for Realistic Water which is too expensive for my large layout. I have seen plastic casting used for embedding objects in plastic but would also be too expensive. I am living on a fixed budget. Thanks
Dennis
What gauge wire is best for the main electrical and branch line? Is it better to use solid or stranded wire? Thanks