John’s been in touch again – this time with his EZ track layout:
“Hello Al,
John from Topaz Ranch, Nevada here. Used to be John from California.
How to begin this…
“I solemnly swear I am up to not good.”.
Here is the Marauder’s Map of what is going on right now.
In 1995 I built a small layout for my son and I to play with. The layout fit between the fireplace and a sliding door that was the primary entrance to our house at the time.
Bachmann’s EZ Track was new at the time and it looked like it might be more resilient to the not so subtle ministrations of a four year old boy than Peco track had proved to be.
The layout was as simple as it was small.
It survived a little over 10 years and the track even survived my young daughter climbing on it several times. Sadly it was that last activity that destroyed everything but the track.
Around 2018 I began to really miss “Williams” (the name I gave that layout). I also was considering writing a book on EZ Track and small layouts at the time.
After I lost my wife in January of 2020, I really had space to resurrect Williams but… It was later on that I purchased a board to build it on.
Alas I could not find where I had stored my stash of EZ Track. I tried using some Atlas track but it just did not feel or look right.
While moving, I found the EZ Track and on March 5 the reconstruction began.
On the original Williams I was mildly frustrated by the lack of a fiddle track or any possibility of expanding the layout.
In this rebuild I made some minor changes that resolved that issue. I like what I have chosen to do — A choice made to keep the original footprint of 3.5 feet by 5.5 feet.
Had I been willing to add a little to the length (say six inches) I might have made a different choice for the “escape” tracks.
I am calling my new layout Wellington after the nearest town with a name that sounds like a railroad might have served it.
Another change is that while the original Williams layout used all commercial structures, every structure in Wellington will be scratchbuilt by modifying paper kits — Some from the 1950’s!
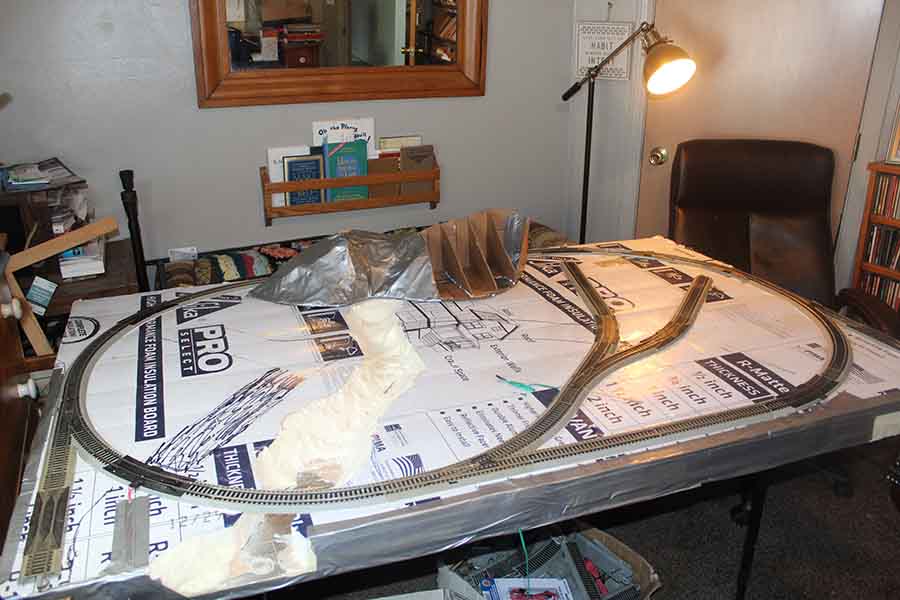
Here is a photo or two of the track had I built it exactly as I built the original.
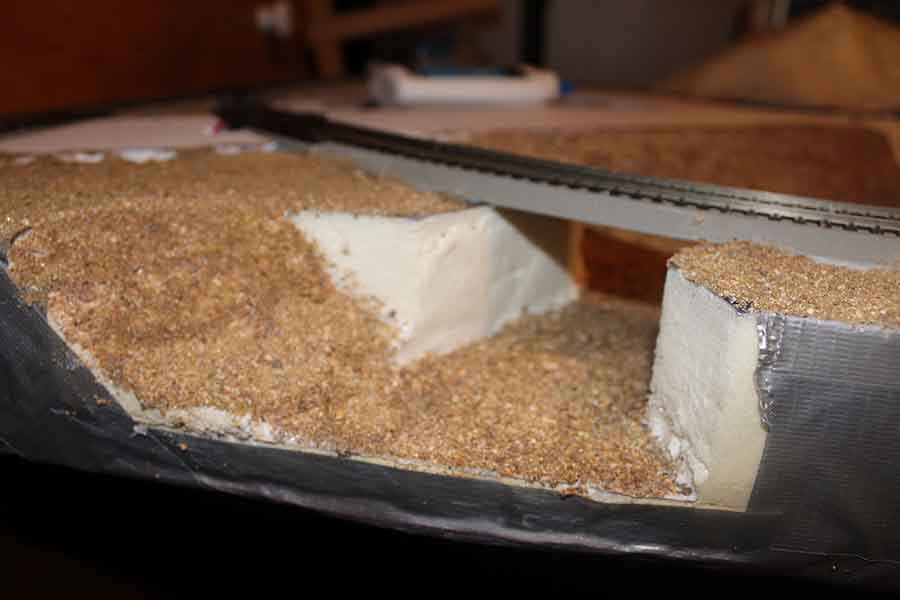
The original Williams layout was framed with foamcore paper board hot glued together.
That frame was solid enough but I made an even more solid choice this time, rigid insulation foam.
In both cases keeping the layout light was a significant goal. Wellington is light enough to rest on an inexpensive fold up table (2×4 feet).
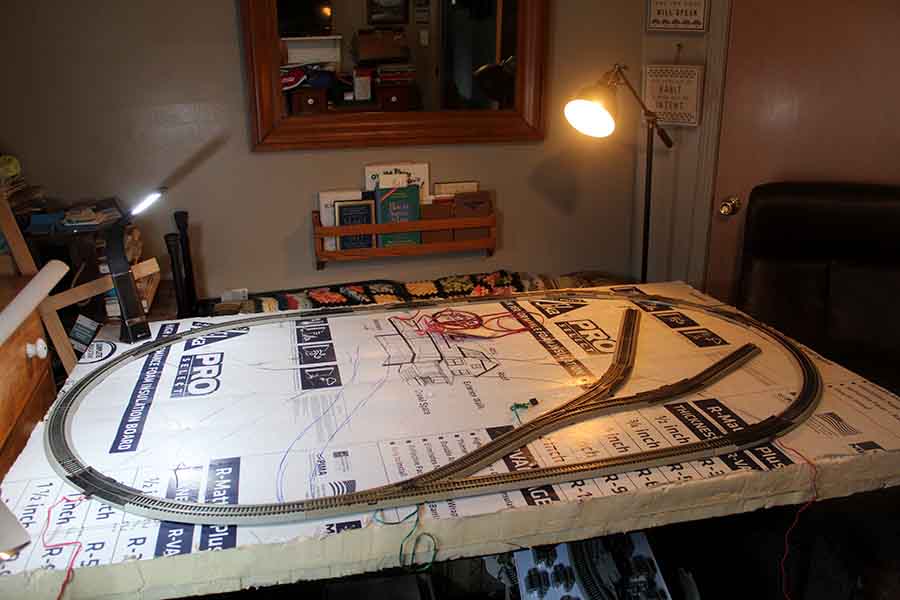
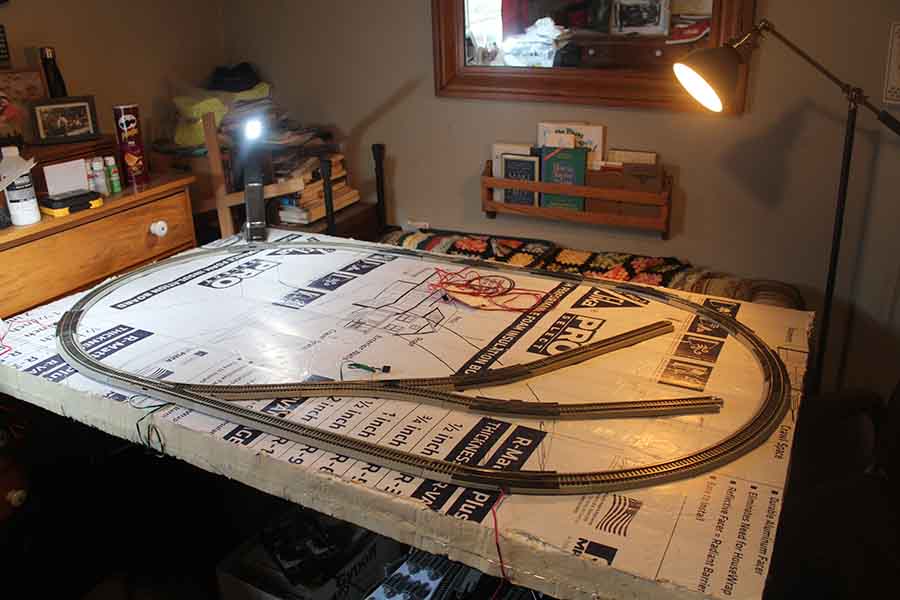
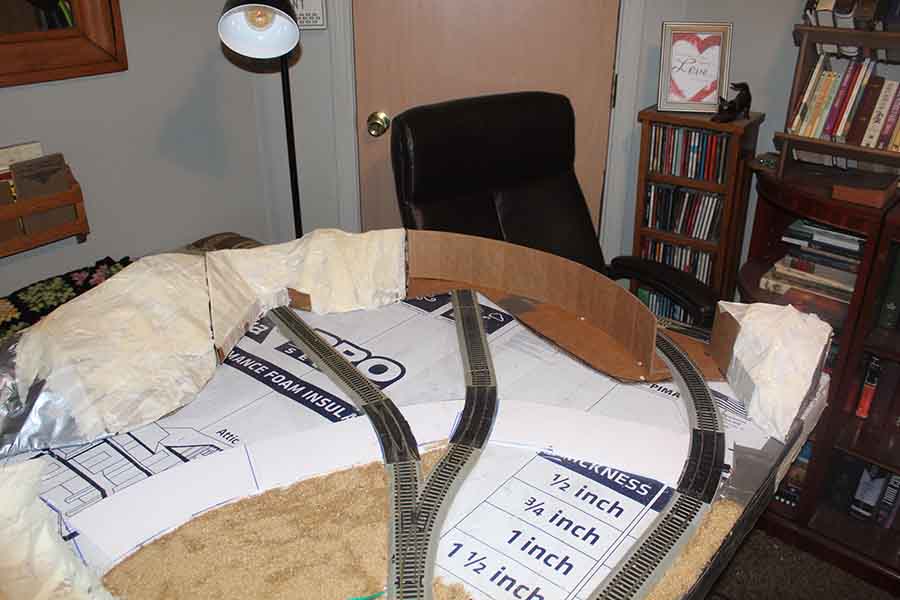
Here are some photos of the revised track plan.
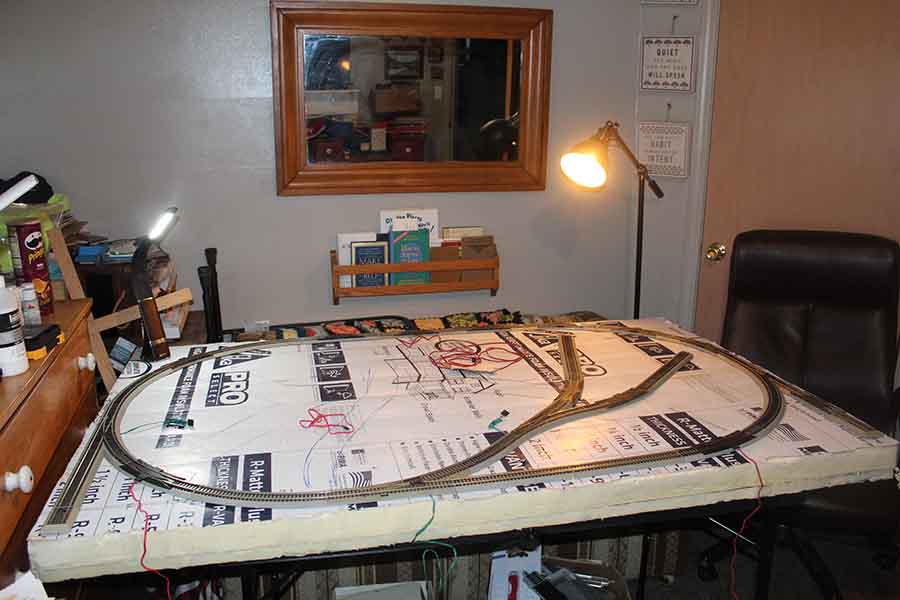
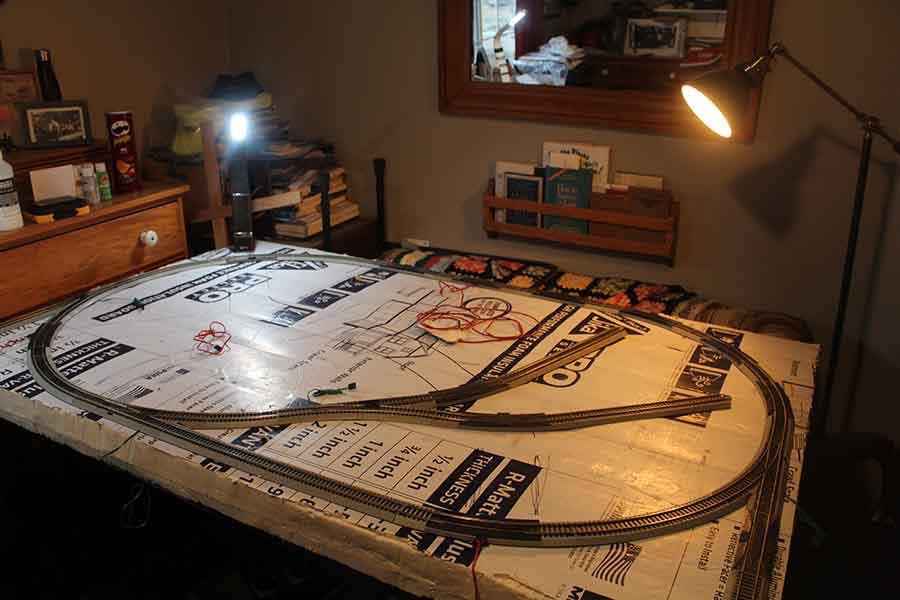
In building Wellington, all the track ins secured with full strength white glue.
The glue was applied to the edges of the EZ Track and the track was weighed down for 12 hours before the weights were removed.
The track is secure, very secure. In the past I have used hot glue to secure the EZ Track, this actually worked better.
One issue came up with the EZ Track and it deserves mention here.
One must always be careful when assembling track to make sure the joiners are properly on both rails.
This is true with everything but Kato Unitrack. It is good to check with a finger to make sure that there is no bump on either rail at the joint.
A challenge with EZ Track is that the plastic snaps like to engage before one has got the rail joiners properly aligned.
This snap action can make it easy to have a joint where the joiner went under the rail — very bad and a source of derailments always.
In my case, at one joint one joiner went properly on the outside of the rail where it looked correct, the problem was that on the inside of that same joint the joiner went under the rail and that miss was hard to see.
Worse was that running a finger over the joint did not reveal the misaligned joiner. Yes, a derailment occurred at this joint but not any other. Quick work with a single edge razor blade and a small, sharp, chisel solved the problem.
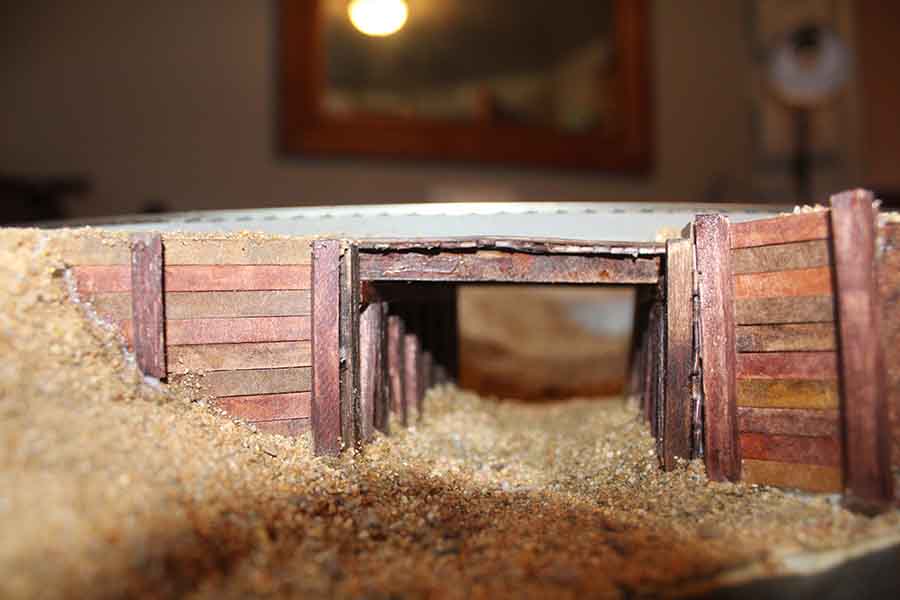
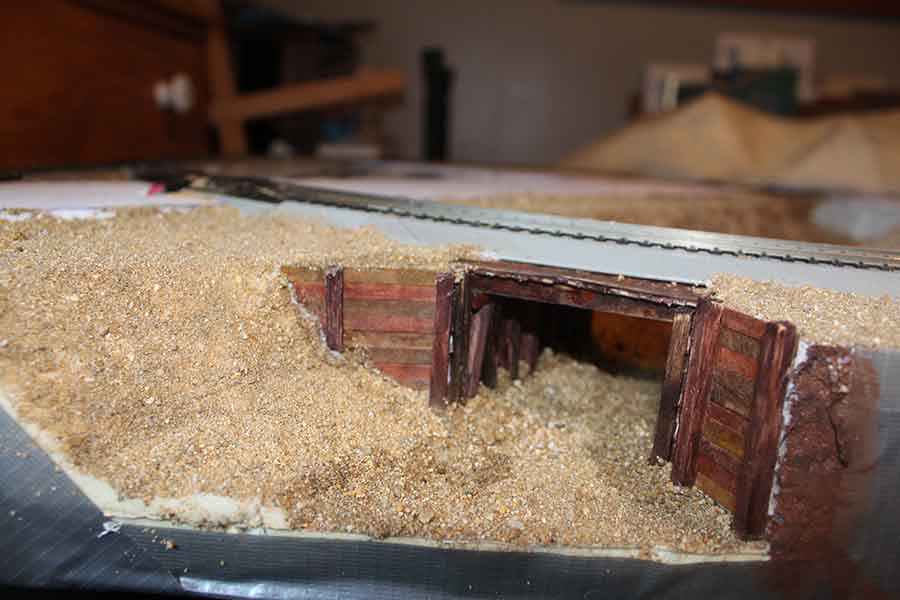
When building a small “roundy round” layout, if one can see the train for the full circuit then the illusion that the train goes somewhere is lost.
I solved this problem with a view block and tunnel on the original Williams.
I am using the same “trick” here on my Wellington layout.

On scene that I liked on my original Williams layout was a little creek that separated the town from the “business district”.
For a bridge over the creek I used two girders from a commercial kit — I think it was supposed to be a flat car load.
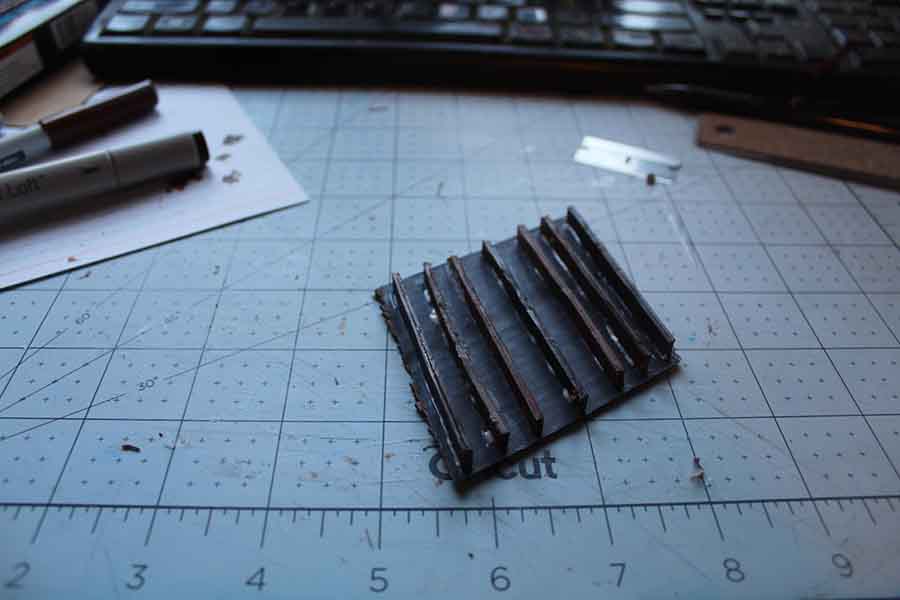
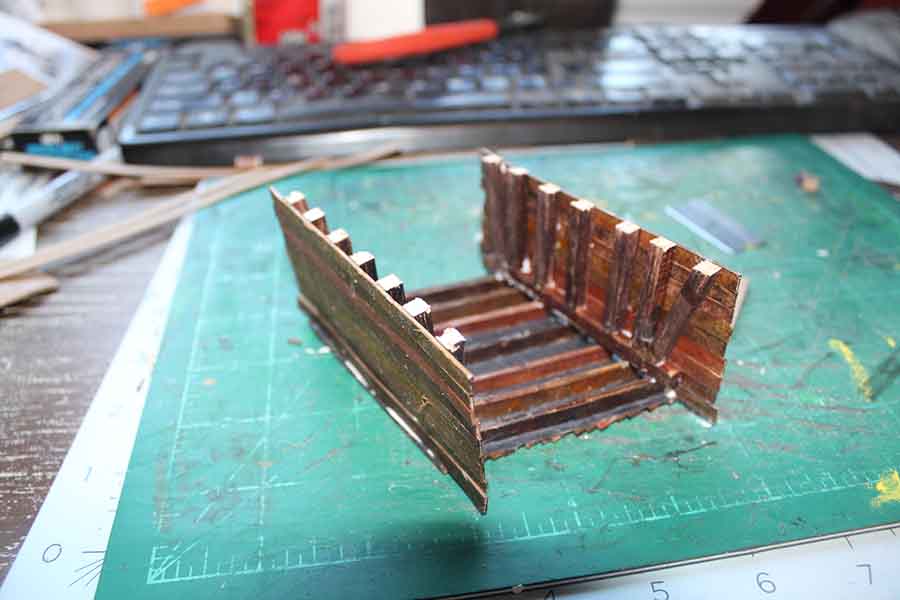
For Wellington I have kept the creek but scratchbuilt a little bridge or trestle for the track to cross it.. My bridge was built from card and a little balsa, mostly from card though.
Here are some photos to see the construction. The bridge had an unplanned skew in the creek so that made things a bit more interesting for the build.
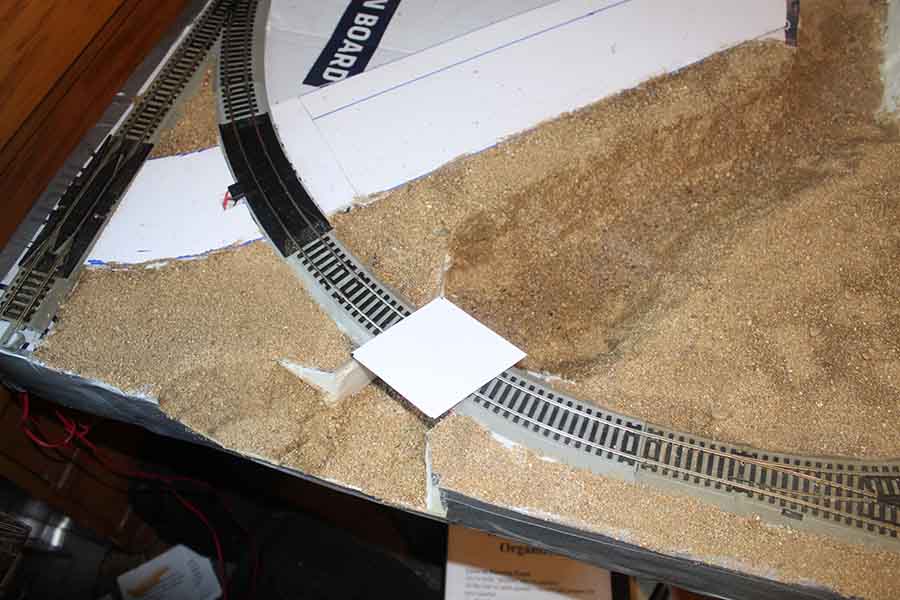
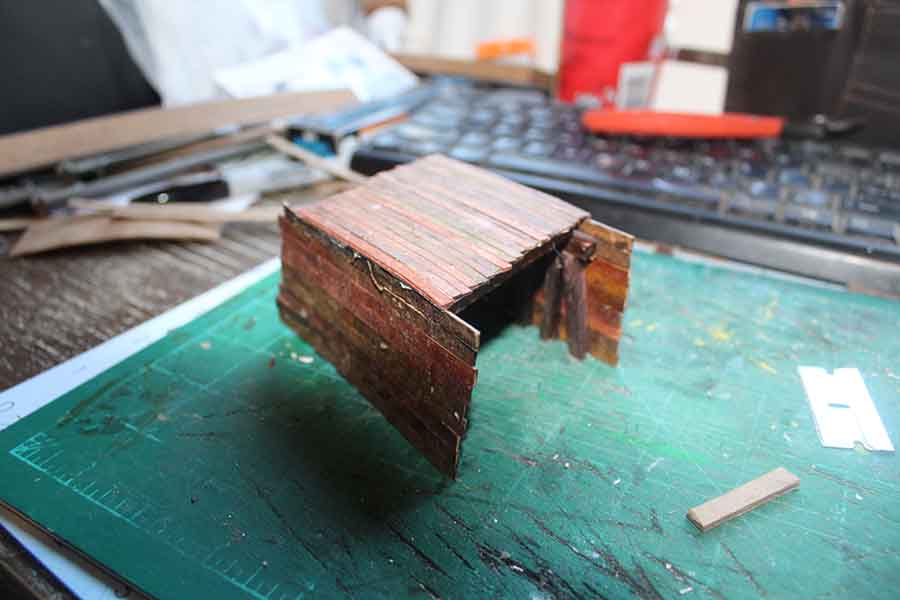
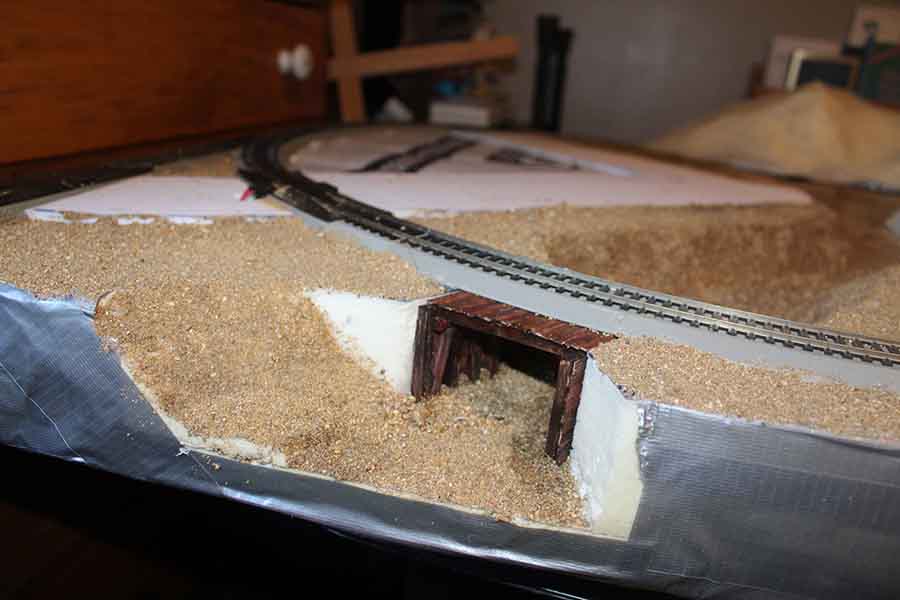
Here is my little bridge in place.
This is the visible side, there is still a little work to be done on the back side and that will happen soon enough.
“Mischief Managed”
And the Marauders Map now looks like a blank parchment again.
All the best…
John Reynolds
TRE Nevada”
A huge big thanks to John – I absolutely love his stuff.
Please do leave a comment below.
That’s all for today folks.
Please do keep ’em coming.
And if today is the day you get started on your layout, the Beginner’s Guide is here.
Best
Al
PS More HO scale train layouts here if that’s your thing.
Need buildings for your layout? Have a look at the Silly Discount bundle.

I am guessing the the layout is HO scale. I really like the bridge. You did a great job with it. Is the layout DC or DCC? By chance, do you plan to extend the layout to a second base using the tracks on the edges of the layout?
Thanks again for your construction tips!
Al, please have more articles on how to really accomplish a couple different reverse loops in DCC. Enjoy your site immensely !!!
Wow looks good
What a wonderful story! So sorry about your wife but I like that you are resurrecting a layout, and using EZ Track that is bringing back the time when your kids were younger.
It also shows every part of a layout (like the track) does not always have to be built from scratch. It’s about setting up and having fun and enjoyment with it, and memories I’m sure.
Wonderful!
I agree with Larry’s comment on loops. Reverse loops seem to be formed in most plans I have developed on AnyRails, not sure how much knowledge I have yet to take that on. Plans are being designed in smaller expansion sections to avoid getting to big to soon and allows me to learn as I progress on a smaller dioramas. Guess the one thing that I have not been able to understand is when additional lines and siding lines enter a reverse loop. What effect do they cause and how to wire them. Would love to see layouts that help explain. Truly enjoy your site and daily post, they keep me motivated to keep planning and studying before I finally start benchwork.
Great going on the new layout. I specially like your keep-it-simple approach avoiding tunnels and elaborate bridges. This of itself can bring many hours of enjoyable railroading. Sometimes elements look nice but bring a high cost to track cleaning maintenance in my opinion. I perceive a simple visual blind such as the one you have created can accomplish the same as a tunnel. A deck type trestle achieved the goal of crossing the water way.
Interesting. Has me rethinking the 2×8 ft shelf layout in the utility room.
Thanks.
A few answers…
To answer Ross Herbert;’s questions;
The layout is HO scale.
While the layout can be run DC or DCC, most of my equipment is old school DC,
The tracks to the edges are so that I can put a ” fiddle yard” on either or both sides although they could also be used to expand the layout if I so desired. The original “Williams” layout of 25 years ago did not have these tracks and that was a frustration albeit a minor one with the original.
To David L.
While I am constructing a tunnel for the left hand side, the tunnel will be removable and cover just enough to help with the illusions. This simple visual blind is effective to a point, that point is that one curve needs to be hidden better than the simple blind can accomplish by itself.
As to wyes and reversing loops — Those are on my ride on sized railroad. I will be posting on that soon also.
John, thanks so much for your post. I’m a beginner working on my first layout. I’m building it in N-scale on a 3 1/2′ X 4′ plywood base. I’m also using Bachman E-Z track and there are a number of similarities with your layout. You’ve also got me thinking about some tweaks I may decide to include in my plan. Jerry H
PS: I have Al’s e-book on creating a breathtaking model railroad for the complete beginner. Thanks, Al. I’m finding your book very helpful.
Al,
I had a “round-the-room” (10’x12’) layout. I used “Homosote” as the “base”. It was certainly heavier than your “Foamcore” base. It had very good holding power ”gription” as my then toddler-son calledit for securing the track.
That layout with continuous “overhead lighting” had to be sacrificed because of the early tall desktop CPU’s. Our current laptops solved that problem but the round-the-room concept has been abandoned. (Ducking under it at the doorway certainly an issue for an octogenarian.)
The revised plan (evolving) is “L” shaped. It will accommodate the doorway and a couple desks that have laid claim to some space.
Part of the new layout will acknowledge my father’s early home above the GTW depot of which his father was the station master.
Happy railroading to all!
Nothing wrong here, take your time. Like the bridge/overpass in particular, real one like that over to New Ghlouster (sp?) until a few decades back. Would drive over extra fast to really spring and slap the boards. Go slow, probably would have collapsed the bridge (road-runner days). Structure is right creosote color, bracing and angle cut support timbers. Could not do better myself…
R, Rich
I agree with the joiner problems. I always seem to miss one
joint. Finger is a good choice or take a car over the rails
by hand to detect a fault
Hey John, your layout is simple but unique. I’m certain once it’s complete it will give you many hours of enjoyment. Can’t wait to see more photos. I love the bridge. You have it colored so that it looks like old aged wooden beams. That’s the cool thing about this hobby, you might have an idea of how you think it should look, then when you put it together it looks much better than anticipated. Great job!
Topaz Ranch John:
Now that you have enticed us with a wonderful narrative we expect updates. You started out that you’d be “up to not good” and we havent seen that yet so further commique from you will be mandatory.
😊
Forge ahead with vigor and lets see those puppies running.
Big Al
Top of the morning Mate! Making 3D printed junk to scatter about what hopefully will be built this year-what fun!
Thanks for the hard work.
Great job John very nice. I like the bridge design, it’s different than other bridge designs which makes it interesting and great.
nice setup & the right size to start with
John, I really enjoyed reading your post and seeing your photos. You’ve shown that a lot of fun can be had with a fairly simple layout. It also gives one a chance to develop all those layout building skills, An oval of Bachmann EZ-Track and a little DCC engine is what revived my interest in model railroading several years ago. It gave me a place to run all those old locomotives that had set in boxes for the last 20 years. Now I have three different small layouts under construction. Keep up the “no good” work and please post more photos and text as your layout progresses. Thank you for sharing!
P.S: If I lived in Topaz Nevada, I think I would have named the layout the “Topaz and Tonopah RR.” 🙂
John! I loved your narrative and your “Wellington” layout. Great work Neveda! Cheers Rossco Adelaide, South Australia.
very nice work.
Nice layout.
My last layout was EZ Track and I could never get the turnouts to work properly. The trains would always split the points.
E-Z Track is a great way to learn and to build a basic layout. I’ve used the system to create a simple layout under our Christmas tree. My dad always built one for Christmas, O gauge and then HO. I continued his tradition for my children and my grandchildren when they come to visit. Easy to build and easy to take down. Your scenery is looking good, especially that wooden trestle. Thanks for sharing.
Jim AZ
Your plan – with 2 extension arms – it terrific!
I REALLY LOVE your detailed description, including comments on WHY you changed or preferred certain ways of doing things, etc.
THANKS for taking the time to present such detail and great photos!!
Hey John nice job in such a small space. Your concept of view blocking and creating the sense of the train going somewhere is spot on. In that “train” of thought might I suggest (as I always do) that you incorporate the edges of your empire into the scenery by removing the duct tape and extending the scenery over the side with retaining walls, rock sculptures, hanging moss, or something clever to draw your eye into the world beyond. IMHO the hard stop created by the silver duct tape detracts from the overall picture you are painting. Nothing personal about this suggestion, I am always advocating for better treatments on the fascia (edges) of every layout on this platform. Cheers!
Great job on the Small Space Layout. I’m planning. It looks right up my alley, except I won’t copy it exactly…lol!
A nice start even though it is a bit small. He might be better off with N scale.