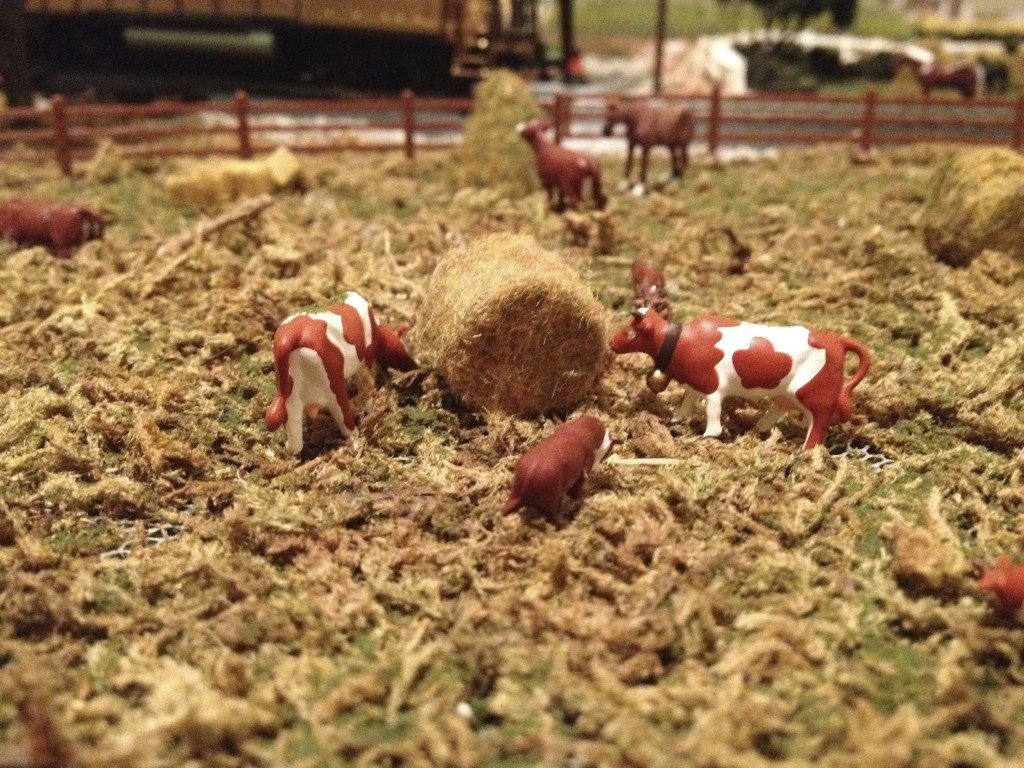
Michael has been in touch again, with some HO scale bails of hay.
(If you missed his last post, it’s here: HO scale L shaped layout.
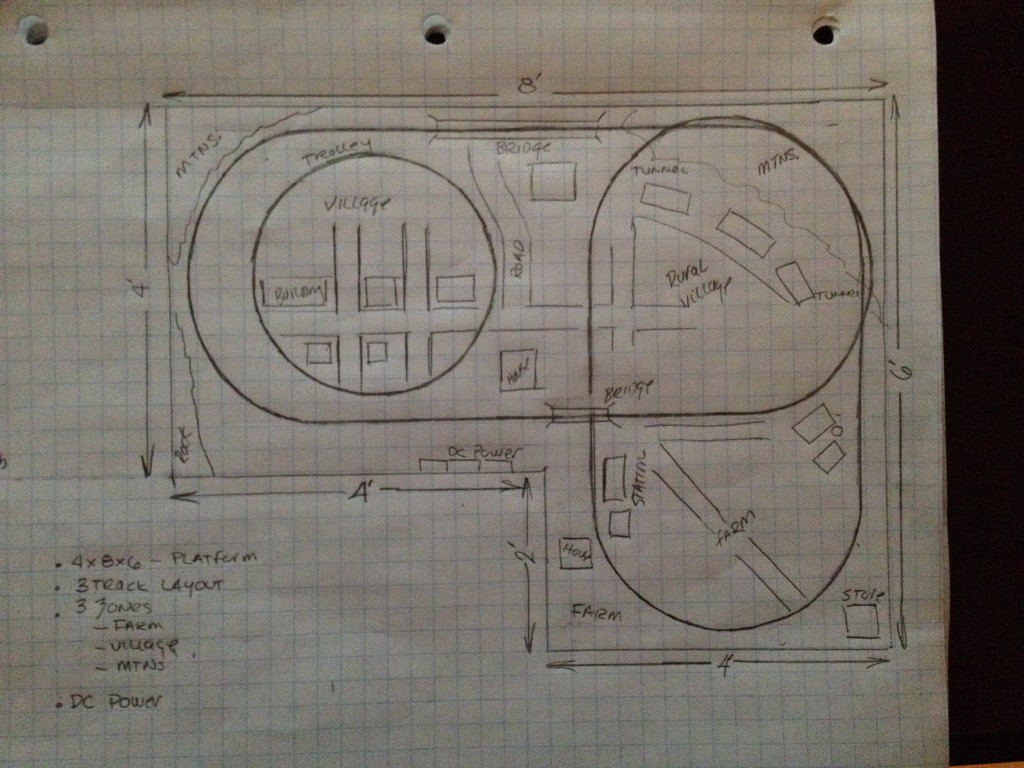
Quite a few of you were keen to see his layout plan, and he’s obliged. Same goes for those hay stacks too.
“Al, Thanks for posting my work.
I have some comments on the questions I received.
The hay bales are from a kit I purchases on amazon but after iI saw it I could have done it with some common materials. The kit I bought had plastic pieces I painted with glue and sprinkled static grass on it. Very realist. If I were to do it again I would skip the plastic pieces and use balsa wood or small wooden dowels painted and the use the glue and static grass. probably cost the same.
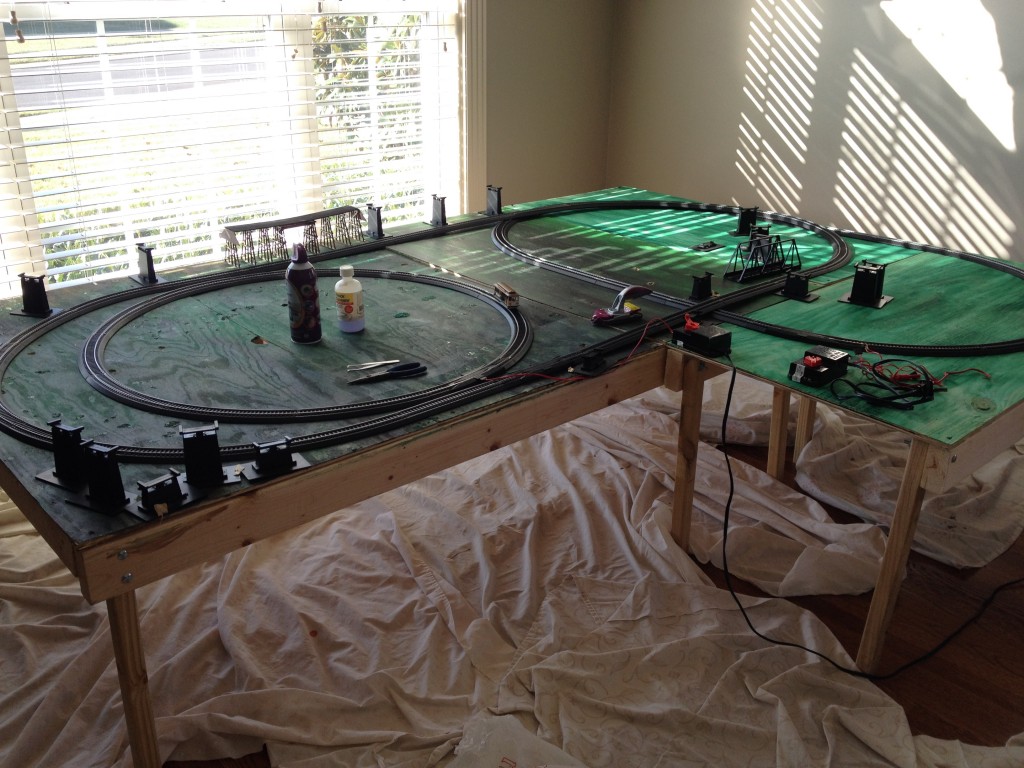
I have include some pictures of the layout before I built the details.
Michael”
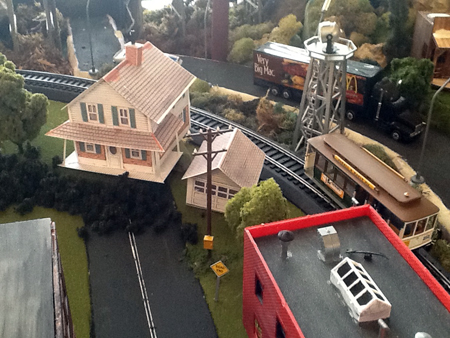
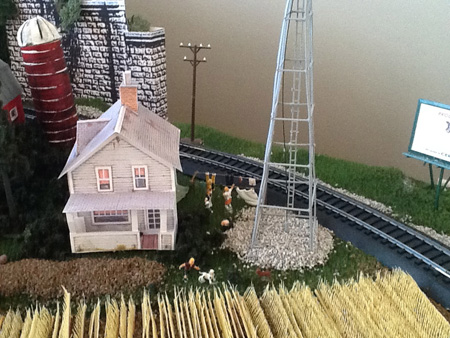
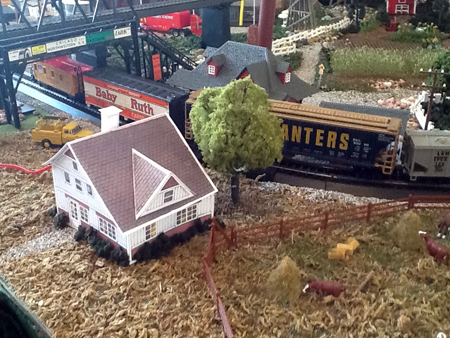
The houses are made from the ones you print out, and stick together (just click on the link at the bottom of this page to see them).
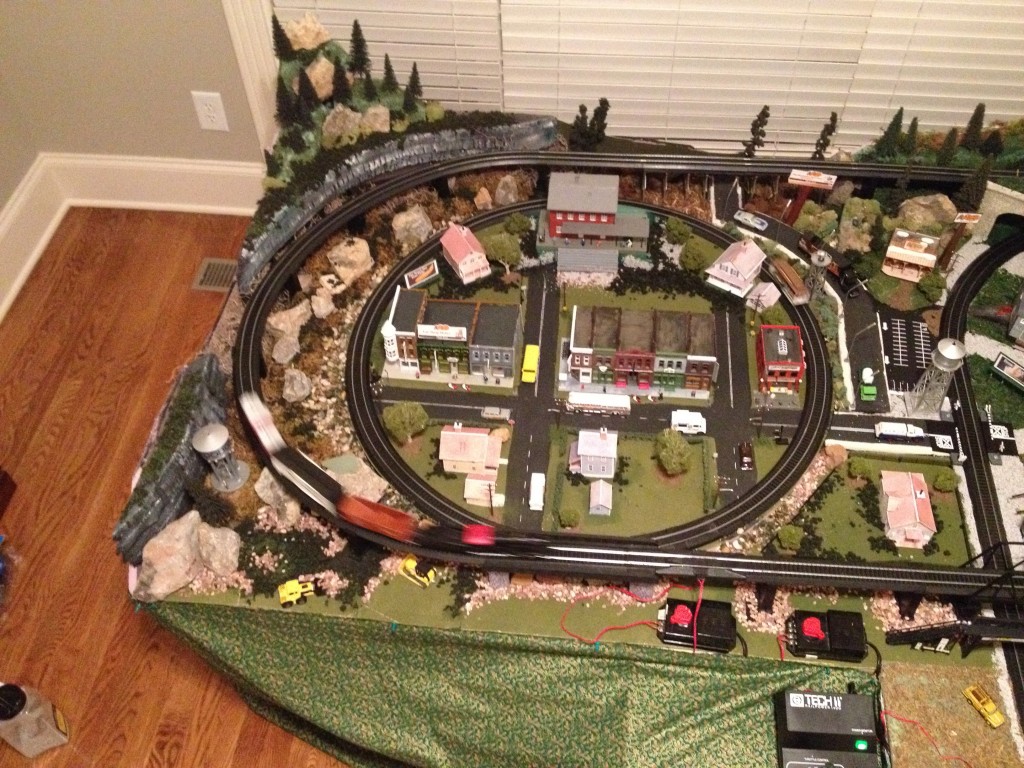
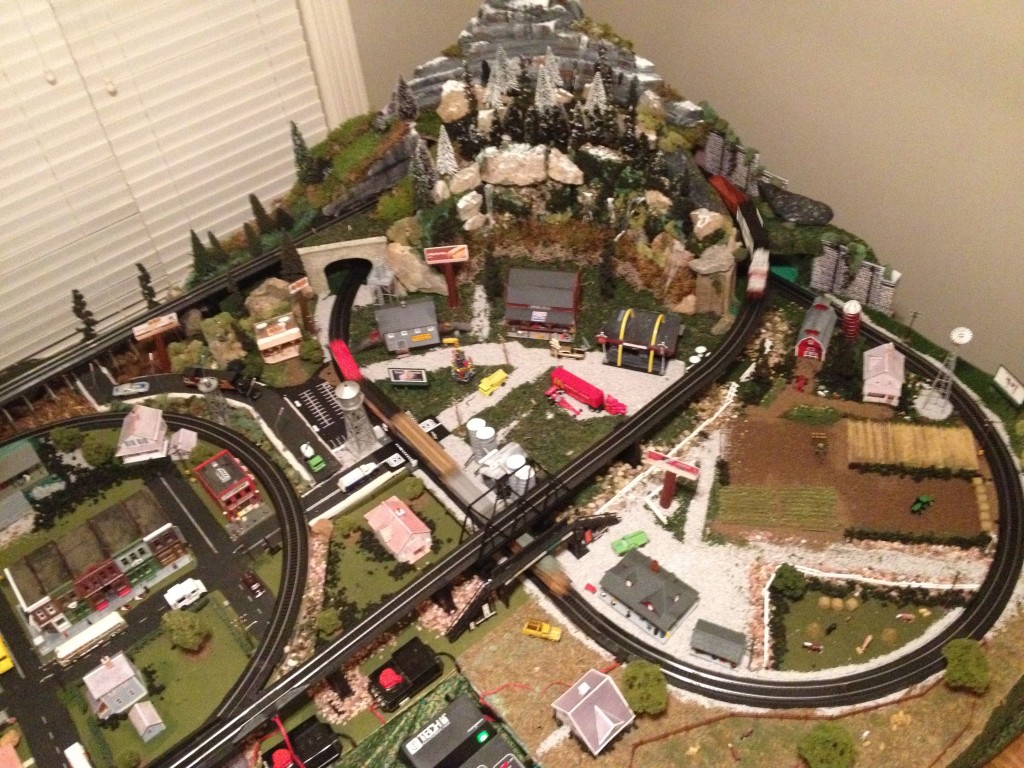
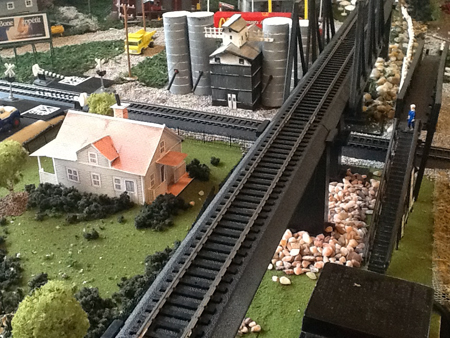
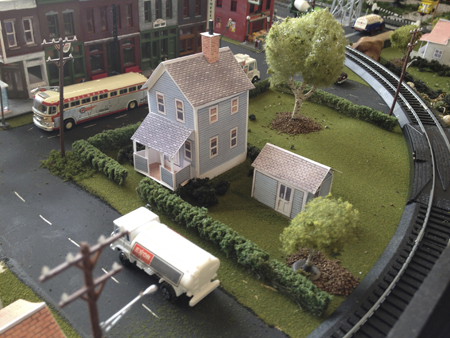
He’s done a great job on them and sent in these pics:
It was the buildings that interested me most about Michael’s layout.
Michael’s layout reminded me of Paul’s: Making HO scale hay bales.
If you’d like to try your hand and making some of the printable buildings, you can get a whole bundle of them here, for just $29.
And lastly, Dangerous Dave has been in touch with his latest update.
“Hi Al , just uploaded the last in the series of My New Model Railway, and half way through there is a surprise visitor.
Regards
Dave”
That’s your lot for today. A big thank to Michael for sharing his HO scale bails of hay, and to Dave too.
Please do keep ’em coming and keep me busy. I enjoy them as much as you do.
And if today is the day you grab the bull by the horns, the Beginner’s Guide is here.
Best
Al
PS More HO scale train layouts here if that’s your thing.
Need buildings for your layout? Have a look at the Silly Discount bundle.

Dave,
Do I hear a Halifax accent? Do hope so as that’s where I was born and brought up.
Not far out Ian , was born and bred in Huddersfield , but live at Bridlington now
Dave,
Have you considered a short video showing how to construct one of your print houses?
Are you recommending paper card stock, or that thin styrene material that printers use for some signs?
Jim , the paper print stock are on Al`s site and not from my layout , but should think they are relatively easy to do
Jim, The houses were printed matte finish photo paper. Easy to work with, rigid enough to hold up and the colors look great on the photo paper.
Al:
Never enjoyed anyone’s videos as I do yours. I have been modeling for over 50 years and still learned a lot from you, so please continue to post them. I noticed that you did not balast any of your track are you going to in the future? Love the fact that you were able to use the top of your home for the railroad and with no windows the “evening hours” under the railroad lights is easy to do. In Texas the top of our houses even in the winter is still 28C and in the summer 40C is easy to reach. Anyone say melted plastic equiptment, let alone operator!
Happy Railroading!
wow very nice work.Im thinking of coping those card board homes.But make them from balsawood.Really nice work love it.thanks tons.
Really nice layout
Dave, I think you deserve a medal for all of the techniques you have tried and maybe a complete set of instructional dvds would help you to recoup just a little of the moneys you have laid out, congratulations mate.
Hi Al yet again some lovely work.
To Dave you have done a fantastic layout. What is next?
As others have said we all lern so much from you vidieos. Many thanks from us all for showing so many of your tips.
Barry
A wonderful layout Dave, I have enjoyed all of the videos for this and all the rest you have done. A true genius and it has been a joy to watch you and learn from you, thanks for sharing and being an inspiration.
Peter
Kim, I’ve done a few balsa wood buildings also. The paper buildings are very easy to build and are nice to add a lot do detail to your layout without a lot of cost.
Very cool layout. Thanks for sharing.
Dave’s layout is really amazing. All that was accomplished in about 4 months. peopel work years to get even close.
How can I receive the advertised paper buildings products on US letter size versus the European A4 size?
Thank you.
John
Great series Dave!
Thanks again Mike for the update reference hay bails. For the track plan and additional pictures of your layout. What a wonderful model railroad you have.
Dave thanks again for the video on a work of art.
Thanks All for sharing with us.
Thanks Al for bringing it to us.
best regards,
Tom
neat work
Hi Michael
all i can say is one word .”AWSOME”thanks for posting
cheers
Albert
hello dave ( and the gingerbread man!!)
this has been a great experience for me to see all this happen i feel as though ive been part of it its turned out so well and the night shots are brilliant hope you have as much fun with the layout as i have had watching it grow
cheers
Albert
Michael,
Nice layout in a small footprint! Some of your rolling stock look like ones I’ve had since the 1970’s! Someday, and if I ever fund the room, I’ll get my trains out and build a layout.
Cheers! Ken
That layout looks familliar Michael.
Its not one you see very often, I have used the folded figure eight for my own layout except the high and low parts are the opposite way around. The advantage I have found with this format is the improved access to the centre of the layout.
Thanks for the updates , nice layout, like the buildings.
Both layouts look great. You guys are an inspiration to the rest of us.
Keep the photies videos coming.
Willie
Love to see them Mike.I tried doing cardboard homes.Im so bad at it.You would think it be easy.Seems to be for most but mine once built should be burned or tore down right after.But give me some wood and im like a bloody beaver.wait im Canadian. I been working on green houses made from popsicle sticks I think will grab you guys.I have already started two more.Truthfuly I got the idea from one of the memebers on here to make them.thanks
Dave – Your layouts and changes to them are just great and very inspirational to us RR modelers. One minor suggestion for your layout when you are almost finished; add a neutral color cloth valence around the inside area to hide all the important stuff you have under the tables. You could easily tack the material up under the wooden trim. Keep up the great work.
Thank you al for comments , and yes Robert I shall have to add a Valance as you say it needs hiding under there .
If mine turns out faif as good as yours I will very happy well done you did good Dave.
One word Dave – magnificent! You should be very proud of what you have achieved. Keep the videos coming – you inspire us all!
great layout Michael the scenery has taken a lot of work and looks good. i like the 3 loop setup, having 3 trains going at the one time would look great
especially if there is a night scene.would like to see more pictures. I cant believe it only took 4 months to rebuild your layout i have been 2 years on mine and it is only a third of the size. your videos have certainly kept me interested in model trains Dave, as well as this web site what other people are doing is just fantastic please keep it going.
Hi Dave can you tell me what the measurements of the layout is and the room in which the layout is in.Just curious would like to get my stuff set up and just looking for idea’s.Thank you Dwayne
Hi Dave i also meant to tell you your layout is Awesome!!I hope one day mine will look half as good as yours!!Thanks Dwayne
VERY VERY NICE.
I am Happy to see a track layout with this tip. I think sense the photos are very well done that to get a better idea of the layout that all the tips should show the track plan. It don’t need to be detailed just good enough to show how the photos tie in to the track plan. Thaks Tony
Michael,
Firstly may i say what an excellent job you’ve done on your layout – I can only dream of such a high quality finish. For your consideration I offer the following. I am a cattle farmer & I harvest & feed-out 5 foot round bales of hay to my cattle. I would never feed-out a bale laying on its side, always on its end. This allows the bale to be surrounded by a steel or poly feeder frame. Cattle have no understanding of the concepts of fodder conservation vs waste & left to their own ‘judgement’ would have your round bale pulled to bits & scattered around the paddock, trampling & fouling it & wasting all but a few mouth-fulls. Hay costs quite a bit to cut, rake, bale, wrap, store & eventually feed-out & this would be as irritating to any farmer as the mis-placed apostrophe is to a bona fide grammar nazi. If you do a search for ’round bale feeder’ images, you’ll see what I mean. Incidentally, you’ve got it right where you store the bales on their sides. The way balers work is to build the bale from the centre with the grass laying flat & mostly in the same direction, around the bale, Stored on its side, rainwater runs off & after several months in the weather without cover, only a thin outer layer is spoiled. Stored on their ends, water would penetrate the entire bale & spoil most of the hay. Cheers.
Now the re-modelling of Dangerous Dave’s layout seems almost complete I must add my congratulations to all those who have found this inspirational. Thank you Dave. I hope there is more to come on the operational aspects of this superb model/ representation of the era.
Greetings, Al:
For some reason unknown to me, the last 2-3 videos from Dave have been just a black blank rectangle without a white triangle in the middle to activate the video. I am stumped and would love to see Dave’s progress and skills. Thank you.
Very clever modeling.
Dave.
The rapidity in which you can work and achieve such magnificent results…
Astounding… Amazing even (to quote Snagglepuss) Well done indeed!
There is no much I can add that my fellow Railway Enthusiasts have not already expressed before me to praise your wonderful work! so I just want to say a Big, Big “Thank You” for sharing your wonderful project with all of us!, you are a true inspiration and watching your work is just such an enjoyment! As I am fortunate to live in an older Victorian house with a similar loft space, you have inspired me to “relocate” my layout there so please keep sharing your wonderful work and humour! It makes the hobby even more enjoyable, Thank God for the Internet!
Fernando Serra, one of your Spanish followers
That is Great! I like seeing plans and the evolution of your idea!
Awesome!!!
Dave: So glad to see that you have concluded this series of your Attic Train Adventure. I now suppose you have much more to do to this layout that you do NOT wish to share. BUT- You said you were working on your canal exit to insure your gondolas /and/or barges can make the turns realistically…..show us that work-if you please. You have added scenery with trees, people, cars, bicycles etc. What governs how and where you place those items? You also added many lights ie signals etc…what do they run off of DC/AC or DCC transformers? By having an additional “Update” on “How To” depicting the aforementioned I personally will have it all from A to Z based on your facts. Thx for any and all of your guidance. Harold Jr.
PS: I do love your work and ability to adjust ALL areas of Model Railroading.
where was how to build the bales of hay , can that be reposted I cant find it till I foward to some else, thanks dan o
Is there a CAD program available gor HO train layouts?
There are several CAD type programs for creating HO train layouts. I used SCARM to create a visual of my layout. First of all, it is fairly easy to learn. Second, it is versatile – it lists turnouts by brand and radius, it allows me to use flexible track and bend it to my needs, or you can use different lengths of fixed radii and lengths of straight track. I created overpasses and tunnels. With patience, you can specify elevations wherever track sections join.
Start by specifying the overall dimensions of your baseboard. Next, add lengths of track where you want it, attaching the next section to the end of the first. Curve flexible track. Cut off the end of length of flexible track and insert a turnout.
When you are ready, one click and you can see a 3D view of your layout. If you want, you can create 3D buildings.
I printed out my track plan, mounted it under a piece of thin plastic, drilled holes in it and installed switches to control my turnouts.
Give SCARM a try – it’s free!
Keep on training,
Carl in Kansas
Love the overhead shot. Been waiting a long time for someone to finally do that. Table top shots are fine as far as they go, but the “bird’s eye view” puts everything in better perspective: Makes the over all layout understandable and how it all fits together.
And the diagram on graph paper is a bonus.
YO Michael, if your town ever has a tremmer or small quake the buildings to the right are doomed. Just say n lol. great layout.
Hi Al
This looks a great layout, I have never answered a querybefore so here goes.
To make round hay bales all you need is a small roll of sellotape and some string.
If my memory serves me right its about 21 inch length of sellotape fix it down to a table sticky side up.
cut the lengths of the string in very short pieces and scatter them onto the sellotape. Press it down to make sure it is stuck, and then start rolling the sellotape up keeping the tape side innermost.
when it is rolled up tight a spot of glue on the end of the tape will hold it all together.
and there it is a hay bale
Very easy and very little cost will make you all you will need.
Thanks Al been reading your emails for years very good tips so I felt i should join in.
Keep the good information coming
Ian
I really enjoy your layout Michael! It sort of takes me back to the 1970’s with the Planters and Baby Ruth cars – Are those old Tyco models? (I think I may still have those myself pack away).
The night light scenes bring Dave’s layout into a whole new dimension. Really does make it come alive. Lots of work on this layout, but you have a world wide body of eager students, watching , trying, learning. Dave, you are an inspiration to us all! Thanks.
Kathe & Frank, Miami, FL
Really like the L shaped layout. When/if I do start one I would make one change. Instead of a circular run I would put in a round house. There was an old saying, maybe a song ” Head for the round house Nellie, they can’t corner you there”. Just showing my age.
Michael, thanks for the info on the hay bales. I was hoping to see it in the original post.
as a lover of model trains, it would seem the hobby has become more of the miniature development of scenery than the trains themselves. just a view from my hanger. Dick Sherman
Pretty Kool.!!!! I hope mine turns out that good.
One comment on Michael’s field with cows and a hog in it – the “grass” is too high for that size animals. The animals would have eaten the grass and weeds down to fetlock length at the highest. This field is made of material that’s for a much larger gauge railroad. I think a very low growing moss would work better here. Otherwise, everything looks great.
Michael, your track plan has helped me solve my layout problem. Thank you.
David
I have a question.How do you get old glue off of a structure?I would be very thankful if some one can tell me if there is a way to do this.
Kool Layout?
Mike……great layout…….the farm is the best I have seen.
Dangerous Dave……your layout is the best…….love the night scene.
That is a much better look at your layout than your last post was. I really like it. It’s compact and scenic. Keep up the good work. Can you tell me what size radius you used? From the looks of the size of the platform compared to the radius it looks like 18″ radius. Thank you for a better look. Rocco from Haskell, N.J..
To Michael, Loved all the work done. I have a question and that is what are you growing in your field near the farm house.It looks like corn if this is correct what is it made from.I am interested in how how it is made.
Fred Melbourne Australia
Hi Dave, great photos of your layout and and excellent video as always.
All the best.
Brian – the HOn3 guy in Knysna RSA
dave looks so great you must have started when you were 10 yrs old ypu should have black and white pics great work
Michael
Love your layout. It just amazes me how you guys plan these layouts-not just in track but in bringing the whole thing together and placing and spacing with themes. There is so much talent in this blog.
Dangerous Dave
I figured it out. That damn gingerbread guy caused you to get your name. I would show him the door.
Much thanks for the ride and the show. . I hope this finds you & Mrs well.
Big Al
Nice! Java, Mike & DD running trains. Danka.
Michael, great layout , you did a magnificent job building the print out buildings . I’m with builder Kim, just can’t seem to make them look right … keep trying . Really enjoy your layout , especially the old style McDonalds .. where did you find that ? Great job , thank you for sharing and giving us hope .
Dangerous Dave , really enjoy your videos , you have a wonderful talent creating model railroad layouts and scenes … superb locomotives , can’t find those just anywhere . Aside from you obvious railroading talents you’re quite the producer … love the animation and general way you make your videos and sequences.
Great job .
Thank you both for the inspiration and insight .
lots amd lots in little spaces. i love it.
Great layout ….. but, what happened to the Night Club?