Bill’s been in touch with his his scratch built HO scale bridge:
“Hello Al,
In response to your question, “What would be my best modeling tip?”, I would have to say don’t throw anything away.
Just about anything can become a useable detail piece on a model layout.
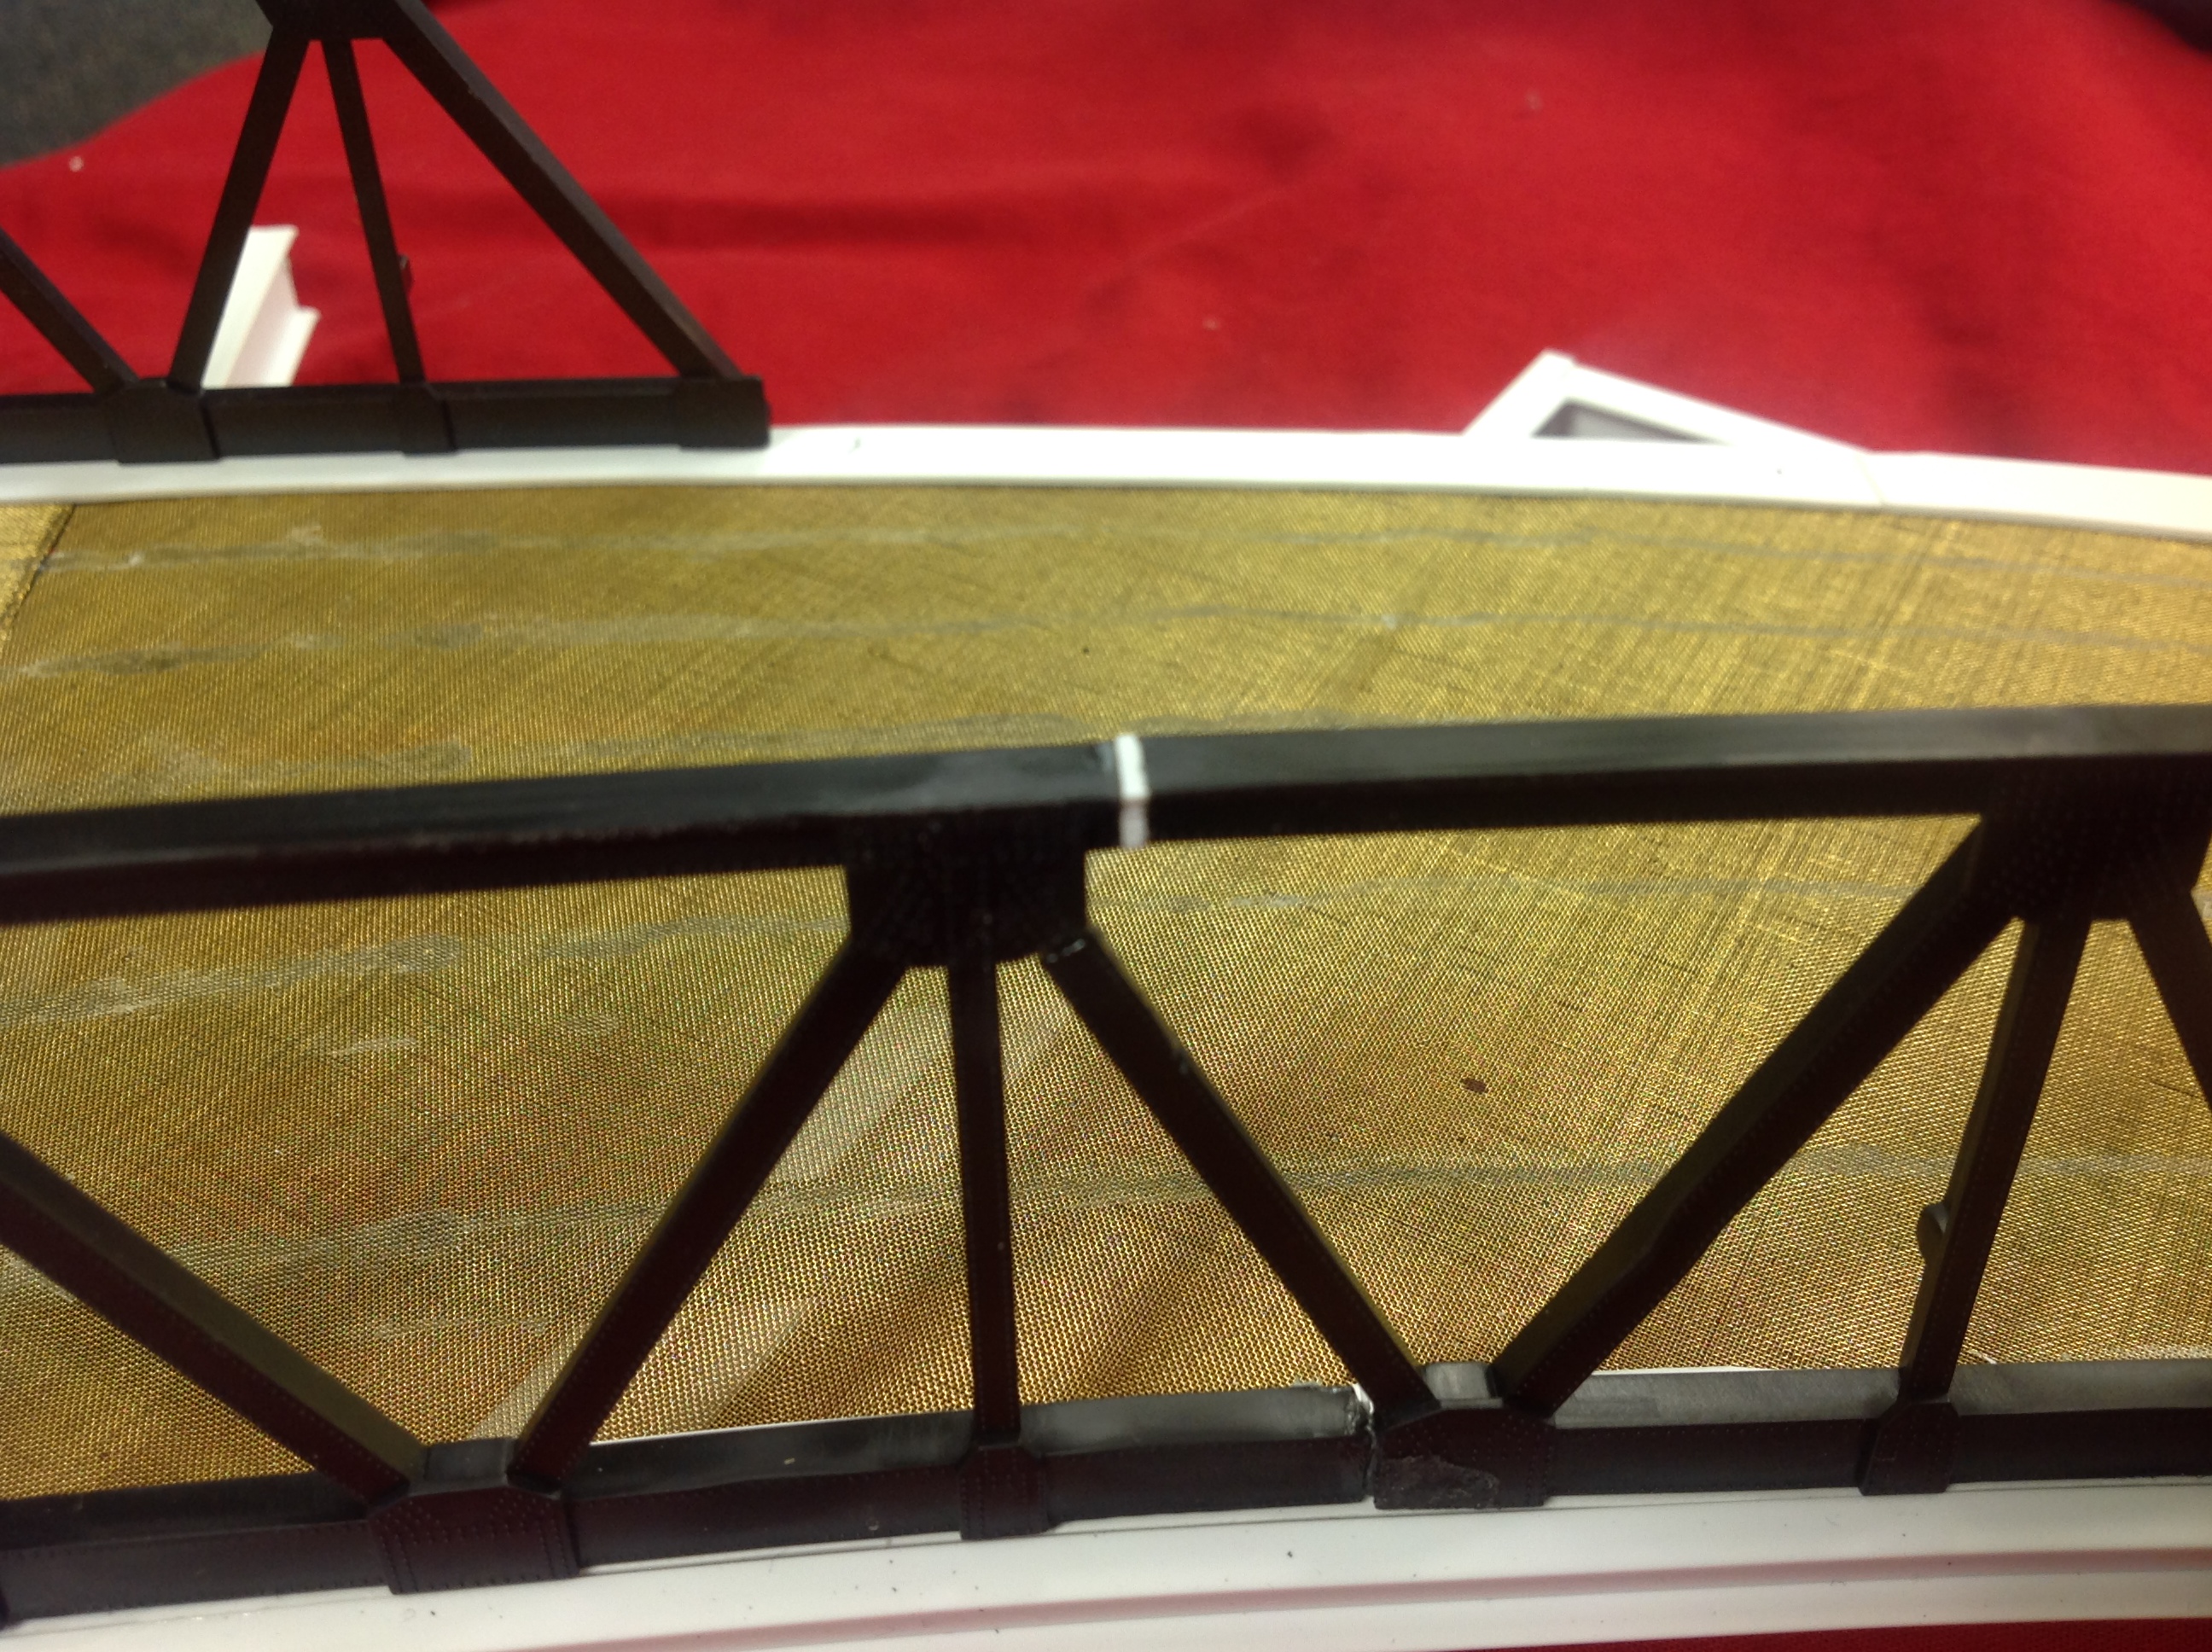
Just as an example, I am currently scratch building a curved bridge using Plastruct and Evergreen preformed bulk pieces, a few Model Power steel bridges, and a sheet of brass screen I sourced from my local sewing supply store. Total cost into the bridge is about $35.00 U.S.
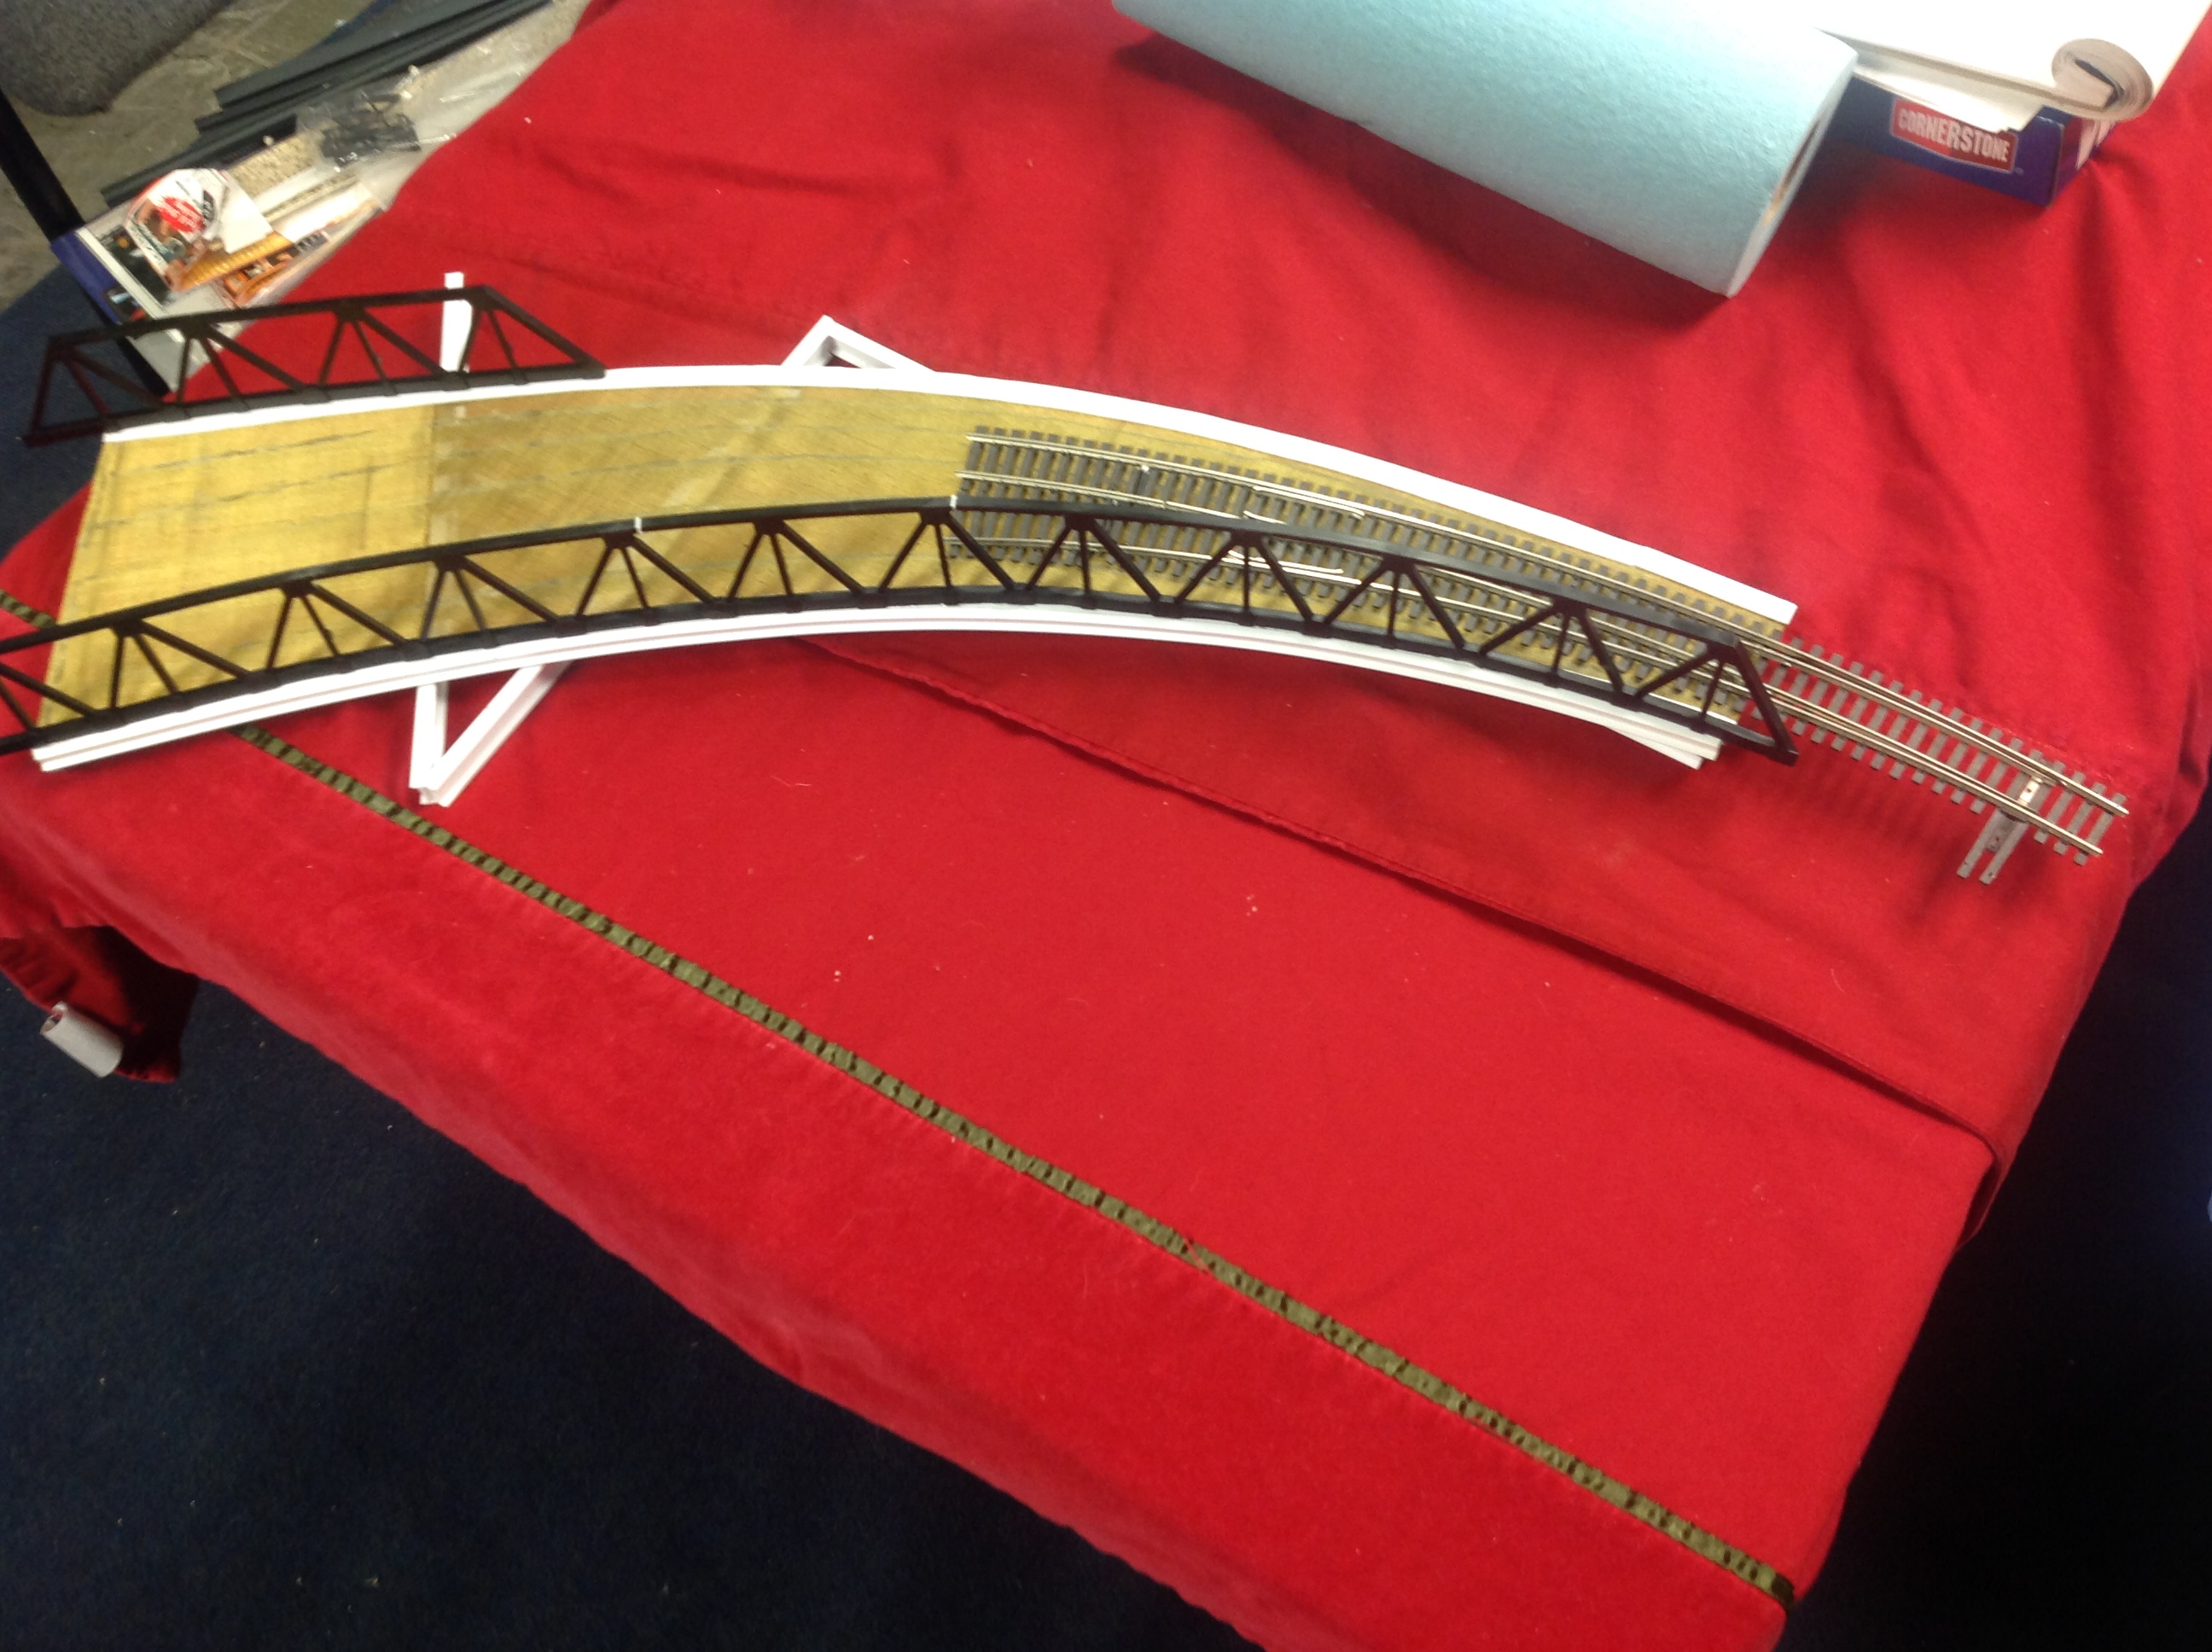
In order to make the side support for the bridge I needed to kit bash the Model Power bridge sections together along with a few small pieces of styrene.
However this left me with a few smaller pieces.
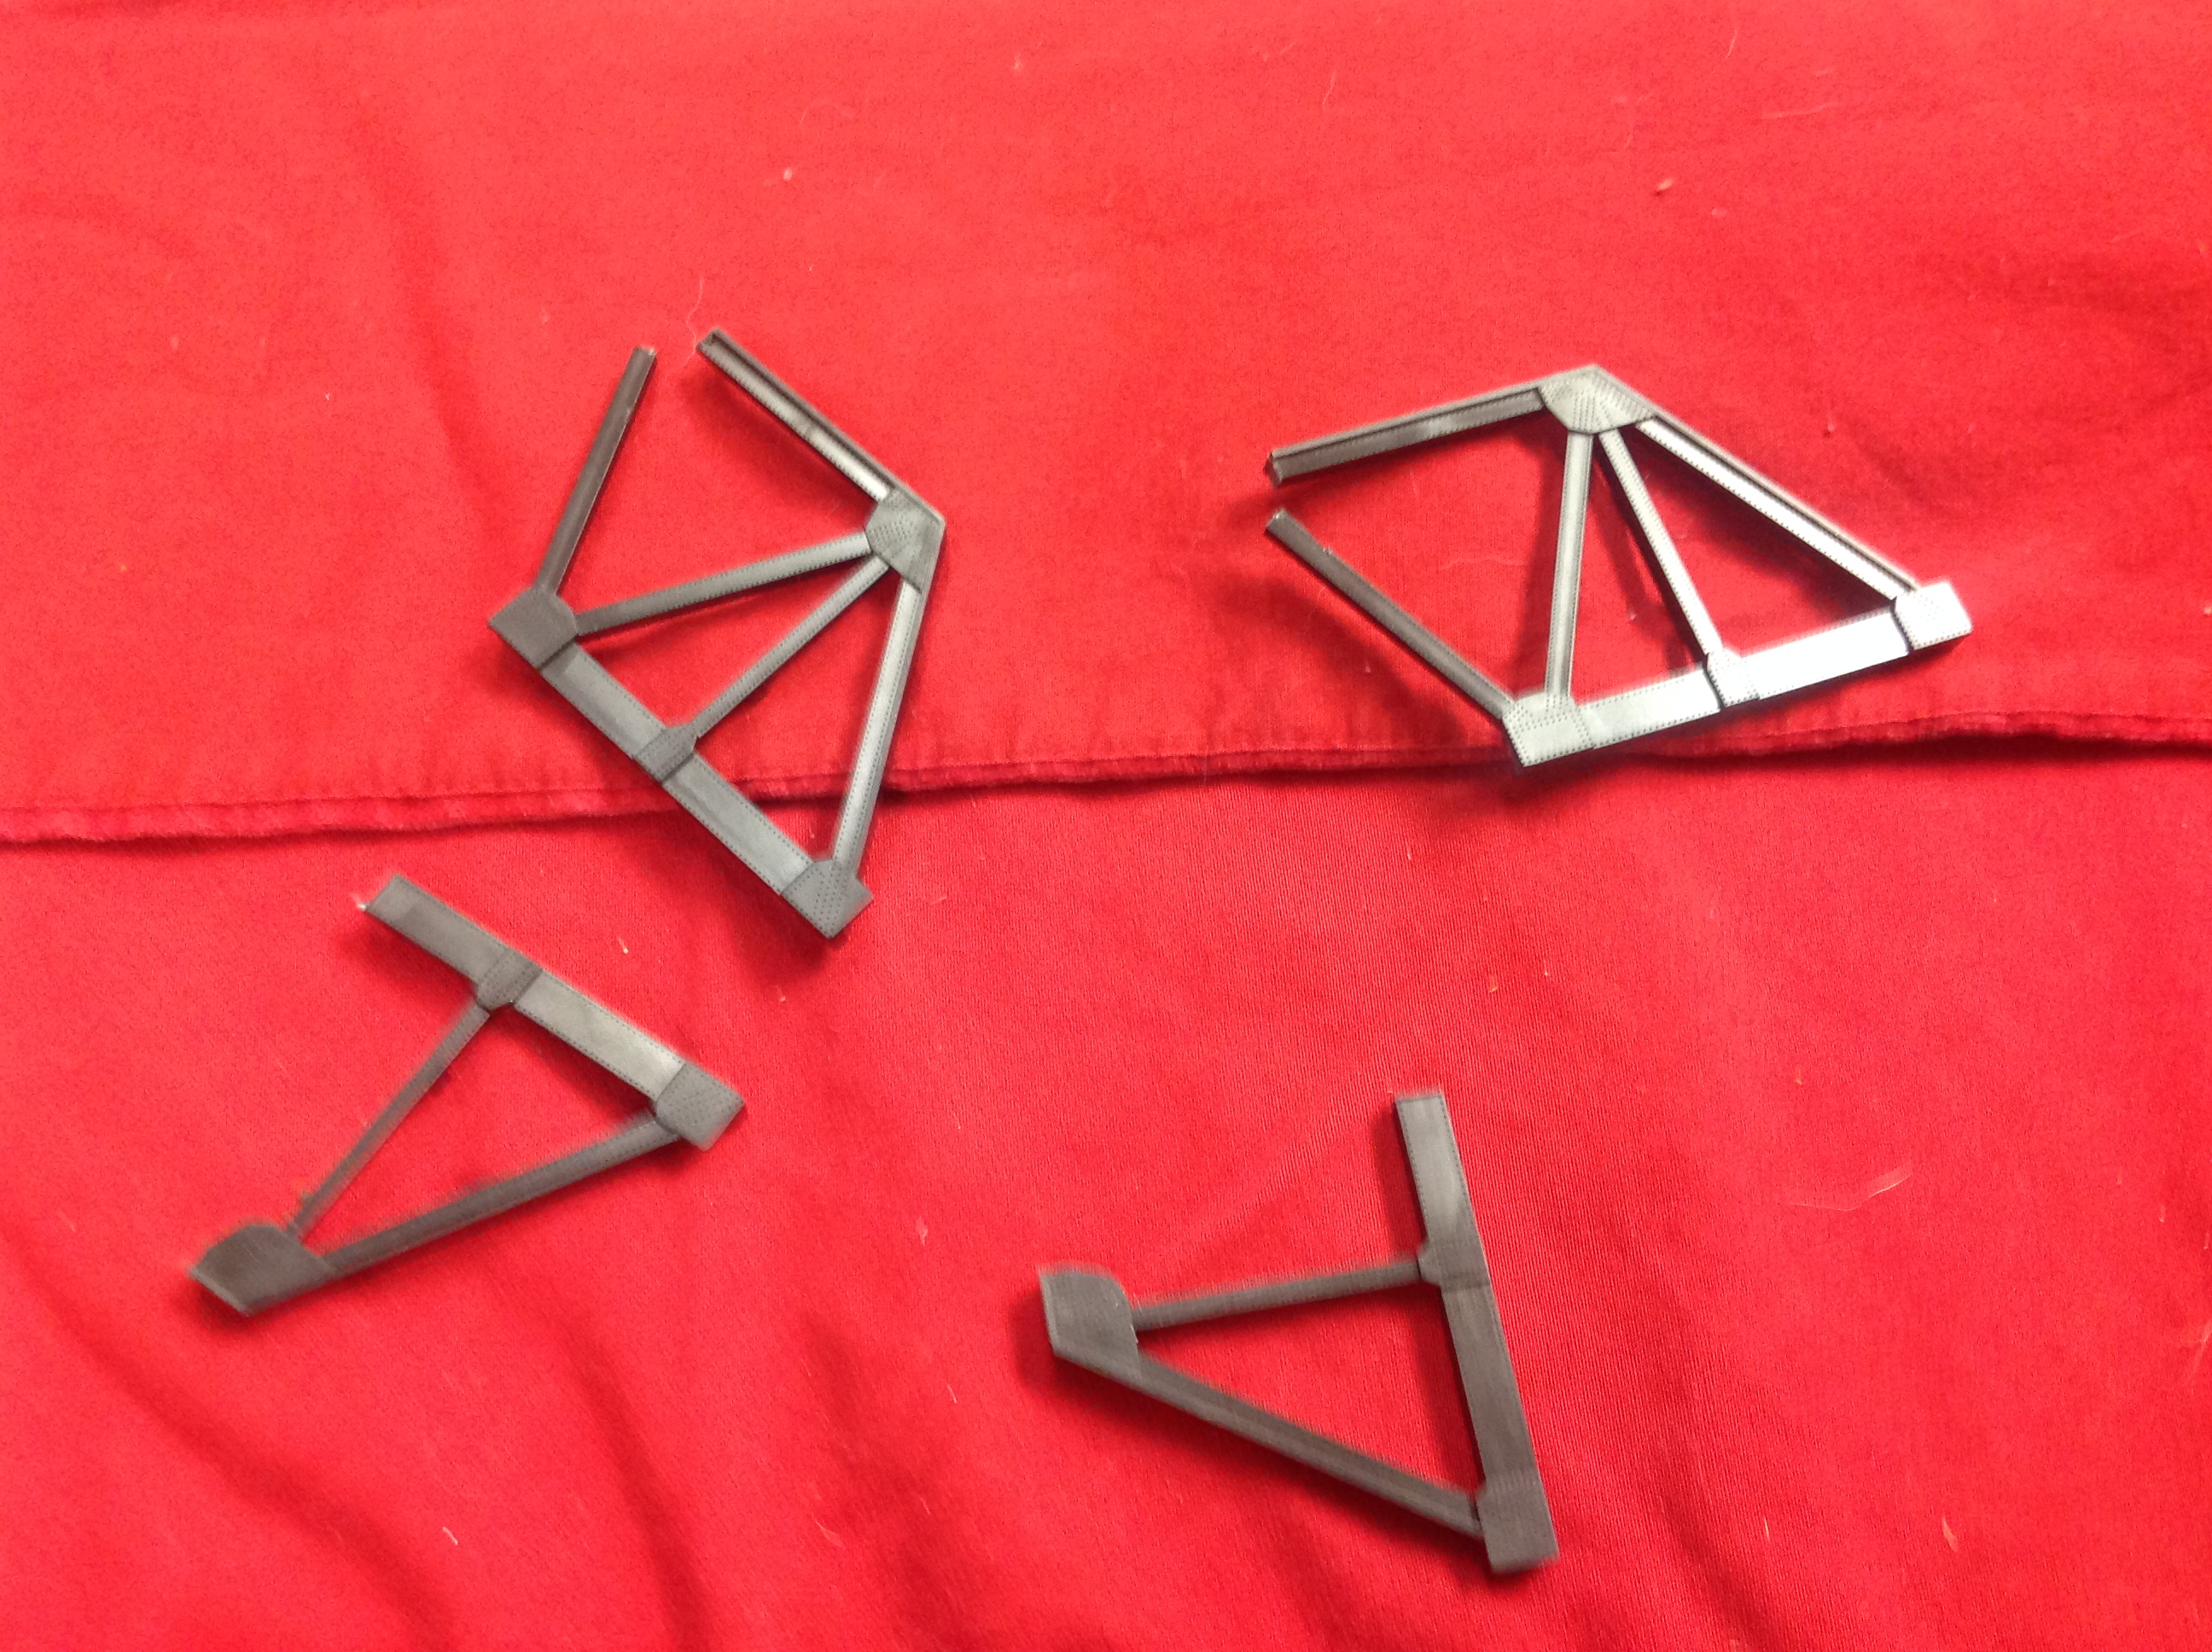
Well, after looking around my layout I noticed I need a few vehicle bridges. So, this is what came out of the left over Model Power bridge pieces and a piece of leftover sheet styrene.
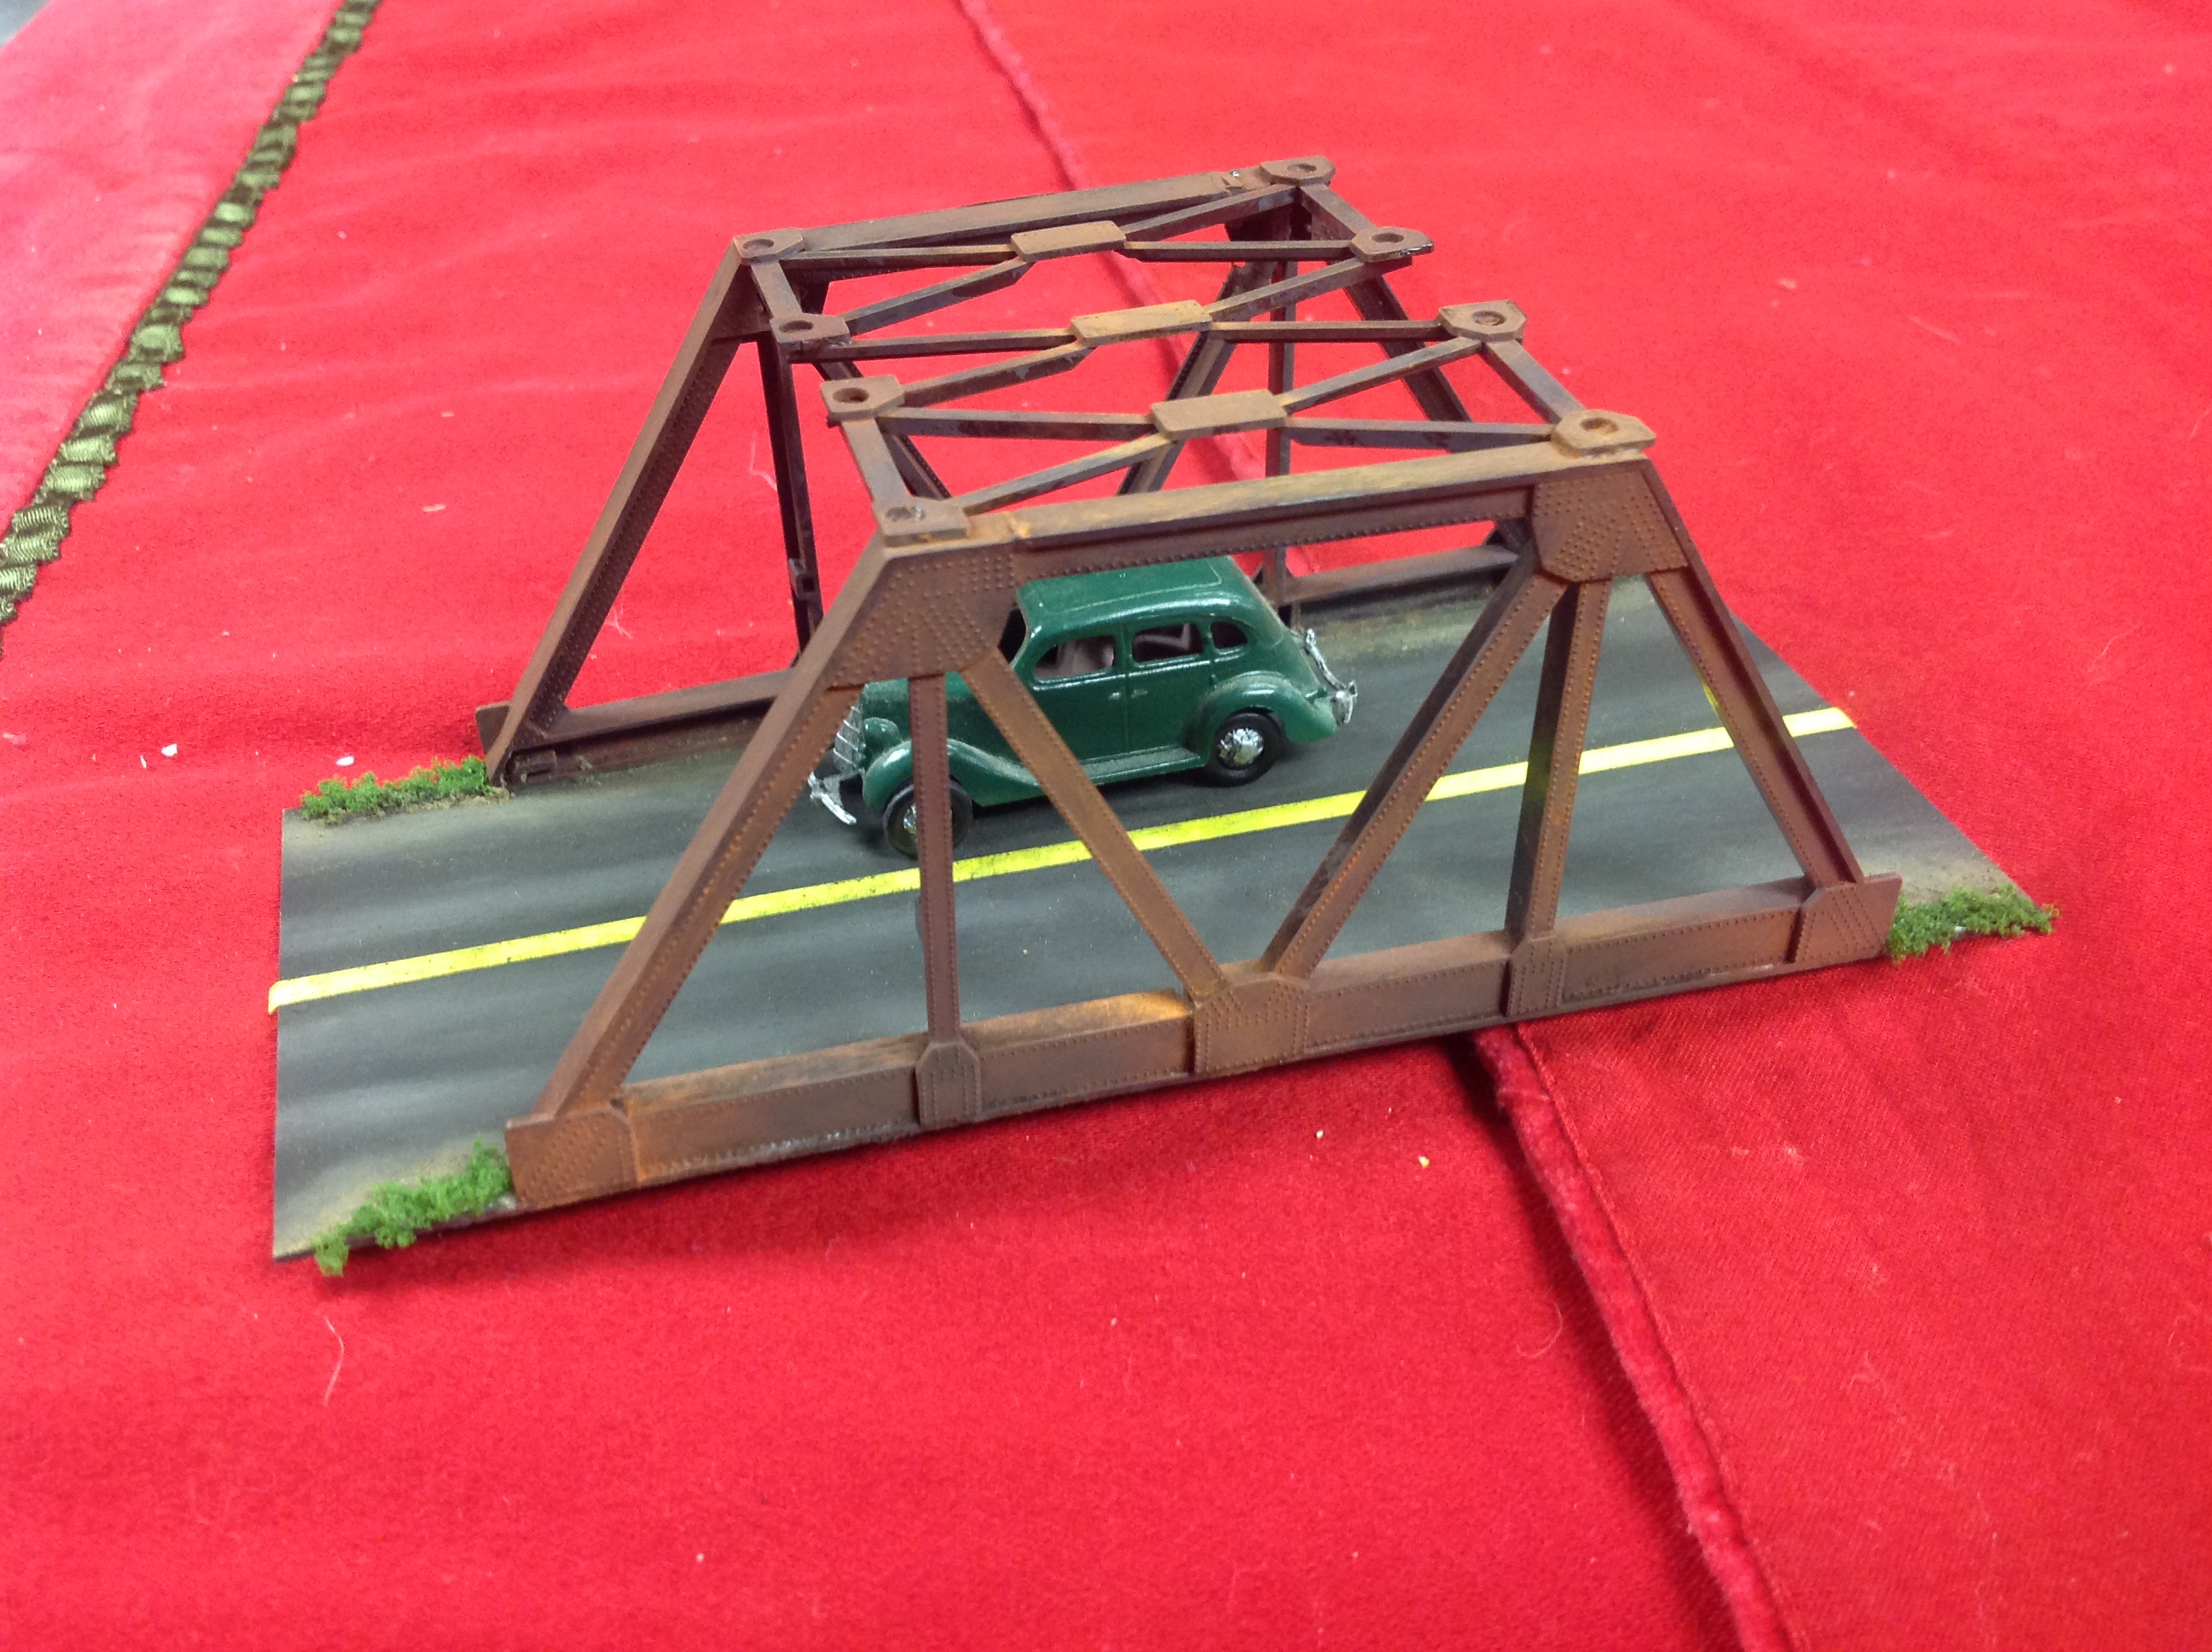
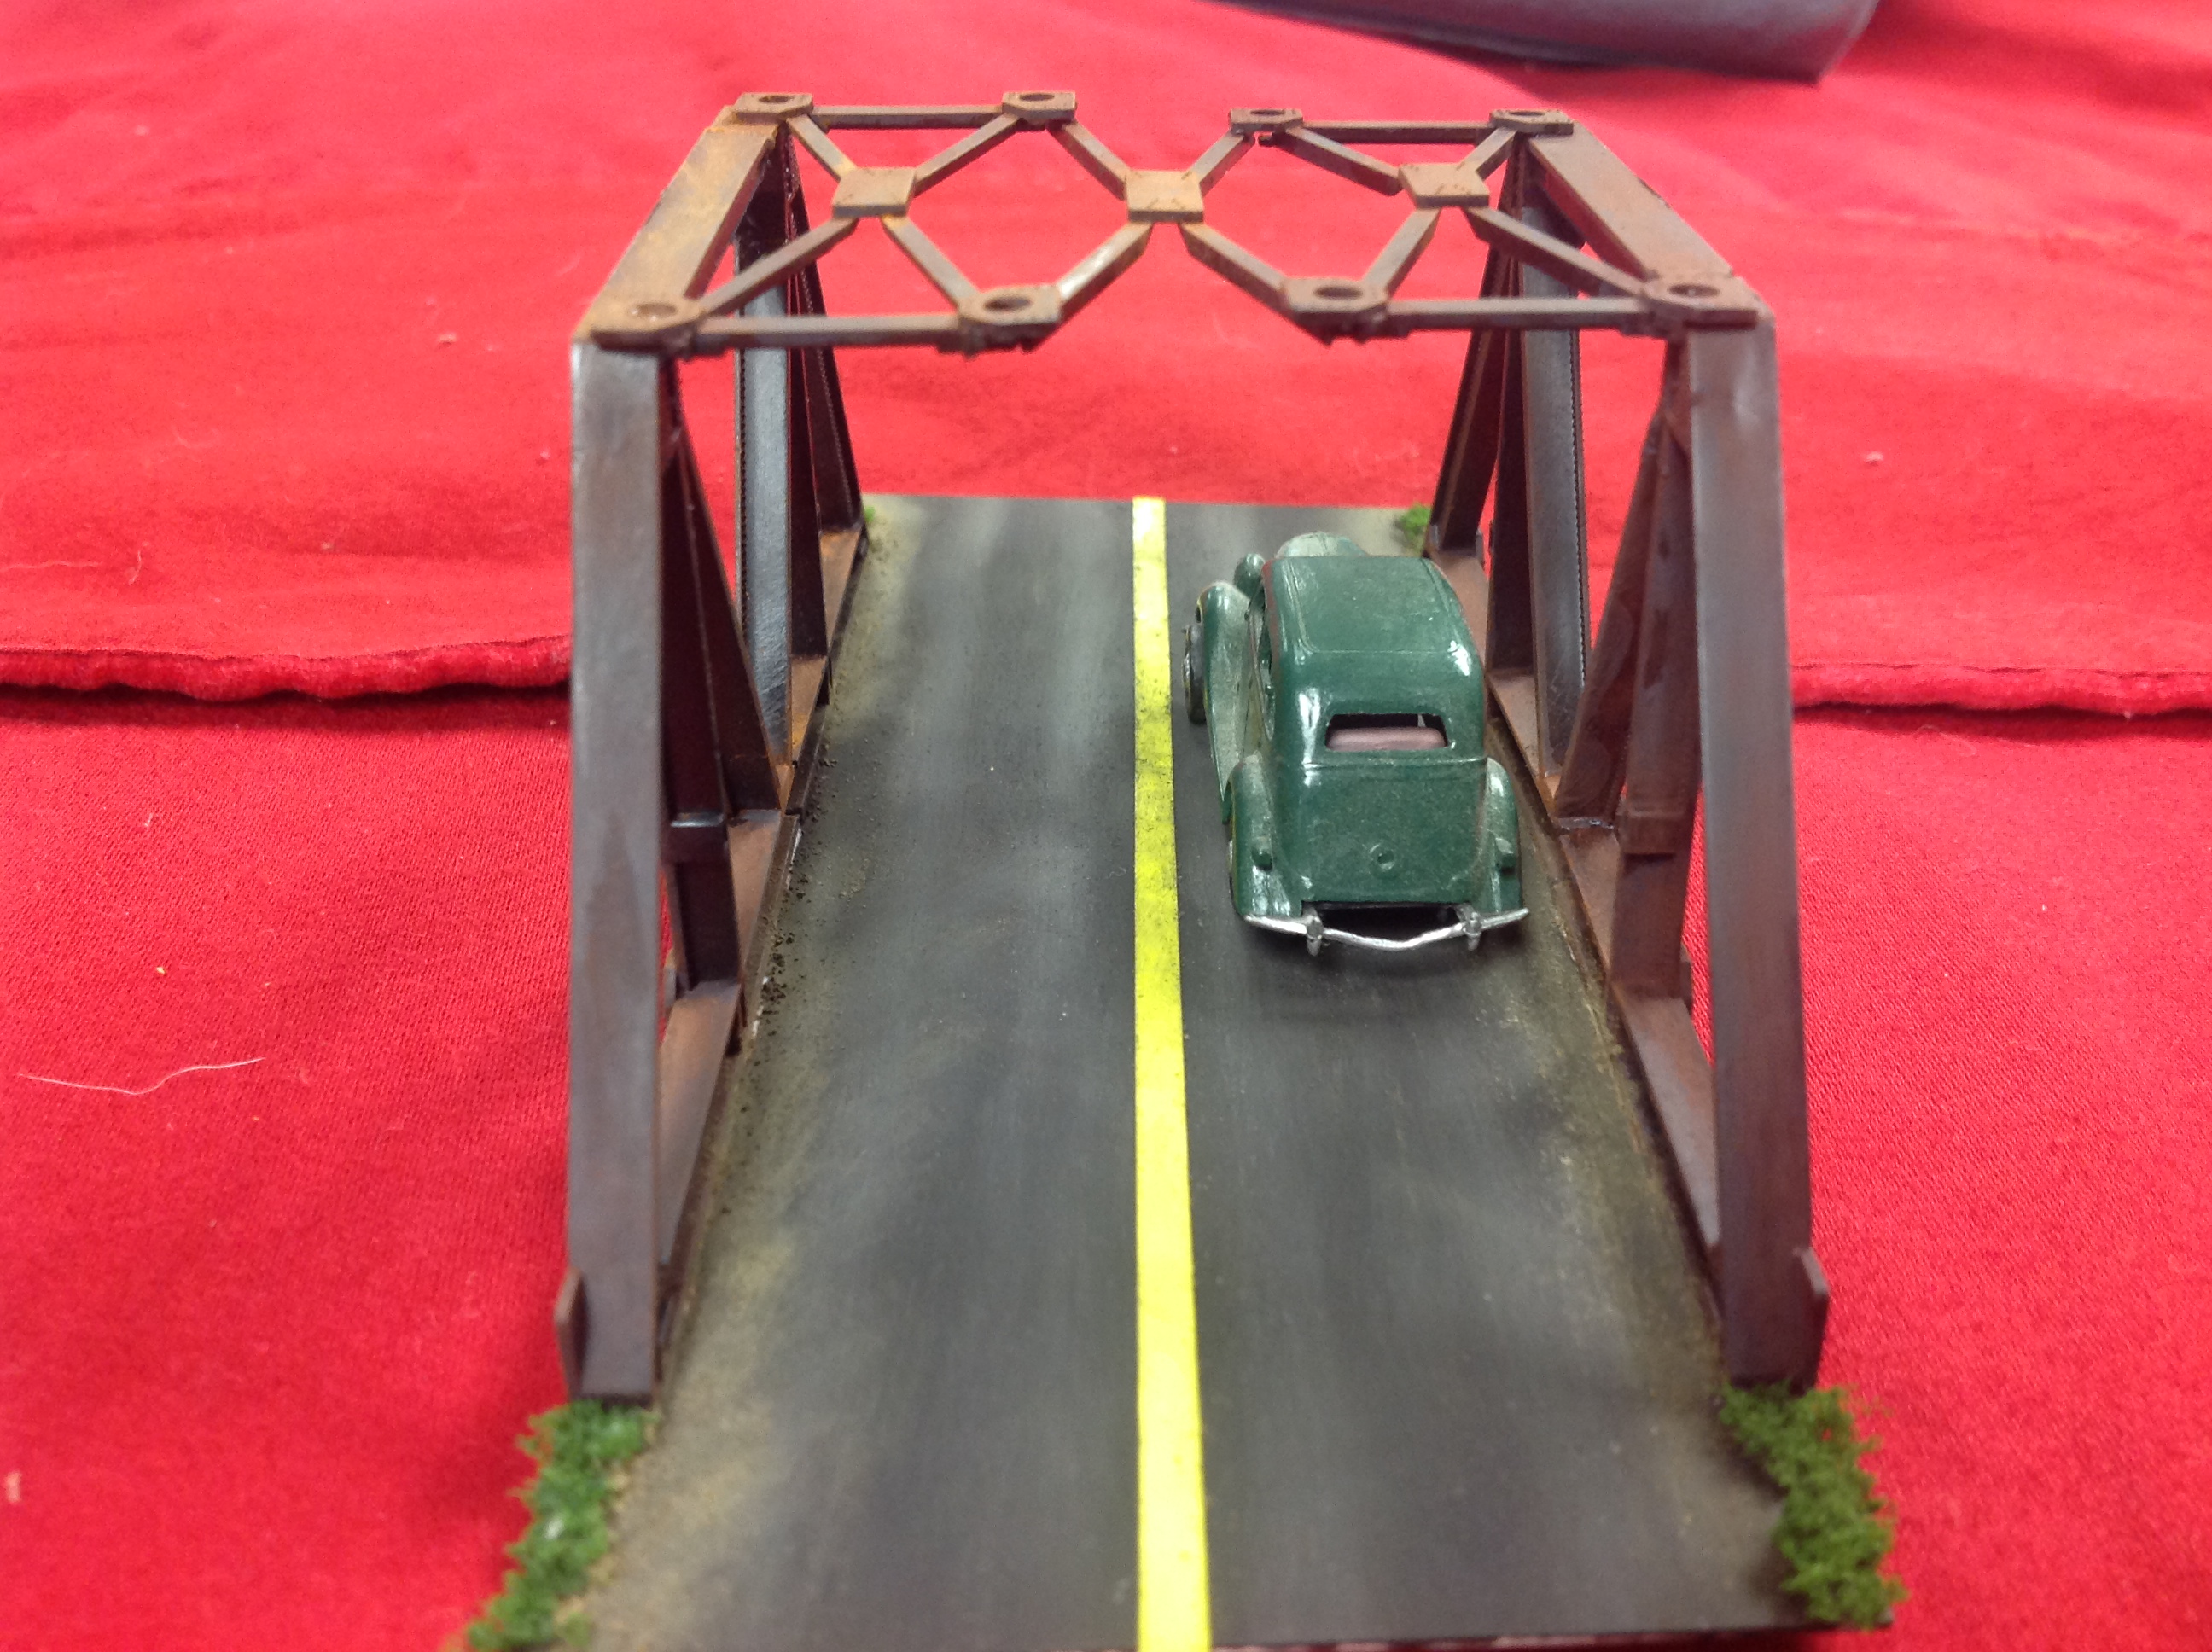
So for my money I actually got my custom bridge, two small vehicle bridges, and I have plenty of supplies for many other projects.
My wife isn’t a huge fan of my “keep everything” philosophy but it does come in handy and saves money when building a layout.
Also, creativity plays a huge part in building a layout.
Inspiration can come from anything you just have to look for it.
Regards,
Bill”
Big thanks to Bill for sharing his HO scale bridge scratch build – and just goes to show he’s spot on: don’t throw anything away ever…
It reminded me of this post: Scratch build a HO scale trestle bridge.
Next, a tip from Dan:
“When coloring plaster rock or retaining wall castings with diute washes of acrylic paint, you can sprinkle on fine ground foam (greens and yellows) to simulate growth of lichens, moss or tiny plants. No additional adhesive is needed.
Thanks, Dan S”
Now on to Rod:
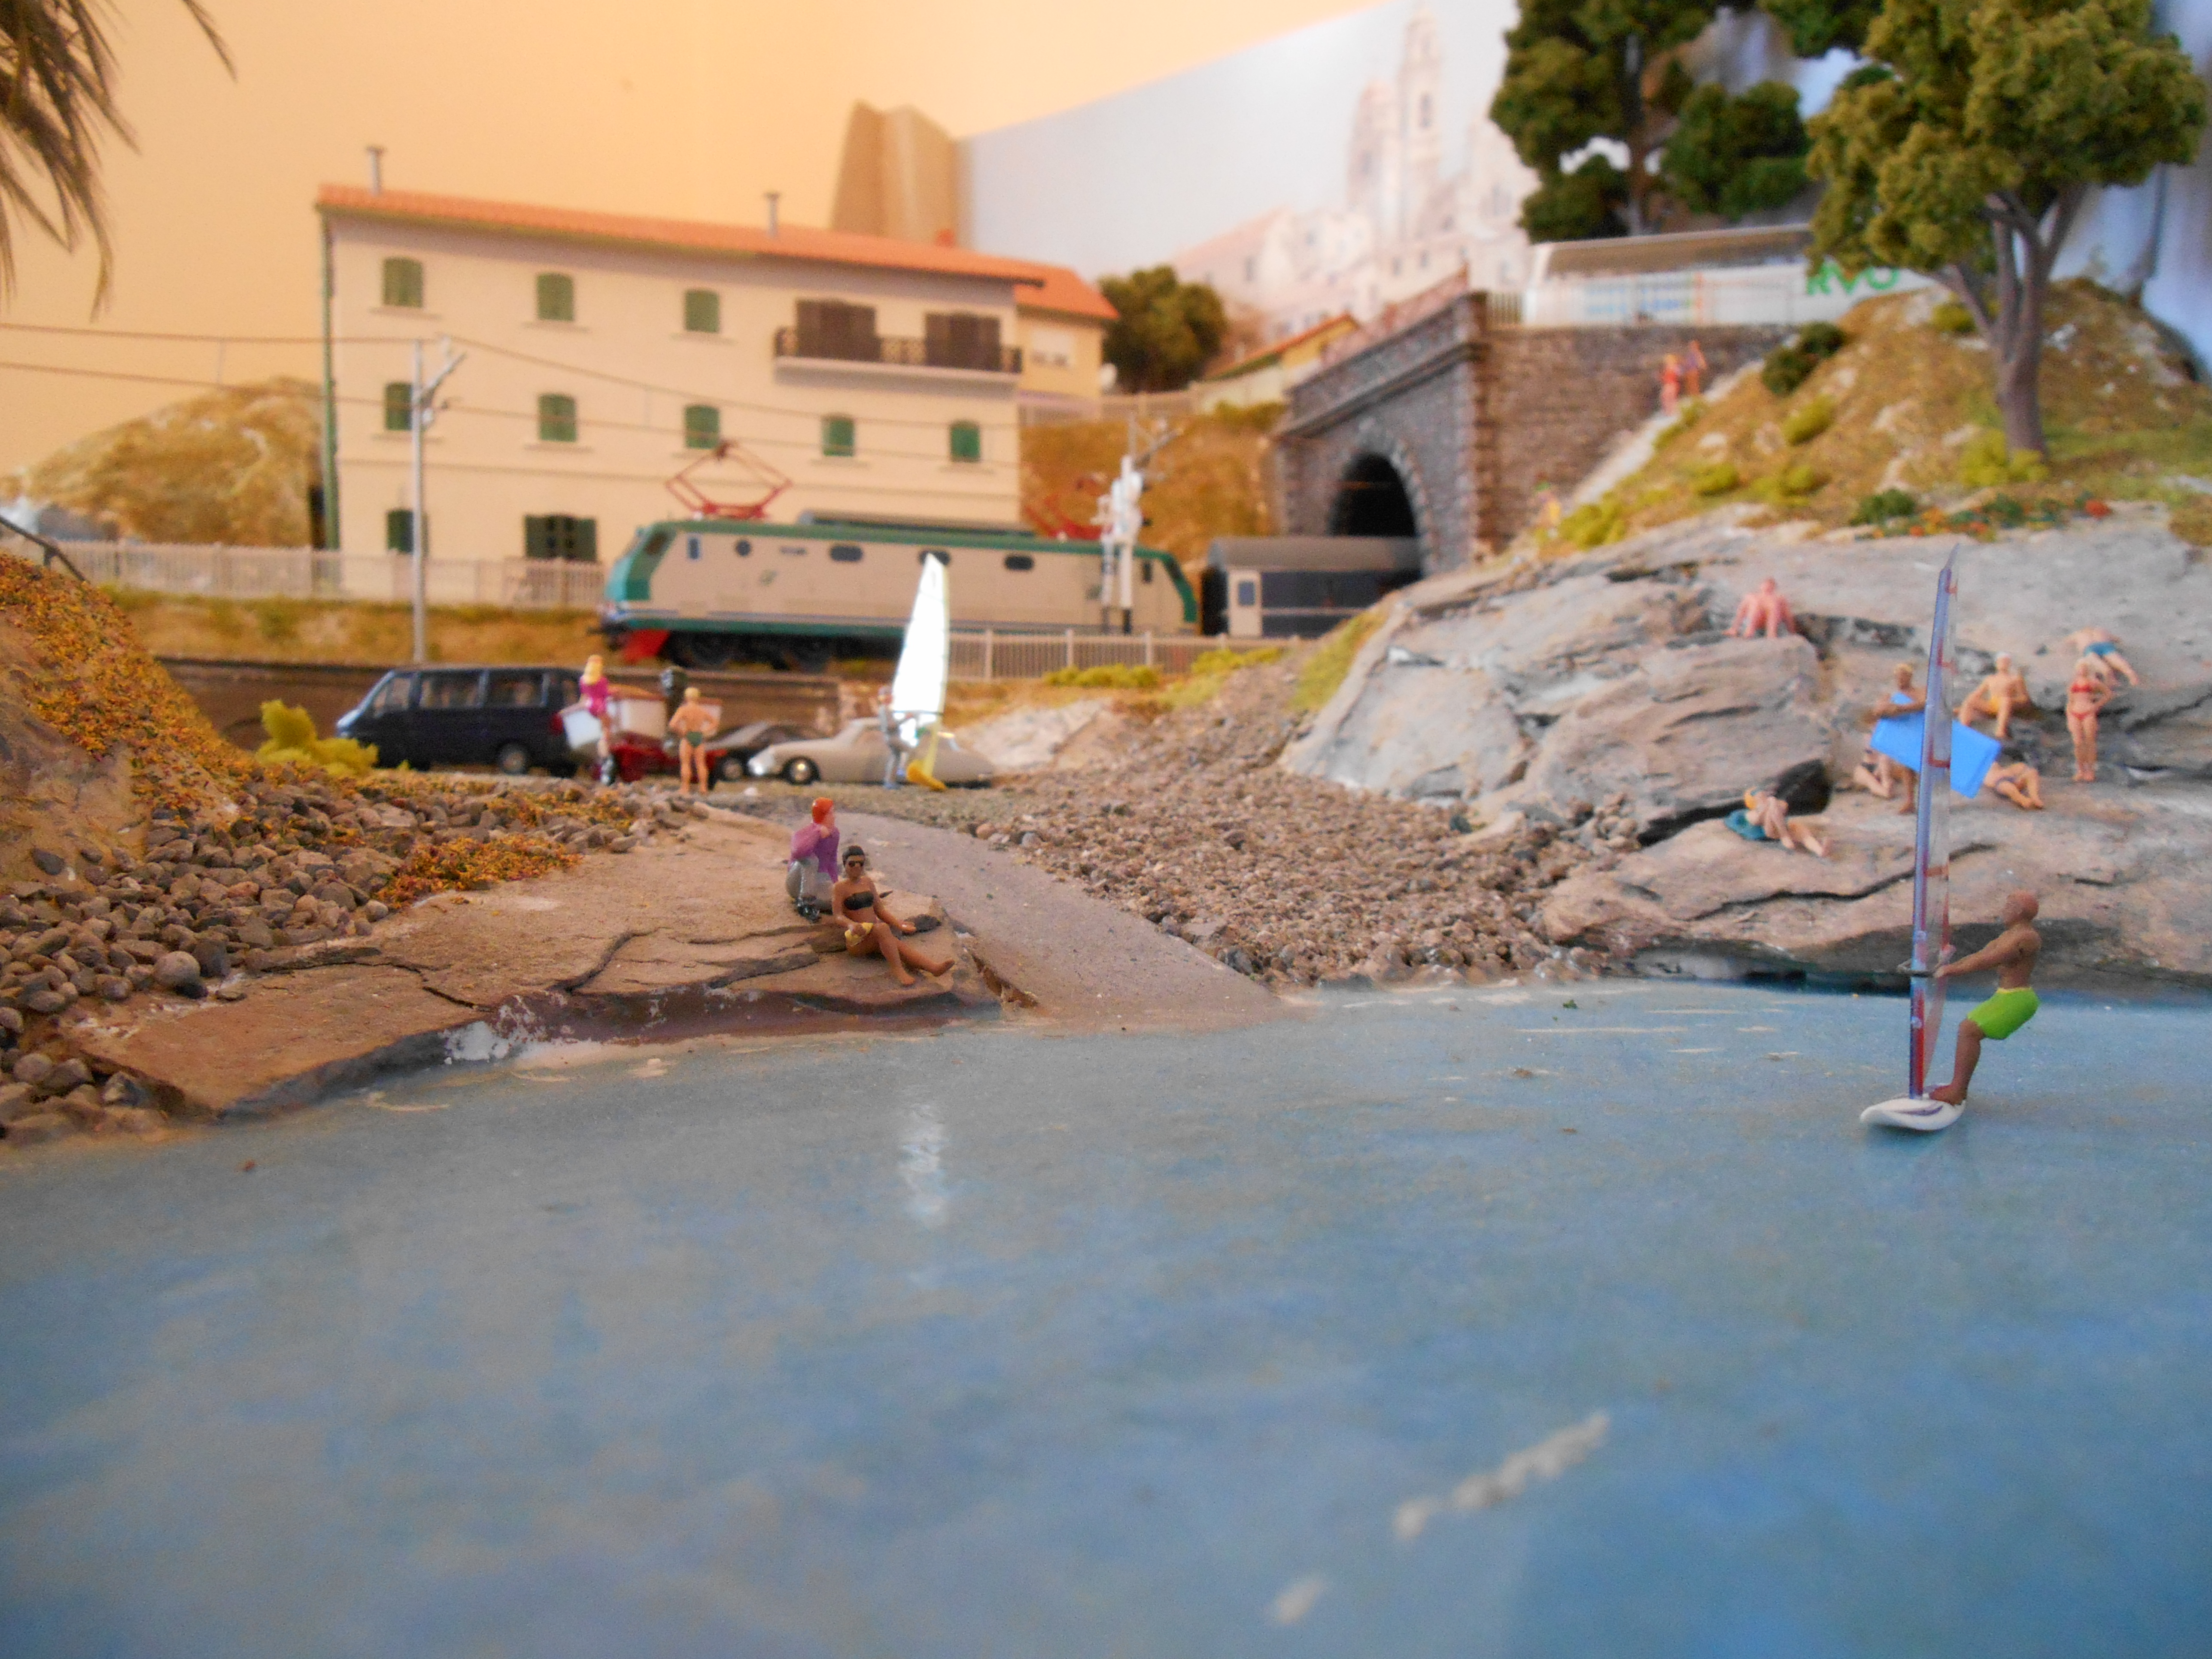
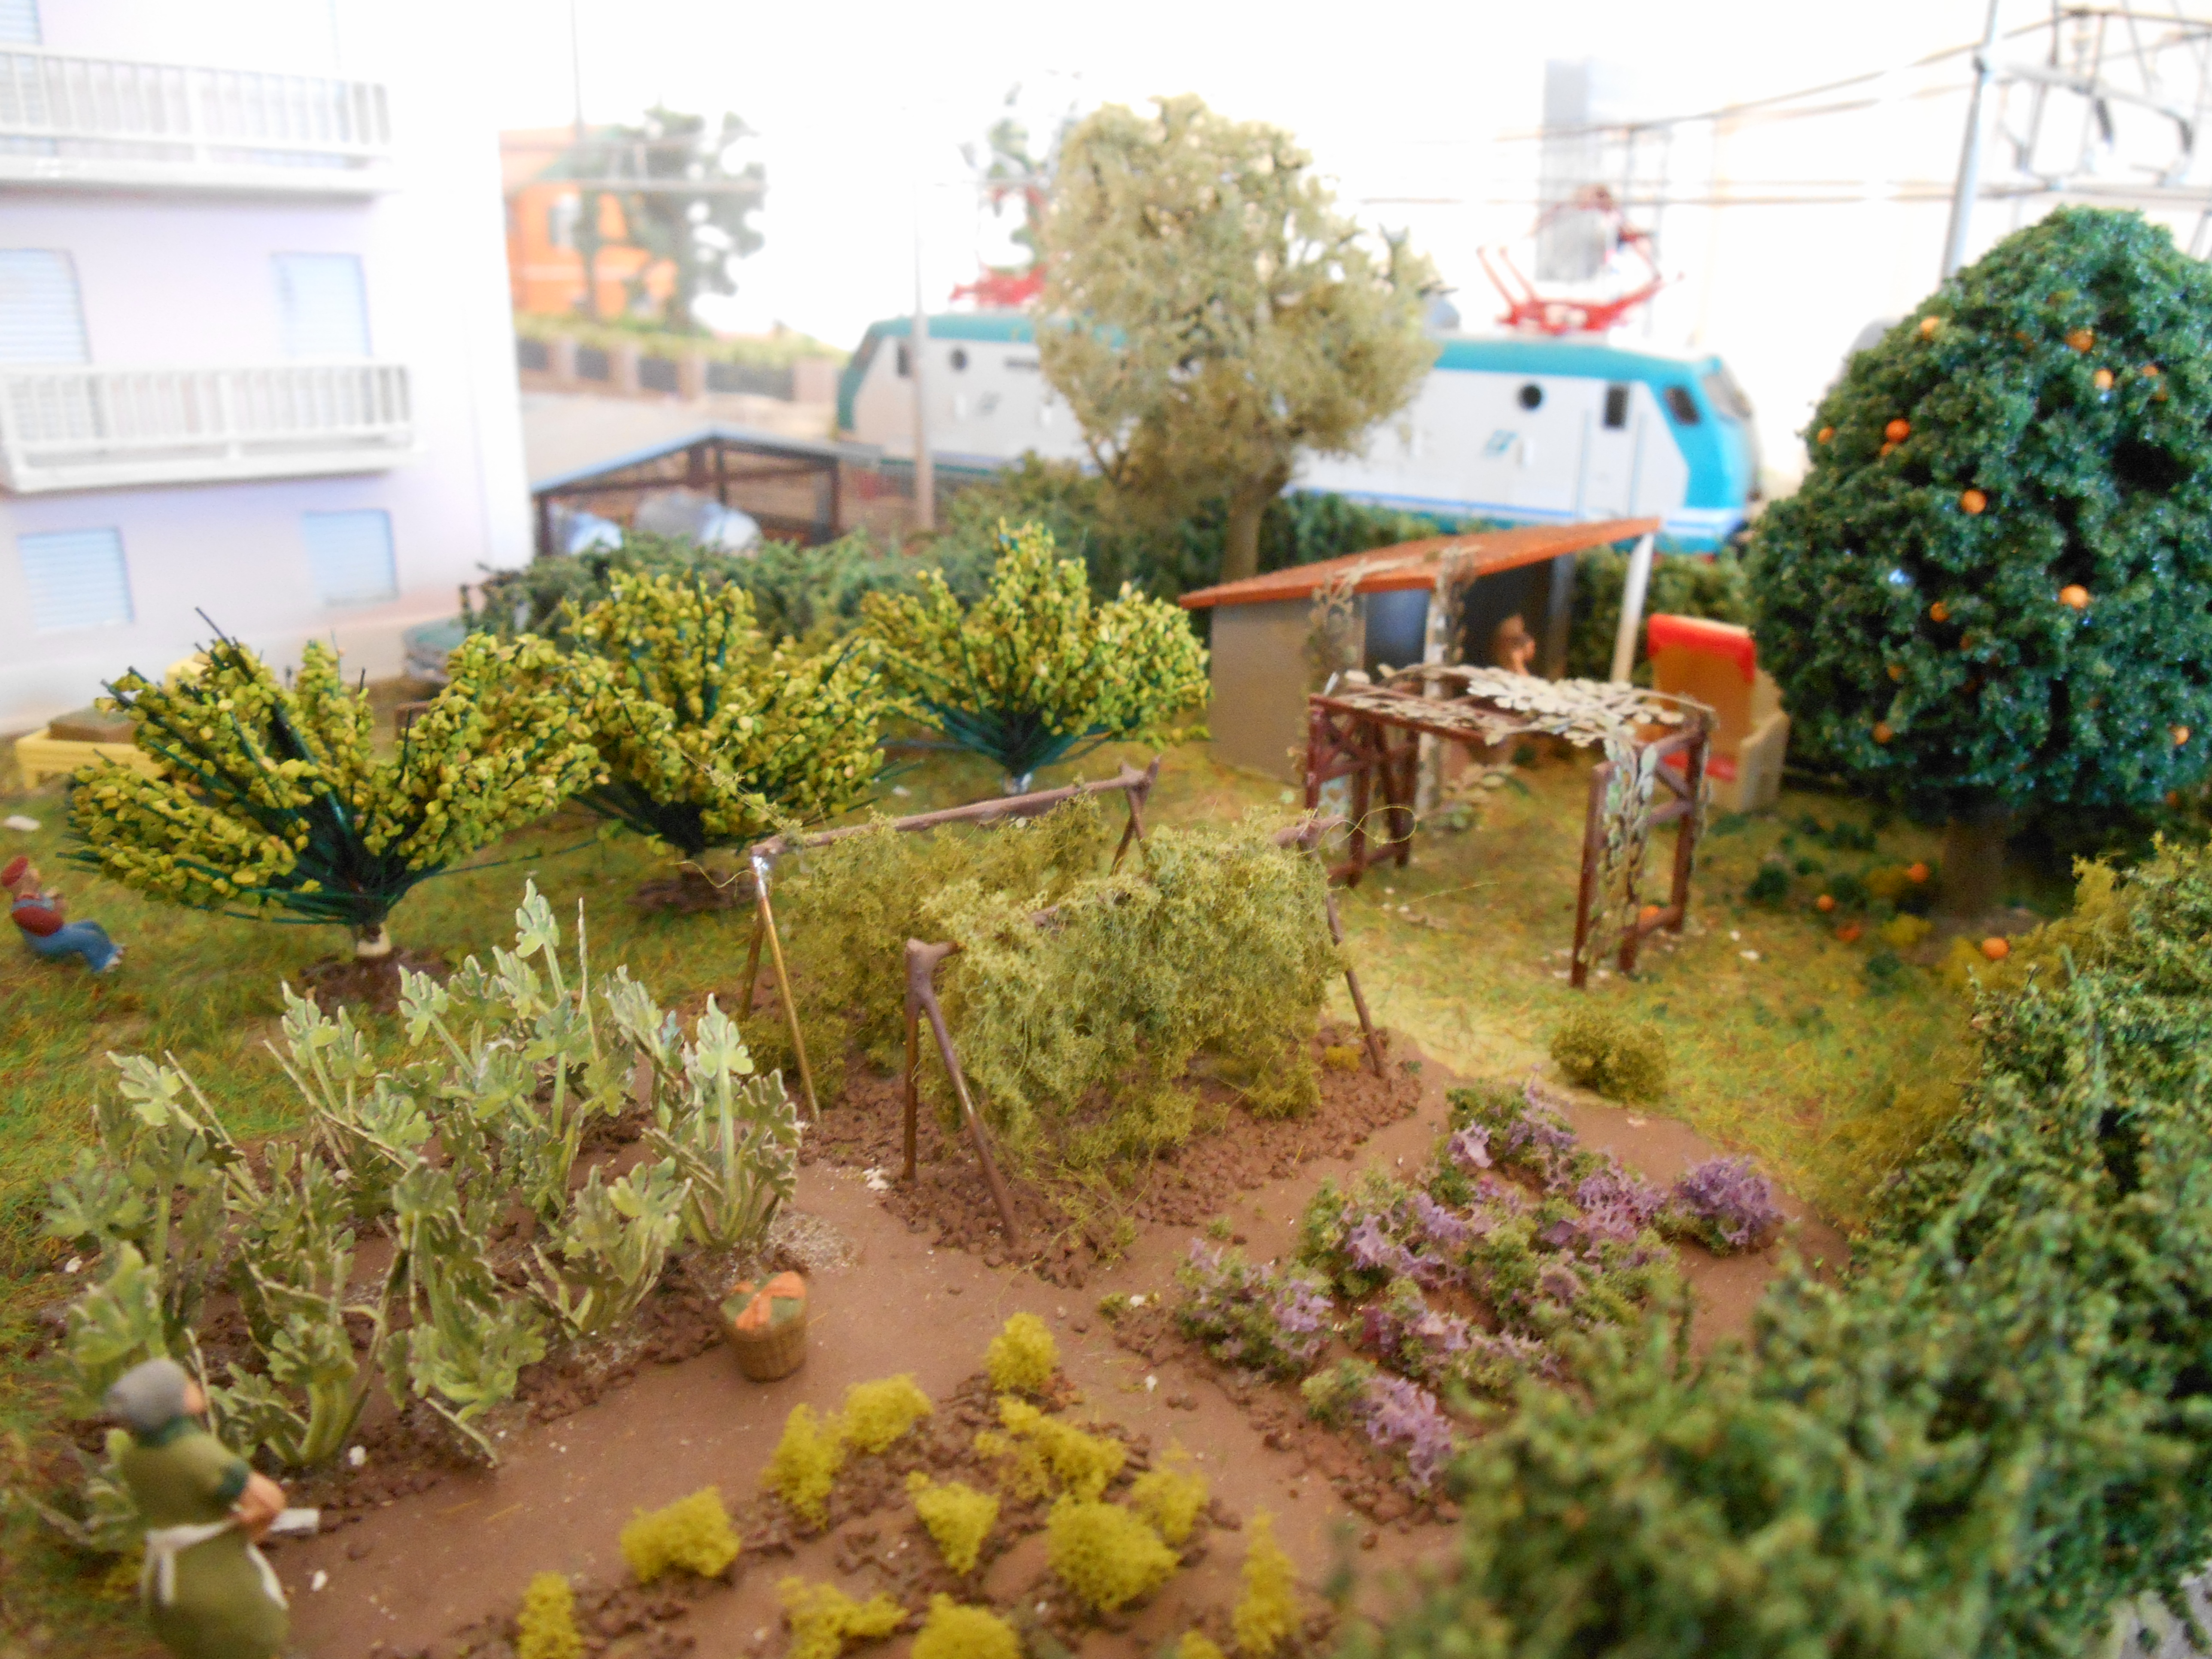
“Sue gave me a little digital camera for Christmas and it can get into places the old ones never could, which is an awful temptation.
It’s fascinating to get sight of new angles, and a revelation how much better the little people look from a more natural eye level, but horrifying to see all the cracks, paint glitches, and various unfinished bits you left because ‘nobody was ever going to see the back’ of something.
I wish now more than ever that I had made the blessed backscene boards removable.
Rod”
(Images are clickable)


(You can see Rod’s original post here: European model railroad.)
That’s all for this time folks.
But please do keep ’em coming, it’s getting awfully quiet this end.
And if today is the day you decide to start laying track and join the fun, the Beginner’s Guide is here.
Best
Al
PS Latest ebay cheat sheet is here.
PPS More HO scale train layouts here if that’s your thing.

Good bit of scratch building on the bridges Bill!
That’s OK my wife isn’t a fan of my that’ll come in handy later philosophy but it saves money which is fine by me.
Well its a good way to use up the bits that have been left over , nice one ..Dave
some times you gotta do what you gotta do. and it looks like it worked out great.
I have o gauge trains. Starting layout. Layout plate form is a u shape 12’x8′.
Thank you
Willy
Hi Bill. Darn nice scratch building .Id rather make my own than buy a piece that just about everyone owns as well.One of a kind. During the holliday was at a friend for brunch.He found me in his recycled garbage and said sheesh kim if ya that hungry go in the fridge.Mean time I had two plastic bags full of his garbage lol.Thick clear plastic for window’s. plastic to make beams and such.And a lot more stuff.He didn’t see when he threw it away that it could be used in another manor.Thanks Bill for the great idea’s.Very nice work that.Would love to see more pic’s of your builds. Matbe steal an idea lol.
I too did this but used some left over n scale rails. Cut them to size and CA glued them into the exact same form as Bill’s scratch built bridge. Looks identical to his. Cost….$ 0.00
Those vehicle bridges are fantastic and the weathering is authentic, very nice work and thanks for sharing. I went back and viewed the “scraps” and honestly didn’t visualize the bridges until I located all the pieces in the finished product. I really need to spread out my scrap piles/boxes before I go to the parts catalog for my next project. Thanks again
Douglas, USA
Bill,
That’s a very clever use of left overs. The younger modeller’s who probably have less money should take note that you can make models that look good from left over bits.
Ian
I agree, never throw anything away that could be of use. My wife now asks me every time if I want anything that she is about to throw out.
Incidentally, the bus wire on my layout is actually adhesive copper tape which I had left over from making stained glass light catchers and lampshades. No need for cable ties or elec. connections. Just solder the wires from the tracks and it just sticks to the layout framework.
I admit that sometimes I look in builders dump skips.
It is amazing what treasures are in them in, wood, wire, polystyrene.
the bulders don’t mind If you help yourself.
Paul Otway
Would Bill consider telling us how he created his road? It looks great and very realistic. Any tips would be great. Paul
One good way of making your asphalt roads look authentic is after your paint them black and they are dry, lightly sandpaper the road lanes and traffic areas. Add in a few patched potholes and then rough up the edges a bit to keep them from being perfectly straight.
Great looking bridges. It proves imagination is worth more than money.
Rob McCrain – Farland Howe
Bill:
Like your Scratchbuilt Bridge on a Curve.. with the switch.. however, I don’t understand why you used a piece of brass as the base of the bridge. Could you have used a piece of thin masonite cut in the same pattern? It would be structurally stable Clever using the scraps to build the highway bridge. You could put a two light dwarf signal at the beginning of the curve to protect the switch. Only comment I could make is: you need to have more bracing on the top of the bridge where the “X” in the middle of the top is for structural stability in reality, and fill in the holes in the beams. AND Hello Dave, Love your Videos, very inspirational. And for everyone,,, Please use some Dulcoat over the Plastic People? They are Too Shiny.. Looks like they are OILED,,, especially exposed skin on the face, hands, arms… You only see the shine if someone stands in direct sunlight. Same with the clothes,, unless they have spit shined shoes, shiny leather coats or handbags, luggage. Or wearing standard eyeglasses. Just my 2 Cents.. Cheers. from Mike in N.H., U.S.A….
I know sometimes, with our curves being tighter than the prototype, you may not have much choice, but I can’t recall seeing any curved girderwork in the real thing, as the weight exerts a turning force on the girder instead of just being transmitted to the ends, I suppose. If they have to put a girder bridge on a curve it’s usually short straight sections between intermediate piers.
Rod
My wife has the same feeling that I should not be keeping “all that old stuff [junk in her terms],” but after some 8 years just put a pvc banner frame back in service. And cannot count all the bits and pieces of “old stuff” that I have used and will be using on my layout. Your scratch-built bridge looks great and reminds me of one that was in rural Georgia (USA) and another longer bridge in Alabama. Ron
Bill… a man after my own heart. My dad was a machinist at/mechanic with the railroad. There is use in everything. I save everything and find used for almost everything. My layout is full of structures made from “junk”. Right, my wife sees my treasures differently. Wooden blind slats become structure walls and loading docks. Coke cans become correlated aluminum siding and raised rib roofing. Computer electronics become power pole transformers and on and on. I just got back into model railroading a little over a year ago. Nothing is more satisfying than seeing that everything on my layout is scratch built. Your work should encourage others to try to create instead of buy it ready made. Great work.
General question not covered, much , how or what is the best way to clean locomotives wheels ? Alot about the track cleaning
To Michael llkenhons: How do you turn aluminum soda cans into corrugated siding?
Bill,
Do you fix things around the house with saved hardware or lumber? When you do, point it out to the Mrs. My wife used to complain about all the stuff I picked up from the roadside or saved in my shop. When she wanted something done, I told her I could try to borrow a tool from neighbor Brett (he had none), and drive 30 miles for some screws. OR, I could use my own tools and supplies. Now she calls me when there is something to scavenge.
Tom
Hernando, MS
really nice bridge work.
Nicely done, Bill! I had to do a similar thing to create a longer bridge with uneven lengths on each side.
Great idea with the bridge ! I have a section of track just like that . Might try to make something similar.
Thanks,
Dan