Jim’s been back in touch with his HO scale DCC layout.
It’s not an update – it’s a completely new build, but you’ll remember him from his HO scale Cedar Valley layout.
Here’s what he’s been up to:
“Hi Al.
Jim coming to you again from Ontario Canada.
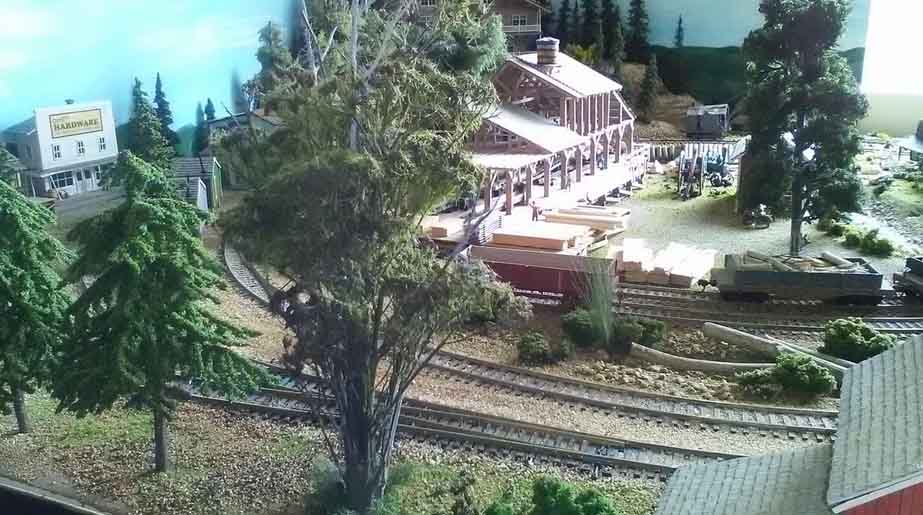
This is the new layout after the tear down of the old Cedar Valley RR and move to the new apartment.
Cedar Valley Railroad HO with DCC
The room size is 10×12 feet with door and closet at one corner. This happens to be the perfect size for my 2x 4 foot modules. You may have to adjust one module to fit your specific space.
The layout is designed to fit along two walls. The only problem I had was to keep the height below one window. The height turned out to be 38 inches with a 4 inch rise on the long wall.
This turned out to be comfortable to either sitting or standing. Height is something one has to determine to suit one’s own needs.
The system is powered by DCC. This setup plan can also be used with DC. I found this plan to be very flexible with the placing of turnouts with regards to bench work and future buildings.
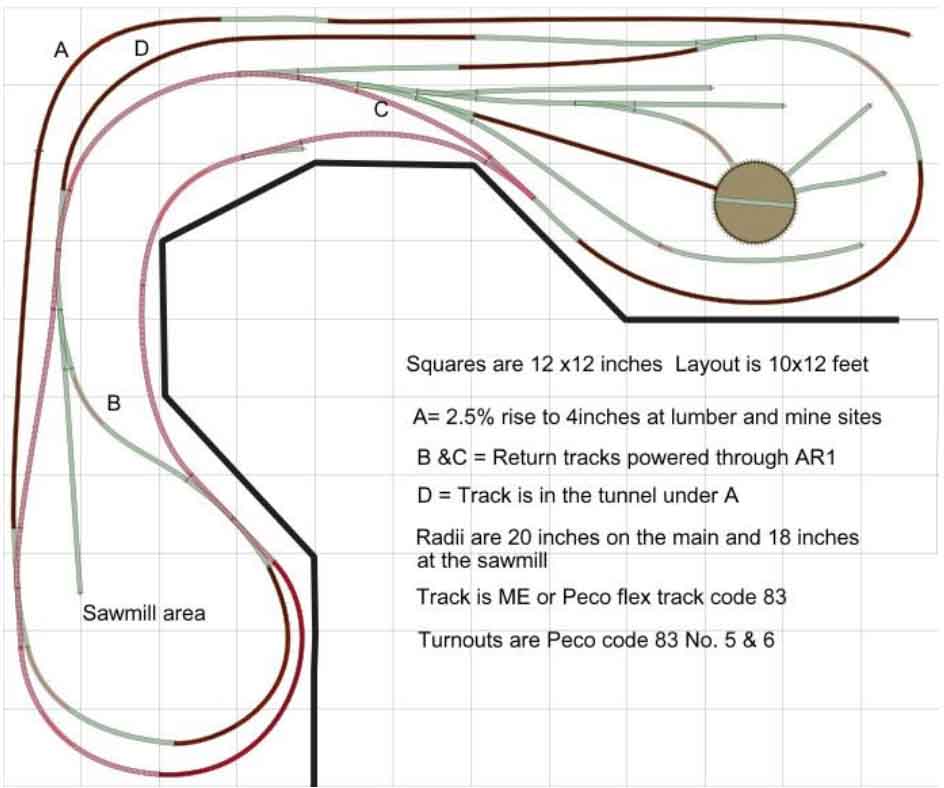
This plan suits my space as we have moved into a rented apartment. I did not want to attach anything to the walls. Thus, it is constructed to be free standing.
I designed the plan to be either left as is or, added on at the end of track A and go back down and join the main line at some place. Or, extend track A to be a return loop back on its self.
The plan is designed to be an operating layout. All turnouts have to be switched by hand. This means you have to be able to reach them. You could power them if you so desire.
All electrical work is done at the front of the layout. The buss wires and feeders all come to the front allowing me to do the wiring without going under the layout.
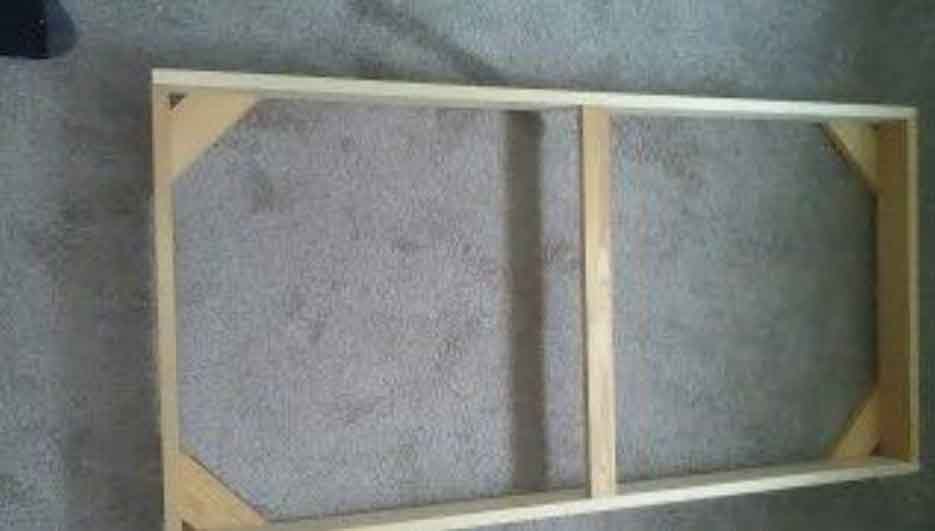
Chapter #1 Bench work
The bench work was constructed of 1”x3 “pine wood. The modules are 4 feet long by 2 feet wide. That is the outside dimensions. This is the size to accommodate the foam panels which are 2×8 feet cut in half to be laid on top.
The corners were braced with small diagonals. The center strip is 1 x 2”.
Make sure it is flat with the top to support the foam. I have found that we have a tendency to make bench work too heavy in most cases, especially if you do not have to move the layout. This way of construction allows you to work one or two modules at a time.
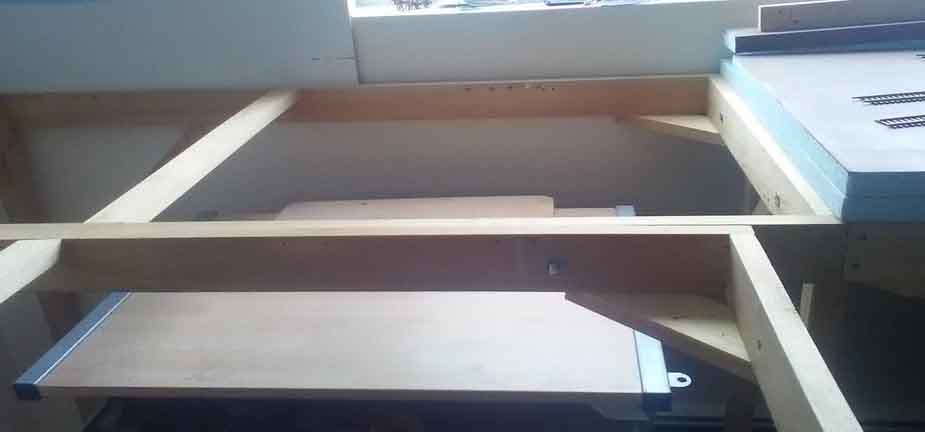
The legs were constructed of 2 x 2 inch posts. I put four legs on the first module then just added two more legs as I joined the modules together. Here you can use any leg system you choose. The modules were bolted together with 3/8” x 3”carriage bolts.
Basic module patern

The back drop is 1/8th Masonite attached to the frame work. You can use any height you wish. I used 16” strips. The Masonite I used had white on one side so, I used this as the clouds with blue painted on it to represent the sky.
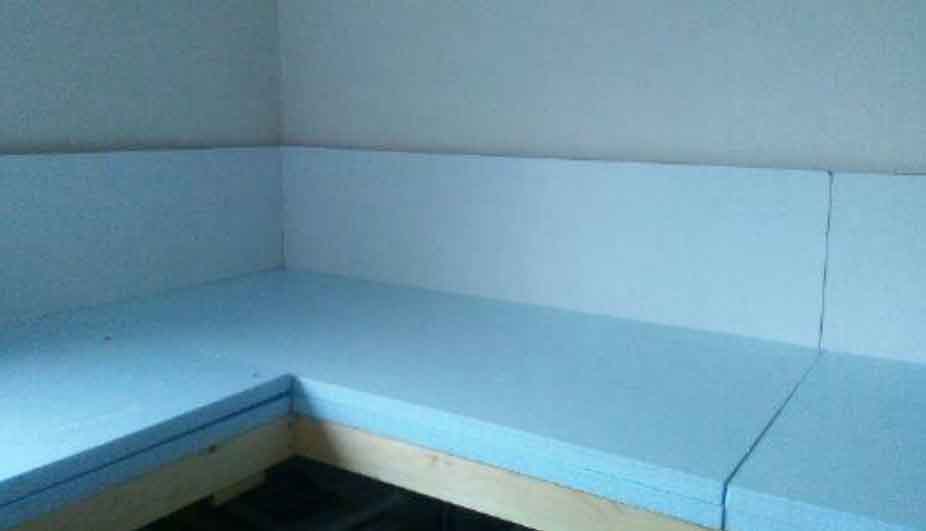
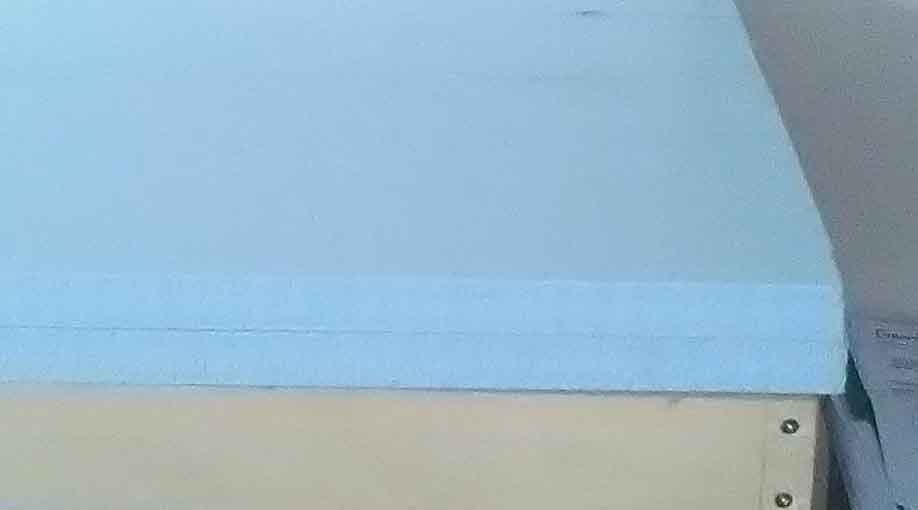
Foam work
The foam bed is just your 1” blue foam board glued to the frame. I use two 1” boards glued together instead of one 2” board. I found this allows me to go down 1” in elevation and still have a flat solid base. I found it easier to carve this way than to carve out the 2” foam. The foam sheets are then glued on to the frame.
Remember the frame was made the same size as the foam. I used foam construction adhesive as per instructions.
I attached the back drop to the frame before placing the bench work in place. If this was a free standing unit with walk around, this step can be done later.
Two things that I discovered are:
1. Beware, all lumber is not the same size. This seems to be true if you buy from different sources. This can be a pain when you go to join pieces together.
2. Two pieces of 1” foam are not the same thickness as one 2” piece. This can be a problem when laying track.
That’s all for now. Stay safe and happy modeling. See you again with chapter #2 Laying track.
Again, thanks Al for your sight. I know it can be frustrating at times, but 99% of the time it is excellent. Keep up the good work, because I know you love it.
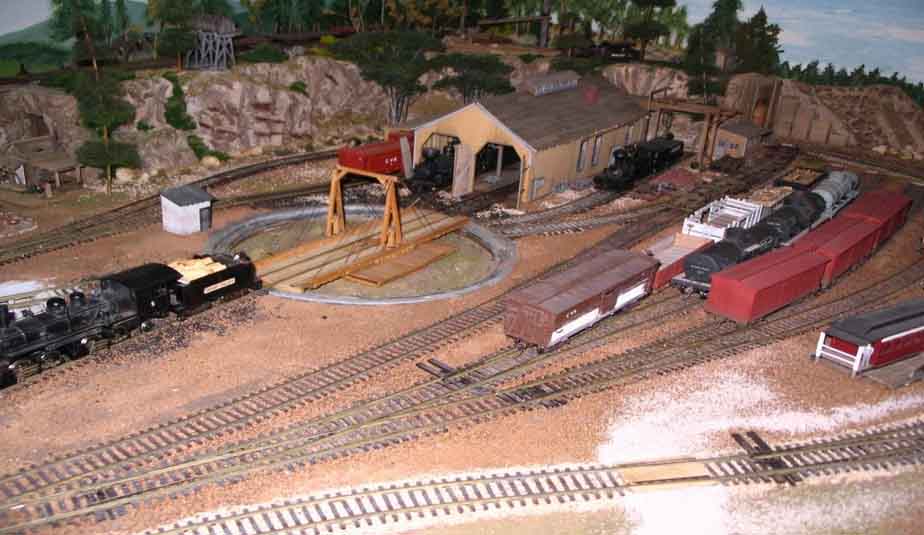

A big thanks to Jim for sharing his HO scale DCC layout.
Over the years there have been quite a few folks who have discovered that not all timber is cut the same size – and indeed the same with the foam height.
It’s useful info…
If you missed the link to Jim’s previous layout, it’s here. Well worth a look.
And now something that’s made me laugh out loud.
My last mail had some brand new printable buildings in them.
There were:

But two of you mailed me saying the same thing: Why does Carl have a dull name, and the other’s don’t?
So I thought I’d ask you lovely lot.
If you can think of a better name for Carl, please do leave a comment below. Have a look at his building and his description and perhaps something will pop into your head.
If it does, please do let me know!
That’s all for today folks.
Please do keep ’em coming.
And if today is the day you get going on your very own layout, the Beginner’s Guide is here.
Best
Al
PS HO scale train layouts here if that’s your thing.

Jim
IMHO you basically have framing at 2 ft O.C. which for 1″ inch foam over time will warp but 2″ made up of (2) 1″ substantially glued may not. 2″ by itself will warp slightly @ 2 ft O.C. If all track will sit on your (2) 1″ then you “may” be OK. I would rather see where the track goes add a small 1/2″x2 joist just to provide support for the foam and you’ll never have to worry. After you load the board with scenery, ballast, buildings, dirt, rocks and even foam mountains the weight will be an issue with just foam- I know. Cut a nice river and now you have a problem.
Your approach to a well constructed but light frame is spot on and a good base is the criteria for years of trouble free running.
Your scenery is outstanding and you wont be happy if its not on a firm foundation.
It’s these kind of posts that helped me so much when I built my new layout starting in 2019. Especially the frame work and I also used foam board on top.
A nice project.
Foam would be cool, but I priced 4×8 sheets for $42.00 which is beyond my budget…
Jim…… great info and tips….thanks
Since the framework is responsible for achieving a reliable, level surface throughout the layout’s existence, it seems to me the investment in additional 1×3’s as cross braces would be cheap insurance to avoid derailing, sagging and a number of other issues over time. Even 5/8 inch osb will sag over time from its own weight. Gravity always wins!
Thank you Jim, you have some interesting reversing loops in your layout and I am looking forward to your experiences with trackwork and wiring
Andrew in oz
looks good
If the foam is not structural, but for sound deadening, try picking up a couple of empty large appliance shipping boxes, glue down a layer or two, and you have a quieter and less expensive surface. Old school may not be hip, but it sure is affordable.
Great layout, especially your track plan. Will probably use it for my N gauge.
Thank you Fred for the tip about the shipping boxes as a surface sound deadener. I live in the desert so I see little problem from humidity ruining the material,
A tremendous amount of forethought and planning is going into this .. and it shows already . Some serious stuff going on .
All that aside , great detail , you’ve an eye for the scenery .
Amazing . Please indeed keep posting your progress .
Great layout for a reverse direction. Hope you don’t mind, I’m going to use it myself.
I use 1×2 for my framework and 1/2 inch plywood for my top. All my trains are Marklin 3 rail that I’ve had for 72 years. With the wood table I get the clitty clack like a real railroad. Does all the foam board make a quiet running railroad? I don’t know, I’ve never tried it.
Nice looking layout and scenery. Very well done.
Thanks for sharing.
Nicely done. Great use of space and well detailed. Would like to see more pictures.
Jim AZ
Now this is the way u guys should show youre accomplishments. Show the track plan and then the layout amenities. Very good job. Good planning.
Jim…… great information and a fantastic plan… your work is well done and an inspiration. Thank you for sharing. Would love to see your wiring plan.
My track plan is almost exactly that ! Can’t wait to see more !!