James had a problem – his model train keeps derailing.
But he came up with a simple and clever solution:
“Hi Alastair
I will be sending update photos of the StarrPoint layout shortly.
Ran into some issues that set me back however now “on track” ( get the pun ) to complete the first half of the layout. The back half of the layout will be completed hopefully by the first of the year.
One of my issues was the rolling stock and some engines de-railing. So I scratch my head and since funds are limited needed an inspection car. So I built one cheaply. I think your readers may fine this interesting on how I did this.
Total time, 1 hour.
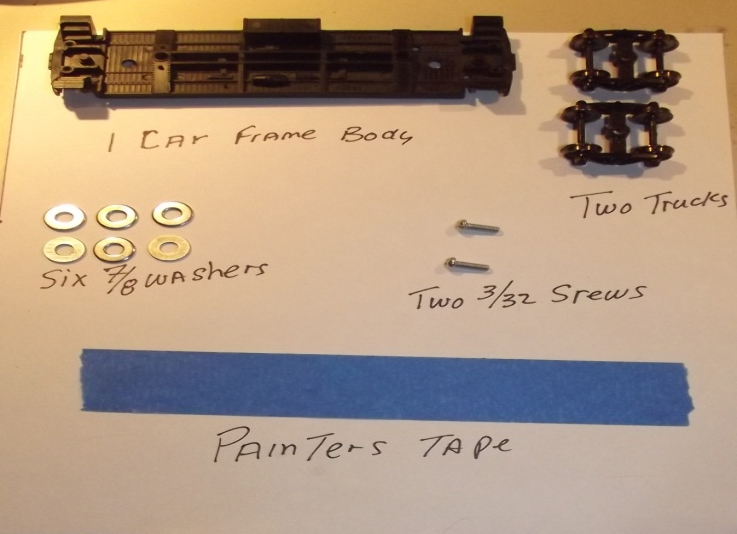
The parts are simple: 1 rail car frame, 2 trucks, 6 washers ( 7/8 size ) 2 screws ( 3/32 size ) and 1 piece of plexi glass
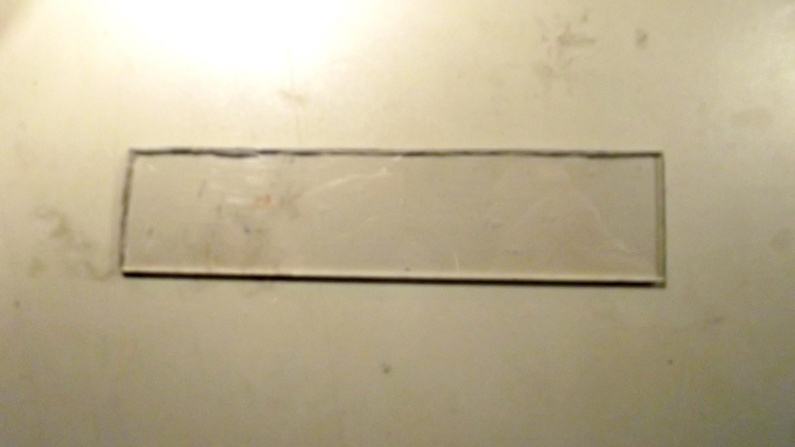
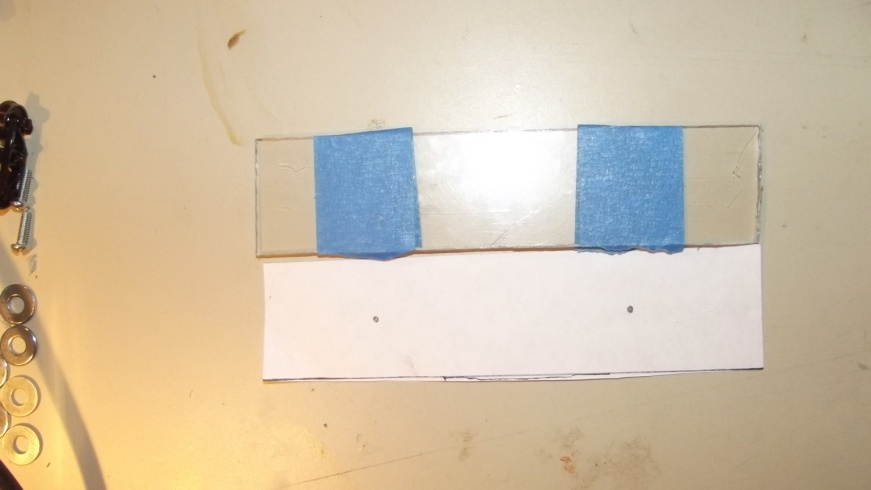
Take the plexi glass and cut it the size of the rail car frame.
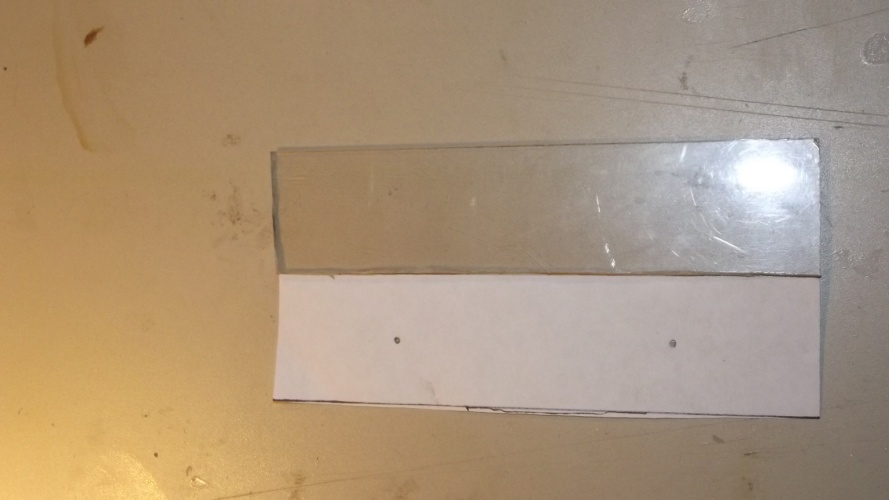
Take a piece of scrap paper and make an outline of the rail car frame. Then cut to the size of the car frame, and place it on the plexi glass.

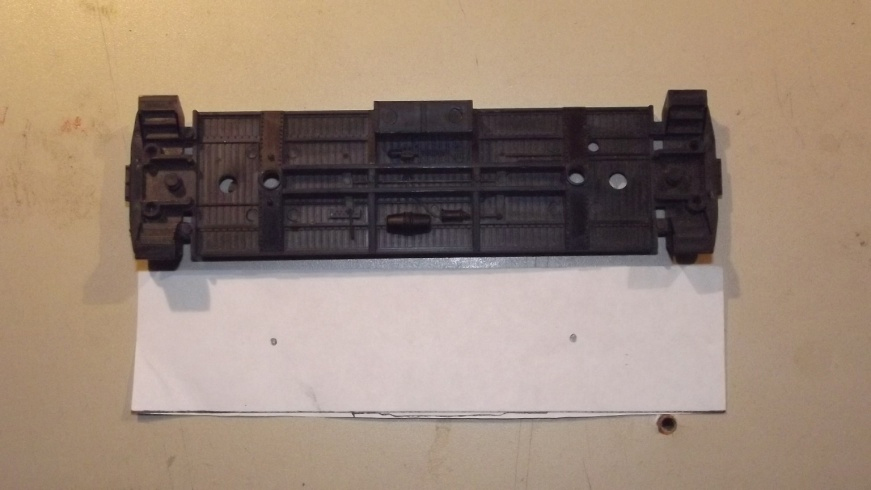
Take the car frame and place that on top of the paper. With a mechanical pencil, mark on the paper the place of the “rail trucks”.
Make sure the car frame is straight when doing this.
Now remove the car frame, take the paper and lie that next to the plexi glass and place the painters tape in the exact place of the marks you made on the paper. Next place the car frame back on the plexi glass and mark the tape for the position for the screws.
Now for the hard part, drilling out the holes for the screws. I have a drill press in my room that made this part easy, however it can be done with a regular drill as well, just take your time. With the tape in place you need to drill the two holes marked on the tape with a 3/32 drill bit.
Once the holes are drilled, and I did it from both sides to ensure the holes were completed correctly, remove the tape. Now the screws WILL NOT be easy to screw into the plexi glass. Take one of the 3/32 screws and screw it through the hole using a electric or battery operated screw driver. Believe it or not, the screw will self tape the plexi glass.
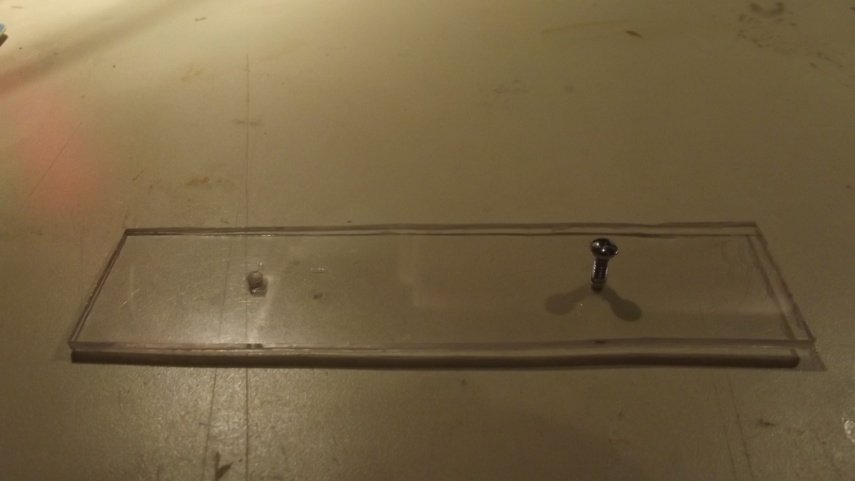
Once the screw holes are tapped, you are ready to assemble.
Take 3 of the 7/8 washers and place them on the plexi glass at the hole sight.
Model train keeps derailing:

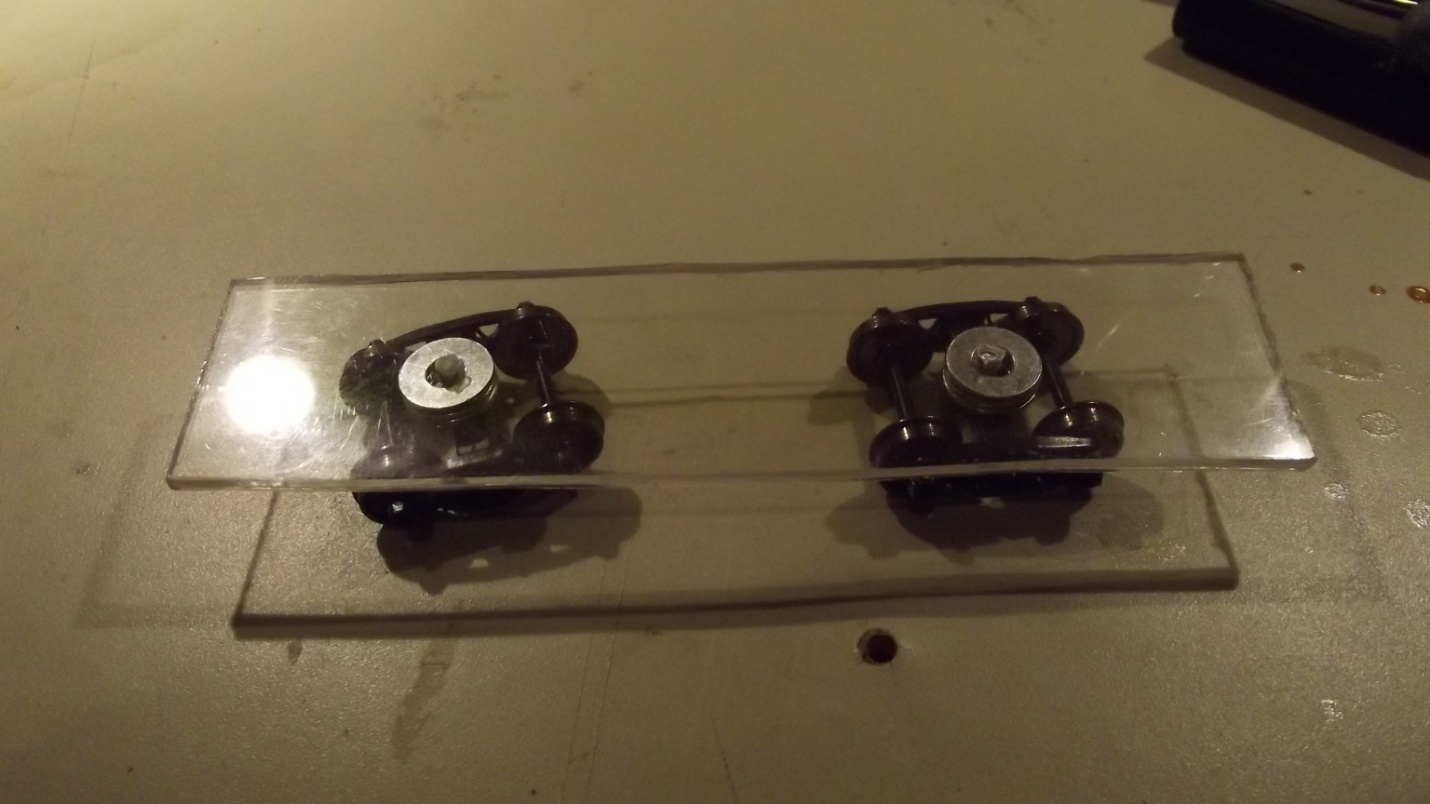
Take one of the trucks with the hole that is indented ( see picture ) and place a 3/32 screw there.
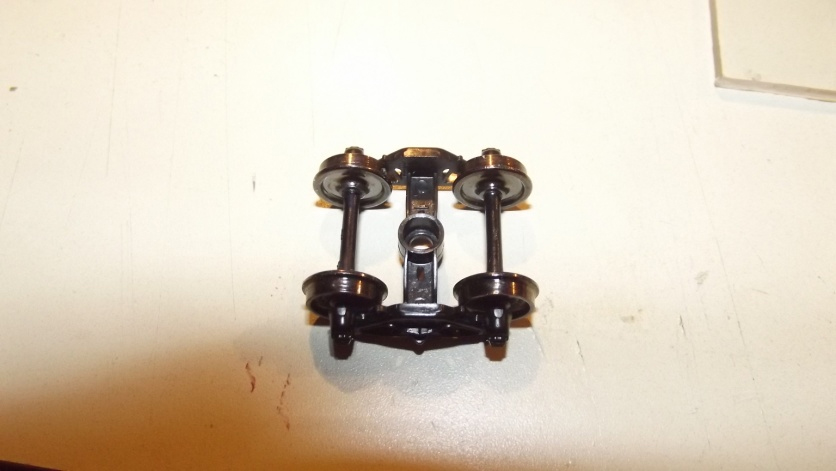
The other side of the truck has the flat portion at the screw hole The flat side has to sit on the washers.
Now with a regular or Philips screw driver, depending on the screw heads you have, screw the parts together.
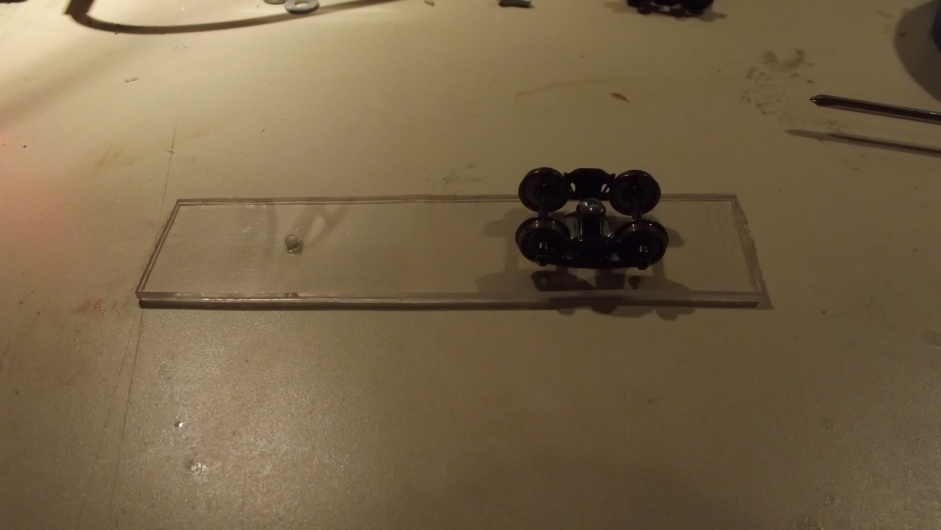
Then do the other rail truck in the same manner. Now you will have to make some adjustments on how tight to make the screws. The rail trucks should SPIN freely so that the inspection car can navigate the curves without any issues
And here is what it looks like when fully assembled
Total cost, $5.00… One of the inspection cars advertised in Model Railroader was selling for $25.00.
For about an hour’s working time and a few parts you too can have a reliable way of checking for track issues with your own inspection car that will not break the bank
Have fun and Happy Railroading
James Volmer Snr”
An excellent ‘how to’ from James – what a way to sort your track out if your model train keeps derailing – thank you, James.
It reminded me of Mal’s excellent posts on dertailing:
How to stop your trains derailing
That’s all for today folks – please do keep ’em coming.
Don’t forget the Beginner’s Guide is here if today is going to be the day you stop dreaming and start doing.
Best
Al
PS More HO scale train layouts here if that’s your thing.
Need buildings for your layout? Have a look at the Silly Discount bundle.

Super.
I am going to build one too.!
Thanks !
great idea…and you could even mount a cell phone camera to the plexi and that way go back and see the ‘inspections’ right on your computer…slow motion, etc….
This is a very good suggestion on how to make an inspection car. I already purchased one (pre-made) and now, using James’s idea, I’m planning on making one for full size Amtrack cars. Thanks for a very good idea.
I have a couple of suggestions to may to the inspection car. 1) Add a coupler to each end of the car so that the car can be added to a train consist. 2) Someone suggested using a cell phone as a inspection camera, but it might be better to use a small wireless home security cam with a couple of bright white LEDs. Batteries can be in a gondola car after the inspection car.. That way you can see what happens along the rails in-question, in real time at whatever speed that you run your trains at, that causes derailments. Also, your expensive cell phone won’t get damaged.
Afterthought:
if the camera can be repositioned from a horizontal to a vertical position, you’ll have a dual purpose car . It becomes a camera car, so your friends and relatives can see your layout as if they were riding on you train.
Well done with that project
Looks very useful, I must have one.
Just wondering how your inspection car goes with regards to NMRA weight standards. Its not mentioned here but I would have thought to get an accurate picture of what the rail issues are this factor would need to be taken into account.
Good idea though, as I have one point crossing which gives me grief on certain stock so will have a go at making one of theses myself.
great idea bring on more.
Hello,
Nice job, but I fail to see the point. Any carriage, truck, wagon, will derail if there is a track/point issue? Or please tell me what I am missing.
Kind regards,
Ray
some one beat me to it but the wireless camera and LEDs are a great idea for a different look of your trackage when it is in use !!
Great idea and we all have parts lay around.
Roland
Great idea James.I will try one myself.I would add the weight to the inspection car to keep it the same weight as all the rest.If its to light it will skip over or bring up another problem you didn’t think would.So adding the weight will help.But love the idea and will make one as well. I have 4 more new builds but will send in in the fall when more people are interested.Thanks for the great idea
Ray, the point is, with a see-through car body you can look down and see what is causing the derailment, e.g. wide to gauge, tight to gauge, checkrail clearance, etc. and the benefit of adding a very small camera could be to see what’s going on in a tunnel or inaccessible area.
Neat idea. I might modify it by using plastic washers and some extra Kadee coupler trucks I have.
Jim AZ
hhmm …great idea James. I’m getting ready to start laying track on my outdoor G scale layout and have many concerns. One being finding and fixing bad places in the track that derail my trains or just don’t look right as the train passes over. I’m going to plant this idea in the back of my mind as a potential contingency if the need arises. Always nice to have plan B, C, D….. just in case. Thanks for sharing!
Cary in KY
Another positive strike for those people who think that the model producing companies are charging us into the ground. Yeah for our side.
Good idea, however I would suggest using a proper tap to put the threads in the the plexi-glass. Also those washers look a little small to be 7/8, Look more like 3/16 or maybe 1/4, or I may using the incorrect measuring system.
James, YEP I built ojne much the same way MANY years ago! And to think they sell for $25 and up to BUY one PRE-MADE!
The next one, I plan to do will have a mounted camera on it for clearances, as well as places I can not “see” the car and watch it on the computer to see the trouble areas (if any)…..
GREAT STUFF guys! I may have some up and coming ideas for those who care!!!!! BUT is taking time (to find the time) to make the posting!!!!! ~Hemi
Very well done, thanks for sharing going to make one myself.( And Al keep up the very good work you do much appreciated.)f
Great idea James. I will definitely have a go at one of these.
Regards
Martin
Brilliant!
Great “How-To”
Those that dreamed up adding couplers and a camera… Bravo for taking a good idea and making it even more versatile!
Another useful track quality check is a small engineers’ try-square, just slide the short arm sideways, flat along the track with the other arm upright. If the upper arm is vertical the track is flat, if the arm points to one side you have a dip or twist fault, which may allow wheelsets out over the side if sharp enough. Quick, visual and no batteries.
Rod
What a great job. My outdoor “G” can use a lot of TLC and this is just the ticket. Always trying to find and solve derailment issues, but never gave your idea a thought. Starting on mine tomorrow. Just for kicks, I’m also going to glue on a round bubble as an extra aide. Thanks for my new project.
Great Thank you
Great Idea, but can you clarify the size of those washers? 7/8 seems a little to large. Could it be that you mean 7/16 or smaller size? Would be appreciate a reply. Don’t want to use the wrong size. I want to use the exact size you use, so there would be no problems. Thank you. Rocco from Haskell N.J..
Great build James. Thank you for sharing.
I built one of those back in mid-90’s. Almost 30 years ago lmao. How come mine can actually couple to engine or middle/end of actual consist and watch switching and trackage routing?
Not my idea even, in Model Railroader or elsewhere…
Regards, Rich 😂
nicely done, good tip, thanks.
The two most likely issues leading to derailment are gauging, both the track and the wheel sets, and track that is not level rail to rail. There are others but these are the usual culprits. Rob
Would suggest using Lexan instead of plexiglass does not crack when being drilled
Ah so! I had to read this and look at the photos twice before I figured out that the 7/8-inch washers are merely spacers to keep the trucks from rubbing on the bottom of the plexiglass. The holes in the truck bolsters are what keep the washers in place. I think I would have chosen fender washers that have a smaller center hole closer to the 3/32″ screw size so they would stay in place better.
I think I’d also consider gluing some extra washers or weights on top of the plexiglass if needed to bring the car up to NRMA standard weight. I guess the clear plexiglass is needed to be able to see where the test car encounters bad track that causes derailments. It would also be wise to double check the wheels for correct spacing with an NMRA gauge. Since this test car has no couplers, it can’t test for track that might cause problems for magnetic coupler trip pins. Still, all in all a nice tutorial on building one’s own track test car James.
A very clever Idea on how to keep you cars from being derailed.