Jim’s been in touch again with his rock molds for model railroads.
If you missed his last post, it’s here.
“Starrpoint Mountain Part Two…..
Hello fellow model railroaders, here is an update on the mountain plus a little extra.
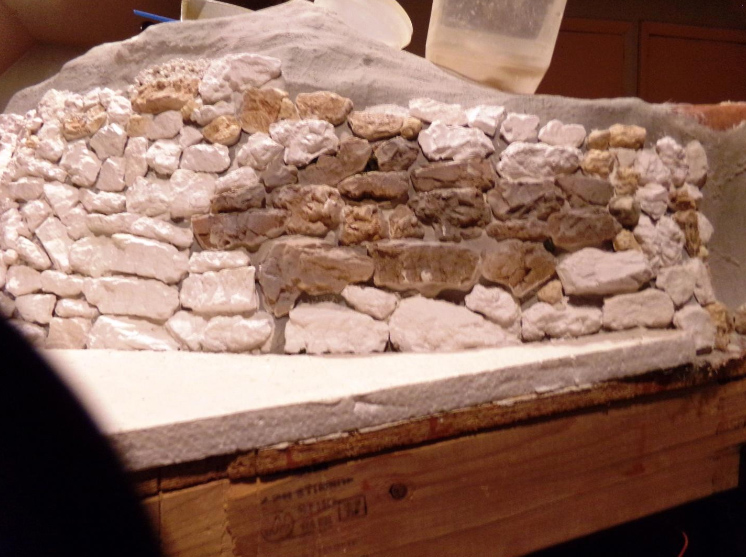
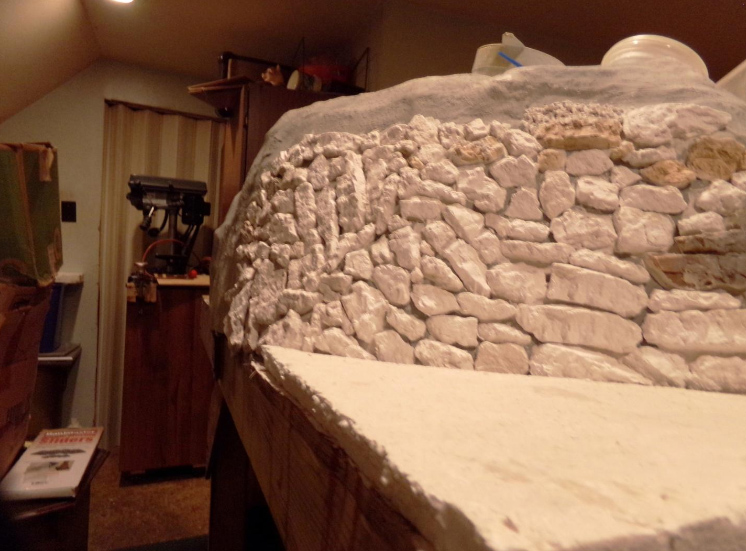
As you can see, the mountain is taking shape nicely. I have started to place the rock formations on the mountain to give it some texture. I looked at a number of mountain pictures, in order to get a close representation of how it should look and this is what I came up with.
The colour of the rocks will closely match the ones in the middle of the mountain. These were salvaged from the original mountain.
Placing the rocks is like doing a jig saw puzzle without any sort of representation. There are approximately120 rocks on now. It took some time to place them all here, since I did not want the fresh ones to become dislodged as the new ones were being placed.
I estimate there will be a total of 300 pieces placed to complete the mountain. It is going to take some time for this, since I can only make 40 castings at a time. I try to make a total of 80 in a day and then install them.
On the lower part of the mountain, I placed a piece of Styrofoam, coated it with the same material used on the mountain, and will plant, trees, some shrubs, and some people relaxing.
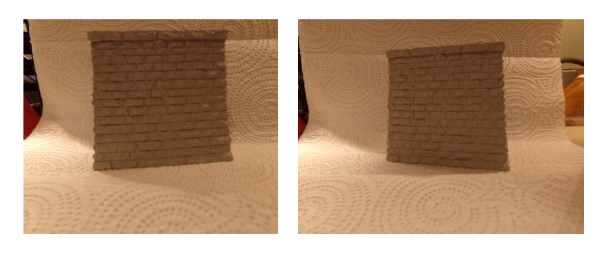
Now for the extra! I have six bridge supports holding up the bridge. I purchased one of them from Walthers for $13.00. Now the cost of 6 of them would have cost me a total of $78.00. NO WAY! So I took the original one, made a duplicate rubber mold copy of it and proceeded to make all of the piers for the incredible price of TAH DAH $28.50 and the mold is re-useable again and again. I even made some for the Train Club I belong to.
Can you tell which one below is the original one and which one is the copy? I think NOT! Not all rock molds for model railroads are the same.
To make the rubber mold, I went to the local craft store, picked up the mold kit for $25.00. The mold kit is from ALUMINITE RUBBER MOLD KIT. Comes with everything you need to make any kind of mold you wish. After the mold was made, I then mixed up a batch of Hydrocal, poured it into the mold, let it set and the rest is history. The only problem, you can only make one at a time but since the Hydrocal sets up fairly quickly, I completed all the castings in two days. I then painted the castings with grey paint, to match the original.
Well that’s all for now. It will be some time before I send the next part on the mountain. Want to place the rest of the rock castings, stain them, plant the trees, decorate, set up the radar station etc.
And yes I will have a new project for you to see.
Happy Modeling
Jim”
“Hi Al, just uploaded part 5 of the new layout, a few tips on here, also shows using the new Peco Static Grass Aplicator, its smaller but it works very well and handy to reach some parts as its smaller, starting to take shape now, but a long way to go yet…
Regards
Dave”
Latest ebay cheat sheet is here. (Thanks for all the comments – please tell me what I should add)
A huge thanks to Jim for sharing his rock molds for model railroads and to Dave – A double bill of updates!
I do love seeing all these layouts slowly take shape. It’s wonderful to see the variety too.
That’s all for today folks.
Please do keep ’em coming.
And if today is the day you get started on your layout, the Beginner’s Guide is here.
Best
Al
PS Latest ebay cheat sheet is here.
PPS More HO scale train layouts here if that’s your thing.


Brilliant, love it. great idea for the bridge supports & looks like works well. Whilst not usually bothering too much about such things, could this step on Walthers legal toes a bit? or did the original perhaps come from some hobby store that could have been Walthers but you don’t really remember, could have been any old store !
Jim’s comment about his piers, and which is the copy reminds me of the old audio tape commercial, “is it live, or is it Memorex” With Jims, can’t tell which is the original and which is the dupe, that is for sure. Good info Jim. Will enjoy future posts as well.
MN Dan
I like all that. The only thing I would point out…is a mountain would not be all that random. That would be perfect for man made walls and buttresses. Mountains would be in layers.Otherwise with all the weight it would come tumbling down. May want to look at some pictures of where they cut highways through hills. I have to learn casting. Plan to make a lot of my own stuff but in Model railraoding and regular kit building
I was wondering if all sides showed relief? If so how do you cut them out and reuse the mold? On rocks and items that will be up against something or hidden then it would not matter.Why did’t you make more molds of the rocks to save you time? It really looks great and wish you all the luck.
I am just waiting for the end of the project to see what you do guy , I am hopping you finish soon I’m still working on my grandsons tiny lay out and have run in to a few small problem spots mainly do to the lack of space in our sun room !
Al. I tried to send you some pics. of the layout but have not caught any response
here so am thinking they did not get received on your end , it seems to be the norm with any pics. I try to send to any one since win10 was forced on my computer so I guess I will have to forget trying to send anything from this computer
? George
Dave, your modelling skills improves exponentially! The transformation from model to back ground is of Hollywood quality almost unbelievable authentic! And as I have always said, your authentic track treatment is the worlds best! Have you ever thought of offering your skills to modelers that perhaps do not have the time or skill?
Whatever, you provide huge entertainment and also hints and tips that are invaluable to all us railway enthusiasts!
I for one are hugely impressed with your efforts!
Hello Jim, nice molding on the rock for the bridge support. Yes it is hard to say on witch one is the real casting but since I have 50/50% chance on getting it right, well after carefully looking at them both I pick,. The right one or should I say the one on the the left. Ha ha but back to the rock mountain, looking good, I already started the little stuff that you would put here and there. Great job and as for Dave film, there was an error that occurred so I will just go over to eBay and find the film. Thank you Al for all your services that you provide for everyone on this site.
SDG St.Petersburgs Fl USA