John’s been in touch with a great step by step: How to build a model train engine house
“For a while now I have wanted to build a wood engine shed for my On30 Porter locomotives.
I was beginning to despair and thinking of drawing my own when you came out with a wonderful shed kit cleverly disguised as a wooden covered bridge!
For my “Porter House” I want to first thank you for your wonderful, inspirational site. The ideas I find here I have not seen anywhere else. I also want to thank your son for his fantastic artwork. Each model he draws is a clever design and offers many “hidden” opportunities for some creative model work.
Lastly (and certainly not least) there is “Mad John” and his bonkers videos about your amazing “print-out” kits. When I am feeling lost in the modeling doldrums, one of John’s enthusiastic videos brings me back to life and encourages me to take one of your kits and make something unique out of it. “Mad John” also connected me with my father and his modeling even though I lost my “Pop” in 1993. (Were he alive today my “Pop” would be 114 years old.)
How to build a model train engine house – The “Porter House”:
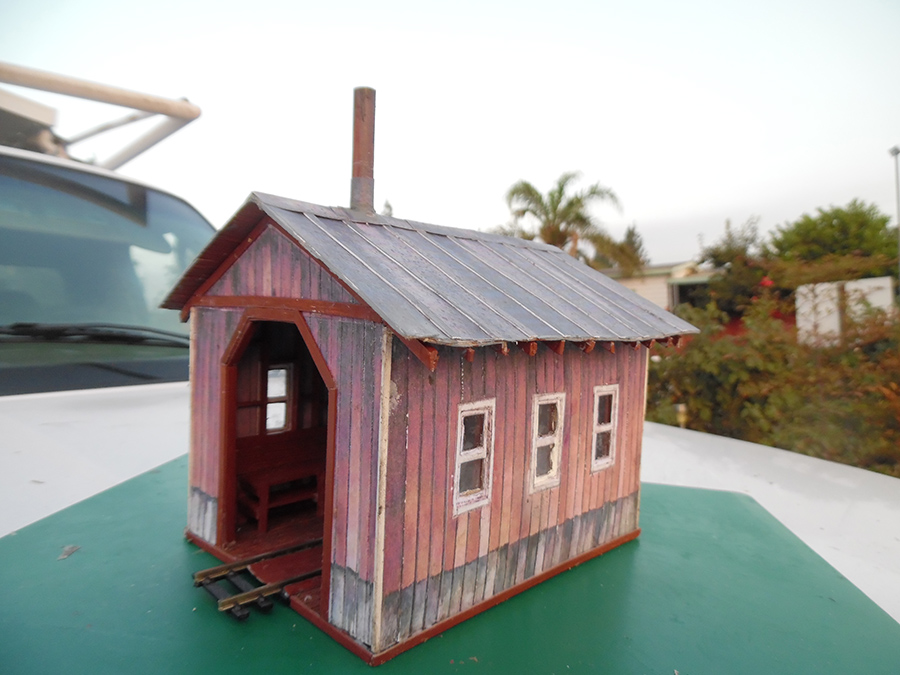
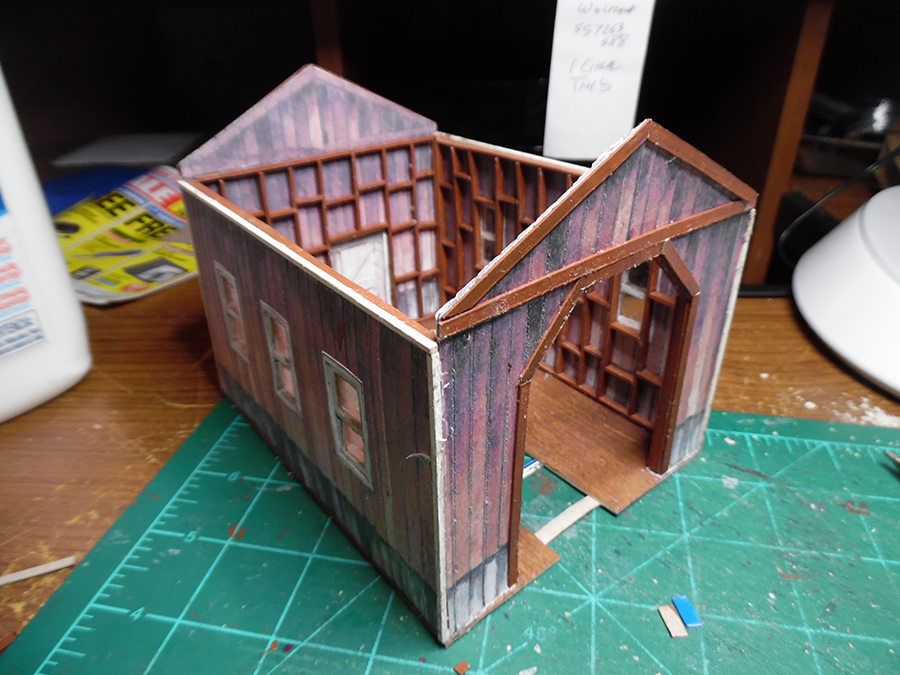
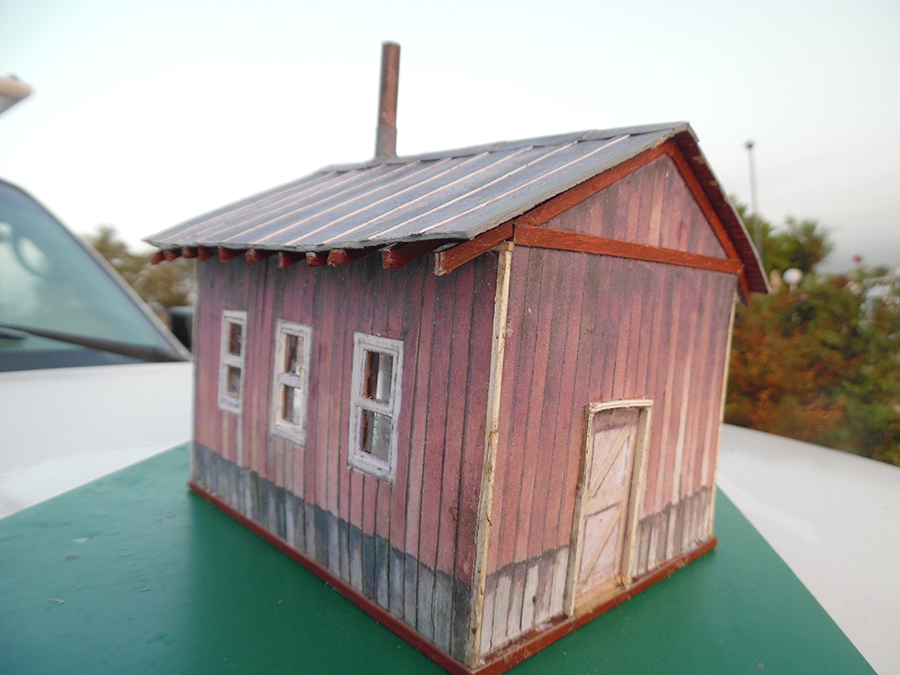
This shed is for one of my small On30 layouts and was built from Alastair’s “printable buildings” models. The base of the model is/was the new “covered bridge” kit but parts were purloined from both one of his house kits and one of the shed kits also.
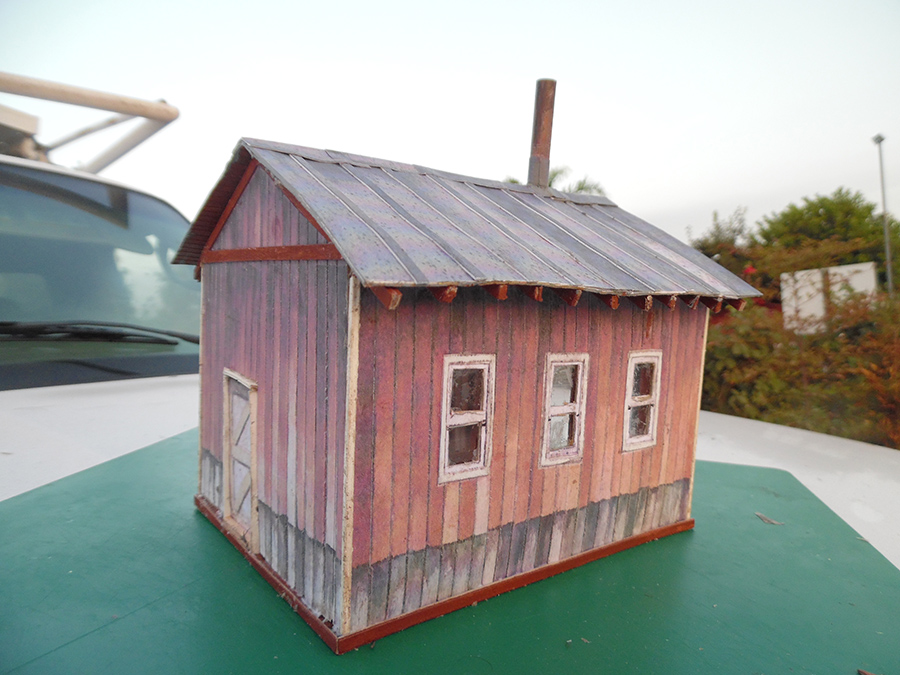
The windows come from the two story blue house that is included with many of the bundles. The door in the back of the finished model comes from the yellow shed that comes from his corrugated metal water tank kit.
When one builds a basic kit, the result is pretty “flat” — What makes the model “come alive” is the extra detail one can add. In HO or OO the extra dimension is a big help — but in 1/4 inch scale it is essential!
I named this wooden engine shed “The Porter House” for the small locomotives that will call it home. Porter was an American builder of small industrial and mining type locomotives; first steam and then much later, diesel and gas.
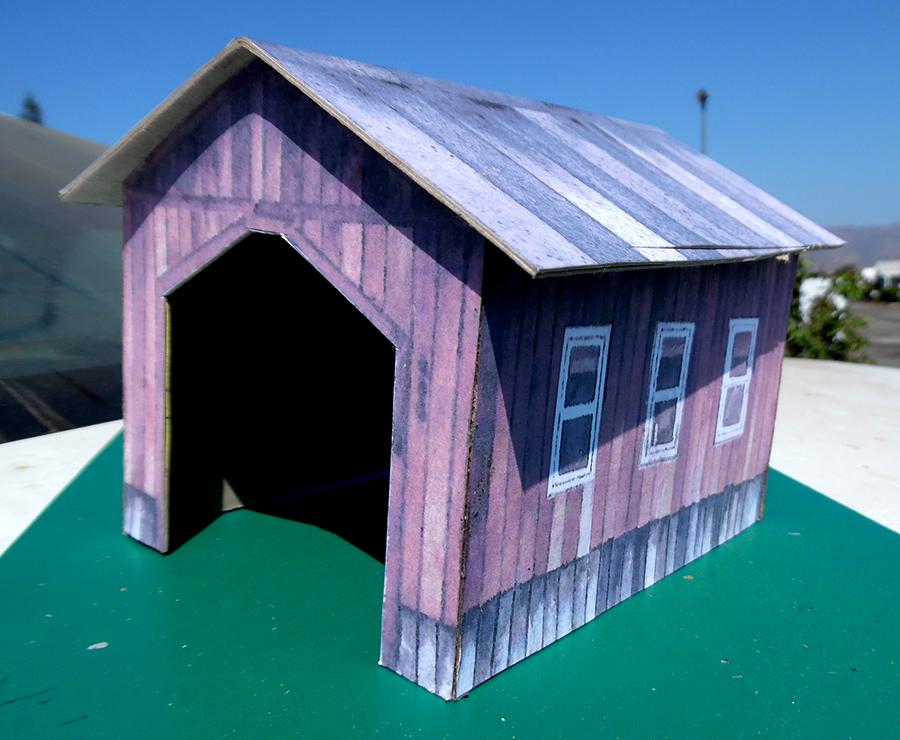
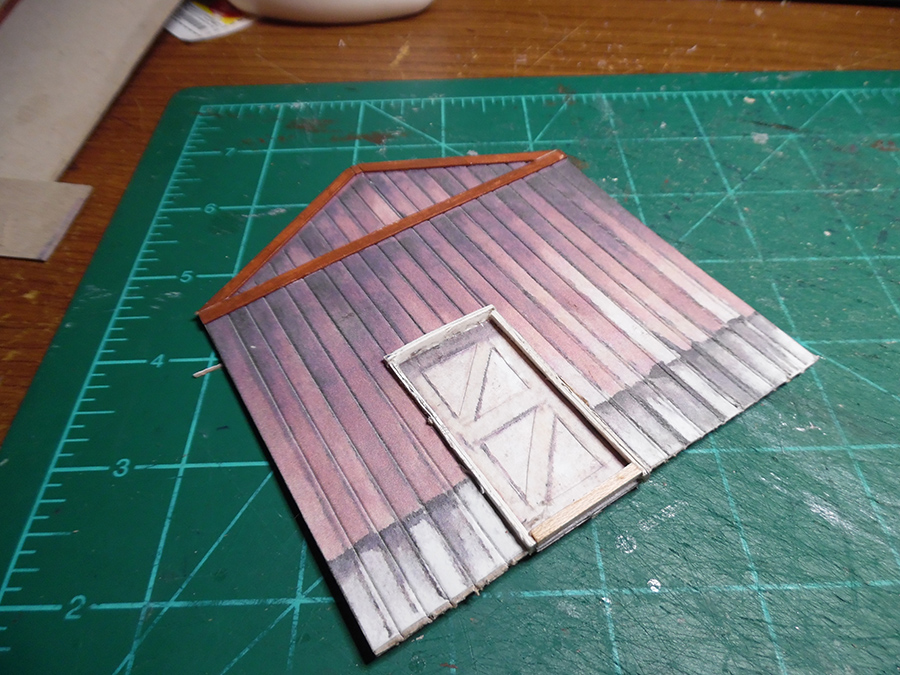
Because of the many modifications I would be making to the covered bridge, I first built a quick model to “:test” my ideas. Test builds are a good idea when making major modifications to any model kit. My test model was a basic print that I “blew up” from the HO scale model size to the size I needed for my 1/4 inch scale shed. Because it was a basic print, the test model shows what a basic model looks like without the additional texture or dimension.
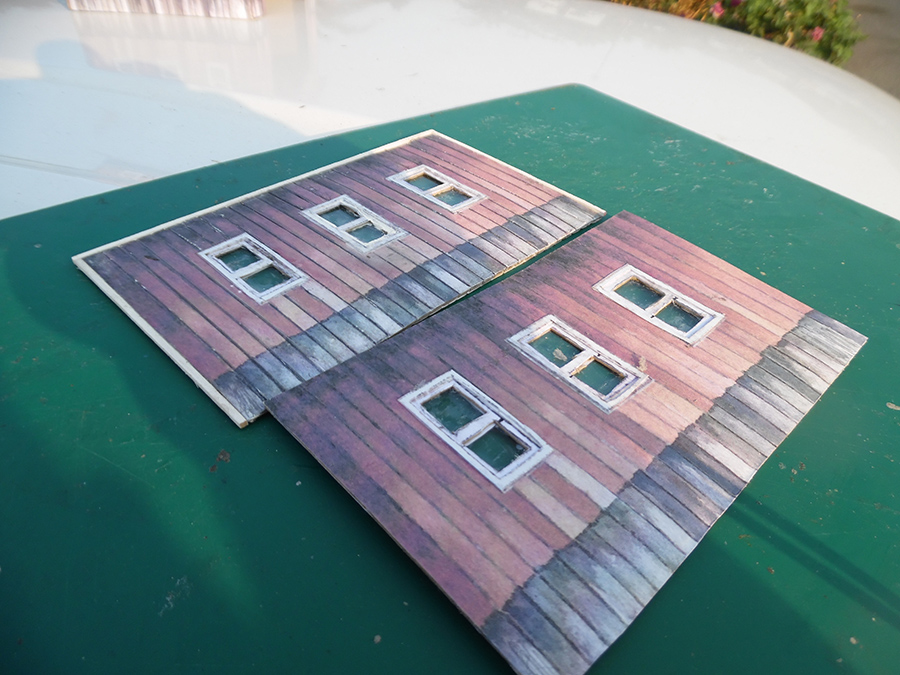
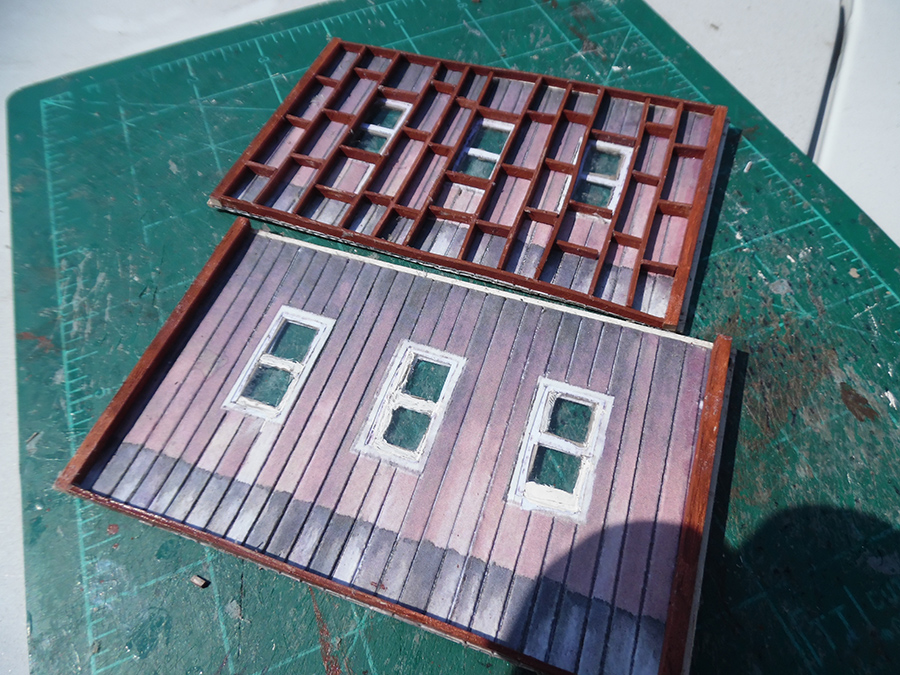
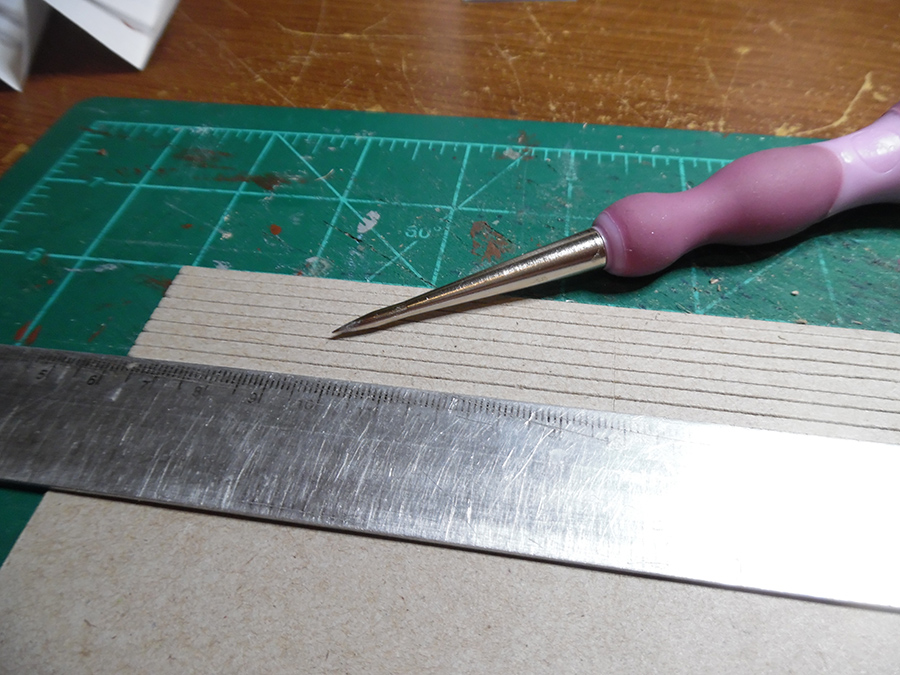
When building the walls for the Porter House, texture makes a big difference. Boards were scribed with a straight-edge and a sewing awl. Several prints were made so that I had inside and outside wall detail.
Also the extra prints went into adding “dimension” for the windows. “Glass” was added so one could see through the windows. The “glass” is a bit of acetate that came from the packaging for a letter set I got at a local craft store.
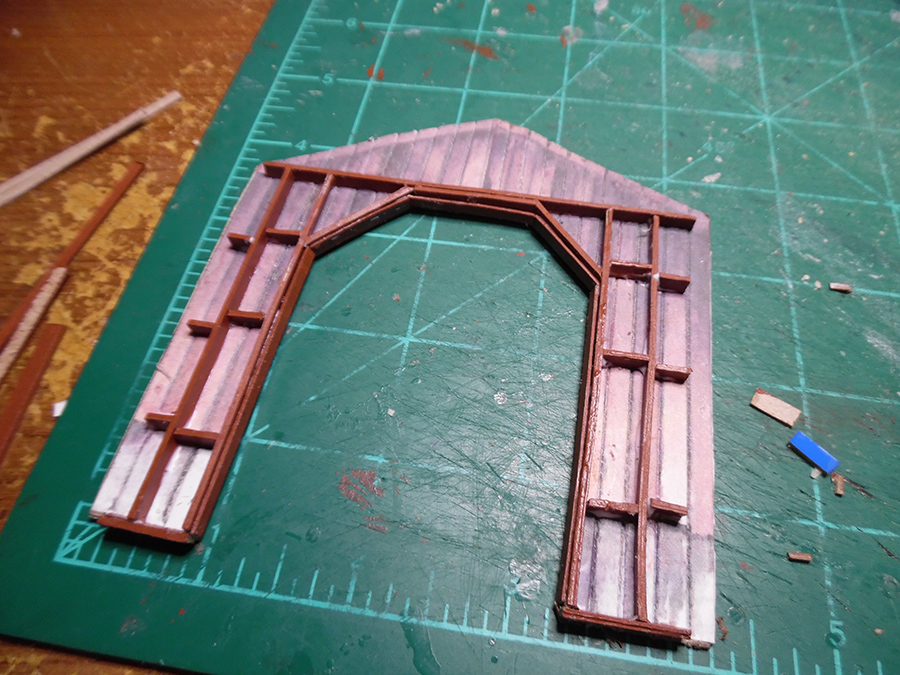
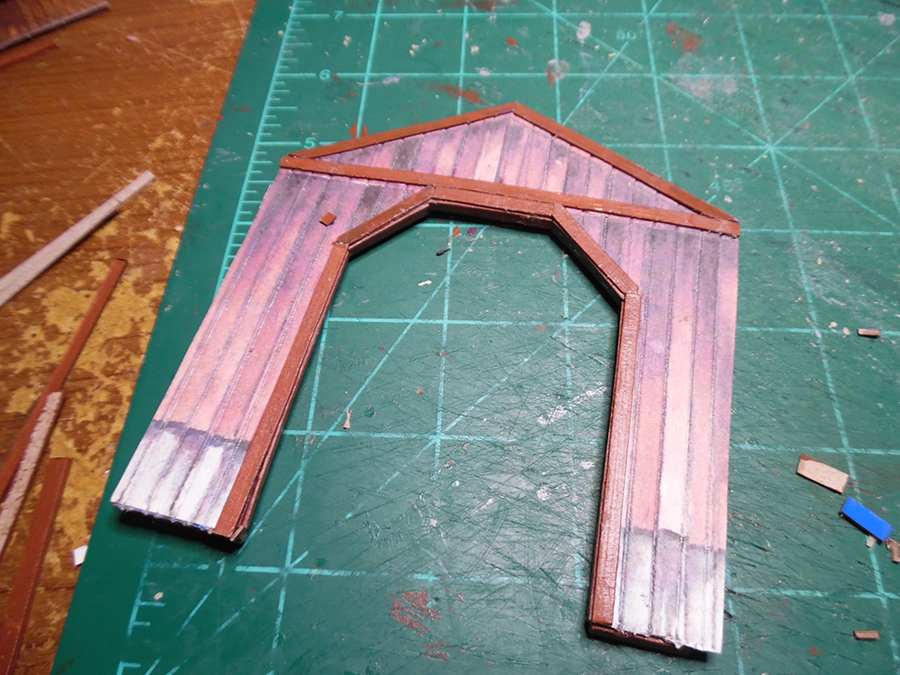
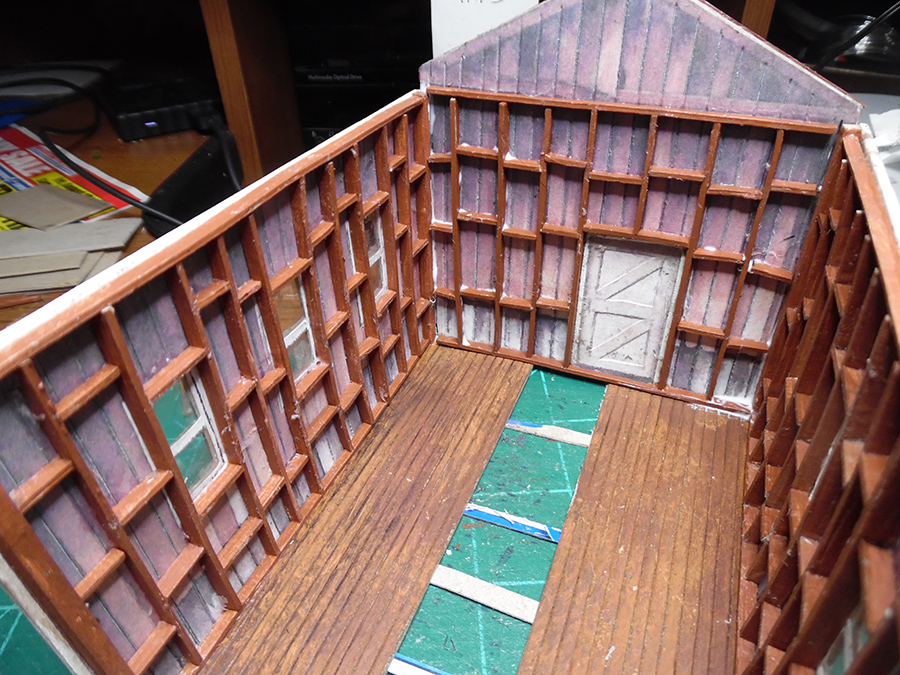
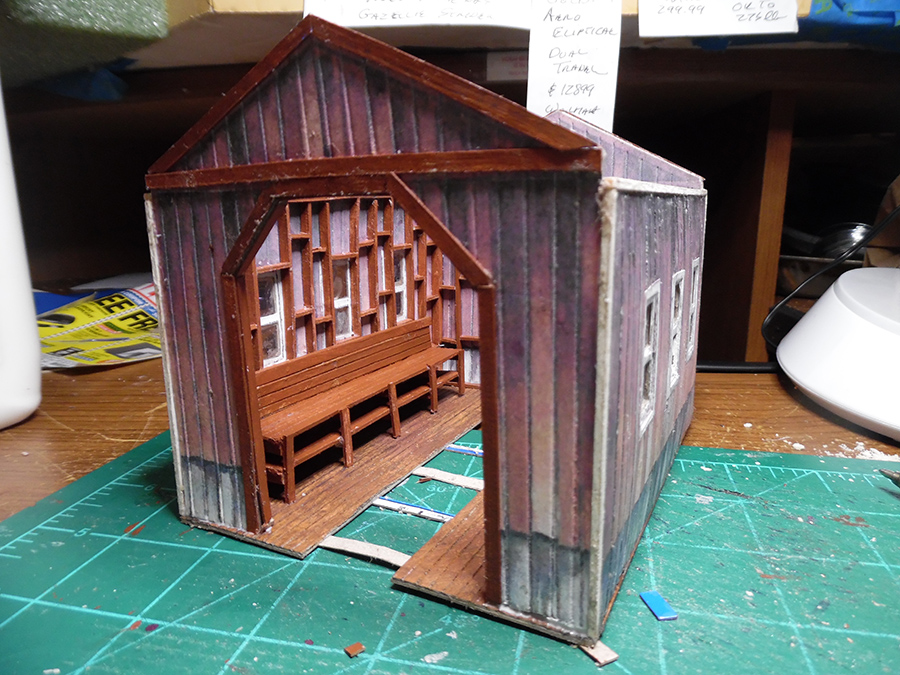
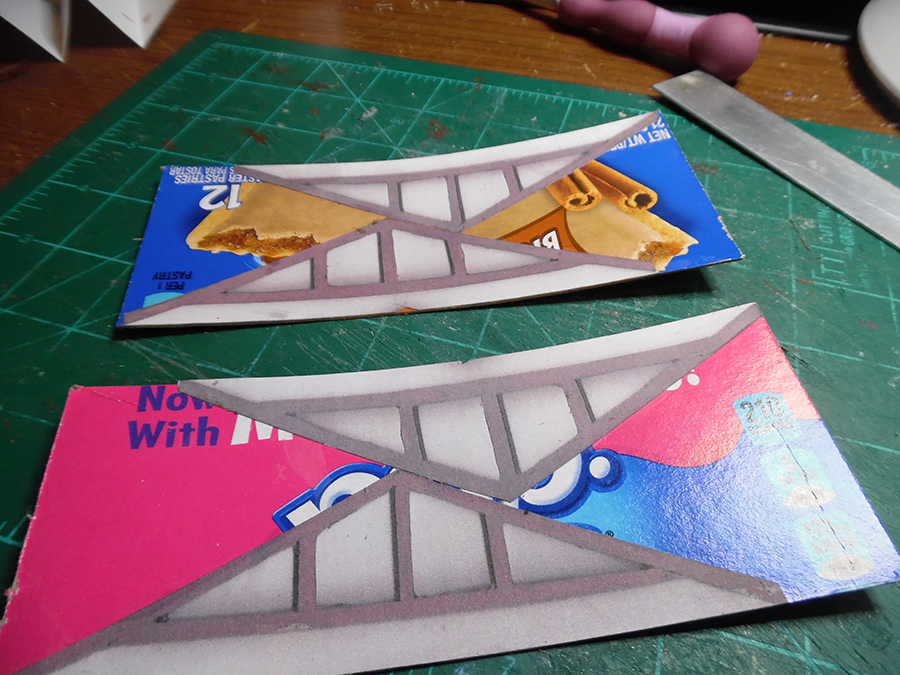
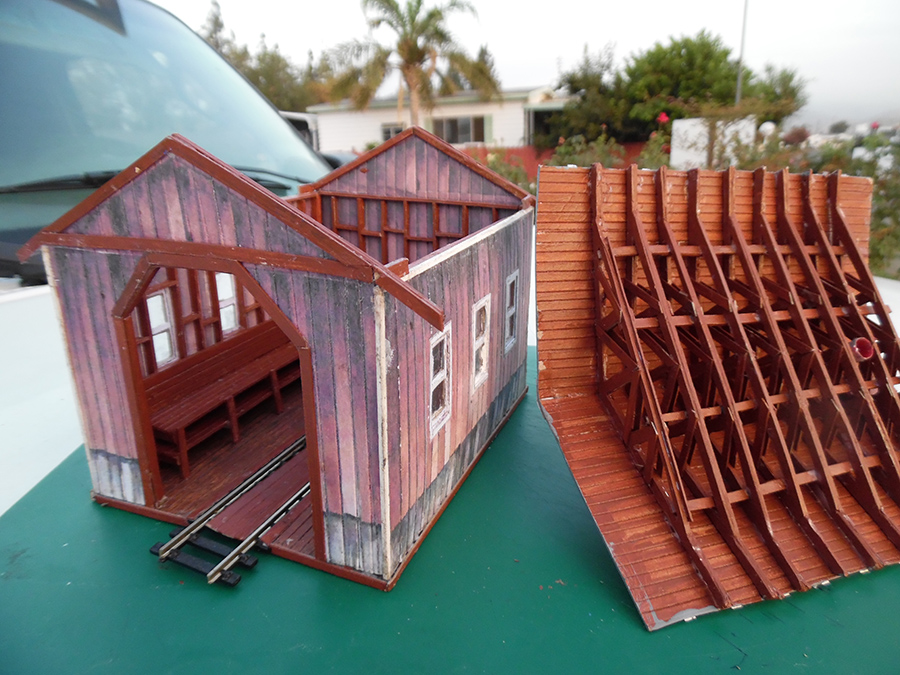
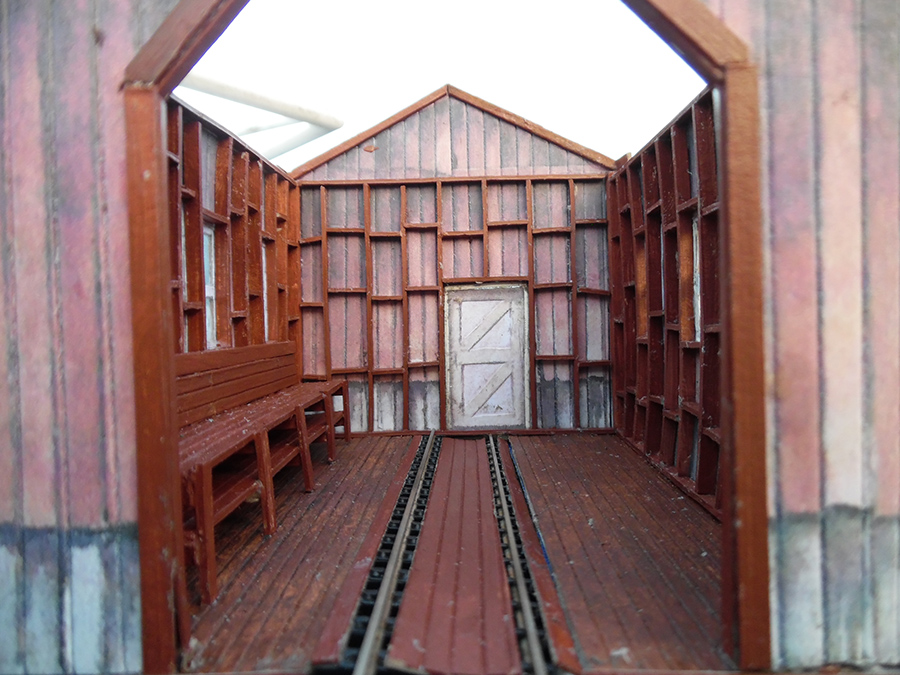
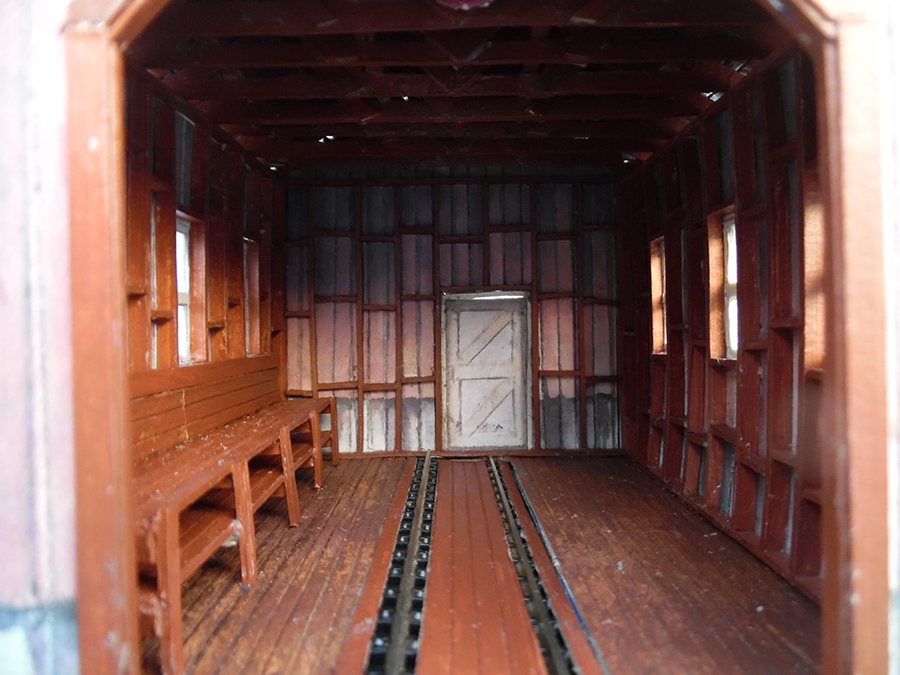
Because this is an engine shed and has a big door exposing the interior of the building, interior detail is important. The “boards” that frame the interior of the building were all scribed or cut from the same type of cardboard box material that I use to back the base prints. This cardboard come from food packaging in the form of cereal boxes, cracker boxes, and similar food packaging.
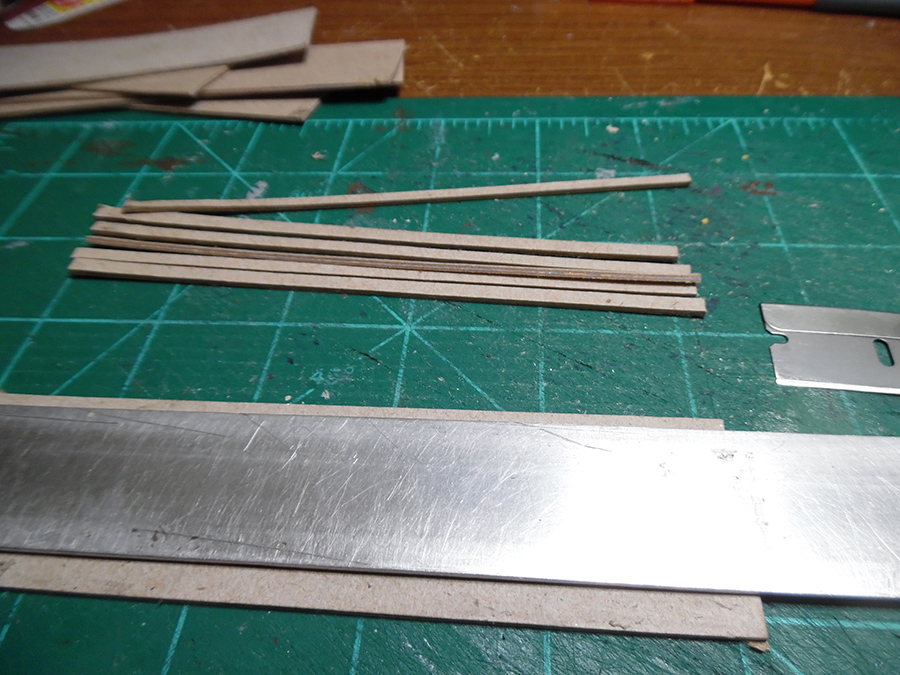
Here I offer a lagnappe and present how make some of the detail pieces from box card.
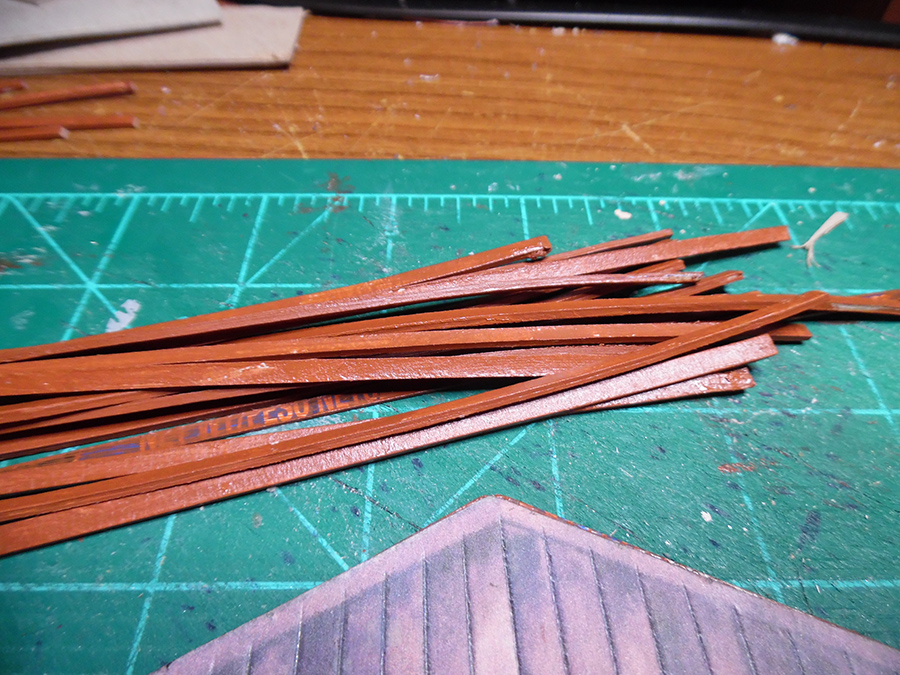
Where I can, I make my own details. “Stripwood” can be made from box card as can scribed wood. Here is how I do it using a cutting mat, straight edge, awl or single edge razor blade, and a little paint.
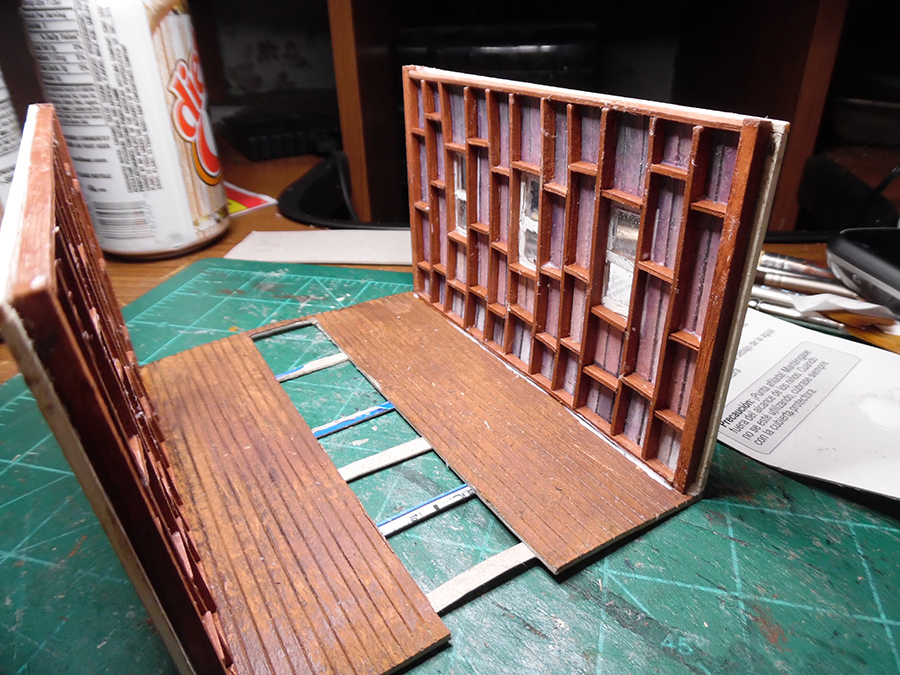
Now that we have walls, the time has come to begin assembling the engine shed. From our “scribed wood” we have a floor to glue the walls to. At this point I used a bit of balsa to give strength to the corners. This is the only real wood that I used in building this model.
I also built a little workbench from box card to go against the interior wall on one side of the shed. This bench was built for some of my scribed and cut “Stripwood”.
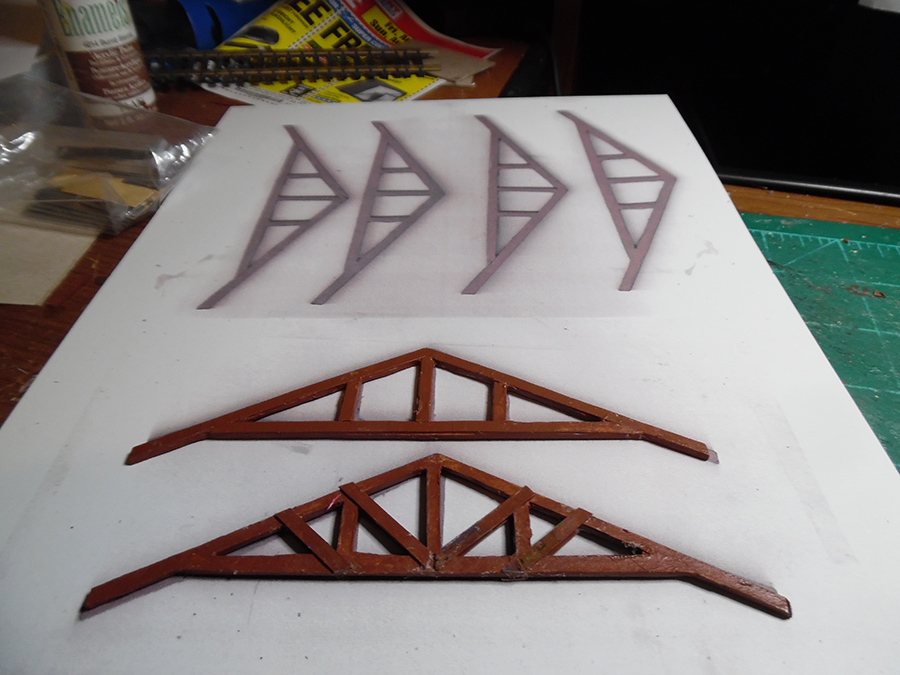
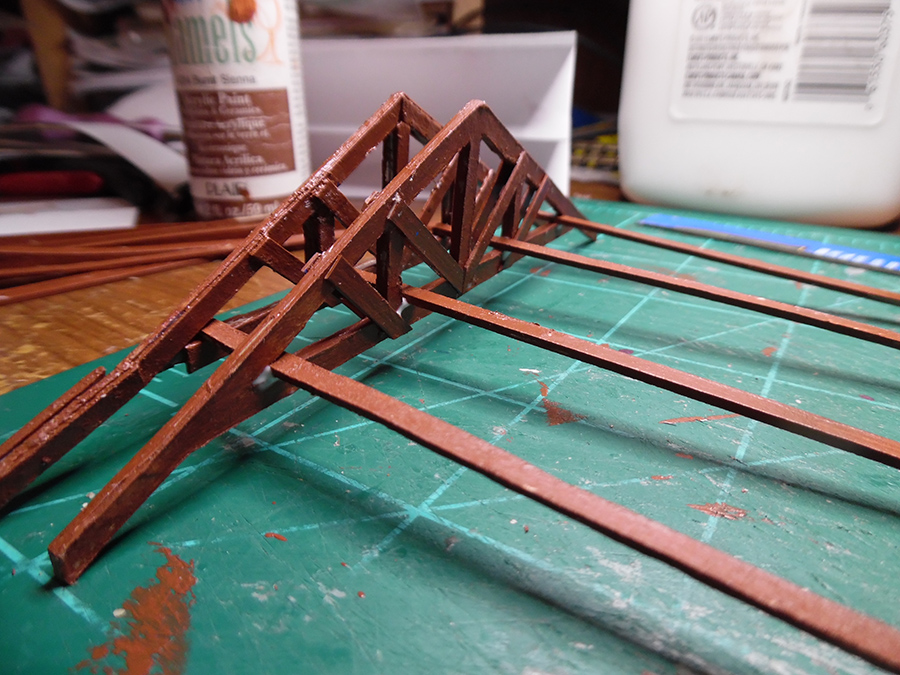
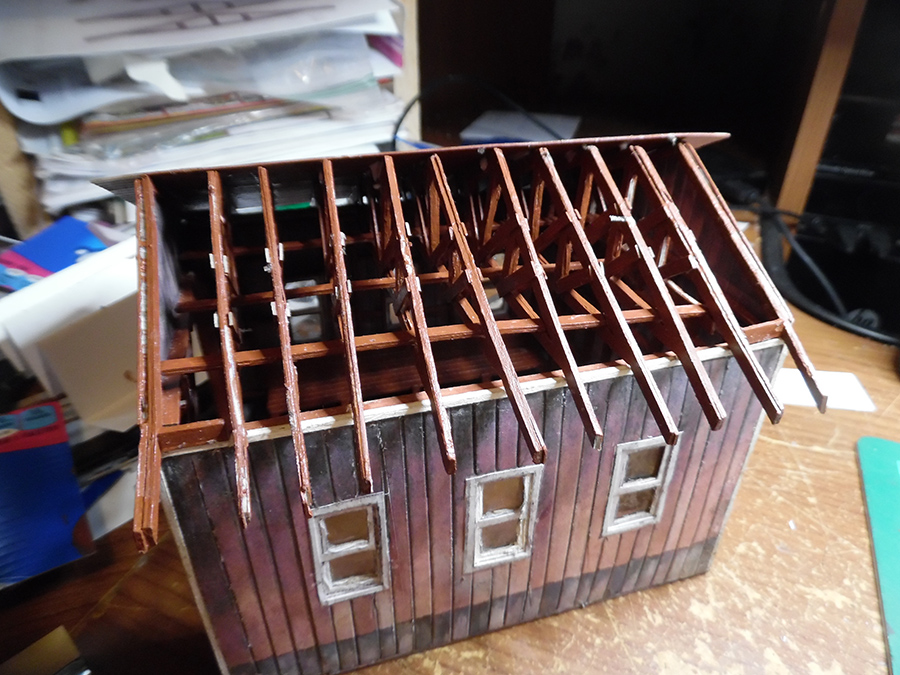
Now that the shed has walls and a floor, it needs a roof. Given the Big Door opening in the front of the shed, the roof needs extra interior detail also. I made a simple pattern from the end prints for the shed. That pattern was copied and a little more “stripwood” was added for all the roof trusses that would support the finished roof.
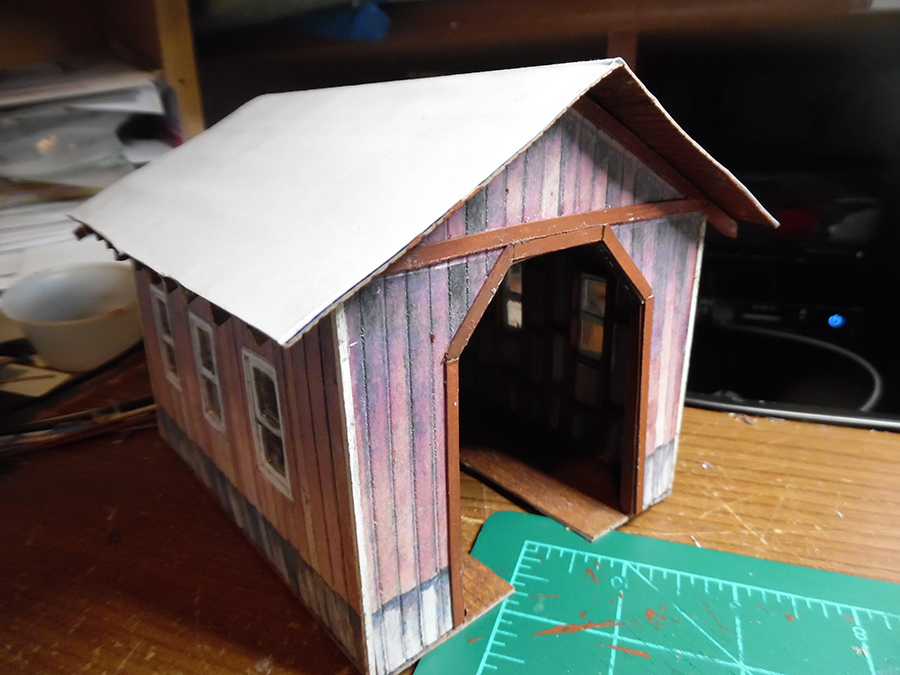
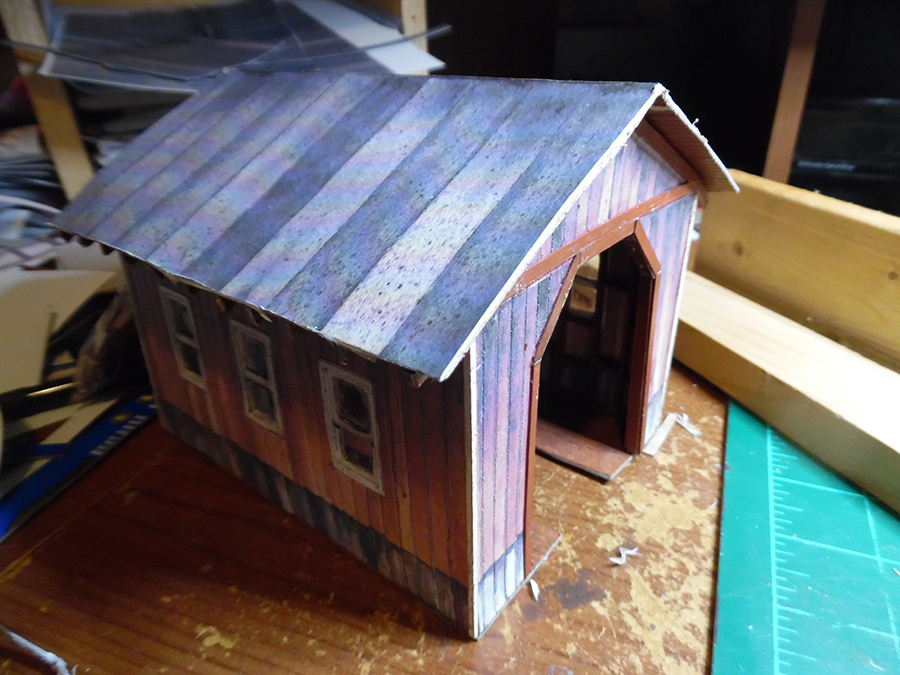
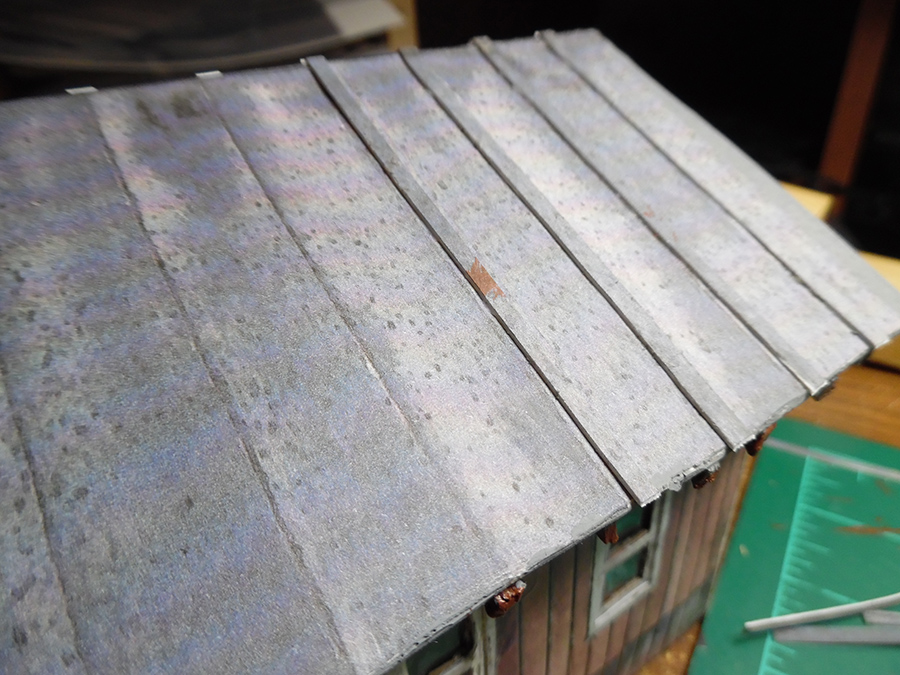
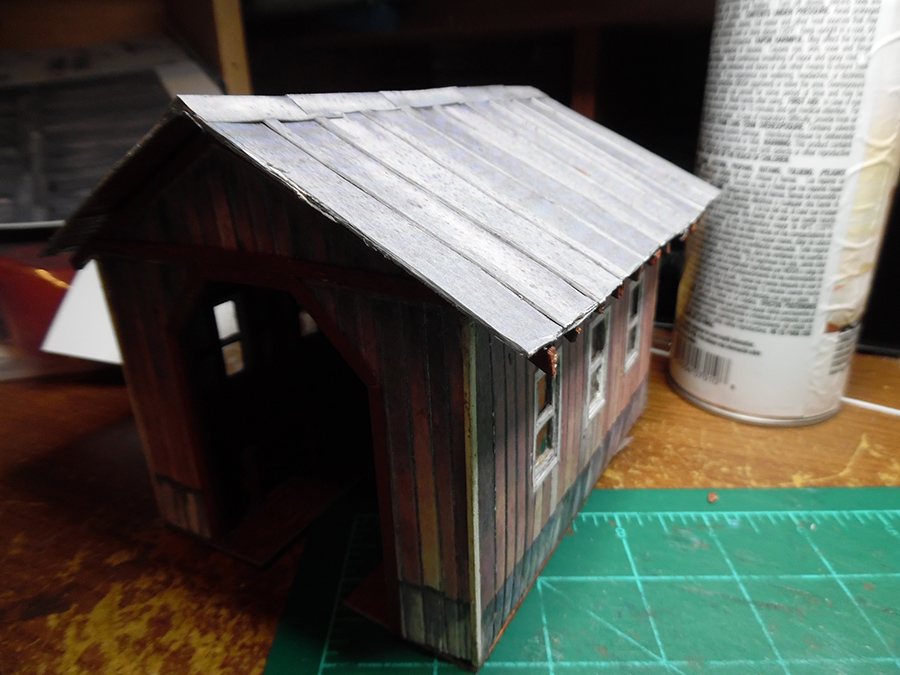
Now that the roof trusses are done, our shed needs a roof. A bit of scribed “wood”, some extra paper, and the roof print from the covered bridge gives us the roof, some cuttings from and extra portion of the print gives some dimension with the roof seams and peak.
This is the last one until I decide to add doors to the track side of the building.
As the model is essentially complete, the doors will just “guild the lily” if and when they get added.
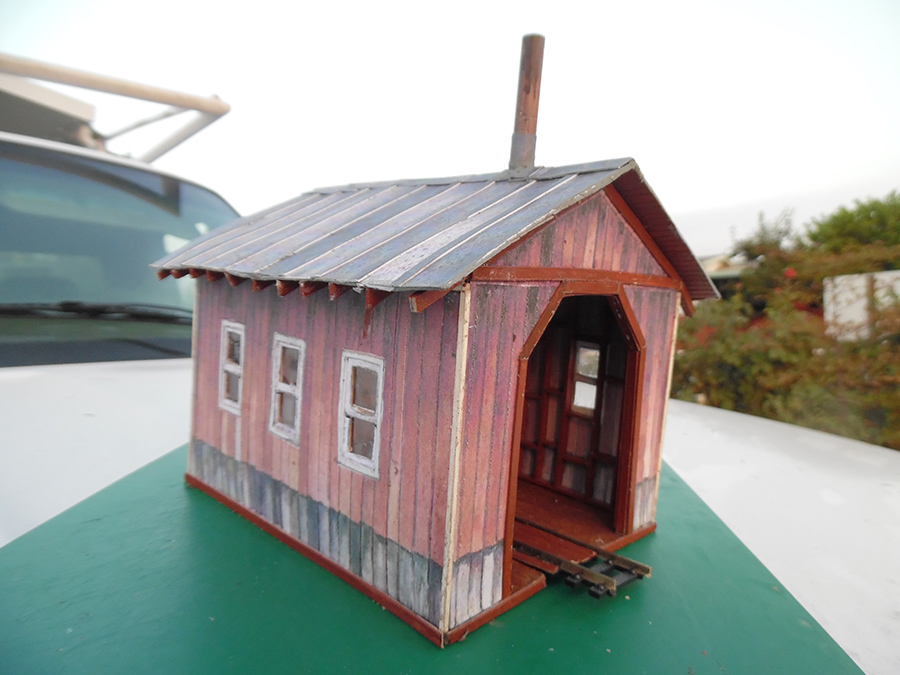
As it is, the model is similar to many wood engine sheds from the early 1900’s before people had to worry about theft or vandalism.
With the roof, our engine shed is essentially complete. A soda straw and a little paint gave us a chimney for the finished model. A bit of track and a little more scribed “wood” filled in the hole in the floor. This wooden shed is similar to many such sheds from the early 1900’s when people did not have to worry about theft of vandalism. Doors may come later but for now the model is done.
Sincerely,
“John from Cali” USA
My word – I really can’t thank John enough for his ‘How to build a model train engine house’ step by step.
Enjoyed every word of it and the same goes for the pics too. I thought making a ‘test’ model before getting stuck in was very smart too.
John used a number of the print-out-building kits, here they are:
The wooden bridge is here (and I’ve re-opened the $5 offer).
That’s all for today folks.
Please do keep ’em coming.
And if today is the day you join in the fun, the Beginner’s Guide is here.
Best
Al
PS Latest ebay cheat sheet is here.
PPS More HO scale train layouts here if that’s your thing.


Beautiful adaptation and a great shed.
Nice job! Excellent attention to detail. How many hours did you invest in that beautiful creation? Cheers! NJ Mark
Very, very nice.
It is on my ” To Do List”.
Again very very nice.
JP
A very convincing model. Congratulations
Great job with that shed. Looks fantastic both inside and out.
Jim
VERY, VERY impressive !
NICE Work John! ~Hemi
How do I take your bundle and use it for n scale??
Beautiful work. I hope you plan on lighting the inside, especially with all that wonderful work done there. Looks like it would have passed building codes, ha ha.
Mn Dan
John, well done on the engine shed. Looks fantastic both inside and outside. Again an excellent model. Brian – the HOn3 guy. Knysna RSA 🇿🇦
Wow – just plain wow…
Nice bit of modeling there. And obviously the skills and patience too.
Jim AZ
Very nice! Would like to see pics of it with tools, etc. scattered about. Inspiring
I concur with all the above replies. love the attention to detail. Great job!
Ken from PA, USA
yeeeoww…..great stuff….
the detail is incredible
‘Mad John”s got nothing on you…!!!
One might also be able to create something like this with a birdhouse from a craft store by removing the front wall (and round “door”) and adding strip wood planks to the walls….
I am embarrassed…
Thank you for all the kind replies…
There are a few small things I would like to add…
Lighting and clutter are two of them.
As to how long it took me…. The answer is that I do not know.
I would spend a few minutes in the morning and an hour or so in the evening n early every day but not quite. I believe I spent about two weeks but it could have been three.
“John from Cali”
Fantastic job
Looks fantabulous John! Great description in your steps and processes.
I’m going to try a kit for my 027 Lionel, for under the Christmas tree.
I like the train shed it took a lot of for thought to put it all together. And lighting is the best way to go for a finished look with the windows in place.