Lawrence has been in touch with his 50s theme model train layout:
“Al
Thanks for all the emails that you have been sending, and all the people that have sent to you, they are inspiration and helpful.
I finished the overhead system and got hooked. When I was in Denver in the early 70’s I went into a town north east into the mountains.
I remember this town with one paved road into the town with a paved road through the center of town.
The rest of the roads out of the town were dirt roads. Just east of Denver I saw farm land. So that was my initial idea to work on. And I decided on a 50s theme model train layout, with steam engines.
I started with only one engine that I have had for 20 years (Christmas tree track) being converted to DCC by the local shop.
Also a few OLD rolling stock and a couple of plasticville houses. I have one working DCC engine (new) at the present.
By watching your emails, lots and lots of utube shows, and the train store in the local city I started putting things together.
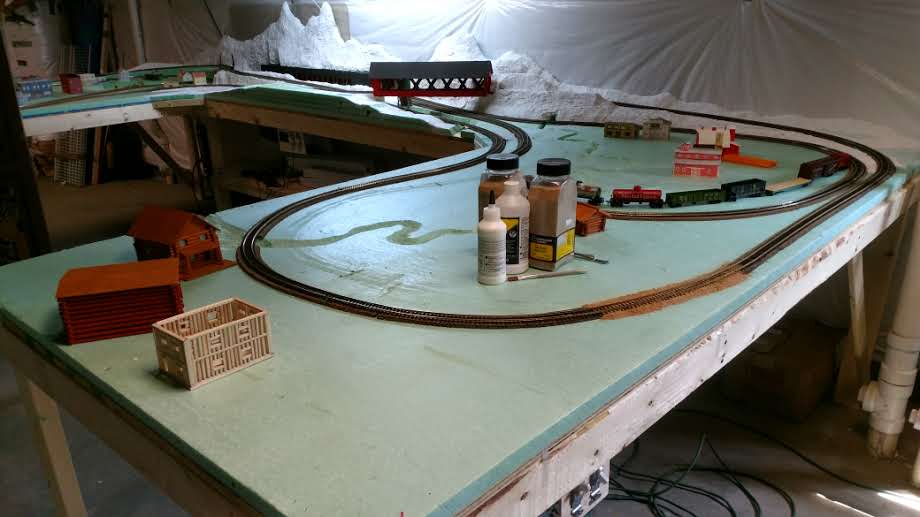
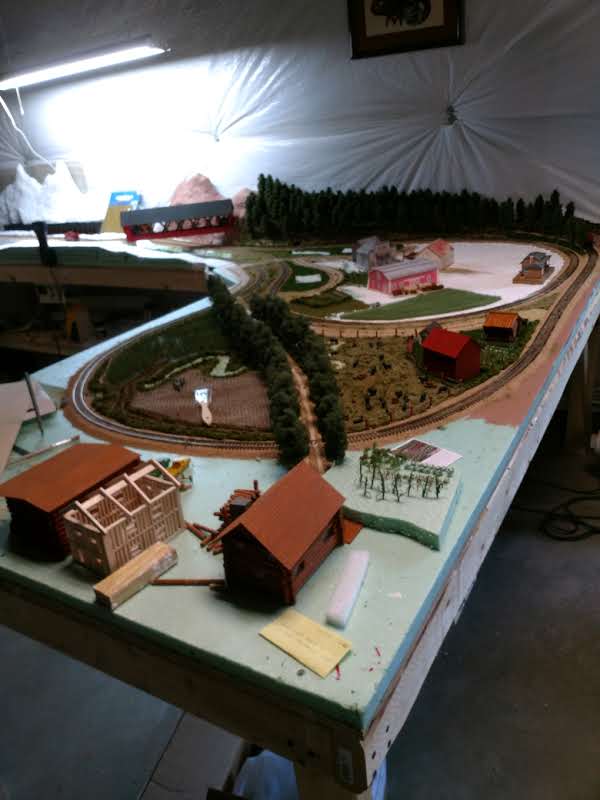
I started a couple of months back and decided on HO gauge. Built the tables to be U shaped around the furnace in the basement.
The legs of the U are 4×8 tables and the base of the U is 2×8 connection. I put one-inch insulation foam on the top for sound insulation.
Then on top of that is a layer of Perma-Mold for most of the layout as I progressed.
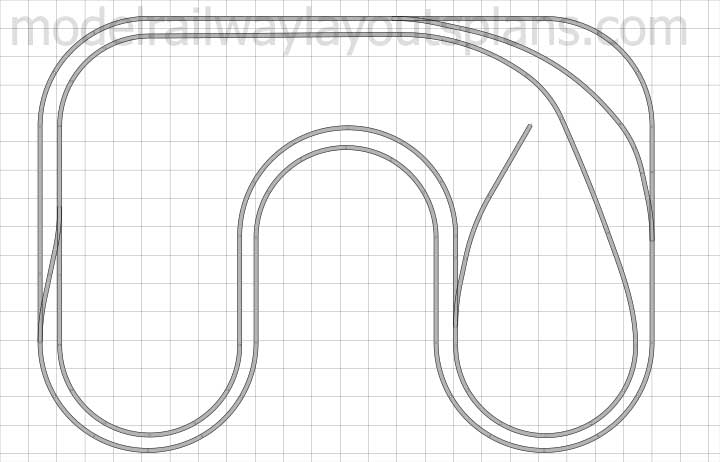
The trains will be steam only with one being passenger and one being freight. I have a very simple layout.
Two separate loops that both traverse the town, mountains and farm lands. Wired separately from beyond the DCC controller with switches on each table so I can shut one track off at a time.
I started by laying down the track and testing. I had gone on the web and I read that the minimum radius of the track should be 15 inches.
But then I found out for steam engines the minimum radius should be 19 inches. Rip the curves up and relay to the new radius. Then cut out my concept of the lake, rivers, and runs from the foam.
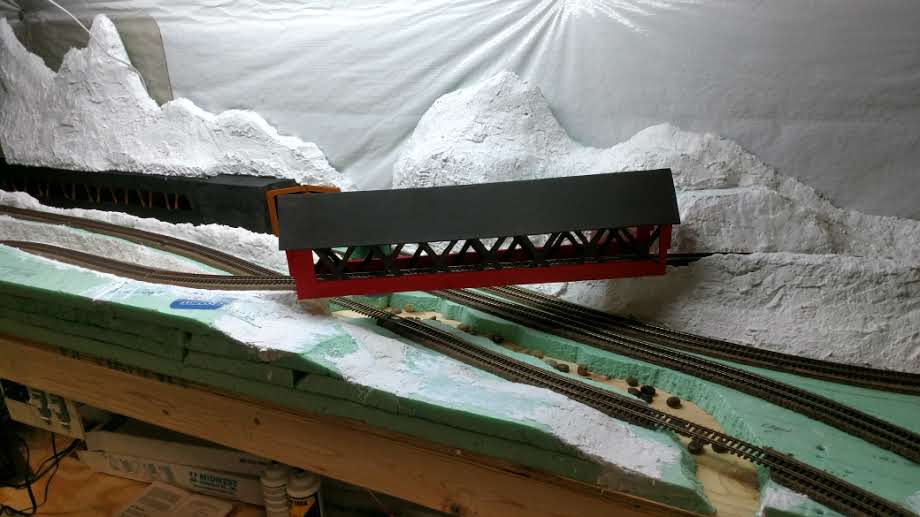
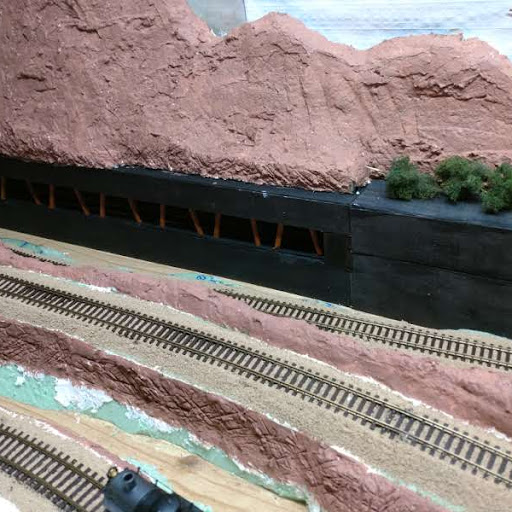
Deciding where I wanted the mountains I built them up with the same foam and plasta-molded to cover them.
I am from New England and I loved the covered bridges so I just had to have one of them. Also went on the web and actually found ONE tunnel that had an open side.
The top pieces of the tunnel can lift off and the side girders can be slid out to gain access to the tunnel if needed.
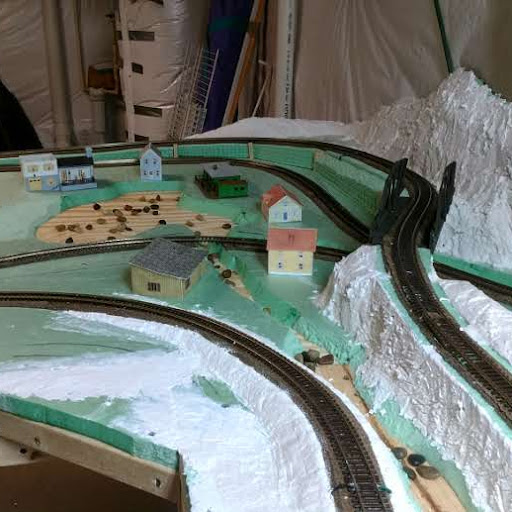
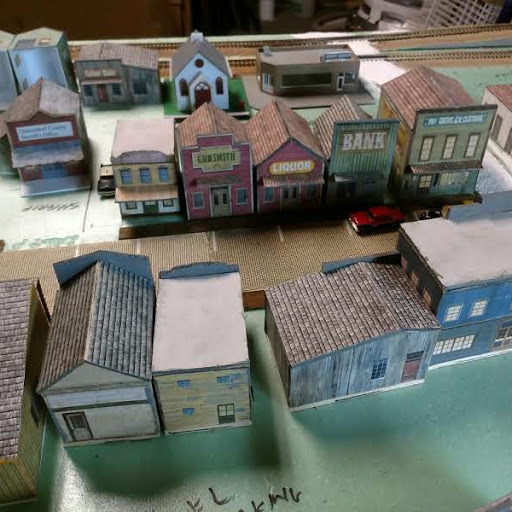
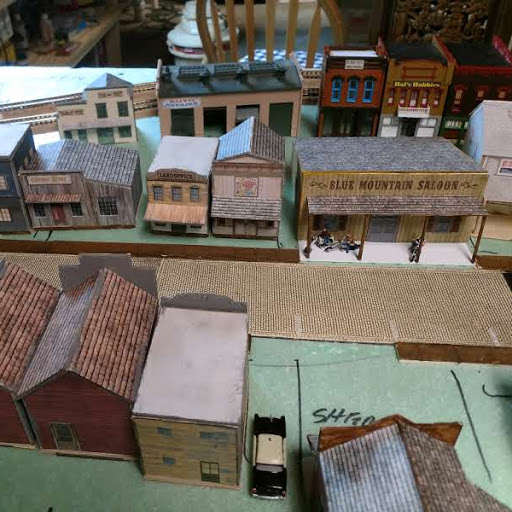
Ninety nine present of the stuff is scratch built. The log cabins are dowels from Lowe’s and notched the same as a real cabin. The town buildings should look familiar to you Al, as I downloaded them from your stuff.
I started building the town buildings with balsa wood but now rebuilding with Styrene so I can install the styrene windows and doors. And also prep for lights (lights (and people) LONG time in the future). I do have three plasticville building I put together and five that came from my Christmas setup. Giving a modern (for the time) of an old town with newer buildings.
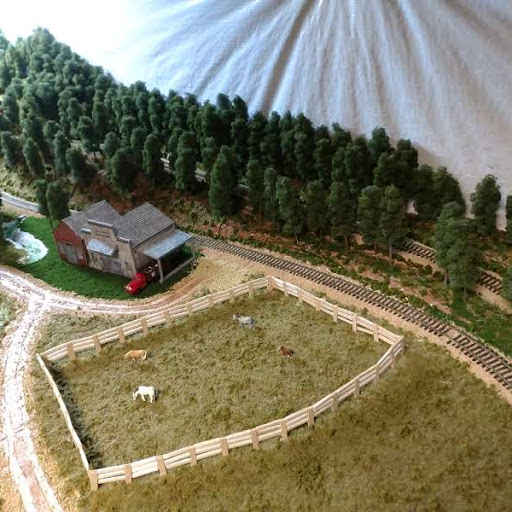
The early corn field, early wheat field, and the three types of fields are all Woodland Scenic products. The displayed 200 trees are from a Utube using bamboo skewers, furnace filter material, green paint, hair spray, and two types of Woodland Scenic grass. I expect I will be making another 300 trees yet. The country stone wall is made with Talus and Elmer’s glue. The town stone fence is ballast and glue. The large field fence is made from balsa wood, the corn field and farm ones from tooth picks, and the cow field is barbed wire.
I put a bunch of the basics in place to give me a concept of What and Where. I have started with the farms and working toward the mountains and the town. A lot of the little details will come with time. All the water effects will come later also.
So I have started on a project that will keep me busy for quite a while in the future. And thanks again for all your emails and all the other people out there that send the good information on what they have done.
Lawrence”
50s theme model train layout:
A huge thanks to Lawrence for sharing his 50s theme model train layout.
It’s really nice to read that the posts are inspiring some of you to get going on your own layout. And knowing that they are helpful makes it all worthwhile. Really does put a smile on my face.
The Beginner’s Guide is here if you want to take the plunge.
That’s all for today, folks.
Best
Al
PS Latest ebay cheat sheet is here.




Thanks for the posts Al. Very nice layout Lawrence and I really enjoy your videos Dave.
Cary B
Lawrence,like your foam and plaster work-well done
Lawrence made a good layout that is not overdone. I like it.
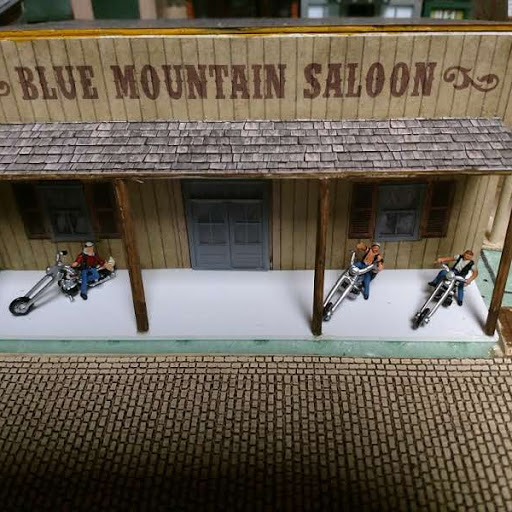
Where did you get the guys on bikes ?
Nice work Lawrence. You’re off to great start. Hope to see more down the line.
Jim AZ
Well done Lawrence. You have obviously put a great deal of time and thought into your layout and it shows. I am sure that when you get it about 90% done – most of us never get it all done -it will be a thing of beauty.
Bob
Actually the ‘Bad Boy Bikers’ are N scale (little small for HO but don’t tell anyone) but I ride a Harley myself and just had to have them for the bar scene, the only people I have bought at the present. I got them from Walters on line, Part #: 785-5344.
Mr. Lawrence.
What you have done so far looks great I can’t wait for you to finish and see the whole thing and possible on video, keep up the great work.
Art in Florida
Mr. Dave
Thank you for sharing your info on repairing your engine on the problem it had and how you were able to repair it.
Art in Florida
Lawrence, you are on the right track. No pun intended. It is all looking good.. I like those covered bridges too. Rob McCrain. – Farland Howe
Looking great happy rail roading
Would love to get a copy of your layout design. I’ve been thinking of doing something like this too!
At least You had a go at DCC, I am a bit nervous about converting, as I have quite few older models , which may a bit tricky to convert.
Dave,
I noticed your handling approach to motherboard’s and daughterboards (daughter fit on top of Mother) is like the rest of us; bare hands and brute strength. The oil, grit, and grime is a source of board contamination. This can lead to shorts. The boards are negative (-) to the components (+) are fragile and crack easily. This is another source of shorts. Try a pair of rubber examination gloves to keep the crud off. Gloves have problems too. I’m just sayin.
Speakers have magnets, that move the speaker membrane, and pink noise, interference from other electronics w/i the locomotive is minimized by a speaker housing; this is the reason for the speaker housing.
Smaller speakers with higher output (Mhz) are better options for sound, google micro speakers for HO or OO gauge locomotives. Just an aside; all this electronic sound reproduction, decoders, are sourced off the shelf Integrated Components (IC) and available through the IC Catalog. Google it, you will lose your mind over the possibilities. This is what Mike Dell used to build DELL Computer. There isn’t an original Dell component in any box he built.
On degreasing the pick-up wheels when overhauling locomotives. I use lemon juice from the grocery store and a cue-tip works every time. My source of discovery is cooking. I used lemon juice to degrease the chicken fat from chicken gravy – and it was a mistake, but what a discovery.
I enjoy your video’s and I’ve never said thanks. Here it is.
bob durino
I like your progress, like Rob said you are off to a good start.
One minor flaw in your memory, the nearest town North East of Denver that is in the mountains would in the Black Hills of South Dakota, there are lots of towns North West , West and South West of Denver that fit your description.
Ha Ha not a flaw in the memory but a dyslectic function. You are correct, what I meant to say is to the north west into the mountains. I switch east/west, and left/right all the time. I catch myself once in while when I say I grew up in Worcester Mass. 45 miles east of Boston. Thanks for the correction.
Lawrence what a layout, well done. A track plan would be good as I like to see where you put everything. I have a n gauge layout the same in a u shape,
David UK
Thank you all for suggestions with my class 37 problems ..I have ordered a new speaker which will fit easily ..m going to use a iphone 6s speaker ..very cheap but they are very good ..i will show the results when i get it ..as for the older 37 with problems , have used Bob Durino advice and used lemon juice to clean the contacts …have re built this and sorry to say again still same problem , even after trying a new non sound decoder ..so in to the spares box this loco has now gone …still waiting for the return of another class 37 having a sound re blow ..so hopefully I can show both these in the near future …Dangerous Dave
I too would like to see or get a copy of your track plan. Is it from a track plan book? I’m building a similar size layout . Your doing a great job.
Lawrence thank you for taking the time to send your efforts to al for us to see. There is a lot to like here. On area I am looking at and also like is where you lined one mainline with rows of trees to seperate it from the mainline next to it. and nothing is overcrowded. Super!
Lawrence…… Nice work…….like the trees and mountain work.
Lawrence,
Your layout looks great! I like that you have stuck with a fairly simple track plan and a good sense of what you’re trying to create. The town and all those little buildings look great — a lot like many old Colorado towns I’ve seen.
Two suggestions: (1) Your covered bridge is neat, but it looks like it needs some bridge abutments at each end to support it better. A couple of pieces of 1 x 3 wood can do the trick if you don’t want to invest in commercial abutments. (2) The mountain would look more realistic if you used more than one color of paint. The solid brown is a good temporary color, but real rocks are more than one shade of brown.
Finally, I’m jealous of your blue foamboard underlayment. All I can get in my area is the pink stuff, which I immediately give a coat of tan latex paint so it doesn’t look so garish. I will all eventually be covered with plaster and scenery, but I can’t stand the pink showing until I get to the scenery. You blue foam is much more tolerable. 🙂
p.s. Your farm field and fence looks really good.
Really nice start. Going to one to keep my eye on. Nice job on the layout. Keep up the good work. Now is when the fun part starts for me. You’ll see!
Wow that is great work. I hope mine turns out that good.