Lawrence has been in touch, adding to the HO scale train layouts 16 x 8. He’s been a busy man, and he has some sage advice too.
“AL
An update to my layout.
I started last summer a complete novice. And now I am paying for that lack of knowledge. I did not know to solder all the track joints. So now I am going back and soldering them, and in most cases, means repositioning the track itself a little bit.
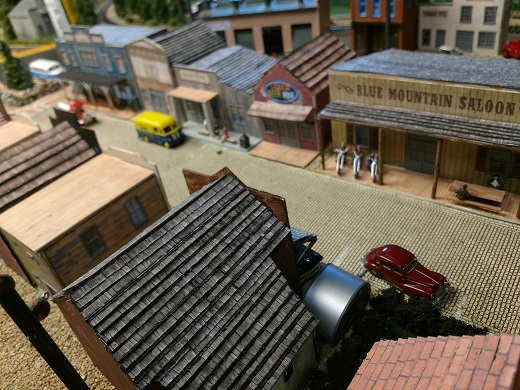
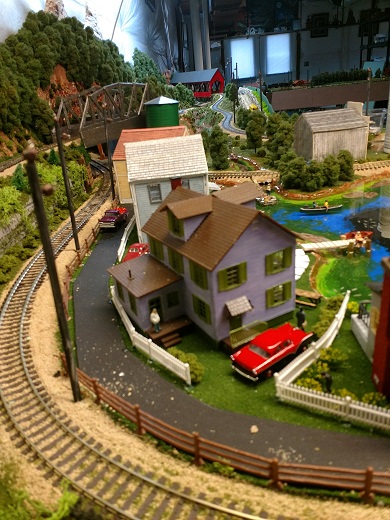
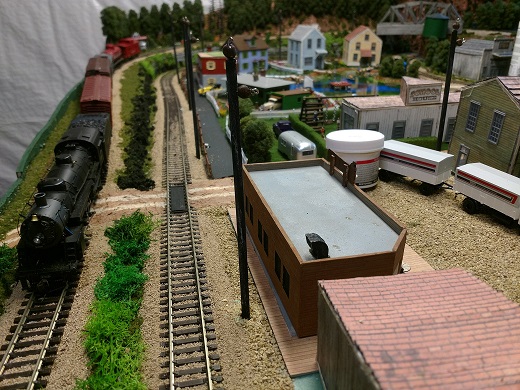
Slowly as I can afford it I am getting autos, people, and animals. I have made all the trees, about 400 of them. If a lot of the buildings look familiar, yup they are from Al’s gallery. I used 0.04 styrene sheet for all of them. Including dividing the inside of the buildings for future lighting.
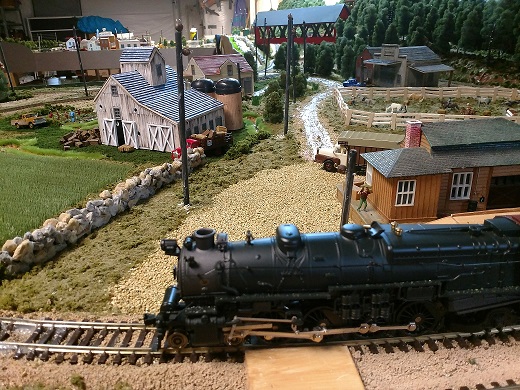
In my previous set of pictures, I had put the track down and then redid a lot of the track to work with steam engines. Well until two weeks ago I only had one steam engine. It was a passenger engine and coal car. I had both tracks working 100% both ways.
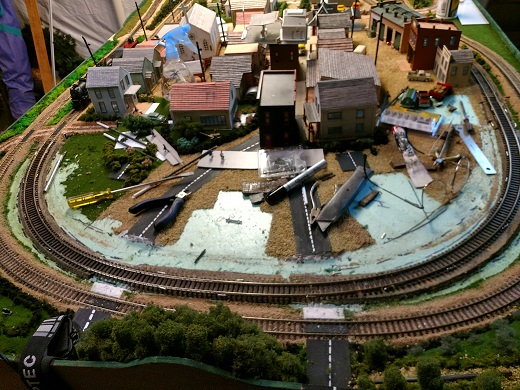
Two weeks ago, I got my second steam, freight engine and coal car. The new one is four inches longer, so guess what! Sixty percent of the curves are marginal off for the new engine. As you can see with one of the pictures I lifted one full curve and realigned it to allow my new engine to run.
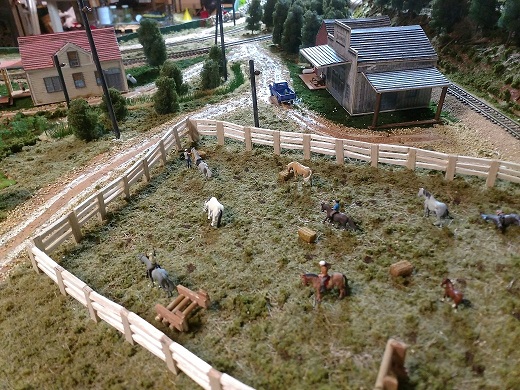
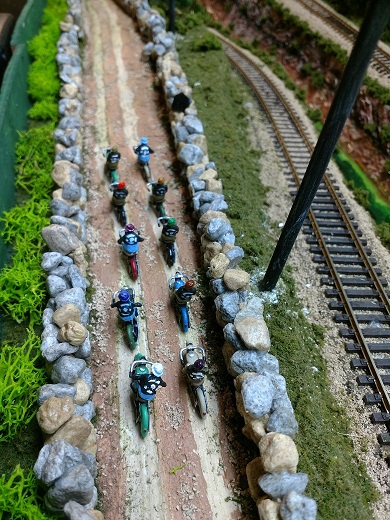
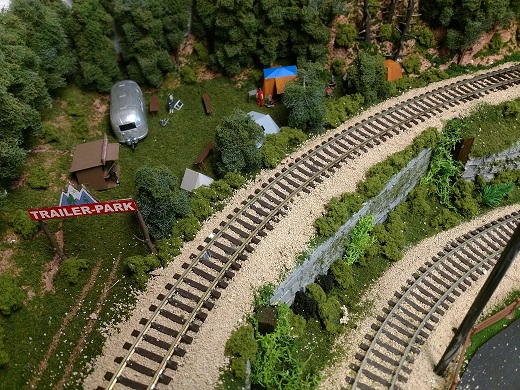
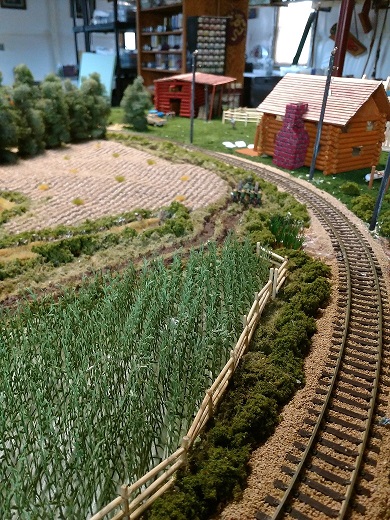
Most of the scenery is pretty much done (ya sure thing?). The farm layout has wheat, and corn fields, cattle and horse grazing. The mountain pass has a motorcycle club riding in. The group fits the time era of this layout as the are the Boozefighters MC which is the first motorcycle club established, in 1946. Have included an area for camping and hunting. Unhappy the hunters I could get only used guns as I hunt with a longbow.
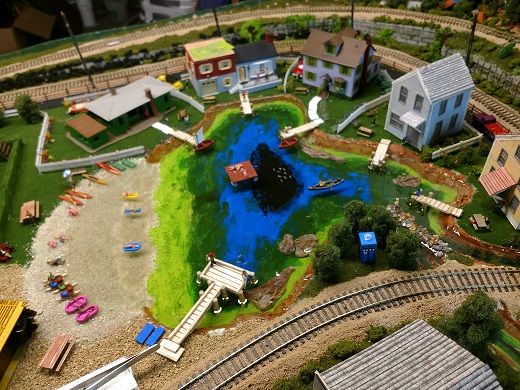
The lake is two layers of about five eight inches deep of deep water. I did it that way so I could use a trick I learned on here. After the first layer of deep water had hardened I added the rice for the fish, glued in. then added the second layer of deep water. The fish are inside the water and with the light they have a shadow on the bottom. The boat also has its shadow. And for those that watch Doctor Who you will find a Tardis.
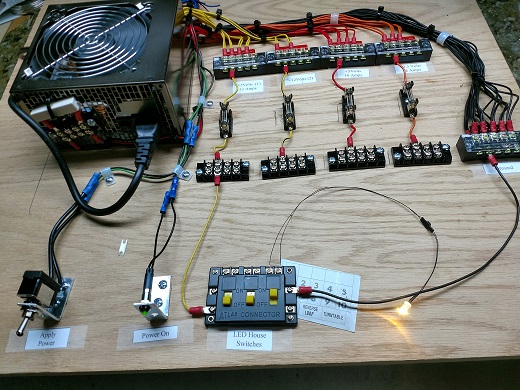
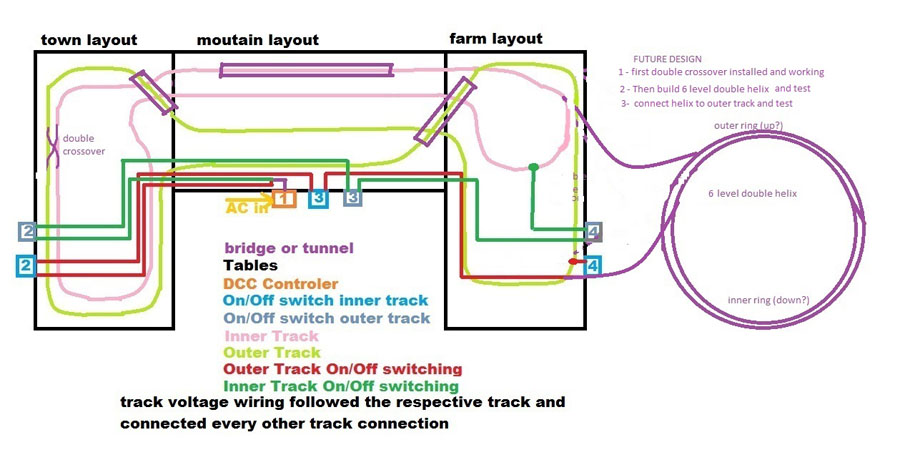
I added the basic drawing of the layout. A couple of future plans to add this coming summer. I did not add the electrical design for the lights. I have a long way to go before I get there. But the power supply has been build from a computer power supply. From left to right is 12V at 32 Amps, 12 V at 0.5 Amps, 5V at 18 Amps, 3.3 V at 18 Amps and ground. Then there is the power on switch, and power light. The three-position switch if for front of buildings, sides or back of buildings, and street lights respectively.
I learned a LOT both by doing and reading all the stuff sent out by Al. I want to thank Al and all the rest of you for passing on the great layouts and knowledge.
Lawrence”
ho scale train layouts 16 x 8:
A huge thank you to Lawrence for adding to the HO scale train layouts 16 x 8 on the site. It’s wonderful to see a layout come to life, and even better when we all get to learn from the odd mistake too.
That’s all for today folks.
Please do keep ’em coming.
And if today is the day you stop dreaming and start doing, the Beginner’s Guide is here.
Remember, Lawrence was a complete beginner – look at him now!
Best
Al
PS Latest ebay cheat sheet is here.
PPS More HO scale train layouts here if that’s your thing.


HI, very cool. I have a question. What is the size of your layout ? I am planing to start my new layout and I am studing the tracks that I could do in 3m x 1,5m space. Thanks.
Soldering track joints is a really bad idea. You need the fishplates to move relative to the rails to accommodate expansion and contraction. The proper way to ensure track continuity is to solder dropper wires to the rails and attach these to a power bus.
Rob
Re Lawrence’s layout. looks really great Like the scenery its well executed and the first picture looks very realistic with the sheen on the road/track that the car is going down looking as if its a wet dirt track. However again scale has fallen by the way side when you look at the size of the wall boulders that the bikers are going down (picture 2). Each one would weigh a ton or more and does look so out of scale.
Keep them coming please
Colin
Each leg of the layout is 4×8 and the middle is 2×8. Yes the stone walls would appear out of scale. But I pass thorough horse country 60 miles north of me with their BIG farms. There is a number of farms that have stone walls (all nice and pretty) that are five to six feet high. Thanks for the comments.
ah need to add another comment – I use flex track. The only time I need to solder the track is on the curves. I found out by not doing that any connection on the curve will end up with a substantial kink. Even using plenty of glue to set the tracks in place. The kinks were enough to derail the train every time. So the soldering wasn’t for the fishplates but to ensure the track joint was straight.
A good way to build your population fast is to order the bulk pack of figures from China on eBay. I got about 400 figures for less than $6 USD. They can be ordered painted (which would require a little touching to create variety) or unpainted. Also I agree sodering all you joints is a bad idea. Rail need room to expand and contract with varying temperatures. Kinks and pull apart make for messy operations.
Lawrence; Your layout is awesome, so don’t listen to the critics about your stone wall. You have made more progress in a short time than most folks make in a lifetime. Keep up the GREAT work and keep us posted with more info and pictures as available…
Very excellent layout..
Love the detail.
Sad to hear about John’s condition and I hope many follow up and help support… We are a community and communities are at their best when people help each other…
“John from Cali”
John,
Sorry to hear about your health issues.
Lawrence ,
Before you start laying track you need to figure out the longest engine and car you ever play on running and from that determine the minimum curve you can use.
Lawrence…Ditto to Rob’s advice…Feeder wires…You do need connectors for expansion and contraction…Your layout is beautiful…Mike
Where do you live? We have the Blue mountains near Pendleton Oregon.
Sincerely,
DW
Was that a standard PC power supply unit being used? How did you wire it for your needs if so?
John, so sorry to hear of your brain tumor. As a physician myself, how long you’re going to live is based upon your tests, results of your test comparing to other patients, and a “best guess’ in my opinion. However; being a firm believer in the Almighty, He is best to know when your final days are, no physician on this planet will ever second guess His decision.
Lawrence, wonderful layout, love the idea of using a computer power supply for lighting!
Best wishes John, hope it goes well for you,
Rod
I live in the mountains with an abundance of stone walls and I see nothing wrong at all with yours. If you have some time and would like to work on my layout let me know. 🙂
I model HO scale and a few years ago I purchased a bag of aquarium stones at a pet store; they work great for landscaping around lakes, at the base of hills or mountains, alongside of tracks, etc. You can even dap acrylic paint if you want to vary the rock color. Enjoy seeing all of the beautiful layouts on this site and the creativity of so many modelers! It’s very true that you are NEVER finished with your layout – there is always more to add or something to change. Thanks Al for keeping the site going. David in Indiana, USA
I really do like your layout and really appreciate the TARDIS being included!
Hi Lawrence, Please tell us how you made your track and wiring diagram. Thanks, Jerry
I am interested in how you used an old PC power supply for your power. Can you provide some basic info on how it is wired. I noticed some power resistors, oner mounted on the case. What are their size and function.
Thanks,
Bob
great layout keep up the hard work there is no stopping you enjoy your layout thanks for sharing. keep a positive attitude John and keep living life to the full.
dear John,
as a lifelong railway buff myself, and not a modeller until recently following nearly 3 years of Chemo cycles & two predictions of …..X months to live I am still here, modelling in 00 & learning all the time. This site has kept my spirits up for many a long time. Remember its your railroad .long may you enjoy it.
Think positive.. Bless you. DW
Do like the cobblestone for streets and the plank sidewalks and bridges. Only thing, way out of scale for fencing and tree house. Believe if stir sticks those might have been split lengthways before constructions. Rock walls nice but maybe smaller stone or even garden shale in smaller increments. Nice attempt with wiring, A+ from most layouts. Just that wires should be combed out, smaller ty’s and squarer corners and layout of devices. Dark blue and black water, not sure there but fish are really good addition. Perhaps toxic dumping @ pond lol.
Just things I would look at if say I “purchased” this layout as is. No criticism intended, way advanced over my 4×8 with yard extension “cookie cutter”. I have one section of track- nothing can go up, too steep but like a slide on the way down (short-cut). Now who really cares?
Regards, Rich
A couple of comments on what Rob and Lawrence replied. I had an issue with some of my steam locos derailing on curves. I use flexible track. One thing I did that I have not regretted is soldering my dropper power wires to the fishplates [joiners]. Where possible I prefer soldering away from the model and the track is easily dismantled with clean track when fishplates are reinstated. The second bit was a lesson for me: when I originally laid the track I used a large compass and ruler. This time I bought some curve templates laser cut into MDF type material. Brilliant. They fit between the rails and there is enough friction to hold them there. I pinned at the end of the sleepers [not into them] about every tenth sleeper and either side of the track. When I removed the template the track didn’t move so I could pin through the centre of the sleepers. Different radius curves meant that there was a gradual tightening of the radius as locos progressed through the curve and then gradual opening out onto the straight. I tested with my most sensitive locos and am delighted with the result.
I am on DC, so can but wonder at Lawrence’s circuitry. The layout also tells stories, the more you look, the more stories come out – that’s important to me.
Very nice. How did you do the roof shingles on some of the buildings? Very realistic!
Hi John:
Am sorry upon learning about your health condition. I pray our Good and Gracious Lord blesses you with serious healing and extends your time on earth to enjoy this hobby more.
Lawrence, Fine Detailed Layout. Can you tell, show us how to use the Old Computer Power supply with correct wiring details? Really Like the Village and the Lakeside Community… Comments: Could you provide them with a Safety Fence between the Lake and the RR Tracks? Same with the Farm. to prevent accidents with either people or animals too close to the RR Tracks.~ and you need RR Crossing Signs on those Country Roads that Cross the Tracks,… the crossing by the Warehouse, Needs RR Crossing Gates or a shack with a guy using a RR Crossing Paddle to guard the Tracks. The Hunting Deer Stand, could be rebuilt with narrower boards for more realism. To add comic relief. Have one of the Deer holding a Rife pointed at the deer stand. (Remember that scene out of “Crocodile Dundee”, when he Put a Kangaroo Upright leaning against a Tree and he fired his Rifle, as if the Animal was holding the Rifle shooting at the Drunken Hunters… Famous Scene. ~ Mike in N.H., U.S.A.
Is this Hollister, Ca. in the 50’s as I see the bikers coming to town. LOL
very nice. lots to look at, well done.
Hello Lawrence,
I really like how you made your crops in your farm photo.
What product or material did you use for your crop fields?
Lovely! And built so quickly. I appreciate your neat wiring. Prayers.