David’s been in touch with his advice on a starting a train layout:
“Good morning Alastair and all blog members!!!
I have held off sending my pics in for awhile now. I’ve been a quiet member of this blog for awhile and every now and then, I may make a comment.
I actually start my day off every morning at 5am with my coffee and Al’s blog. It’s quite enjoyable to see everyone’s “Masterpiece”, no matter what scale or even what level of “Craftmanship”.
When I open up Al’s blog every morning, it’s like being 10 years old again on Christmas morning, every time!!!
The anticipation of what’s to come my way when I see one’s Masterpiece, is always a delight.
Many of yalls ideas have been incorporated into my layout. ( HO scale in my case) I am really greatfull of the tutorials that many of our members include in this blog. Without them, I wouldn’t gotten as far as I have, with my layout, as yall will see in a moment.
A special “Thanks” goes out to Al for providing such a great wealth of information, with a blog like his.
With all that said, I am a huge fan of both the G scale and HO scale model trains.
This post, I will be referring to my HO layout only. At least once a day and sometimes all day on Sundays, I am a 10 yr old kid trapped in a 57 yr old body, located here in Hickman County Tennessee.
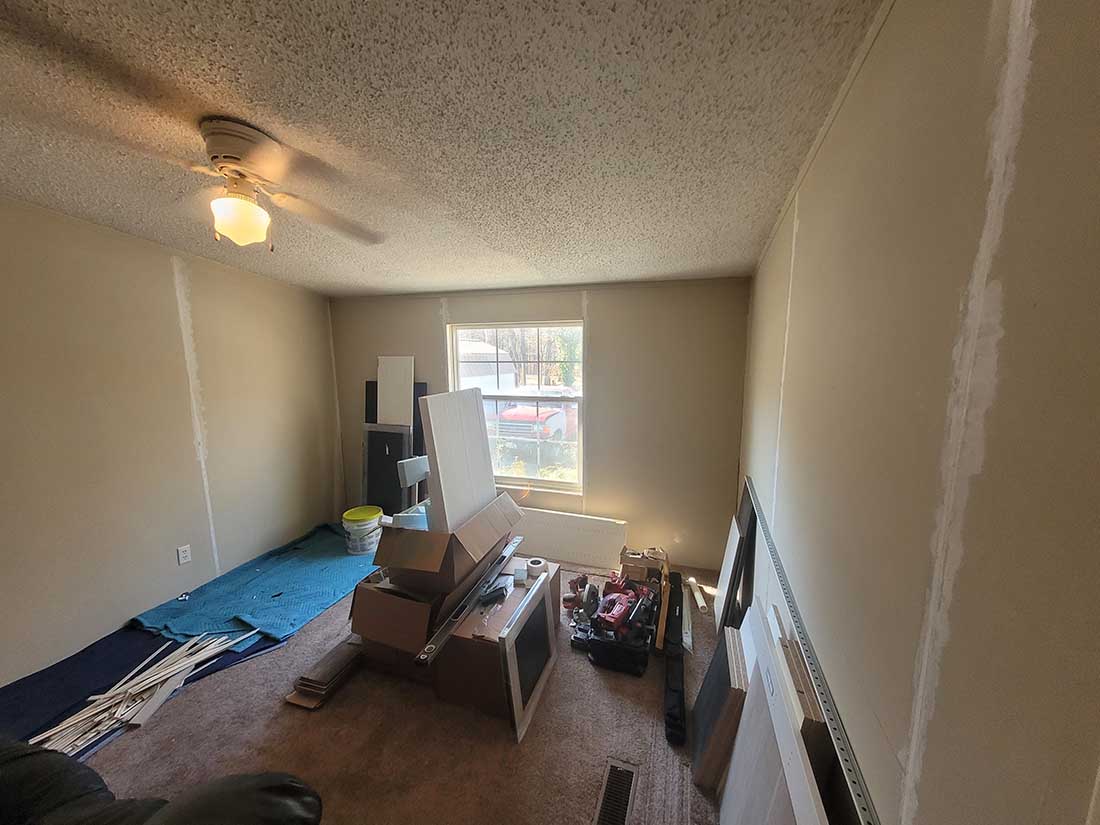
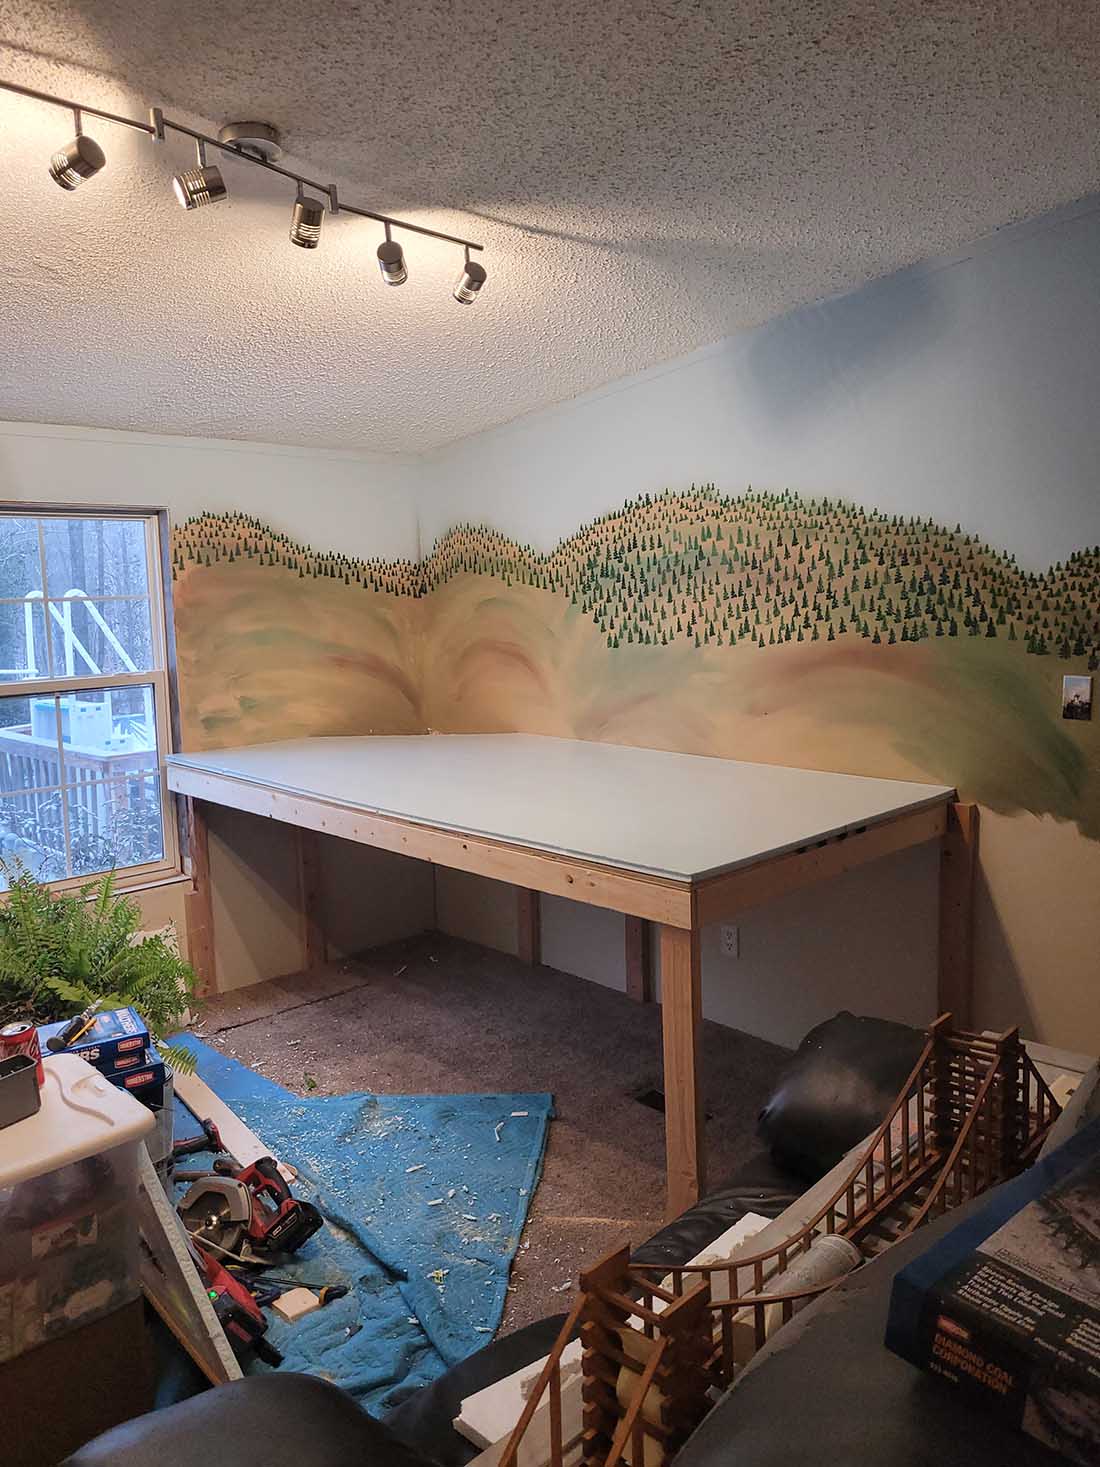
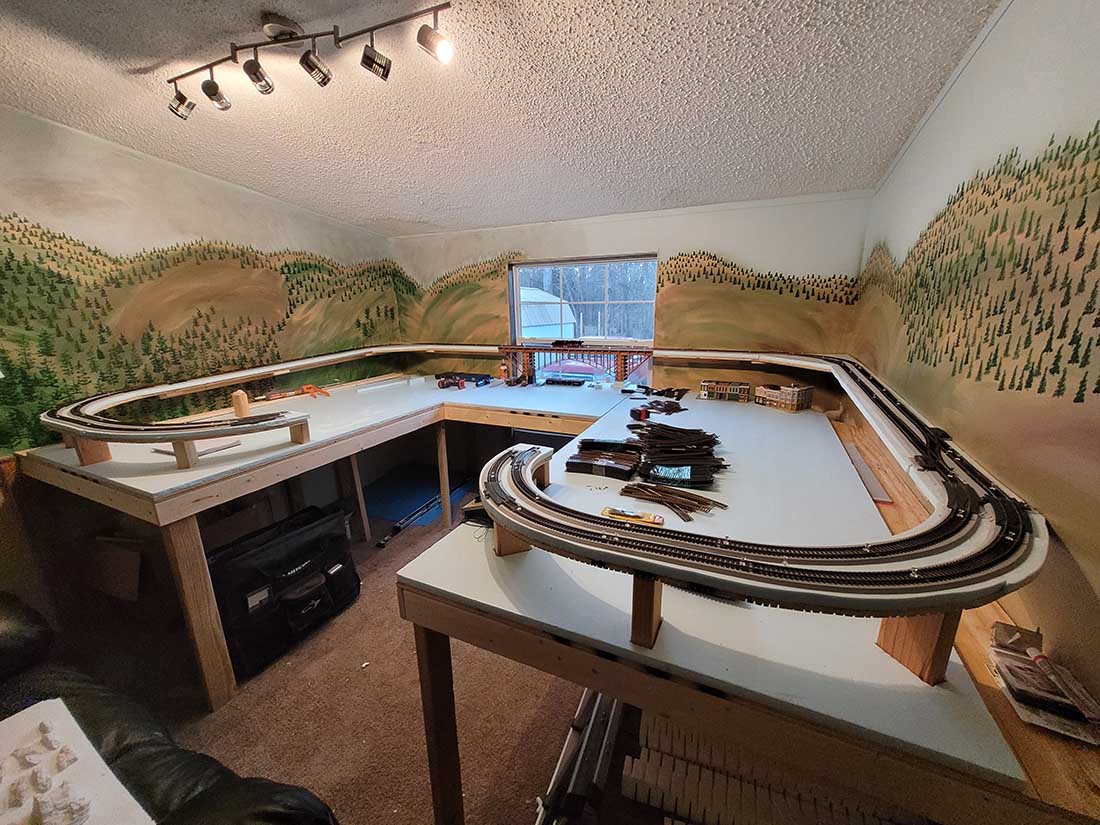
The Mrs and I purchased this house 2 years ago, with the sole purpose of having a room for a mid-sized HO scale layout….yes, we had to have a room solely for trains. We call this room, ” The Iron Horse” room. This is not my first layout however, it is my first layout of my own, inside a building.
As AL states, “it’s all about The Start”!!! For some, it’s about “money”, for some it could be the “space”, and for others, it could be the lack of “imagination”, and lastly, for some, it could be all about the “when do I have the time”.
Well, for those that are new to Al’s blog, I’m here to tell you, every member of this blog has talked about how easy it is to overcome all these “objections”.
I’ve read how many members have built things, for free, with odds and ends, just laying around the house.
I’ve seen layouts that hang from ceilings, fold down from walls and even doors.
And if you don’t have an imagination, that’s okay, just open Al’s blog every morning and the ideas flow in.
As far as “Time”…well, building a model train layout is not something one does to complete in a day, a week, or even a month. Sometimes it takes years to complete.
Fact is, a “Layout” is never complete. The fun and excitement comes from building “it”.
My uncle, in Pittsburgh, had an HO layout, in his huge basement, for over 40 yrs. He was always adding something. It was a sight to see for anyone to see, especially a 10 yr old kid.
We spent many hours in that basement, when we got to go visit. It was my inspiration to build one of my own, one day. Well, November of 2022 was my day to finally get started.
Yes, after a solid year and a half of being in this house, I finally got started!!! As many of us here have once said, “we always tend to over think things and make things complicated “, when in fact, it’s pretty darn easy to get started.
Maybe it’s the “fear” of “messing up”, or maybe, “I’m gonna do it wrong”, who knows?!?! Well, trust me and others here in this blog, it’s YOUR layout…build it how you want to do it!!!! Build it for your reasons and build it for your enjoyment!!! If you enjoy it when it’s complete, then thats all that counts.
Back to my layout… I take many o’ pictures of everything I do, and with the Mrs being so big into Scrapbooking and her new Cricut machine, she will one day have a nice novelty to leave behind for the family to enjoy.
I could not even begin to choose what pictures I wanted to send AL. Please keep in mind, this is just a “Start”. I hope everyone will enjoy!!! And for those of you that are still thinking about “getting started”…well, TODAY is the best time, not tomorrow!!! Why wait for tomorrow, when you can start having all the fun and excitement, TODAY?!?!
I didn’t want to spend much time with a narrative of my layout, as much as I did about how important it is to “actually get started”!!! As you will see, there are so many pics and videos, that the progress speaks for itself.
David, from Tennessee”


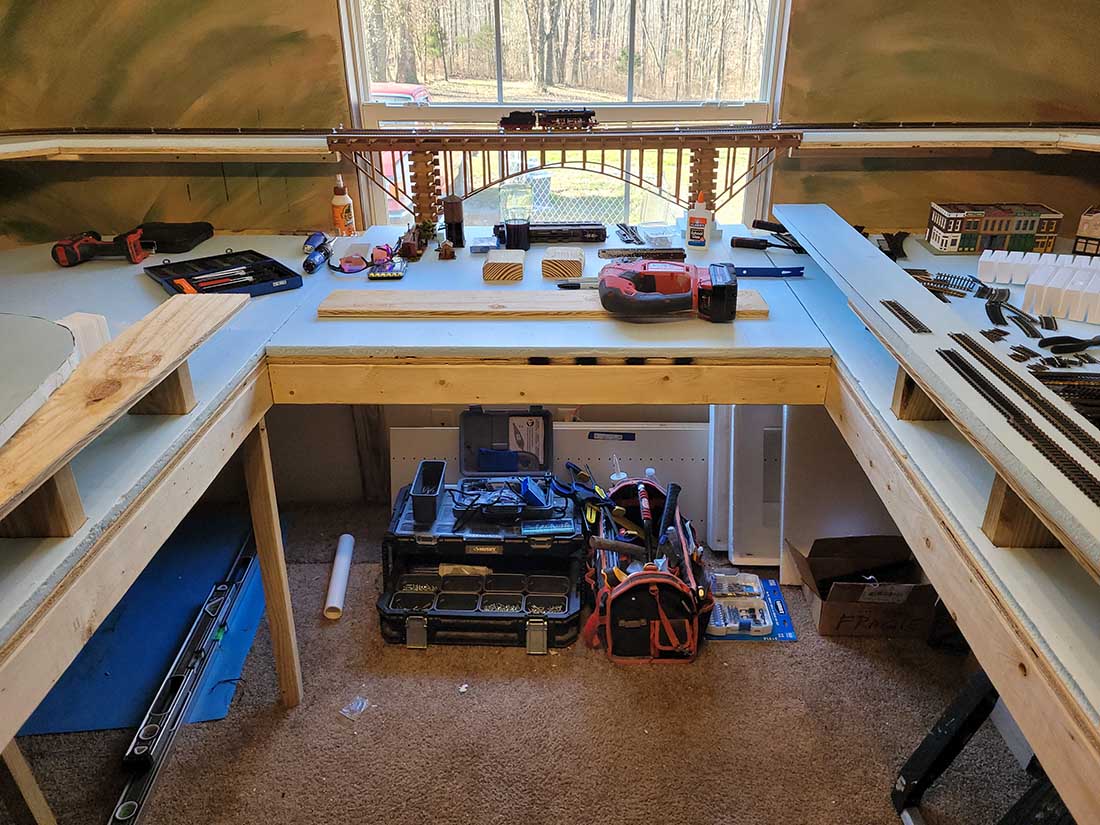


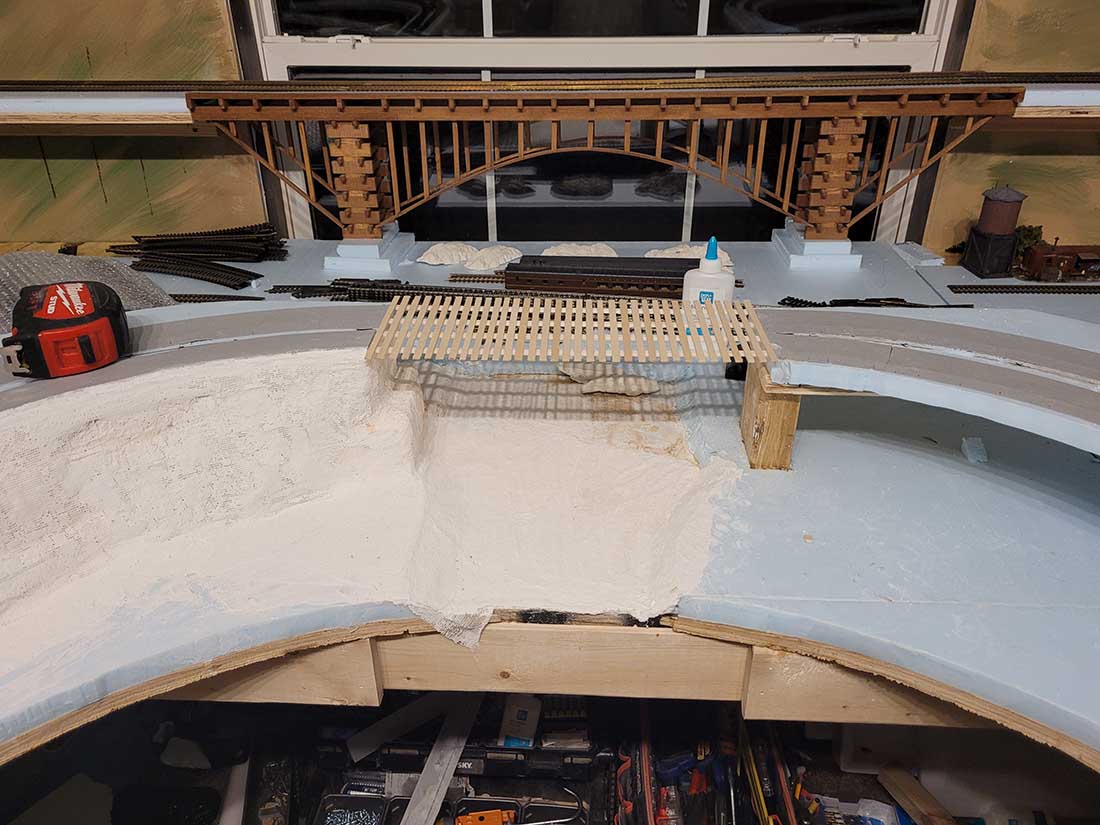
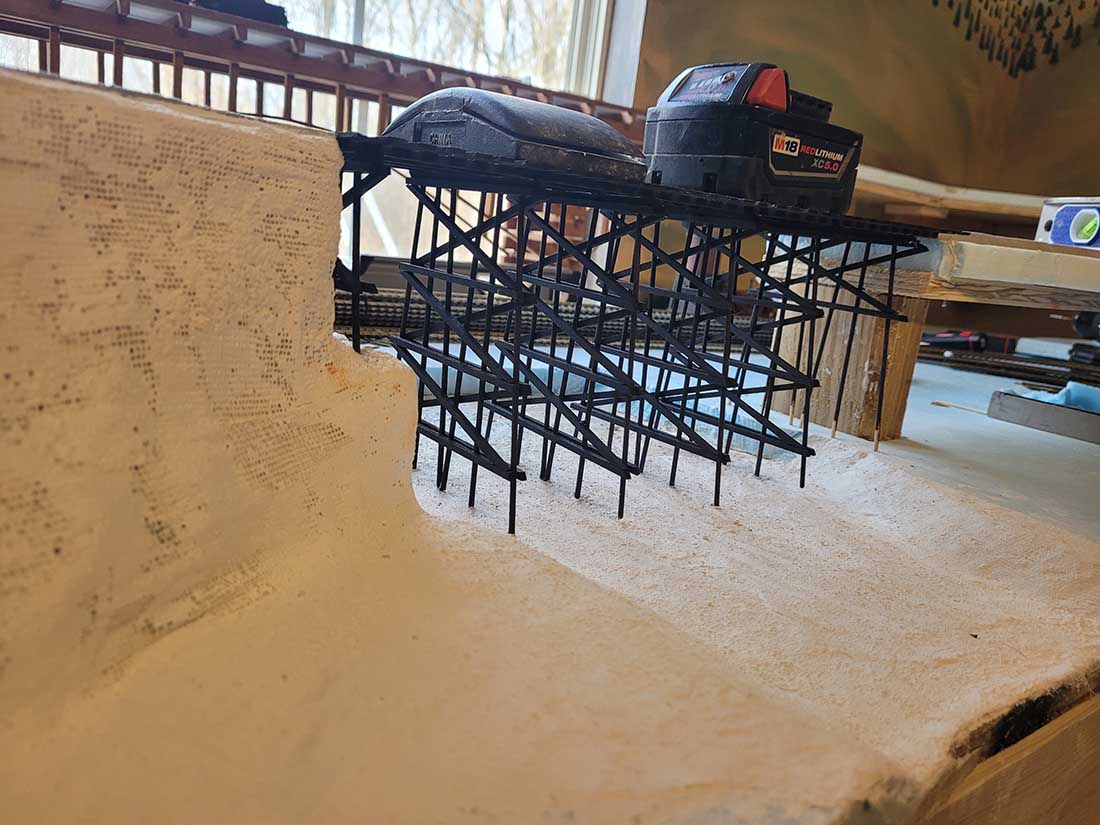
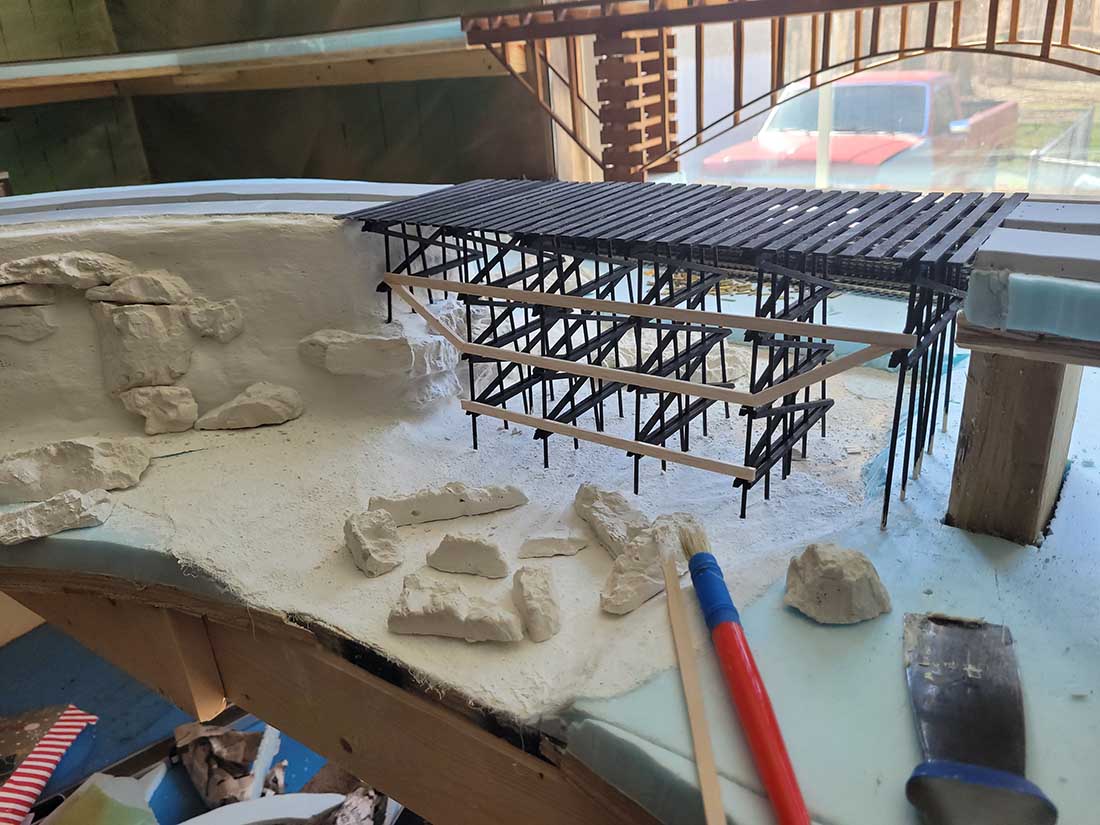
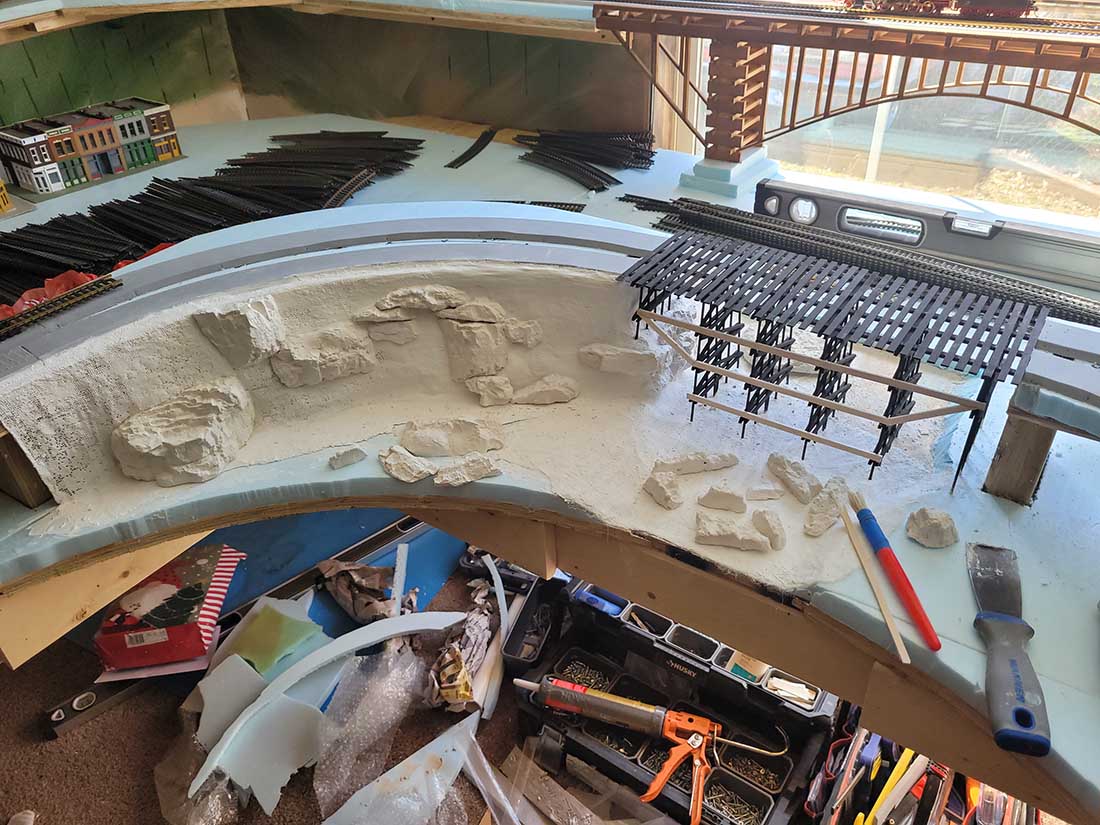
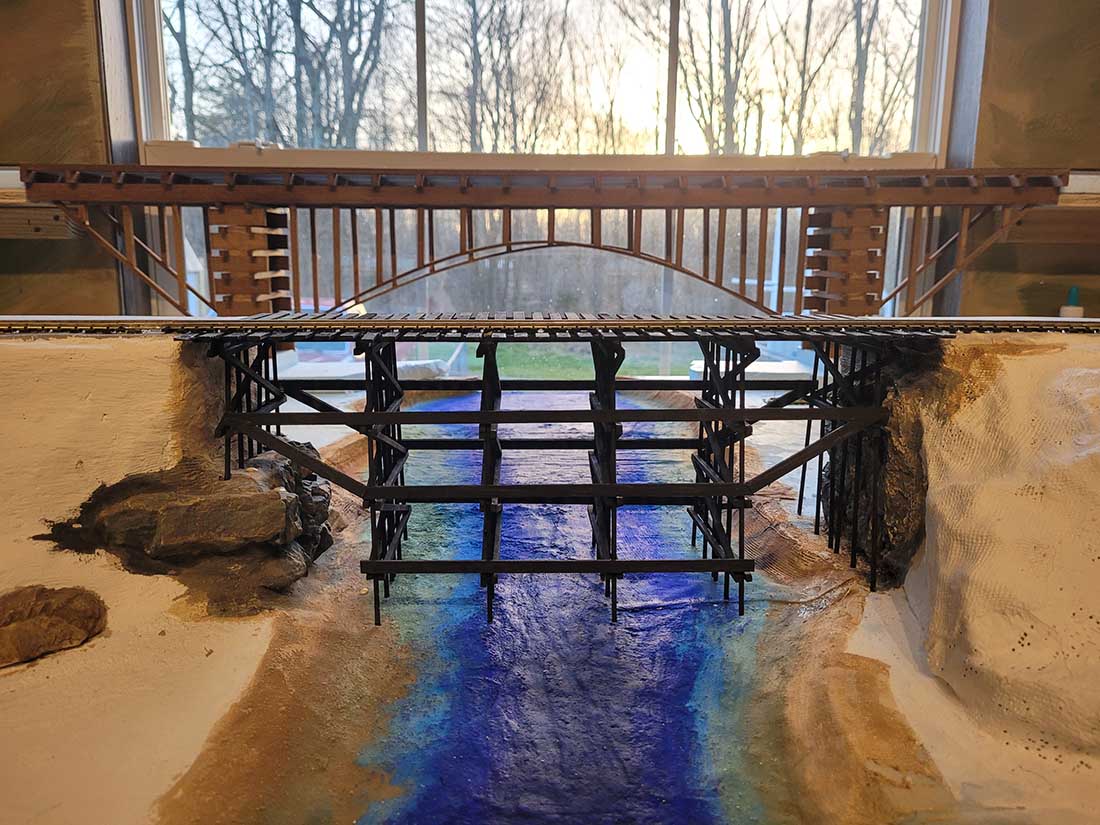
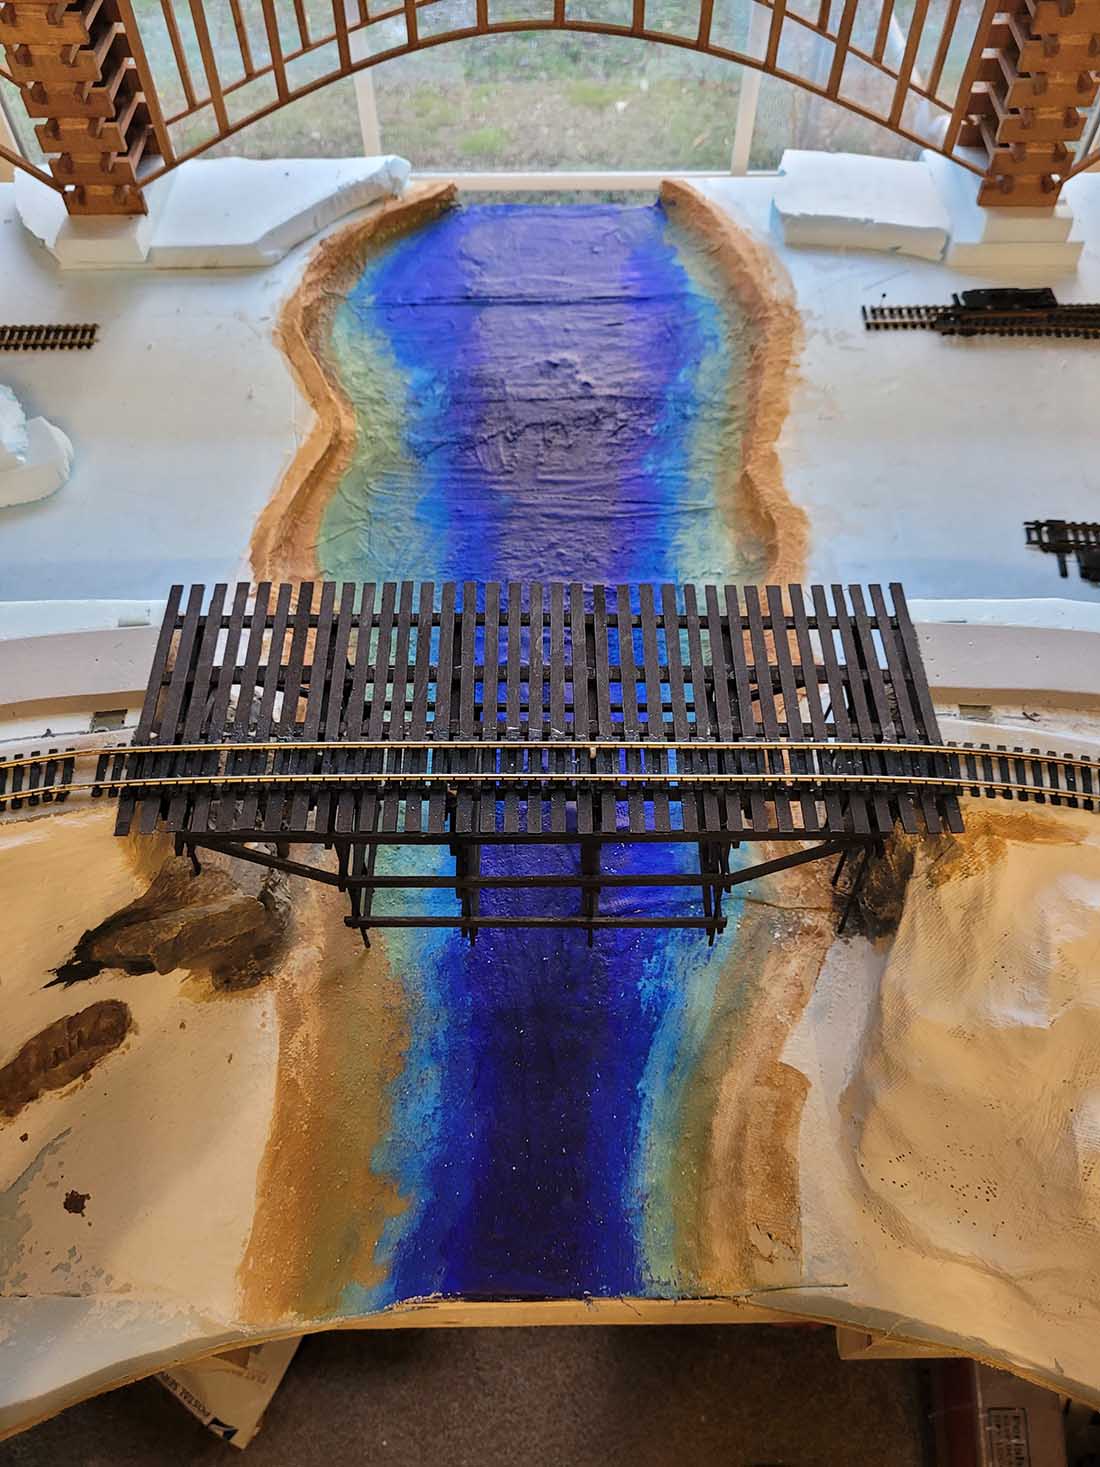
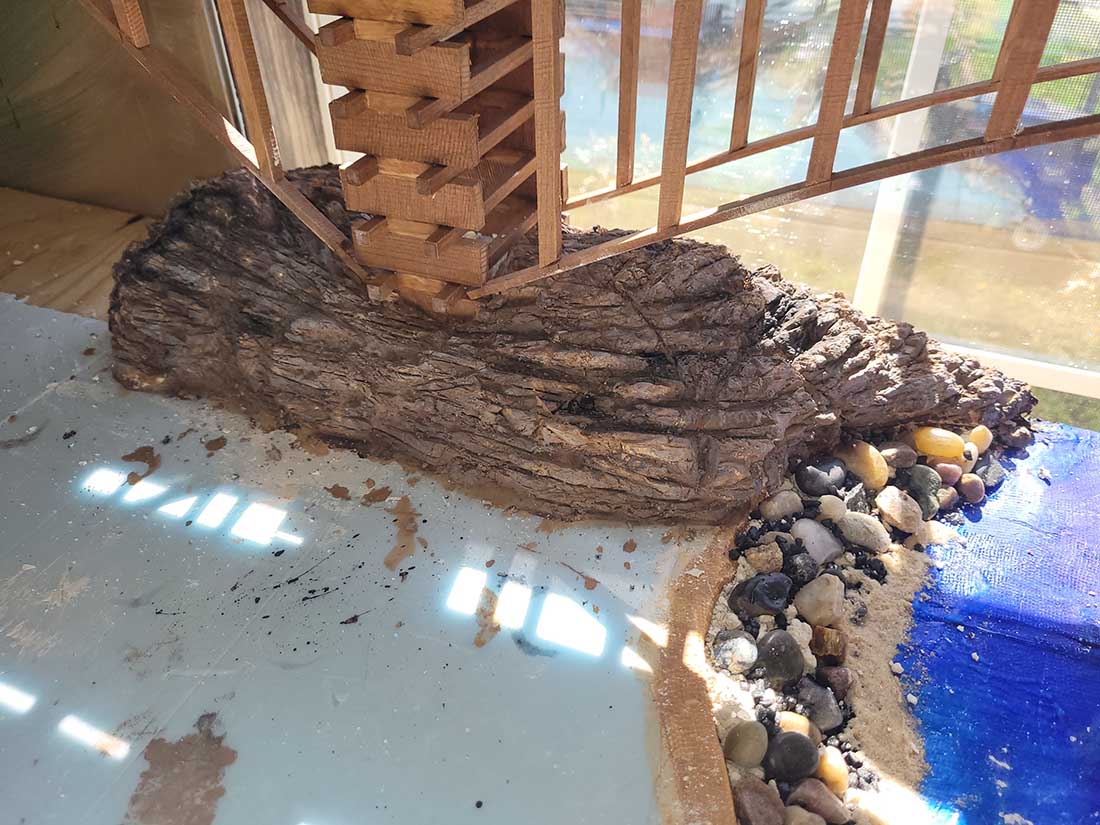
Starting a train layout – the bridge:


A big thanks to David – his narrative is a tidal wave of enthusiasm, and of course, he’s right because it helps when starting a train layout.
That’s all for today folks.
Please do keep ’em coming.
And if today is the day you get started on your layout, the Beginner’s Guide is here.
Best
Al
PS More HO scale train layouts here if that’s your thing.
Need buildings for your layout? Have a look at the Silly Discount bundle.

Great painting of the backdrop. I wish I had the discipline and planning to have painted my walls first. Looks really good.
David, what an awesome, fantastic job so far, I cannot wait to see the next set of photos and the progression. I love it, you are doing a super duper job!!
Excellent backdrop. You must have an artistic background to do that
your hands are very good. I’m watching with pleasure
Sedat from Türkiye
Wow , actual planning and forethought .. who knew . That is going to be an awesome layout . Your bridges and water feature are incredible, very impressive craftsmanship and skill. Please keep us posted as you progress . This is going to be an epic layout when you “complete “it . I grew up in Pittsburgh and that is one train driven town .. everyone there seems to have a layout . Glad your uncle inspired you , the baton is in your hands now brother , and your work is inspiring indeed .
Happy Easter to all!
Love it when modelers document the evolvement of their model railroads. As an aside, I sleep in until about 6:30am to read here with my coffee!
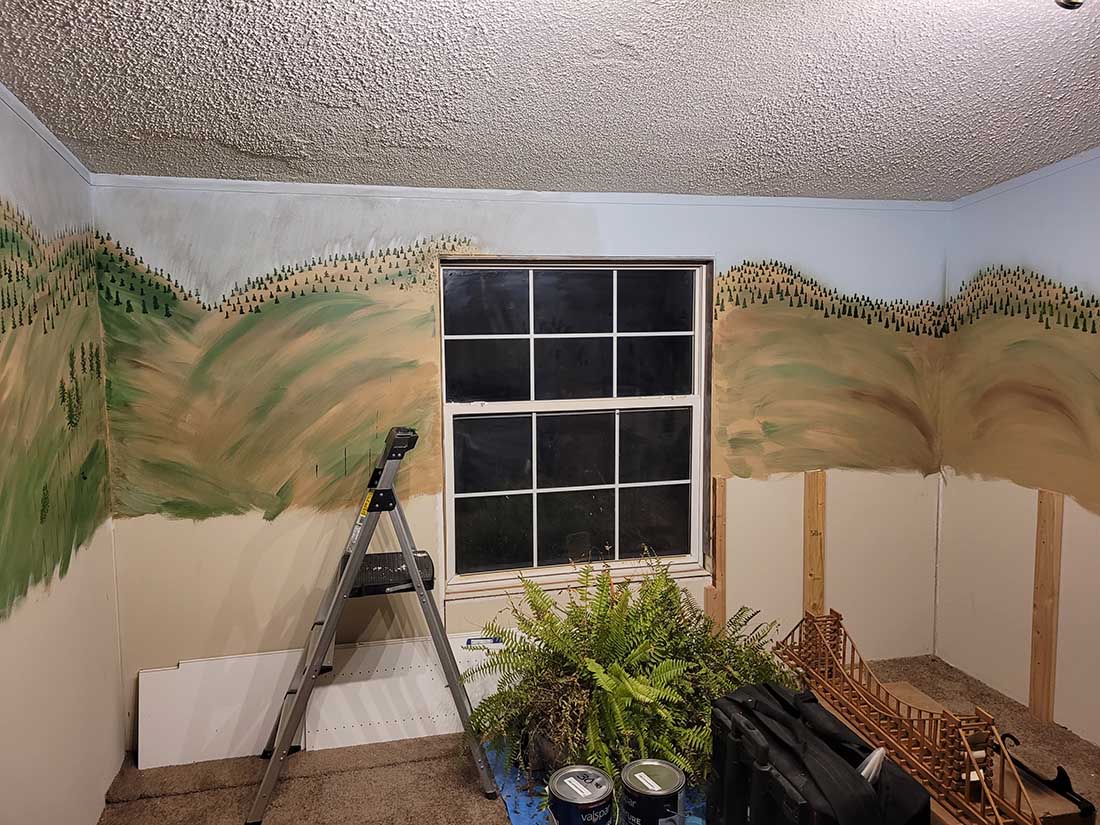
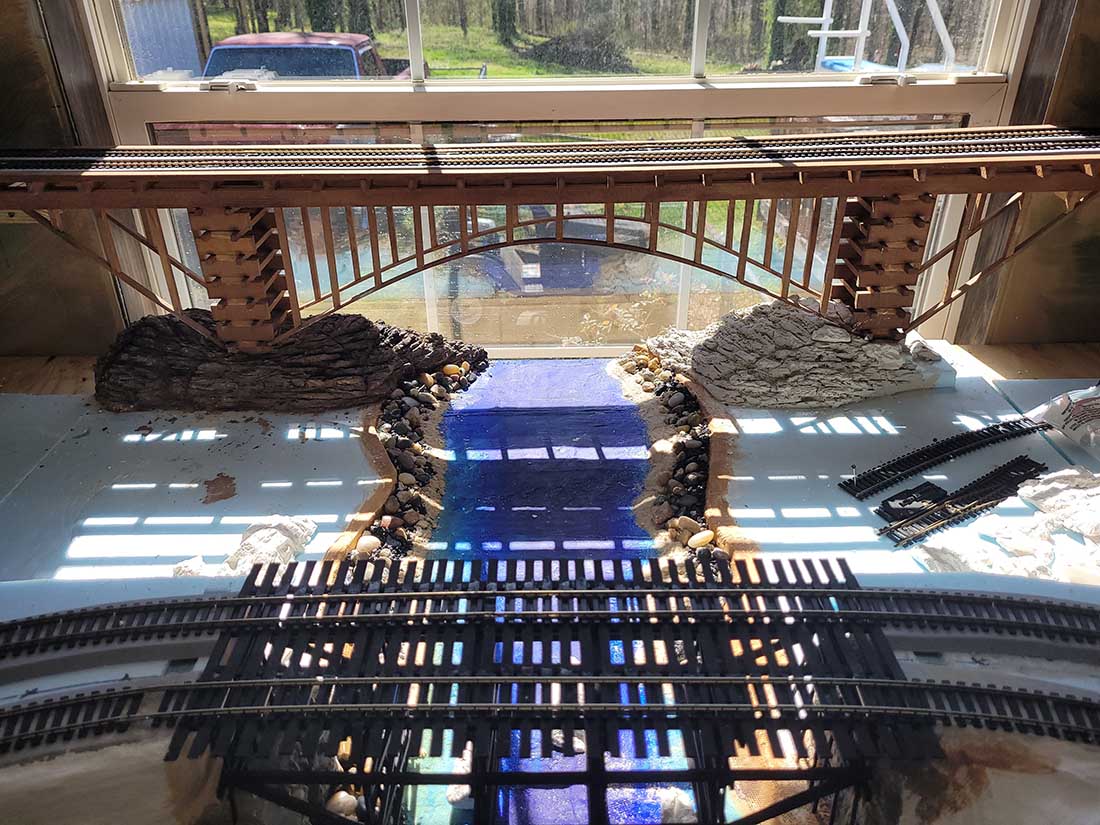
That’s really good the way the window is incorporated into the scenery. Looks like the river is flowing in from some far away, and it silhouettes those great bridges. Nice!
Nice work! Love the story too. Lot’s of modelers like to say they are looking for a new train room…..hopefully with a house attached.
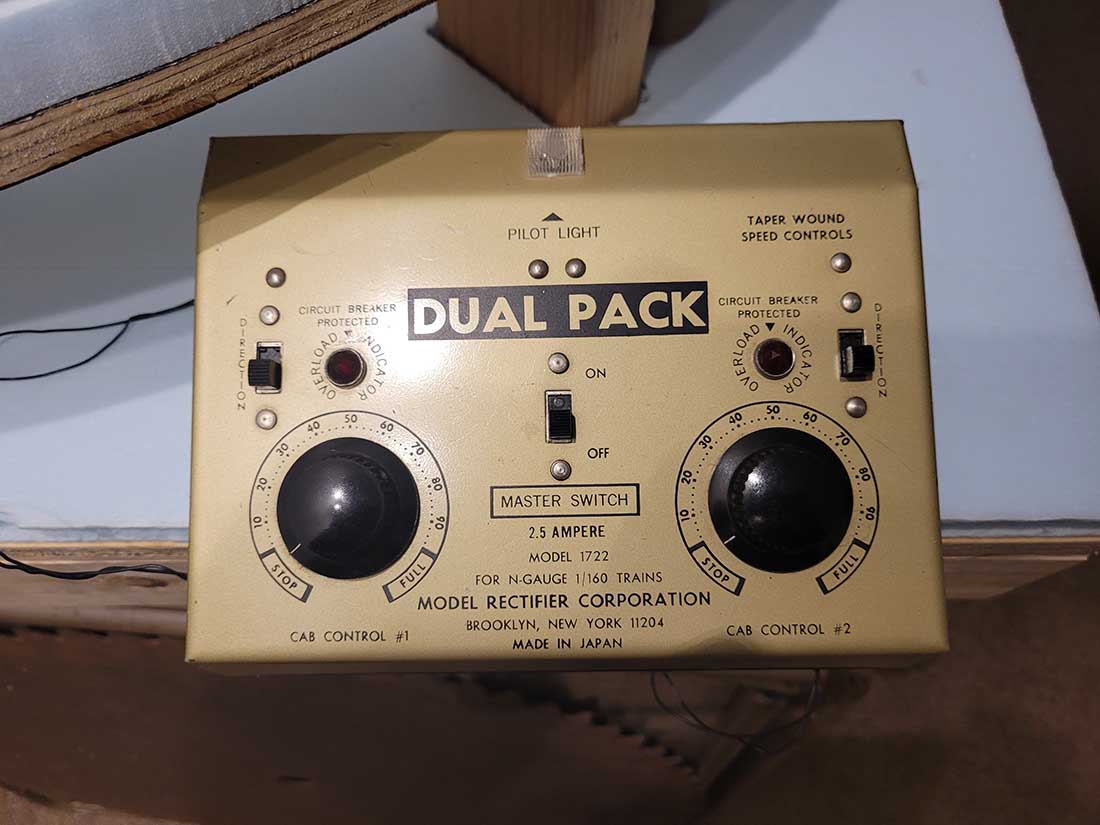
What caught my eye was your MRC Dual Pack Transformer. I had the same one powering my old HO layouts many years ago.
Keep up the good work.
Bob
Love the layout and especially your narrative.
Great layout More suited for modern day diesel electric trains as opposed to steamers.. Good job though.
The Critic
Graeme and Andy…
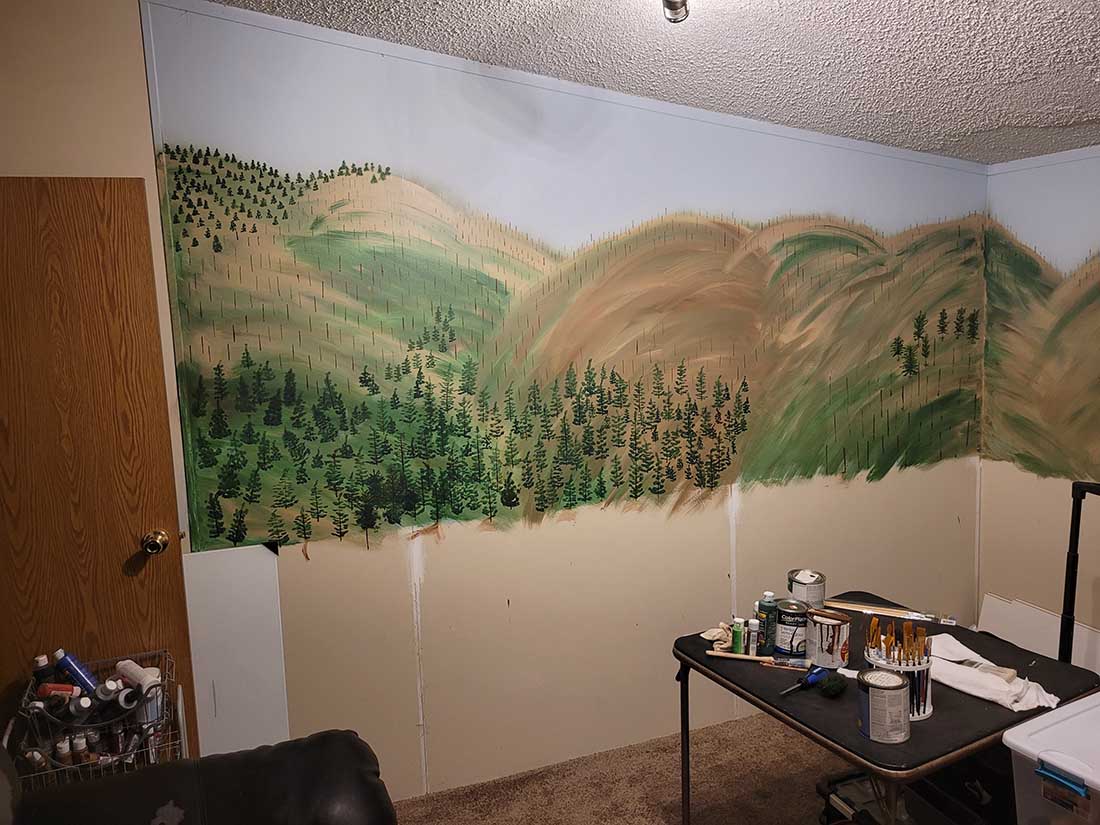
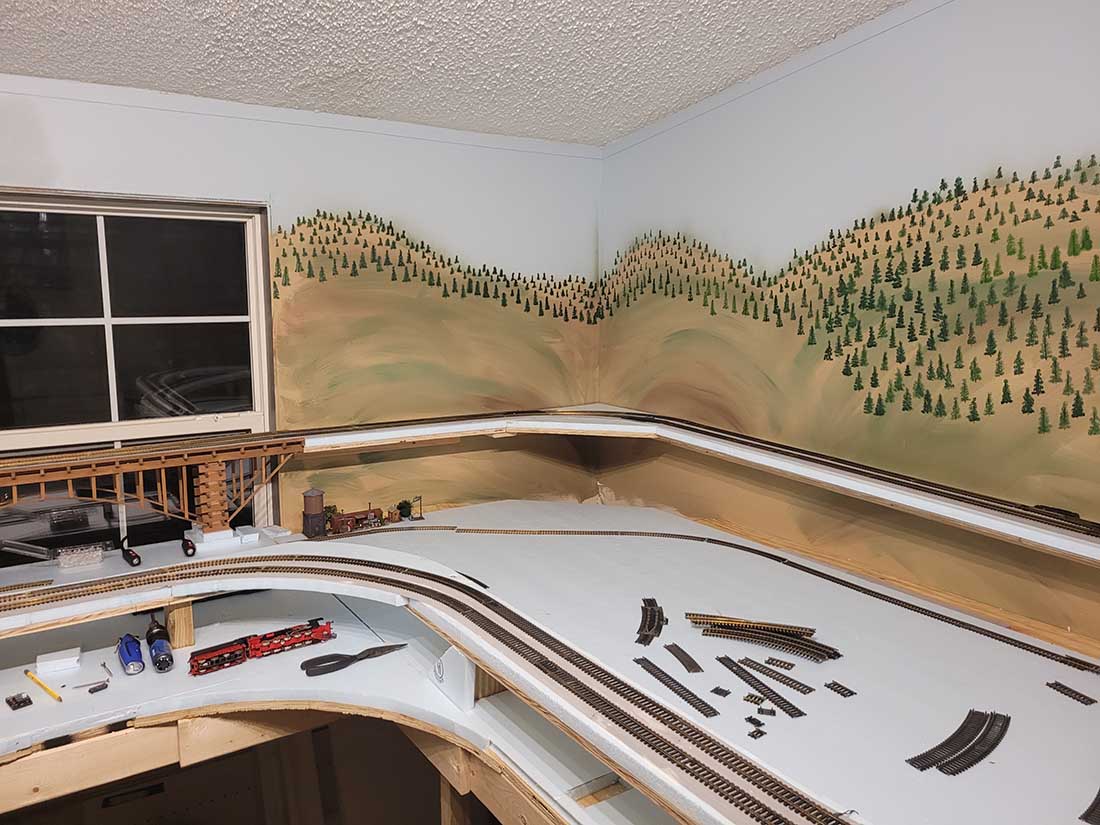
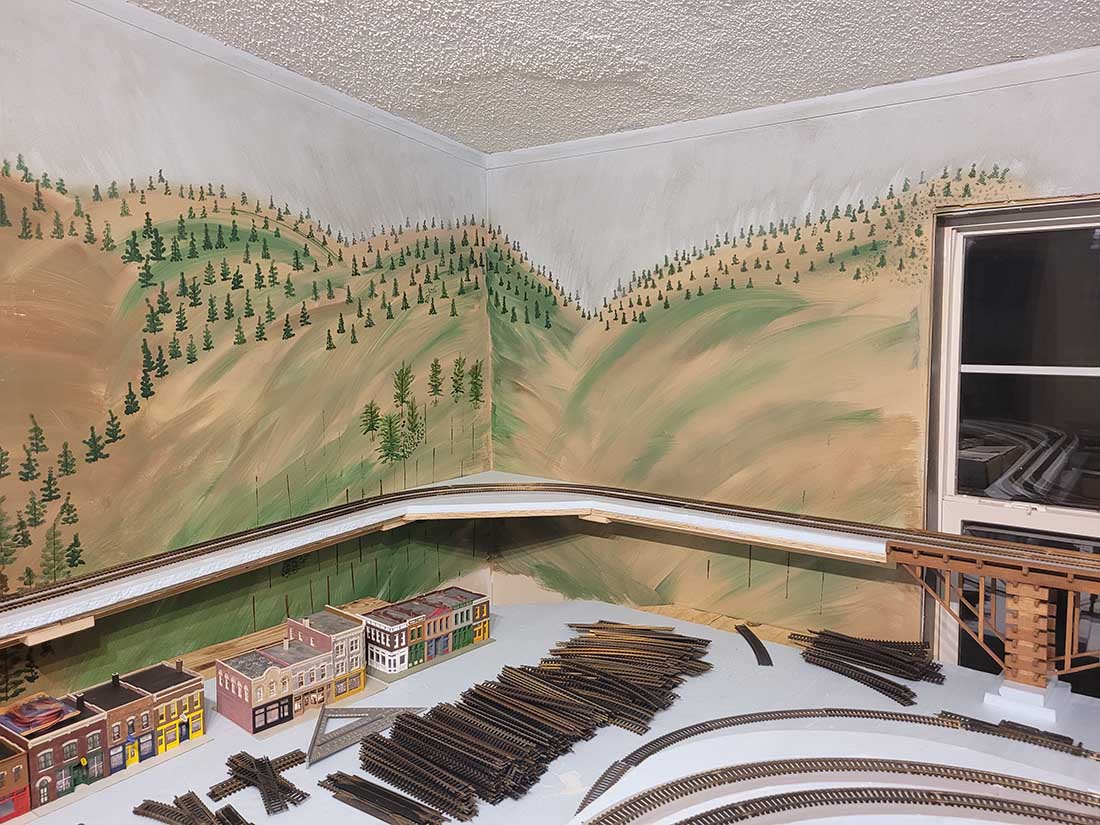
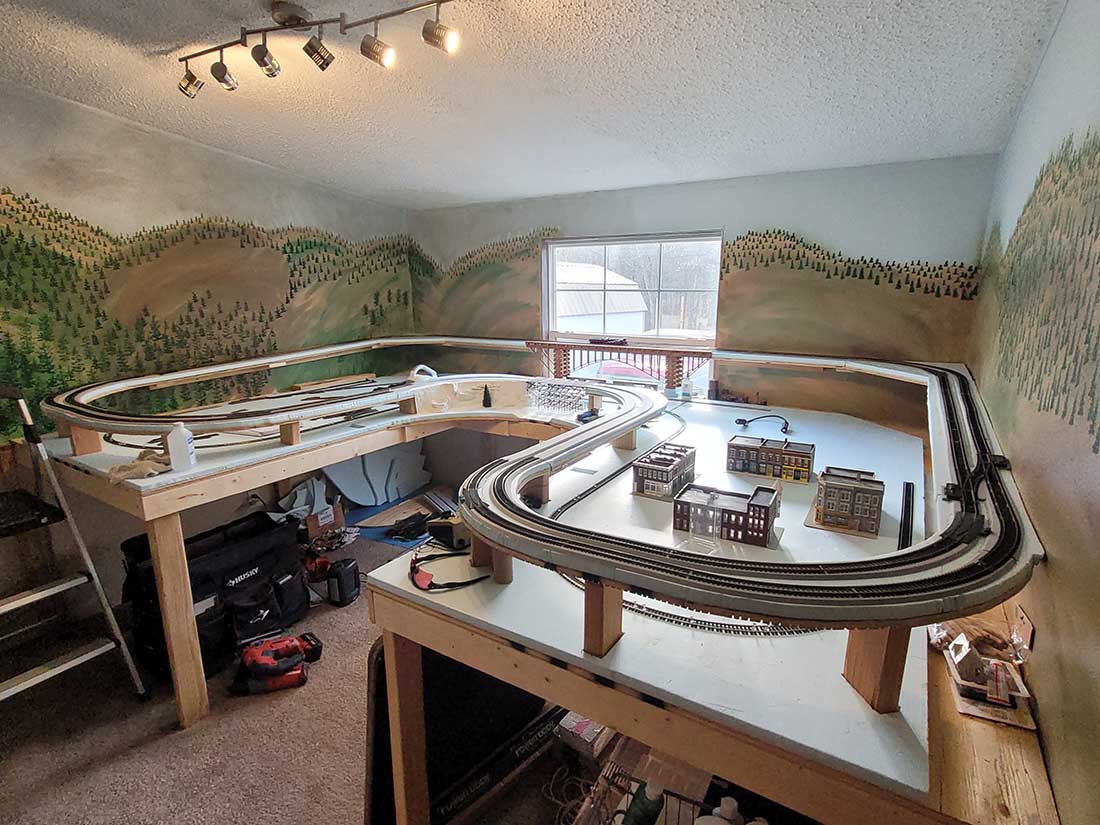
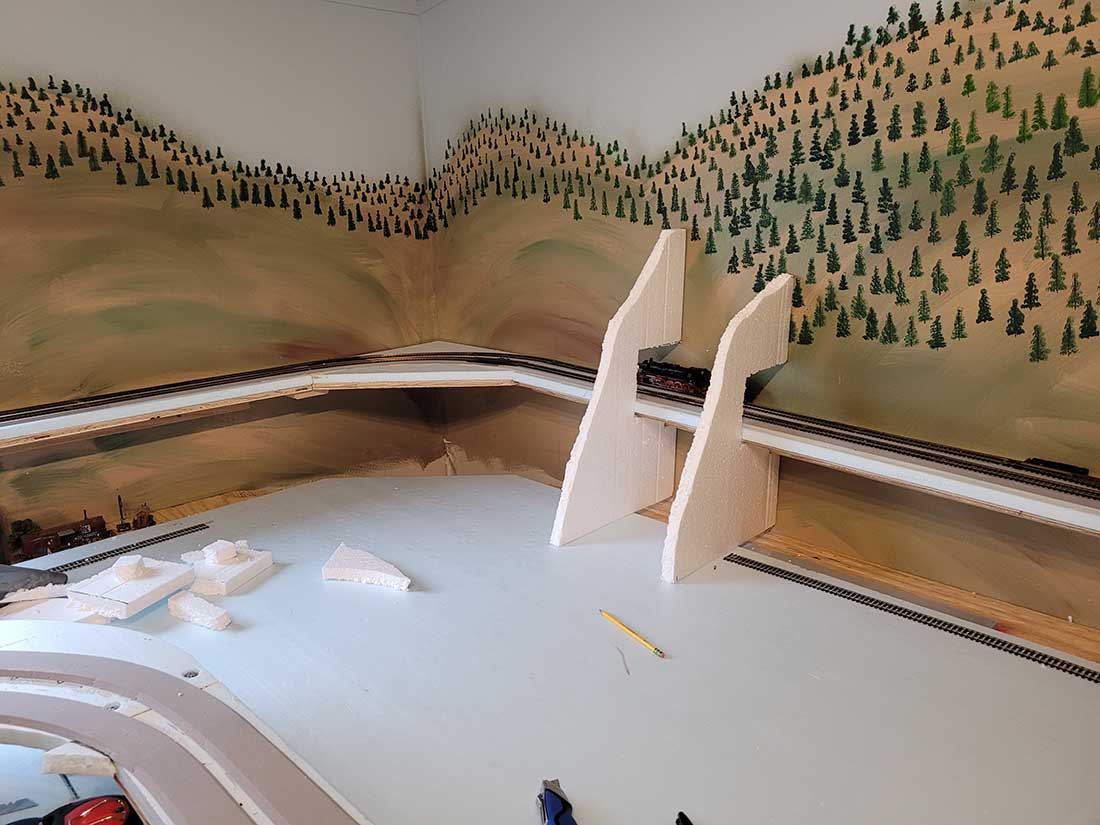
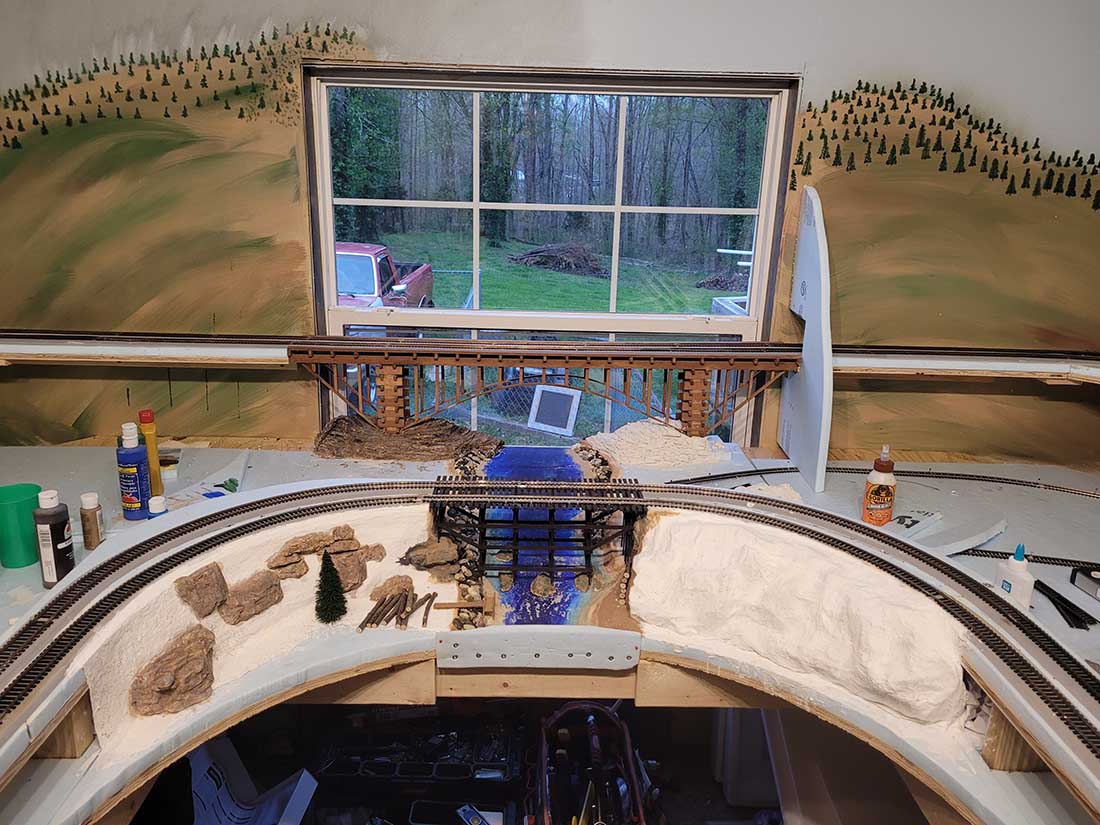
Actually, the Mrs painted the backdrop. And believe it or not, if you took the “drying time” out of the equation, it would have taken about a half a day. I painted the blue background with a roller paint stick. All 3 walls took less than 30 mins. The next day, Donna basically smeared 3 to 4 colors on the wall with a wide paint brush. We let that dry, and the next day, we both used a “dabbing” method for the trees. We are not artists, but the finished results may look like we are. Thank you again for your compliments.
Wow! What a fantastic start you have made. You have given me some great ideas for my own layout in ’00’ gauge. I can’t wait to see your next set of photo’s. It’s so good to see that so many people around our age are starting to build some fantastic layouts. Thanks for sharing it with us all.
This is the first time I have commented, although I have been an onlooker for a few months now. I live in Northern England and find that most people here use ’00 gauge’ systems.
Keep up your excellent inspiring work.
Stephen and Mike…
Yes, maybe too much “forethought and planning”…lol
Sometimes I really think that could be one reason why it takes one so long to make their “Start”. For the most part, the “execution ” is on track but sometimes, the “execution” doesn’t always fall in place with the forethought and planning, and we are faced with “altering” the design a bit. I never look at it as a “setback”, rather a chance to be more “creative”.
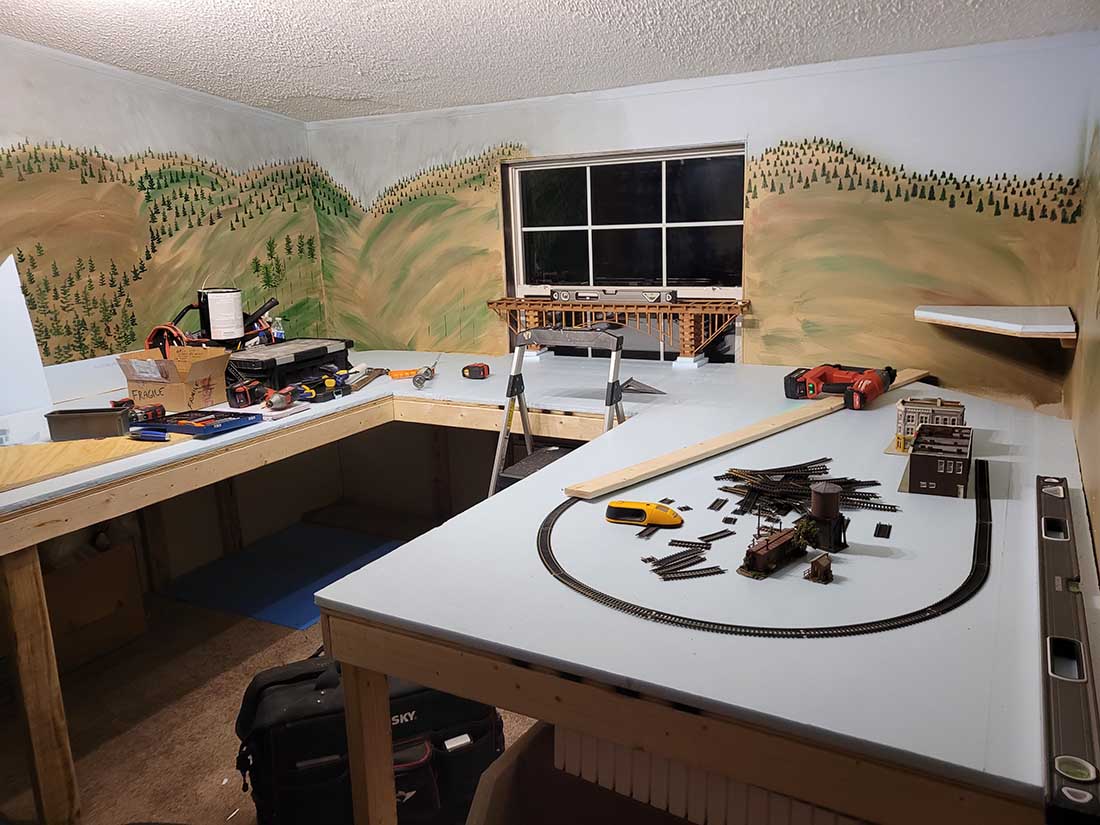
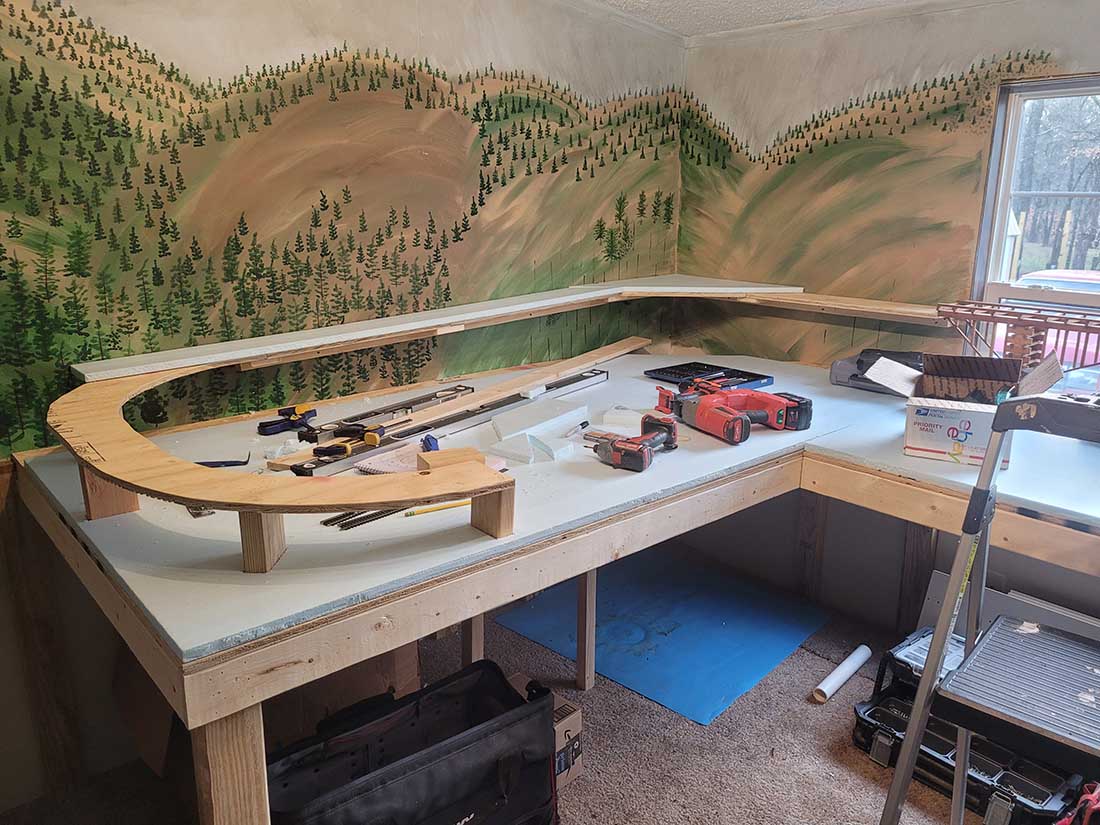
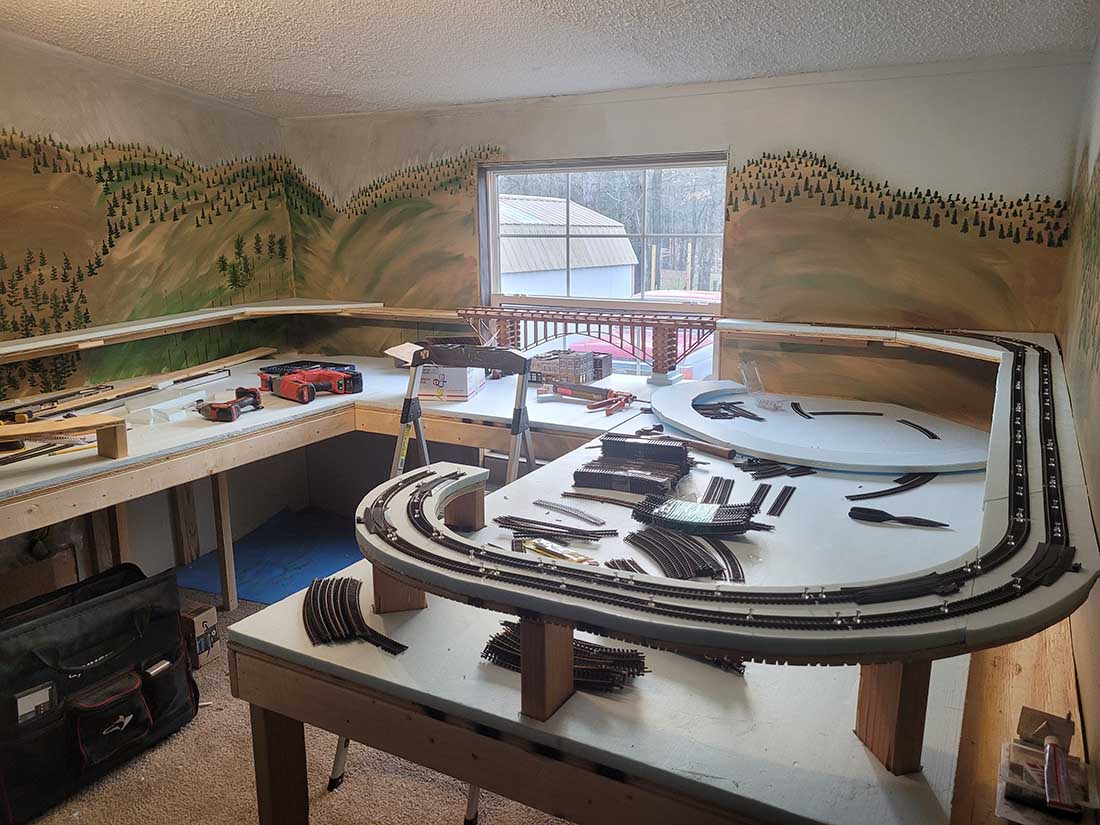
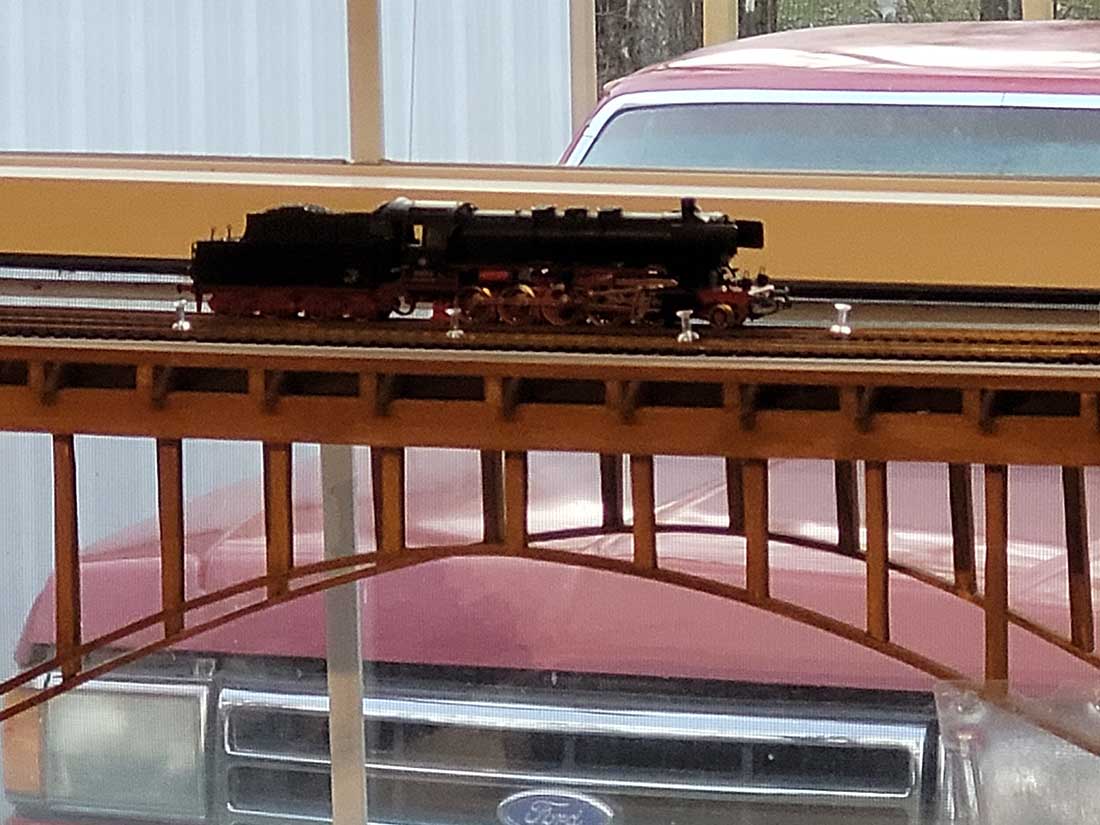
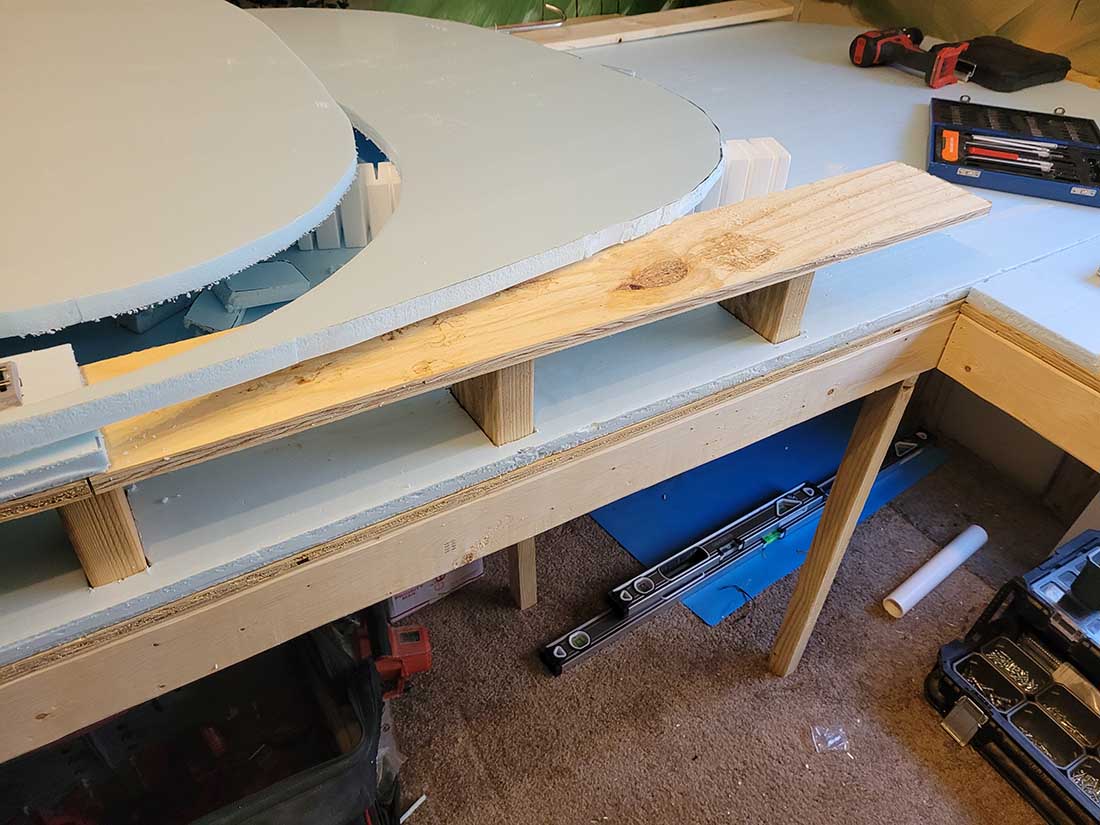
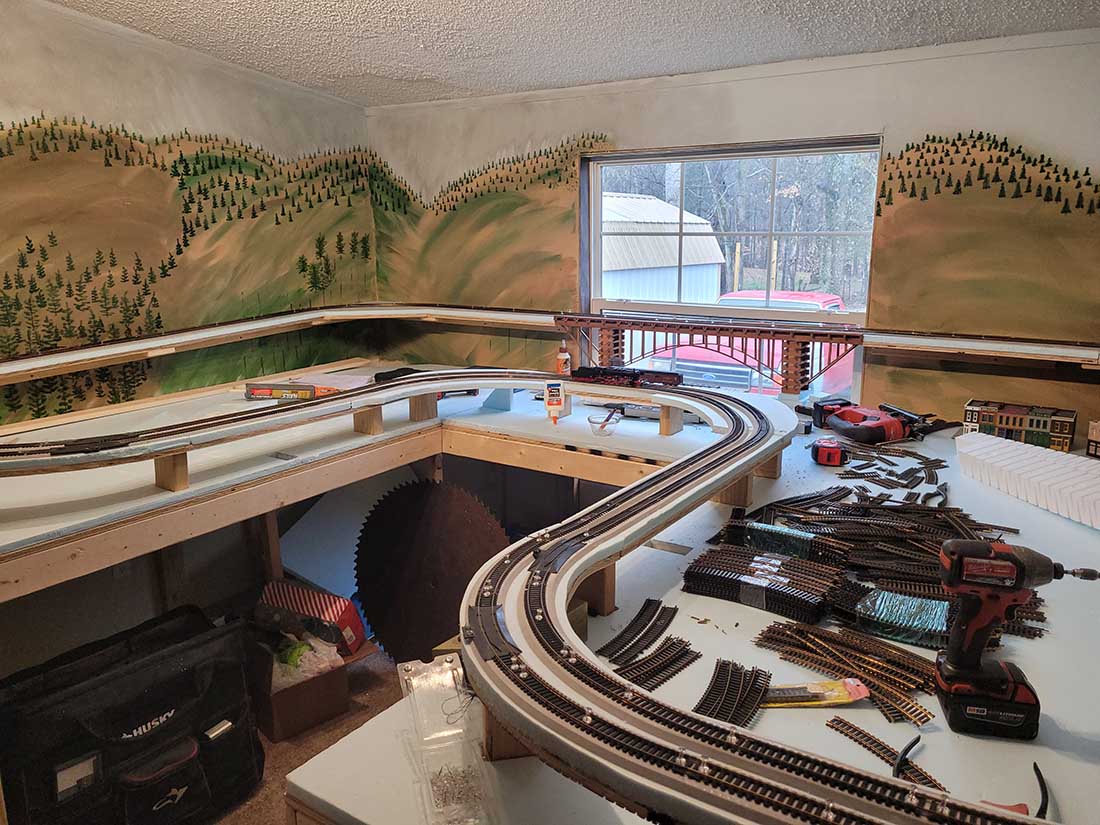
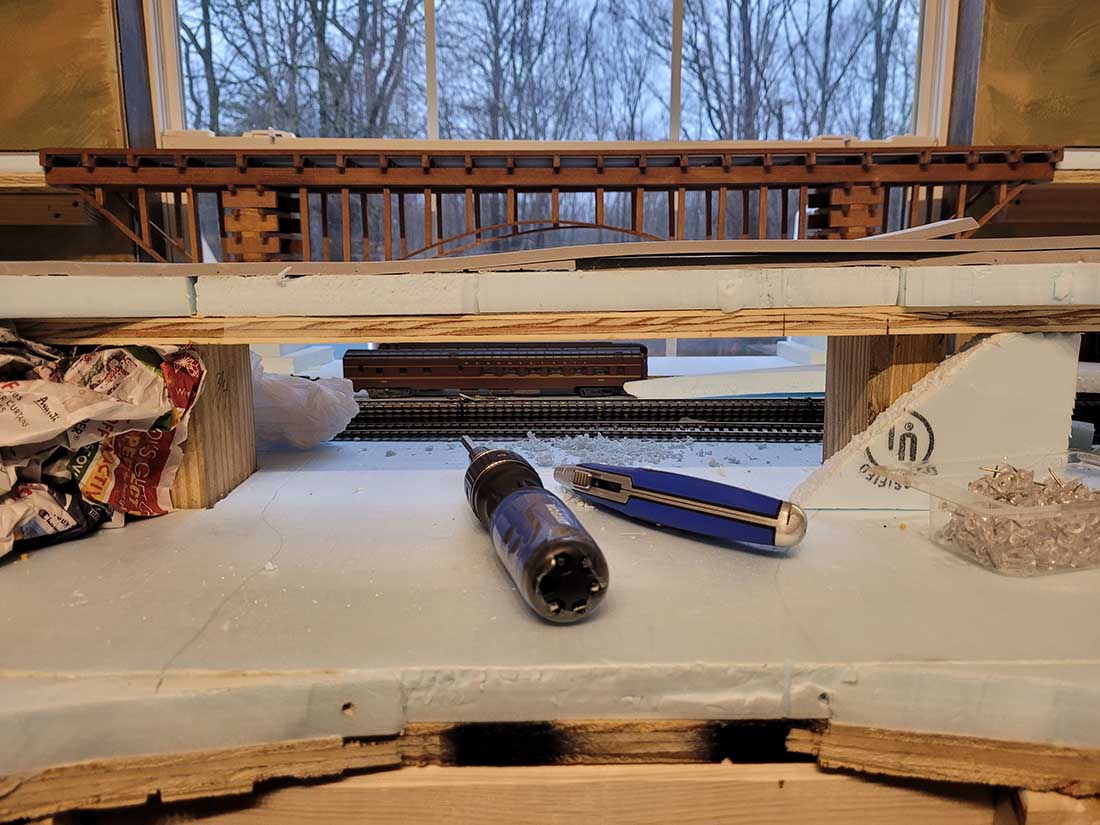
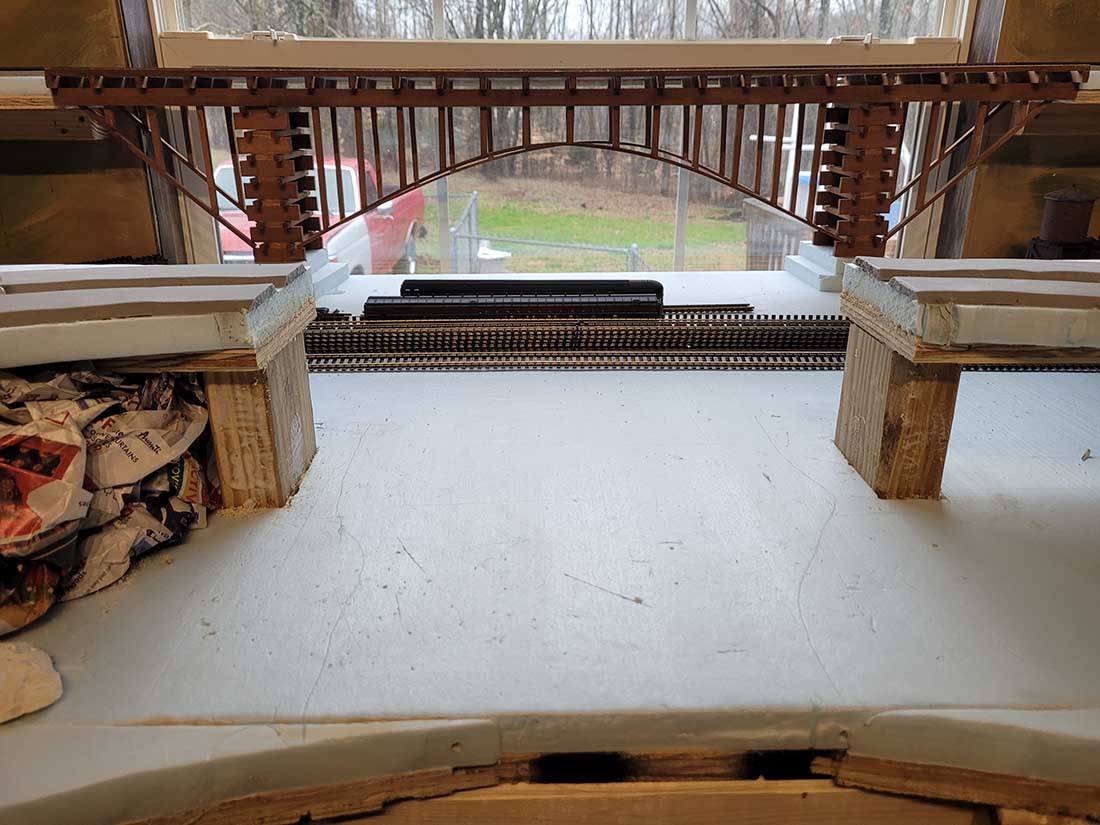
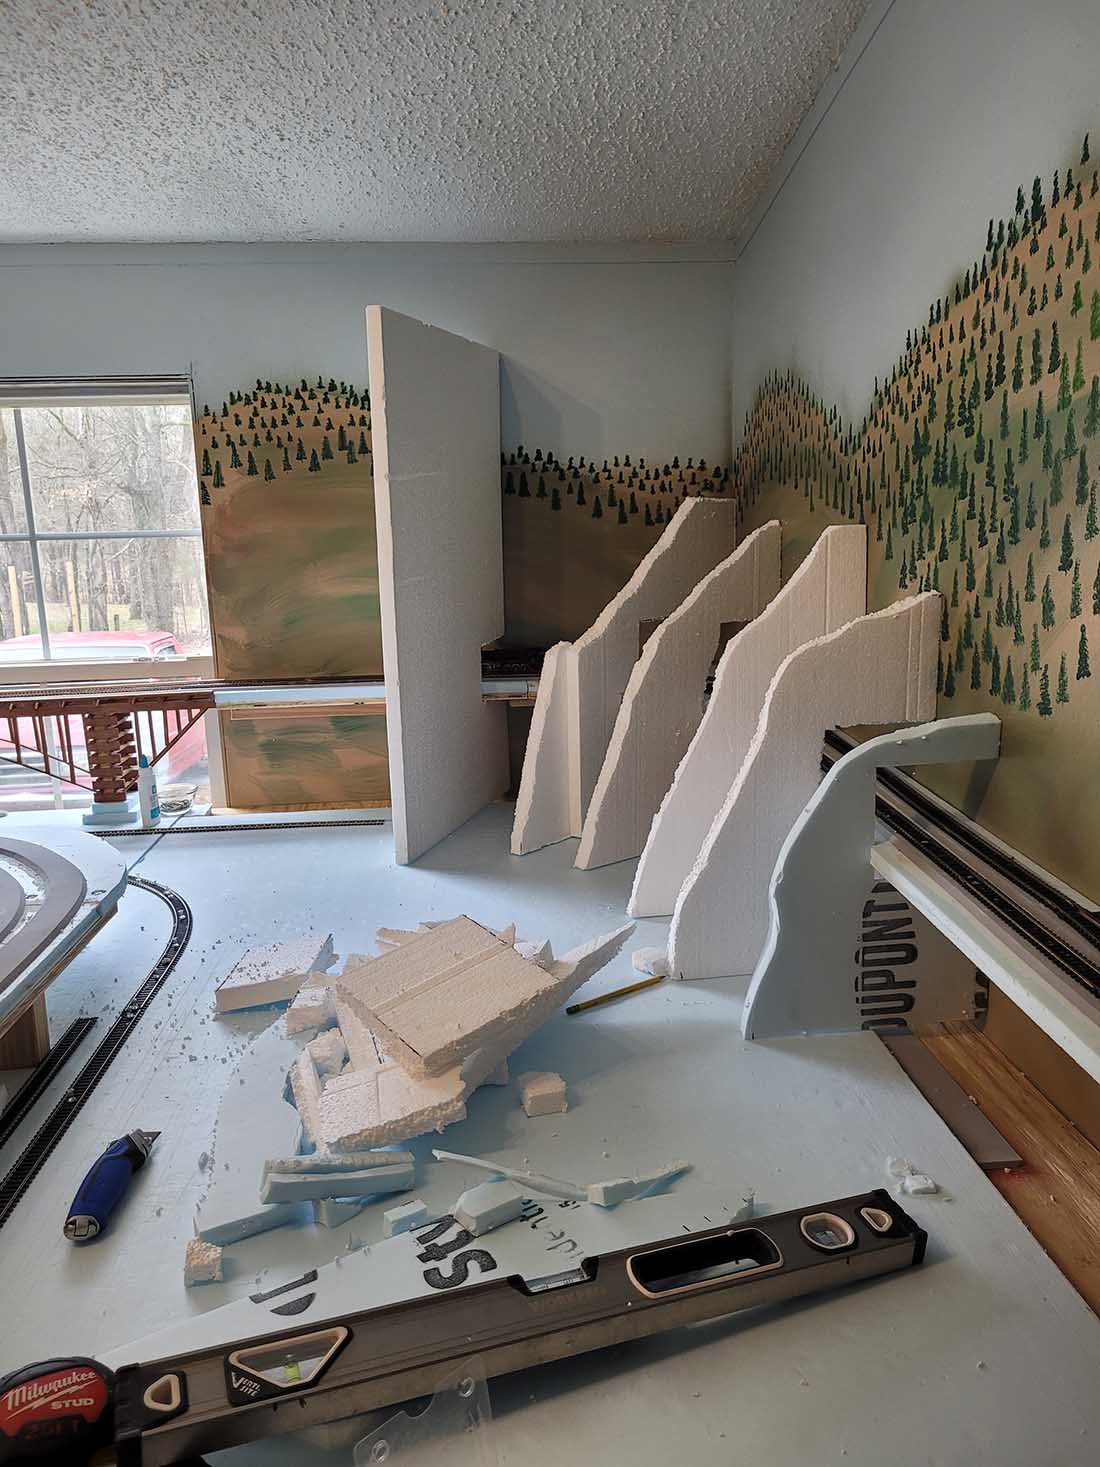
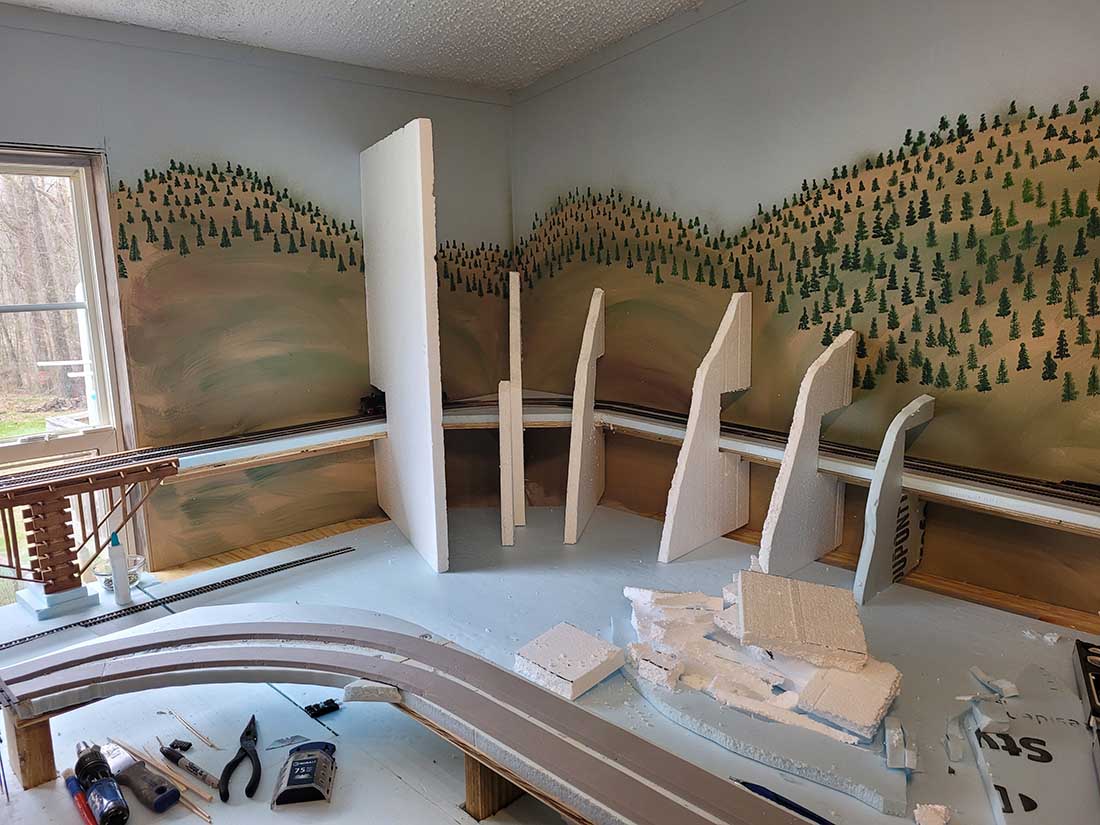
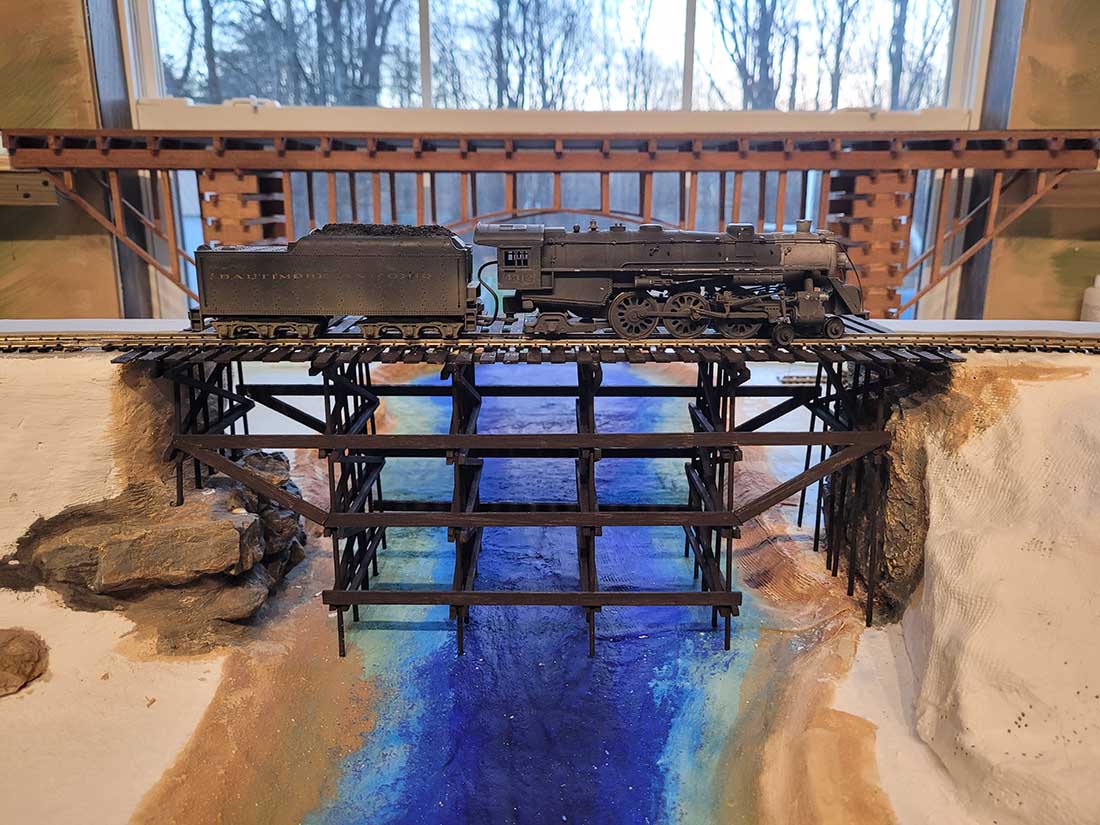
The two bridges are made from scratch. The one against the window is actually one that survived a major windstorm on my G scale garden layout. It actually worked out on this HO layout pretty darn good and allows me to lay 2 sets of track side by side. As far as the window and the scenery of the trees behind it, well, I got lucky with the view. However, my plans for the window are to inset a canvas painting with a river to link the mountains on either side of the window. Once that is completed, I will create a dimensional waterfall coming right out of the painting, cascading behind the bridge, down to the base of the river on the layout.
Again, thank you for your kind comments.
That is a serious build. Great bridges.
TJK
Bob…
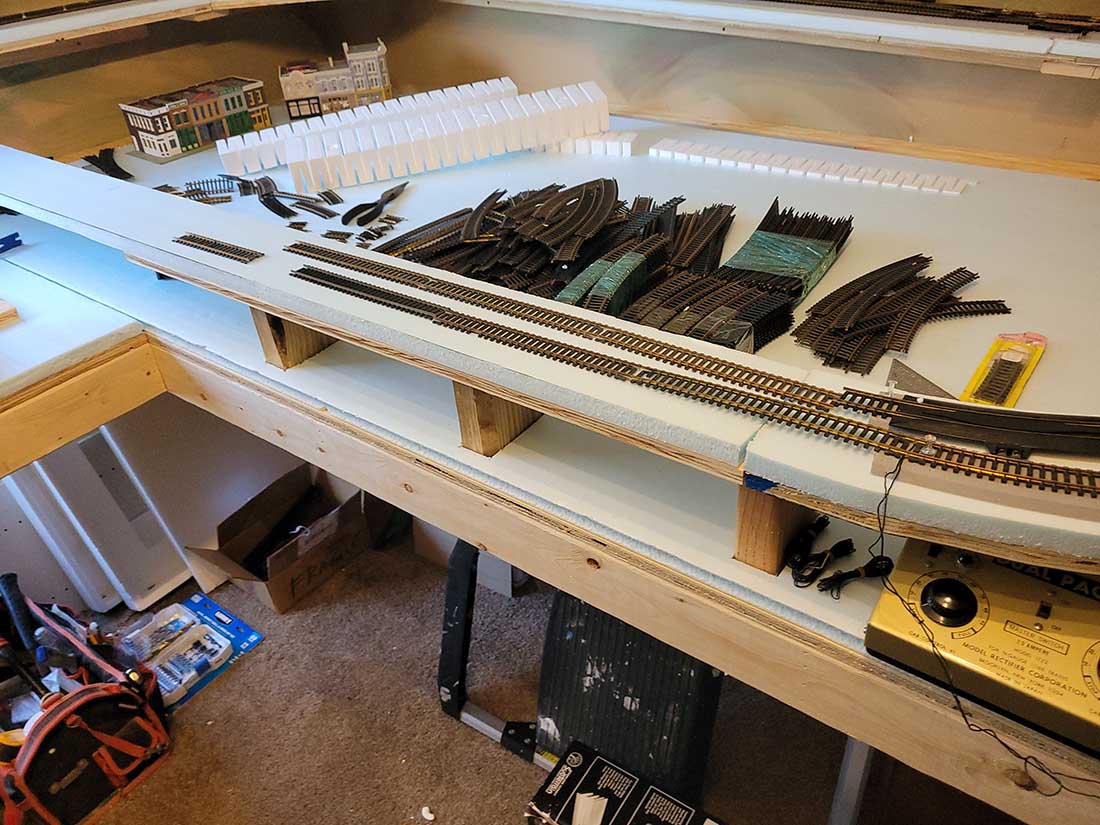
The MRC Duel pack is kind of unique, in my eyes. This transformer was actually given to me from one of the guys in the Model Railroad Club that i belong to. It is designed to run 2 N scale locos, however, with a .5 Amp higher than the HO transformer, it actually runs both my DC steamers better than my Tech 4 transformer. The 2 sets of upper tracks were intentionally designed to run DC only. This allows me to run my 2 favorite steamers, (4005 BigBoy and a Fleischmann 2-10-0), while I’m actually working on the lower part of the layout. The lower part of the layout will be DCC. And I will run both Diesel and steamers. I do not have the DCC power cab just yet, but my birthday is just around the corner…lol I plan on going with the NCE system.
Again, thank you for your kind comment.
Speachless!
Very nice work great job.
Loved all the “progress” pics. Nothing spurs on the imagination better than seeing the stages of how something comes together.
Also, great job on the bridges as well; very nice to put a bridge past the window :).
This looks like a layout that will bring you years of fulfillment!
Interesting!! Always worth a look to get ideas for ones own layout. One thing I wish every poster would do in their narratives is include a room size, Sizes of benchwork, etc. this would really help a lot of us rookies in our planning!!
Nice background. You have some talent there. I also like the tunnel and river scenes. This is where I need to work on more. My backdrop is my next project. Right now I am just pushed against the wall. This gives me some inspiration. Thanks Dave.
Love your painting skills for the back drop, layout is looking really good.
Jim M…
You do bring a good point up, Jim. I see alot of layouts with enough space behind them to walk behind and have access, in case of derailment or wiring issues. It is wise to plan for this if one is vertically challenged or if one’s health prevents them from crawling under the layout.
The room is 11’9″ x 12’6″. The actual layout is 11’9″ x 8′. I purposely built the layout against the walls. In each back corner, the is a cut-out large enough for my thin body to crawl up through and reach everything that will be behind the mountains. I will be able to reach everything from anywhere outside of the layout.
Hope this helps, my friend!!!
I hope to see more progress.
Have been enjoying Allister most every morning for several years. Usually, I admire the day’s presentation and then delete and move on. Not today! Mr. Caldwell’s work is going to reside in my computer’s memory. My Mother used to tell me that the only real compliment is imitation. I plan to perloin those two very fine bridges and have already set aside some wood for them.
Thank you, Garry from Maine
Very impressive in a contained space!
Awesome David!
Impressive, good detail!
Awesome layout!
The steam locomotive in one of your pictures looks exactly like a Marklin locomotive that I have, but I don’t think that you are running 3-rail ac.
Looking forward to the finished product as the beginning is simply superb!!!
Great start with pics?
really good bridge work. river scene as well.
I appreciate the combination of close-up and long-view photos! It looks exciting!
So fun to see things taking shape! Keep up the good work
Hi Al, David expresses just how thankful I am for the blog and your untiring commitment, I couldn’t have said it better. Thank you so much.
Wow! Very impressive effort. One thought: create a panel from wallboard or some other medium to fill the window gap in the well done scenery on either side.
David,
I agree with all the positive comments so far, but I don’t see how you could get to a derailment in the tunnel. It looks to be rather “solid”, up against the walls, and presumably, “mountain scenery” down the front.
Tom in Mississippi
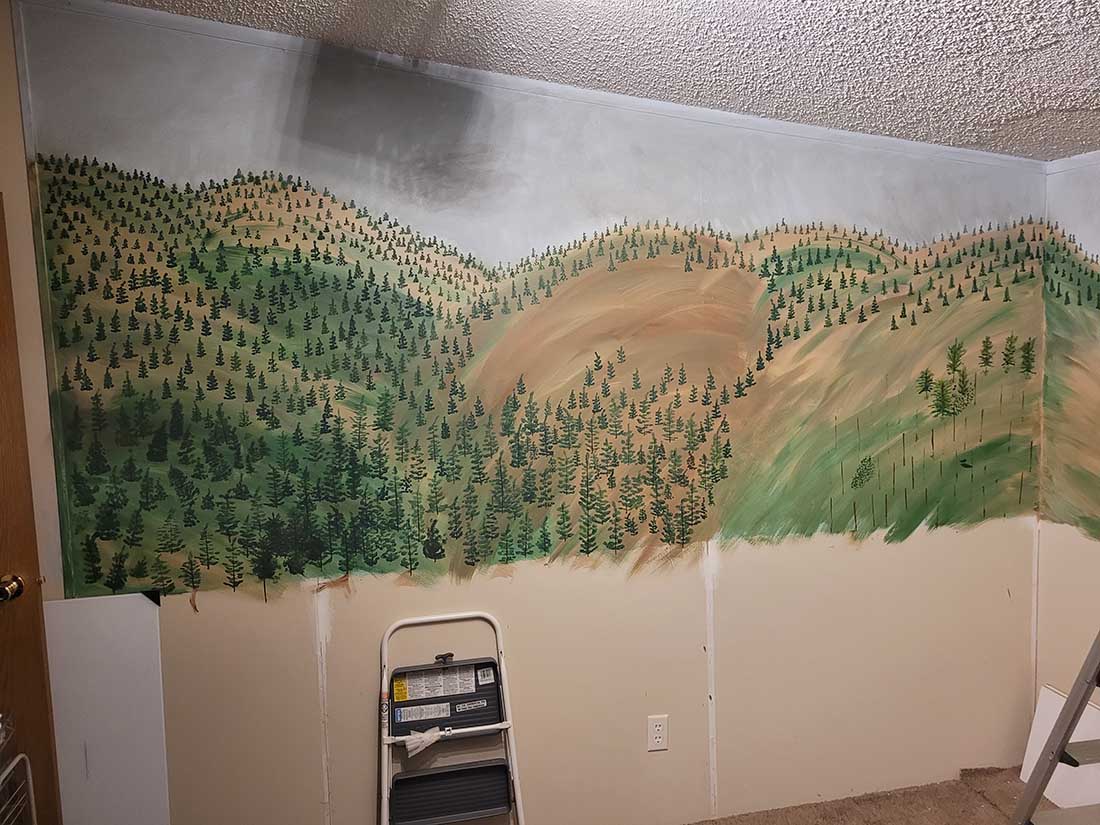
Dave, What a layout. I commend you for such fine work. I am 80 years of age and still planning my 4th layout. I have two questions. Did your wife use some kind of stencils for the trees? I just cannot see how you could dab trees that look like that on the backdrop. It must have taken quite a while to do. Thats a lot of trees. It is beautifully done. Also can I ask you what the radius is on your curves? I am guessing 22″. Again you and your wife has done a great job on the layout. I would appreciate your reply. Thank you. Rocco Maley from Haskell, NJ.
David: what a layout. I commend you on the fine work. I am 80 years old and planning my fourth layout. I hope I have enough time left to build it. I have two questions. Did your wife use some kind of stencil for those trees? I just cannot see how you can dab trees that look like that on the backdrop. It must have taken quite a while to do. They look like they were painted on individually. They look great. Also can you tell me the radius of your curves? I am guessing that it is 22″. again that is one great looking layout. You and your wife has done a great job.I would appreciate your reply. Thank you. Rocco from Haskell, NJ.
A lot of thought has gone into this layout. The wall scenic is excellent and ‘makes it’ look real. Best wishes as yoiu progress with further detail.
Great Dave keeper rolling.my days are much better off have morning coffee with Al’s site than than morning news.
Loved the photos showing your progress. Looks like you will have a GREAT train room going forward!!!
David outstanding artwork on the walls!!!!!! Your Steamers along with modern trains will look awesome!!! Great Jog enjoy!! 2 thumbs up!!
nicely done
Short of being trite, I read these posts at least 12-14 hours later than they are sent. I find it a nice way to wind down after a long day of being retired. I still own a small seasonal business in southern New Jersey, despite being a three time pensioner.
I have been an avid fan of Alastair’s posts, and a person that has been designing my layout for ten years now, literally on paper. I have not found an automated program that will do what I want to do, nor really think that I need one. I’m quite old school and have stayed with the idea of wiring the DC route. I am lucky like DMC to have a dedicated empty nester bedroom (16’x12’) with plenty of layout room and due to age, a walk around perimeter area, my procrastination comes with the start of my lower level (massive staging area) under the main layout. I fear the long periods of living under the layout as I snake a hundred miles of wires under the main level around the staging level. I’m trying to design the staging to be as open as possible for access and clearance from wiring above. I’m setting a goal to start on September 15, 2026 (the closing date for my business). I’m hoping to actually retire from it finally on this date. Then, it’s being 10 years old again for the rest of my remaining days as a model railroader!
Kudos to David Michael for his energetic post and extremely well thought out layout details. Thanks to the understanding spouses that support us crazy addicted hobbyists!
Great looking layout and inspirational narrative. You could be a motivational speaker. Hope to see further updates. Rick from Ohio
I certainly concur with the all the glowing remarks about this project and I too, have my first cup of coffee every morning on the blog. I was wondering what the theme of the RR is and the track plan? It seems like the upper double track doesn’t connect with whatever is going to be built on the lower portion. If that is that the case don’t you think your really limiting your operational possibilities? Jus’ Sayin’
So fun to see this coming together! Great start David!!!
Since 2007, the only “layout” I’ve had was a 5′ straight that I used to test new equipment that I bought over the years, hoping to have a real layout again one day. In April, we will be moving to a new house with a Train Room. I hope my layout looks as good as David’s!
If I had the large yard that comes with the new house and no rolling stock, I would definitely go with G scale. But, since I have accumulated 369 total pieces of rolling equipment and a significant number of buildings in HO scale, It will be HO for the third time.
I have 56 locomotives purchased 1965-1991, and only 3 purchased since 2000, so I plan to stick with DC and use multiple transformers for each main line, the main switching yard, and longer spurs. There will be a lot of wires!
David…Very much appreciated your intro and bringing us up to the present…excellence in your layout!!
Lots of thought and attention to detail here. And it shows!