Rob’s been back in touch, this time he’s been busy adding model railroad electric utility details:
“Hi Al,
This video strictly runs trains and with a quick look around a few newer things.
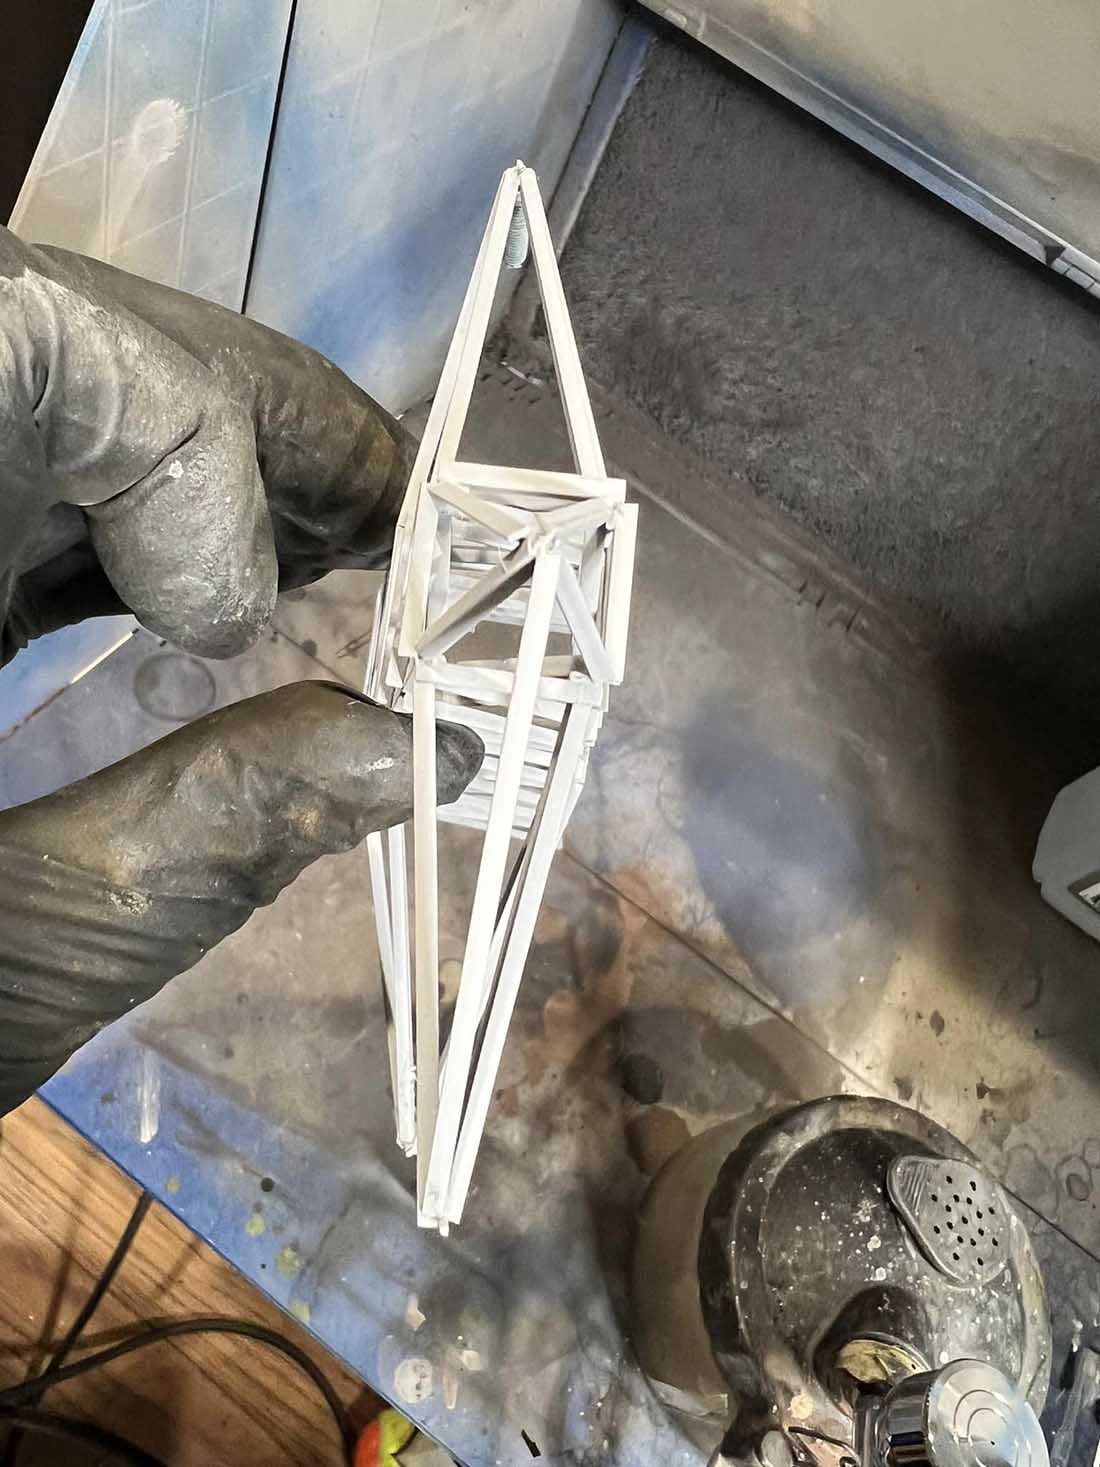
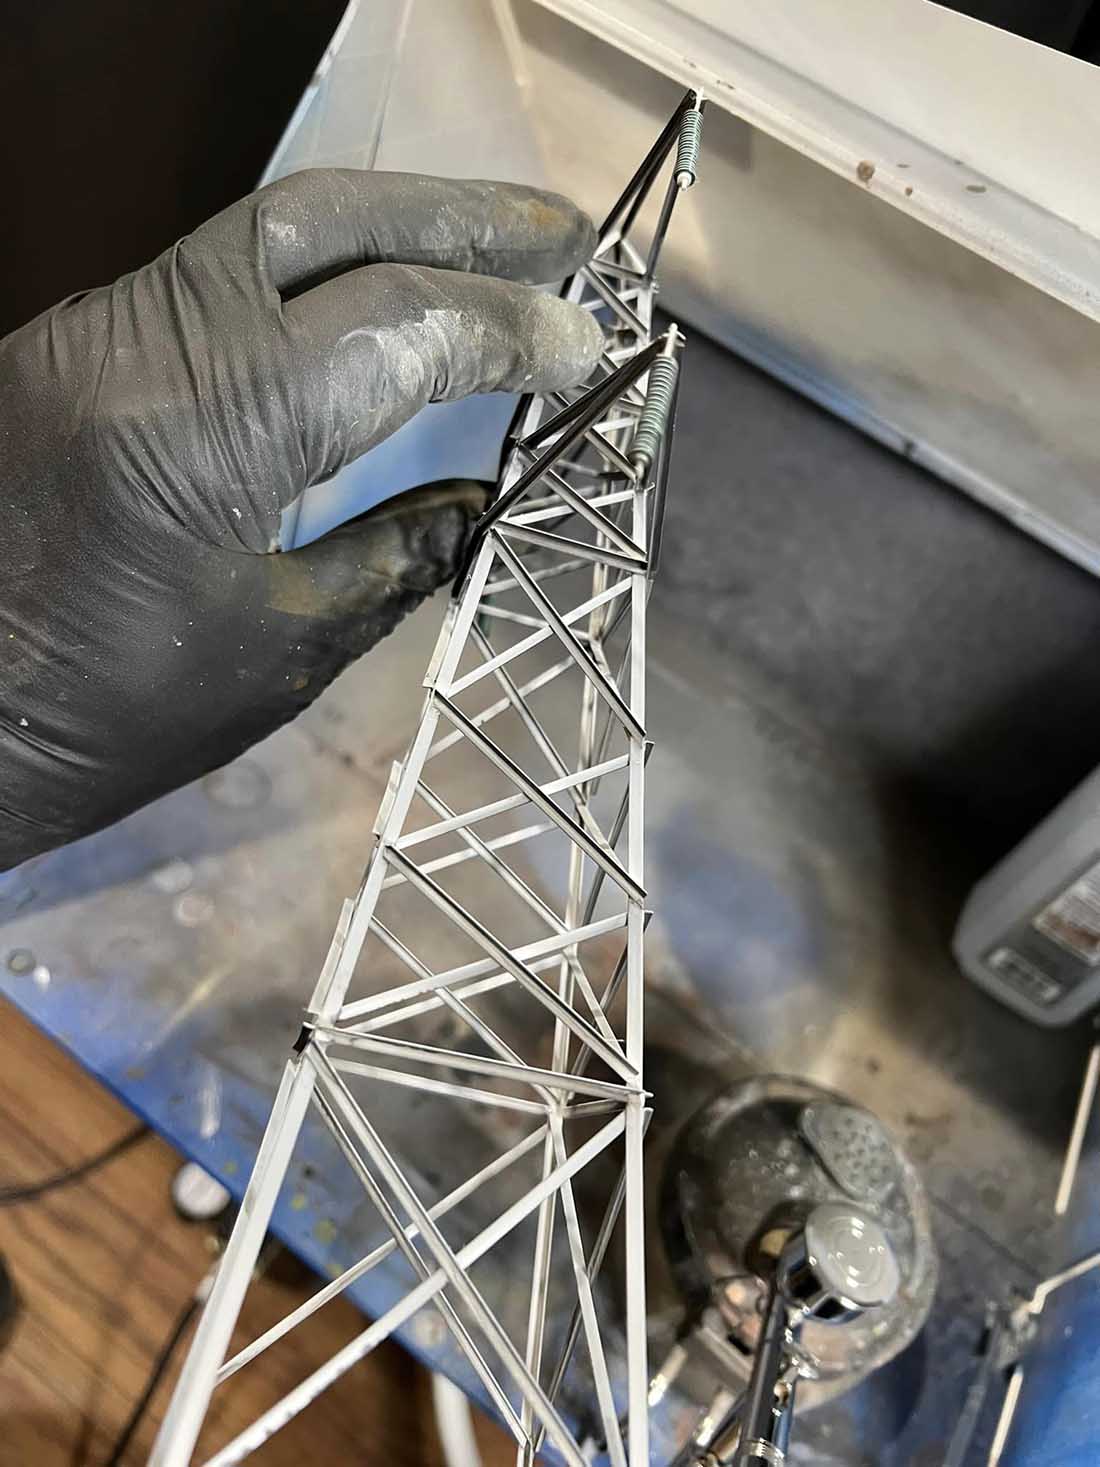
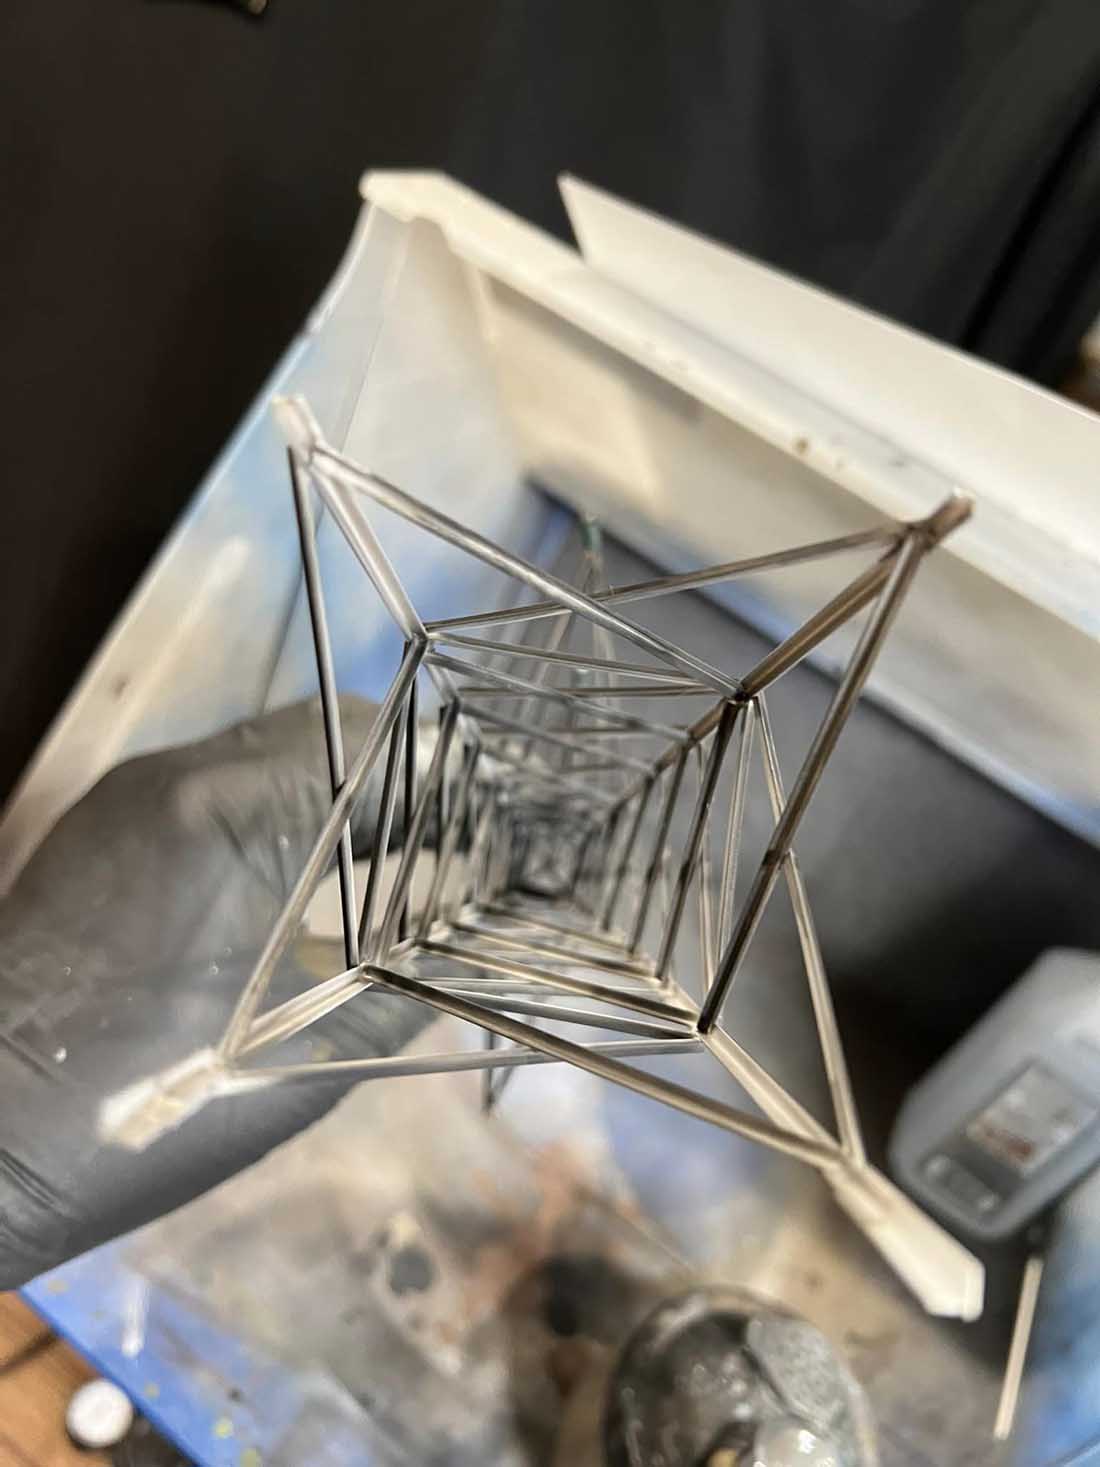
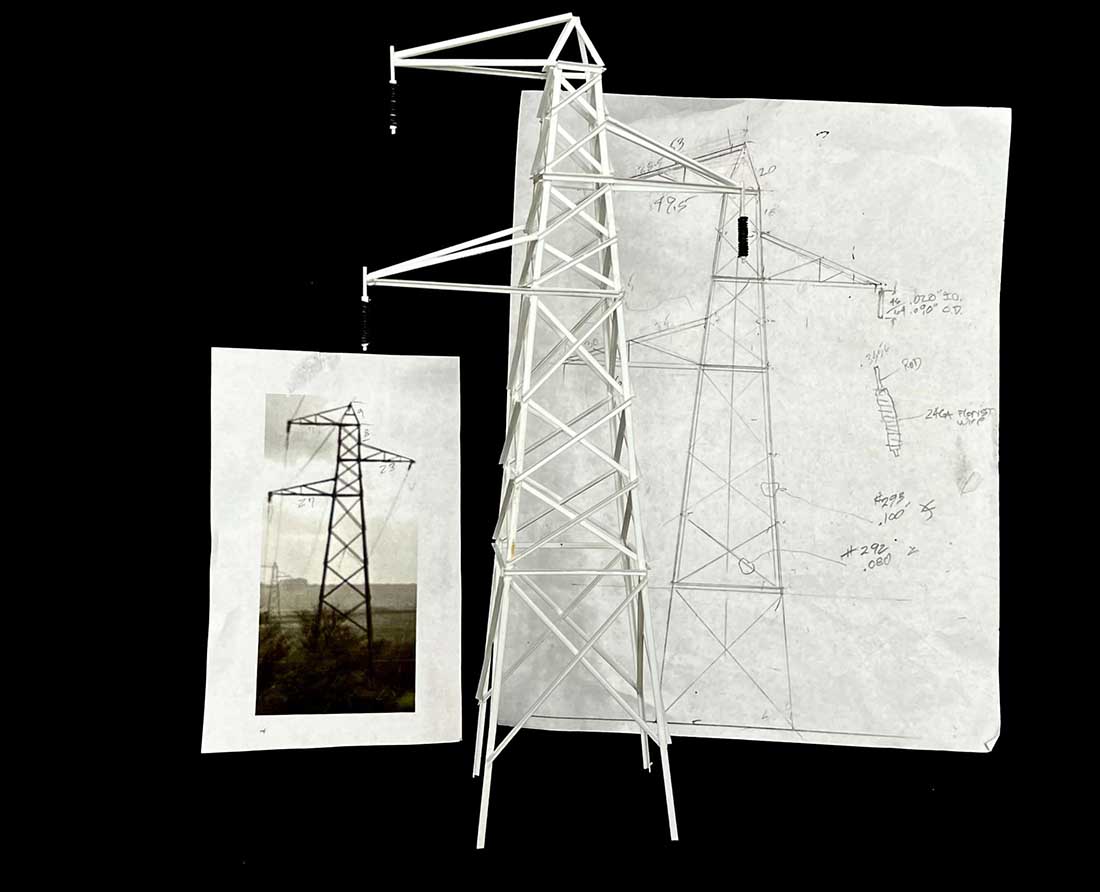
I got the high-voltage power cable pylons completed. There are 4 fully formed ones and I hung a single-sided one on the wall.
I tried a four-sided pylon on the wall but the shadows cast by it made it look confusing. A one-sided pylon seems to look better.
I was hoping the wall-hung effort would suggest the pylons continued off into the distance. I probably should have made it about 3/4 size so it would suggest it was farther away. Hindsight is 20/20. It still looks good.
The class 67 is my bargain find. I was able to buy it used for about 1/2 price.
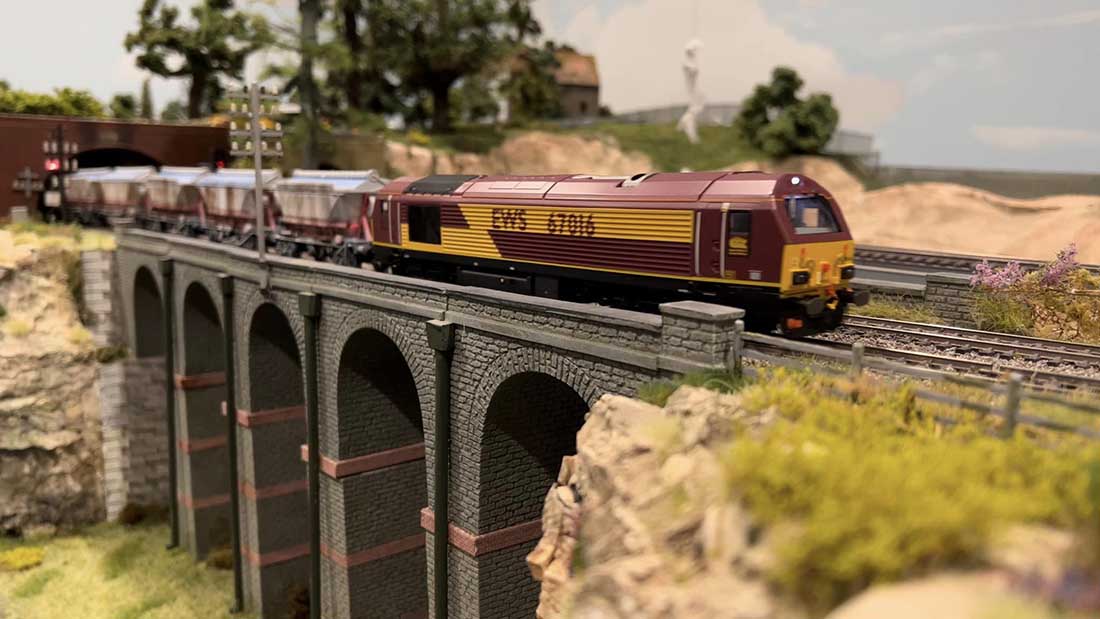
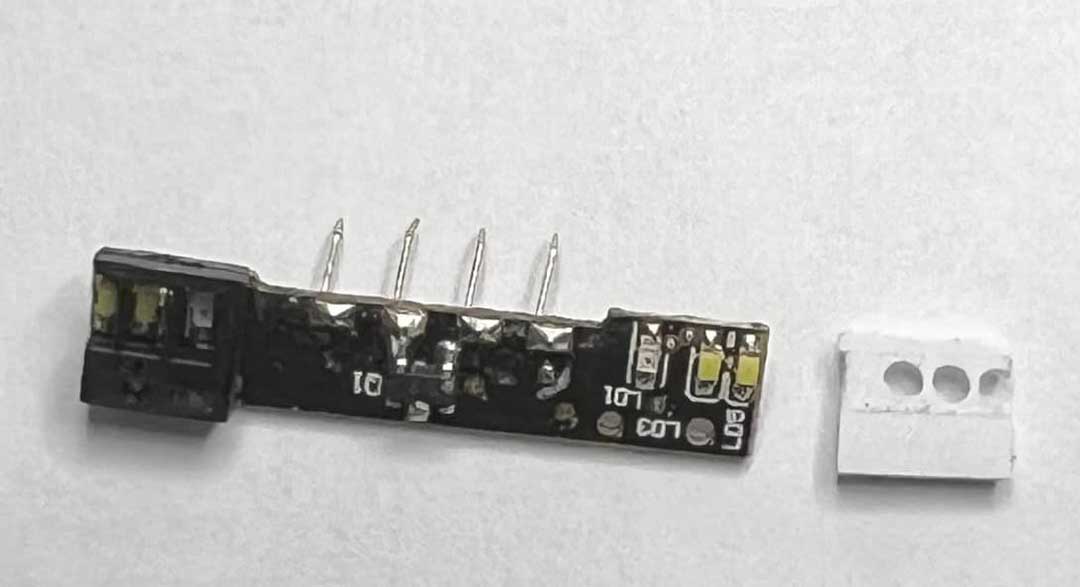
While installing a DCC decoder I noticed that one of the headlight/tailight shrouds was missing. I was able to fabricate one out of styrene plastic, paint it black, and then used cyanoacrylate glue to hold it in place. It definitely seems to be working.
The light shroud is shown before painting.
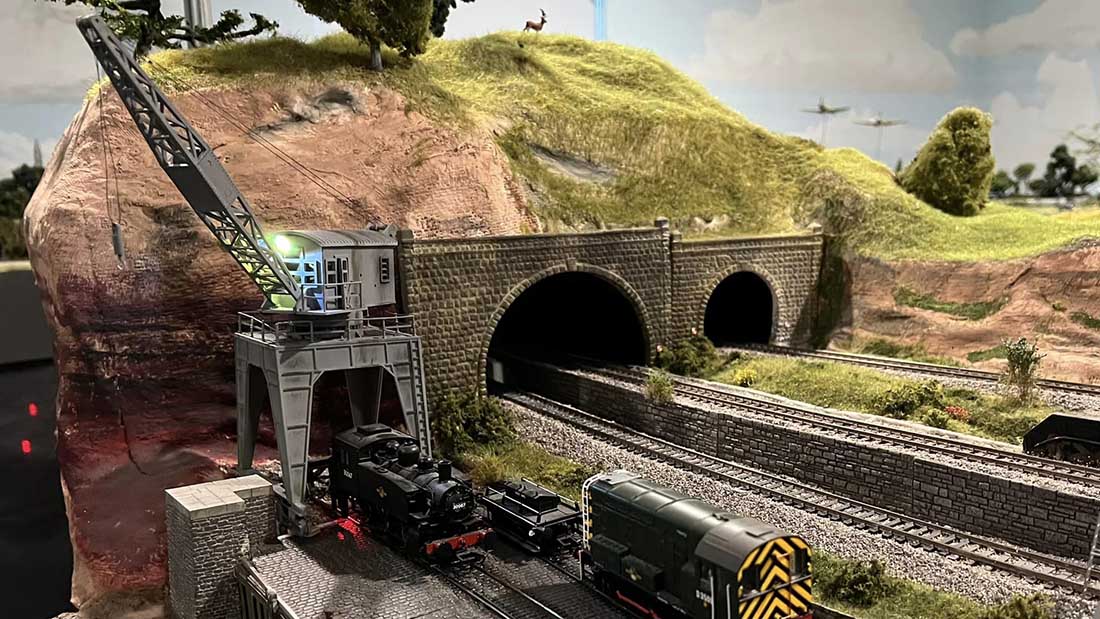
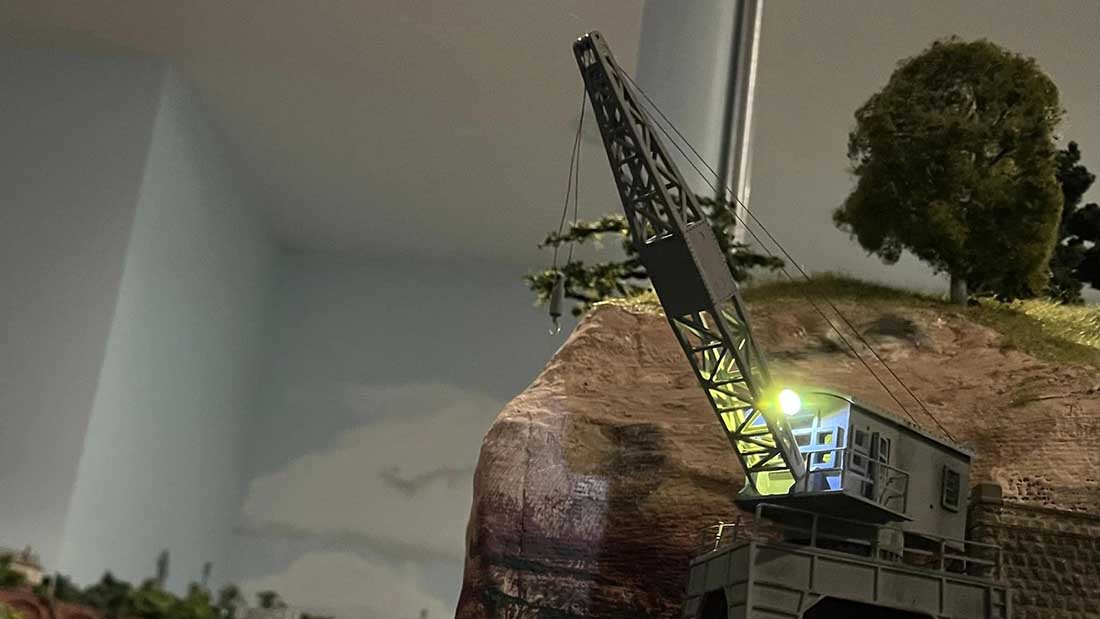
I thought it would be fun to add a crane to my harbor scene. The story goes that the old dilapidated crane was about to be scrapped but the local people who lived around there wanted it preserved.
The battle over keeping and restoring the crane raged on but in the end, it was preserved as a historic artifact and there it is. It was an easy and fun kit to build.
The series of photos as I rotate the pylon around illustrates a painting technique.
If you look closely looking down from the top the color is quite light, but as I turn it in my hand you start to see darker areas and when it is upside down it is very dark. This creates the illusion of shadows. These shadows, however, are painted on.
It is achieved by spraying black from the bottom up and then the light color from the top down. This technique can be used on just about any model.

Thank you Al, your efforts to keep your blog afloat are appreciated by all in the worldwide modeling community, in particular me.
Rob”
A big thanks to Hall of Fame member, Rob, for sharing his model railroad electric utility details.
And now on to George.
Not only is he taking the time and trouble to plan his layout, he’s making sure it’s his layout, with his rules. Quite right too!
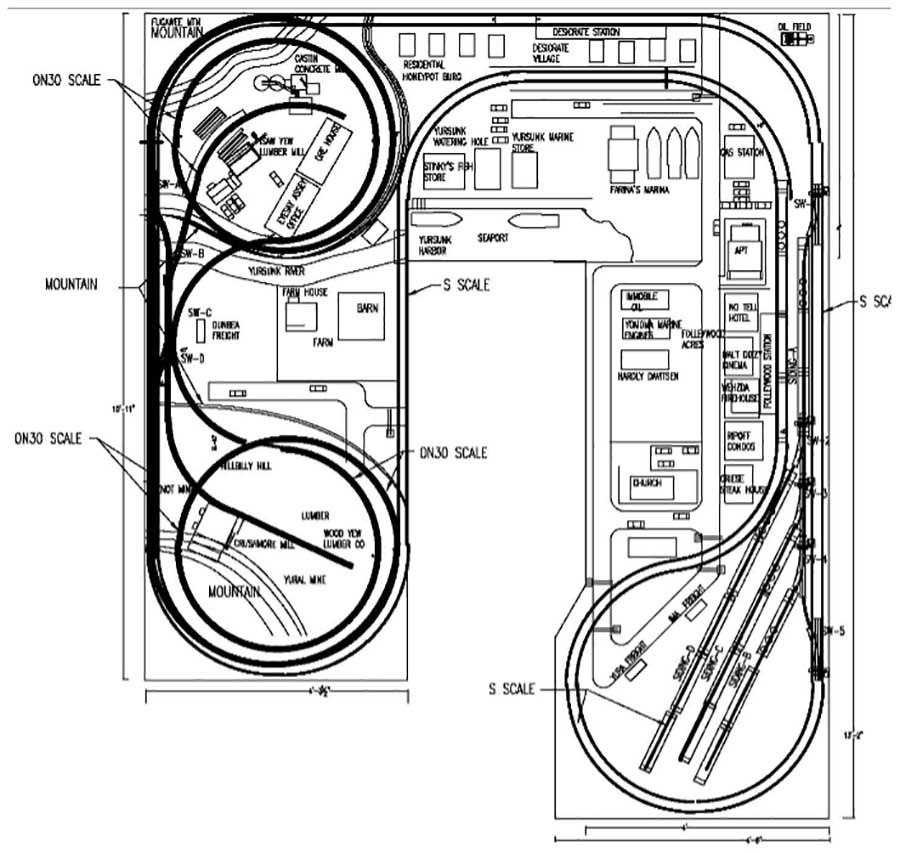
“Dear Al
The following CAD drawing is of the S scale ON30 layout I have just begun to assemble.
It is a little different to decipher and I hope all can read it.
Basically it is two mountains on the left side which will feature the ON30 operation and the right side a flat S scale layout and trainyard.
The buildings closest to Follywood station are all 3D puzzles that are closer to O scale but I wont tell anybody. I like them.
I truly love my brothers on your blog and so respect the incredible work they do but I believe that every group needs a clown and I’ve elected myself to be just that. You see what I lack in building talents can escape scrutiny when observers eyes are blurred because of laughter.
If I am in fantasy land, making models from real things, then MY way is with humor. I had a blast giving names to the buildings and areas. BTW that’s ITZNOT MINE in the lower left corner.
There is a long story behind this layout and I will send that soon. My granddad’s farm was in the town of Neversink, NY where the Neversink river and reservoir are so the Yursunk river, harbor et al was thus created.
The barn is an exact 3/16” scale model of the cowbarn and the house also.
I just hope I can build this reasonably OK. Pics to follow very soon if I can rearrange the mess.
George”
A big thanks to George and Rob.
That’s all for today folks.
Please do keep ’em coming – it’s still jolly quiet this end.
And if today is the day you get started on your layout just like George, the Beginner’s Guide is here.
Best
Al
PS Latest ebay cheat sheet is here.
PPS More HO scale train layouts here if that’s your thing.

And there’s the Silly Discount bundle too.

You have a beautiful layout Rob. The pylons looked great.
The towers for the transmission lines are great! But where are the power lines? They make great products for that even for N scale that have a bit of elasticity so they stand up to being bumped into without pulling down the towers or poles. Much better than wire or thread.
Rob , thank you for sharing , your videos are awesome. The detail in your layout is stunning , electric wires or not .
I’m curious , do you ever display your layout publicly? I imagine your local folks would like to see your work . I’d pay to see it , must be awe inspiring to see in the flesh .
Great layout , no doubt as to why you’re a hall of fame modeler .
George , looks like you’re on your way sir to a fine project … keep us posted look forward to seeing the completion
Rob Fantastic layout and great videography . I enjoyed the entire video
The Critic
Rob
Your exactness to detail is what makes your creations beyond outstanding. Your pylons are super. Thanks
Rob, the layout looks great. Love the video. Makes you feel like you’re there. Awesome job.
nice work
“Ditto” Al to Rob’s last comment. By the way Rob, A great looking model railroad you have there. It looks like you are pretty handy when repairing things. Keep up the good work. Rocco from Haskell, New Jersey.
Rob…….great work……..I always love your how-tos and the video was awesome.
Love the station scenes.
George…….waiting for your pictures
really nice work, keep going.
Rob,
Once again I’m beyond amazed at your layout! To me, The level of detail that you have is beyond amazing, it’s simply incredible! Obviously I am impressed! Heck, I’d be happy with 1/3 of the details that you have in place!
Question please: at time mark 3:01 I can hear the conductor’s whistle immediately followed by the train horn. Is the conductor whistle automated (controlled by possibly an Arduino or some other sort of automation)? And is the train whistle also automatically controlled?
Could you shed some light on how those sounds are produced please?
Amazed in Alabama!
ron davis
Outstanding work from both presenters! Rob, I’m in awe of your scratch building skills and attention to detail. I’ve done a little myself but I definitely pay homage to the master! There’s so much to learn from your posts and I love that you show how you did your work.
George, your CAD design looks great and I’m looking forward to updates as you build! So much detail!
Rob,your photog makes your layout come alive. just your ballasting alone looks authentic.
The Critic
Loved the video and your details.
just getting interested in Building A great RR.
any one with suggestions on comparison of different gauge widths.
compare them in size and scale
Hi Rob, great video and nice to see different sections of your layout with the trains running. Loved the clickity- clack sound just after the 4 minute mark. Great photo and sound of the water at the end.
Brian – the HOn3 guy from Knysna RSA.
Thank you ! Inspired by Fred I’m building a gravity arch dam with a hydro electric power house below…
I’ve wanted for some time now to build out the towers taking the power up and out of the gorge … you’ve given me some ideas (and hope)! –
The cad drawing is excellent and as I’m an American Flyer modeler it hits real close to home for me thank you both !!
Rob your layout is so nice, it just gets better and better. Your video is excellent, very relaxing and enjoyable. Detail is wonderful on the layout. Thank you for sharing your work and effort you put in to make a master class layout.
George thank you too for sharing your dream, I sure do look forward to the development of your railroad.