Dean’s been in touch with a very good ‘how to’ on model train mountain scenery:
“Al, greetings from Dean in New Mexico.
After a long winter of time off, I am finally getting back to construction of the Conejos Valley Railroad.
With the table and supports built and the track laid down and tested, I am now moving on to scenery.
This is a tutorial on one of my two construction methods, building up hills and mountains around layers of Styrofoam.
I know that lots of modelers use the more expensive blue construction foam, but when cut with a hot knife, the Styrofoam gives nice smooth surfaces.
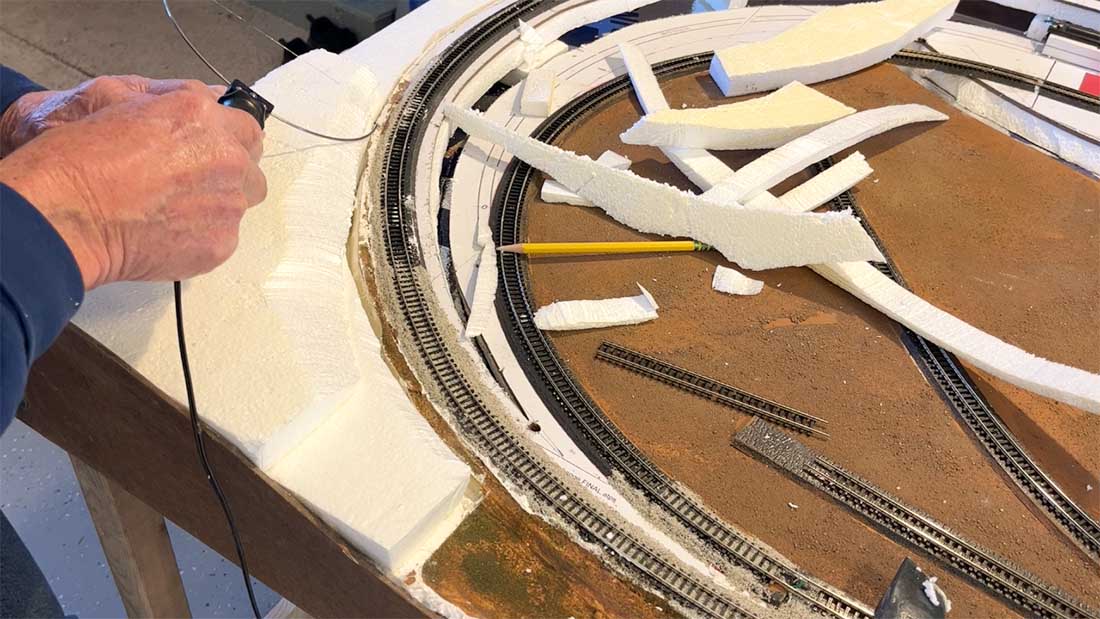
Today, I want to show how I built and put down scenery for a small hill in the left front corner of the layout.
Before proceeding I added fascia boards to the four sides. This gave a line for the top of the hill.
Then I started cutting, with a hot knife, four layers of the Styrofoam to build up the hill.
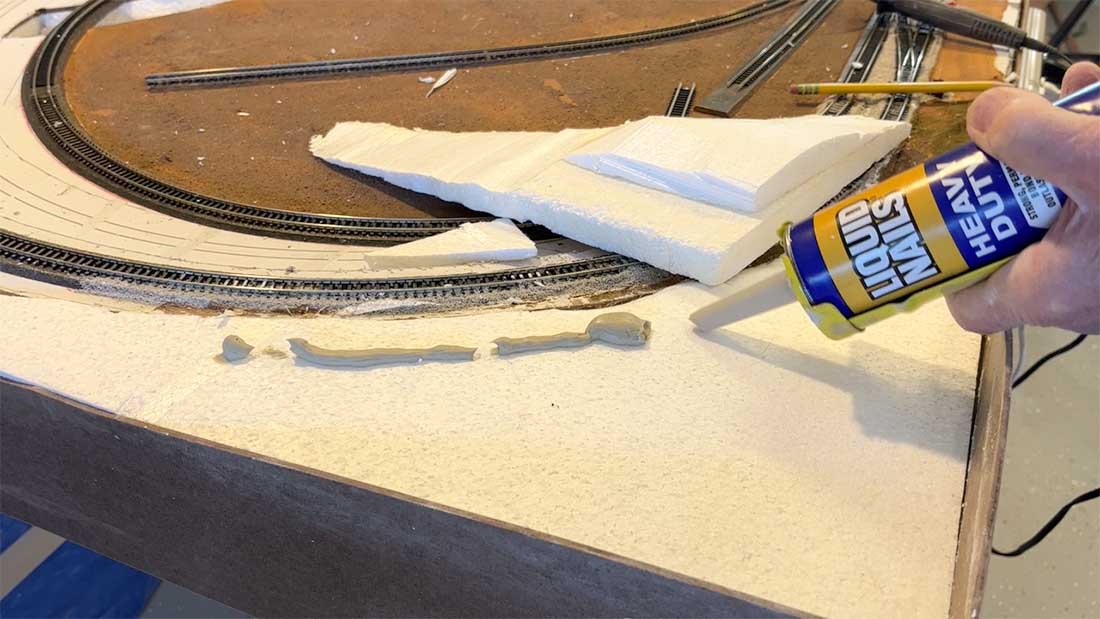
I then glued the cut layers together with Liquid Nails.
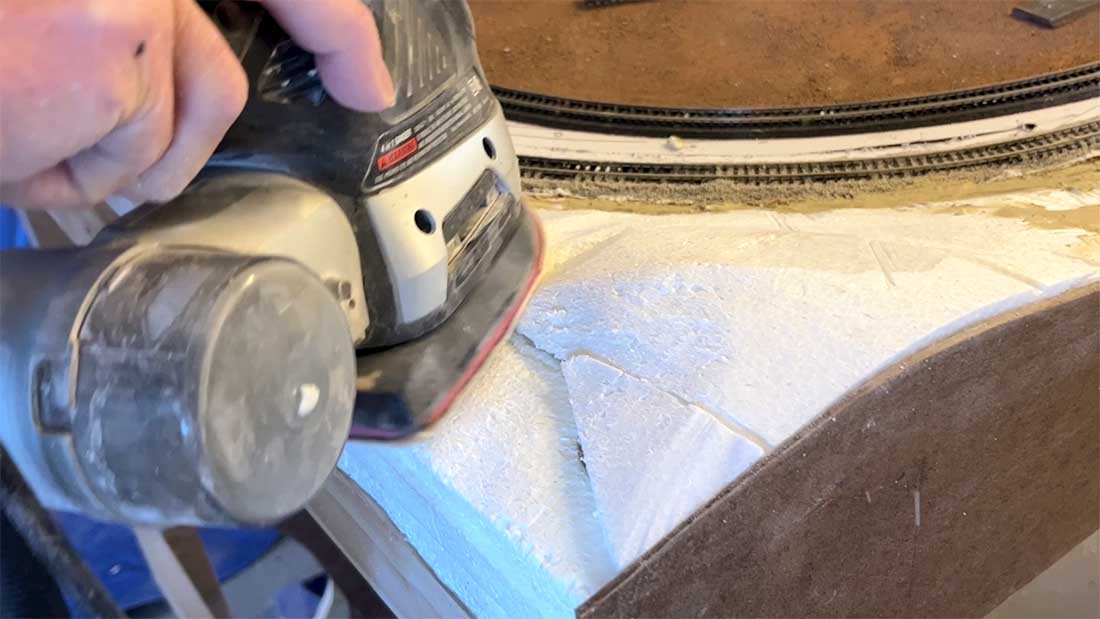
After the glue dried, I sanded off the rough surfaces to make a smooth hill.
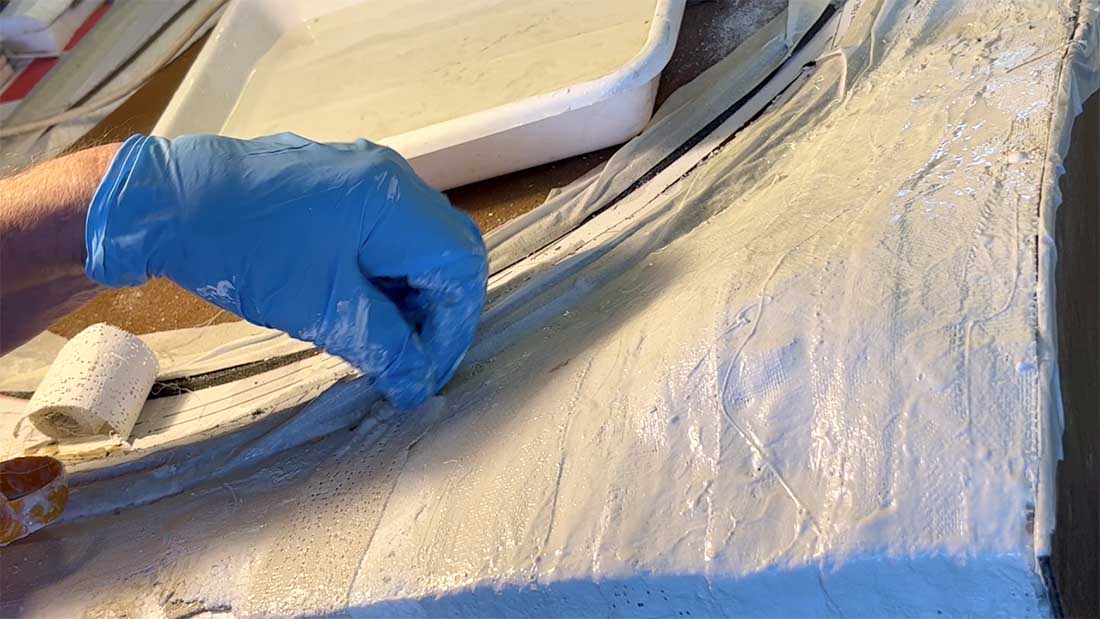
Then I coated the base form with plaster cloth. Incidentally, the cloth sold for body casting (sold by Amazon and others) is much cheaper than, and works just as good as, that sold for model railroads.
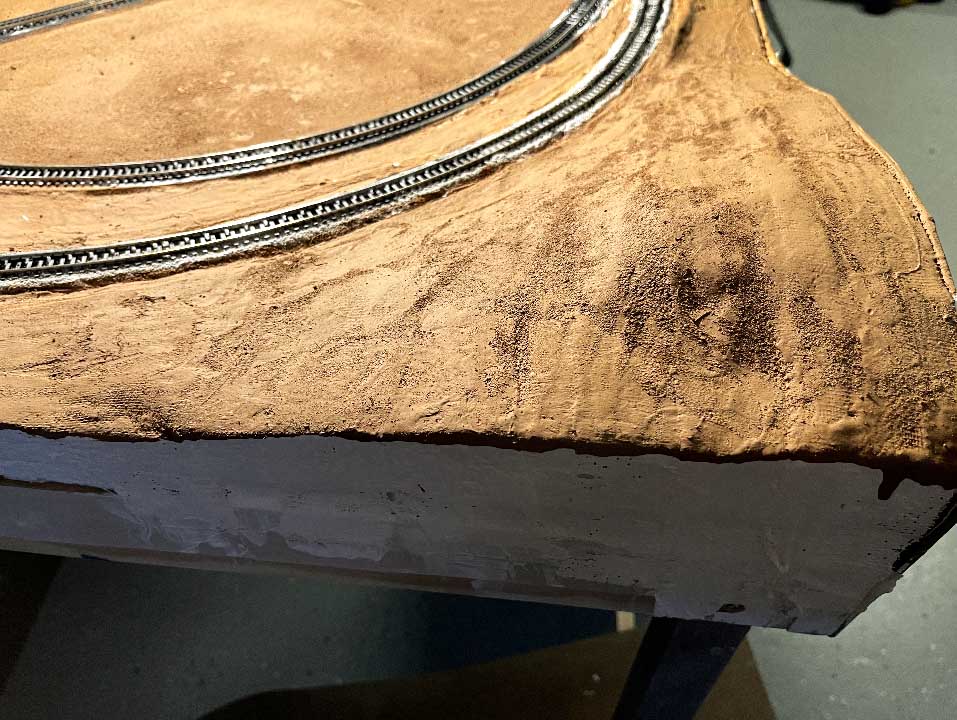
I painted the dried cloth with a mixture of acrylic paint. I used Apple Barrel brand paints from Amazon (cheap) and varied the recipe until I got the effect I wanted; a slightly reddish-brown color like that found in my neighborhood. (16 oz Nutmeg Brown, 2 oz Yellow, 2 oz Khaki, diluted with 2 oz water.)
Here is my recipe for scenic cement. Many modelers use ModPodge instead of the white glue, but I bought a gallon of white glue several years ago, and still have half of it left.
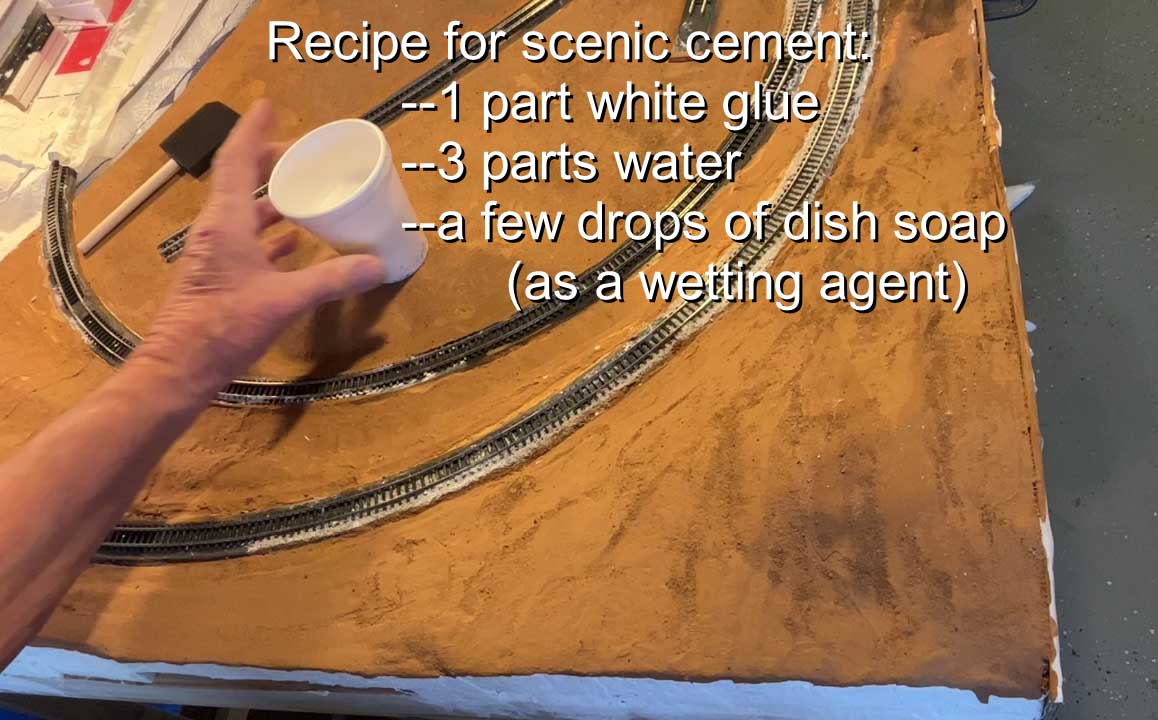
The scenic cement is painted on
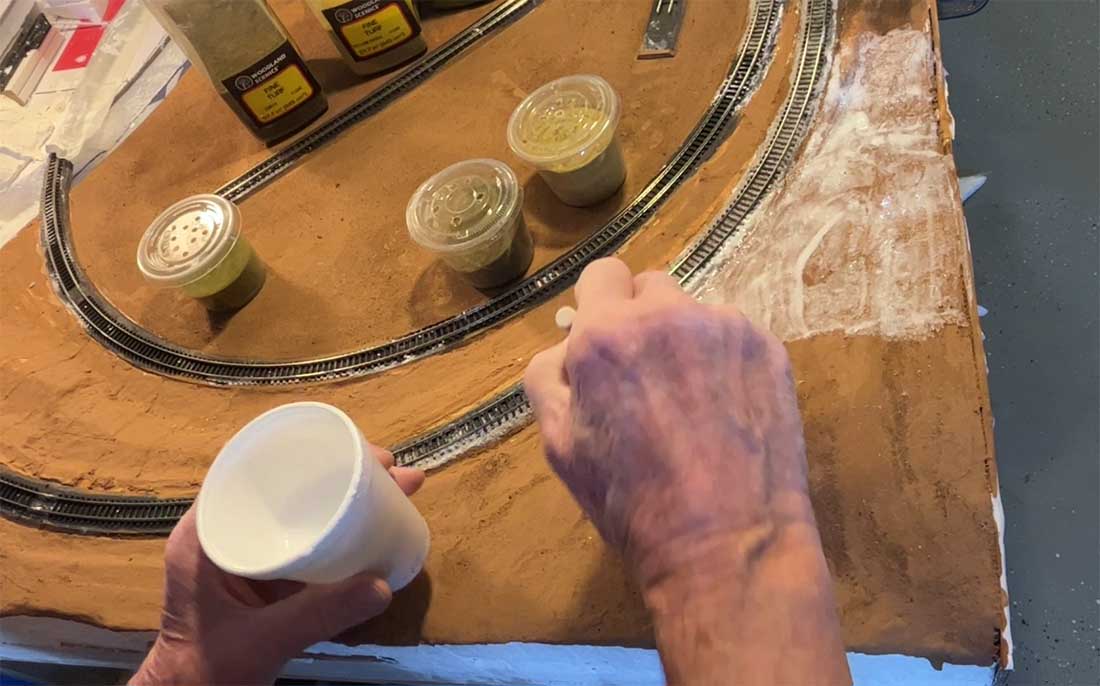
Then I covered the wet cement with Woodland Scenics scenic turf: lots of Earth, less of Yellow Grass and Burnt Grass, only a little Light Green, only a little black Soil, and very small bits of darker Green.
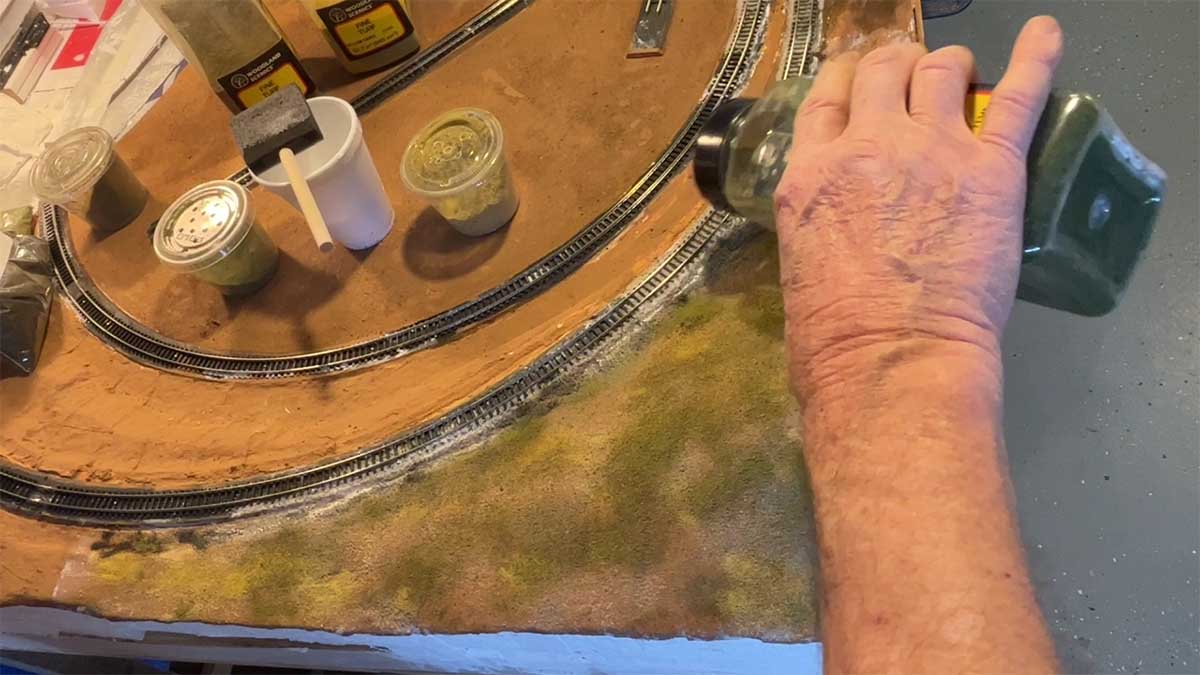
Finally, I use white glue to attach clump foliage (Light Green, Medium Green. And Dark Green, small amounts).

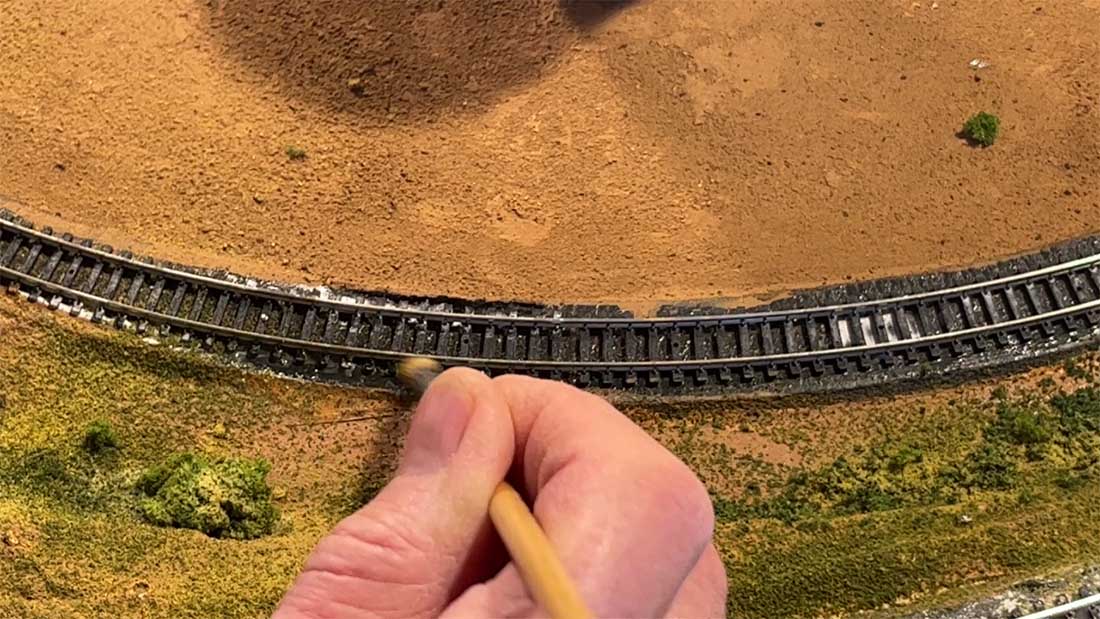
Since I am a sloppy worker, I always get spots of plaster on the track and roadbed. I treat it with water, and it is sucked up into the rubber roadbed. At that point I ballast the track. (Subject of a later discussion.)
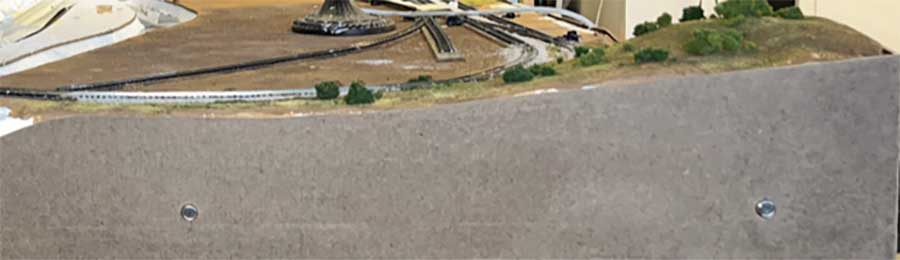
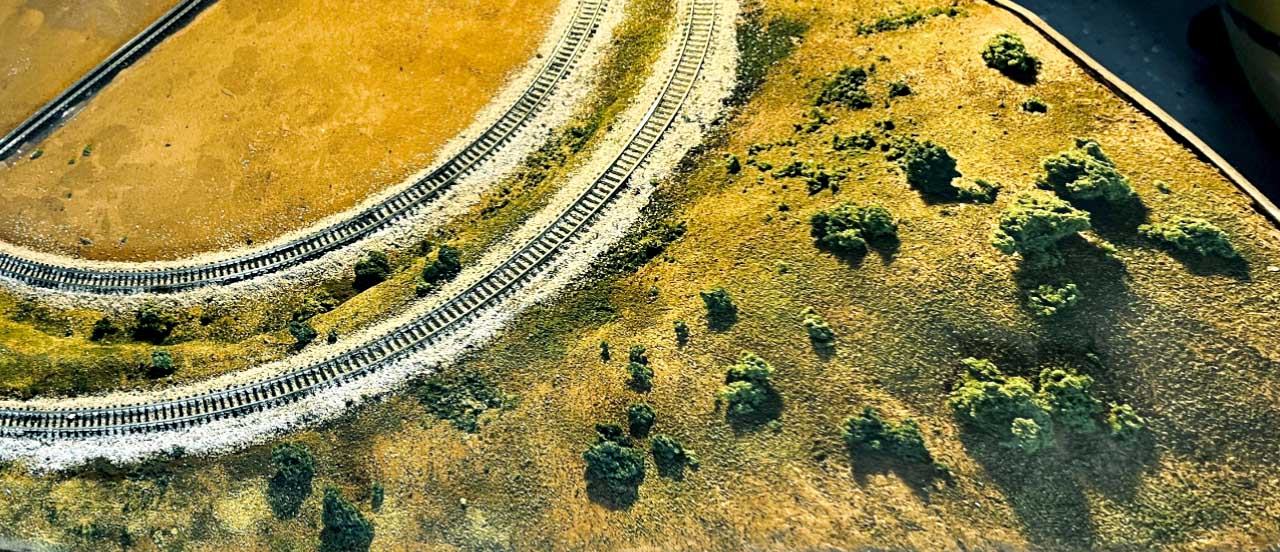
And here is a photo of the final results
A big thanks to Dean for sharing his way of making model train mountain scenery – it’s a really clear ‘how to’.
That’s all for today folks.
Please do keep ’em coming – I know I keep saying it, but it’ still jolly quiet.
And if today is the day you stop dreaming and start doing, the Beginner’s Guide is here.
Best
Al
PS Latest ebay cheat sheet is here.


A very nice tutorial you have there Dean, I have used the same method on my HOn3 layout in one of my town corners and behind my logging area on the upper shelf. Thanks for showing us. Cheers.
Brian – theHOn3 guy from Knysna RSA
Dean , thank you once again for sharing your insight and talents . Great step by step tutorial, looking forward to applying those techniques. Working this go round with an N scale display , will have ample space to create scenes and natural areas .
Very realist final touches, your layout must be something special to view live .
Great to see some more hands on tips love this site so keep up the good work
Great ideas as always here, thanks for sharing and great pics.
Dean
Did one have to have Grande Cojones to ride the Conejos. LOL.
Much thanks for the ” Practical” approach to scenery and modeling. Us old retired types on a fixed income may find this Hobby a bit expensive at times and must resort to clever substitutes.
Keep plugging away and hope to see CVRR trains making noise.
Dean it looks to me like you have a great start going on your Conejos Valley Railroad. It looks like you have captured the look of the New Mexico landscape quite well. When you get further along, It would be great to see some more photos of the effort. Best of luck with it. Rob McCrain
You were saying about getting the medical plaster bandage instead of art works as it’s cheaper, I found that if you just buy a bag of crepe bandages of amazon or anywhere you can get it cheap then cut the lengths you want and mix it in a bucket of plaster of paris. I find that this was the cheapest way to do it.
Thanks for the tips for hills and especially earth paint.
Been looking for years as alternate to the expensive stuff
from Woodland.
good tips, thanks.
Beautiful looking scenery 👍🏼👍🏼👍🏼
Thanks, Dean. Appreciate the video and your scenery techniques.
Jim AZ
excellent
Excellent tutorial. Thanks for sharing the info.
Great job!!!
looks great i,m going to try to make a few have nothing but time thanks for info joe