Kaustav has been in touch with his model track ballast ‘how to’.
Have a look at his vid:
“Hi Al,
I am following some great new posts in the blog and it is exciting to see how model railroaders are doing some quality modeling.
I finally was able to finish my ballasting demonstration.
I’ve used some unique techniques in this experiment, both during the painting stage that I mentioned earlier and also while ballasting and weathering. Especially for small and micro layout makers who will not have to ballast 10s of scale miles of tracks, these methods are particularly effective to produce some really good looking tracks.
Hope you all enjoy this and if any of you try these techniques, I’d be really interested to know how it turns out.
Cheers and keep building!
Kaustav”
Latest ebay cheat sheet is here.
Thanks to Kaustav – it reminded me of Steve’s post: Model train ballast.
“Hi Alastair,
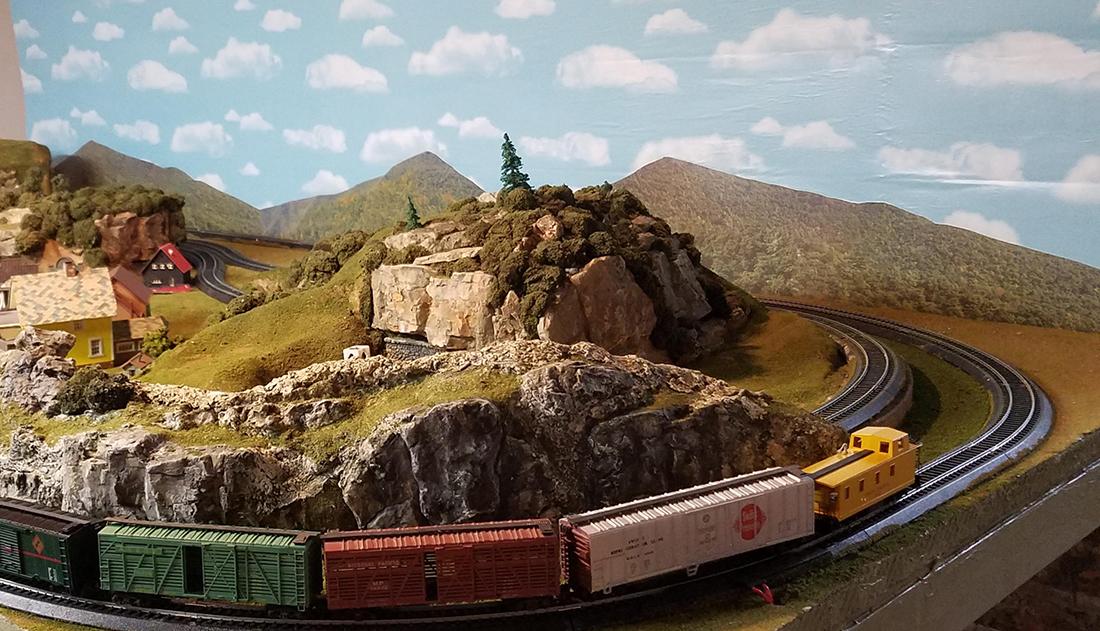
Heres some photos of my layout that I’ve been working on here in Erie, Pa.
Take care and stay safe.
Bob Jacky”
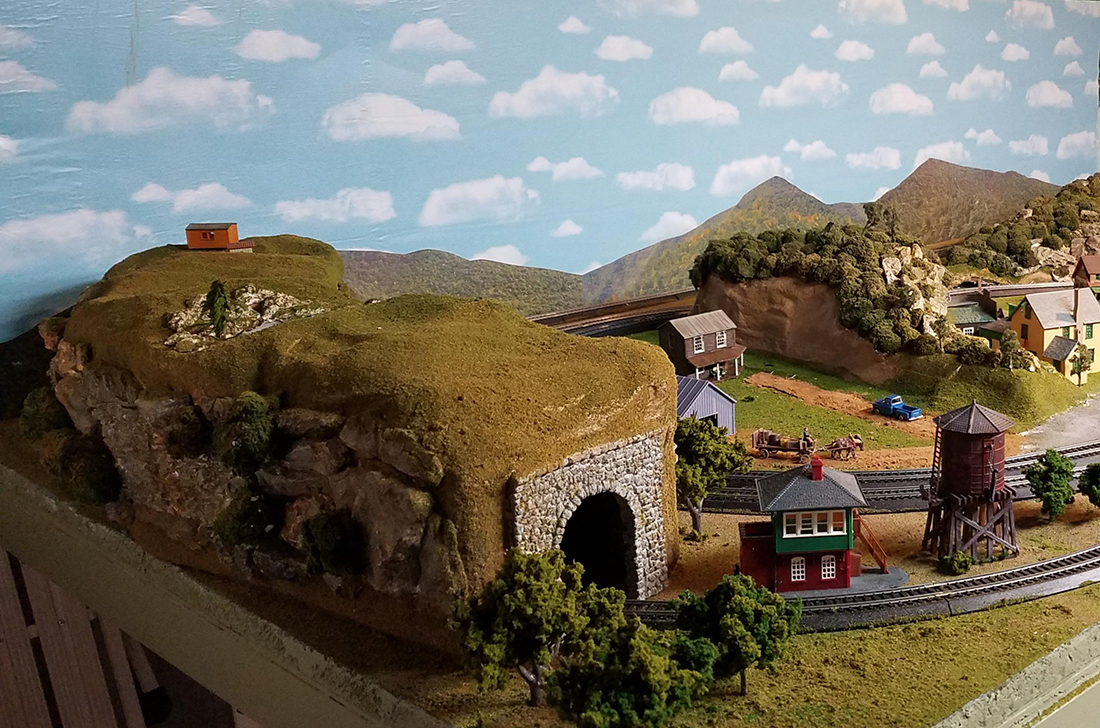
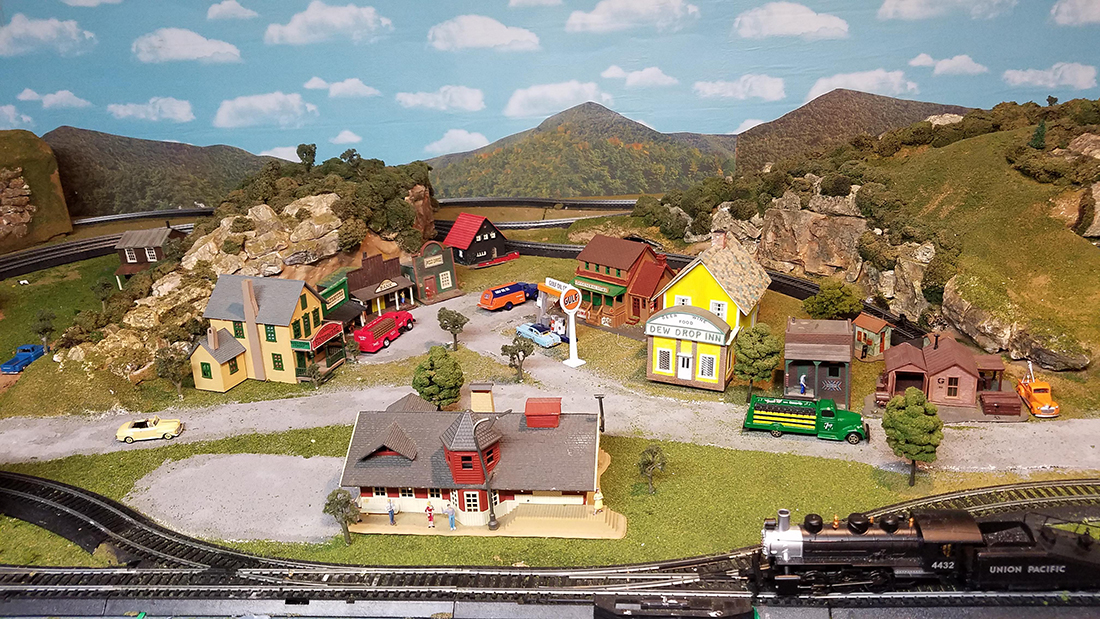
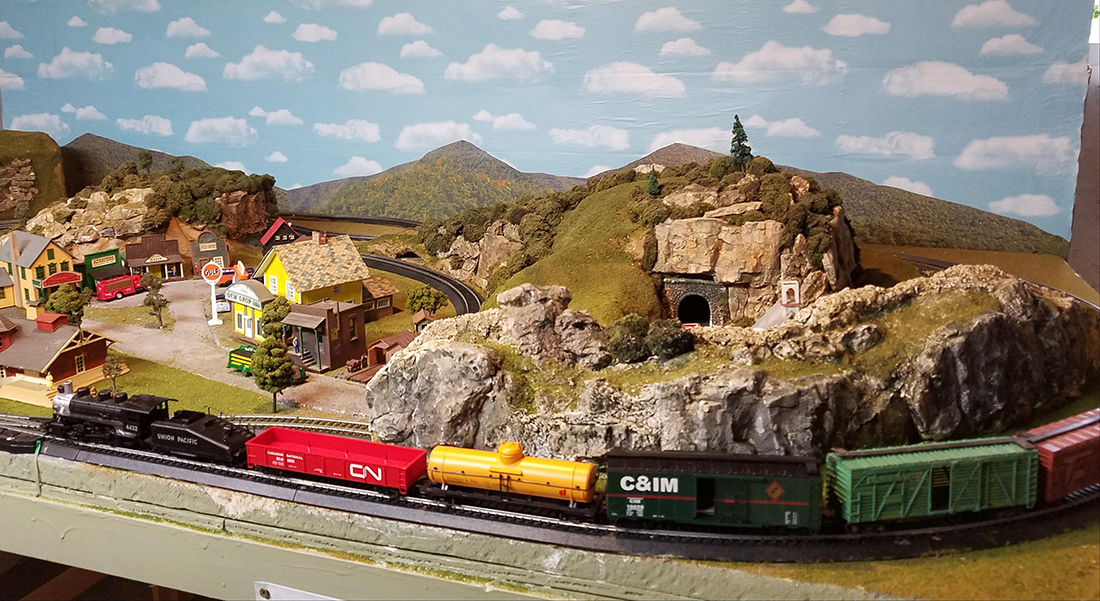
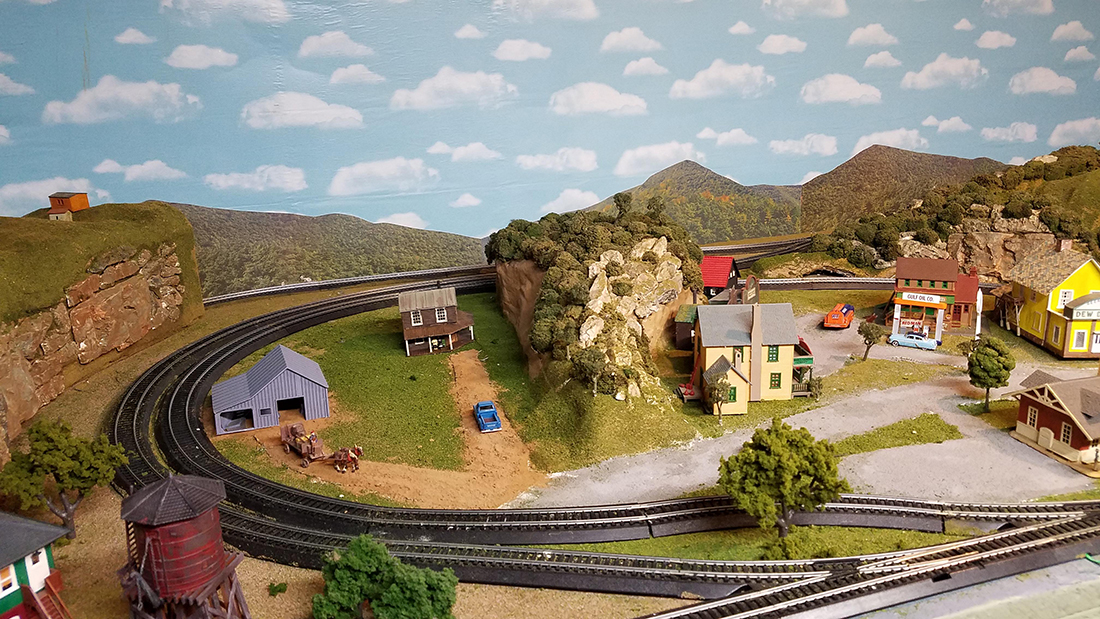
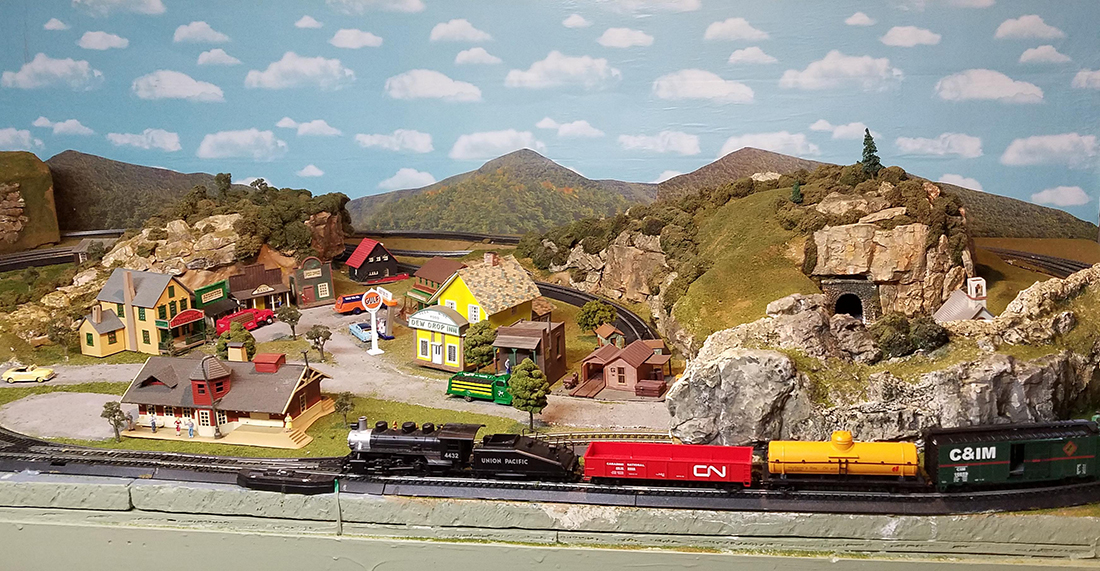
“Hi, I thought I would share this with you.
My layout is 10’x 16′ and is ho scale with dcc controls.
I started building a little over 2 years ago after moving to my new home.
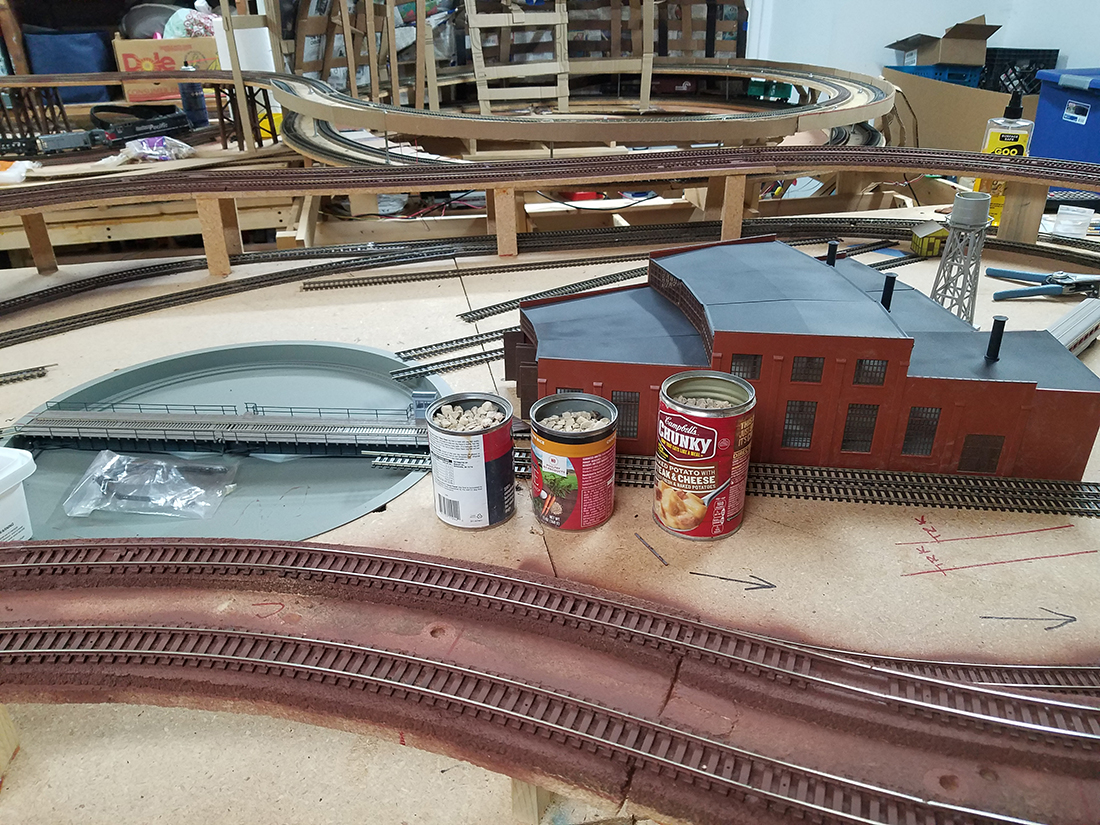
I have an upper and lower tracks which are connected to each other by way of a helix in one corner. I have a turntable and roundhouse that I wanted.
I have spray painted all my track a rusty brown color.
Alot of scenery to do, but I wanted to make sure that they were no issues with my track work or wiring first.
There is no theme, I’m just doing freelance and incorporating whatever I think will look good together as far as structures, scenery and my imagination.
Thanks,
Chuck”
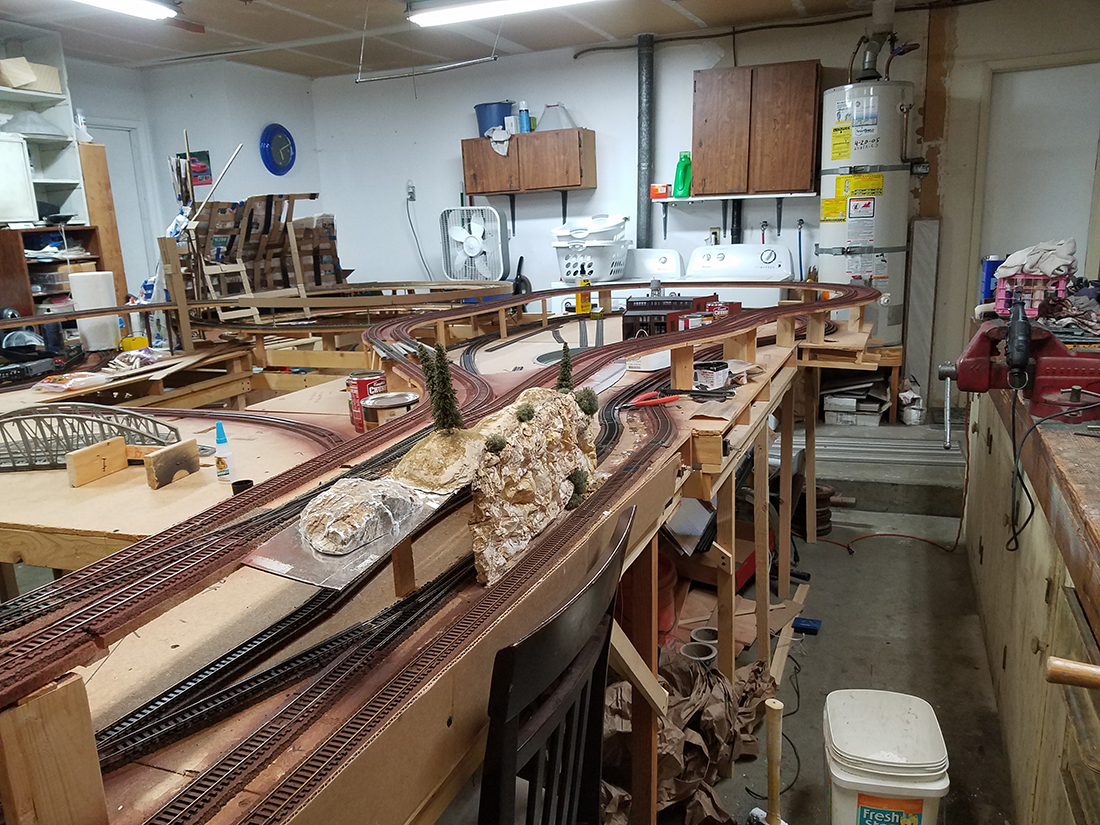

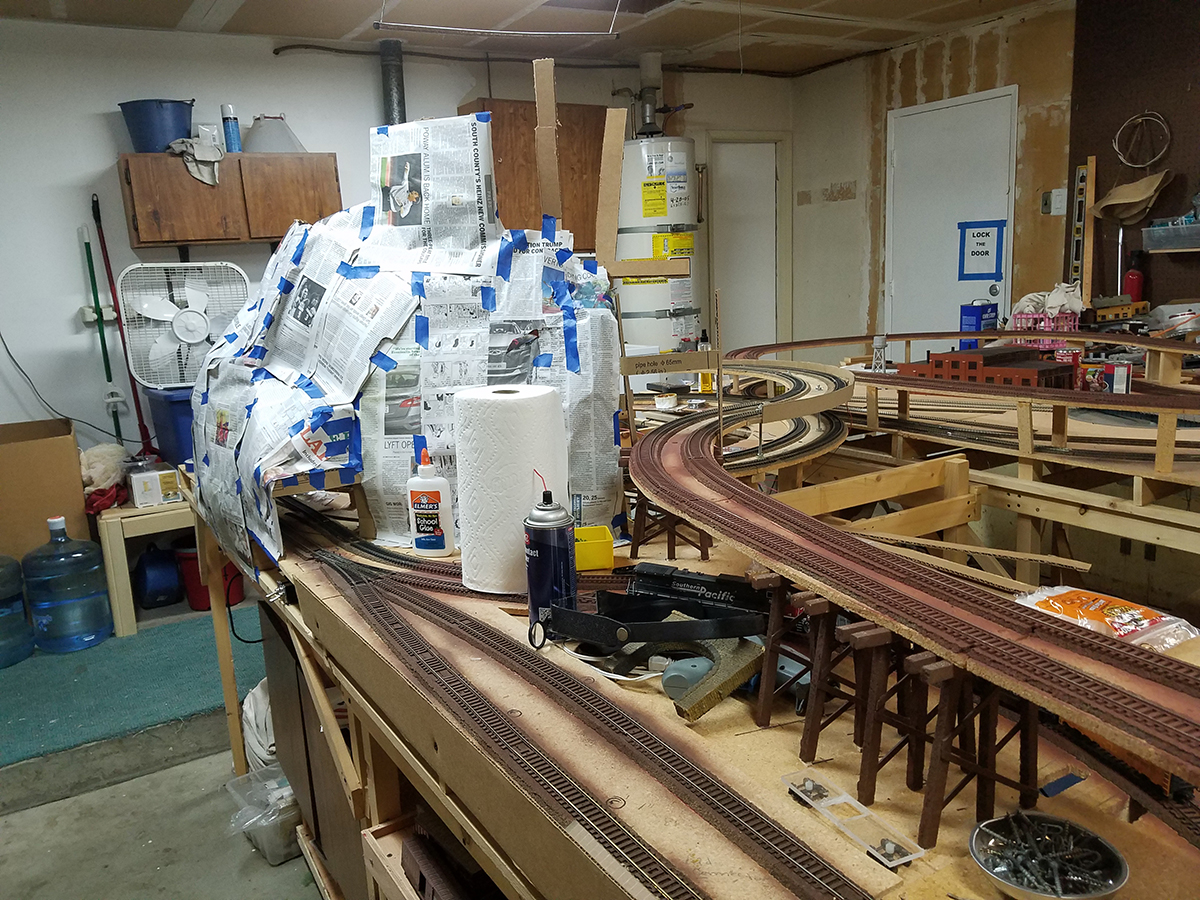
My word – quite a project Chuck has going on there. Can’t wait to see an update!
A big thanks to Kaustav for sharing his model train track ballast video, and Chuck and Bob. It’s wonderful to see so many people making a start, because that’s what it’s all about.
That’s all for today.
Please do keep ’em coming.
And don’t forget the Beginner’s Guide is here if today is the day you take that very first step for your own layout.
Best
Al

I think that’s going to be a fantastic lay out when it’s done I don’t know about the paper mache I think I would use phone myself for building the mountains and tunnels but other than that it’s great.
Use Foam for the mountains.
Impressive looking helix Chuck. How did you make it?
Can’t wait till its done Chuck! Check out hoseekers.com
Hi Tom
Building the helix was very difficult. At first I tried use a helix calculator online that gives the rise and run. I knew the area was to be 5×5 and that my track was going to overlap. It took many attempts at getting this right because when I tried a train with about 12 cars it would struggle. I knew that my track at the first point where it overlaps had to be 3″ high for a train running underneath to clear. So doing calculations, what I came up with my track rises 3/8″ every 15″ so at 5′ I’ve risen 1 1/2″ and 3″ when I reach the 10′ mark. The trains work well now without struggling to make it up because my grade is .05 percent.
Thanks for asking.
Thank you Al for posting my layout.
Bob
Nice layout
Kaustav
Always great to see your expert work. Thank you!
Chuck
Looks like a career project. You have the same mind set as I with track and elevations. Please let us know how you are doing including any headaches because we all learn by this. How do long cars & engines function? Did you solder the flex track joints? This DCC? How many power blocks? Love to see the layout plan. Please keep us posted and keep the faith with this massive undertaking. My take is 1 month/ sq ft so this should take 13 yrs of steady hard work. Shorter if you are one of the masters.
Best to all
Stay safe
George from NY
I was wondering if anyone has built a helix to have train go down and then up on same helix. If so does anyone have a plan available. Thanks
Nice work, everyone! Kaustav, you do beautiful and thoughtful modeling. I would like to know the length of track that you used in the diorama to demonstrate your techniques and how much time was invested into the project. Stay well. Cheers! NJ Mark
Kaustav, very good video, I love your teaching style. I am going to try some of your techniques on my layout.
Kaustav………………..love your work and your videos………you must have spend a lot of time experimenting with different color schemes……
Chuck……..its going to look great when it done……which will be a while…..but the trip is worth it…………Also, smart thinking with the track and wiring work…….
Very Nice! Love seeing the mountain you are doing for the Helix. I’ve got to tackle a similar project for a 4-track Helix in our small town’s RR museum’s HO layout.
Great work, Bob !
Looks great, nice detailing. Keep up the good work !
Ron
Thank you everyone for your kind comments.
@NJ Mark – The diorama is 22 inches long. I used one full length of Peco flex track for the main and the siding for the broad gauge track – that is 3 ft. The narrow gauge track was exactly 22 inches after modification. It took me about an hour for the narrow gauge line, and about 3-4 hours for the broad gauge ones to complete ballasting – but you need to remember I was terribly slowed down to focus on the video. I follow a script while shooting and as you might have noticed the video angle is changed to focus on different perspective of the build and to show the details. In between, I have to transfer the video to the computer, do spot check for focus and light and readjust. Without the camera, I guess I’d finish the NG line in about 20 minutes, the two BG lines in about 45. Hope this helps.
@Bob – your layout looks like great fun!
@Chuck – You definitely have a lifetime project in yoru hand, mate! The helix is looking great, love the multi level action.
Stay safe everyone. Cheers!
Kaustav
I am working on an 11′ x 20′ layout myself
Chuck, I build at helix like yours to reach a second level on my layout. I used threaded rods to carry the track upward. I found that I could make micro adjustments as needed. when humidity and temperature altered the original somewhat. Then I created a cardboard webbed framework for a mountain, covered that with paper and flour paste. The net was a solid mountain that I could stand inside when I worked on some turn outs in back of the mountain. I also mounted a mine shaft and Adit based upon an example I found in a book on Colorado mines. Foam is great ,but the paper mache is still very solid.
My name is Chris Clarkson. I love model trains. I’m thinking about planning a model railroad layout of my own. I saw a few buildings in the Walthers catalog, and I saw a train layout similar to the one at the Train Station in Columbus, Ohio, where I live. I think your layout is the bomb. Keep up the good work!
3″ rise in 10′ is 2.5%, not 0.05%
Chuck: One thing I’ve learned from reading other suggestions is to make sure that some part of your mountain (i.e. helix covering) is accessible to handle derailments or anything else that could happen inside of it. It isn’t fully clear in your pictures if it is only going to be one-sided with the inside of it left open. Do you intend to fully enclose it? Just wondering. Lovely work!!!
Bob, What a near little layout you’ve created. Looks like about 4 x 8 feet or so. I’d like to see your track plan.
Kaustav, You never cease to amaze me with your modeling skills and you very professional and coherent video instructions. Thank you.
Chuck. That looks like a great start to a big layout. You’re wise to get all the track and wiring issues addressed first before you hop into the scenery. I like your turntable and roundhouse. Is it a Walthers turntable? Thanks for sharing your pictures and keep us posted on your future progress.
Bob,
Your rock formations are the most realistic I’ve ever seen! Congrats are in order as it’s not easy to fabricate such natural scenery. Keep us updated on your progress.
Kaustav, that is the best demo video of ballasting I’ve seen. I learned a lot, thank you for posting!
Bob, excellent mountain and rock formations, they look awesome!
Chuck, doing a helix In my opinion is extremely difficult. I give you a tone of credit for doing it!
Kaustav: Brilliant Ballasting Demo Video.. Very Informative. Even for Long time Modelers. Liked the way you mixed the different grades of ballast and colors
together…and placing the weeds, grass, even the Oil spots on the ties and along the tracks… beautiful realistic results of museum quality….
From Mike in New Hampshire, U.S.A.