Scott’s been in touch with his HO scale modular model train layout – he’s building it block by block.
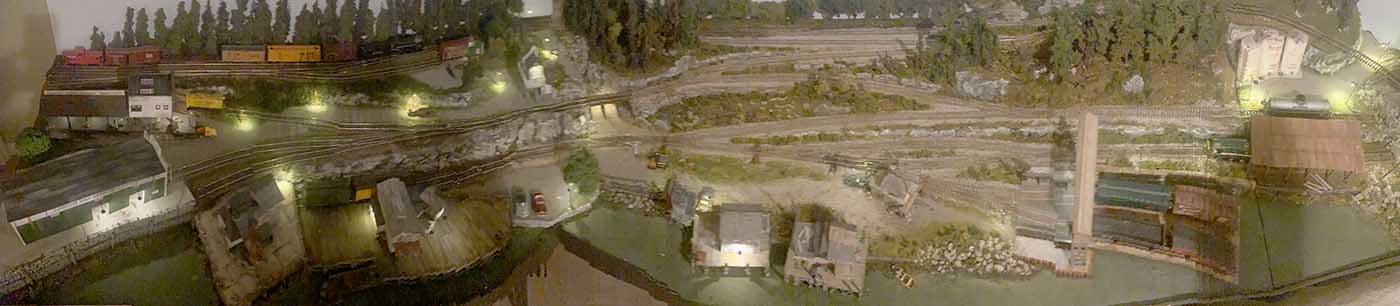
At the moment, it’s currently 7’ x 10’ L shaped:
“Hi Al!
I have enjoyed your e-mails for months now and finally have decided to share my layout progress with everyone.
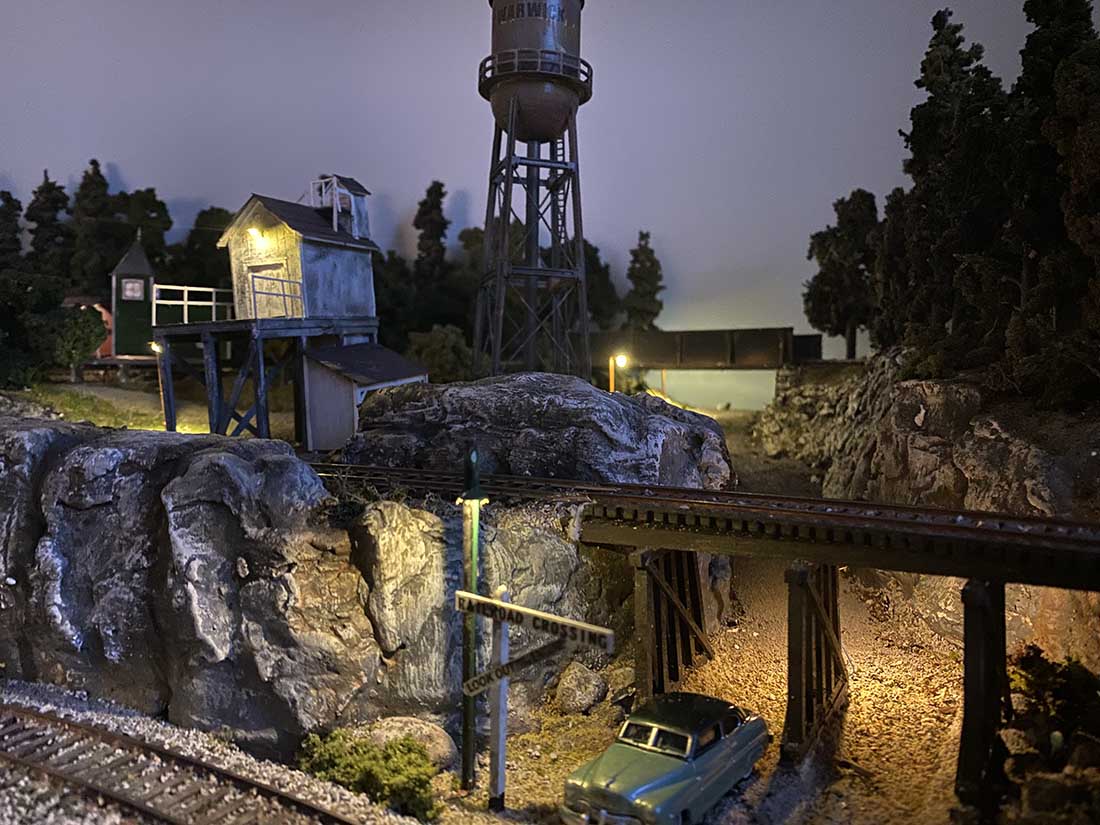
The layout is entirely freelanced prototype. Set in 1949 it includes the actual towns of Warwick and Cordele in South Georgia where I live. But this railroad never actually existed.
In my freelance scenario the W&W is in its final years as a class three railroad and is soon to be absorbed into the Southern Railway System which it currently interchanges with.
As I am only a few months from retirement I am building it module by module in order to transport it to a more permanent location next year. I have a 10’x24’ building where I am moving to.
The building will house the eventual railroad which will be composed of 20 modules on two levels. The current state of the build takes up two walls of a spare bedroom and consists of three modules. I intend to continue this “module by module” build even after I move into the next space.
I enjoy all of the aspects of the hobby – but I find that committing one long period of time to construction, another to laying track, another to wiring and so on gets a bit tedious and boring.
Building a large layout in twenty modules – each module to be completed before work on the next begins – is allowing me to experience every step of the build in twenty shorter time frames. It’s almost like building twenty layouts from start to finish!
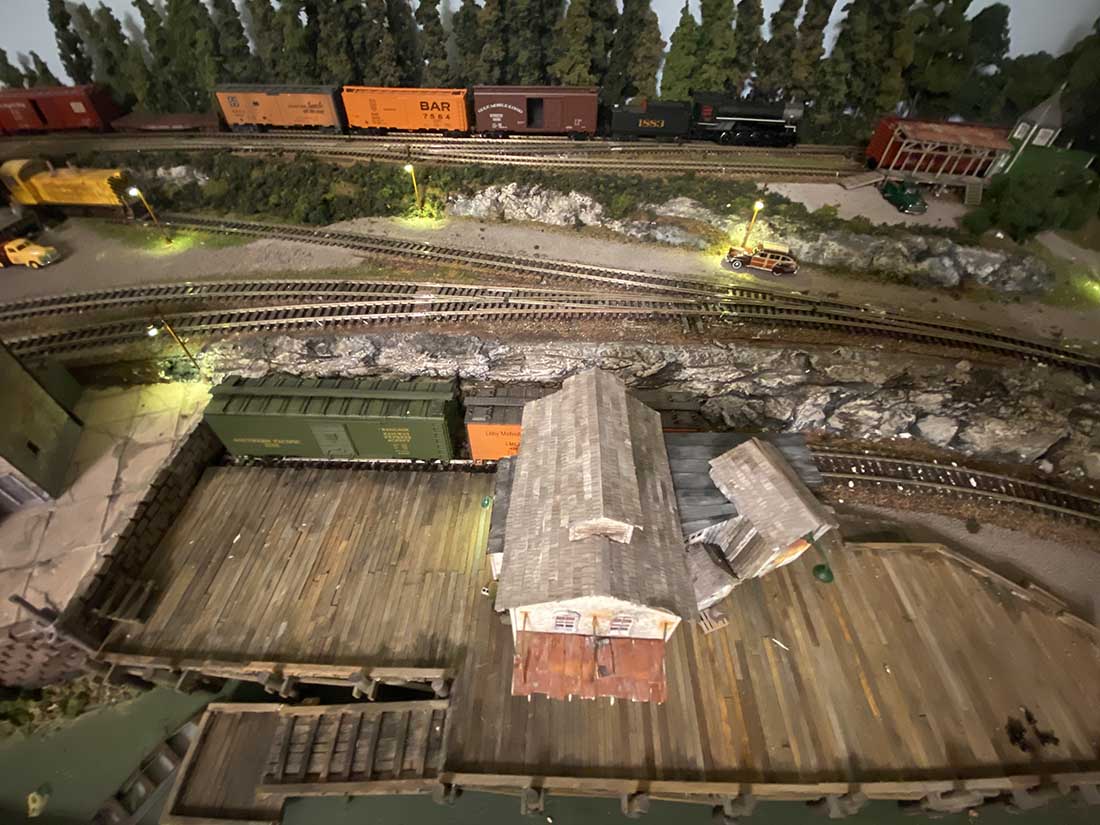
These three modules are not completely finished. The last one of the three still lacks ballasting and a few more structures need to be built and installed. But I think it is close enough to being finished to share it with you and your subscribers.
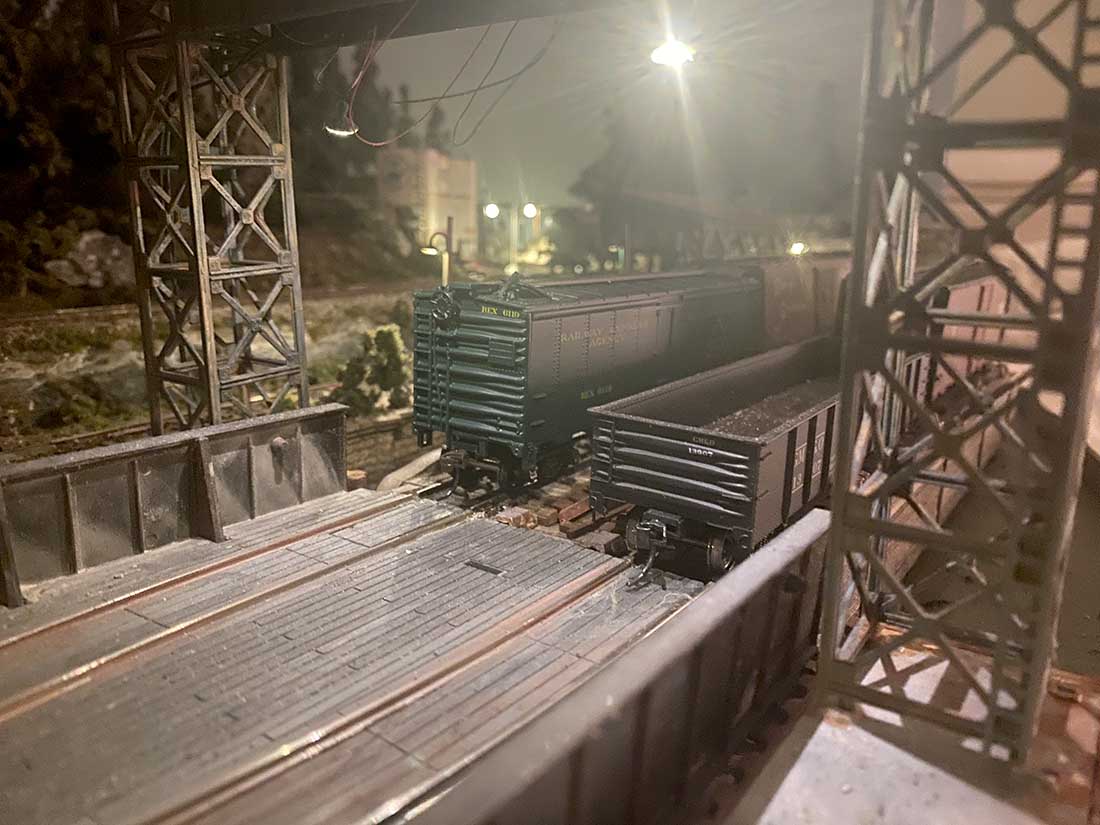
I am able to run operations on the layout in its current state. I simply use the portion of mainline track where the steam engine is located as a small interchange yard.
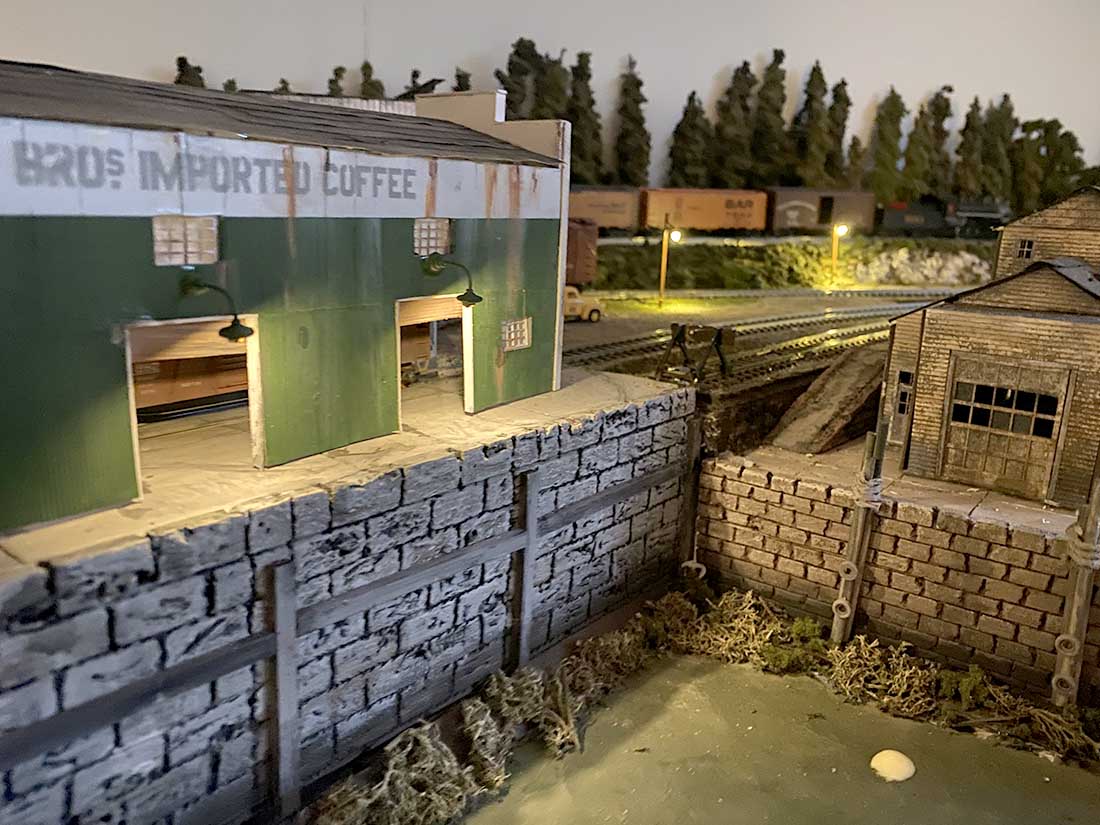
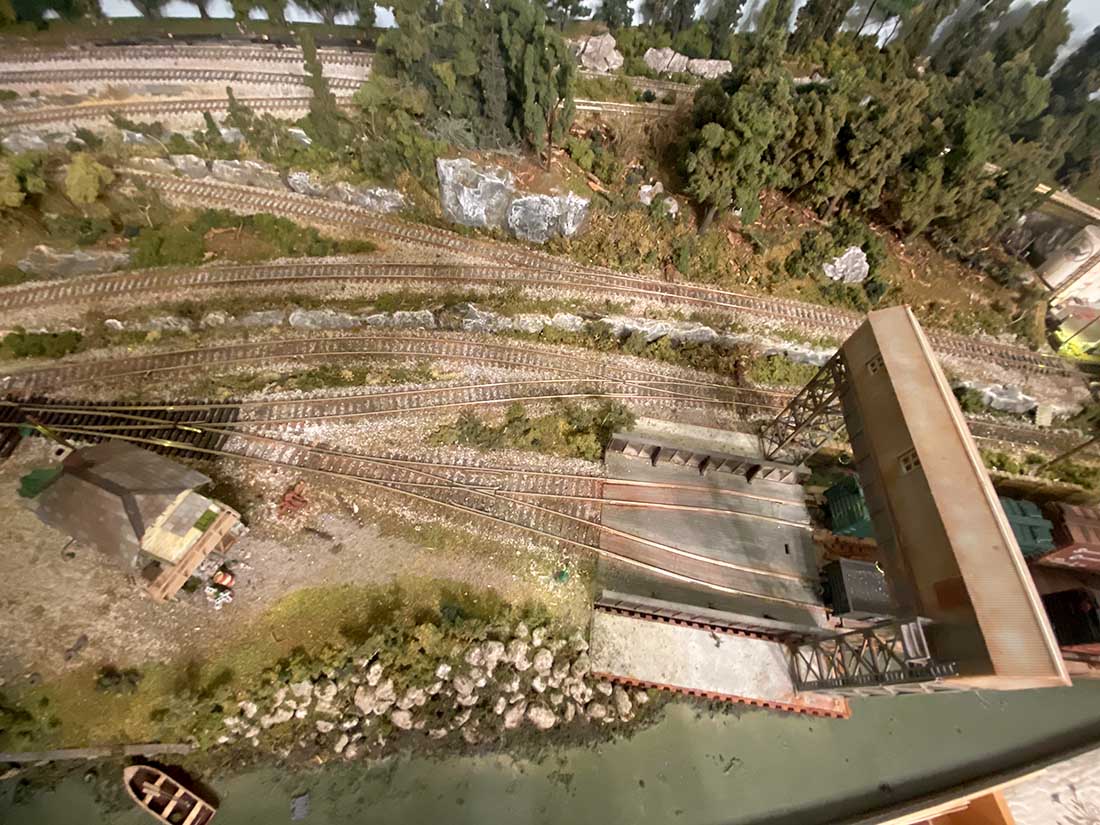
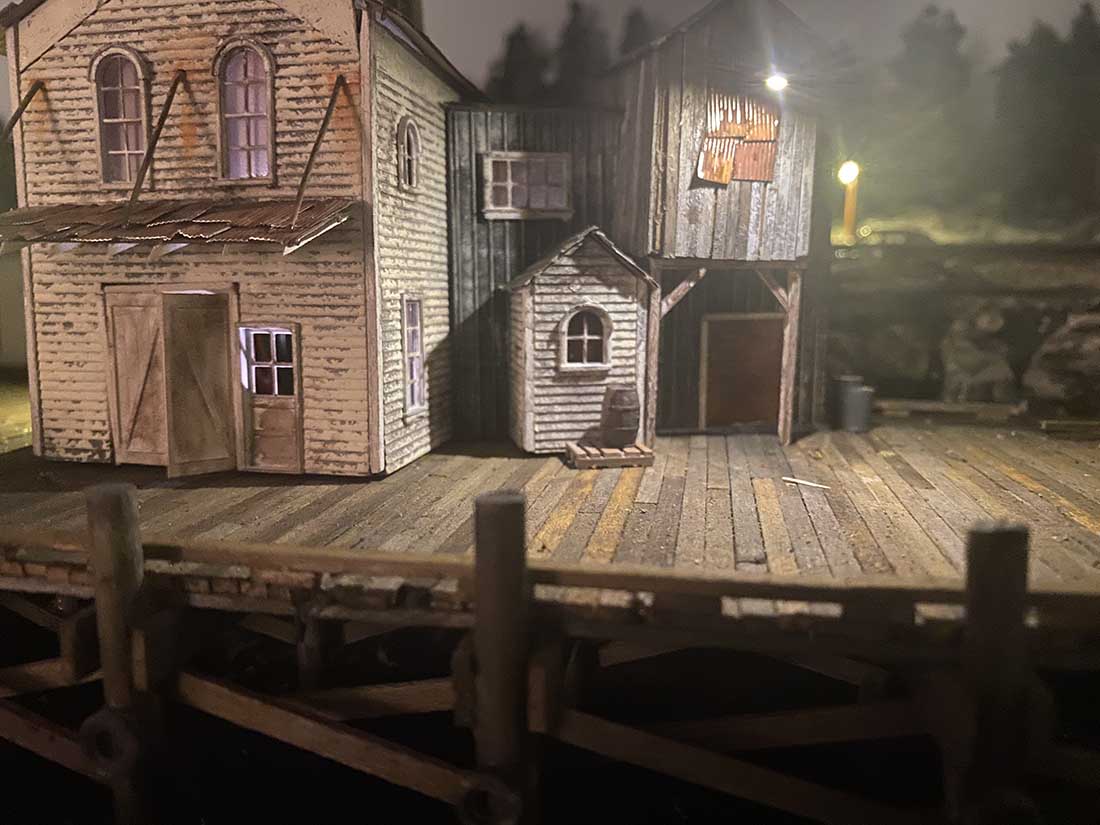
The Carfloat serves as another interchange point. The entire three module setup is a switchback that descends a full 32 scale feet from the mainline to the wharf.
I deliberately started with this section of modules as I knew the switchback operations would provide a lot of fun in my limited space.
I look forward to modeling the water after I get to the final setup location. Unfortunately all three wharf modules are connected to a continuous body of water which, if I poured it now would render them permanently connected. For now I have just painted the water area a deep green color.
Thank you for the opportunity to share!
Scott”


A huge big thanks to Scott for sharing his modular model train layout.
His layout is a great example of how a little planning can go a long, long way.
Lastly, Cassio has been back in touch.
He’s a man of very few words – the language barrier I think. He’s sent in a vid, I don’t think it’s his layout but I quite liked it, so here it is:
You can see Cassio’s Union Pacific layout here.
That’s all for today folks.
Please do keep ’em coming.
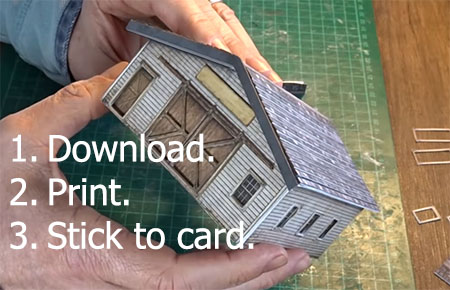
And if today is the day you get started on your layout, the Beginner’s Guide is here.
Best
Al
PS More HO scale train layouts here if that’s your thing.

Very cool scenery. I wish guys would share more pictures of the underside of their layouts. It says it’s modular but I’d like to see the connection points in between the sections both at track level as well as the underside. I’m also intrested in how the legs attach. Just think more pictures of the details on the build would be cool to see along with all the other pictures.
Very nicely done, Scott. You have a real talent for modeling! Can’t wait to see the follow on modules!!
Yes well done Scott, looks great
Love all the buildings and structures with their weathering. Agree with Andy, it would be good to see the wiring connections and how you join the modules together.
Mike S
Andy, it’s not modular in the way T-tracks or such are modular. My connection points are simply bolted together with carriage bolts. I only use the term modular because each section has a logical “break point” from its adjacent section. And it is wired such that there is only one bus wire connection between each module and all accessory wiring is separately installed in each module. And there is a track joint at or near each section joint. Therefore to move it only requires a disconnect of the main bus wire, disconnecting the track joints, and unbolting two carriage bolts. It is designed to be taken apart and moved. But not exactly like a true modular layout is. I wouldn’t want to take this apart and set it back up for shows or club meets.
As for the legs, I use threaded steel tubes and have mounted several threaded sockets under each module. It is pretty stable now. But when I get it more “permanently” installed I will attach the back side to the wall.
I can see the advantage of modular building from the perspective of getting a chance to complete and experience all aspects of a layout build for each one, but it would deprive one of running trains from the time the first loop of track was completed. This allows one to make sure the track work is sound and there are no issues before moving to the next stage. Otherwise, it is great. Rob McCrain
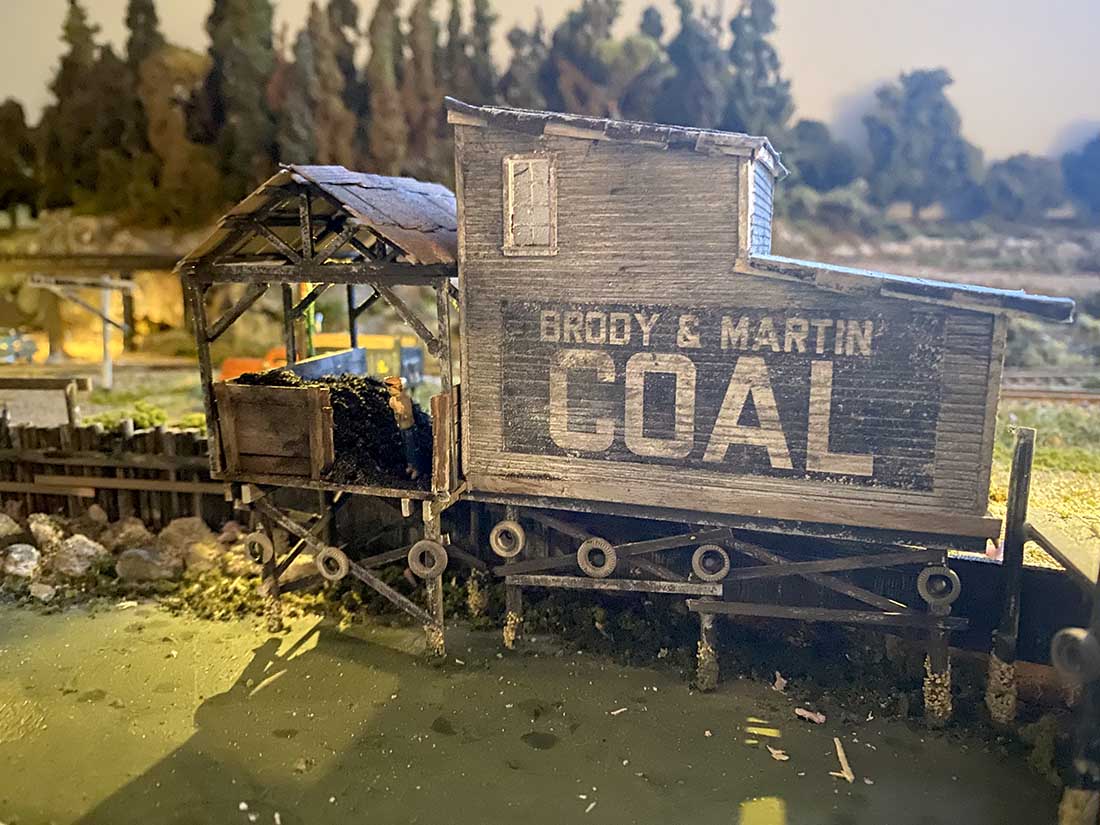
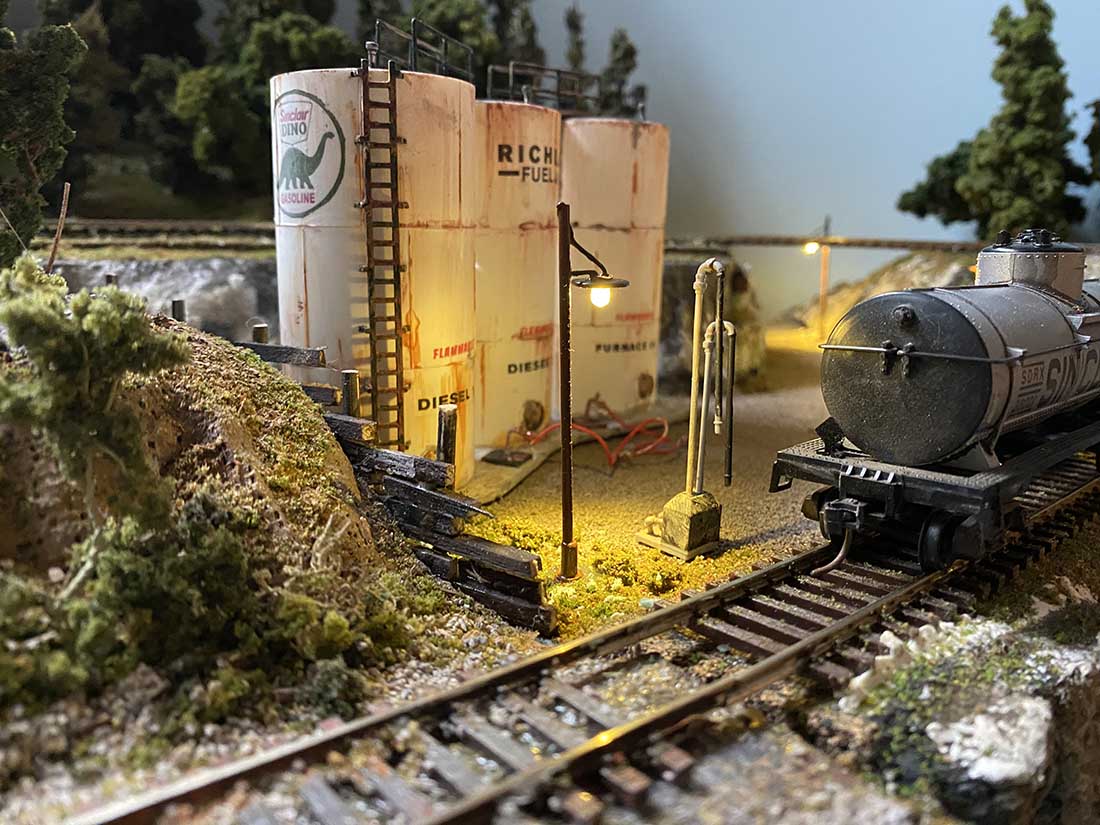
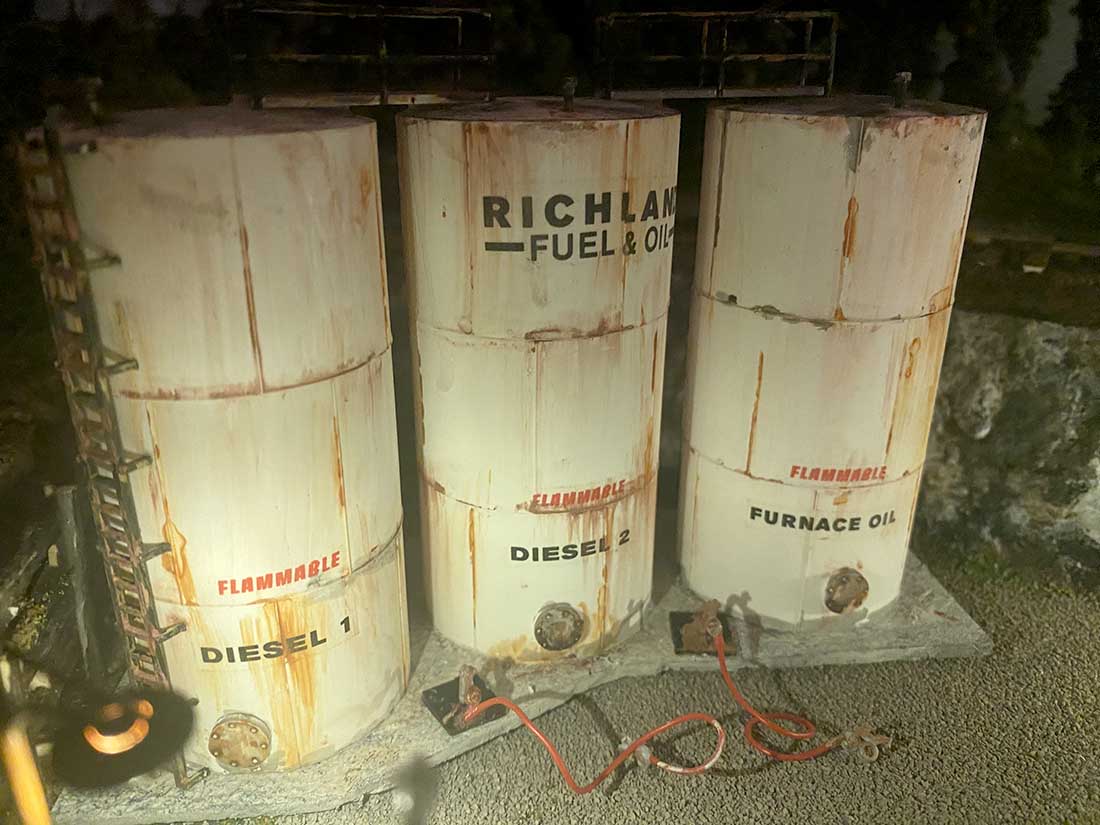
the Sinclair & Richmond fuel & oil storage tanks are really nicely done & the entire layout was awesome from the riverbeds to the one with what looks like water in it. the Brody & Martine coal is really nice & the docks are as well. well done.
Scott- great work! Thanks for answering the ‘modular’ question- I am building mine in a similar way- so it can eventually be moved if necessary. Keep us updated!
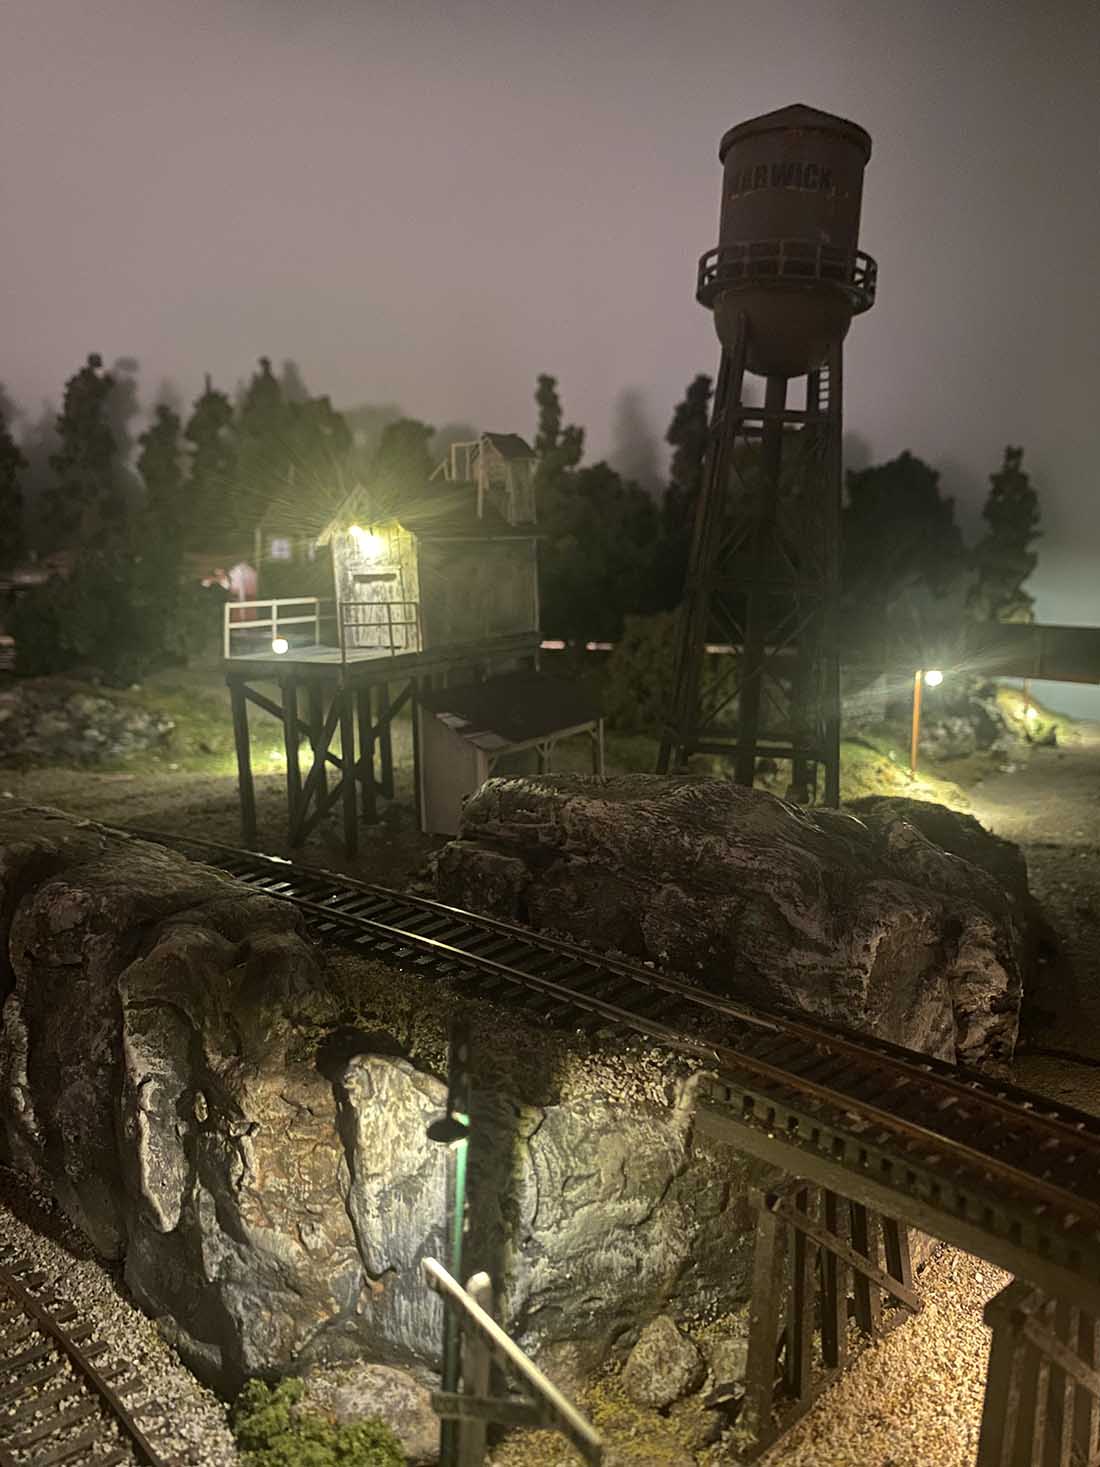
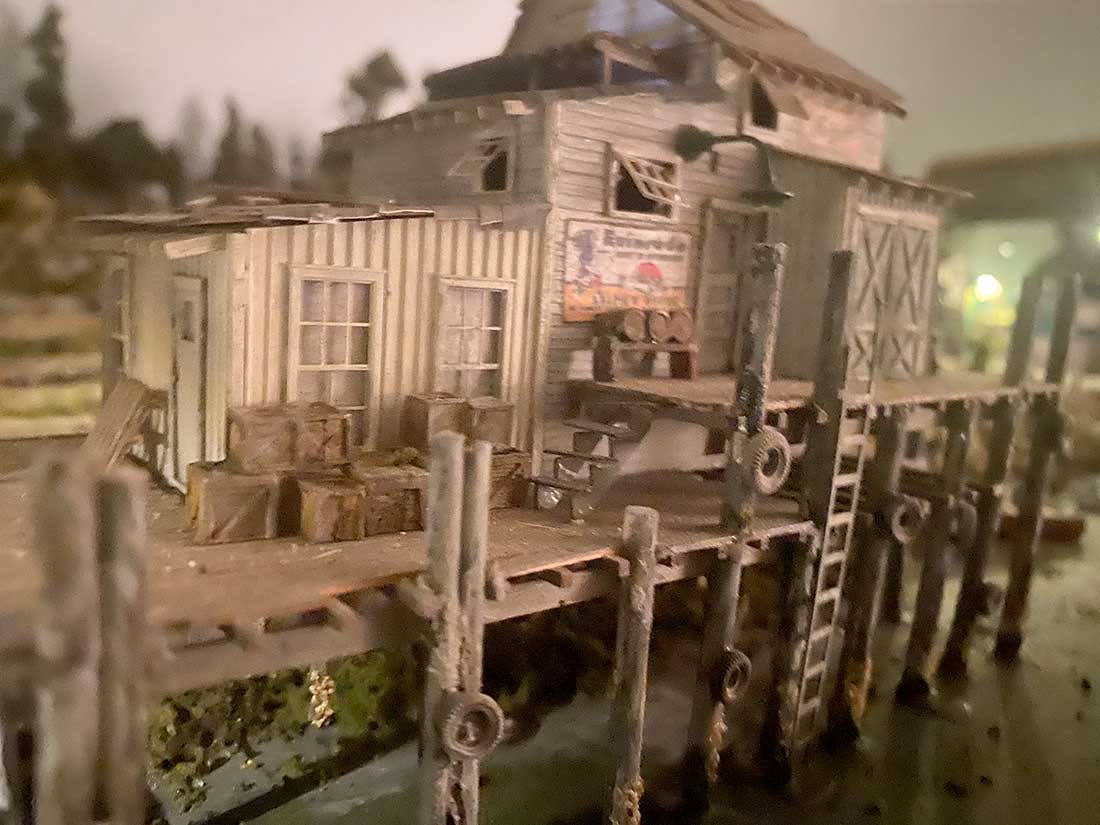
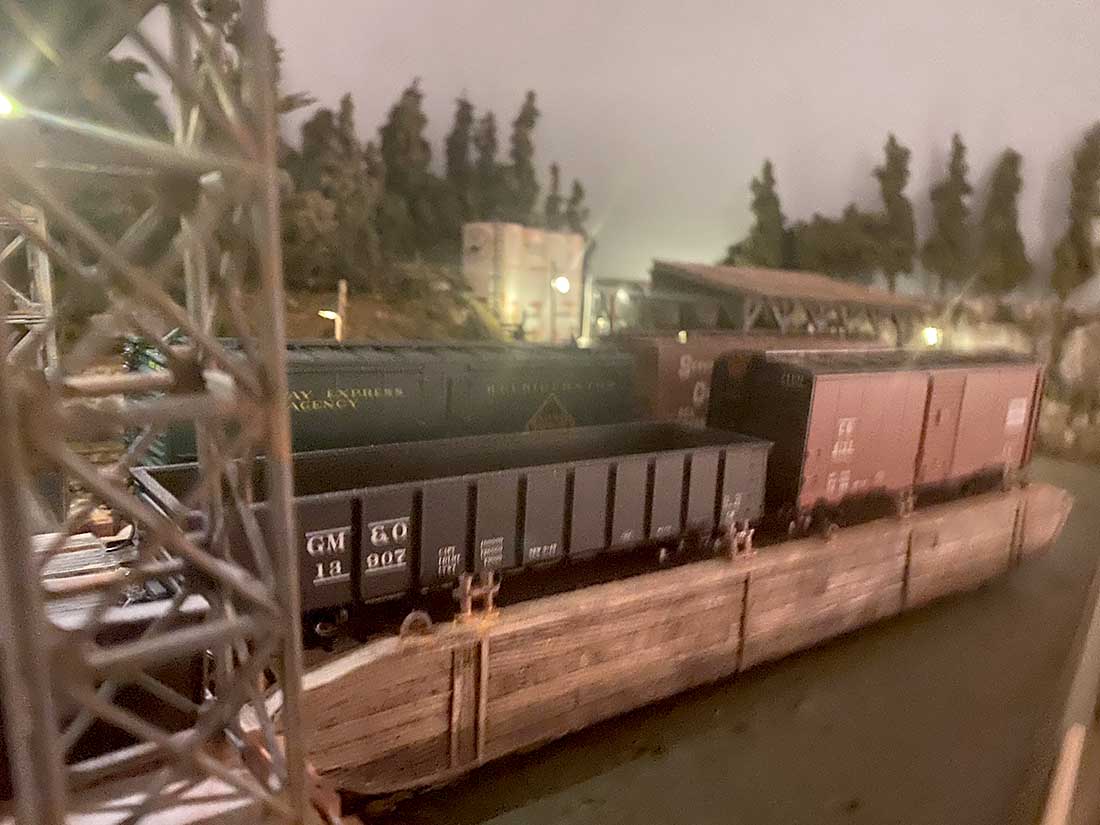
Great Job… the Harbor Scenes are Fantastic… Beautiful Job Weathering the buildings… where did you find the Railroad Barge that is parked – attached to the Floating Bridge that connects it to the main trackage ? Liked the way you have modeled the different levels of the piers and the details, the tires for bumpers, etc. Can just hear the Seagulls carrying on and listen to the old seaman chat by the docks… The night scene with the lighting is terrific… looks like you are part of the scene viewing it…
Wonderful attention to detail. Your photography skills are also excellent.
Scott,
You’ve done a great job. I, too, am near retiring and would like to start building my layout. I like your idea of this freelance modules. Would you be able to give me some details of your dimensions per module? How tall are your steel legs? What is your tabletop made up of and how thick. Where did you get your steel legs? I am more a visual learner and it would greatly help if you could post or email me photos of the underneath.
Scott
Great example of great modelling. Do you have a master plan? Please share some techy stuff like what track, turn outs, switching, DC or DCC, etc for us nerds that thrive on that stuff.
From the looks of what you’ve done so far you’ll have a large fan club begging you for updates & sharing your ideas. “You can’t build a reputation on what you are going to do” – Henry Ford.
We hope to hear from you soon. From people that like to be amazed-all the best.
Big Al
Keep reeling in the big ones. Great stuff.
Nice work. My main 6×12 N Scale Layout is set in Wyoming. But I now have a 2×4 switching layout set in North Georgia where we now live. LOTS of scenery opportunities!
Outstanding, the level of detailing is fantastic and the weathering of buildings and rolling stock is excellent.
Fantastic work! I am also recently retired and might be moving my layout from the building I currently have it in to a different space. Like you I designed my L shaped layout to come apart in three parts for moving (notice that I did not say modules). I’m keeping my fingers crossed that I can get it back together so that it will work again! My L is 22’ x 10’, so the pieces are rather large.
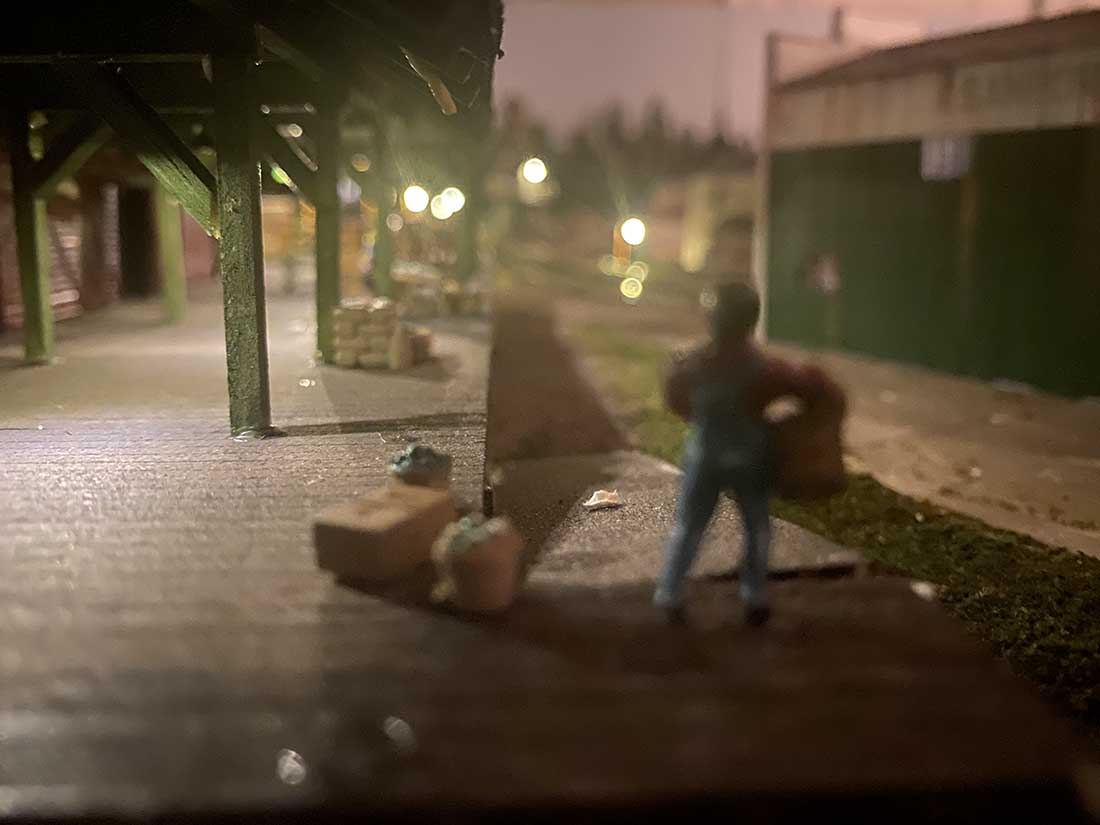
It’s amazing how the glare from the lights and blurriness resembles my vision at night with mild cataracts! That makes the scenes look all the more real to me. I find myself blinking continually, trying to get the image clearer, the way I do in real life. No one’s model’s images have done this to me before. A once in a lifetime experience. Way to go, Scott! 😀
George,
Turnouts are all Peco hand-thrown. except for the eye leading to the Carfloat apron. It required the use of an Atlas Wye.
All track is Atlas code 83 except for the code 70 I installed on the Carfloat.
Control is DCC using NCE Powercab.
Michael,
The barge is from Modeltechstudios. They have a large and small size. Mine is the small size. The larger one would not have fit where I wanted it. Also, since it serves basically a small sleepy fishing village I didn’t see the need for interchanging more than a few cars. It holds four 40’ cars or six ore cars. It is a very nice model. I will post some close ups of it in another post if Al will allow me to.
Beautiful layout! Well done
Conrad,
All of the modules and future planned modules are different sizes. I basically worked out a master track plan over the course of a year or so that can be divided into segments that I can transport in a van or SUV. They are all less than 7’x32”. The truck is to design it so that connection points from module to module have no turnouts involved and contain as much straight track as possible. I learned the “straight track” part the hard way. These first modules are connected on curves. Not a great place to connect flex track. I had to take it down a few months ago and found out just how hard it is to get the curbs to hold when disconnected. I think on future modules if I have a curve connection I will use a more rigid track that holds its shape like Microengineering.That’s another great thing about completing a module at a time. I learned a lot of things making mistakes on the first modules that I will do differently from now on.
I will try to post my entire layout plan next time for reference as to how this scene fits in and you can see my modular divisions planned for the future.
Those buildings are exquisite so real looking simply beautiful layout .
ONG Bill in Virginia! You have been my most significant inspiration! I love your work! Every one of your videos has taught me how to be a better model let. And this was ALMOST an On30 layout because of you. I decided in the end to make it in HO simply because I love building structures so much and I knew O scale would not allow me to build as many. Cheers to you and thank you for the inspiration!
Ruben,
Thank you. But I really must give credit to the fact that I don’t have a fancy canera!😂
Andy,
I will try to share some under pictures in a future post. Thank you for your comments and interest!
Scott……Great pictures and fantastic detail and weathering and scenery. Good idea with building the layout in modules. Gives a person a chance to learn more as you proceed onto the next section.
Buildings and detail are some of the best I have seen.
Thank you Gary. The buildings are for me my favorite part of the hobby. That means a lot!
Great detailing, aging, etc.
Fantabulous Great lighting and photog
The Critic
Amazing work, Scott! We are sort of neighbors, I guess, since I’m also in SW Georgia. I live about 30 minutes from Warwick, and have been a student of the Georgia Northern Ry and the Albany & Northern Ry for many years. My HO scale layout (Digitrax DCC) started out as somewhat representative of the GN/A&N, but has moved away to a freelance Georgia Southwestern RR, set in the mid 1960s, about the time Southern acquired the Pidcock Lines in 1966. Its a bent dogbone in a 16’x20′ shop building in the back yard. I’ve been running trains for 10 years (since 2014), but scenery hasn’t been a priority. In fact, I’m thinking about a significant rebuild of part of the layout. If you happened to have come by, I was a vendor at the Cordele Railfan Day event this past November 9. I’ve been thinning my 40+ year collection. Best of luck as you reach retirement and continue with your layout!
Scott, beautifully done. Are you NCE ? Can’t wait to see it finished ! Keep up with your great work and design. Awesome !!!
Tom
Scott: I love your narrative and layout. Good for you to have found the modular way to work towards the longer goal. Yes, it’s certainly exciting to make a lot of individual railroad layouts and it appears (and shows) you’re enjoying the journey! Keep us updated as you progress.
You’ve proven that a great layout doesn’t need a lot of space. Excellent detail work.
I did modular also. I used connector blocks between the modules. It makes it easier to disconnect/connect the wires.
WOW! Awesome modeling, so lifelike. Plus how can you go wrong with a GM&O gondola in the mix
really nice rolling stock, and good layout.
Good stuff. The lighting effects are quite effective and highlights the well detailed scenes. Some great modeling skills by you.
Jim AZ
NICE!!! And a great way to tackle a layout. Like eating an elephant one bite at a time. Ha Ha… Also love the quilt on the bed. My wife is a quilter and we all have them. Keep up the good work.
Scott, what excellent modeling! Detailed, weathered, just delightful. And building it in a small place, to later set it up completely, is brilliant.
Great layout Scott! Your modeling skills are excellent. Your planning of the whole future layout so it can be sectioned is a wise step too many of us forget to do in our eagerness to get started building the layout. I look forward to your future posts. Thanks for sharing your story and wonderful photos.
Scott:
Well done! You definitely have a gift for creating beautiful scenery.
John LINY
One of the more realistic layouts I’ve seen. Excellent details.
Fantastic!! Cannot wait to see how the other modules turn out!!
Scott,
Is that a bed in the foreground of photo 5? Have you considered making it into a Pullman bunk? You could have motors and cams gently rock you to sleep!
Craftsmanship and photography is top notch. Congratulations.
Yo Scott, Really Nice Work!!! Congratulations
Weathering/detailing of structures is superb!
Scott –
Fantastic job. Your scenery, weathering, photography and detailing are amazing.
I do have one question: How did you model your cement block walls in the first picture? They are beautiful.
I’m sure Al will be posting your future updates as they are certainky worthy and many of us will be eagerly awaiting them