“Hi Al,
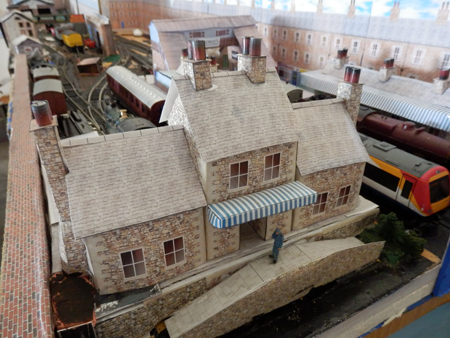
just a photo to let you see how I am progressing, I would like to install street lights but without drilling holes in the baseboard, any ideas please?
Starting the scenery now and will keep in touch.
regards
Alasdair M”
“Hi Al,
Here are some more photos of my new railway under construction.
As you can see in the photos, some scenery has built before track was laid.
Also in the photos track laying is well under way. I am using trackrite underlay, which can be purchased from hobby shops and ToyWOrld stores.
The underlay has to be modified to go under points, but can easily be cut using sharp scissors
Paul”
“Color Coding
I have 5 or 6 different sized, diameter and thread, screws I use frequently while modeling. To make things easier, I color coded them so it was easy to identify the tap drill and tap as well as the screws for them.
I bought some cheap fingernail polish in different colors. On a particular drill and tap set, the same color of polish is painted on each. I have small zip-close bags for screws. The same color represents a particular size. For example, all bags with 2-56 screws, the bag has yellow polish stripe. Drills and taps for 2-56 have a yellow painted band around the base. 1-64 screw bags, drills and taps all carry a blue stripe or band and 0-80’s a red stripe or band.
In instances where I have both tight and loose fit drills for a particular size, the tight fit drill will only have the appropriate color for the size while the “loose fit” drill will have a second band of silver on it. Thus, the drill for a 2-56 for a loose fit, probably one where I intend to use some sealant to make it permanent, would carry the yellow band with a silver one beside it.
Not only do I store my screws in zip-close bags, but the drills and taps too are stored in them and the bags are all identified accordingly.
This makes identification easy and when several are left laying on the work bench, it very much simplifies sorting and putting them away.
Dick”
Loved this color code tip!
What a clever lot you all are.
That’s all for today folks.
Please do keep ’em coming – it’s all getting a bit thin on the ground this end.
And if today is the day you get started on your layout, the Beginner’s Guide is here.
Best
Al
PS Latest ebay cheat sheet is here.


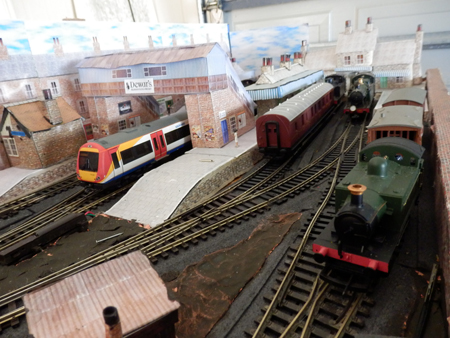
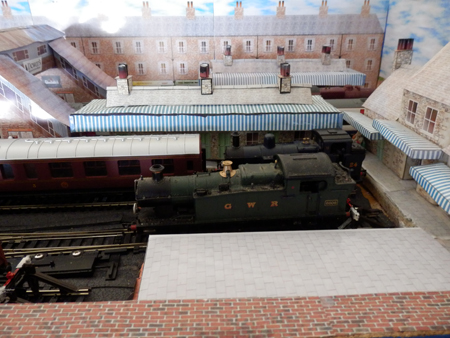
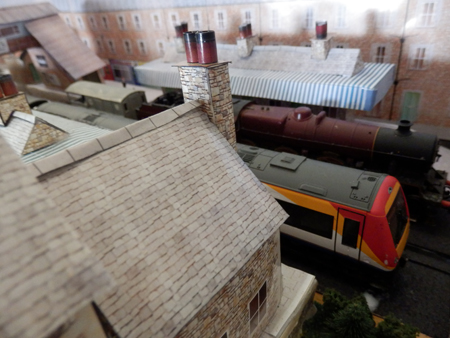
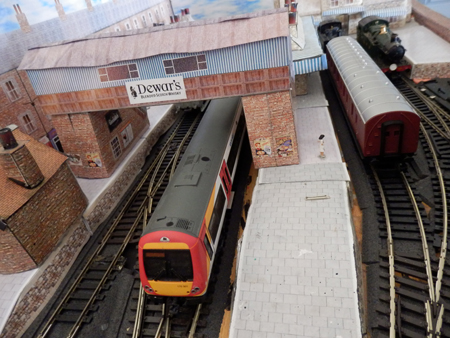

Hello Alasdair M, you have a few options with street lighting that you do not wish to sink in the baseboard.
Lamposts can be sunk into hedges and the wires run under the hedge. Lamposts can be converted to wall mounting off buildings (or can be bought). Using very thin wire the lampost feed wires can be below the pavements or roadways without causing any uneveness. Long ago lamposts were powered with hanging wires from post to post (like a washing line) this will be tricky as you will need ‘soft’ wire so that it has an even hang.
Regards Kenneth
if a corklayer or “grass” paper is not glued you can tunnel stranded 24 wire from the street light position to the edge of the board and join nit to your lighting distribution grid.
if you cannot tunnel under the corklayer or “grass” paper then glue short posts and use the twisted pair as a chain-link between posts acting as a fence.
just an idea … you could also run a small caliber tubing along the roads to contain the wiring as if it were a steam distribution grid … or raise the “grass” paper edge to cover the wire etc … many ways to do it although the easiest would be to drill a hole! 🙂
Not all towns and cities have underground wiring for their hydro. Think back to the age of what you are depicting in your overall scene. You may try to install hydro poles and run wire between them in an overhead wire installation. This will be realistic in that it will appear older. Buried wire was not really popular until the late 1960 era. The telephone company only started burying drop wire to houses in the early 1960’s. I worked on crews doing that at that time. If you are using LED’s for your lights you can use very small wire gauges in the range of 28 or even 30 gge. It will serve fine since the current is so small. Hope this is one of the many suggestions to help.
Love the idea of color coding. Had never thought of something like that for my workshop and now to the trains….. I can now color code the wiring underneath in stead of crawling out and looking and back under. The layout is great!
nice see your pages I have just started to rebuild another layout I get the impression that people are more interrested in fictional layout than they are in none fictional layout.I am working in N gauge as I don’t have a lot of room to work. I have found that some of the model kits have so much detail
which is hard to see with out a spy glass.
John Fuller, above, has good idea. for your pole to pole transmission wires find an electronics hobby shop. ask for speaker coil winding wire. This ought to work well with LED’s. It will be small enough to scale correctly and it is Not insulated but is coated with a dark colored varnish, You can scrape this off with knife in two closely spaced places, solder, then glue the three wires to the cross arm or pole and cut the transmission wire between the two LED wires On another subject, your layout looks great.
Great to see some of my work in the emails, I will show you guys some more.
Hi! I use sticky backed copper strip as used for making artificial led light windows it is about 6mm wide and about .5mm thick and you can solder to it. I actually use this method to lay most of my wiring on my layouts as you nan lay up to two or three layers across each other without making it two bulky in height.
I lay a dual strip of this tape under the road covering (usually computer printed A4 or A3 paper sprayed with crystal clear mat acrylic spray paint) and take + & – strips of to the street lights of this to each one also to any buildings that have lights.
Ribbon cable from the computer industry makes good colour coded cable (and helps you stay tidy). This is only suitable if you are using LEDs to light your layout as they are only intended for low currents. another small cable that comes in individual rolls and a variety of colour is”wire wrap” cable that can be obtained from electronic suppliers.
These cables are easily concealed within the scenery.
Hi Al.Hi all.Alasdair.Could alway’s copy my power pole design’s.And run fine cooper wire from a small motor.Thats what im going to do.Did some test’s and it works as long as you dont go touching both wires same time with some metal object.Al put threw on here my pole’s.
Hi Alasdair:
You have a really good looking layout there that is taking shape nicely!
Your desire to provide street lights without drilling holes through the board is interesting but in my opinion generally impractical — especially on a layout of any appreciable size if one intends to use a significant number of lights (lampposts, building interiors, etc.) and where one already has an appreciable number of terrain elements (buildings, roads, track, etc.) in place.
Surface mounting would be more practical if it’s part of the layout planning stage, and done on a basically bare terrain just having the intended sites for lights and other objects marked on the board so you could work around them.
But an ‘after-the-fact’ installation could be acheived with some ease if only few lights were to be installed and you laid out the wiring on the layout and conceal it with some form of conduit — e.g., laying turf and/or other terrain elements over the wires till they reach the edge of the layout and can be connected to a facia mounted terminal/distribution strip.
It appears your layout is well under way. So trying to now incorporate ‘surface’ mounting techniques might be more cumbersome and more work. I think going under the layout would save time and effort in the long run.
Arnie
Alastair,
Where did you get the direction switches for you point control panel. They look very good and show clearly the direction selected.
Cheers
John.
Best method i found is to use the copper tape. this is the same tape that is used in dollhouses, it will carry a 12 volt charge with no problem ,can be sodered, can be overlaped with it self with no shorts.and also is color coded silver and gold. this can be found in most arts and crafts stores here in the US.
YOU HAVE A VERY NICE LAYOUT
Al the many instructions I have read; videos I have viewed: and the pictures I have looked at: are very helpful indeed as they will assist me in the process of building my N Scale model railraod. The lighting instructions are most helpful to me. As I find them most intriguing a something I knew little about until I have read the instructions.
Thanks for all the help eveyone!
Thanks Al for a great site to share.
Regards,
Tom N
great layout ,you could use .40 telephone lead in cable.remove the 4 copper wires from the sheath, the copper wire is insulated with a coloured plastic. you could use 2 black wires between poles and coneect it to the buildings like the electricity is in some places. or you can plce it under your balist or as or ready suggested under hedges.
The videos I have viewed: and the pictures I have looked at are very helpful indeed. The lighting instructions are most helpful to me.
Does anyone have advice as to how to syncronise signals and points on a 00 gauge DCC layout?
I am working in HO scale modeling a rural scene in Virginia. My problem comes when I try to depict streets with houses. The HO scale 1″ is 87″ you can only get 2 or 3 houses and then you are out of space. I am trying using N gauge buildings to get a more realistic depiction of distance. Works real well if street is set back in the mountains not adjacent to the track. I got the idea from a model train layout in Phoenix AZ where they laied a third rail inside HO track and were running N gauge trains and HO on the same track.
Jerry
Beautiful layout. A lot of love & work. Thanks Vic
Lighting, Use telephone poles. run active wires pole to pole to building, just don’t cross them.
Beautiful layout what size is it
If you want the lights on the roadway may I suggest making the road a “boulevard” You can design the center section as you want.Usually these road dividers are grassy with trees.You can hide the wiring under your center addition.I did this on an old layout I had using those mini raisin boxes taped together,sprayed with clear paint and dusted with “grass” before the paint set.
Installing streetlights above baseboard – – –
A thought comes to mind about doll houses. I wired my daughter’s up with flat metallic strips ( from the dollhouse store ) along the inner surfaces of the walls. Then wall papered over them. Perhaps you can use these before your ground cover goes down. You still have to get power to the strips somewhere to drive them, perhaps over the back edge of the benchwork or just one hole down thru, and then run them around.
Bob
Also love the directional point switches – where can I get these.
Regards
Ian
You could run coated magnet wire on each side of the nearest tracks where the ballast meets the baseboard. A tinynbit more ballast stome would hide them. Run the wire from the track to the pole in a knife slit in the scenery. A little touchup and the wires are hidden. You could even just run the magnet wire on the surface glued down with clear aliphatic glue alone. The dark colored thin wire would be inconspicuous, especially if you painted over the slight bump with a matching color.
I plan to run all wiring on top of the baseboard due to hip problems that cannot be fixed, I’m on chemo. The layout will be high and I will use ribbon cable, i e computer cable, before scenery is installed. All wiring will run to the front of the baseboard, where a cable way will run in a covered by a lift-off road etc.The baseboard will be in lift -off or hinged sections.
Color coding is good for some, but not all. I’m constantly asking “what color is this wire?” Yellow isn’t so bad, but greens, blues and reds, especially when faded over the years can be very difficult for me to ascertain.