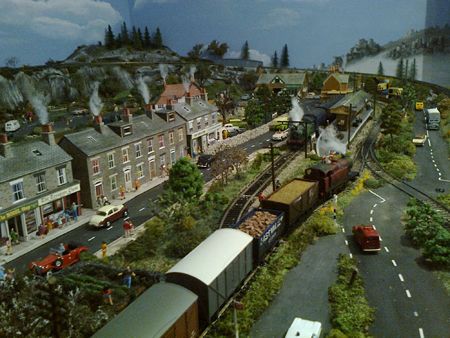
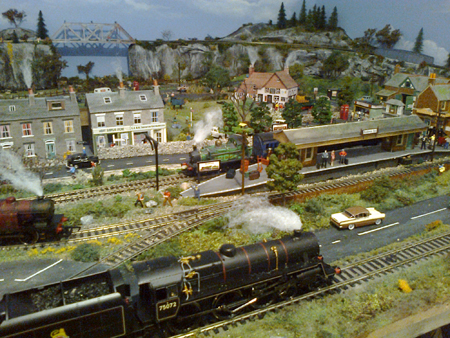
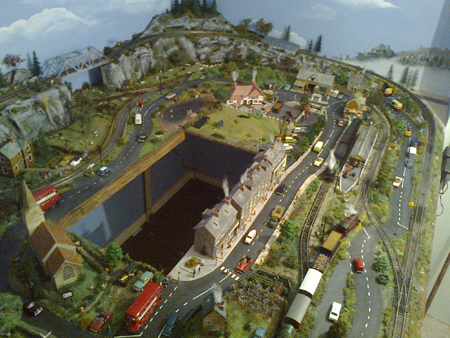
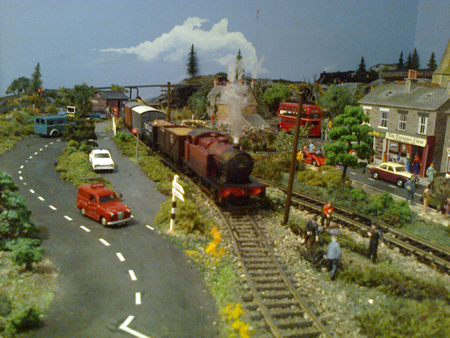
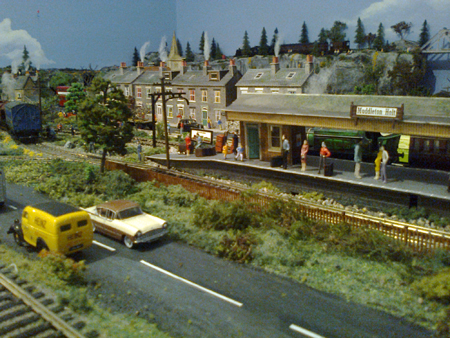
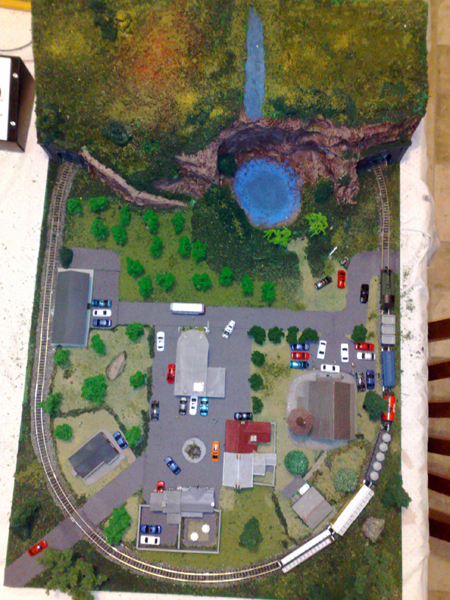
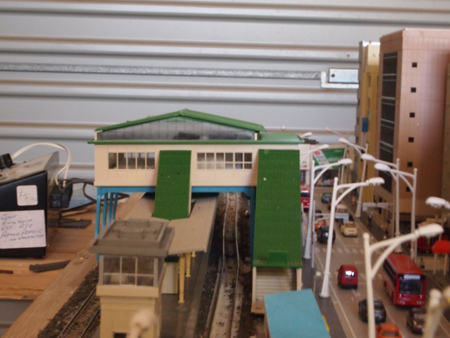
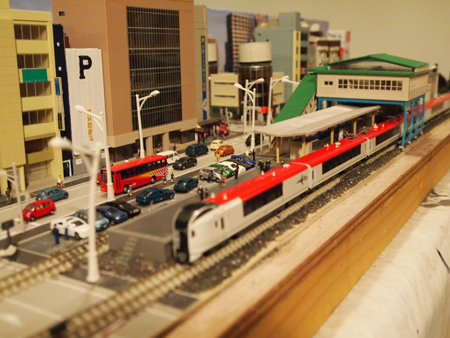
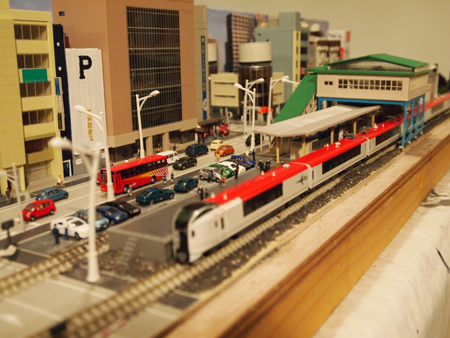
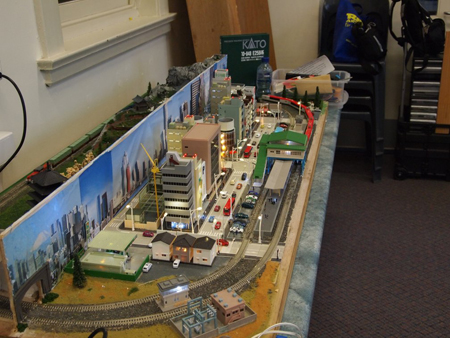
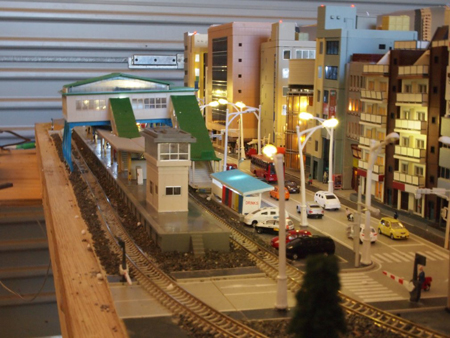
“Hi Alistair. More pics of the station area which is coming on now.
Still a lot of touching up to do, and always something else that needs doing; as you know it’s never really completed.
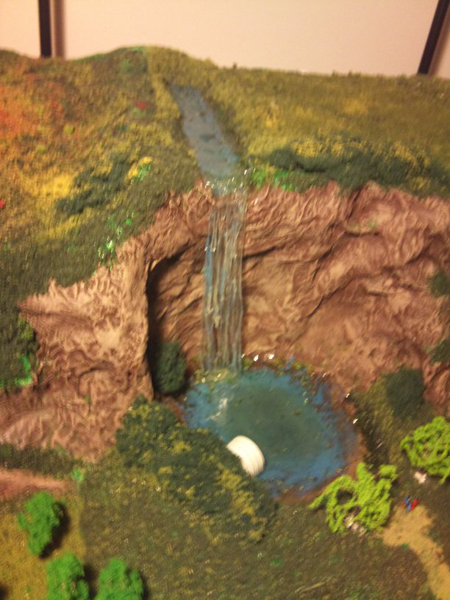
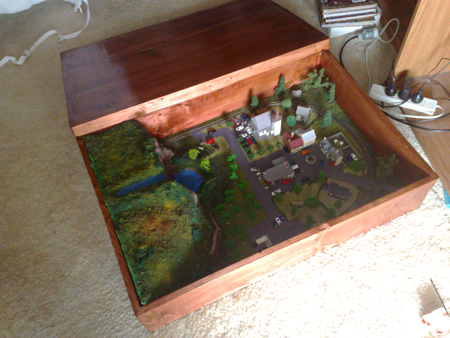
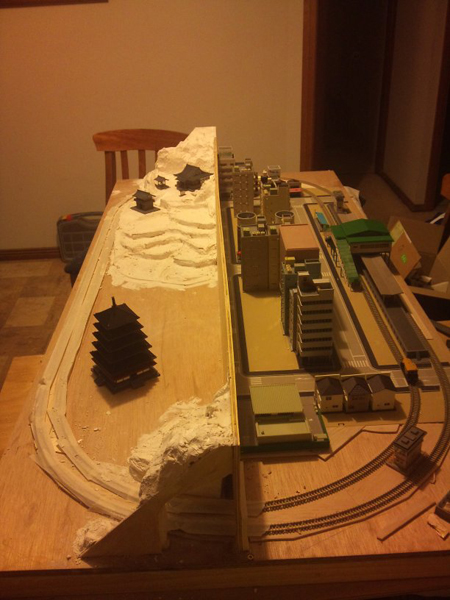
I have decided to make a small lake area in the middle of the model which can be lifted out and replaced whenever I need to get into the centre.
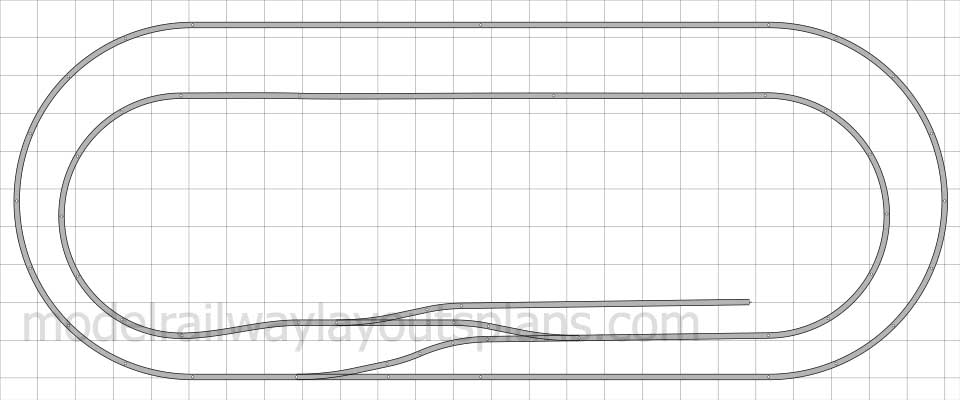
I have made some mistakes on this build, ie the climb for the train on the outside track is too steep for it to run without working the control, I have to speed it up on the incline and slow it down on the descend; however my next one will be bigger and better I hope, cos I have really got the bug now, this has certainly been a fantastic hobby.
A big thank you to everyone for sending in their tips, photo’s, videos and how to’s. There have been some fantastic ideas, will keep sending in new things.
Cheers
Stuart”
Now on to Grant:
“Hi Alastair,
Here is a contribution for you.
I am an N scale modeller from Australia
I have several small layouts that I show at our local rail shows every year. Currently I have completed a Small Coffee Table layout that is modeled vaguely on Germany/Europe.
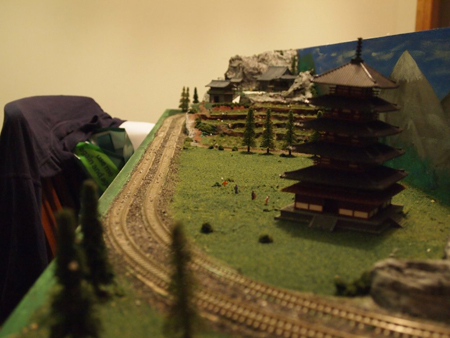
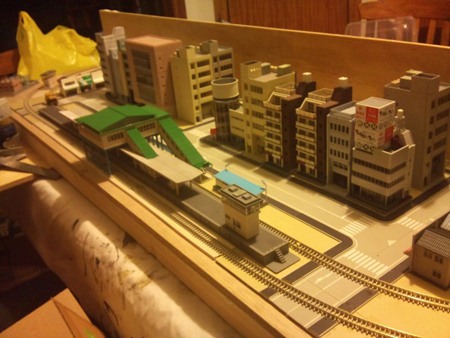
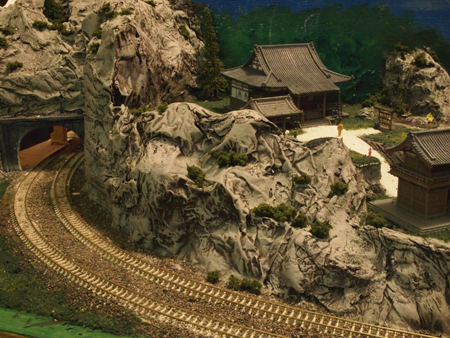
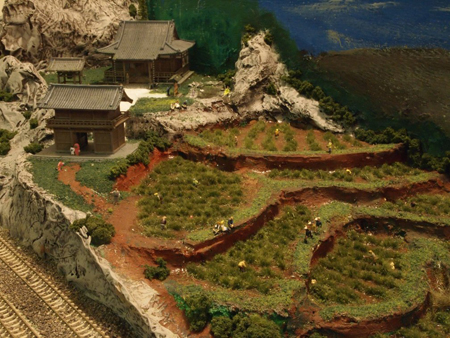
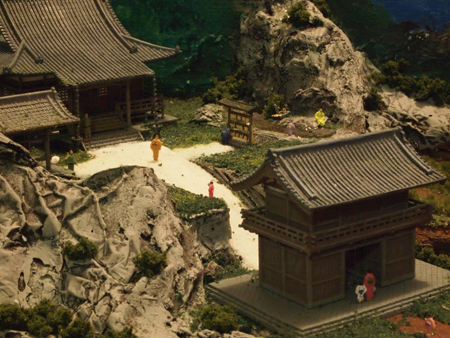
My other completed layout (as much as any layout is ever “completed”) is a two sided Japanese layout, with one side being urban the other rural. I found this a great way to have more detail in a small space.
Mountains – I have a tip and trick for your readers. How I do mountains.
When doing mountains I do some things slightly different.
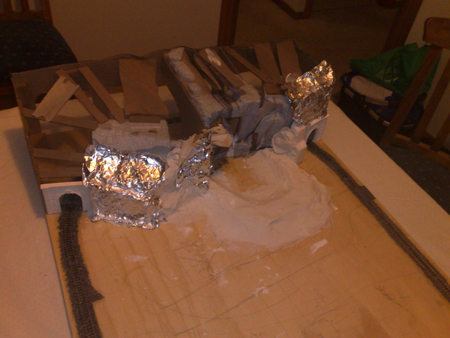
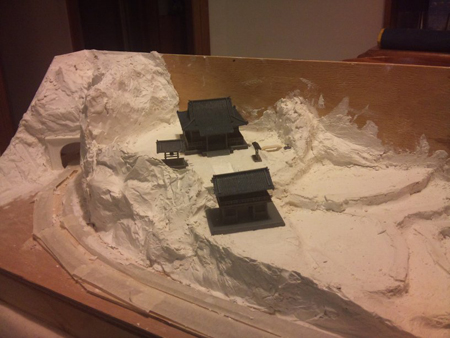
As usual I create my frame work using polystyrene foam, bits of cardboard or whatever is lying around. I then cover this in plastic fly wire (mesh) that I get by the roll from my local hardware store, securing it with tacks or a staple gun. To create my realistic mountain shapes, I use the following tools
• Plaster of Paris
• Cement render Tints
• Tin Foil (usually one foot squares (30cm by 30cm) folded into quarters. (15cm x 15cm)
• Wet Water (water with a couple of drops of dish detergent)
Once I have a good idea of the sorts of formations I want, I create as much as possible with the under frame to avoid unnecessary weight. (my layouts travel a lot)
I then mix up my plaster in small batches, usually three or four large tablespoons of plaster and one large teaspoon of Tint. These tints are available from your local hardware store and are used to shade the cement renders used in housing and concreting.
I use a chocolate brown for earth tones, and a terracotta for my Australian red desert scenes. I used a grey tint on the Japanese layout.
These tints make undercoats more effective, but also, if the layout is chipped and damaged, then in stead of a white showing through, I get an earth tone, which looks less obvious and more realistic.
Also, varying the amount of tint you use changes the shade of your plaster, which can create an effect all its own.
Once I have the Plaster/Tint mix at the right consistency I then spray the tin foil with the Wet Water.
I then place the plaster on the foil and place that, foil up plaster down on my framework. I then shape the foil to the contours I want, or leave the natural crinkle in the foil to generate a random pattern. (usually a little of both).
A batch of that size will allow for 2 or three patches at a time, so have that much foil ready.
It is important to note to do these patches away from each other, so as to not foul the foil. I usually work from each end and in the middle.
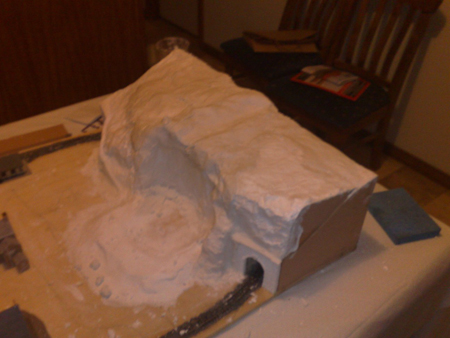
I then wait about 5 minutes for the plaster to set (once it is warm) and then gently peel the foil off, revealing a contoured area.
I then repeat with another batch in more small patches next to the ones I have created.
The foil can be pushed to follow the shape of the last patch, so each section is seemed with the last.
Also, Start at the bottom and work up.
Painting – To paint my mountains. I use a dark base coat, much darker than I want to end up with. I also have three shades of the colour I want, including two lighter than I want.
For example on my Japanese layout I used:
• Burnt umber undercoat (almost black grey)
• Grey (rock colour)
• Nimbus Grey (highlights)
• White. (highlights)
I start with a dark undercoat, usually watering it down so it soaks in all the little cracks, holes and crevasses the foil has created.
Once that is dry i use a technique called Dry Brushing to add the primary rock colour.
Dry brushing is a technique by which you place a little amount of paint on the brush, rubbing the brush on the palate to remove most of the paint leaving you with an almost “Dry Brush” and then gently brushing across the surface in quick strokes.
This causes the paint to adhere to the raised areas, but skip over the lower ones.
For my colour coat I tend to still have a fairly “wet Brush” but I make sure it is not running into the cracks.
Then I switch to my first highlight colour and do that with a very dry brush. You may have to work over areas a few times to get the shading you need.
Then I use my second highlight to just add to the very tips of the areas. This is usually a very subtle highlight.
This technique is worth practicing as it creates real dimension in your mountain work.
From there I would decorate with flocking, trees etc.
I hope your readers enjoy.
Grant”
That’s all for this time, folks.
Please do keep ’em coming.
And if today is the day you stop dreaming and start doing, the Beginner’s Guide is here.
Best
Al
PS Latest ebay cheat sheet is here.



Dave the railroad look great at night love the changes you did.
Dave
love all the pics
I am just starting to get back into the model railroading hobbie now that I had to stop working and go on disability. This is a very nice layout. I am going to try to make my layout of the Rocky Mount, NC back in the 50’s and 60’s when the railroad was big in this area. If anyone has any info or aireal view af that area I would love to get them. I will include photos of the making of as I go
Always a thrill to see this in my email box. Stuart, I like your layout very much. I did the same thing with my first layout – tried to raise the incline too fast. I learned to gradually block up the track and to be sure the train could run smoothing before making anything permanent. It looks like you could come back to the front center of your layout and start the incline without messing up too much of your beautiful work.
Grant, just finsihed building a mountain on a small modular N scale using florist wire and cardboard overlaid with plaster cloth. I have already encountered the white specks showing through. Your use of tints is very tinmely so I will use it when I build my next mountain. The Japnese layout looks very inviting to viewers.
And Dave I love your layout. I hope to have one someday that will be on a par with yours.
Have a happy Sunday everyone and thanks for all the tips.
Al, A couple of questions for Grant. He mentions the plaster mixed to the right consistency. Does he mean the consistency of say peanut butter, or hot fudge or thick gravy? Give an example. Second when he applies the plaster to the foil, how thick of a layer of plaster? Half inch? Quarter inch? About how thick. Thanks, Lloyd
Dave, I am building a layout for the first time. I have enjoyed your videos. After seeing your layout, I am thinking of taking down what I have started and starting over. I created a track plan, made the framework L-girder, layed track, created mountains and I was about to start scenery. I goofed, I didn’t leave room for buildings. I like the way your layout goes around the room. Could you post the dimensions of you layout, and your track plan? Love to see it. I live in Rhode Island but I’m modeling Canadian railroads. My wife is Canadian. Thanks Bob
Once you’ve seen that awesome smoking locomotive, it’s difficult not to think of the other steam locomotives as being lifeless imitations of life.
Looking very good Stuart ,and Grants waterfall in such a small space ..excellent
Marvelous layouts, the scenic divide idea seems to work well. I now know what I am going to do with the access hole in the middle of my layout, a lake has all sorts of possibilities. Perhaps surrounded by some of those plaster mountains. Dave I presume you turn the smoke alarm off while you run that black five.
I’m glad to find out I am not alone Stuart. I have one of my outside tracks that have the same problem. I have finally decided to bite the bullet and rebuild that section to lessen the grade. Your layout is great by the way. The detail is superb.
Your tinfoil sculpting looks excellent Grant. I do a variation of your process with tin foil but I like your process better. I am going to use the your concept to build the section I am working on now. Thanks for sharing. I really liked your Japanese layout, especially the traditional country scene.
Bob Miller
Dave , You are a legend !!
One of the most detailed and creative Japanese layout I’ve have seen in quite a while. Traditional buildings and topograghy are excellent. Best detail I have seen. Does not look toy-like some of the other layouts on this page.
Hi Lloyd.
1) plaster consistency I aim for is about tooth paste, or a little thicker. In warm weather, (aussie summers are hot and dry) thinner consistency to give time to use.
2) I apply probably quite thin, about a eighth of an inch (5mm) Because the shaping and texturing will vary the thickness, as long as I have coverage (2-3mm) i am happy.
I Hope to do a “How To” video soon, as I am about to start mountains on my new layout.
Thanks for the feedback.
Grant.
The waterfall is done by cutting ragged strips of a very thin clear plastic (I think it was PVC) now I use the sheets from clear trasparencies i scored from office supplies. The strips are cut in wavy patterns, secured top and bottom using Woodland Scenics “Water Effects” using this to shape the splashes at the top and bottom. Also at the top, block of the trench of my creek. Both lake and creek are filled with Liquid Water (or whatever you choose) and then dry brushed. This is actually an older photo, I have sinced coloured it better and highlighted the splashes in White.
Dave, that is a marvelous model, How wonderful to have the room to make such a brilliant looking town, and some great tips too. I have followed your build as you have sent it in and your ideas have halped me a great deal. Thanks
WHEN YOU FINISH YOUR LAYOUT IT WILL BE BEAUTIFUL.
Hi Bob , my layout is approx 30 ft. x 8ft , sorry no track plans , I just build as I go along (and yes do have to rectify from time to time ) ..The smoke is by way of using the Seuthe smoke generator , they are on sale most places these day , I got mine including fitting for £25 , so a cheap addition for the effects
That is a superb job i wish i could do that with my HO layout i am getting there slowly
regards
Albert
Just when I think this website can’t get any better, it does.
I have a MTH N&W 4-8-4- “J”set with 3 passenger cars,track,remote controll. I don’t think it has over 15 hours of use. I use to put “smoke” fluid in it but caught so much hell from my wife that I quit doing that, you know how that goes. I haven’t run it since 2010/11. It is all in the original box on a shelf in the closet in the back bedroom of the 2 br small house I live in. No I am not posting an ad to sell it,I don’t think I’ll sell it. In 1985 I had one of Lionel’s NW 611J set with the engine,tender,and all 7 passenger cars. Like an idiot I sold it. It was almost like new and had all of the original boxes. As you can see I am a fan of the N&W/NS railroad. Original home is Norfolk,Va. and now reside in Bristol,Va., on the Tenn/Va. state line. halfway between Nashvile(yes vile),Tn and Norfolk,Va. How do you dissapate the smoke from the locos. I am a retired sheetmetal mechanic and am just wondering.
I always look forward to receiving you emails Al your members are very talented I love the hints and tips in todays email and the layouts are fantastic, great job everyone.
Let me add, for those who use the dry-brush technique, or are considering it. In the 50+ years of being a professional artist, I have used, and teach the method of using a NATURAL “sea sponge” which is not what you typically buy in a housewares section, but in a faux or decorative paint department of a hardware/paint store. They come as small as 2″ in circumference and when wet with paint, and then squeezed out, give superior “glazes” which is what dry-brushing does, but with far superior random-ness of paint distribution and finer detail. Be sure to squeeze the sponge almost “dry” before applying in TAMPERED technique, which is lightly touching and then lifting the damp sponge. PLUS you get quicker coverage, and better ability to work heavy textured surface such as plaster, or plaster fabric.
I like the concept of this layout.Thanks for the tips.
Matthew Prithiv Raj
will send my pictures soon. they are from the us. excuse me.
Very nice Stuart and Dave .
From all the information from everyone. I dismantled my complete HO layout, boxed the track, trains, houses, put everything in a dry storag area.
Completely redesigned, I’ll call it train platform . Painted the surface a light dirt brown. Started laying ” 0 ” garage Lionel track. The top passanger train track is supported by old plastic tresses. Many will call this the main line, which will completely be constructed to go around complete layout.
Lionel “0” garage as some know requires some surface area. So the layout is as such, pretty much a rectangle. 8′ wide sides and 12′ front and back, with a 2×4′ opening in the center. All ply wood is 1/2″ thick, sieds are 4″x 1/2″ x 8′ pine and legs are 2×4′. Supported legs by running crisis-cross boards from center of under neath to main 2/4 legs. Wanted strong enough to support a 200 pound person, it’s a platform not easily moved by one person. Bolted the sections together, after leveling the ends of each section to make a more even train track run.
Being 71 I just can’t handle the small HO any longer. Most of the trains, track, just about everything dates back to the early 50’s, of the Lionel I have, some back to the 40’s. Wish me luck . .
Bumper
Suggestion for Stuart, something to try before changing your gradients.I run 3rail O gauge with1:36 gradients. I overcame the problem by separating the flat,uphil and downhill sections and adding resistors in series with the power feed to each section as follows, no resistance to uphill, 2ohms to flat sections and 4ohms to downhill using 10watt wire wound resistors. This gives me max power uphill with slightlly less on the flats and slower{braked}downhill without the need to constantly change the throttle. You may need to experiment with the resistor values and power rating for your layout, but these work fine on the larger gauge.Good luck, Bernie,[Gold Coast, Australia]
Dave, as always the master modeler ! Incredible layout, awesome detail and now SMOKE ! I enjoyed this video almost as much as the great train wreck where you had fire and rain… Lol… Keep it up, love your posts. I live in Ky and model the 1950’s steam era. Learned a lot from your videos.
Darrell Smith
Stuart , Thanks for the Many Idea’s you provided me tonight on hiding a Hatch on my layout.
Stuart and Grant – very nice modelling. Interesting to see the Japanese layout.
Best to all
Brian, Wokingham, UK
Stuart,
I like what you’re doing with the station area. To echo what Bernie wrote; I had to tame a friend’s layout to keep the trains from running off the track on the down hill. He had a curve at the bottom of the hill! I choose to use a sliding reostat. Which gives the ability to adjust the resistance without rewiring. It’s especially helpful when switching engines.
Grant, great job on the water fall.
Bob in Horse Country NJ USA
Pretty neat looking? I hope mine comes out that good.
Well done Stuart. I love the detail and capture of the English scenes. Well done!