Eric’s been back in touch – he’s added to the N scale mountain layout plans on the blog:
“Hello Alastair
Part two is in the books, sorry for the little delay between part 1 and 2.
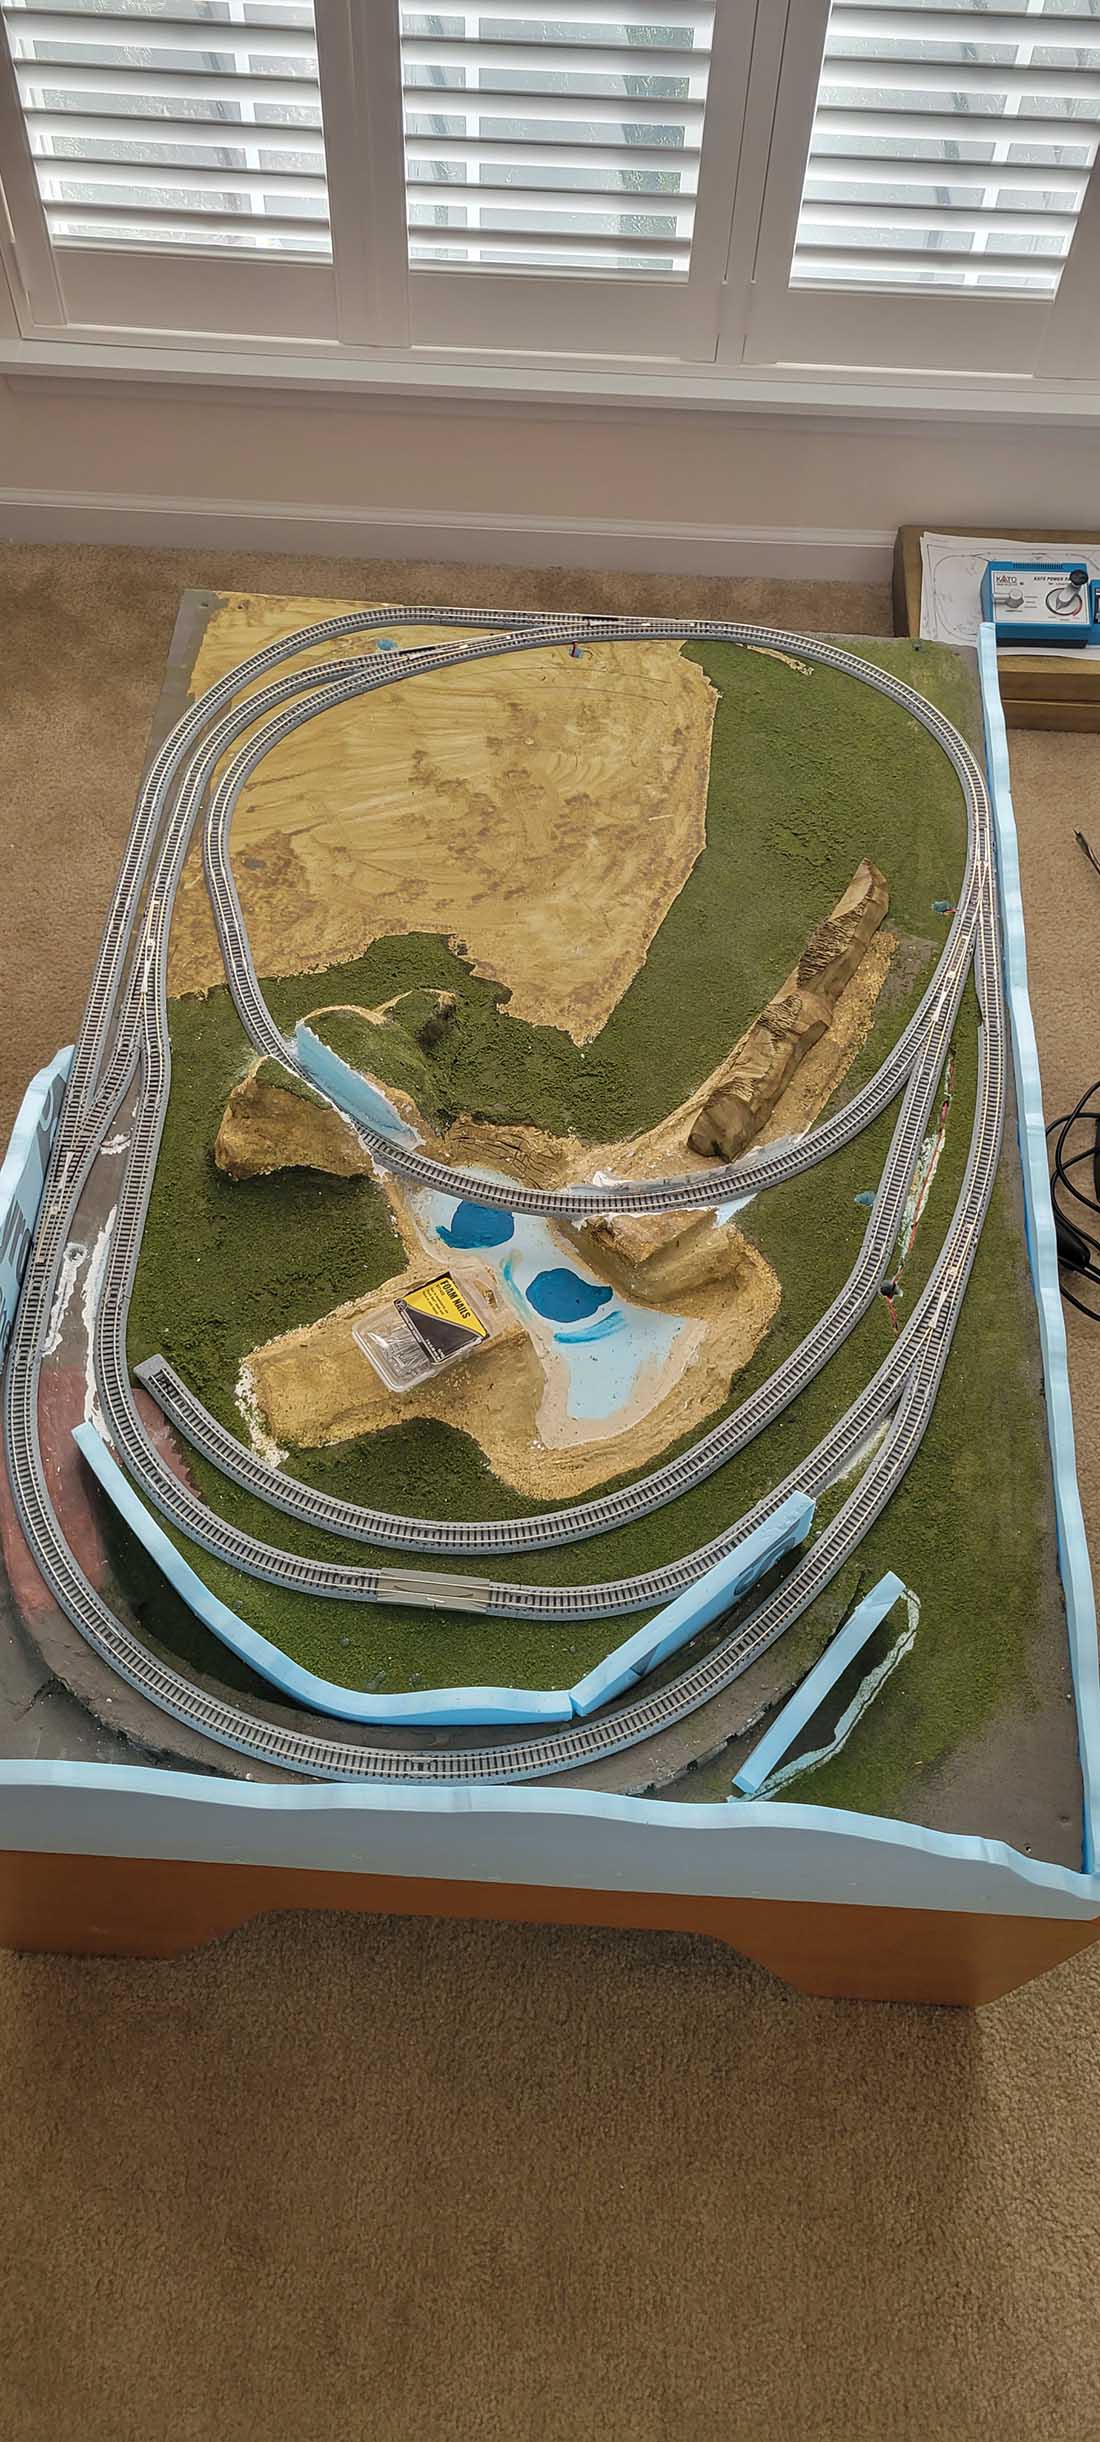
The layout had some changes happen in part 1 with a minor track design . That change lead to the carving through a hill to get another loop in. O yeah it is busy. Got to remember the layout is called ” Flying By The Seat Of My Pants ” and measures about 36″ x 48″ . You my of noticed , it is in my office.
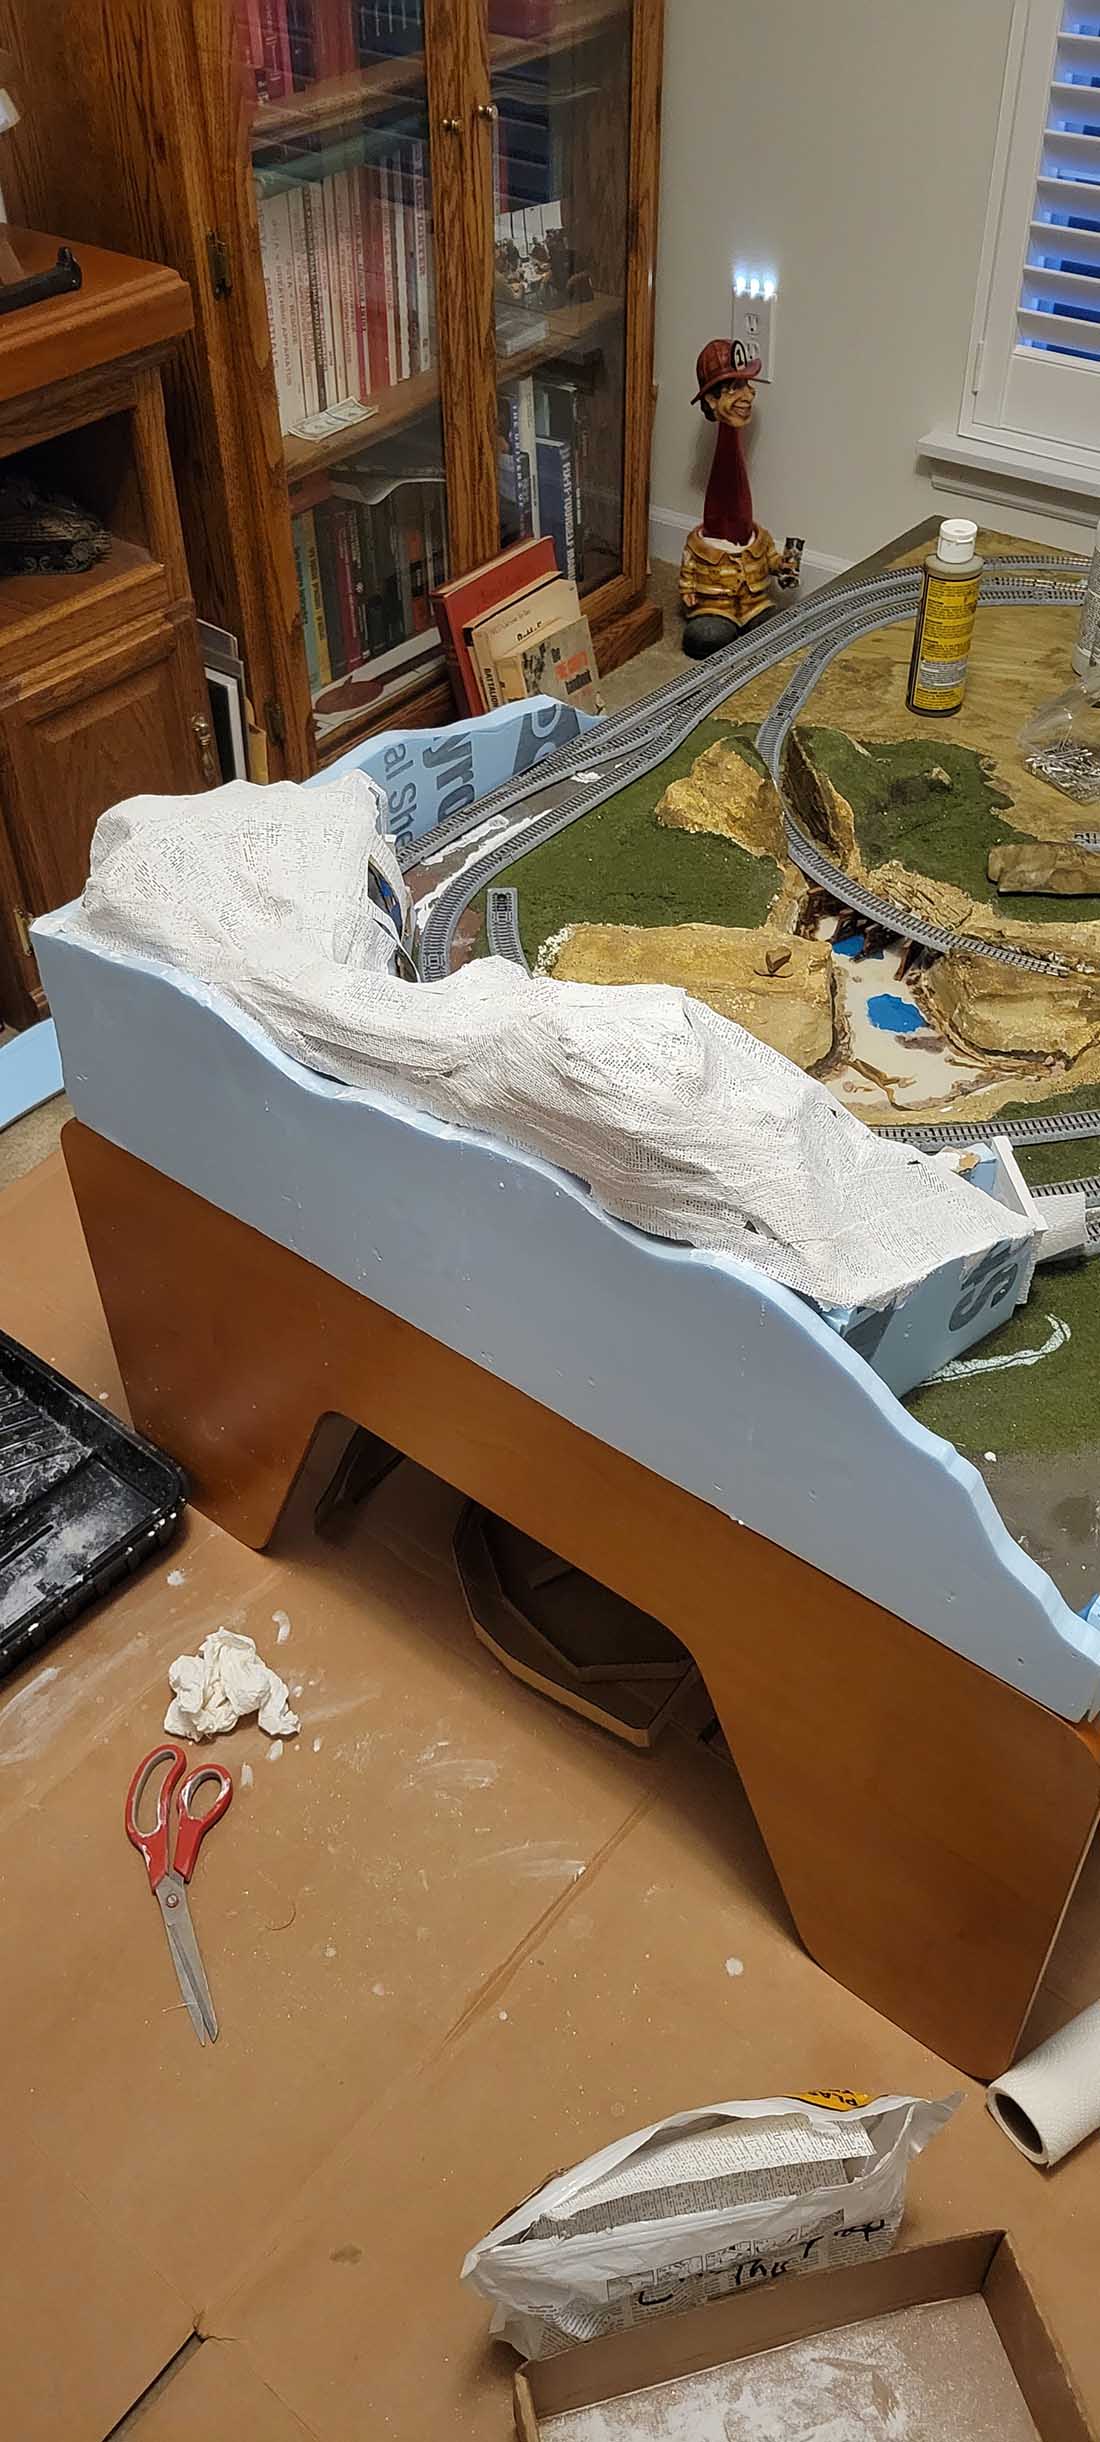
So the next set of pictures is the construction of the mountain tunnel.
First vertical foam board was put around the outer edges. These were put in place and then a hot wire cutter was used to shape heights needed for the contour.
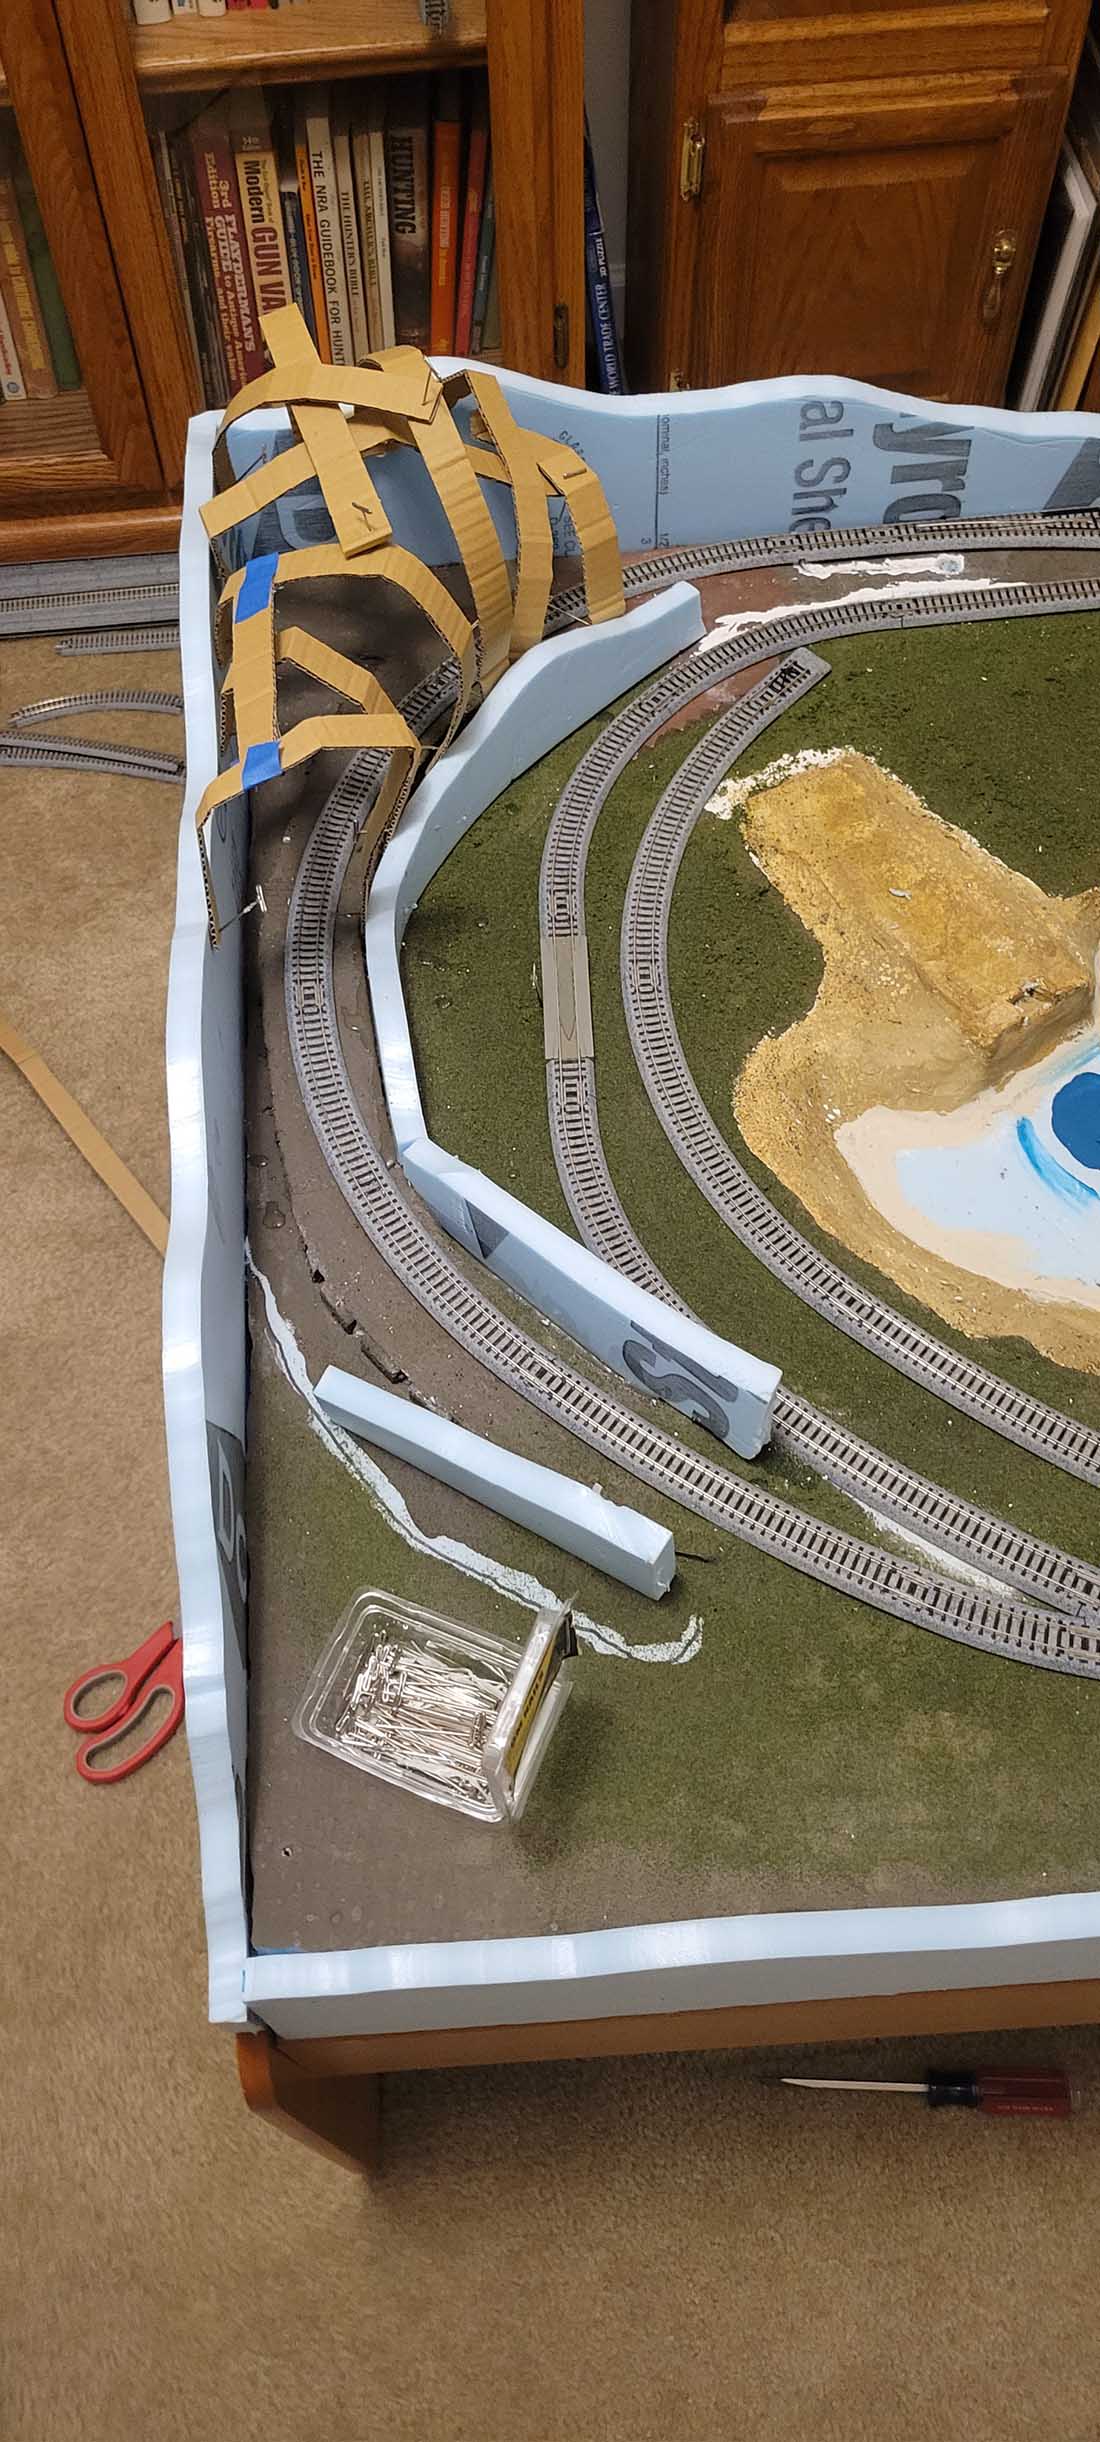
Second the inner or lower part of the mountain was put in place and cut into shape.
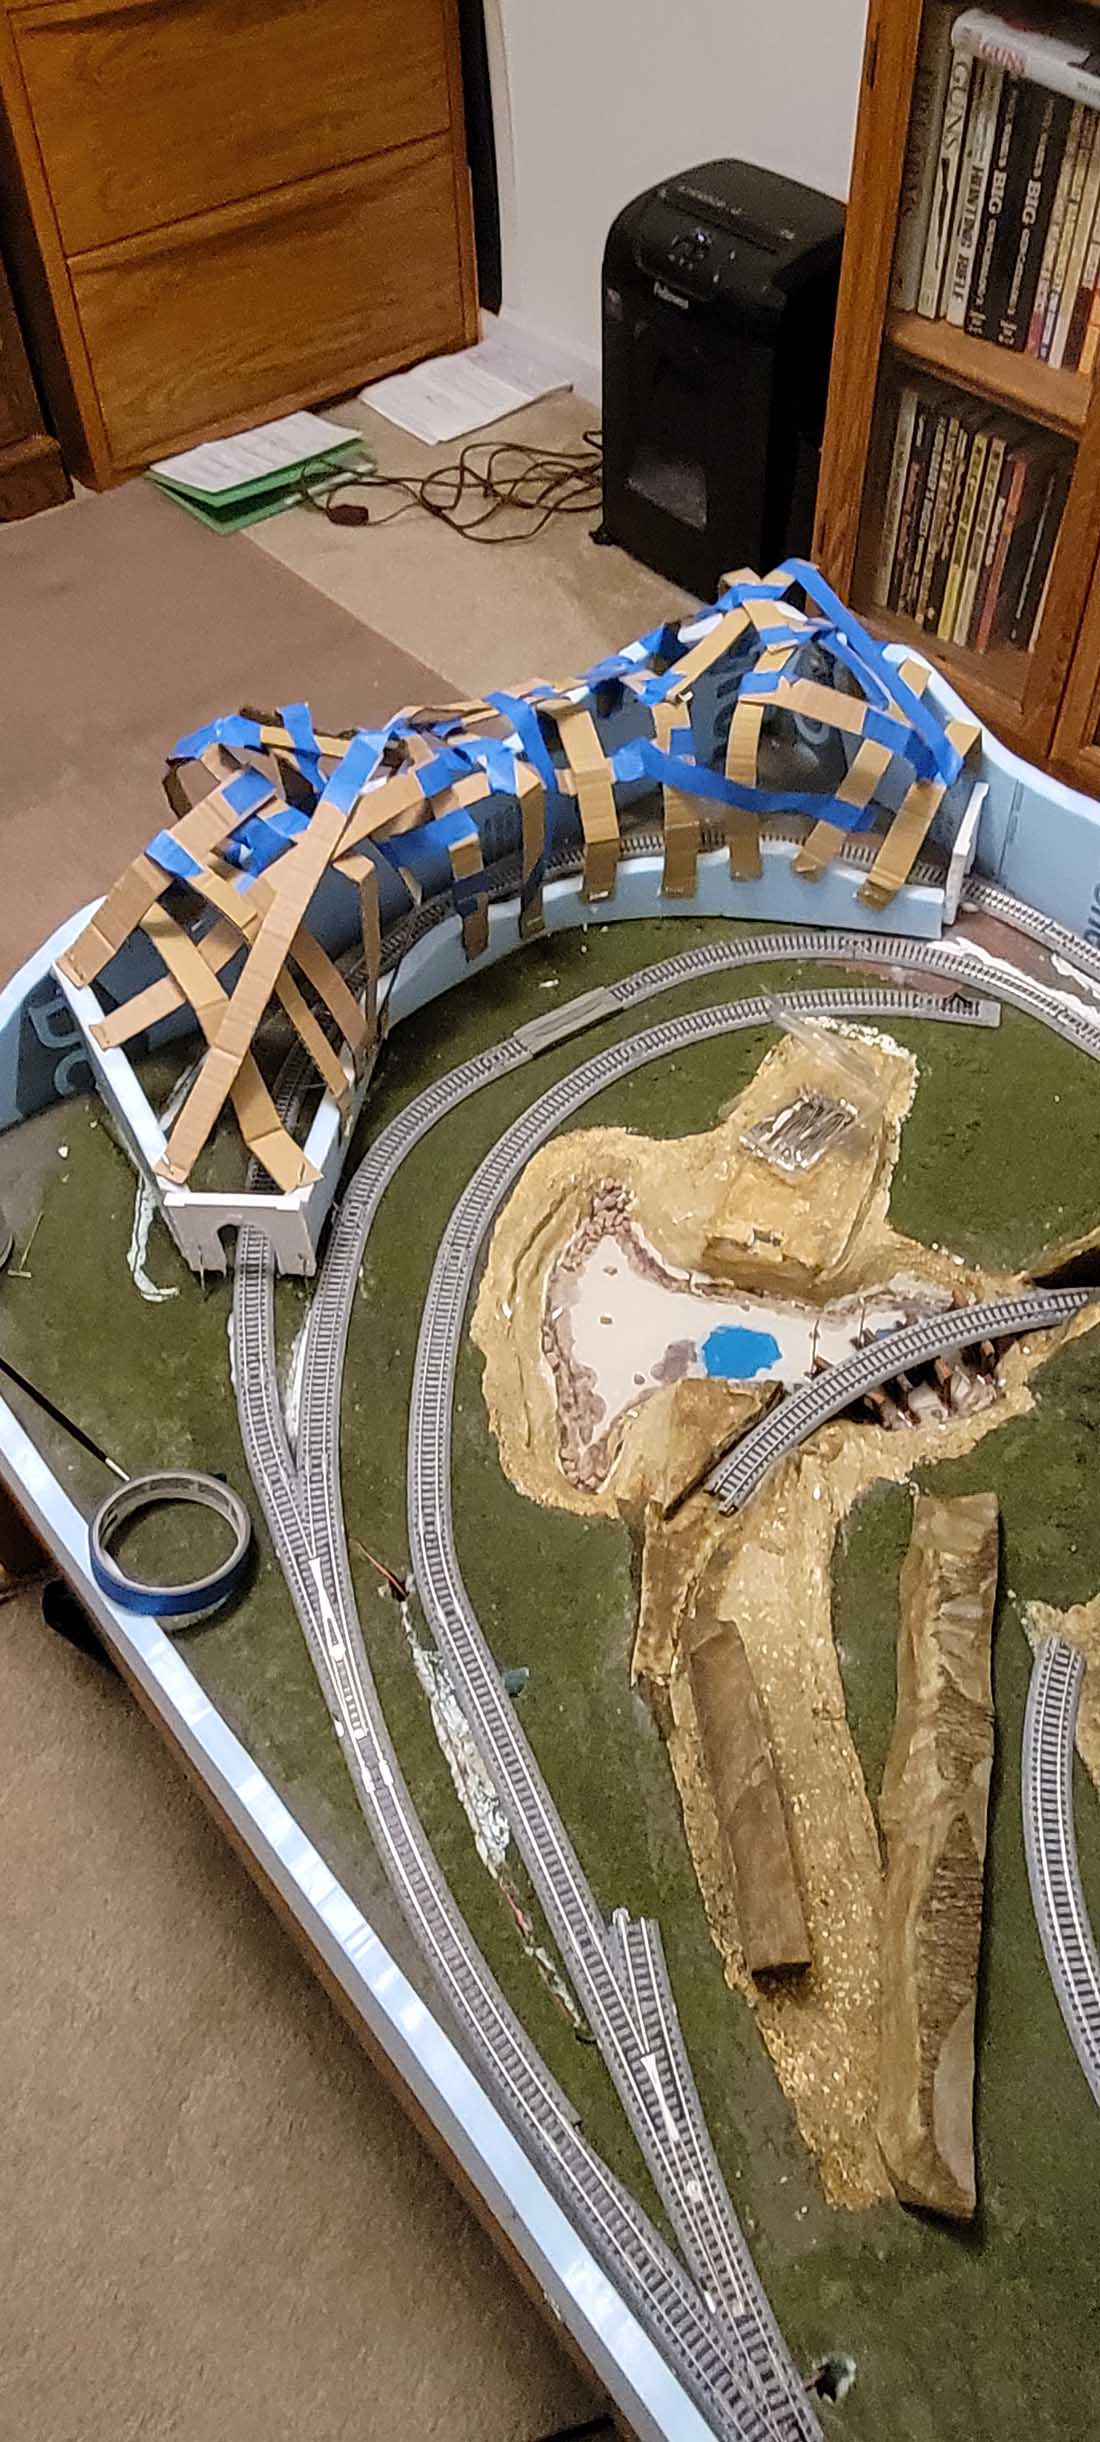
Then strips of cardboard was weaved from upper to the lower and held in place with tape, pins and staples.
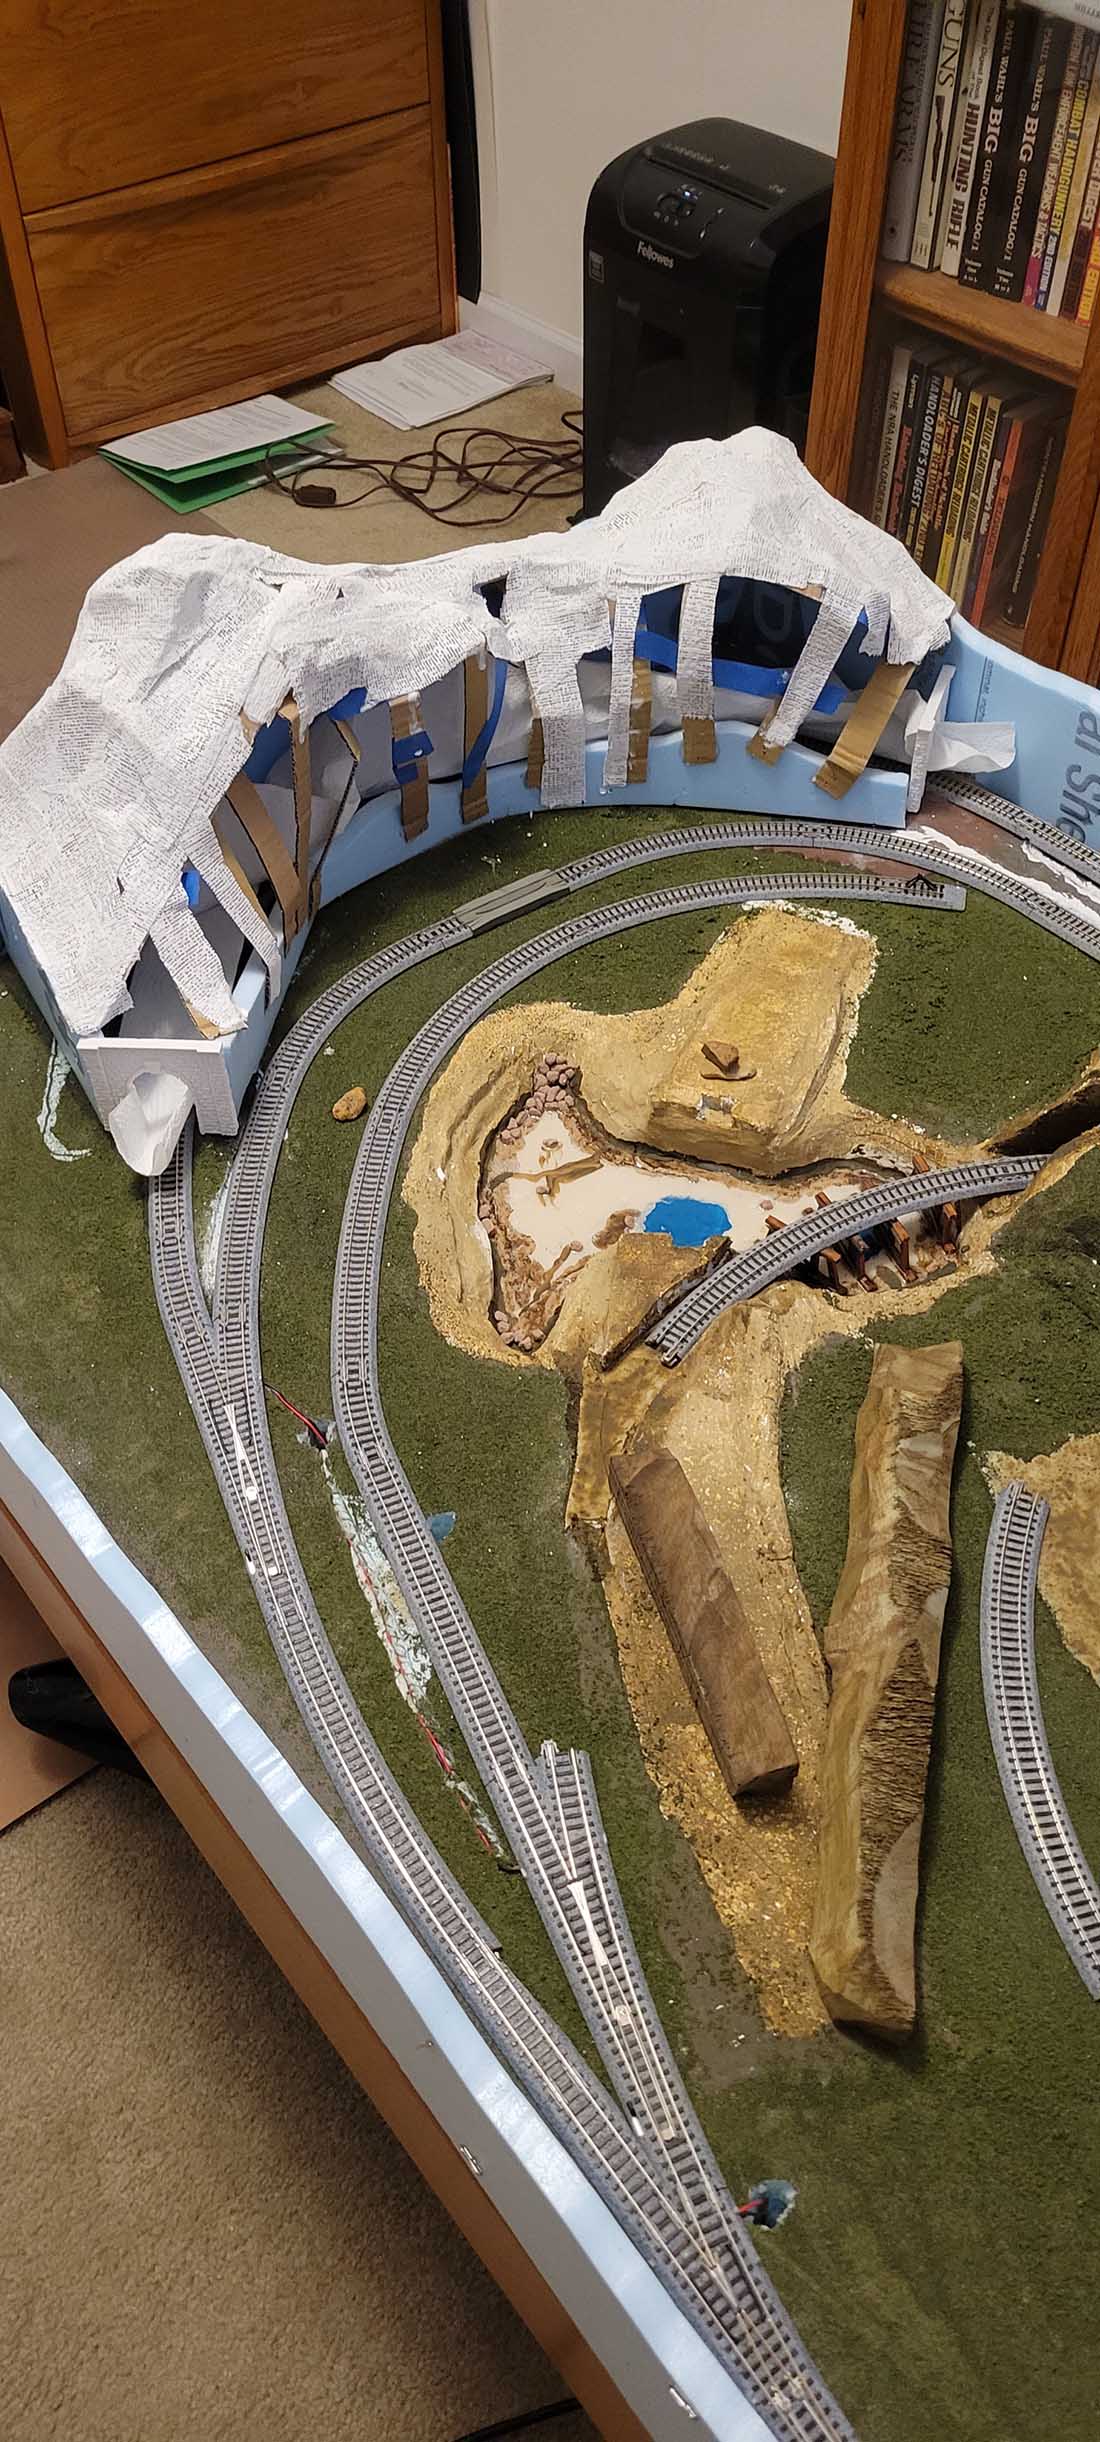
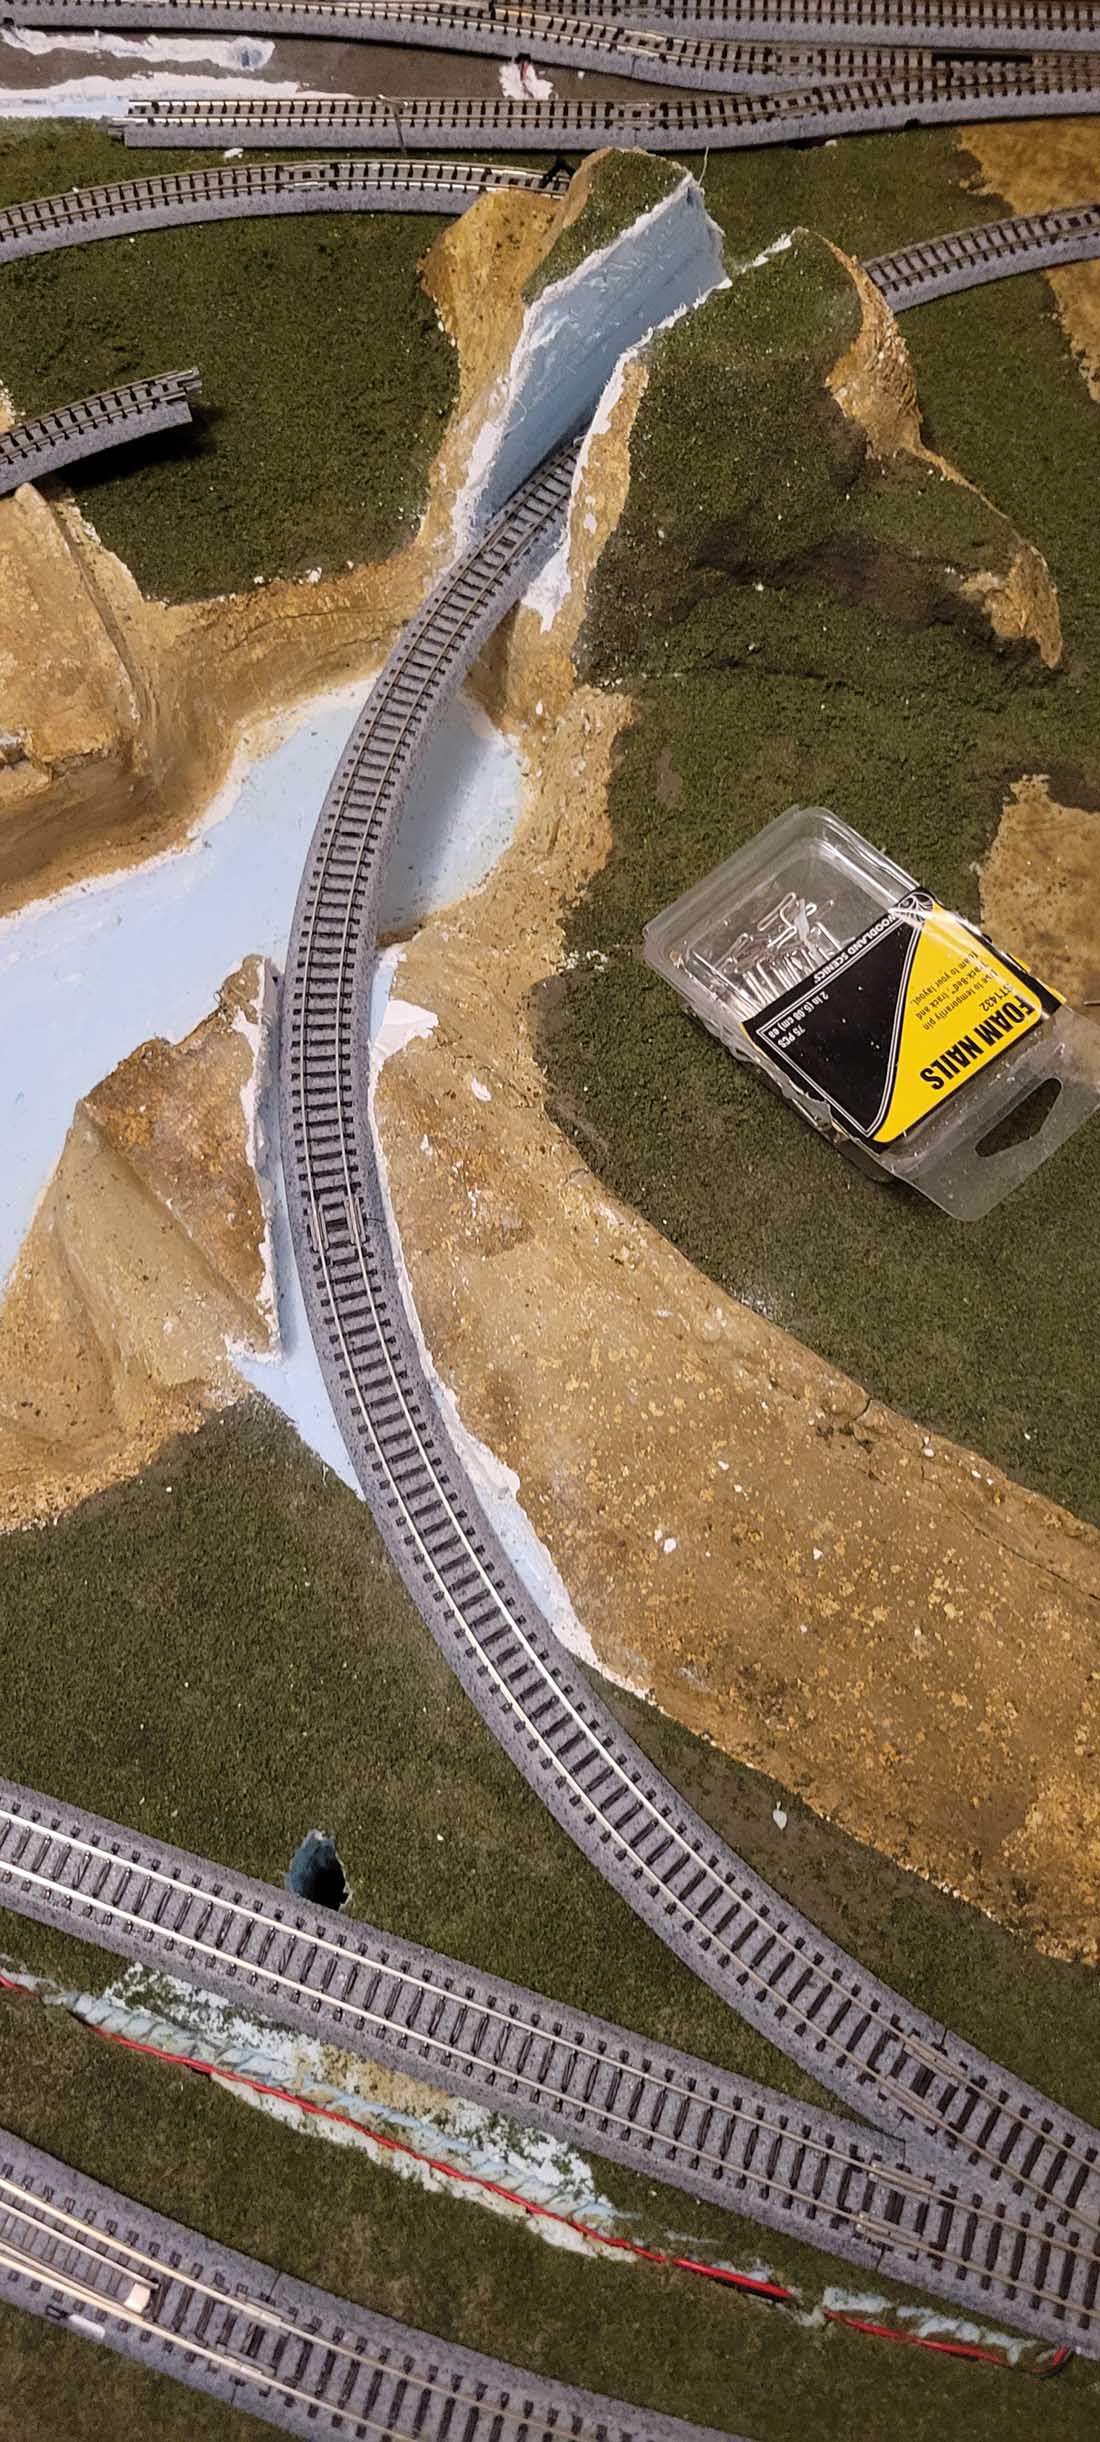
Then I began covering with Woodland Scenics plaster cloth. The cloth layed over the cardboard which landscaped the look of the mountain. Some adjustments were made around the entrances to adjust for the portals.
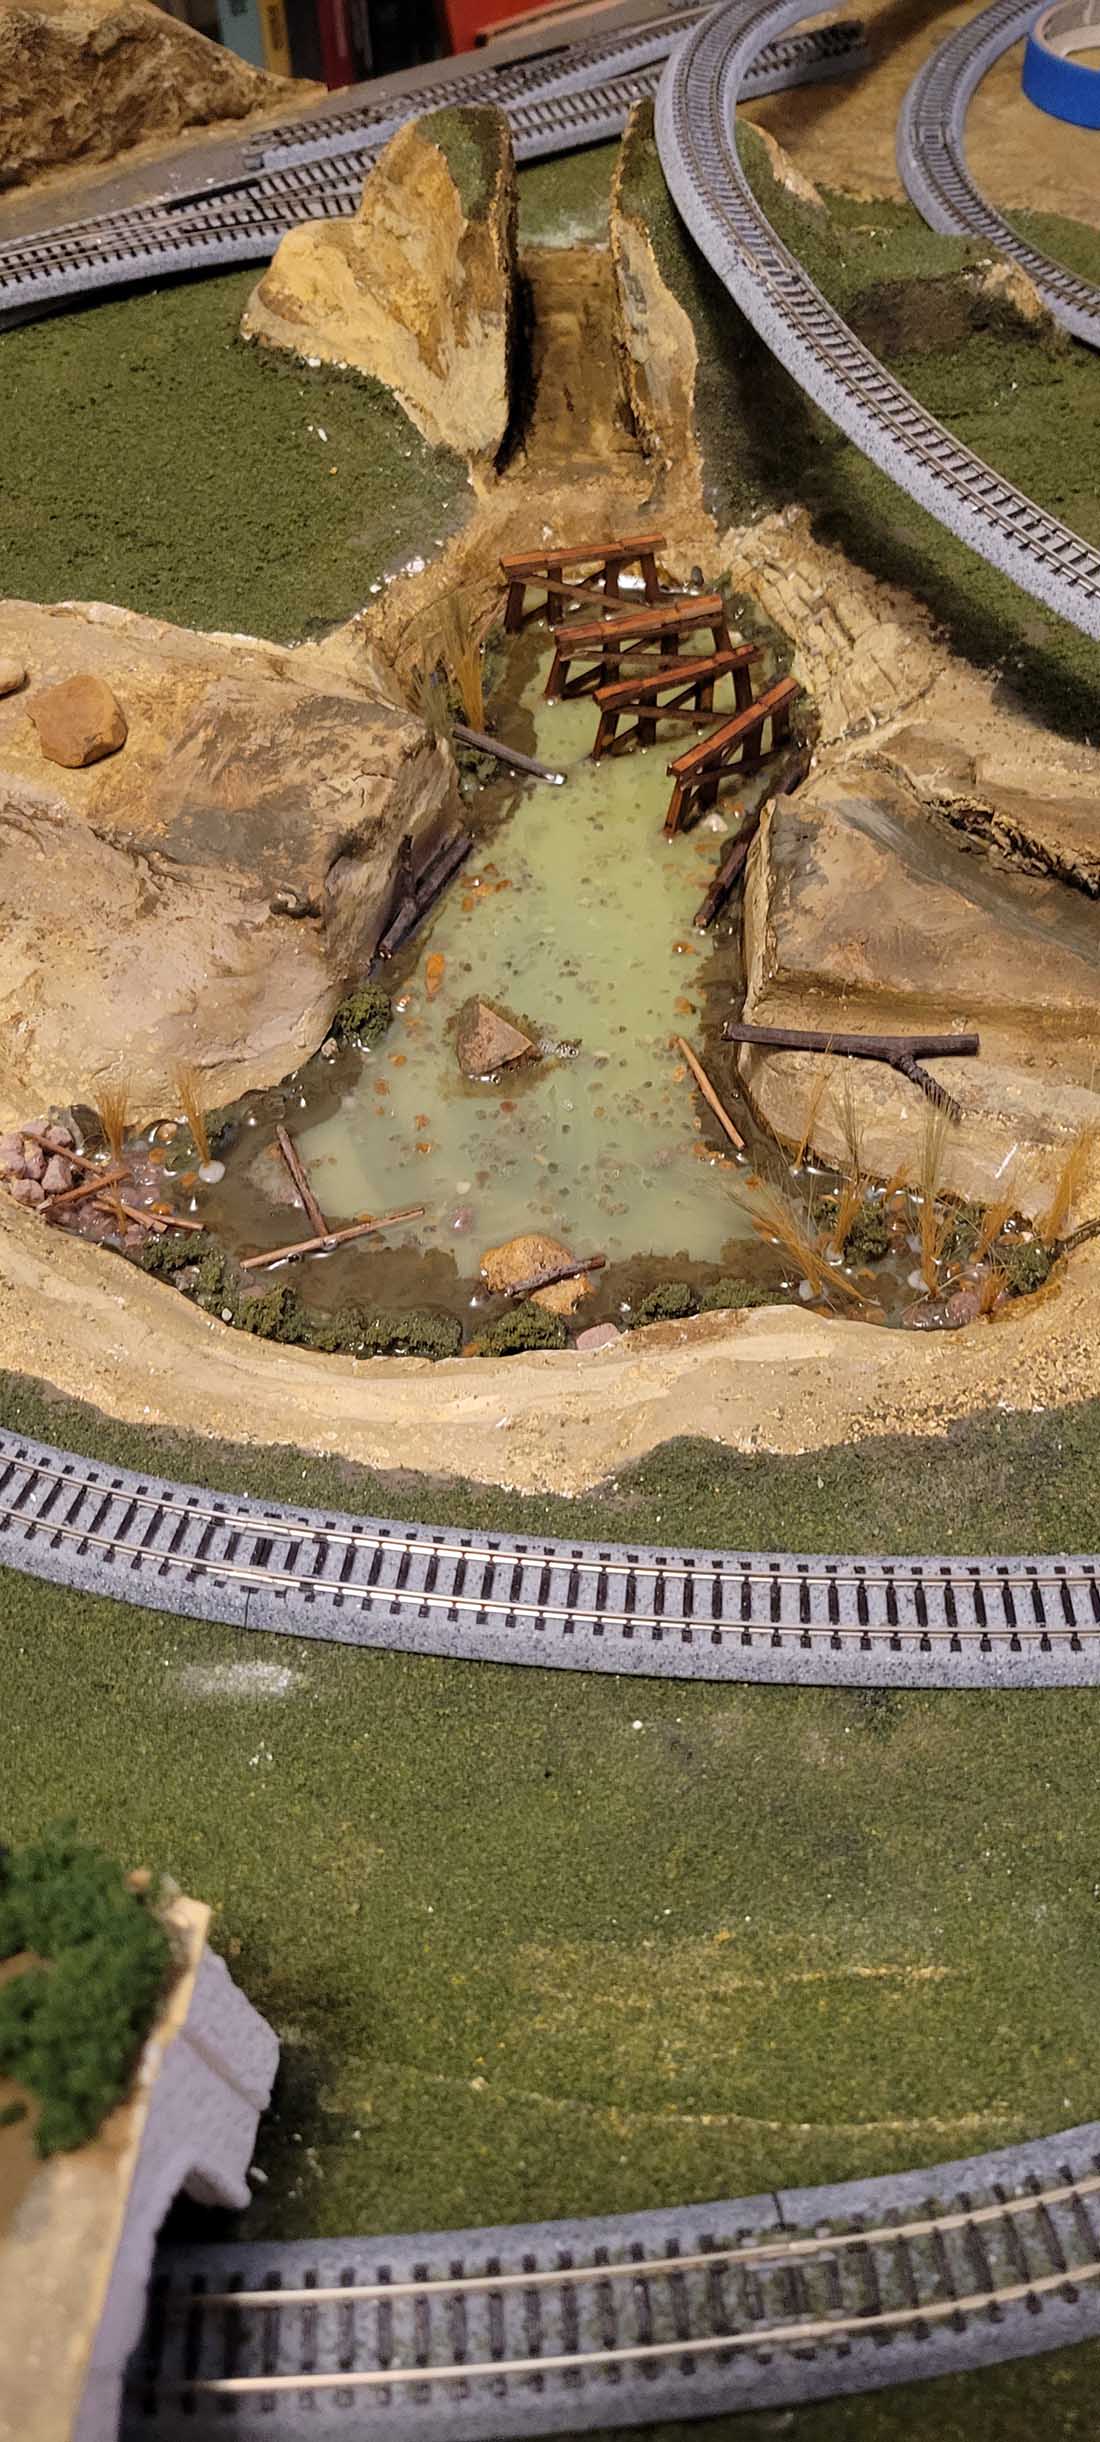
In the meantime some coloring was done and a small lake/pond was poured with a truss bridge. Landscaping began around the pond and also other minor things like cutting a opening in the back side of the mountain for a derailment if any.
Part 3 will be coming showing the mountain as it comes to life, I think.
Thank you Al and all your followers for things I have learned and hope that I have helped them also.
Eric The Retired Firefighter from the St. Louis, Missouri area.”
A big thanks to Eric for sharing his N scale mountain layout plans – Eric’s last post is here Simple N scale.
The mountains reminded me of Gregg’s: Mountains from plaster paris.
You may also remember him from his HO scale stuff too: HO scale town.
Now on to Steve:
“Hi Al, Thanks for the work you do. I am an avid follower.
Here is a little circuit to connect further led’s in parallel that some folk may want to use to automatically illuminate LED’s at night (ie the lights only illuminate when room lights are turned off ie night running).
NIGHT LIGHTS
The circuit is a simple transistor, which is held OFF in normal light. If the light goes dark, the transistor bias changes, so that the transistor turns ON. This is achieved by a Light Dependent Resistor (LDR).
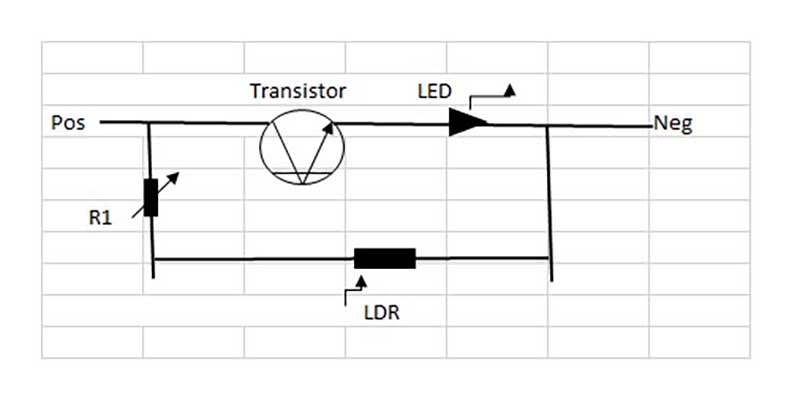
I tested the circuit with two common transistors, attempting to achieve an output of 1.5 volts, to illuminate a bank of 5 x leds. I would expect that many more led’s could be connected (be aware that each led takes 10-20mA from the power supply). The table below shows the values discovered:
Transistor Pos R1 output
2N3055 5v 15000 ohms (15k) 1.5v
2N3055 12v 33000 ohms (33k) 1.5v
BC547 5v 10000 ohms (10k) 1.5v
BC547 12v 47000 ohms (47k) 1.5v
The values shown for R1 are approximate. R1 should be a potentiometer (or trimpot), so that the output can be adjusted more accurately (simply use a trimpot at least 2 times the values above).
All parts are readily available from ebay etc, or electronics retailers. The 2N3055 is a power transistor, and the bc547 is a small typical size (500 mA). Both are around $AU 1.50.
Regards
Steve (Sydney)”
That’s all for today folks. A big thanks to Steve and Eric.
Please do keep ’em coming.
And if today is the day you poke boredom in the eye and join in the fun, the Beginner’s Guide is here.
Best
Al
PS Latest ebay cheat sheet is here.
PPS More N scale layouts here if that’s your thing.

And there’s the Silly Discount bundle too.

2 good tips this A.M. The office RR is pure genius, fits in as a high end furniture piece. So you can go straight to work… eight hours working with trains and commute directly after to kitchen for supper.
The schematic for building variable intensity lighting is in itself “the pastime”. Must of found someplace Thomas Edison’s work dealing with the light bulb. Can the same thing be done with photo-eye? Like the direction this is going regardless.
rich, regarding
Doesn’t look like your trains are going to fit through the tunnel portal. Looks kinda close.
the Critic
Nice work on the mountain area. Good to have your trains be able to disappear on a small layout. Even for just a bit.
Steve, normally a transistor has 3 leads, (input, output, and trigger, where does your trigger wire go on your wiring diagram?
To Jim, good valid point. Is it possible a large enough forward bias is generated for transistor to fire, gate eliminated. Got me…
R
i have used the left over cardboard tirck before, with paster of paris. cheap and not to dofficult. nice layout.
nice layout
Eric, nice picture illustrations.
My old school USAF electronics I learned transistors have 3 legs. Emitter. Collector. Base. I don’t see the base leg connected. So how will this work?
I am thinking that you still need a resistor in series with the LED. A transistor when energized has little resistance.
It would seem just using a variable resistor in series with the LEDs would be a simpler circuit. That way you just use the variable resistor to adjust the voltage to the amount of LEDs in use.
Eric On your first 3 or 4 pictures looks like your tracks are stuck between a rock and a hard place. They can easily be connected for continuum.
Jim and William. The ‘base’ connection has been lost in transit. It connects between the LDR and R1. I will resend the cct. If the output is adjusted to 1.5v, there is no need for another resistor in series with the LED’s.
Steve White (Sydney)
I have a comment and a question. First, the comment: I love how you took step-by-step pictures of your project. I am storing this one in a safe place so I can follow with my own layout…
Now the question: Along the back side, you built a mountain with track running through it. what happens when you have to do maintenance on the track or a train jumps track? Just curious how you are planning for the eventual….