Jim’s been back in touch with his N scale steam layout:
“Hi Alastair,
I modeled the Pacific Northwest in the 1950-1970 years, so I could include steam engines authentically.
Since getting the layout far on the road to what I had dreamed of, we moved from Washington State to Florida, and the layout didn’t come with us, though I have everything except the scenery, of course.
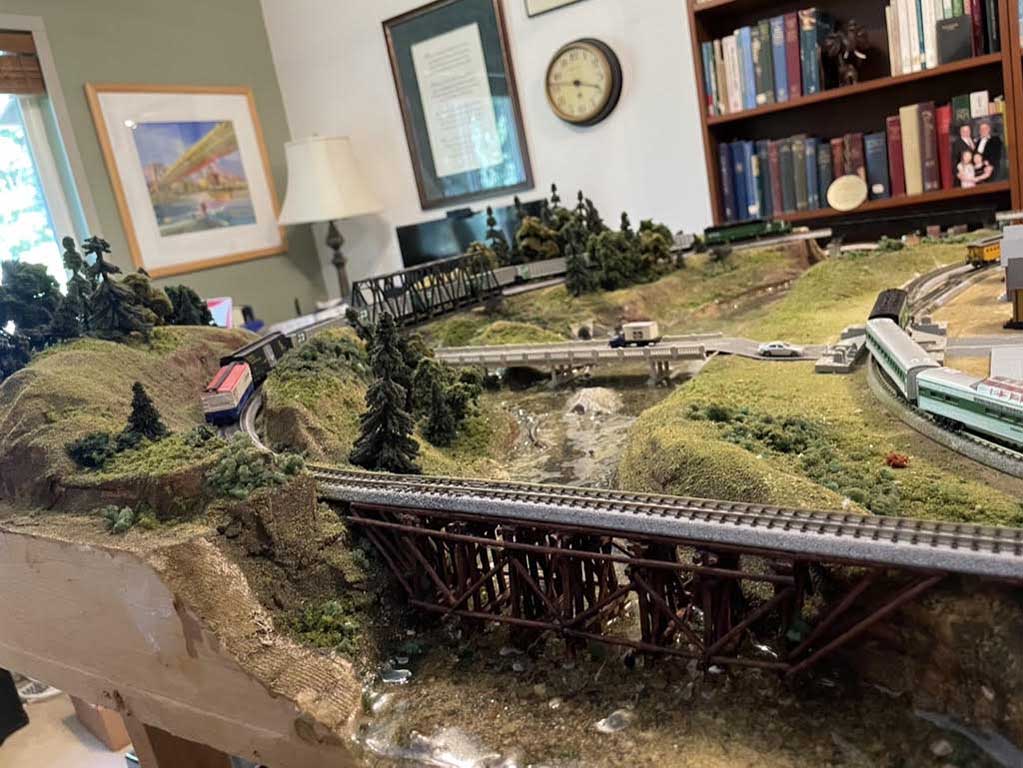
Here is the up to date picture of the hills and river that I showed in progress in my first post (in which I sent pics only and NO explanation—I apologize, everyone).
I built the trestle from scratch using small dowels and popsicle sticks I bought at a hobby store and am very pleased with how it turned out.
It was fun to build. All the trees were purchased, but in my next layout, I’ll make them using the great advice from other modelers on this site.
I am pleased with the way the river turned out, but I made a rookie mistake trying to make the river look deep by adding more and more of the water product to it. Total cost of all that water? About $150! Live and learn.
Another rookie mistake: I built this layout on 3/4 inch plywood, and to make the river be below the level of the town, I had to add more plywood about an inch below the rest of the layout. It worked, but was really kind of a mess. In my next layout, I’ll do what all the rest of you sensible folk do and put some kind of foam on top of the plywood. Sheesh.
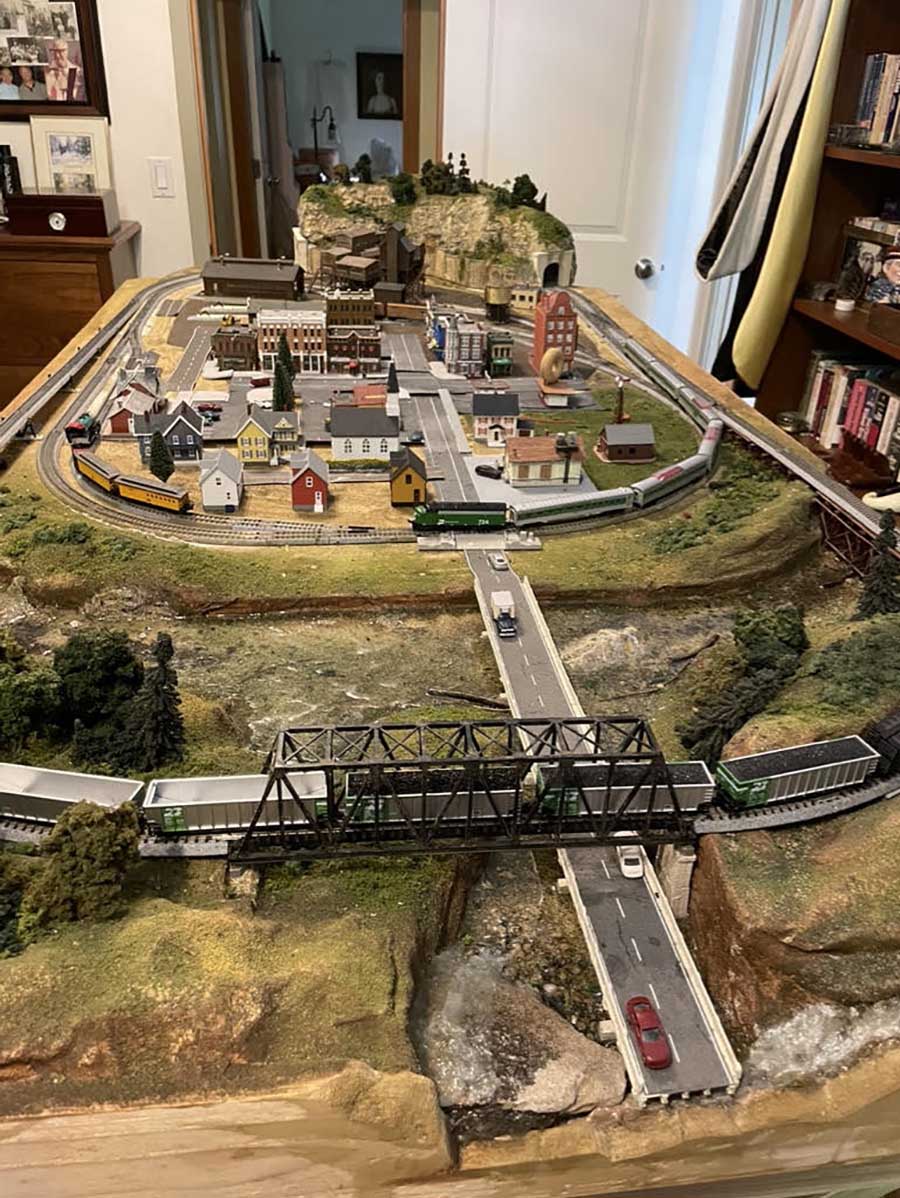
This is the whole layout, from the river end.
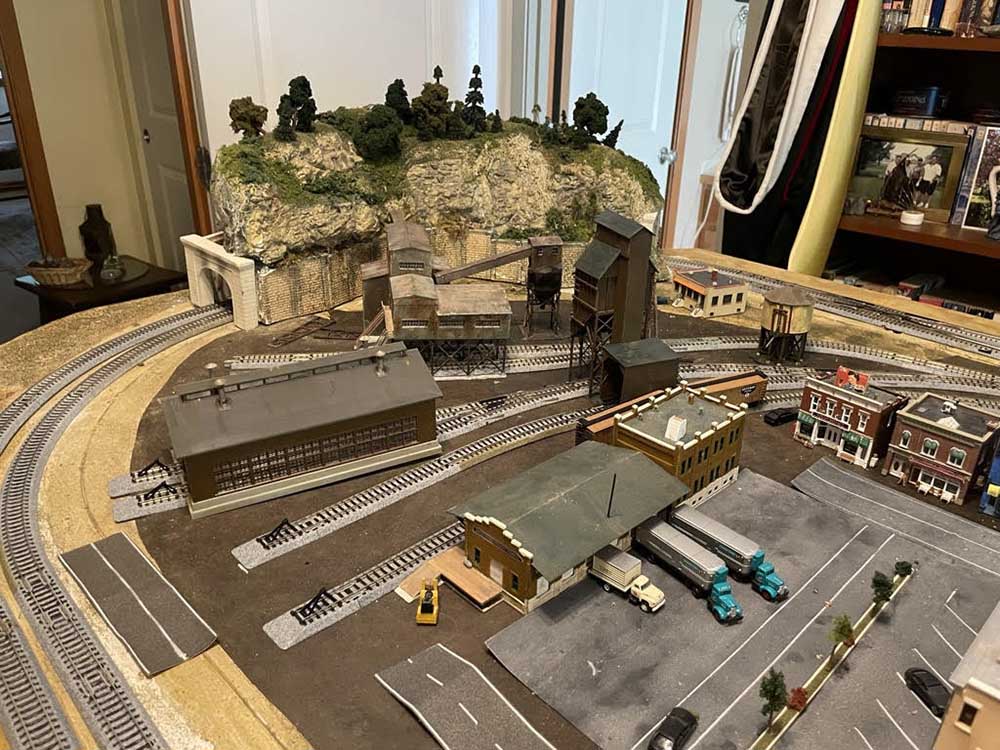
This is the “industrial” end of the layout. The road that was intended to run along side it, to the left of the photo, never got made.
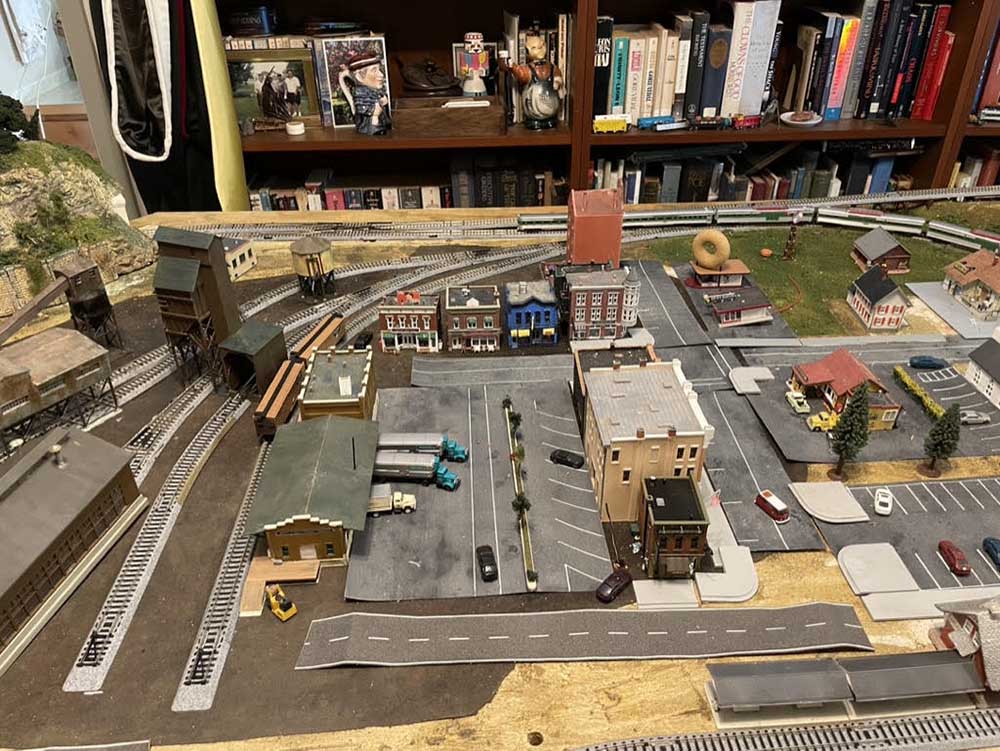
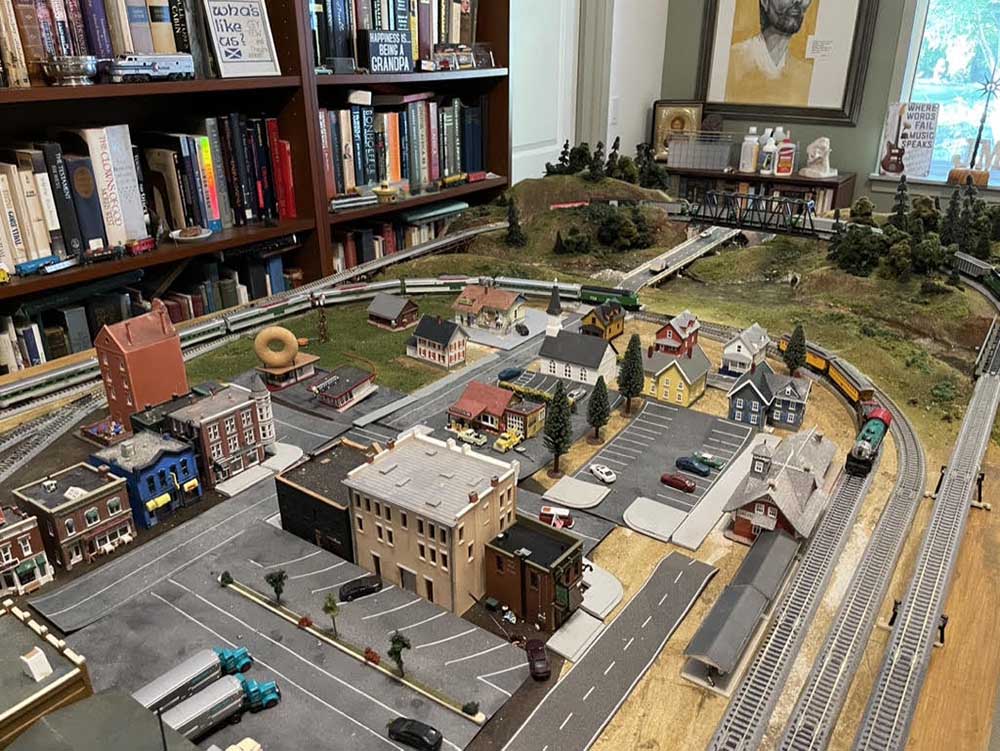
An overview of part of the little town and the business part of the layout. You’ll notice that the roads and the parking lots aren’t glued down—I wasn’t ready yet to commit to that step—and then we moved! Main Street isn’t captured very well, and I never took a picture of it, but its the street with the donut shop. to the far right is the church parking lot, with a milk farm above.
A view from the town to the river and hills beyond it.
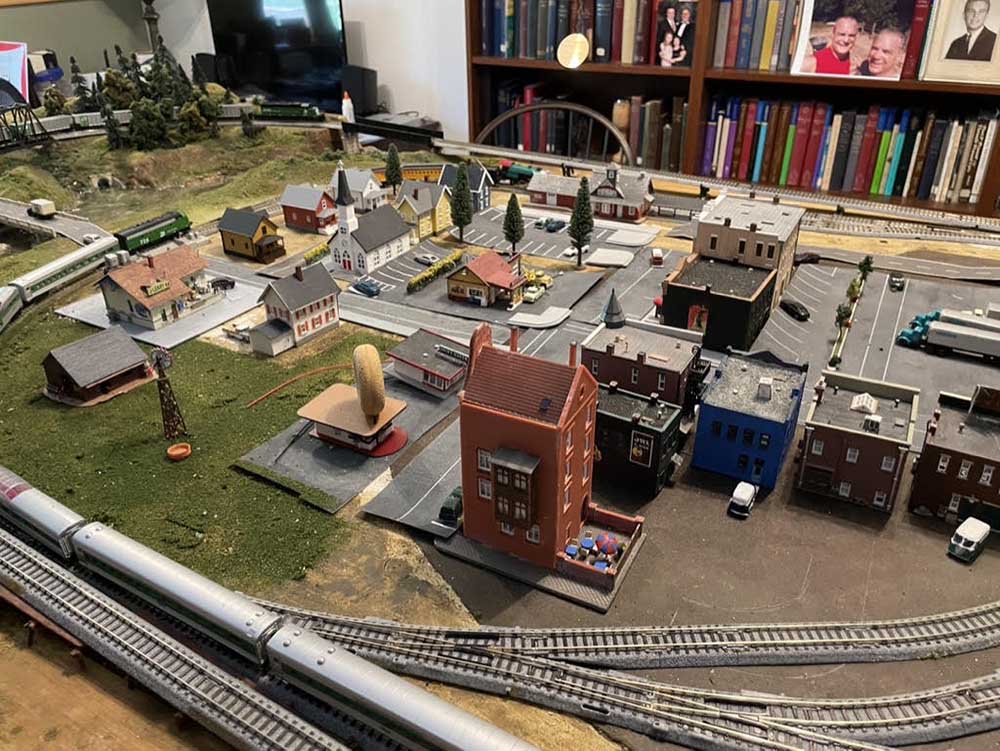
Another view of the town, and once again, I didn’t shoot the store fronts of Main Street! It’s really nice and I’m proud of it, but can’t show it. On theleft is the milk farm and farm house and the milk store.
Notice the black paper that is under the buildings and roads. It’s roofing tar paper; I painted several colors of diluted paint on it to age it and make it look like black top—greens, browns, yellows, anything to keep it from looking uniform in color. Then I glued it down.
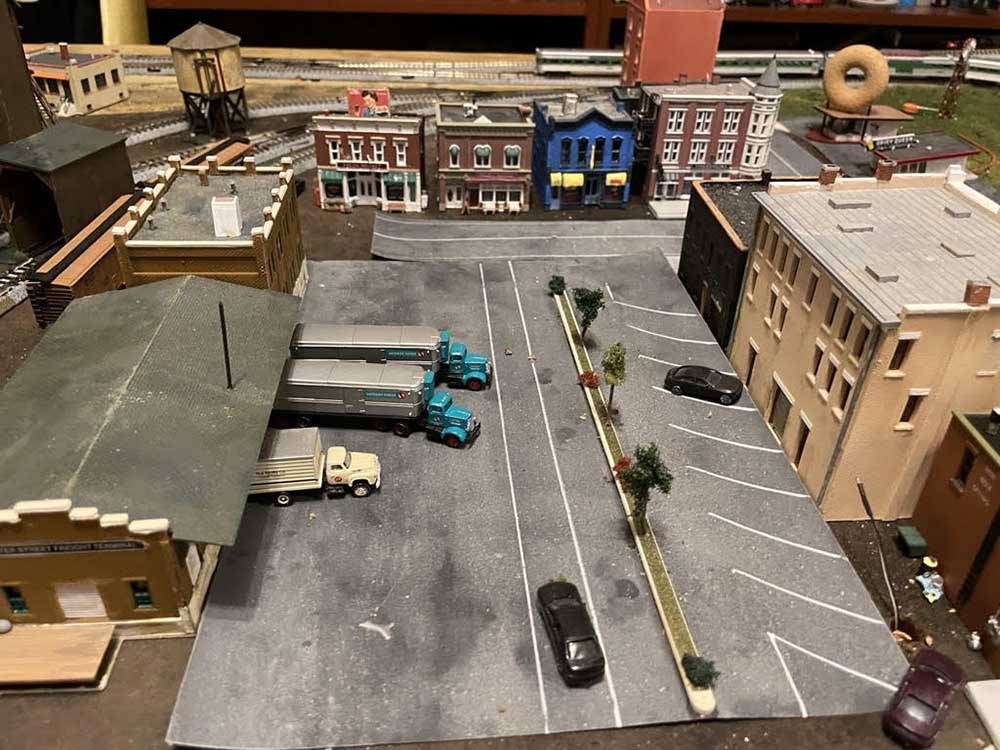
This is a part of the layout that turned out the way I wanted it to — though you’ll notice that the parking lot and the road behind it aren’t glued down. Again, not ready to take that step.
The parking lot and road are made from sheets of fine black sandpaper washed with paint — I just experimented with different mixtures of white wash and a very little bit of dirt color until I had a result that looked like asphalt to me, and then I brushed it on and rubbed it gently with a cloth to make it look worn, and to keep it from looking uniform.
The stripes for the parking spaces and for the roadways were made with a pen that dispenses white paint. Measuring was a stinker for the parking spaces, AND it was hard to get the stripes right the first time. I worked really slowly after a few attempts that went badly.
All the buildings were from kits—a very expensive way to go. Next layout I’ll try some of Al’s offerings.
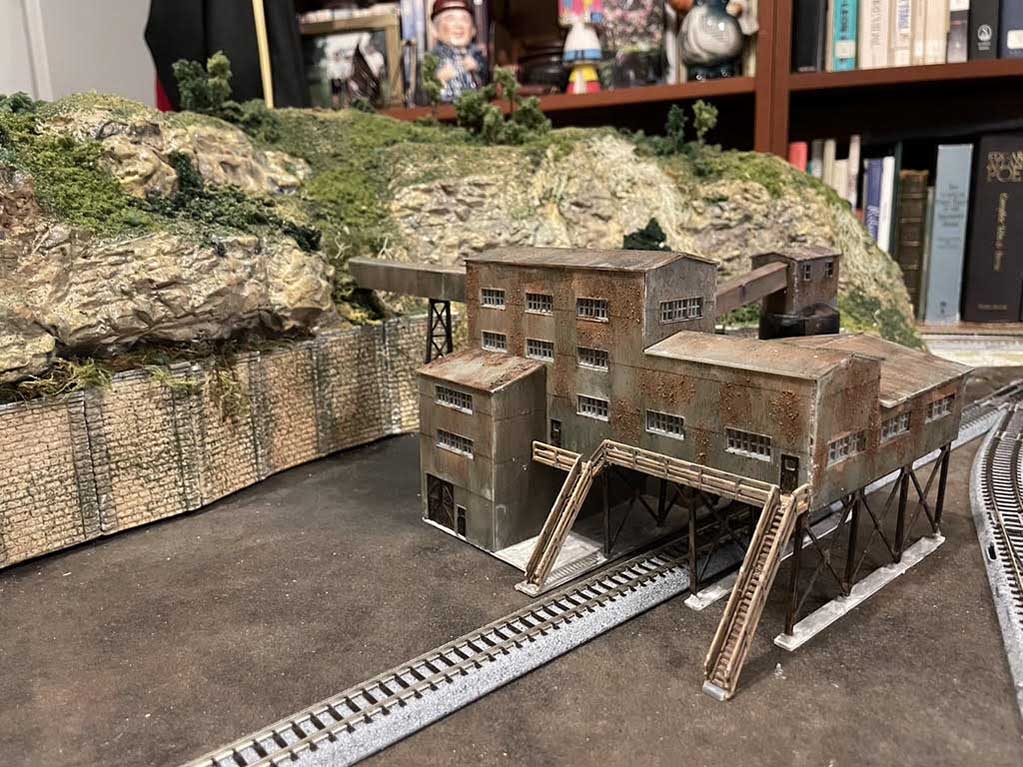
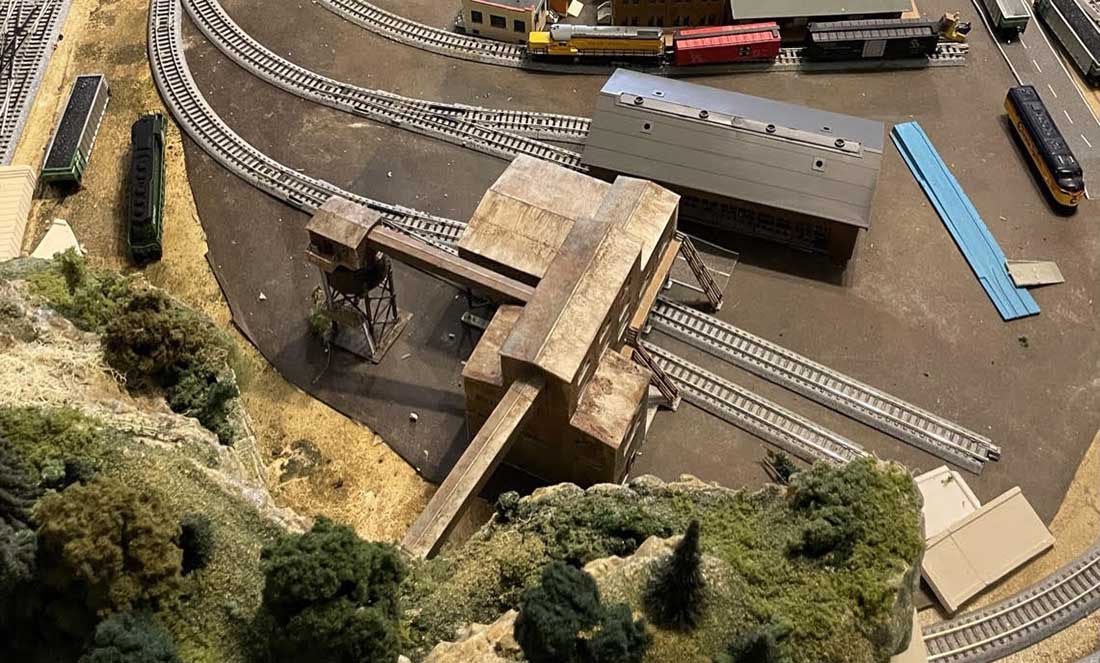
Last are two pictures of the coal mine building and the hill behind it. The kit was made of light gray plastic, looking like a brand new metal building. I weathered it with several layers of wash, including black, earth color, rust and a mix of a few browns and so on.
Then I used a tip I got, maybe online, suggesting that cinnamon would make a good rust color on a model. So, I went to my wife’s baking shelf, got cinnamon and applied it. It worked, and added a kind of very small texture that I find very pleasing.
The hill/mountain behind the mine was made from crushed newspaper and plaster strips—the way I prefer to do landscape (hmm–the only way I’ve ever done it, actually).
The rock formations were made with forms bought from Woodland Scenics–I bought each of their two sets—as well as all the ground cover materials. They work great. The key to it looking real is taking lots of time to look at real scenes, watch lots of YouTubes, get lots of tips from Al’s fans, and develop layer after layer with different colors and textures.
This hill was made for a previous model, and so doesn’t really look realistic—it just kind of juts up out of nothing. But, I really like the way it turned out, and I needed a tunnel SOMEWHERE, so it went on the layout.
Thanks for looking, and thanks for all I’ve learned from Al and everyone else. I’m hoping to start a new layout with my 10 year old grandson in the fall—after getting the garage in order first.
Like all the rest of those who receive your blog I am very, very grateful to you – and to all the other modelers you post – for all the good advice and beautiful work you pass along to us every day.
I read your blog first thing every morning!
God’s blessings on you.
Jim”
A huge big thank you to Jim for sharing his N scale steam layout.
Sharing the mistakes we all make is just as important as sharing the wins.
Hope you enjoyed Jim’s post as much as me – I think using cinnamon for rust is very clever, it really looks spot on.
Jim’s pics made me think of Tom’s post: 1950s N scale.
And Harry’s: N scale layout 32×64.
That’s all for today folks.
Please do keep ’em coming.
And if today is the day you decide to stop dreaming and start doing just like Jim, the Beginner’s Guide is here.
Best
Al
PS Latest ebay cheat sheet is here.
Need buildings for your layout? Have a look at the Silly Discount bundle.

Love that donut
with the donut this isnt supposed to be springfield, where the simpsons live is it? just kidding. love the bridges the donut is ok too.
with the donut this isnt supposed to be springfield, where the simpsons live is it? just kidding. love the bridges the donut is ok too. like the mountain too.
Jim that is a nice looking layout , donut is too cool . Very nice job
I think your layout is great! The cool thing about modeling is that you can always rework things that you don’t quite like. As far as your mountain jutting up out of nowhere… it’s okay. If you wanted a tunnel then so be it. Just say that there was a huge granite boulder in the way of the train and the Army Corp of Engineers had to come out and blast a tunnel through it! (At least that’s what they call them here in the States). Someone said they couldn’t tell if my layout was a town that needed a railroad or a railroad that needed a town. Either way, it’s fun watching the layout take shape. Great job Jim!
Jim….. great looking layout. Great job in the bridges. I also like the idea with the tar paper for the street pavement. I have been using black sand paper.
Jim
That sign says it all ” Happiness is being a Grandpa”. What better way to interface with your Grand kids than creating stuff for a model train layout.
What a wonderful submission, great layout, a message for us all, and hopefully a future thought forthcoming.
Henry Ford, creator of modern industry, said “Success is the sum of your failures”. And my take is If you aint messing up, you aint doing anything.
Big Al
Muchos Gracias Amigo
I love the way u made the ravine so real looking . and it’s amazing how you keep your water way dust free . Your asphalt needs to battan down ,you can use water based adhievsive to do the trick spray or brush on.
The Critic
awesome layout, love the donut shop & am a big fan of passenger trains, but all the rest is just awesome. great work
Very nice job, Jim! Your idea about using painted sandpaper for the roads is quite intriguing. The effect looks very good overall. As for the previous comment about the mountain arising out of nowhere, you could place a piece of masonite across the back of the layout and paint a mountain scene to blend into your mountain tunnel area that would give the 3-D impact you are seeking. You certainly seem to have the modeling skills to be able to paint it! Well done and keep up the good work. Glyn
Great layout and I love the location. Rob McCrain
Awesome job!!! Your effort shows!
I’m in Florida also. Finding room for a train layout without a basement is hard. N scale works well. Nice job. Scratch building is my favorite thing to do also.
Hi I love the layouts and hints I bought the printable buildings but had not built them last week I looked on eBay and picked enough pre built buildings and a heaps of ho faller excetra train stuff for $150.00 plus postage most in original boxes
I admire Jim’s technique in creating terrain that is so very realistic and obviously done with great care and patience — a talented craftsman!
Jim… thank you much for sharing your layout with us ! While your trains, buildings and scenery are excellent, I was most taken by your commentary, which was both lighthearted and instructional.
We moved to FL in 11/21 with the notion I could do a layout in garage, but we brought too much furniture, so I’m still looking for some space.
Again, thanks !
Hi Jim, Fellow N’er here. Quick question… what is the size of this layout? Jst curious as mine is on an 80 x 36 door. Thank you in advance.
How big is Jim’s layout? 4′ x 8′ ?
Nicely done. Scenery is quite realistic and the town layout looks great. Appreciate the fact that people who work and patronize the town have ample parking. Hard to do sometimes but you don’t see that in many layouts. Good planning.
Jim AZ
Looks Good, now you have to think about weathering and detailing, it looks great but it’s to newish.
Michael Ormsby
Love the river part. I’m an N-scaler as well. Wish you were up here in Calgary, Canada.
Love the coal mining building best.
Jim,
Most realistic river I have seen. Grear job.
Good looking layout Jim. The river, although expensive, looks very good!
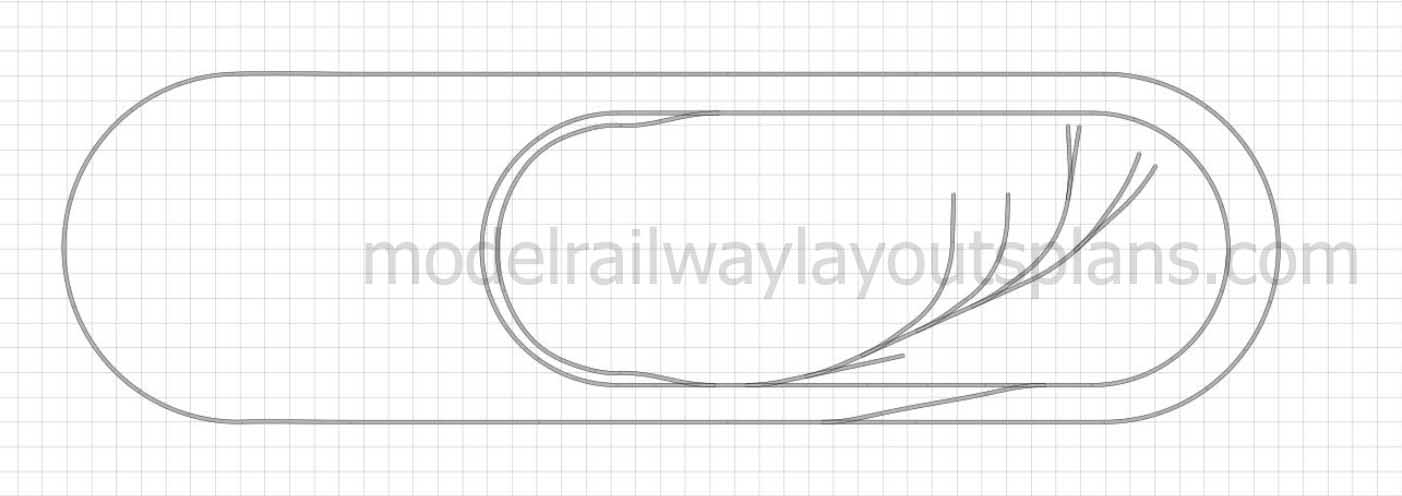
Thanks for so the nice comments, everyone. The layout has odd dimensions due to it growing over time with what I had and what would fit on my office. It was 73” by about 39”
Happy railroading friends
Jim
All that I can say is you have one incredible to allow you to take over an entire room to build your fabulous layout…. You still have a lot of work ahead of you but awesome so far…
The only negative is that I think you have too many buildings or too large of an area for them. Still, a lot of work ahead so keep it up…. Just my thoughts… JB
You did a very nice job, Jim. Your layout has given me a couple of ideas for the one I am about to start.
Is this correct, the dimensions are 73″ X 39″?
still very nice layout.
Wow!!! That’s a really nice job on your layout! Thank you for sharing your pics
Chris- Michigan
Super layout !!!
Great job and the scenery is perfect, just the right amount.
Jim, you “complained” about the river not looking deep. Actually, given the wood trestle and terrain behind, I would say you got it exactly right. Painting the bottom a darker colour would make it seem deeper, but, as it is, I respectfully think that it looks like a beautiful stream. I only hope my river will look half as good as yours does.
Great layout. I am sure all you “kids” will enjoy it. After all, that is, as Al says, THE MOST IMPORTANT PART of model railroading. (Your empire, your rules)
Frank Fleury
Surrey, BC
MMMM Sprinkles LOL had to put that in 🙂