Dean’s been back in touch. This time he’s been busy on his n scale track bed:
“Al, greetings from Dean in New Mexico.
I’m finally back to my new L-shaped N scale layout, the Santa Fe Northern RR, and have begun to lay track.
So far, I have put down all the track except the yards and sidings. I used Woodland Scenic roadbed glued down with Elmer’s glue to the 1-inch foam baseboard (over a 2” foam layer for support).
I used flex track which was glued with Alleen’s Tacky Glue, a glue used by craftspersons. I found it worked very well, and was equivalent to Woodland Scenic’s Foam Glue.
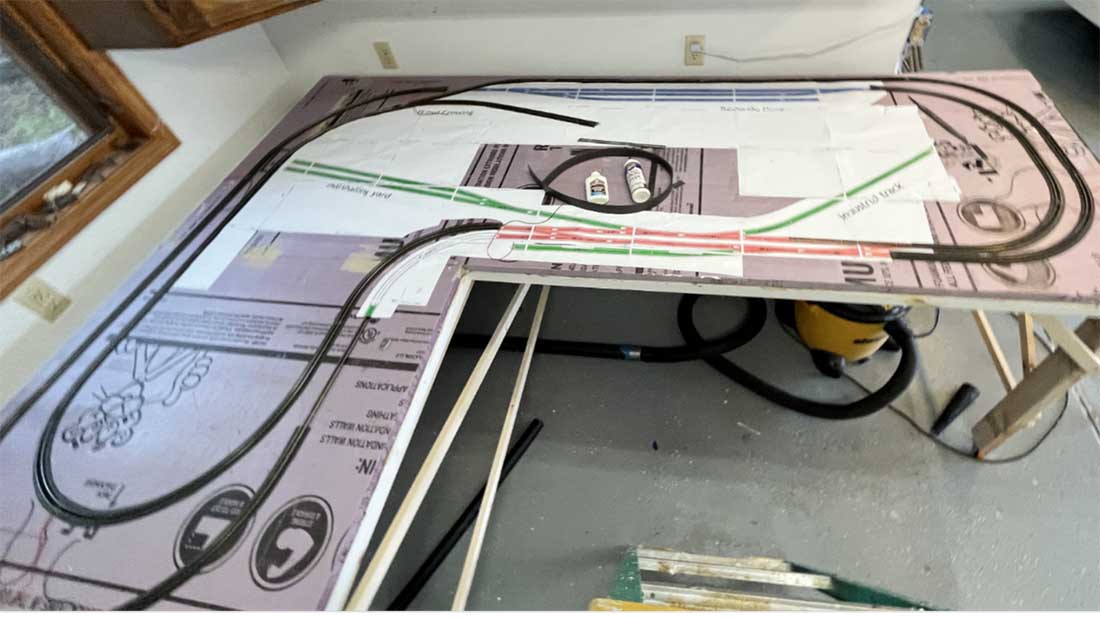
As your readers may remember, I use the software program SCARM (Simple Computer Aided Railway Modeller) to design all my layouts. SCARM can print out the layout design full sized on computer paper. Below is the map showing how the printed pages will print out.
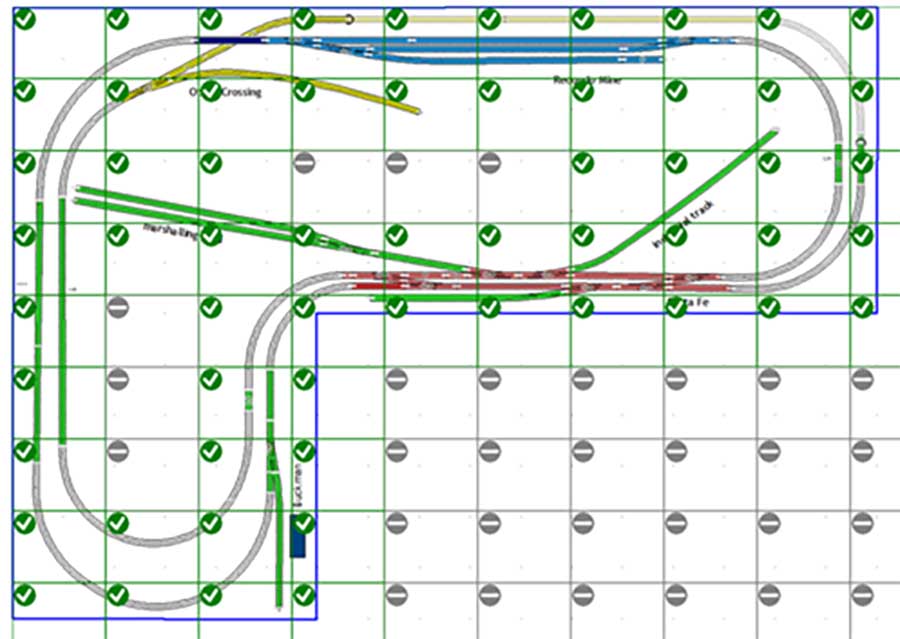
In my last layout which had a top layer of 1/8” Masonite over three inches of white Styrofoam, I glued down the sheets to the Masonite with white glue. But when I tried that here, the foamboard warped. So, I just taped the paper sheets together with Scotch tape and secured the long edges of the line of paper sheets to the foamboard with shipping tape.

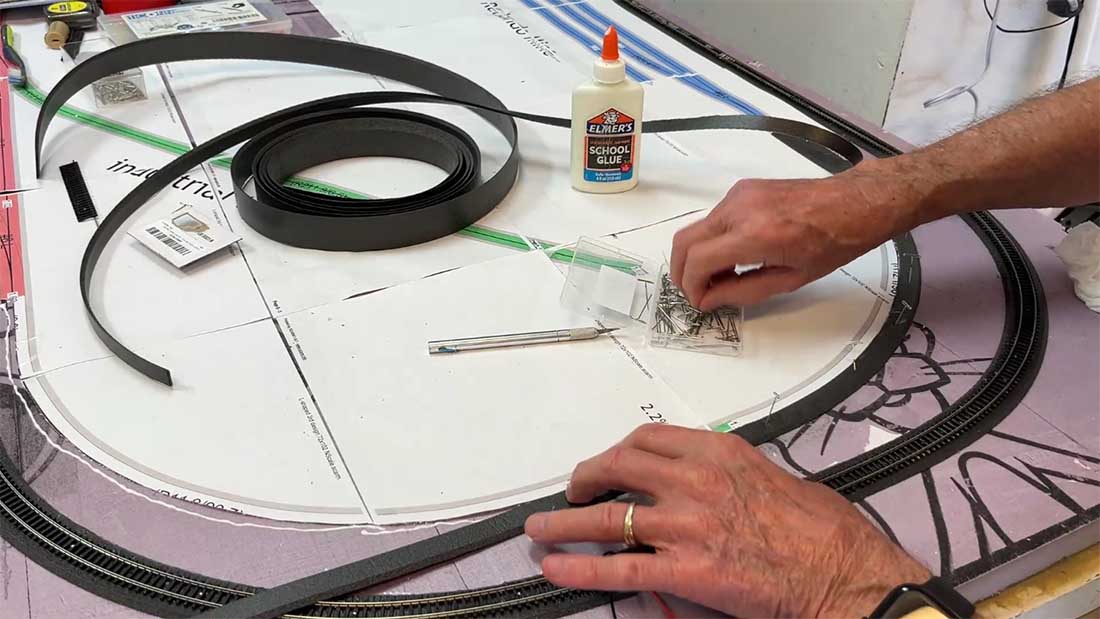
I then marked the edge of the roadbed where it would go and cut the paper along that line with a hobby knife.
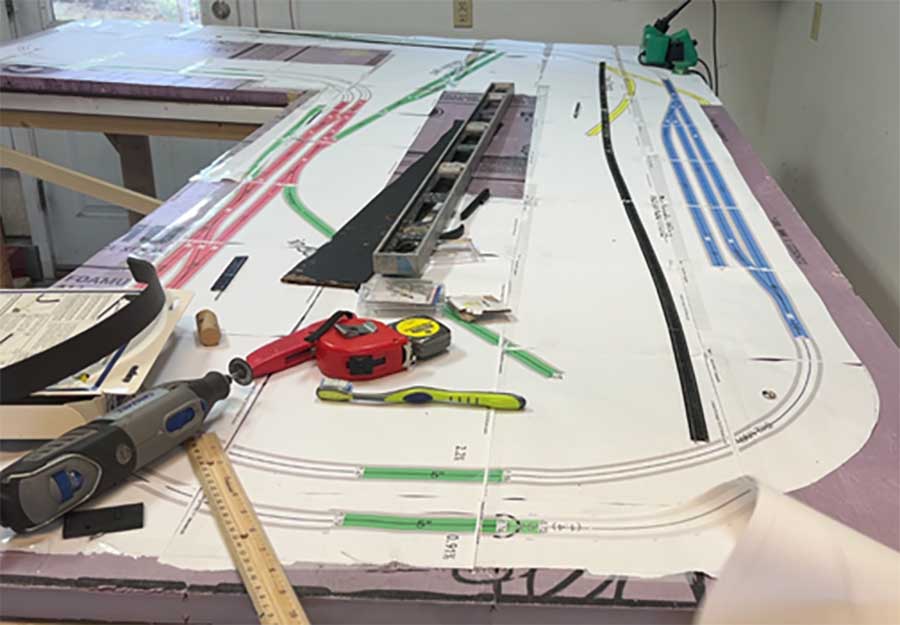
Then I put down a bead of Elmer’s glue and pressed the edge of the roadbed against the paper edge and secured the roadbed with T pins.
After that I ran two beads of Aleen’s Tacky glue where the track would go and placed the flex track down on the roadbed secured by T pins. I eyeballed the track in the center of the roadbed as it was glued.
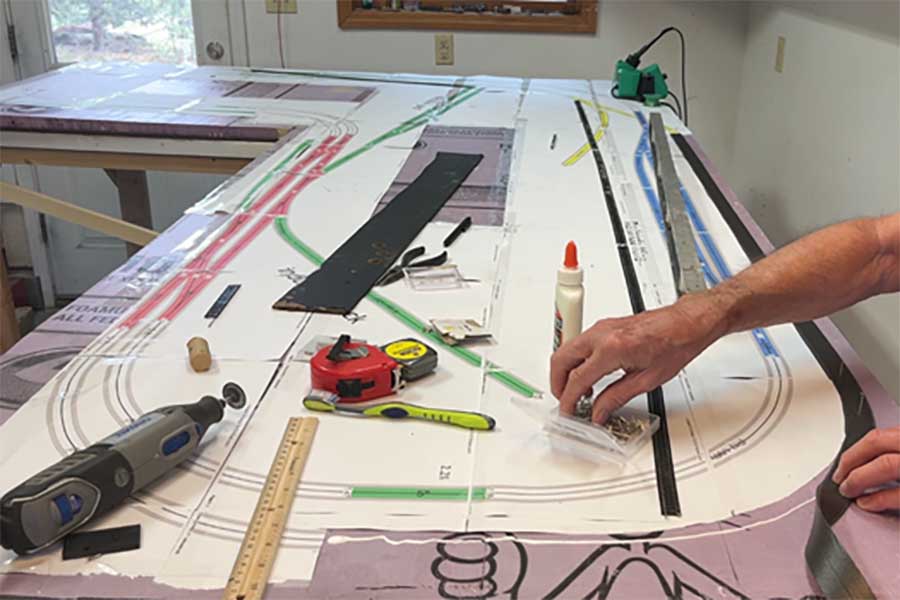
I found a better way to locate the roadbed and track was to cut the paper plans down the center line of the track. Then I pulled the roadbed in two down its center (it is designed for this) and glued one side of it to the cut track plan.
When that was secured with more T pins, I pulled away the other side of the paper plans and glued the other half of the roadbed down in place. The cut line between the two halves provided a direct line to line up the track as I glued it down.
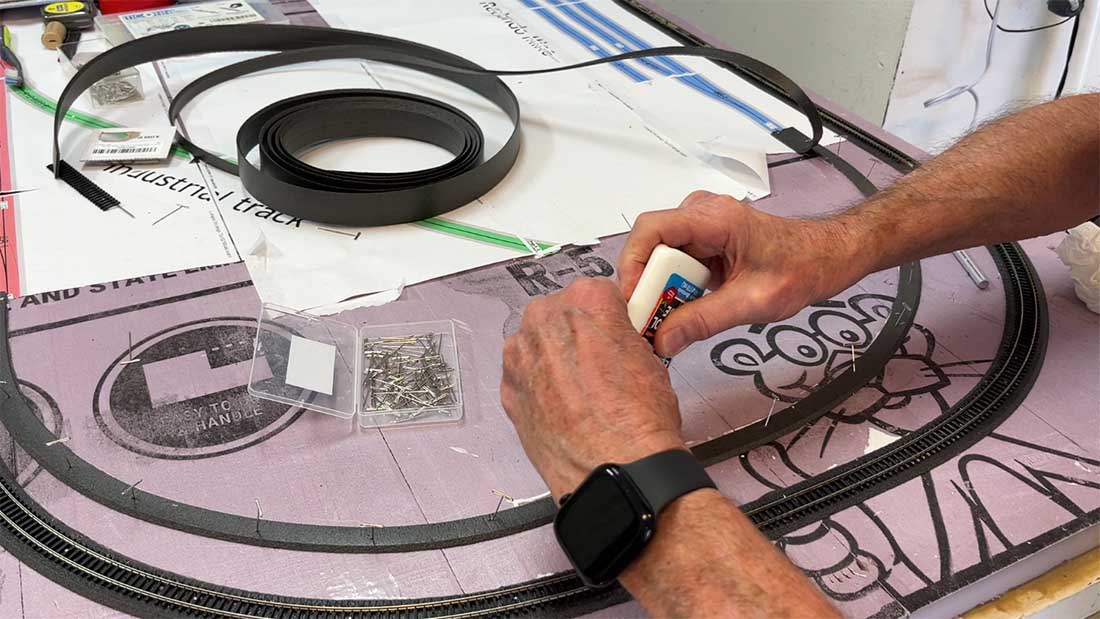
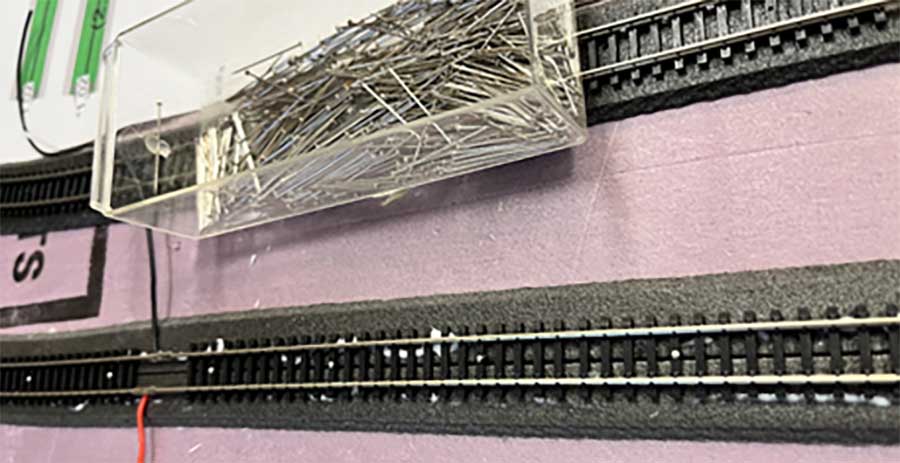
I also found that I could use straight pins to hold the track down as the glue dried. I ended up with a perfectly centered track.
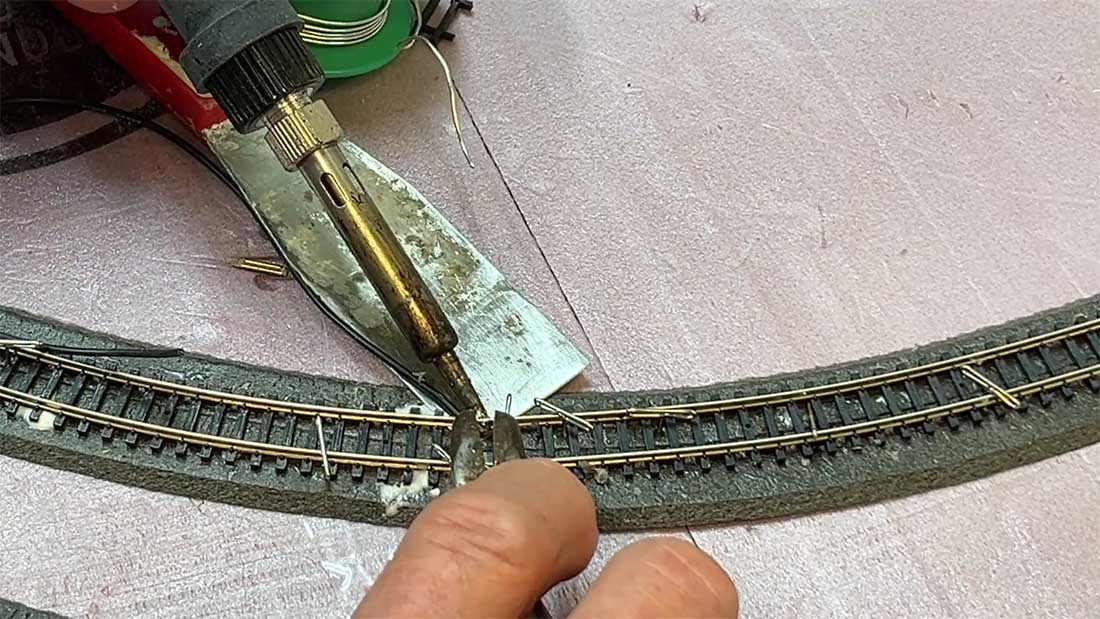
I soldered power leads to the track rail joints before pushing them on to the track ends. These were added every 3rd or 4th rail length. In one case I joined two rail lengths on a curve. To hold a smooth curve, I soldered the rail joints while holding the track with a pair of pliers. The spatula was placed over the roadbed to protect it and also to hold the soldered wire in place.
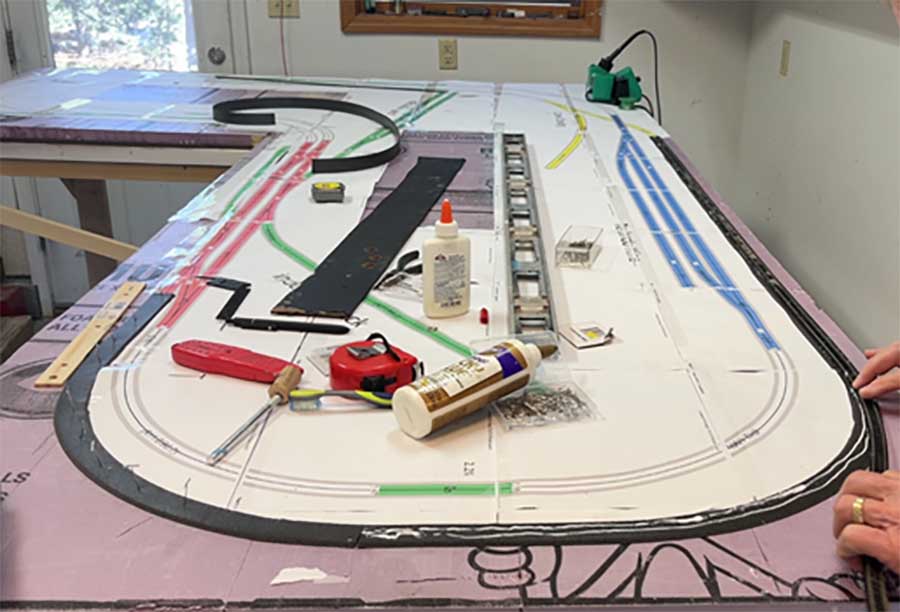
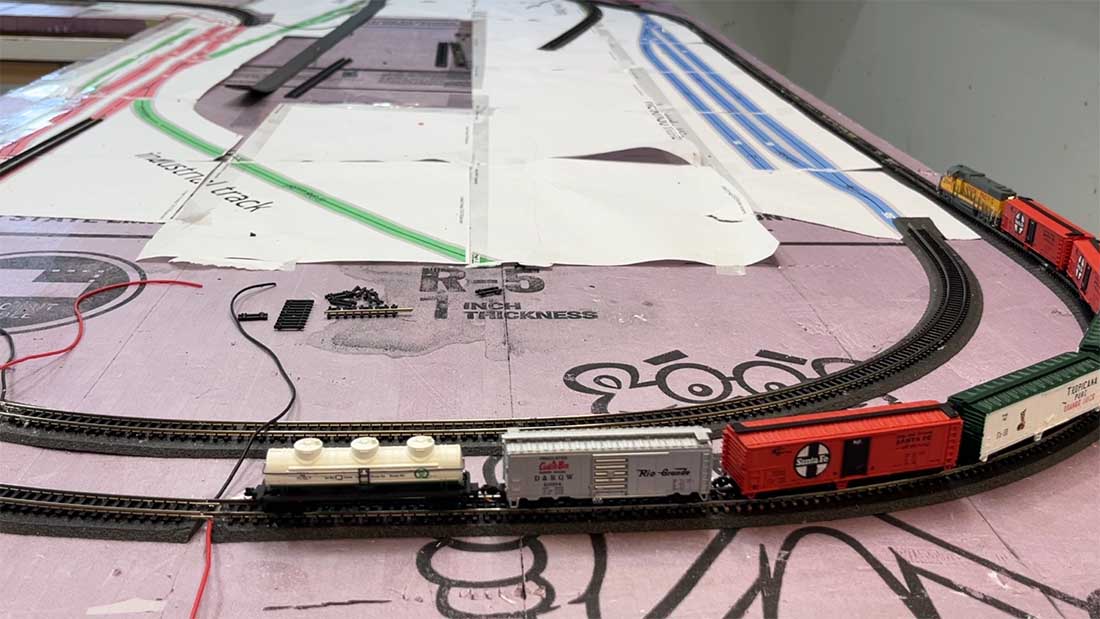
Here’s a bird’s eye view of the layout and track as of now.
Finally, I ran a long train back and forth over the track to make sure it was good.
For more info and a video of the running train:
Cheers,
Dean”
I big thanks to Dean for sharing his N scale track bed update.
If you want to see his previous post on making the table for this project, it’s at the bottom of this post: Model railroad church building.
That’s all for this time folks.
Please do keep ’em coming.
And if today is the day you get started on your layout, the Beginner’s Guide is here.
Best
Al
PS More HO scale train layouts here if that’s your thing.
Need buildings for your layout? Have a look at the Silly Discount bundle.

Great start, Dan. Well planned and great technique and process.
Thanks for sharing.
Jim AZ
Thank you Dean, very helpful.
One question – How did you remove the excess solder from the inside of the rail joiners? It appeared that this could affect the wheel flange on passing trains?
Best wishes from Down Under
Andrew in Oz
too much underlayment for N scale.if you’re using road bed over foam board you don’t need foam board or vice versa.Nothing like good old fashion ballast. That’ll be one quiet N scale.
The Critic
I’m afraid The Critic doesn’t understand my approach. The foam board is not to silence noise, it’s to replace the usual plywood sheet to support the entire layout and allow for rises and falls of the track. The layout is supported by two layers of foam board, a 2″ layer for strength, and a 1″ layer for supporting the track and for forming 3D scenery.
As to Andrew’s question, how to remove solder on the inside of rail joiners:
1) Use small amounts of solder such that it doesn’t build up.
2) Use desoldering wick braid. Place it against the solder and heat with an iron to melt the solder. This sucks it up cleanly.
3) Or melt the blob with the iron, then flick it away with a wet Q-tip.
Thank you Dean
Andrew in Oz