“Hi Al,
I found your site about 4 months ago and have thoroughly enjoyed your posts, pictures, videos, and modeling tips. I have since paid for the golden ticket and found it to be a great investment. I consider myself an amateur compared to most of the people who are sending in pictures and videos.
I used to have an n scale train set when I was a kid and really enjoyed it. About 14 months ago I found a box in my attic with some of my old n scale trains, track, etc. There was not much left but it got me thinking about researching what it would take to start up again. A little over a year later I am totally hooked
.
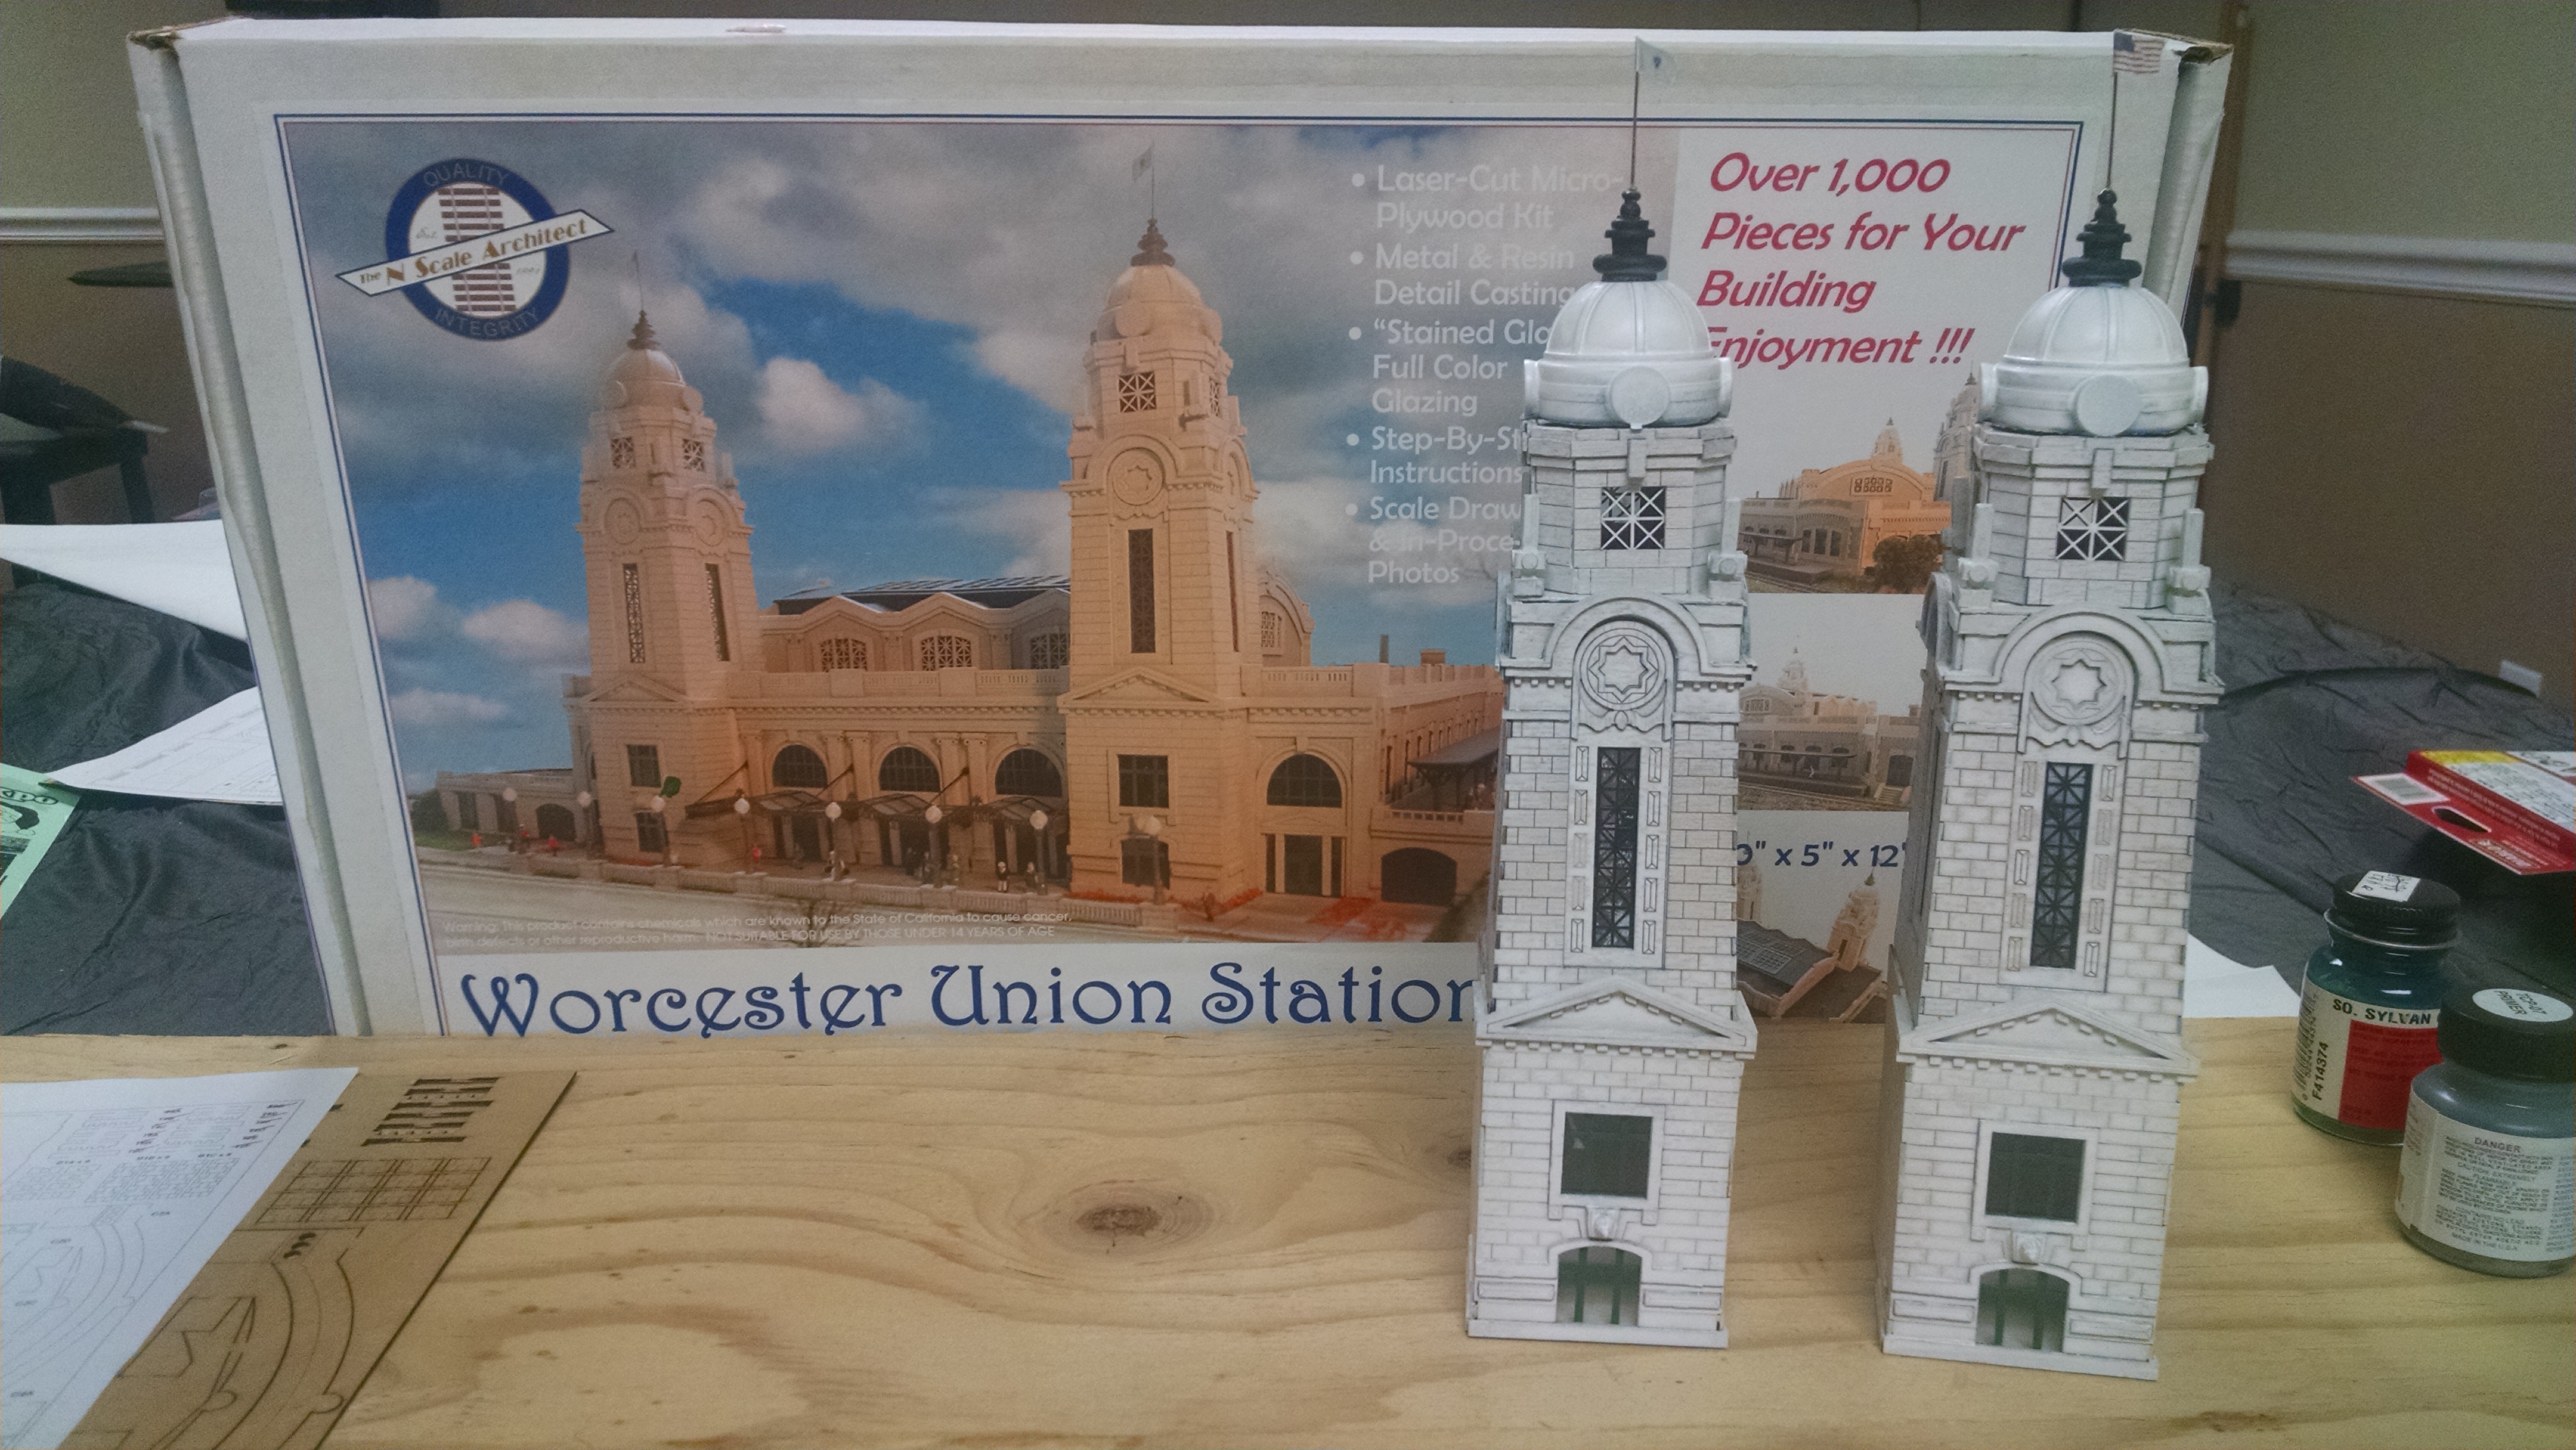
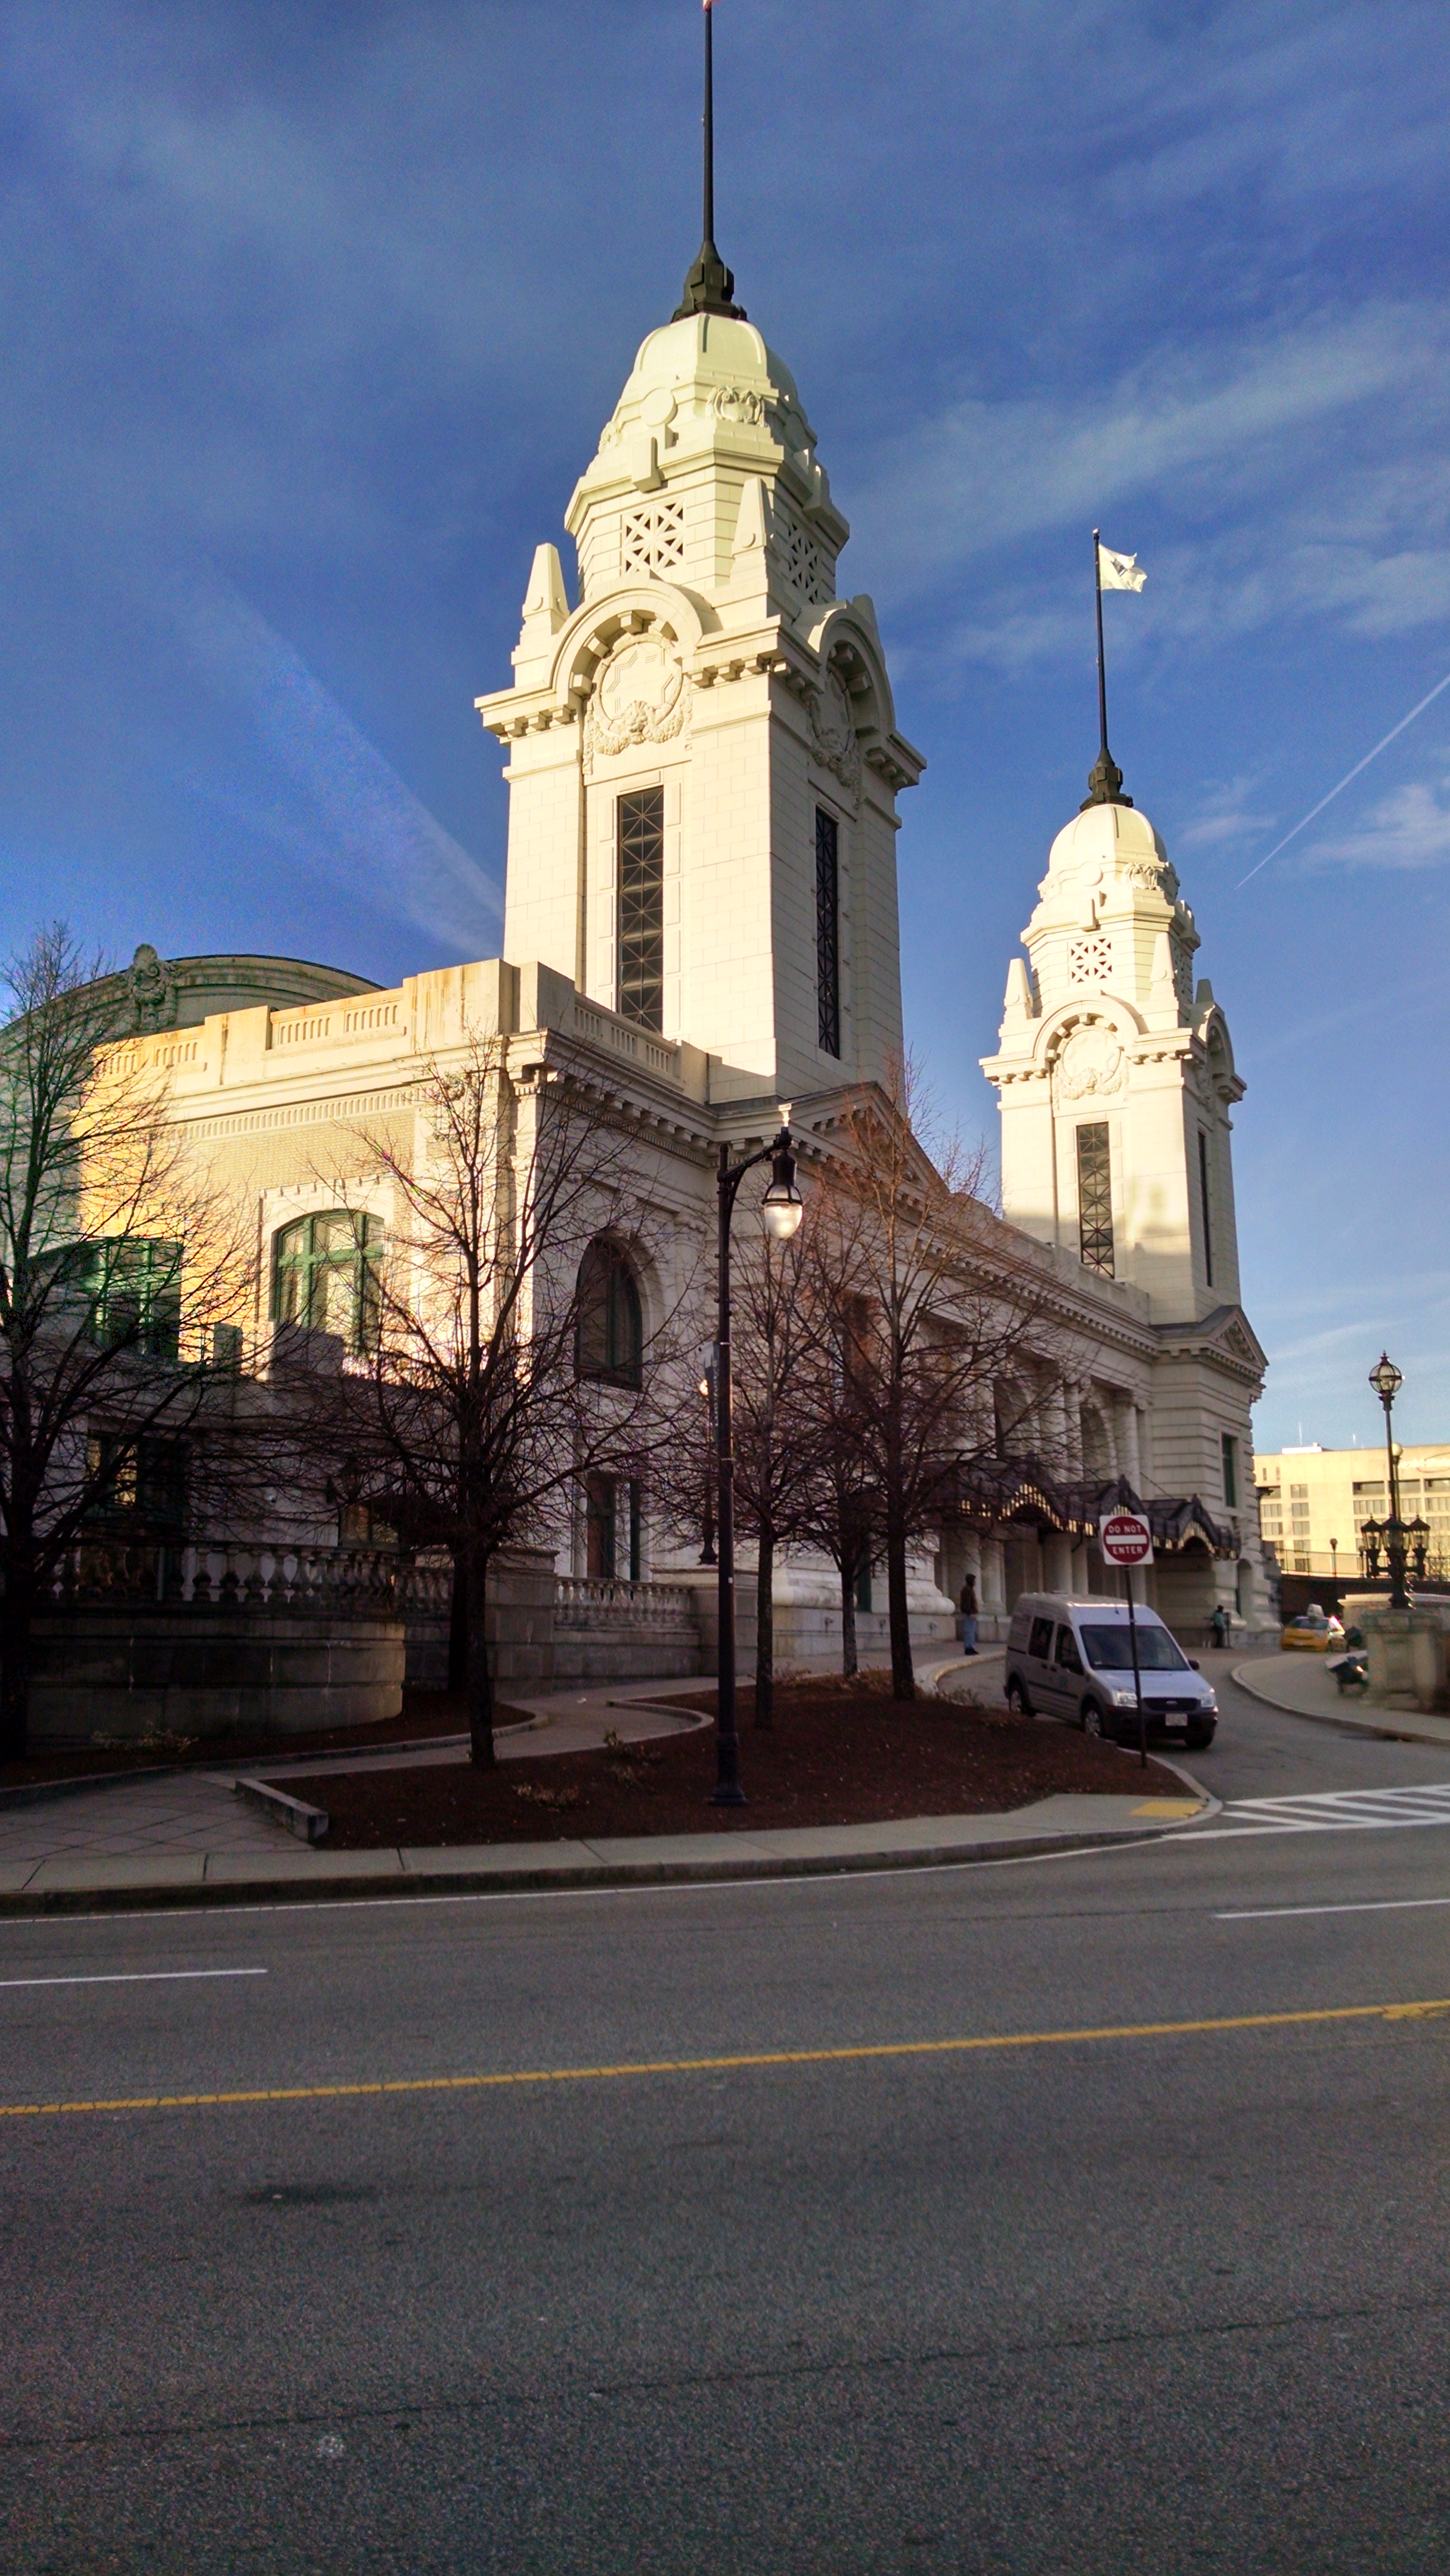
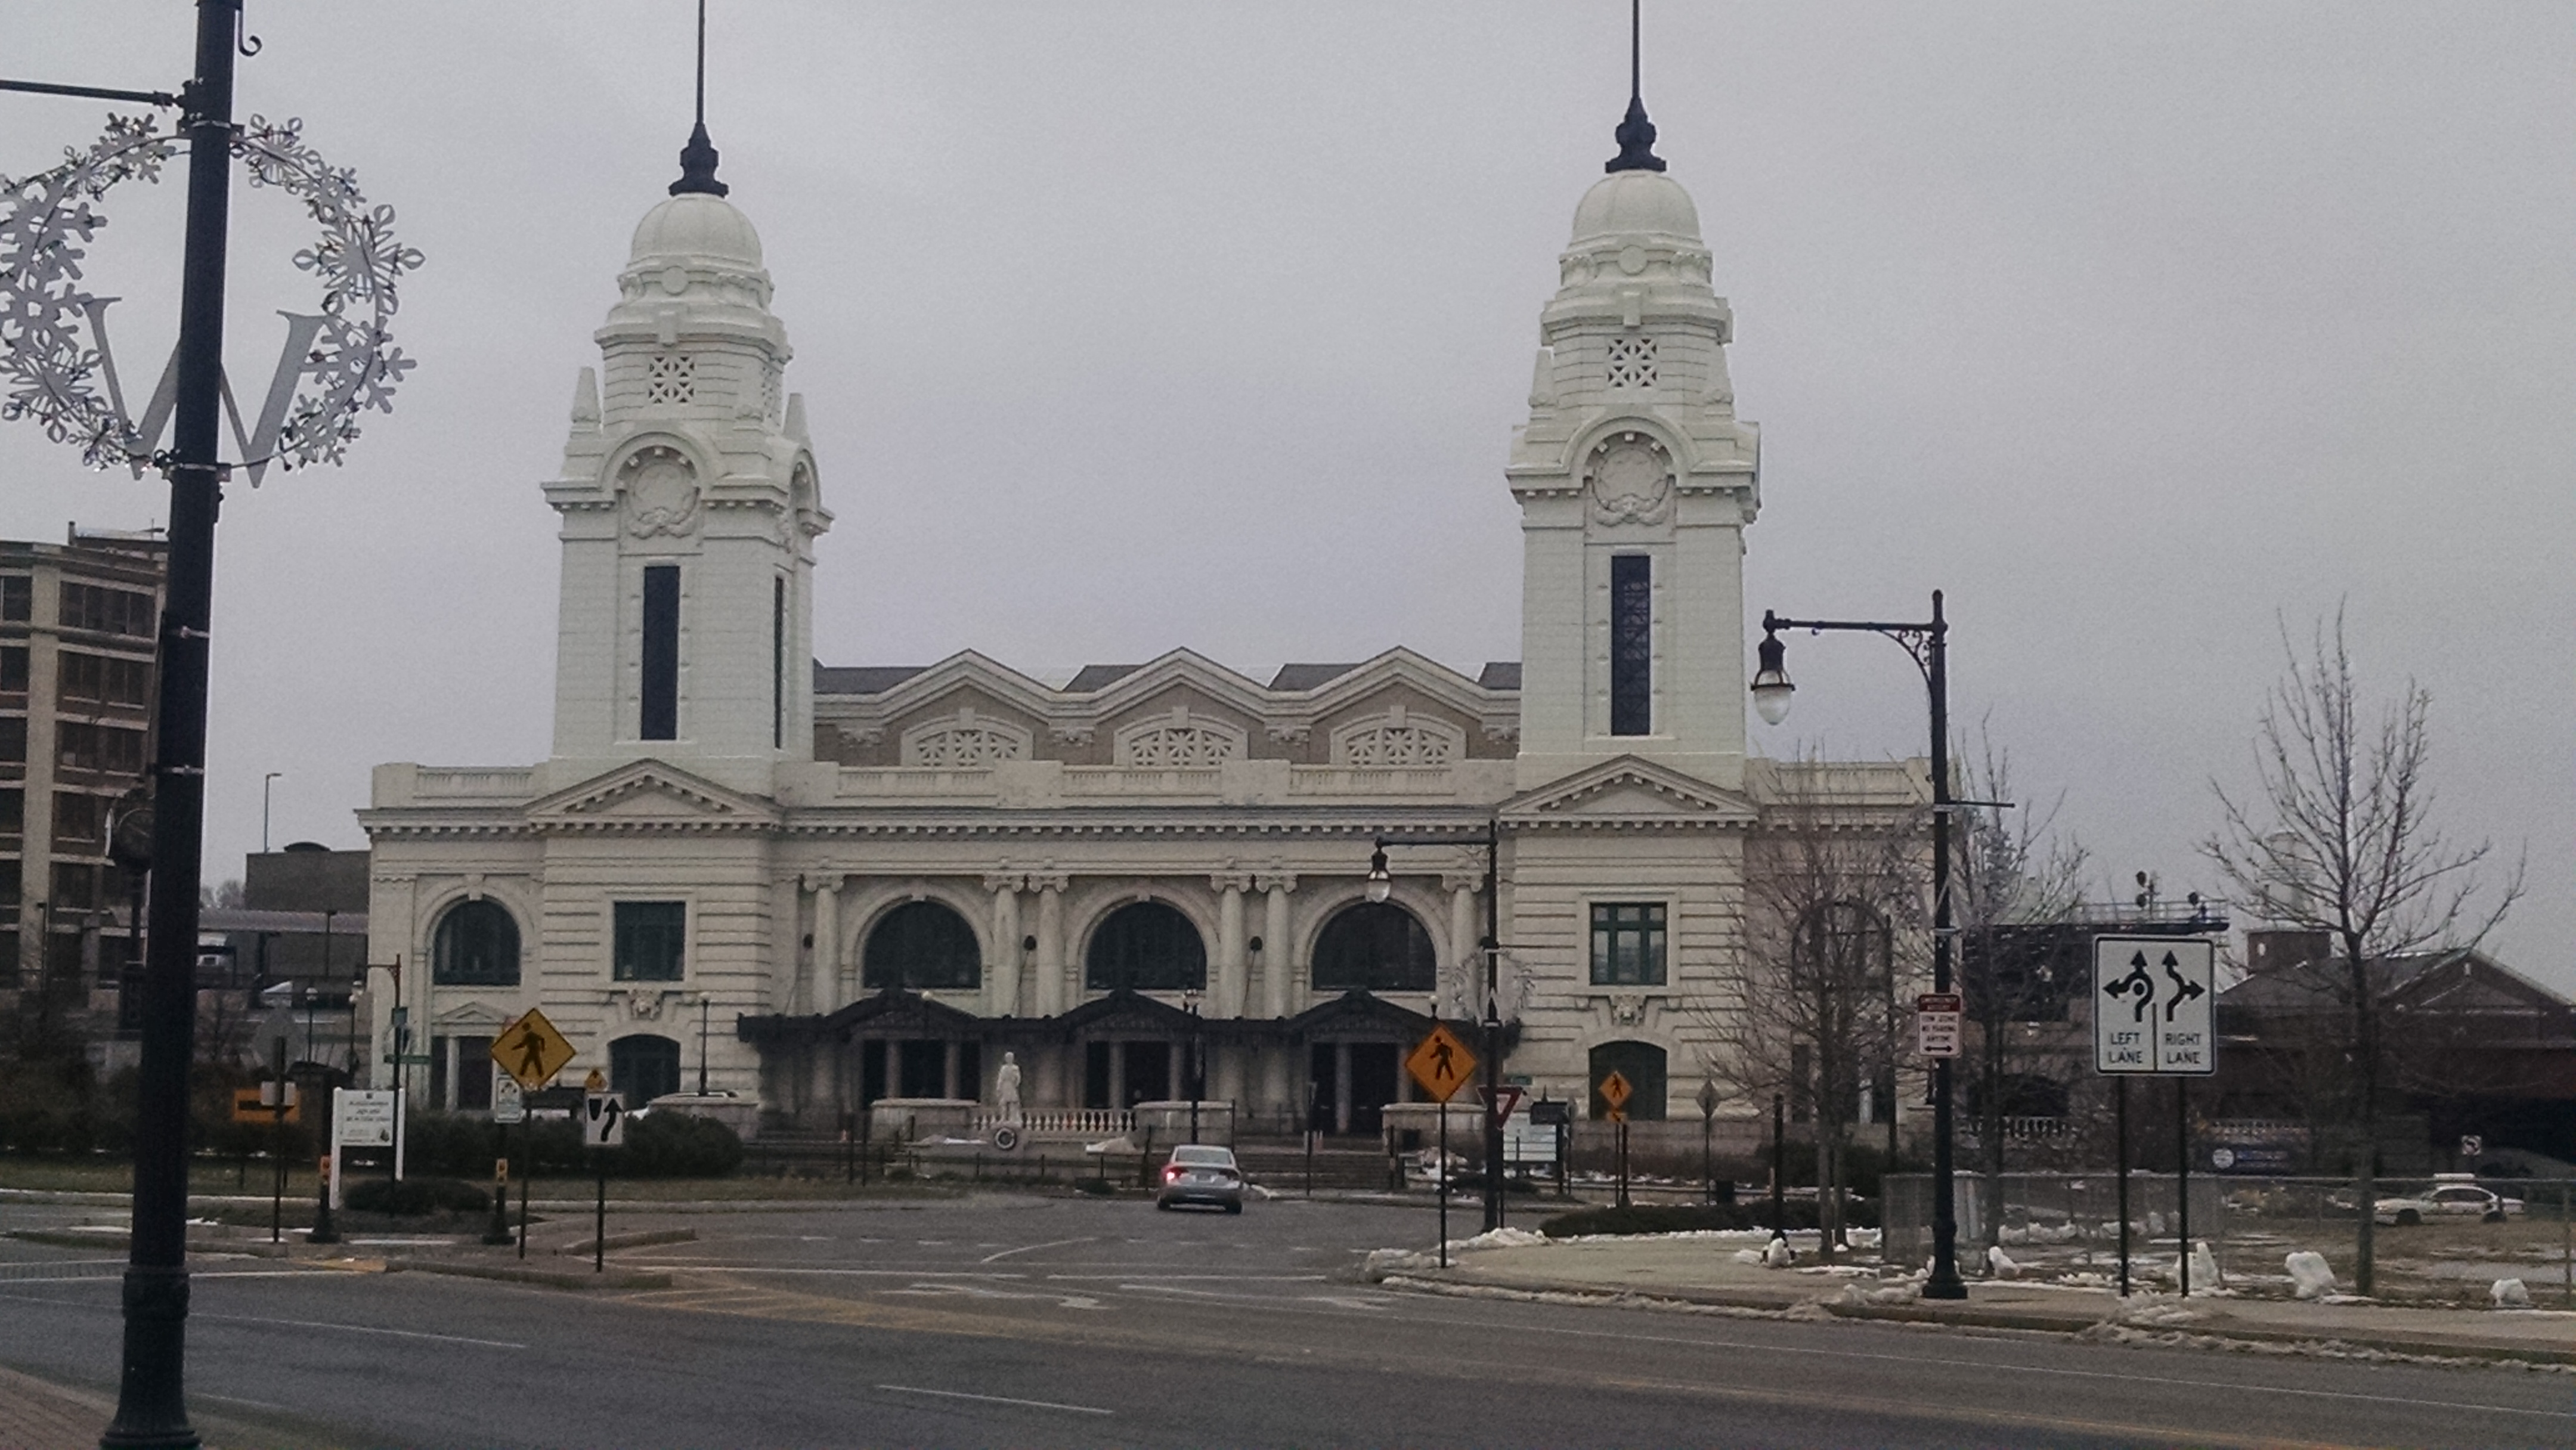
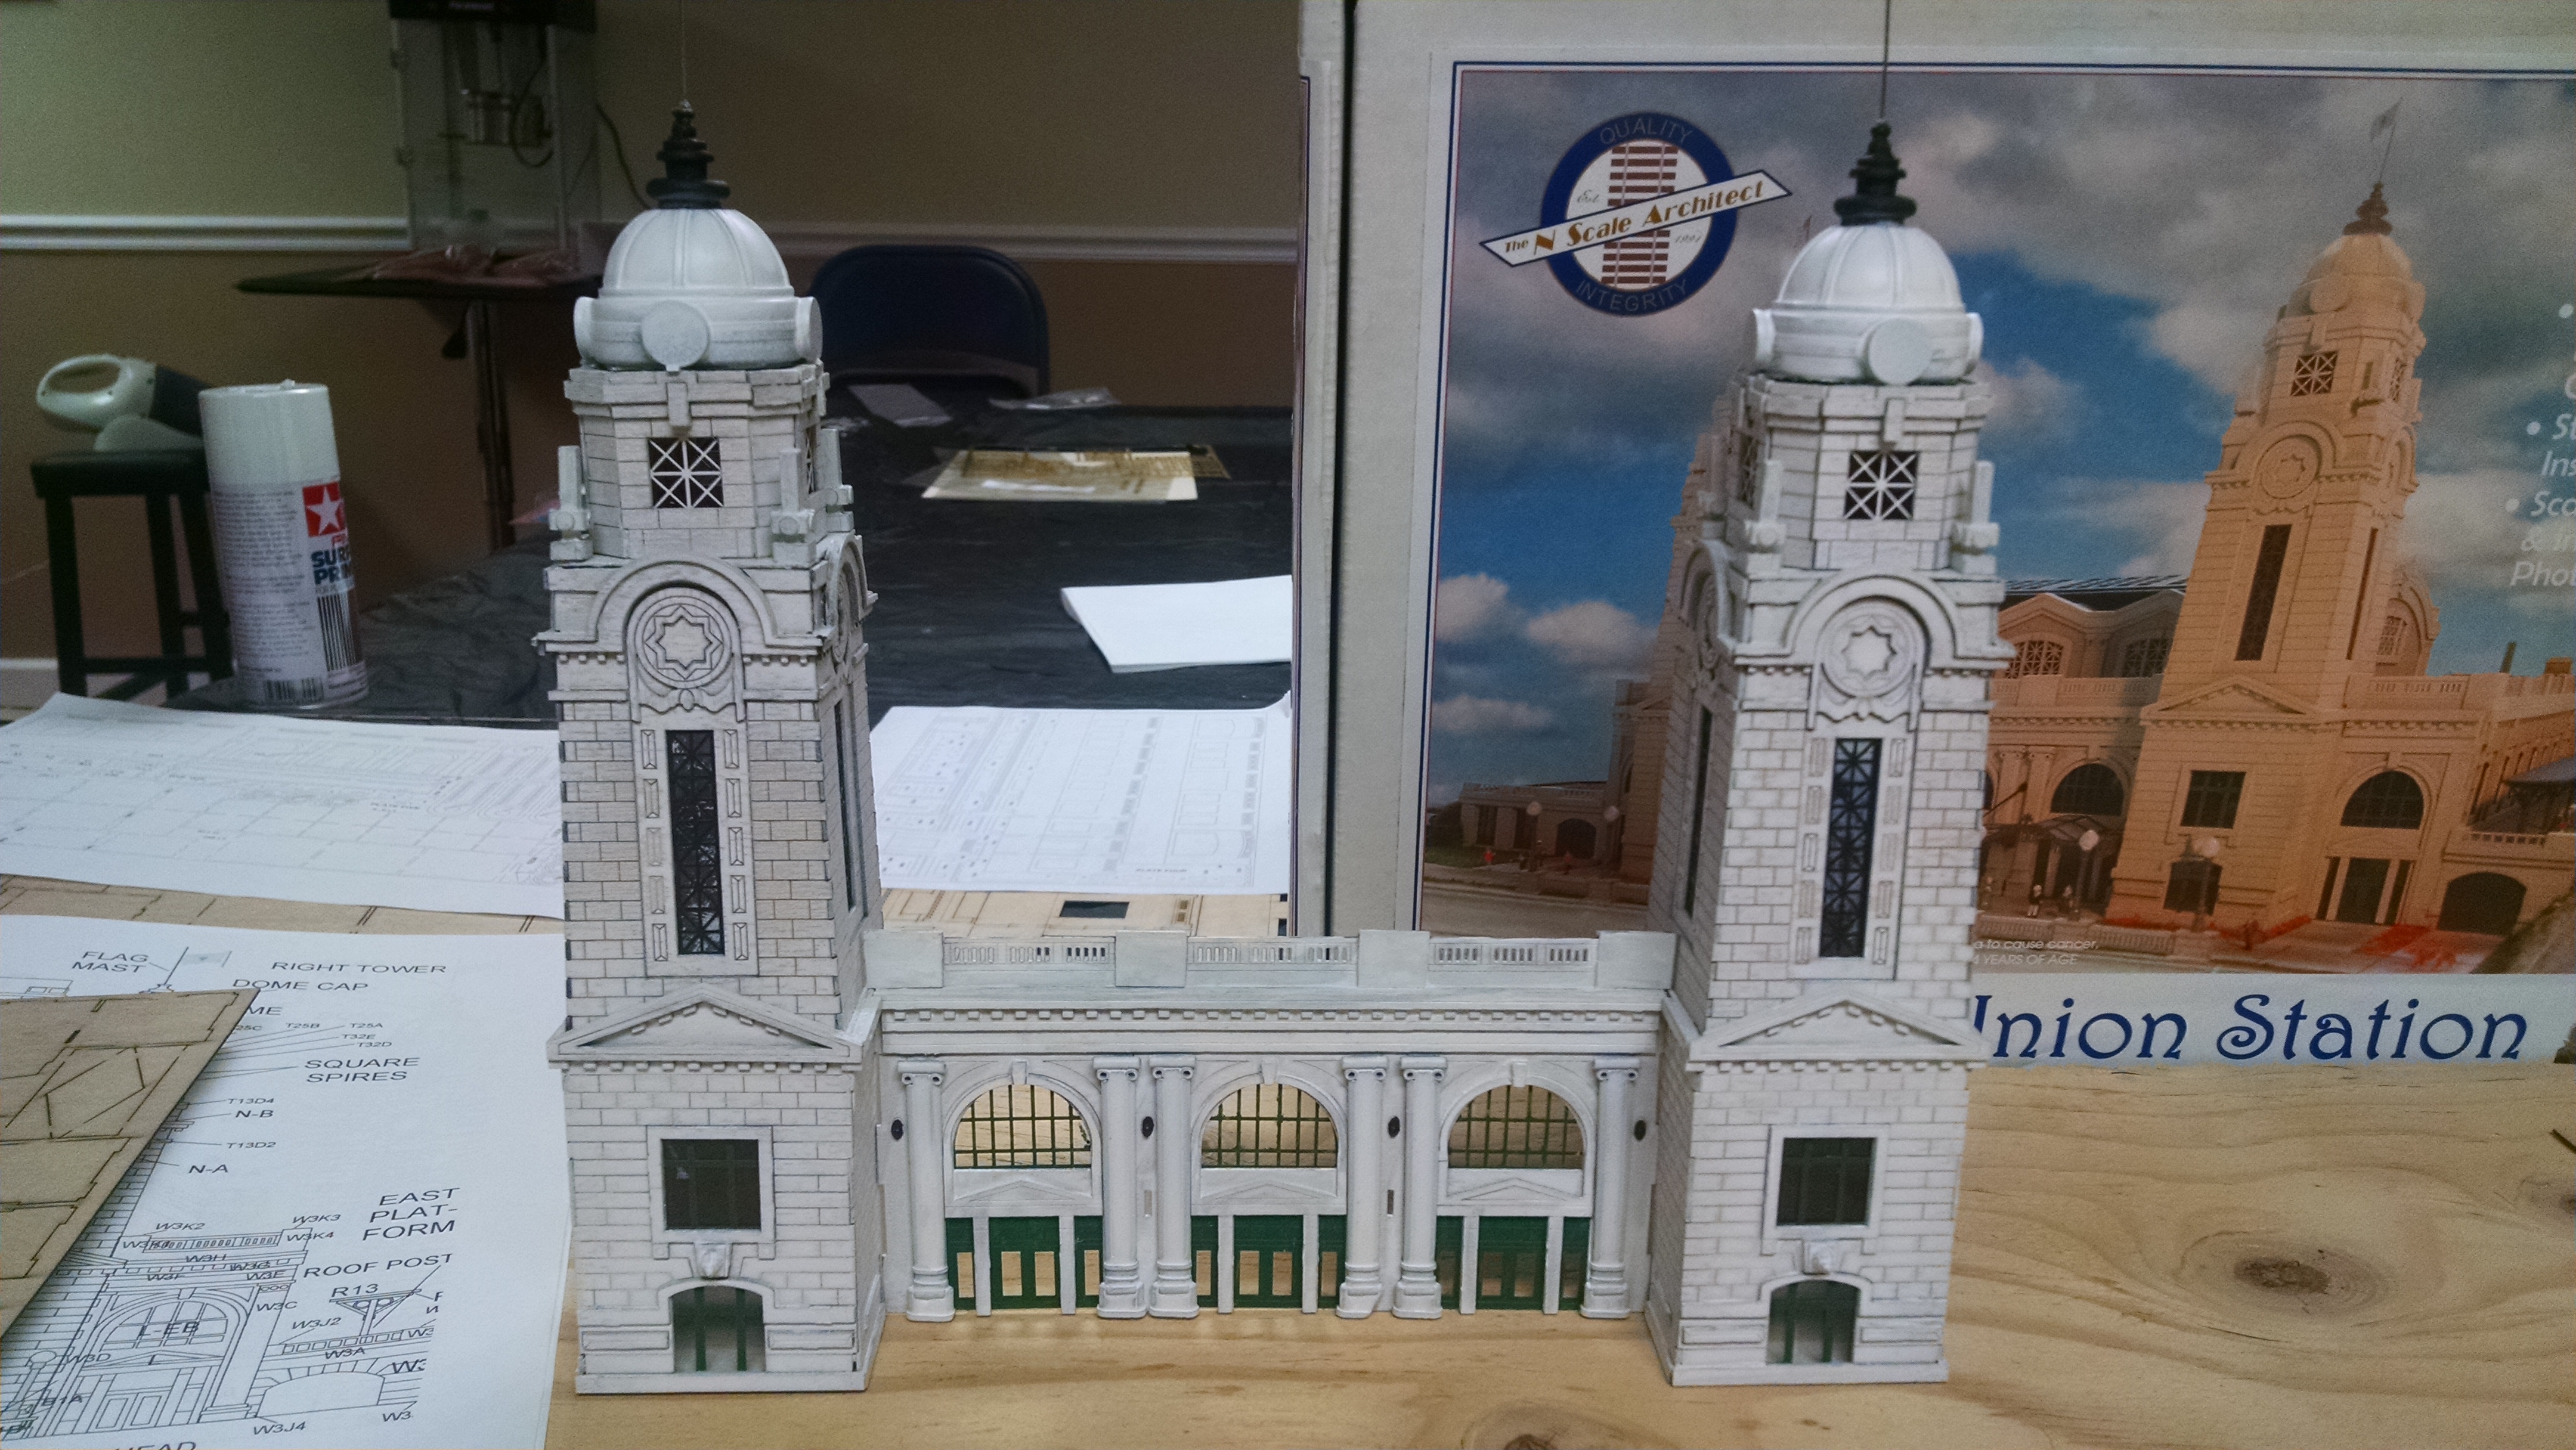
Being from Worcester, Ma. I have always been interested in Worcester Union Station which was restored a few years back. I have attached a few pictures of the actual station. I then found a model of the station (a laser cut wood model) that I had to have. I was warned that this would not be a good project if I have not built a laser cut model yet, but I ignored the advise, purchased the model on line, and went to work. 100 hours later, here is how it came out.
It is the centerpiece of my layout and the first thing people notice when the see my layout. I have attached some pictures for you.
Best,
Ray”
A stunning piece of scratch building – big thanks to Ray for sharing.
That’s all for today folks – please do keep ’em coming.
And if today is the day when decide to join in the fun, the Beginner’s Guide is here.
Best
Al
PS Latest ebay cheat sheet is here.
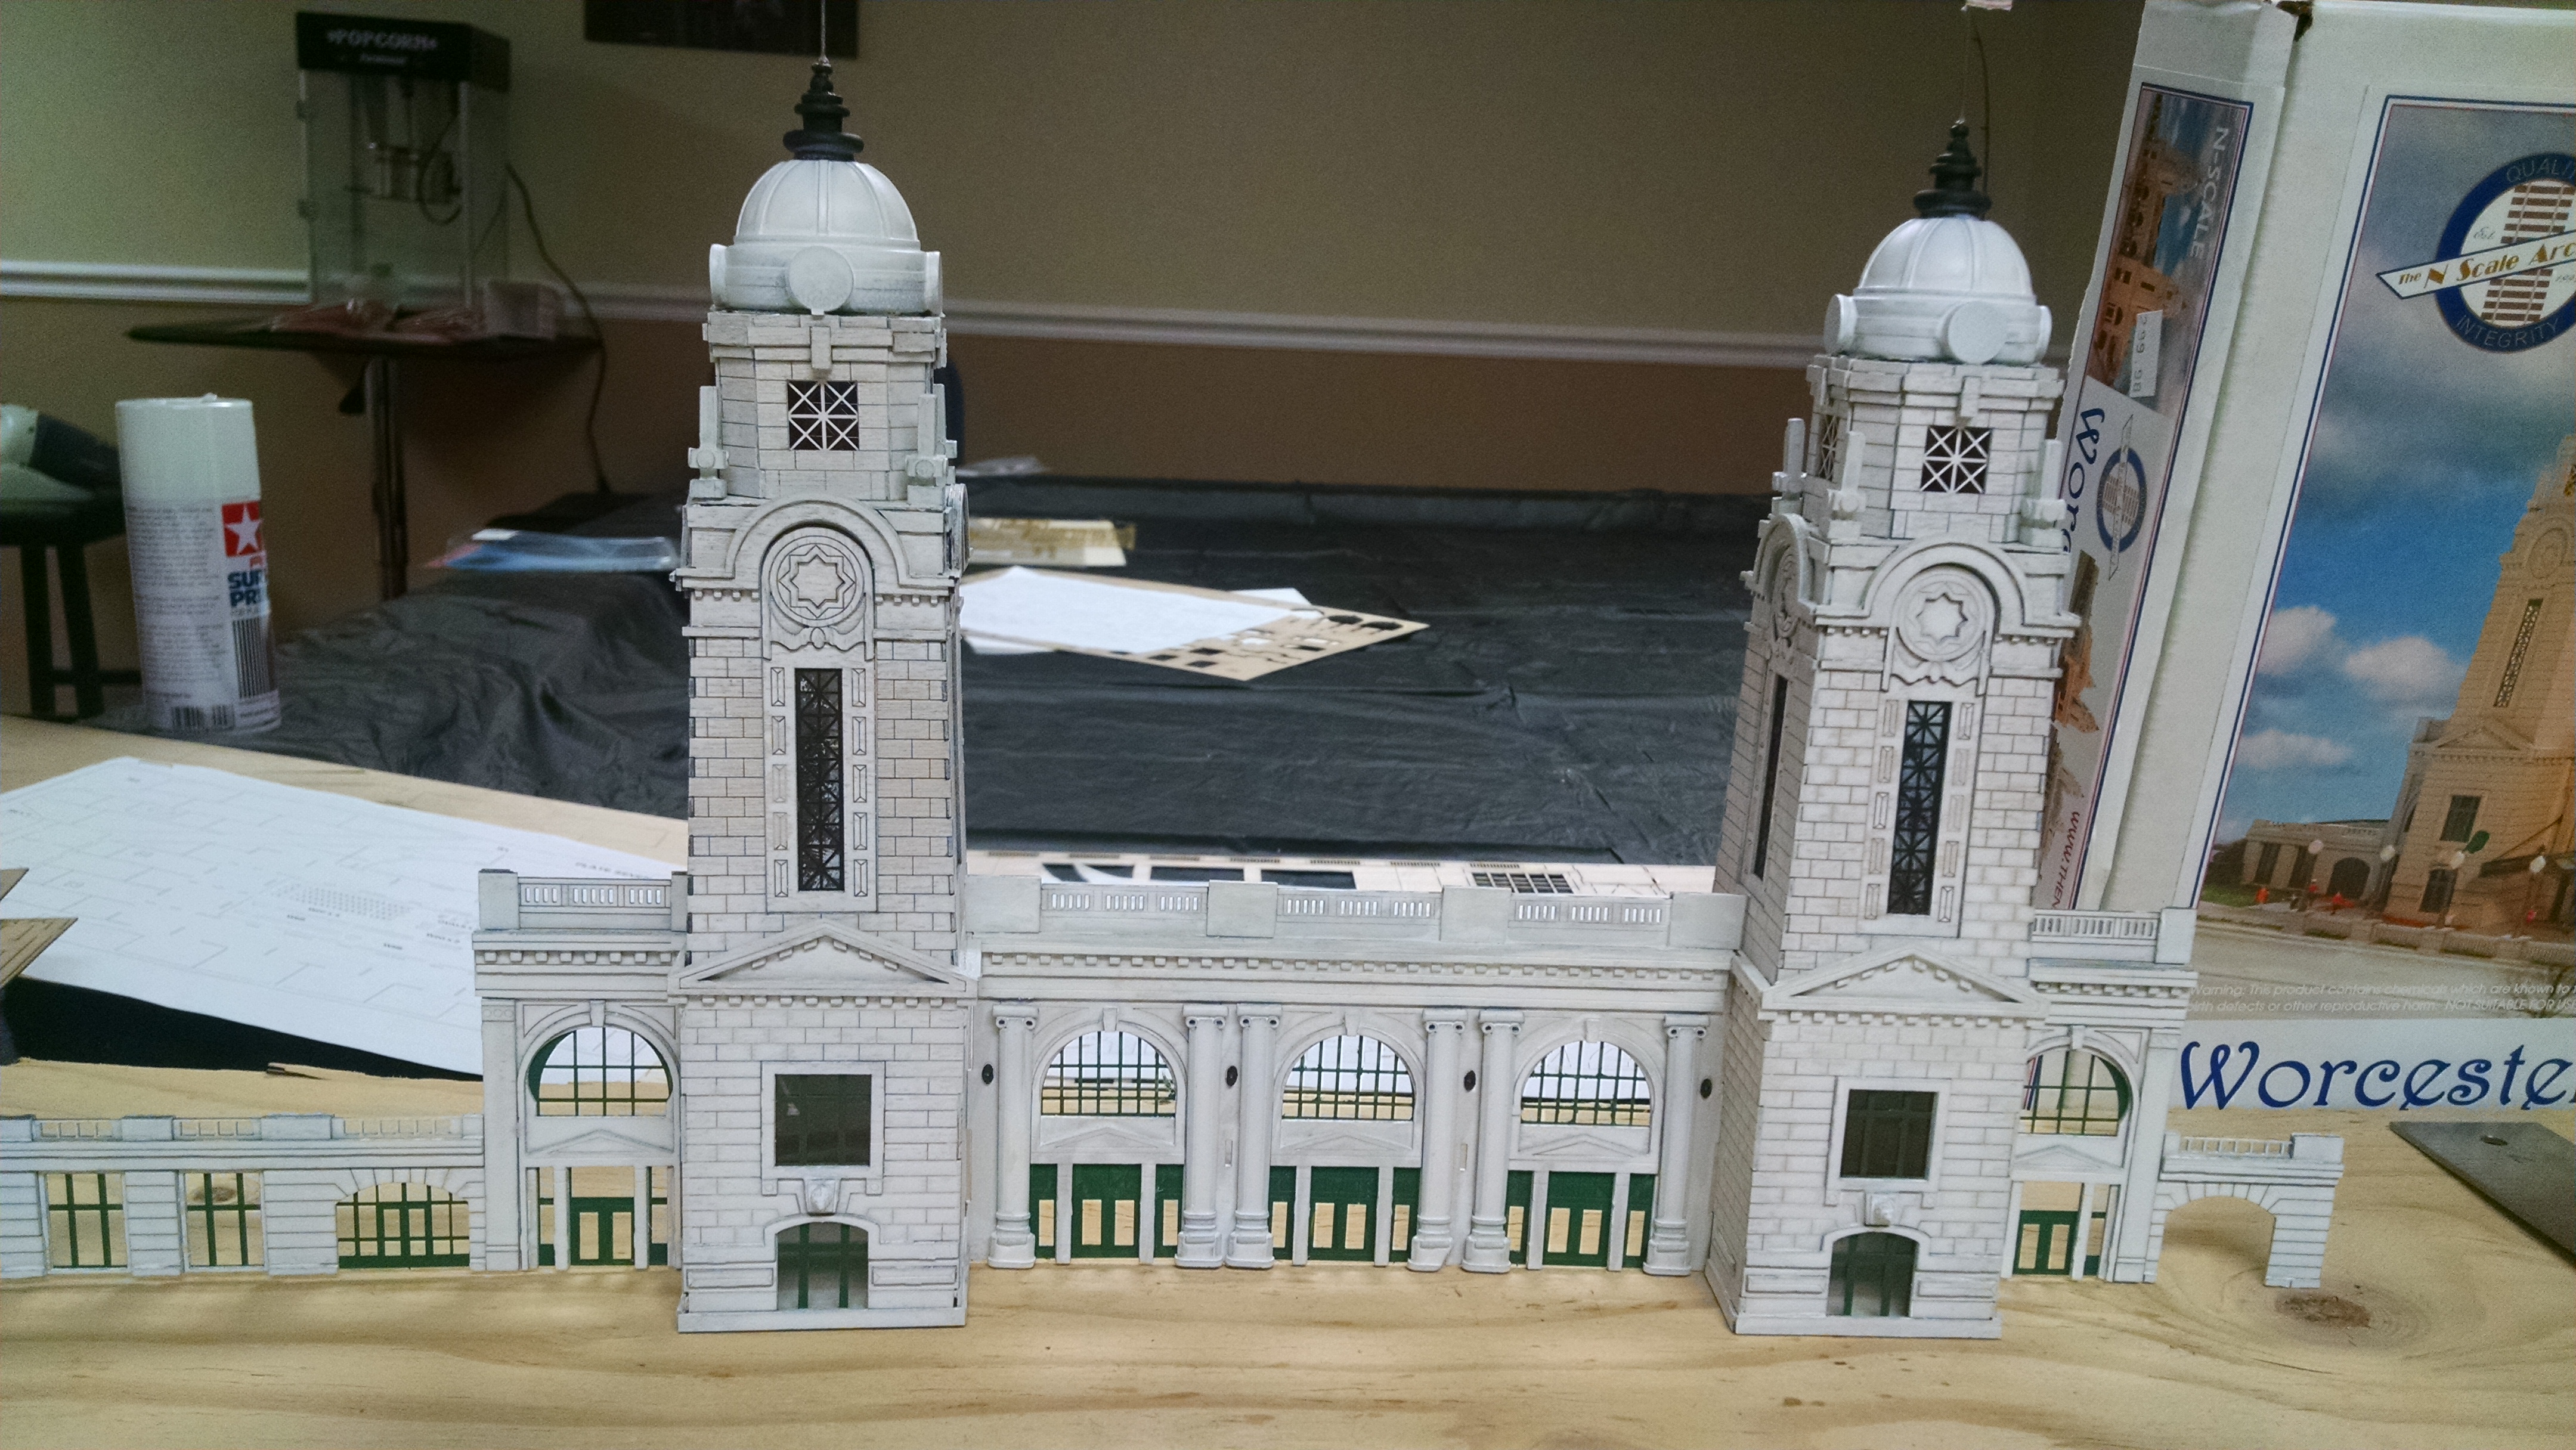
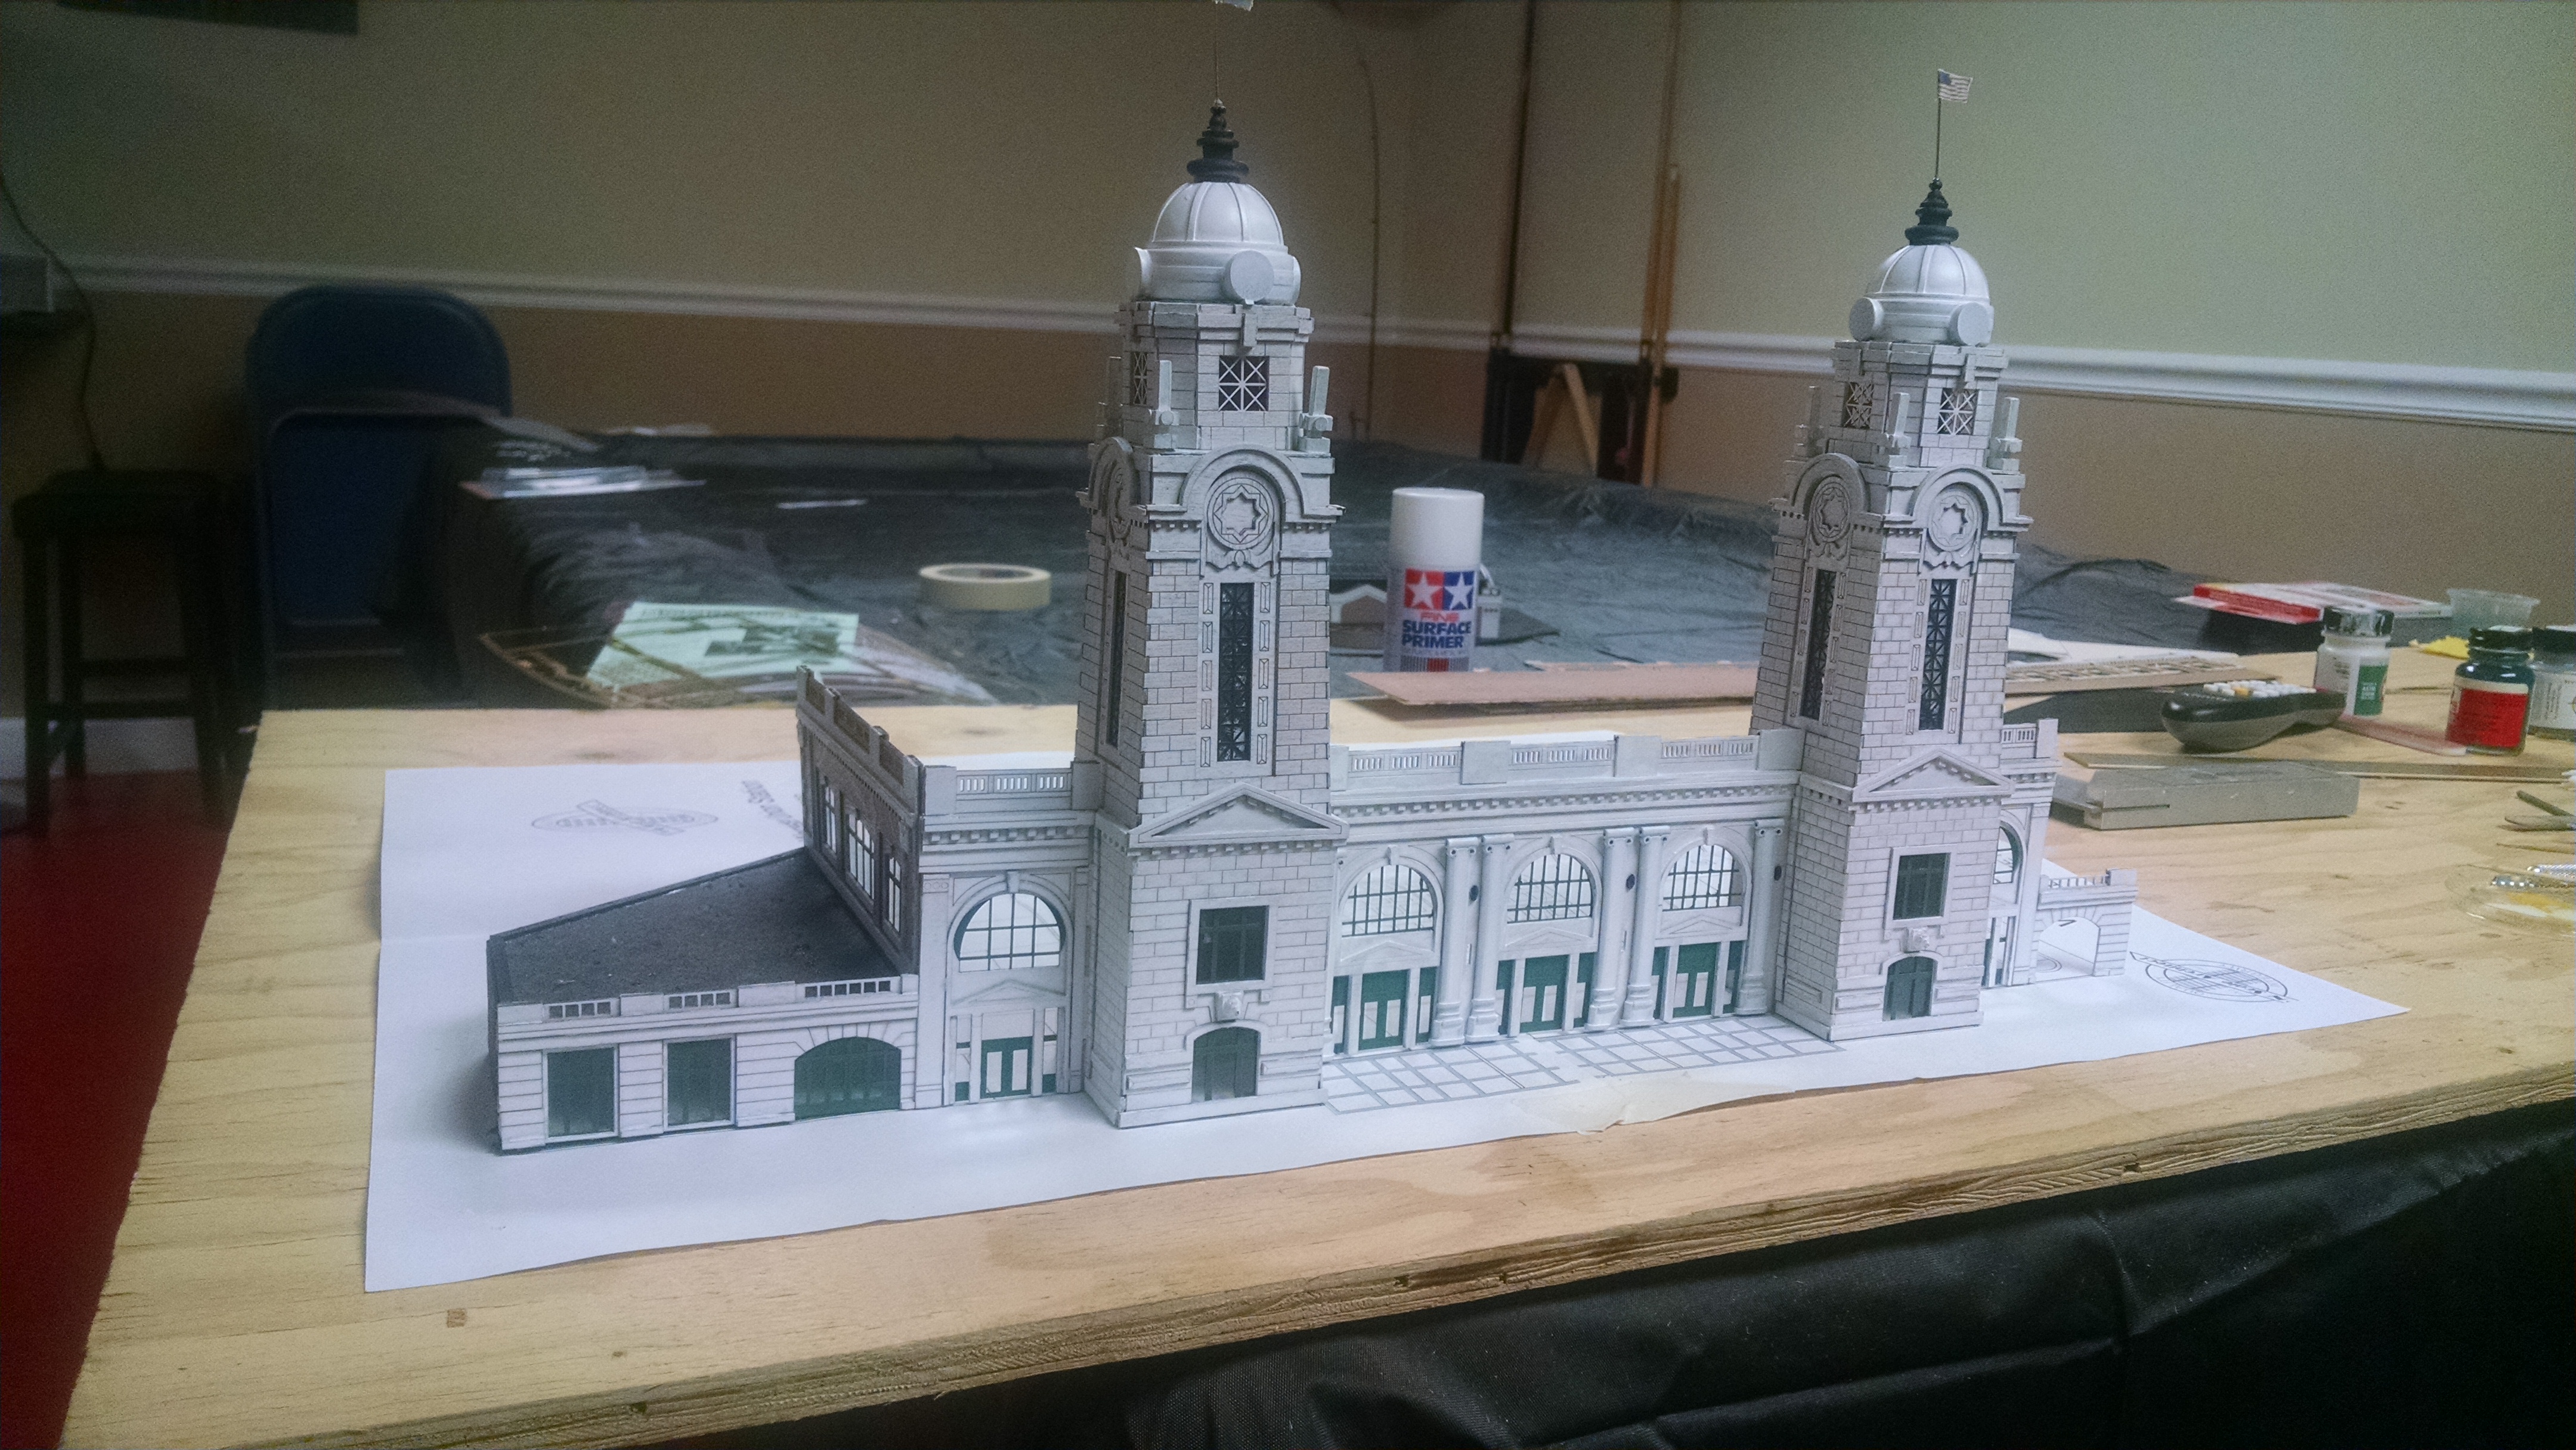
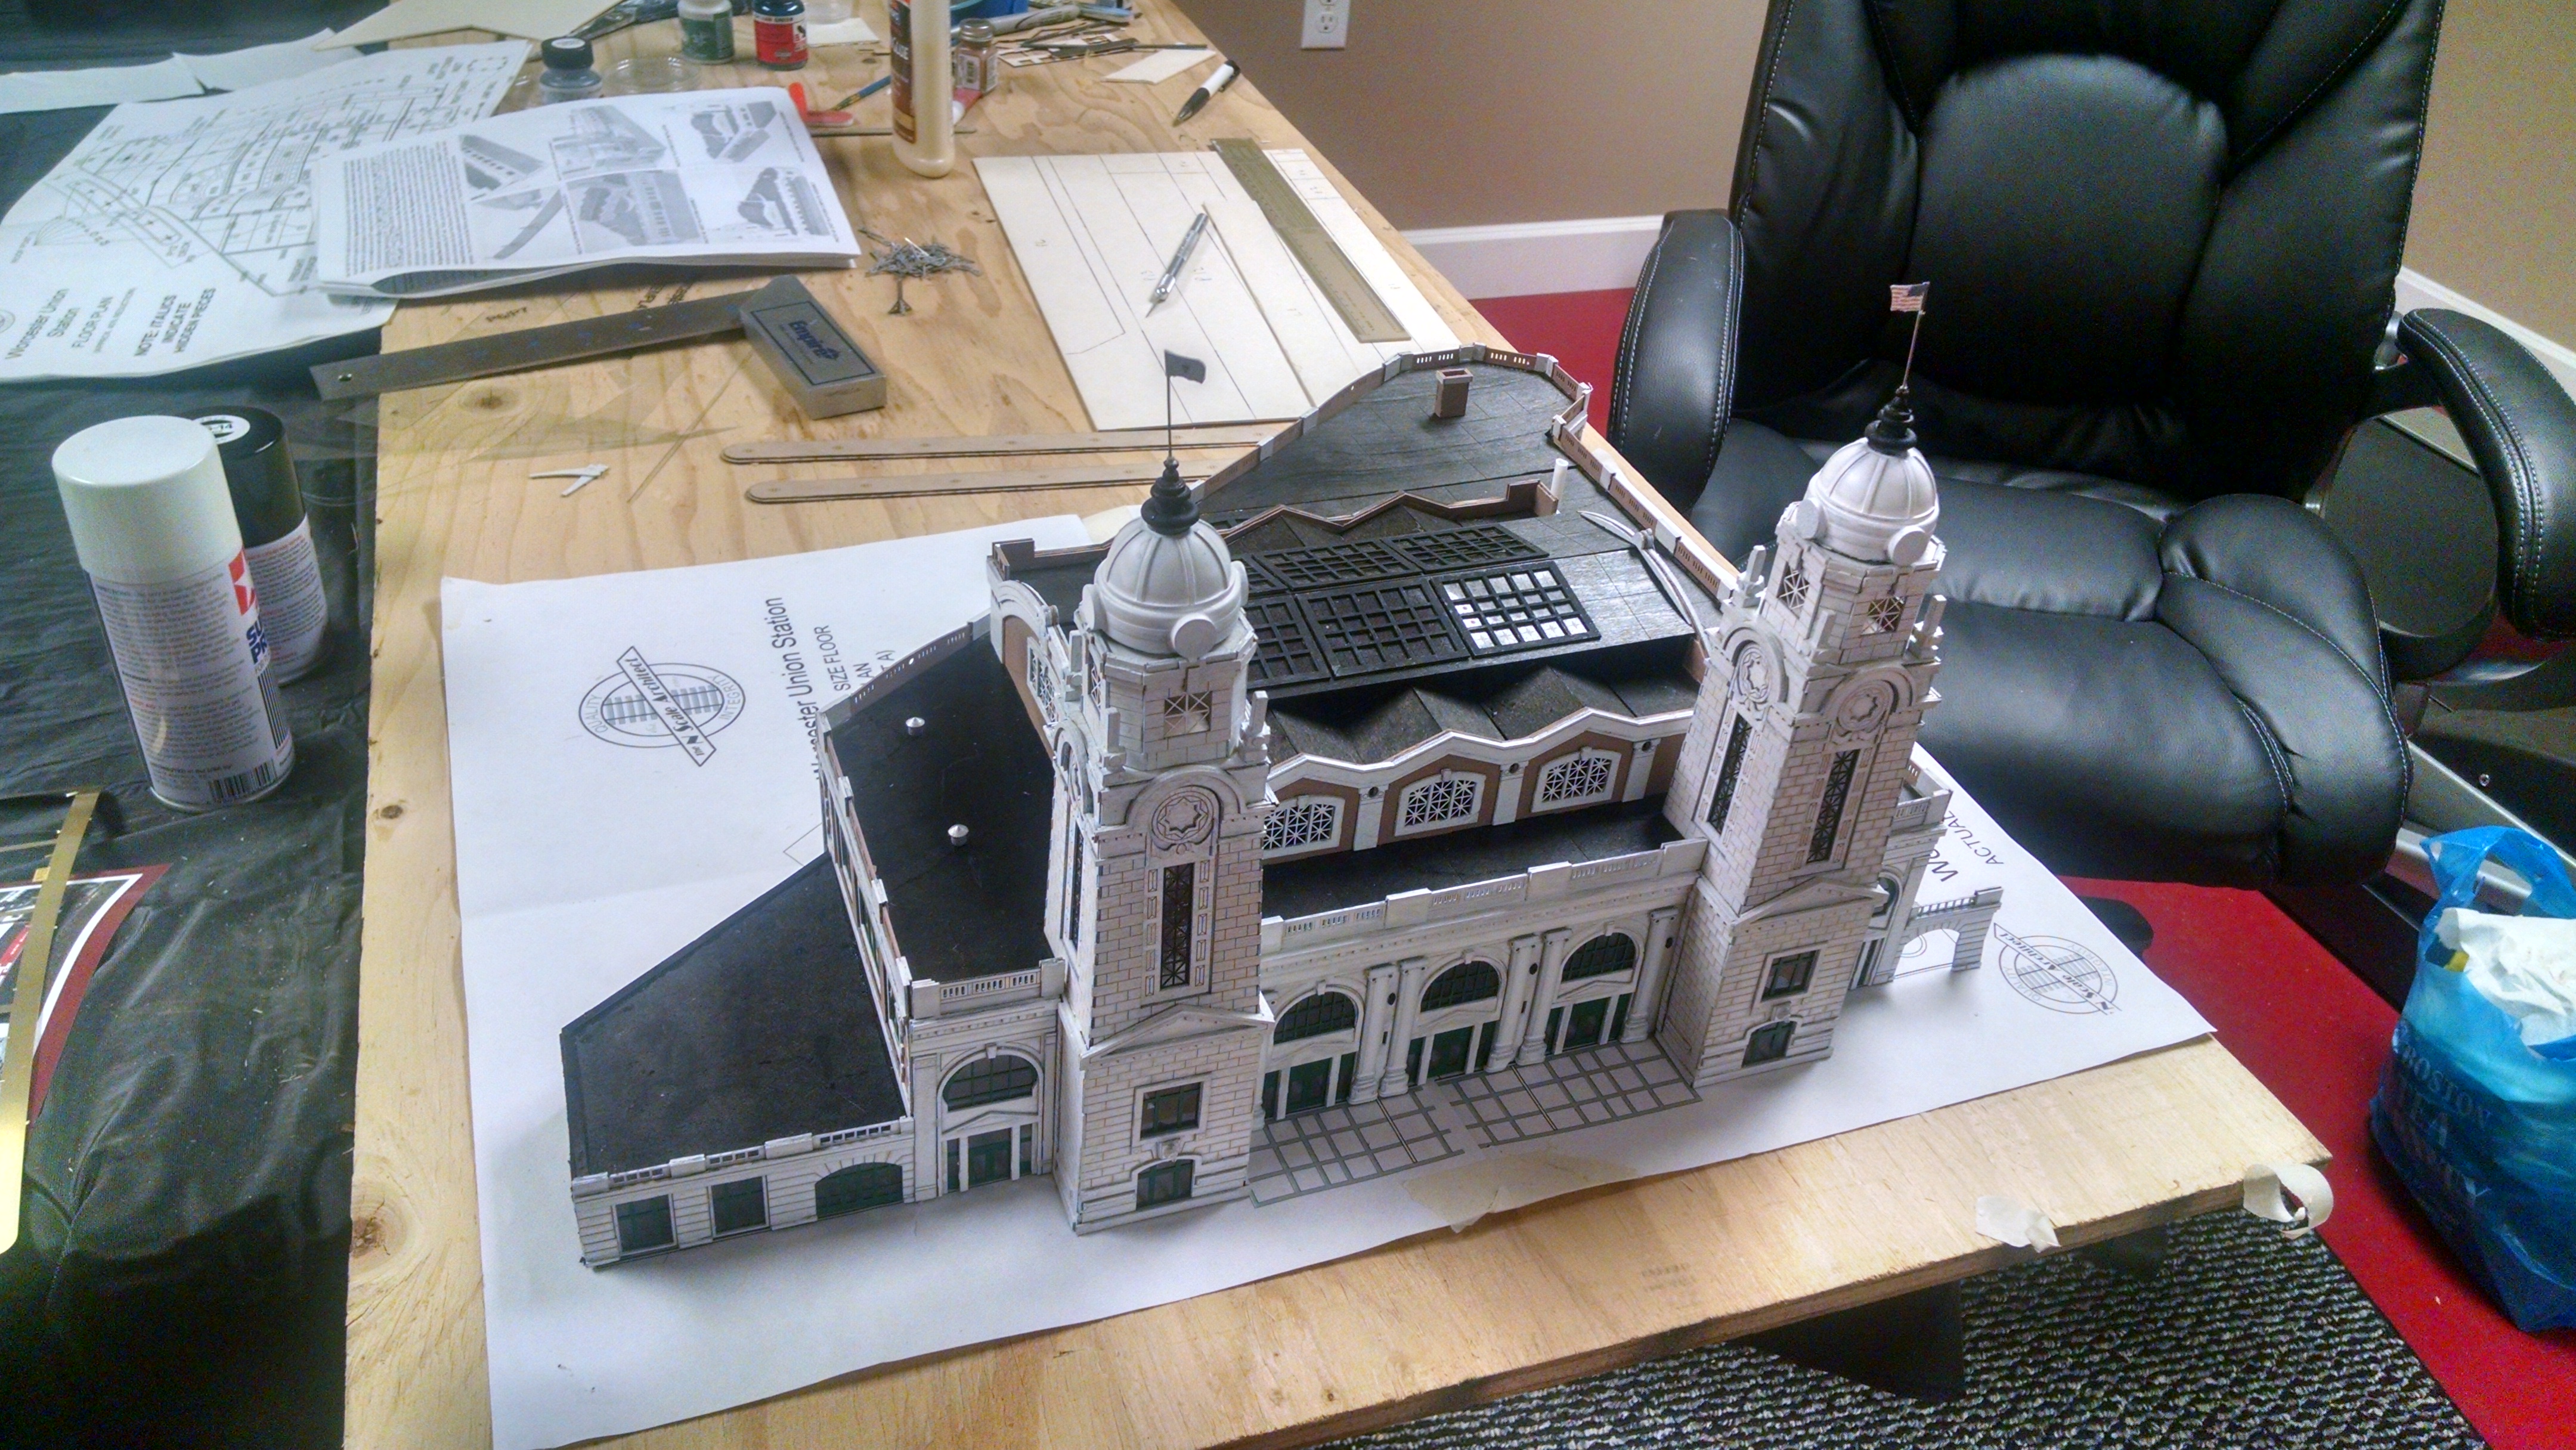
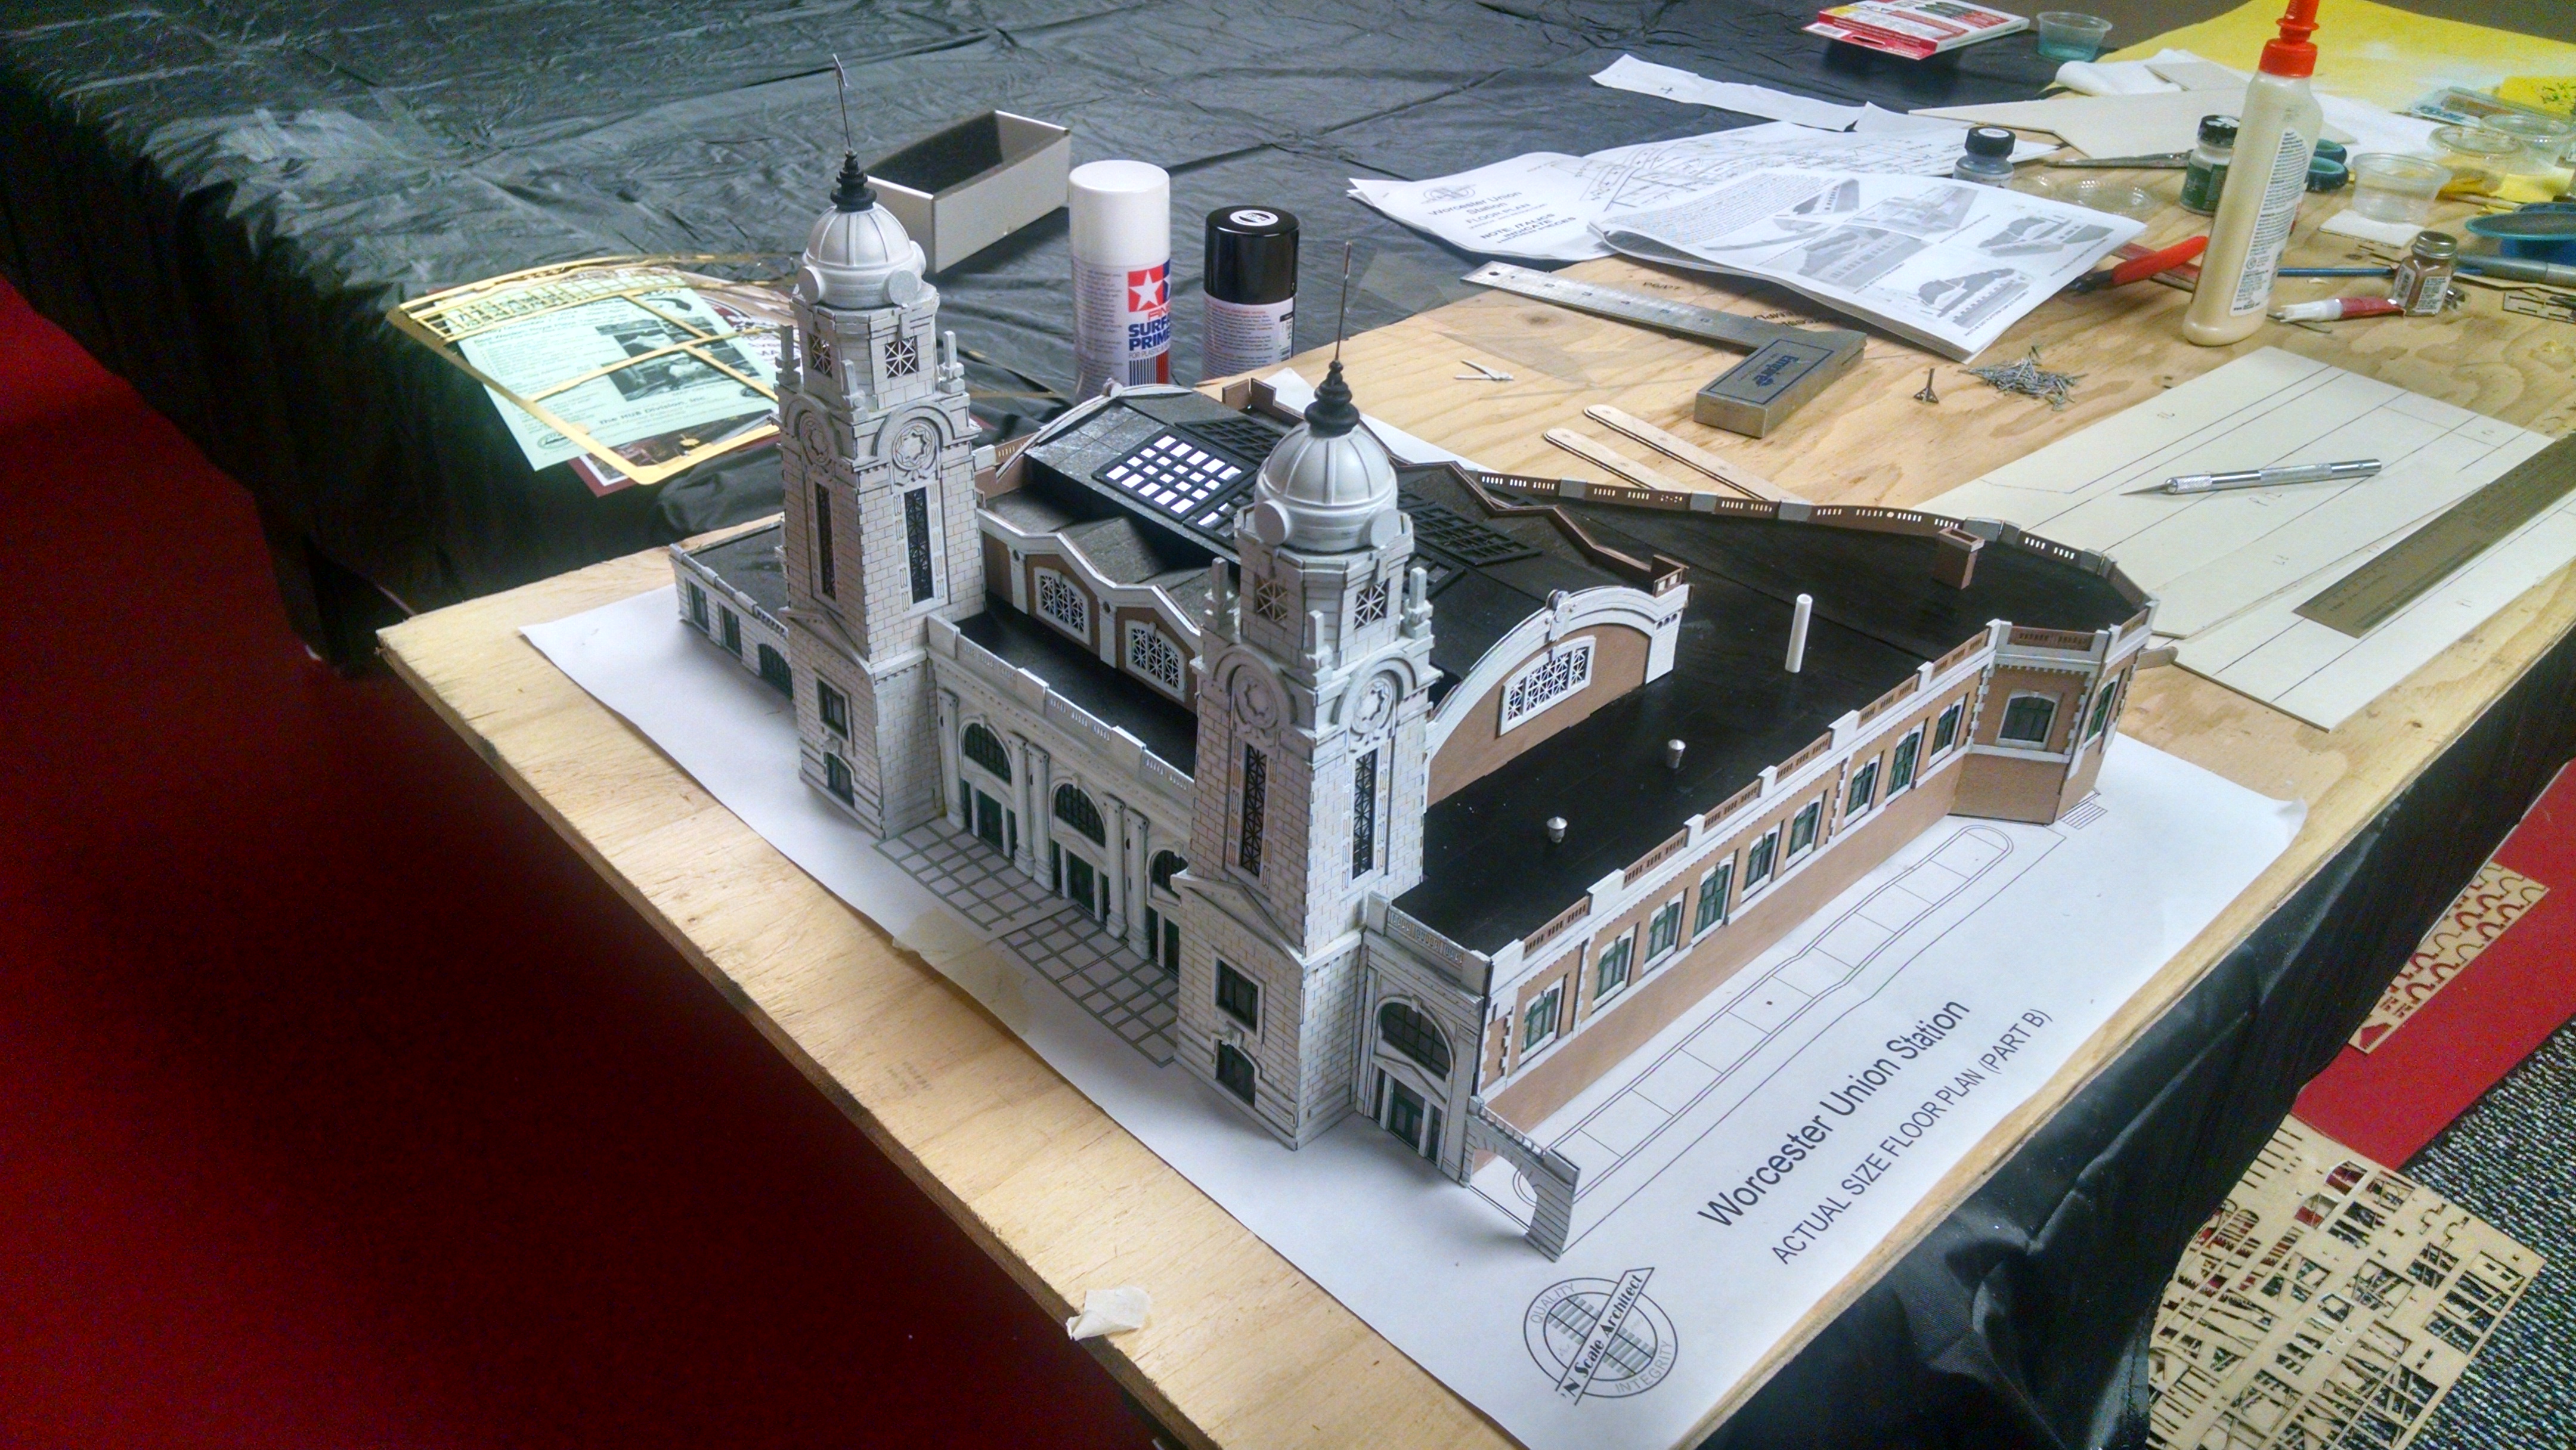

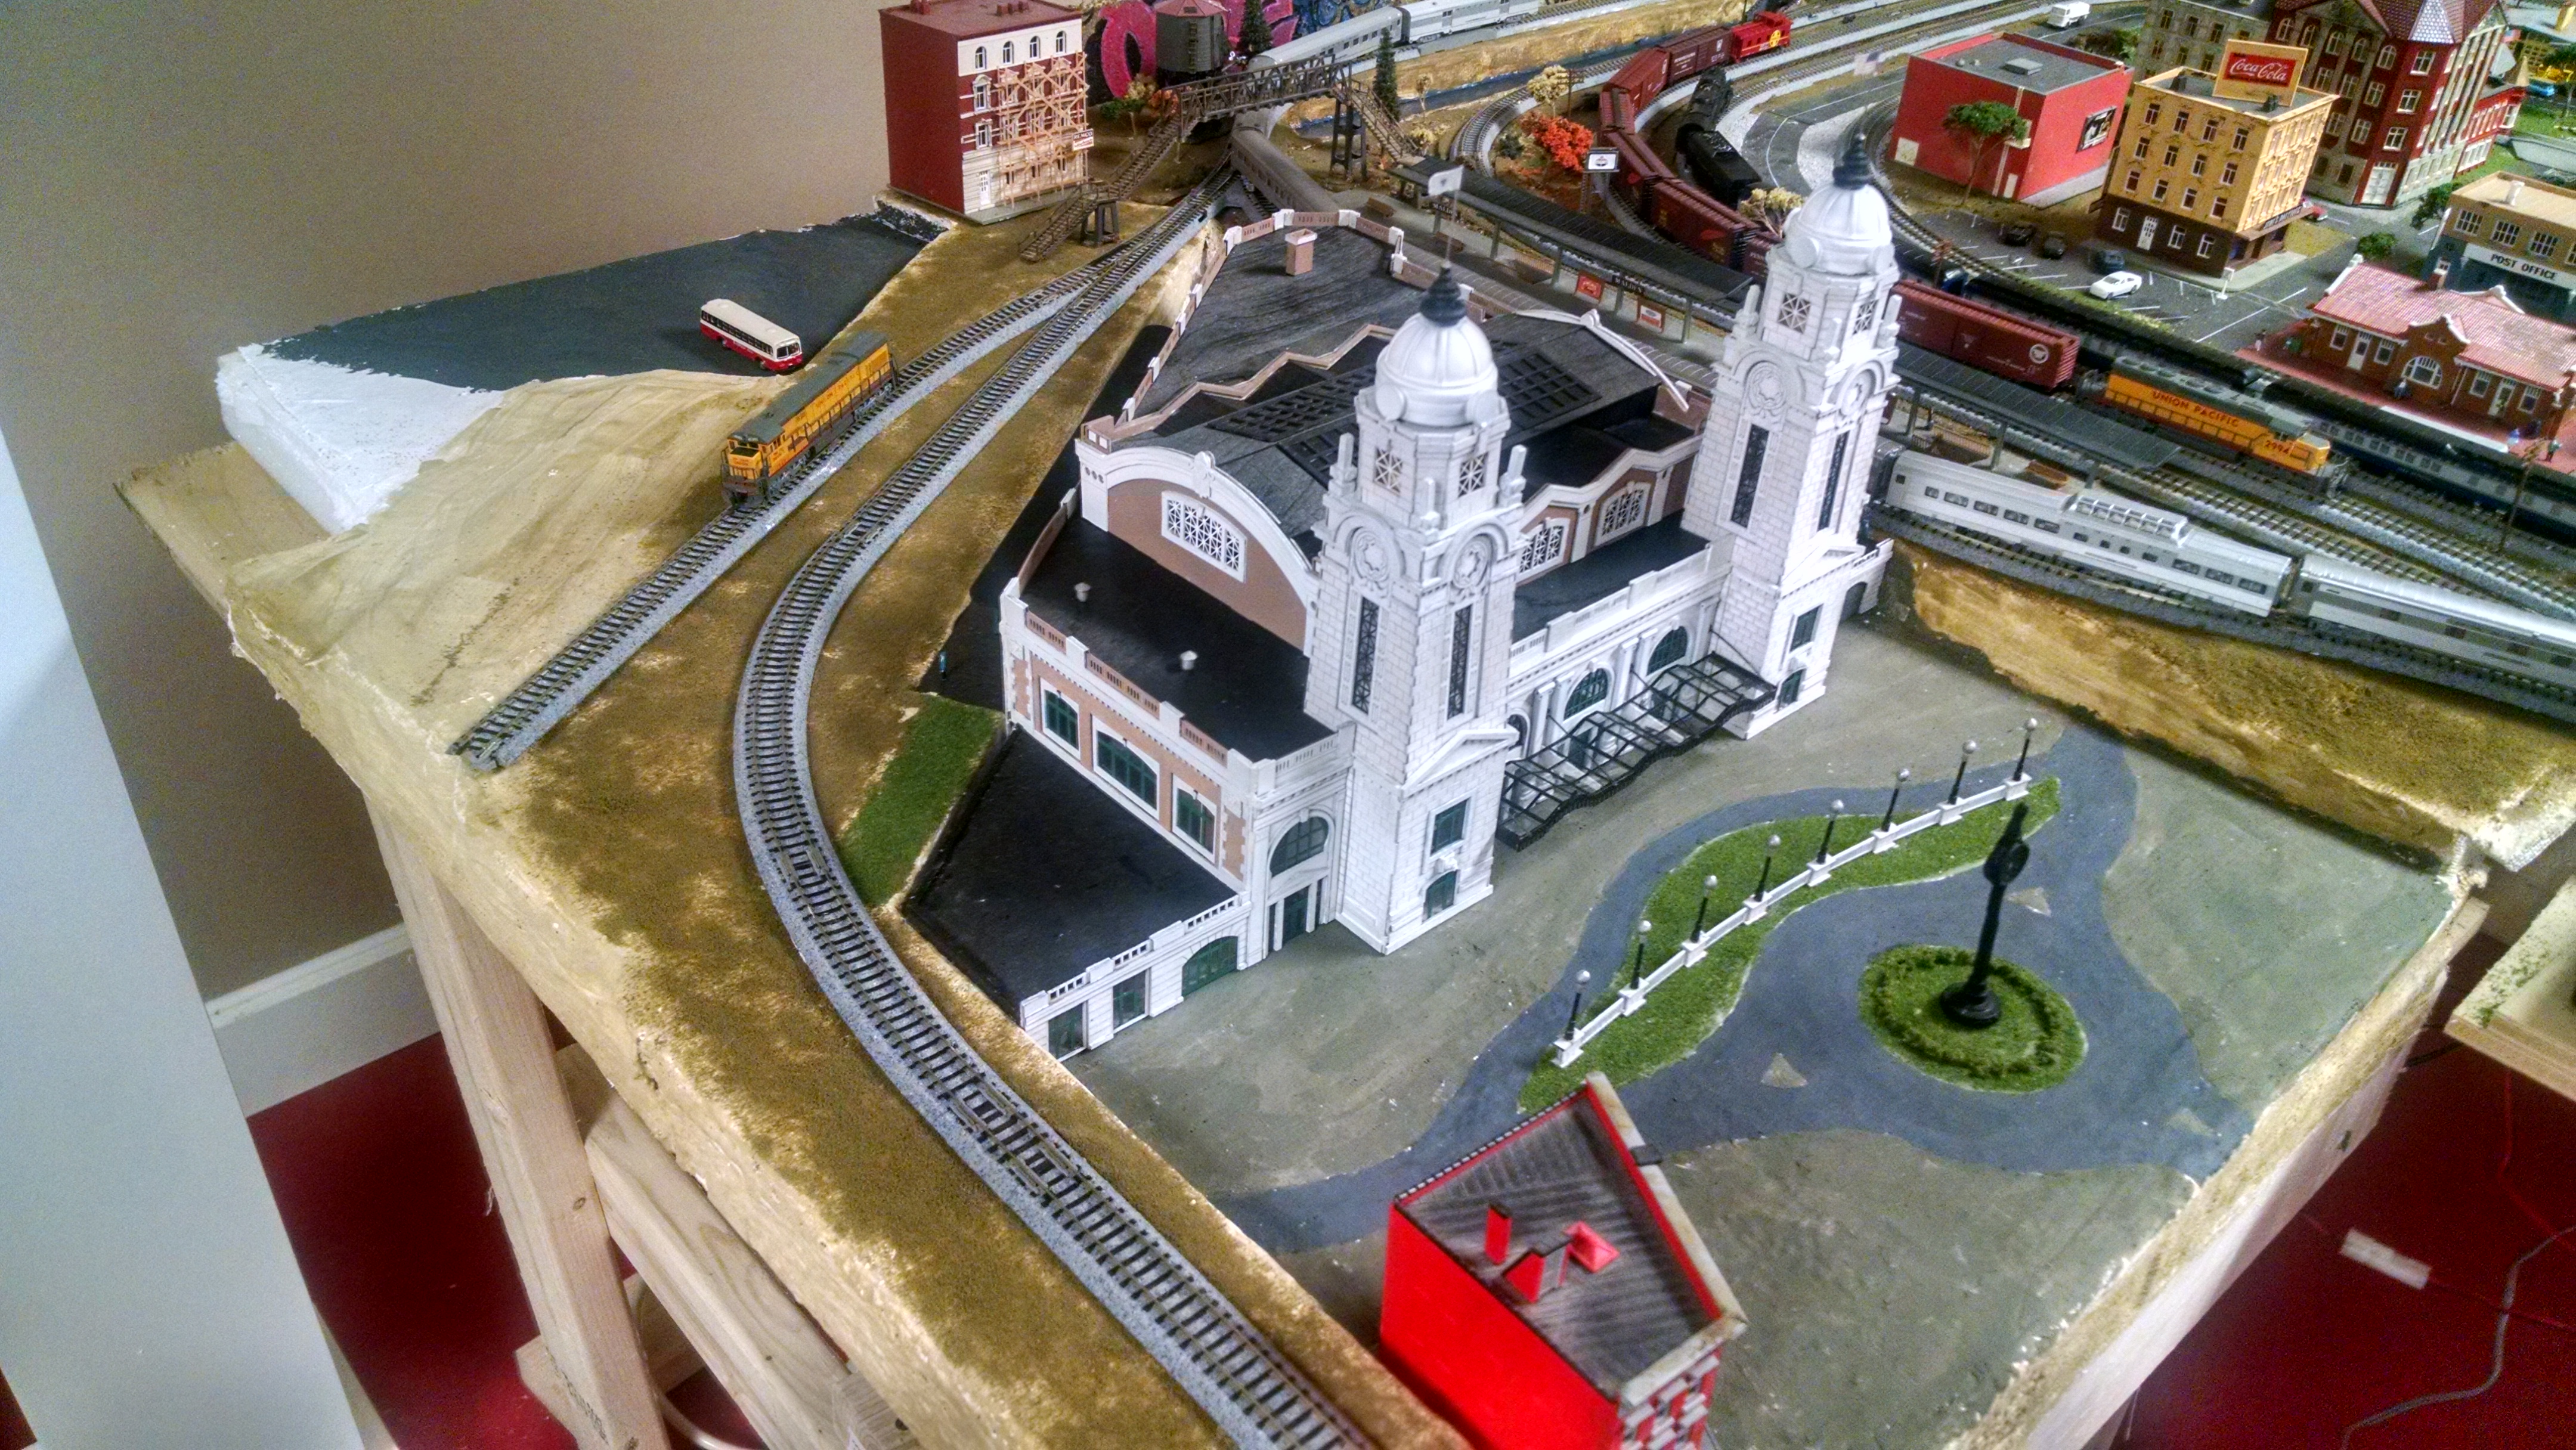
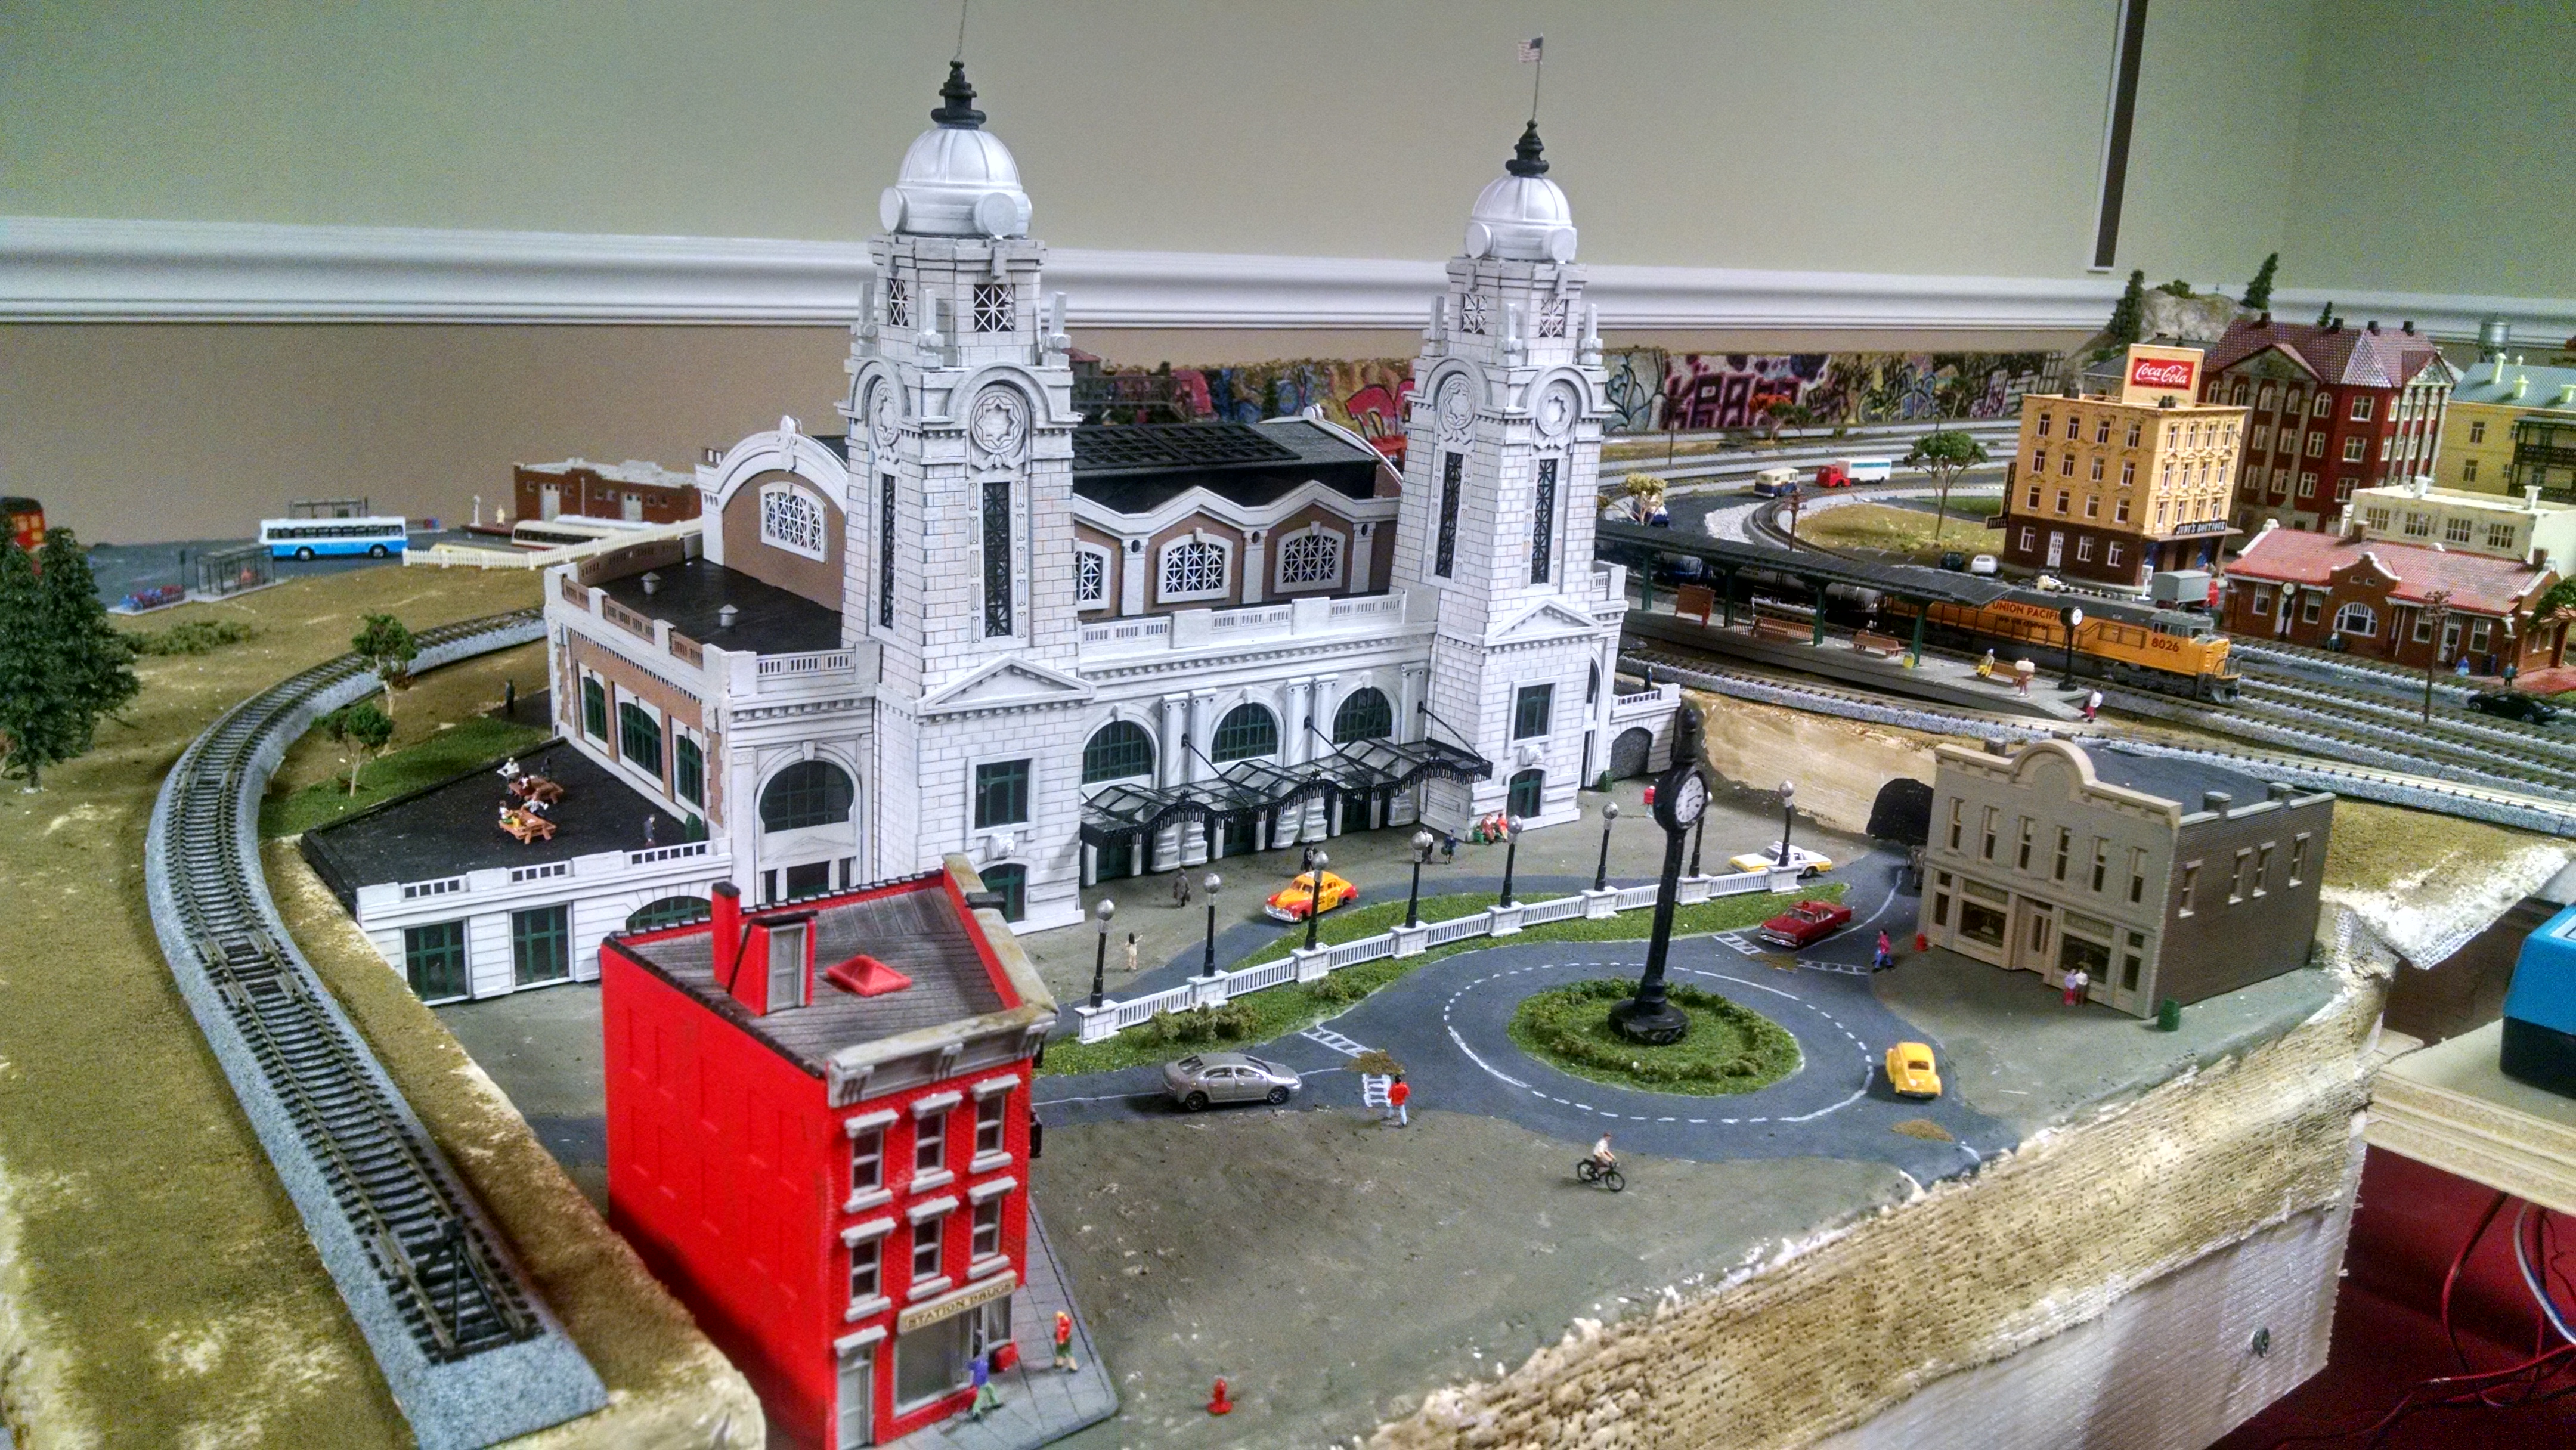

Great looking building, that’s what you call a big build!
Have to disagree with you though Al, its not scratch built if it’s made from a kit!
Suberb job though Ray and the rest of the layout looks great as well.
Mike S
This is incredible work Ray, great job. Laser cut models are in fact very difficult to work with. I love your enthusiasm towards your ability to tackle this. Keep up the good work.
Excellent work… As an architectural professor it routinely takes my students 100 hours or more to build a finished model – your model building gets an “A”…thanks for sharing.
For a moment, I thought it was the old Wembley stadium! 😉
Hi Ray
What a choice for your center piece, not supprised that people make comment, great to see, thanks for the photos
Mark
Nice Ray. There is no doubt the craftsman kits are a challenge, but, very rewarding. I have dicovered Rusty Stumps kits and they are very good, especially since I can turn them to typical Ozzi buildings.
Any way, well done
Pete
Wish I could find or get someone to build me the Kansas City, MO. Union Station. Have tried everywhere. No luck.
Sure is a stunning Building ..Well done on building it …Dave
Outstanding work. I, too, am looking for a model of Washington DC’s Union Station for my proposed N-scale layout.
What a wonderful job of constructing a laser kit! It’s certainly something you should be very proud of. A hundred hours is quite believable, given what I have learned from my own constructs! I’m a 78-year old lady, who is determined to continue pursuing my HO dream that began when I was just 4! My husband got me started two years ago, and in spite of several medical setbacks, it is slowly progressing…I would love to build the Los Angeles Union Passenger station that is a part of my childhood memories, but at $200, it might have to wait. I’m not sure I will ever be willing to do it, but I’ll keep my eyes out for a better price. In the meantime, I am having a great time alternating my time between mountain-carving and finishing my small town. My farm scene turned out to my liking, and gave me the encouragement I needed to continue on. This site has been my salvation, as there is no one in my area who does modeling, so in addition to giving me so much help, it keeps me from feeling lonely!…Thanks for your great post, and keep up the wonderful job of modeling!…Mississippi Marion
Beautifully done! Inspiring! Thanks for sharing!
Ray — Beautiful building ! I know the difficulty of building in miniature, but building in N scale beats most. Expect to start a very small N set this spring or summer, and don’t have the space for a building like yours. Hats off to you on this project.
Herb – Long Island NY
Great model Ray, really sets your layout off
Pete “The Mackem” in England
excellent build Ray..!!
what a great model and original station!!
it defo is a centerpiece of your pike..!!
and yeh…I wish someone could build the Kansas city Union station from scratch too!!
Stunning indeed! Where can one get these models?
FABULOUS
Great job Ray. I have tried building a few HO scale kits with fair to medium results. If this is in N scale I am very impressed.
WOW — such talent This is one or the best scratch built buildings that I have seen. Great Job.
Excellent job Ray on building this beautiful, complex and detailed kit. Though not scratch built (sorry Al) it is nonetheless a superior result given with a very time-consuming and challenging project. Keep up the good work!
Arnie
Fantastic piece of scratch building. Well done
nice station.
Great job on the laser kit, Ray. And a shout-out to Missouri Marion…I’m also a 78 yr old female realizing my life’s dream of model railroading…love the building and scenery but, also, the trains.
A Fantastic model, well done.
Very well done. Wish I had that patience.
love old buildings, more needs to be done to save them. beautiful work keep it up.
I used to live in Massachusetts and remember driving by that station on route 290. Great work! I need to look for something similar to add to my layout now.
Hi people, love the model of Union Station, as always I am humbled by the work of others.
A number of comments say how hard laser cut models are to make up. Out of curiosity, never having come across one in the flesh (or in the wood / plastic) why is this ? My instant, un-informed thought would be that being laser cut, the bits would be accurately cut and go together easily. Clearly this is not the case, but what is the problem? and are they usually best avoided by novices like me?
NEIL
Good morning,
Thanks for all the positive feedback. It is in fact a laser cut kit. It was my first attempt working with such a kit, and I was warned not to try my first on such a complex kit. There were times I had to stop and just walk away…take a few days off and then get back to it.
It will not be my last laser cut project now that I know that I can do it. My advice is if I can do it, anyone can. If you find something you like, go for it!
Thanks again for all the positive feedback.
Best,
Ray
That is a very fine model Ray. I would imagine that building a 2mm scale is very trying. I am just building a model of Tetbury Station in 4mm scale which is a laser cut product and is manufactured by Timber Tracks, who are based near Bristol. They are very expensive but the quality is breathtaking and well worth it. I model in EM Gauge but this is compatible with OO being the same scale, they also provide a range of models at 7mm scale (O gauge). The site is definitely worth a visit. When I finish the model I`ll post the results on this site.
For those of you who collect (or would like to – and I’m one of them but can’t afford them !) `full size’ replicas of your favourite BR outline model name plates, loco numbers, shed plates etc Timber Tracks can provide them as a kit!
One more great stuff Ray!
All the best
Jerry
Ray, your patience paid off. Beautiful job. I’m an O Guage person myself and have been looking for a kit resembling out State Capitol Building here in Hartford, Connecticut as one of the stops on my layout is Hartford.
Really like the fact that your pictures showed the station build in stages. Makes the station even more impressive. Thanks for sharing.
As pointed out by others this is NOT scratchbuilding, this is kit building. Scratchbuilding is building from “Scratch”….Nothing, Zilch, Absolutely Zero!!!
Nonetheless if it took 100 to build then that is a feat in its self!!
Well done Ray it looks fantastic.
What a beautiful job you’ve done on the Worchester railroad station. I have done a few small houses and stores from kits and, by the time I finish the interior decorations and installed lighting, I’ll be I have 25 or 30 hours into each one, so I’ve full of admiration for the time you’ve put in and the spectacular results you have achieved.
So glad to hear from other women who are working in, and enjoying this wonderful hobby.
Great looking building. Have you thought about using it in a diorama and entering it in a contest or show?
Hi again, so impressed with this that I am still looking. I can’t help noticing the shot of the box the kit came in.It says “Over 1000 parts” So if this took Ray around 100 hours, thats one part found, cut out, correctly sited,& fixed in place every 6 minutes for 100 hours !! Now that is REALLY impressive.
Whenever I make kits, the glue brings me out in an itchy rash, so I still think of it as scratch building !!
NEIL
that’s kit built, not scratch built. Scratch building is literally starting from scratch with uncut un-prepared materials, eg, card from cereal packets, and a drawing.
Laser cut kits are kits!
Having said that, the model has been very well made.
Great job Ray. Would probably take me longer since I have arthritis in my hands. Would love to find my home town old train station. Fort Wayne Indiana Baker Street Station.
Regarding the “Scratch built” issue. I have been away from modeling for a number of years, but have plans for when I get to a new house. However, I have always wanted to build a wooden sailing ship. I found a “kit” at a church rummage sale for $5. I grabbed it because it was a “kit”. I have since found out that it is the most difficult level of model that Bluejacket makes. I took it home and wondered how a 36″ boat could fit in a box that is only 24″ long. When I opened the box, I found sticks. And more sticks. And more sticks. Some planks, a bit of string and some castings. And plans to make a 36″ boat stick by stick, just like the real boat builders. I don;t care it the box says “Kit”. A kit can be just a collection of raw materials that the builder uses to scratch build a model. Great work Ray. There was probably a lot of scratch building that you performed building that kit.
Beautiful model, extremely well done, but too many excuses from posters on why they can’t or won’t get into modeling. Build the kits that are available here, they’re affordable and easy to build.
WOW! SUPERLATIVE!! What a colossal job. You must have the patience of Job. You’ve given me inspiration to complete the large steel mill kit from Walthers for the industrial section of my HO layout. It’s halfway there. It resembles the steel mills in the Pgh Pa area where I spent my youth watching trains haul iron ore into the mills and trains hauling red hot ingots of steel out. And steel mills in the USA are coming back!
Keep up the great work. You’re an inspiration to all of us.
Capt. Kirk (now in Fla.)
Wow great I too have always been interested in Worcester station. Where did you find model Ray I would love to get one
Amazing, well done
Looks GREAT!
Ray,
AMAZING scratchbuilding work! Keep up the GREAT work and skill! ~Hemi
WOW…….that is beautiful……..
Gary M
I live about 10 miles from Union Station and have admired the restoration work the city of Worcester has performed.
Your recreation of Union Station is an excellent example of scratch building work, well done!
Beautiful job I work in fiberglass and scratch built the two towers
Hi To Sparky: Just checked eBay for the station previously mentioned. N Scale Architect Union Station on eBay $80.00 plus $11.50 shipping. Very nice kit.
Regards: Ray
Ray
You have used a kit to create a great model but for me the inspiring scene is to be seen in the background of your penultimate picture, the red building complete with scaffolding that marks you as a truly creative Modeller. Do keep us up to date with more of your work.
I saw wembly in it too
100 hours was time well spent. What a fantastic centerpiece. Cheers! NJ Mark
Impressive much better than Worcester station in the UK!
Superbly impressive work on the kit-build..well done 🙂 JD
You did a beautiful job on the station kit Ray. Thanks for both the original prototype photos and the in-process shots of your model. I’d love to see more photos of the rest of your layout.
nice!!!!
Having grown up in Worcester, I’ve always loved the design components of Union Station. It is wonderful the city renovated it and brought it back to its former glory. Your photos bring back many memories. You did a superb job building that model.
Thanks for the memories!
I’ve never built a laser cut model but when modelling you will find me scratching my head trying to work out what next or which way is up.
Andrew in Oz
Beautiful building! Beautiful job!!! Been there many times.
Mississippi Marion,
I live in South Mississippi and would like to contact other modelers.
Well done, Ray!! Fun to see for certain.
Nancy from Sequim
Wow is overused in this case but what else can you say. This the best build I have seen and this one prompted my first post ever. Wow!
great job on the build! N Scale Architects kits are very good, but usually quite large and with a lot of detail parts to work with, so are not a good choice for the novice builder or someone without patience, but you have shown it can be done. good advice you have given, when you get tired or frustrated, walk away, come back later with new eyes and new attitude. It also helps to invest in some good modeling tools, model sized clamps, a pair of 3-4-5 blocks for squaring corners and as a gluing weight, a couple pairs of tweezers: a pointed pair and a bent pair, and a flat paddle tipped one, and a tool I think is indispensable: a #3 plate Optivisor. This should be your first investment. Trust me none of the other magnifiers is as good as the Optivisor brand. They are light weight and comfortable enough to be worn all day, can be worn with glasses and flip up when not needed. These will make the most difference in the quality of your modeling! They are available from Amazon and Micro-Mark.
I think the finishing touch would be a thin wash of alcohol and India ink. It would age the building to better resemble to prototype pictures and bring out the detail. To make the wash add 1/2 -1 teaspoon of ink to a pint of alcohol (isopropyl or rubbing alcohol) mix well and apply over all with a large soft brush top to bottom. The thin color will flow into the low spots and detail, darkening and making them stand out add a second coat under horizontals like eves, window sills, and streaks down from corners or where dirt would accumulate and wash down. Of course test on a sample of the building first.
Hey I got a LEGO racecar, for Christmas, and it’s still not finished. My dukes are thoroughly kicked. You guys are my hero’s!
Gorgeous! But what is that garish red building in front of it? Please tell my you just set that there while making a place for it. Elsewhere!