Rob’s been in touch with his N scale freight depot:
“Hi, Al —
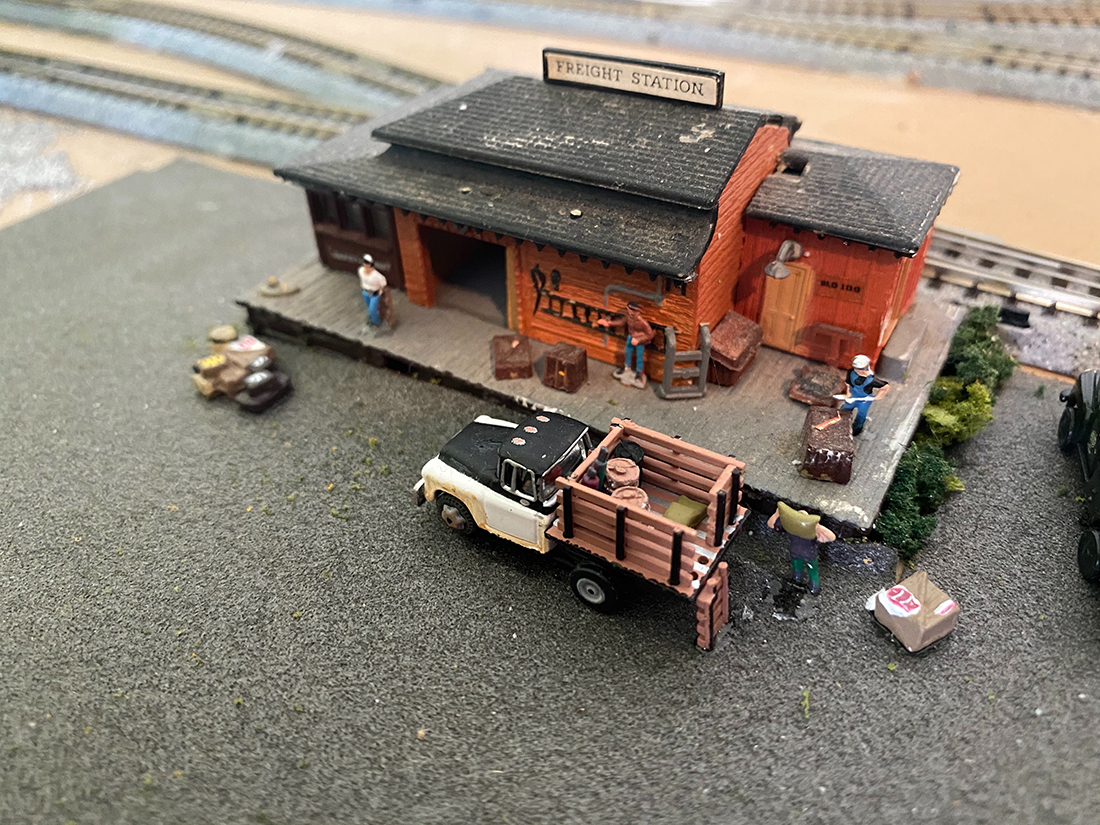
Here’s a little progress update on my N scale layout in my NYC apartment. The first is the main freight depot, which I’ve gotten cluttered up a bit.
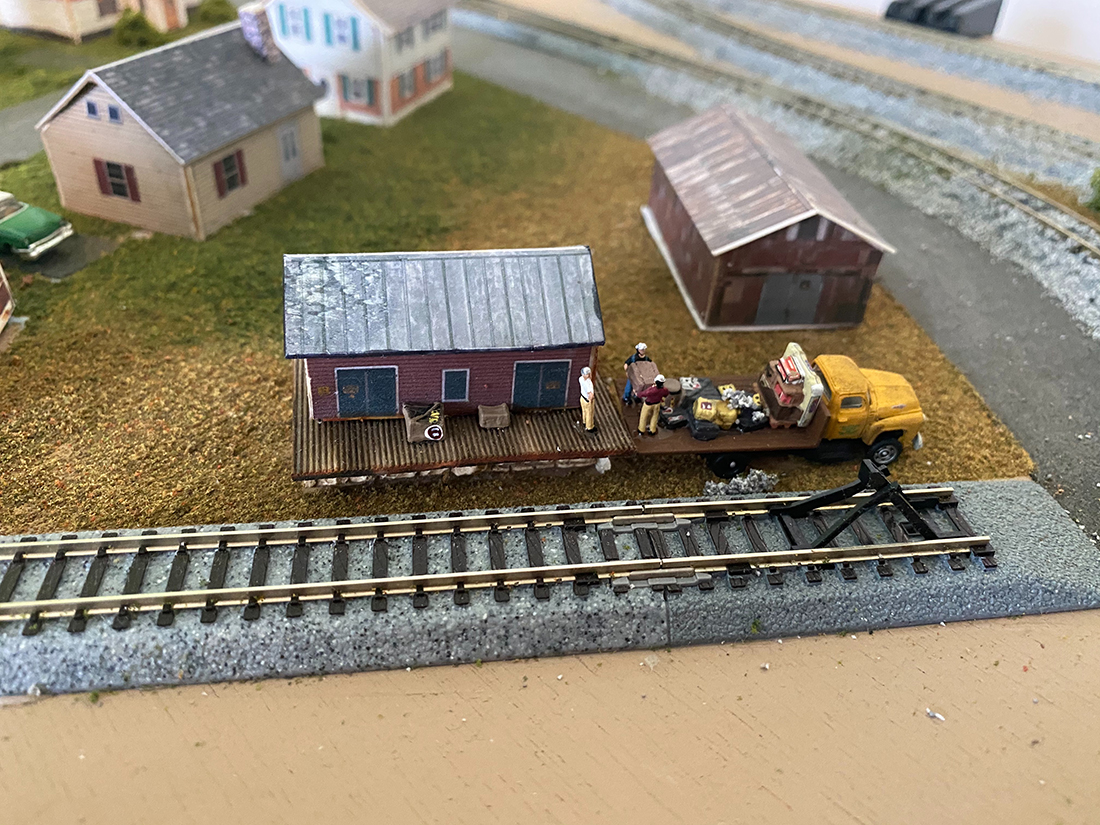
Here is another freight facility, using a print-and-build building with platform and details added
And finally my hobo hangout, with a furious checkers game in progress. And a dog. Another of your structures in the background, and the beginnings of a scratch-built engine shed. It’s a de-commissioned baggage car, muddied up a bit, with the deck added.
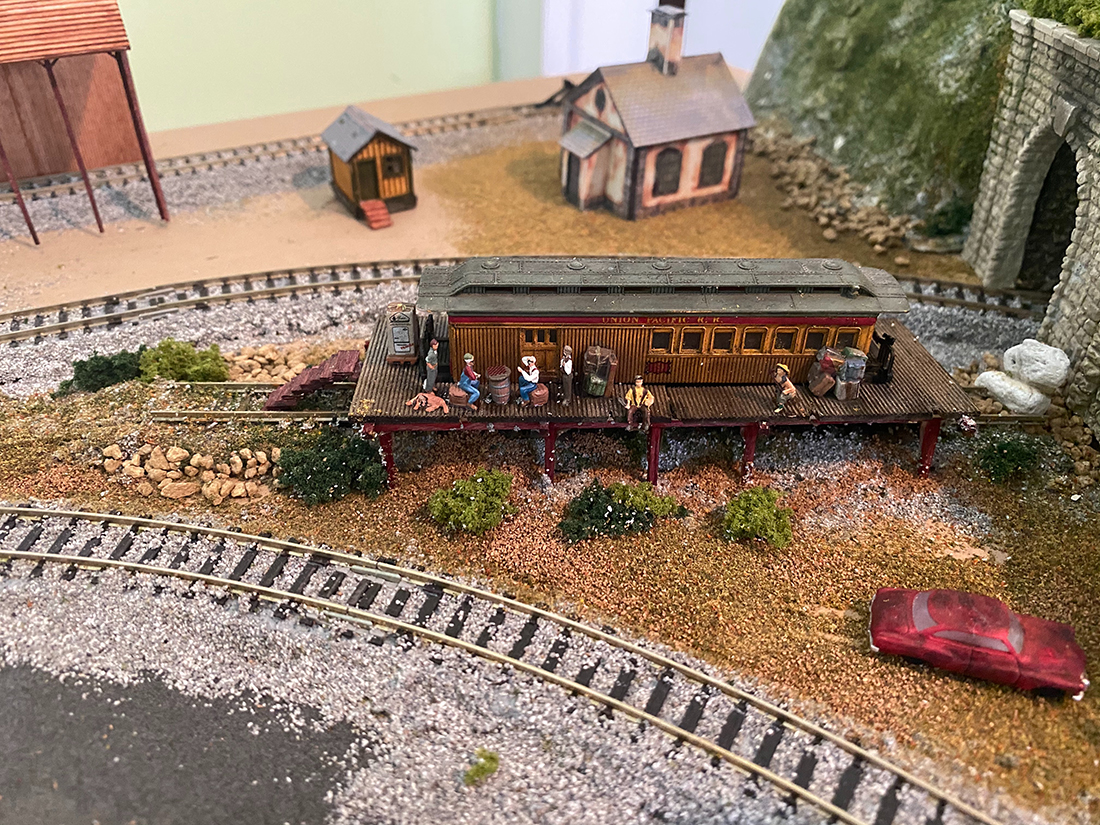
This might be the “Ironwood Redruth Railway”; I’m still contemplating names. It would be quite a railway, as one of those towns is in the Upper Peninsula of Michigan, and the other in Cornwall!
Rob”
And now on to Rod:
“Here are a couple of photos of odd jobs done during the great shutdown.
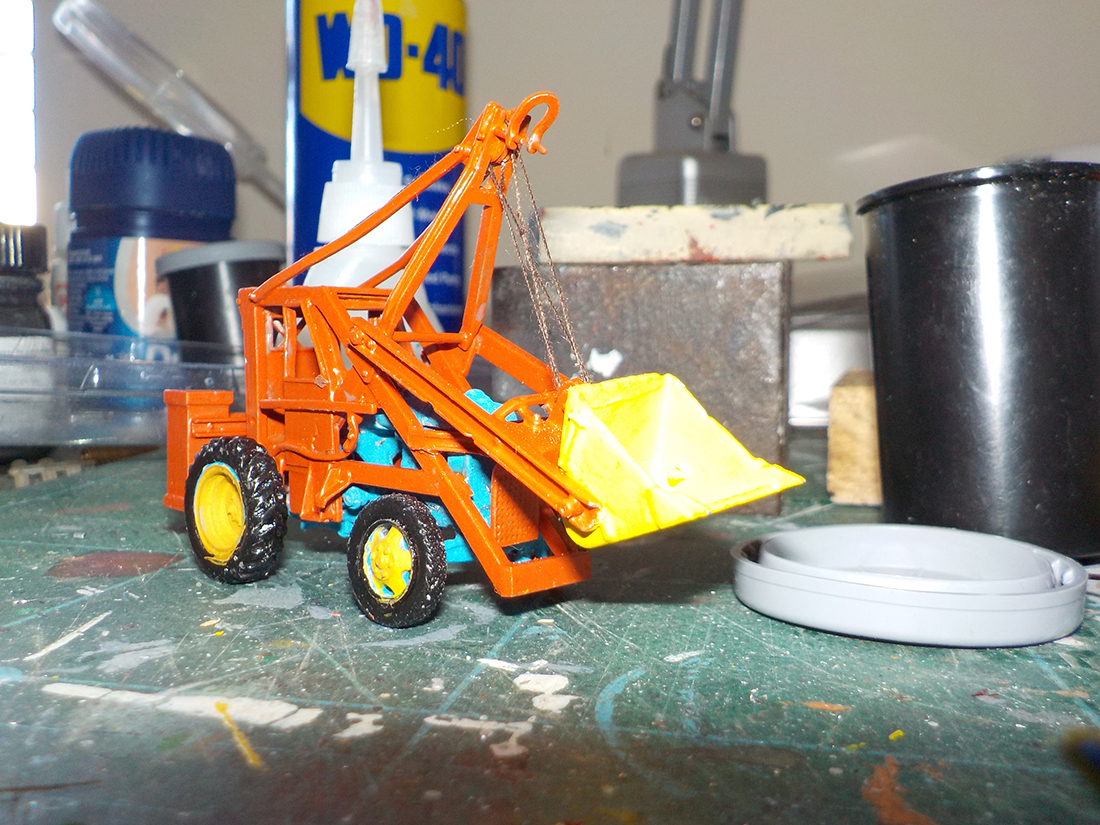
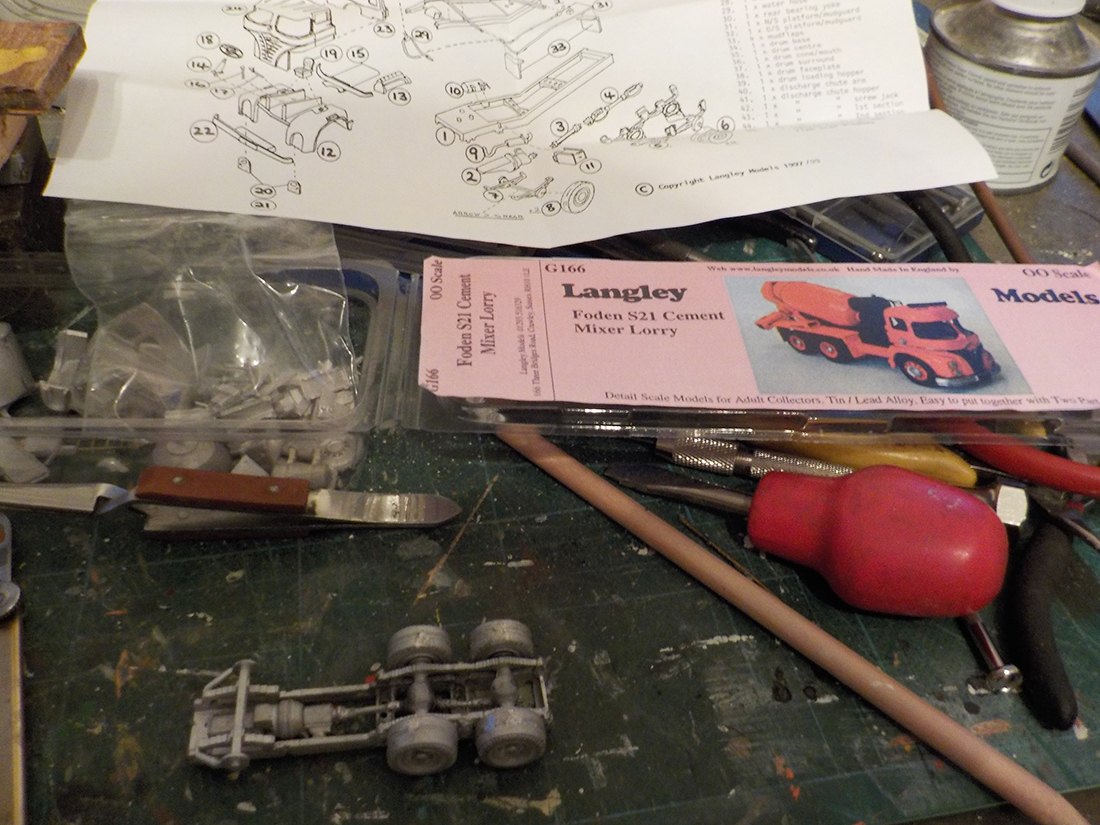
Firstly, a Fordson tractor with Chaseside loading shovel framework, from a whitemetal kit by Langley Models, who I had a lovely chat with while sourcing a replacement shovel bucket, the folk who run these artisan kit firms are really making a labour of love and deserve our support.
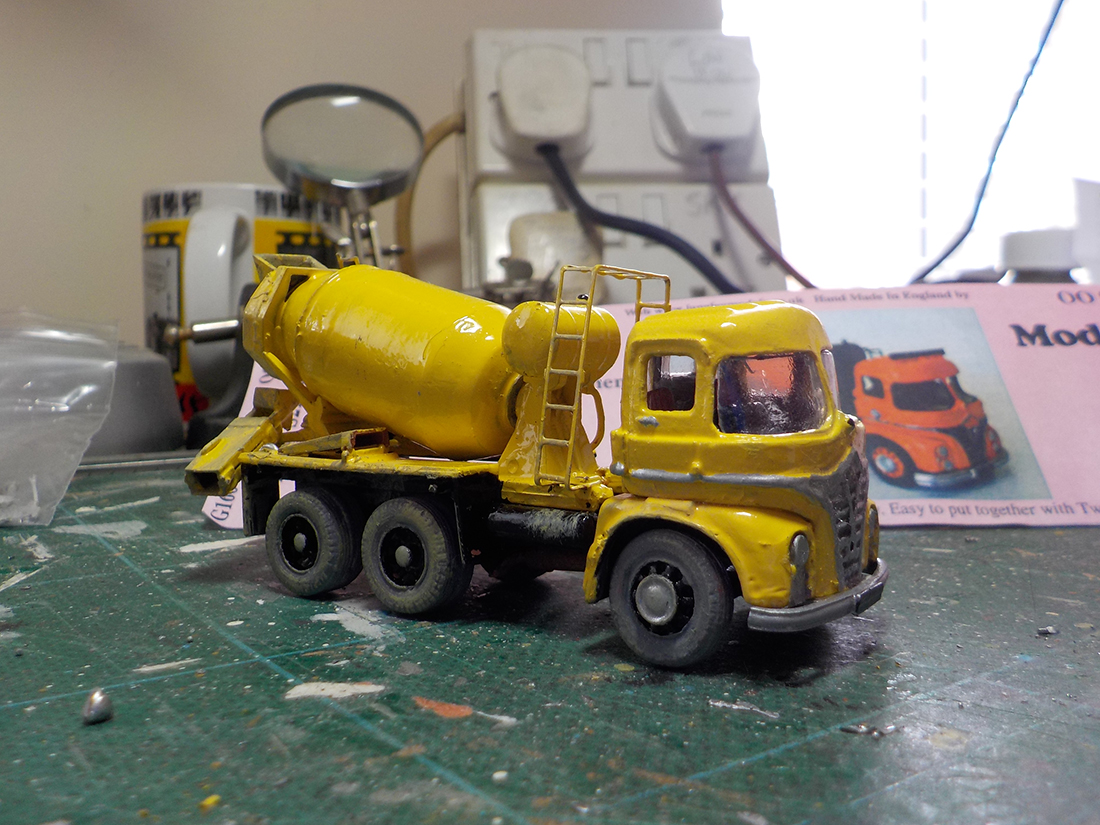
The second and third pic show a Foden six-wheeler cement mixer truck, also from a Langley kit and a joy to build, I did quite a bit of it with low melt solder which makes it all a bit more solid than the cheap supermarket superglue I’d been using. Both these models are for a cement batching works we’re making on the local Arriva staff model railway group.
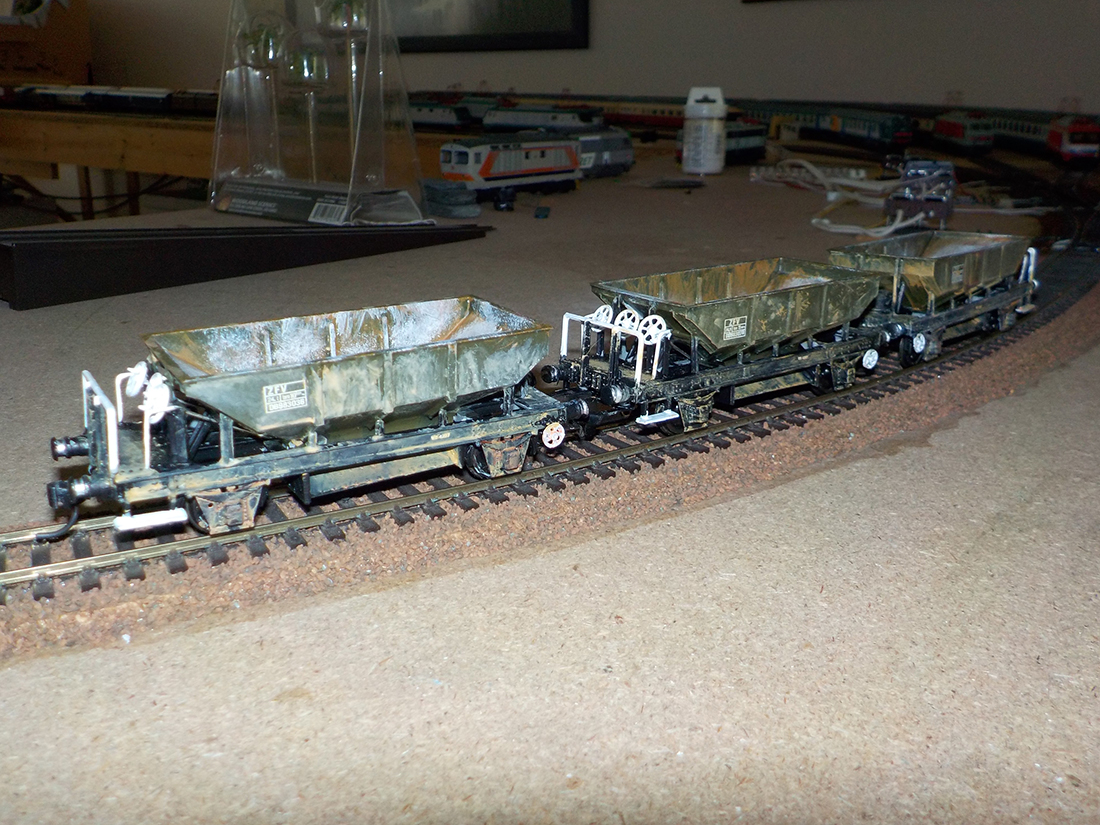
Finally, a batch of British Rail ‘Dogfish’ ballast hoppers from the Cambrian plastic kits, these were a bit of a swine as the hopper body sits within the frames and is supported mostly by the vertical angle irons off the solebars. Usually with a plastic wagon kit you can assemble the chassis flat on its back to get the running gear square and level, but not with these as the solebar castings include both the W-irons below the solebar, and the hopper support angles above them.
I used a piece of nice flat ply with a batten across the end and a grid drawn on it, which I put together for getting brass loco frames square for soldering. I set the solebars upright on this using Blu-tack under the W-irons, which allowed me to attach the headstocks square across the ends to form the frames.
They all run true, thankfully. I think I may be overdoing the weathering a bit though!
Rod”
“Hi Al… well after a bit of consideration… Dangerous Dave has struck again… yes time for a few changes… not absolutely sure what the outcome will be, but after watching same layout for 18 months now, its time for a change, just uploaded this video, and maybe you will get some idea of what I intend doing.. least give me something to do on these wet days.. and well thats what the hobby is about, building a layout.
Regards
Dave”
Latest ebay cheat sheet is here.
A big thanks to Rob for sharing his N scale freight depot. And to Dave and Rod.
That’s all for today folks.
Please do keep ’em coming.
And don’t forget, the Beginner’s Guide is here, if you want to make that start.
That’s all for today folks.
Please do keep ’em coming
Best
Al


Just a tad drastic Dave! I know what you mean about the slope up to the suspension bridges, but it’s not exactly a cosmetic change. I hope all goes well and I will follow your progress with interest, keep us all posted. Thanks Pete…
G’day Dave, amazing how fine surgery can be done with a 5lb lump hammer. All very exiting, can’t wait to see the next instalment. whatever it will be, i assure it will have some nice juicy ideas for me too. Maybe you need a military installation of some kind! (I make this suggestion because, I am trying to incorporate one on the side of lake (on one side I have a holiday camp and caravan park and on the other I think an army base is needed).
Good luck Dave, i am sure it will look great!
cheers, Graeme from Bendigo Victoria.
That what mine kinda going to look like.
Dave,Dave, Your suspension bridges were ur signature series of your layout.
you must reincorporate them!
The Critic
Dave never like the bridges anyway….can’t wait to see the finish, Sorry almost finish layout. Ha,Ha.
Dave, I’m glad to see you removed the sailboats from beneath the bridge. That was no place for a sailboat to be and always bothered me. As Robert Brady mentioned, your large suspension bridge is your main signature and hopefully it will remain. I think it’s great that your layout never stops evolving and it’s always a pleasure to view your videos. Thanks. Minnesota Mike
OMG Dave! I think that is the 3rd renovation in the last few years I have been watching. And my layout is still all in my head. I really admire your layout and all the detail you put into it but I won’t miss the grade change at the end of the bridges starting down the slope. It needed a vertical curve there. Can that be done in the model world?
Well Dave
I really liked your last series of changes brining in the sweeping curves so I’m sure these changes that your undertaking will be a similar changes for the better, I had notice in the past when your trains came down off the suspension bridges that there was a definite sharp change of angle that was reflected in the movement of the trains as they crossed from the edge of the bridge. Dropping the rise should definitely eliminate that . Anyway happy modelling and looking forward to see how and what you develop on your layout,.
Thank you all re your Comments on my change using the big Hammer , need a big one that PVA glue sticks good ….I think I shall have to keep 1 of the suspension bridges but at a lower level , maybe just 1″ to 1″ and 1/2″. its a case of try and see if it works ….but like a lot have said it was far too steep before a…Dave