Steve’s been busy with his Balsa buildings – but he’s after suggestions:
“Hi Al
I have been following your how to’s for a few years now and I need some help to decide on what to do for a town layout.
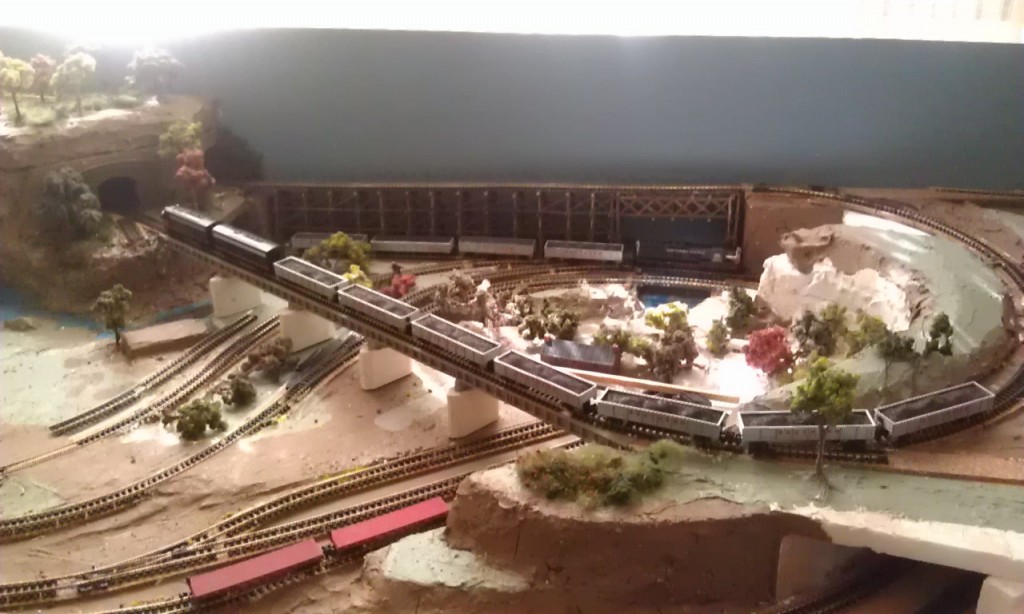
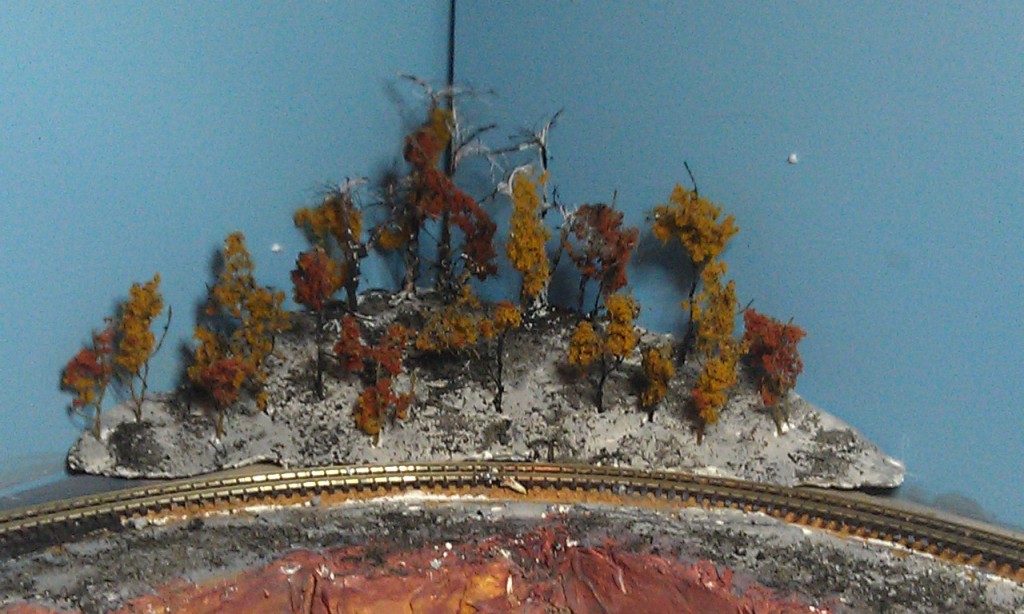
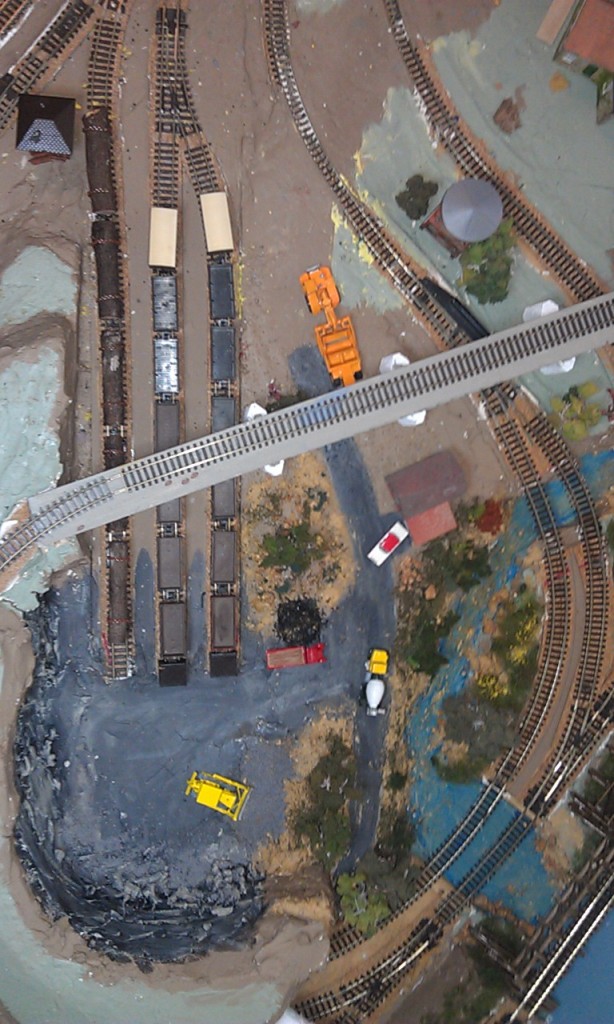
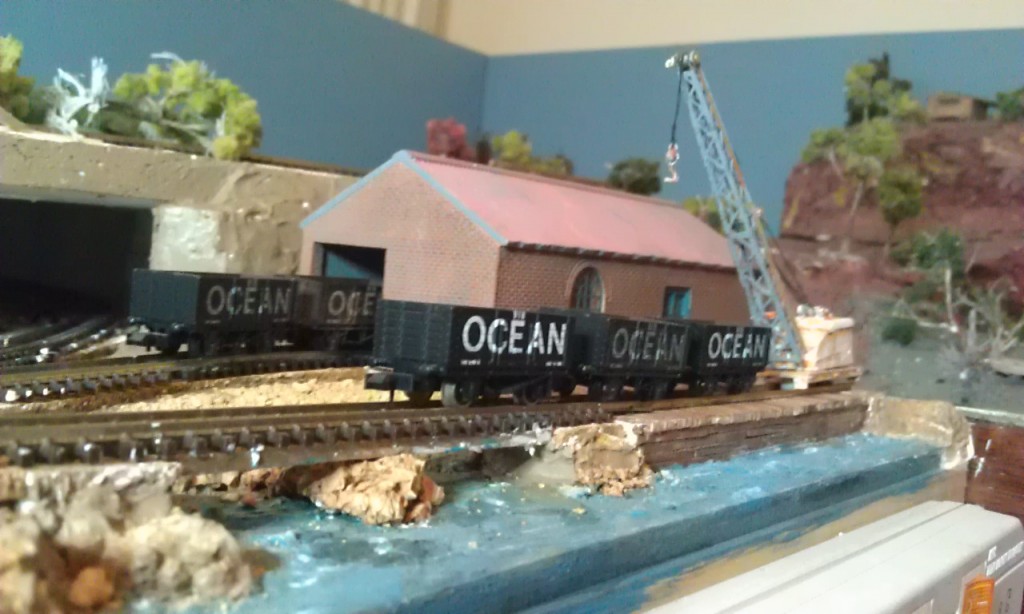
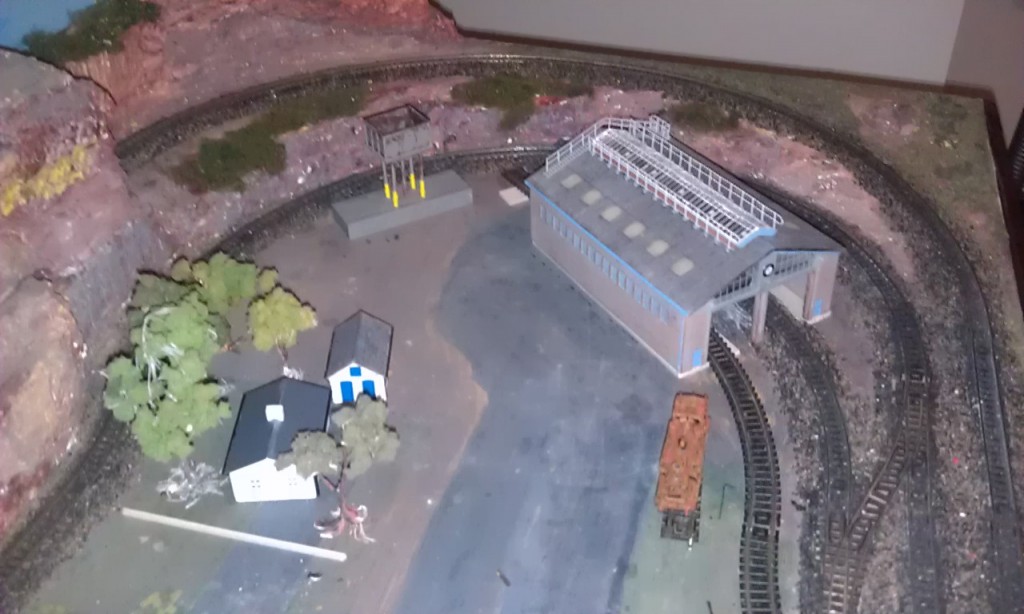
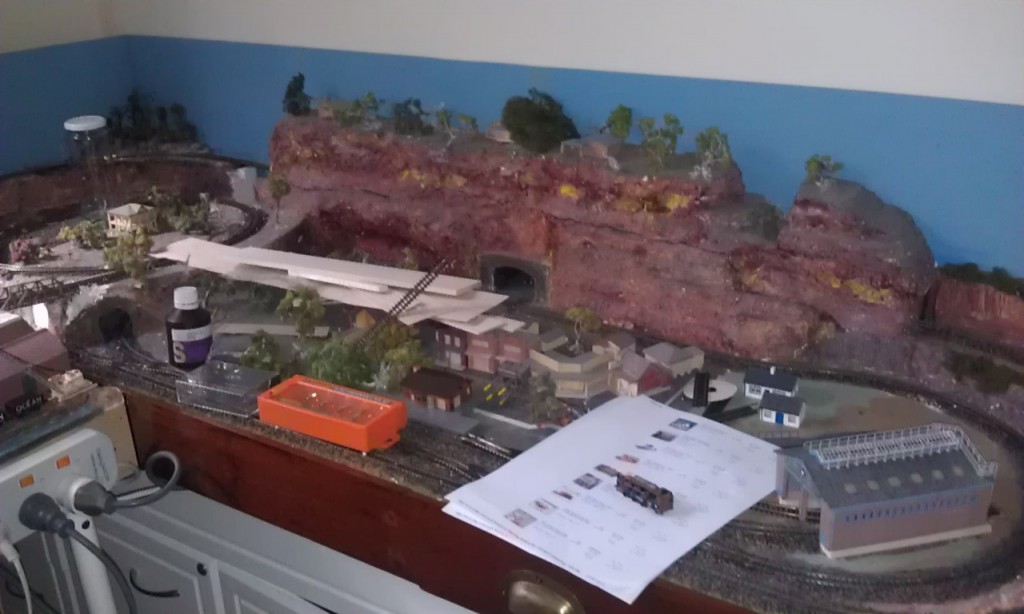
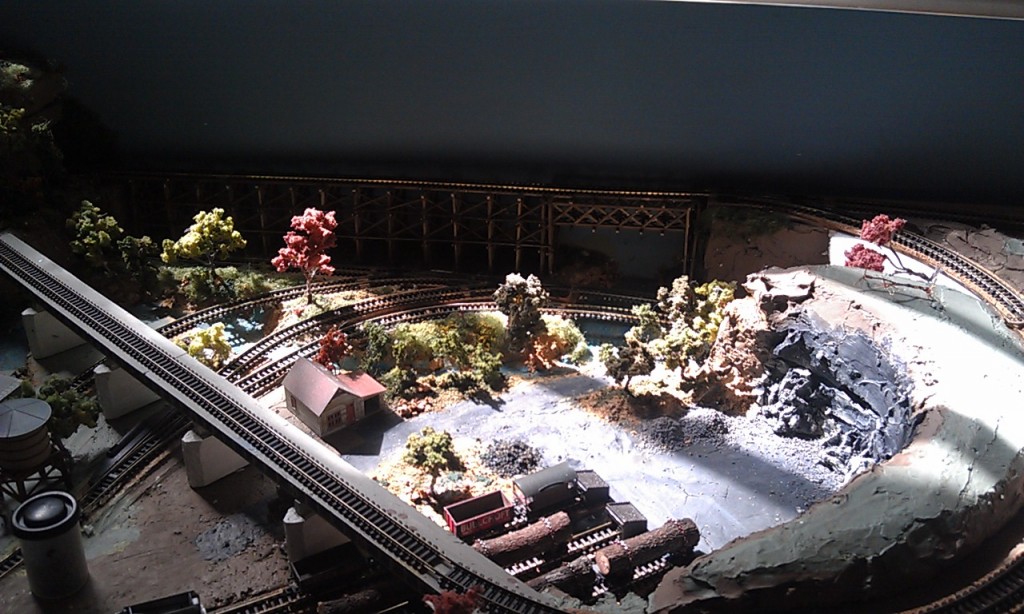
My layout is N scale, I have attached some of the scene shots of the layout.
What I am after is people’s ideas / comments on what building types to use – plastic / paper – card / Timber etc.
I have a tried most as you can see in the photos and haven’t been able to find the types of buildings in materials that suite to finish my town.
Town size measures 350 x 450mm + truck/ train yard of 350x350mm. Layout is far from finished years to go.
If anyone is interested I scratched built the scenery from common household and model items.
As you can see in the pictures I am joining two layouts together the one with the town (balsa buildings) was built about 3 years ago and this town needs a face lift, I run both English and American steam and diesel so the layout is my own would.
All help welcome.
Regards
Steven”
Any ideas for Steven? Mine’s a shameful plug for the print out buildings.
But I’d love to hear your comments. And so would Steven.
That’s it for today my friends.
Please do keep ’em coming.
And if today is the day you get bored of sitting on the side lines, the Beginner’s Guide is here.
Best
Al
PS Latest ebay cheat sheet is here.


I’m modeling im On30 and have a had time finding anything suitable for my layout. I usually buy cheap plastic kits and kit bash them, or modify them to suit my tastes. You can also do the same with wooden kits.
Hey, It’s not a contest!!! That you enjoy yourself is what
it’ all about. I have redone things two and three times, and still not been entirely satisfied. But, it’s PROGRESS.
All the best!
Hi Steven, best is to figure out the era that you are going to model then what type of finish are you looking for. Wood would be an excellent choice if that is what grabs you and is very easy to work with the product. Next I would suggest plastic card as you can represent most finishes with it, be it metal, cladding or concrete. Also easy to work with if you have the right tools and glue. Good luck – Brian
Interesting layout. It would be nice to see the trackplan and dimensions.
I agree first and foremost with Jaaques — very good advice — I often start with paper or card stock props to gauge proportion and position. There are some wonderful hydrocol kits from Townstreet in Scotland that offer a wonderful model that can be used as a starting point. Or hydrocol panels from CC Crow in US. I do a lot of scratch building in wood using ink washes and board by board construction with lumber from Midwest or Northeastern Scale — I find the key to achieve the best realism is the stressing the scale lumber, the washes/paint (always mute the colors for more realism) and the details surrounding the structure (ground cover, re-painted figures, details like bottles, vending machines, dust vents, outhouse, loose lumber, trash, etc.) look at ModelTech’s site for ideas — the more you apply the more realistic your structure. But again this is a personal choice — in the end you are the only critic you have to satisfy.
Plastic buildings usually have good to excellent detail, but look too hard and shiny. No painting required. Fine for brick or stone structures, but a spray matte finish helps tone it down.
Wood kits may (or may not) lack details, but when painted, still looks like wood. Ideal for houses, etc. Adding plastic windows and doors will give more dimension.
Paper buildings also lack depth, but look more like wood. By gluing paper to cardboard, you will have structural rigidity. I print them on card stock, and find that adequate for most HO structures. Print a second copy on card stock, cut out details like windows and doors, glue to original, and you have more depth.
Bottom line – it’s your so do what you like and enjoy your layout.
In n-scale there is one plastic kit mfg who specializes in 1930’s era downtown buildings. You can find the best selection on Trainmasters.com and at under $25 prices. They all have the fancy brick and stone work that can be painted and greatly detailed, lighting can be done to light just the top floor etc.
I use closet door mirrors as backdrop. They dramatically change the appearance of The layout, adding depth and detail that is very realisti
I think a simple rule would be that paper buildings which have less dimension on the face make great low-profile for the more distant structures, Wooden buildings or wood finish are not common in the UK, but much more common in North America. Stone & brick & concrete are the more usual surface finishes in the UK. Cast or moulded plastic materials are usually better at providing those finishes unless you care to do your own surfaces.
There are a number of entries on you-tube where one modeller is seen scratching the lines between stones on half-dried “drywall compound” (spackling in the US?). perfect imitation of stone-sided cottage.
Good luck, Bernard
Steven: I’m 73 years old and just starting my first layout since 1967 after about 7 years of “preparation” The most important thing I have learned came from a dealer at a train show: “It’s your railroad. You are the President and board of your railroad. You get to make all the decisions and no one has the right to criticize.” I too reach our for opinions, and they are usually helpful. But I’m learning that it is ultimately up to me to decide and press on. Otherwise, nothing gets done. Best wishes on your effort.
Great start, take your time. Let us in on your progress, thanks
layout looks really good. and yes, i had to look at the video. i lasted about 2 mins. i like wood working alot. It WAS amusing!
The era of your layout and the location of it are important. You have some vehicles that look newer than the transition period (since you have both steam and diesel) so I’m not sure…but older buildings are OK especially if you are in the U.K. The location of the layout might be important if it is someplace where you have dampness as the card stock buildings might be affected by that. But you could use them especially if you mount the card stock to something like foam board. I’m starting a layout in our shop and it does get damp so I’m using plastic, wood, hydrocal/plaster, etc. buildings. But, as they say, it’s your layout (and your budget) so go with what pleases you.
I have found put that the printable building do well when printed on a sticky back paper(like used for shipping labels-can be bought in full sheets or 2per sheet at office supply stores). Using the printed buildings on 3/16 inch foamboard, cut at 45 degree on corners. Gives dimension and when used on backdrops, can use building faces on foamboard and vary depth on buildings. Can use partial sides for depth effects. Also, painting the backdrop onto the foamboard is fairly easy too. Would add photos of what I have done if I could figure out how to do that.
Hi Steven,
You can either be “rivet counter” or an “anything goes” man, or the whole spectrum in between! Best advise is as said earlier – it is your layout so enjoy it.
I am also building an N gauge layout – UK LMS. My own opinion is that the embossed plastic buildings and plastic scratch-build materials tend to be too heavily embossed for N gauge ( mortar lines are not 3 inch deep !!) and have settled on printed buildings on a card base, with etched brass fret for windows, if I want super fine detail.
The photo realistic print-your-own gives a much better look than you can ever achieve by hand painting plastic. For USA outline then those by Al’s son look great. For UK then ScaleScenes PDF downloads are excellent. The great thing with both of these is if you make a mistake – just print it again.
With both you can kit-bash variations and alter details, or add weathering. with water colour or acrylic paints.
For internal lights I prefer the tiny grain-of-wheat or grain-of-rice filament bulbs give a more realistic light colour than LED which I think look too harsh and cold – I under-run them to give long life – 9v for a 12v bulb or 2v for a 3v bulb. Watch out for light leaks around roof-wall joints ( been there got the T shirt ).
Have fun.
Regarding “Print your own” buildings – I should have said make sure you use a high resolution photo paper – I use the Canon HR-1 110gsm, then spray with a matt lacquer before gluing to the mounting card and cutting out. By the way, some matt sprays are actually semi-gloss – the best one I have found so far is Liquitex Professional Matt – and it does not stink the house out !!
Steve,
I don’t know what paper buildings are available in N scale. Quite a few are downloadable for HO.
I print them on heavy paper (about 60 pound). This makes them rigid
They’re easy to place on any surface since the bottoms can be cut a little to match the ground.
–Ben
Don’t overcrowd it keep it simple. No need to have every thing in the world on
one layout. Printed buildings are great. D/
Steven, I enjoyed your pictures, but am too inexperienced to offer suggestions! The ones I just read in response to your inquiry sound great. Like you, I have to remind myself that this is not some kind of competition, and, yes, I AM the president of this RR, and I have only to please myself. Have fun
DALE: Congratulations on resuming the greatest hobby ever! My husband and I are 78 and 77, and are just getting started, with NO experience whatsoever. He has built the benchwork, glued down foam sheets, laid some track and connected DCC. I am alternating kit-building with applying some scenery. I have wanted a “train set” since age 4, and hubby presented me with my first one on my 77th birthday. Such fun!
Love the women dancing in the trees. Original creation.
Hi Steven
Model railways,is about enjoying yourself not what others think, we all make mistakes as we go along but hopefully learning at the same time. spend some time looking at old railway pictures they are so full of ideas and suggestions, but above all the way it should look. What we are all trying to do is create something we have a passion for. I think your layout is a great start you have the basics now is the time to step back, look and adjust as required.
Good luck and happy modelling
Just enjoy & have fun, after all that’s what it’s alll about
great advise from above i have an n scale layout. i used alot of green matt or green stuff in a bag. the buildings i got of the net they are timber of a laser printer scaled just right they come from Australia a butchers , chemist and a fruit and vege shops.they look good. i am trying to make the old style country town. good luck and make sure it is fun to do. the greatest hobby i have got in into my third year now this site has helped me lots thanks again to you all.
Al,
Love looking at the different photos of the layouts that you get in. But I need some advice. I relatively new at railroading and just love it but I am having a very hard time nailing my track down to my substructure. It’s 1/2″ ply and I bend more nails and have tried every type of aid out there to help that I swiched over to glueing down the track. I just don’t know what I’m doing wrong. I have 4 different types of hammers, devices to hold the nails so I just gave up. I’m a little nervous about gluing it down, but it seems to be working out a little better.
Keep sending in the photos and when I’m ready I will send in one of mine as I progress along. Take care bud.
and happy railroading.
Harry Kubarek
Superior, Wisconsin
Thanks to all for your help, as for the era looking at turn of steam to diesel (1940-1970 I guess). As for the buildings I am thinking a mix of card, plastic and resin is the way to go. And yes I am the president of the railway, with 14 steam and 15 diesel locos the layout can run 5 at a time.
Phil the layout is 2 layouts put together 1 is 1800x600mm the other is 1500×750 they join 3 times through the helix to form an “L” shape at different levels.
Thanks Again Steven
Hi Harry
I use “Copydex” – a rubberised fabric/ carpet adhesive for gluing down track and buildings etc. It sticks well and provides a bit of sound insulation between track & base. The big advantage of this type of rubberised glue is that you can lift the track or buildings in the future by sliding a thin blade underneath and gradually easing it up.
Have a try on a scrap bit of track to try it out.
Happy modelling
Regards – Gavin
A VERY UNIQUE LAYOUT.
Steven, if you want to run both UK and American stock on the same layout you have a problem – for one thing they’re a slightly different scale I think (1:148 and 1:160 by memory from when I used to do some American N) but the scenery is the problem – platform heights, building styles, the vehicles and which side of the road they’re on, everything’s different from the type of signals to the adverts!
What I suggest is, divide the layout into two areas, with a dividing backscene separating them, so that one side is a properly British scene and the other set in the US. Run one fleet of trains at a time and make sure your trains can run through the “other half” so they come back to the side you’re looking at – in effect, you use the side of the layout that doesn’t match the trains you’re running today, as a sort of fiddle-yard (that’s called hidden staging if you’re in the US) which means it’s like having two different layouts, and it’s still interesting for visitors who aren’t train buffs to compare and contrast the two countries. Have fun!
Rod
As an architect I see many opportunities in modeling buildings in layouts. Cardboard works, kit bashing works, paper print outs work, plastic kits work… Blend in a mix of those, pick and choose which buildings are prominent and which ones aren’t.
3d printers are very useful and some awesome ones can be purchased for $600 that scan, print, and plot at 3D. Laser cutters are great, but expensive still, but if you know someone that has one you can do great things with them.
Grey chip board works great for those far away buildings not requiring great detail.
Jamie
Oh yeah, building materials: I’m still learning myself, but mistakes I’ve made so far include:-
I made some card kits for someone and thought I’d strengthen them by glueing a few ice-lolly sticks in strategic places, eg along the top of the walls. Using PVA seemed to be a mistake, there was some shrinkage and wrinkling. Oops.
I did a Plasticard building with 60 thou walls for strength. It made cutting out the window and door apertures VERY hard work on my craft knife fingers. Oops.
I bought what I was told was clear styrene sheet in a model shop for a modern building, and was going to just put thin Plasticard overlays on to create the walls and thus not have to cut out the windows etc. Turned out it was polyester of some sort, so liquid styrene cements just made it a sticky mess. Oops.
I bought a motor table saw to ease the hand cutting work, and got one with a “fence” to cut straight lines against. Turns out the fine blades are so flexible they follow the grain in the material until they or it go ping! so really you have to “steer” by moving the material around so it cuts straight, and the fence is no help. Also, the blade moves fast enough to melt Plasticard which will re-bond behind the blade or even grab onto it, so adjustable speed would help. Oops!
Finally, I gather when you put overlays (eg mouldings, doorframes etc.) onto flat Plasticard sheet walls, the reaction between the two sections may cause warping, so if you put, say, a 10 thou overlay on one side of a 30 thou wall, put a similar bit of 10 thou on the inside as well, doesn’t need to be an exact match or very neat as it won’t be seen, but it helps even up the stresses, allegedly.
Have fun.
Rod
I have just started building my own 3D printer, it is a system that anyone can build, which is available in the UK and Australia. For a cost of about $20.00. a week, and you get to receive a weekly magazine that teaches how to operate the Sketchup system. if anyone is interested.
Allan
To Harry in Wisconsin, put down styrofoam sheet on top of the plywood. I built a n scale on plywood BAD. With styrofoam it is easer to nail and add trees lost or whatever just push them into the foam with a little glue. I glue track much easer and will come up with thin putty knife. Tom in AZ
Sometimes I see buildings when I am traveling and say to myself that might look good on a layout. I stop and take pictures. I sometimes combine several types to create a particular type or use of a building.
Hay man, it’s your layout.Do what makes you happy. I myself like the print out buildingd. If done right and beefing them up a bit (Watch you tube) they look great and are very strong. A lot cheaper then the plastic kits.
Agree with all comments about “your layout”.
But suggestions?
How about a fancy bridge for your long overpass? Wooden trellis construction? Suspension bridge?
For any one scene, you may find it more satisfying to limit to era and region; preservation railways and specialist servicing depot (turntable & water) may allow unexpected options for running stock.
And do keep US & UK separate. Staging in the unused half sound great, but will require lots of (long) sidings. How about a dedicated staging area?
Good luck, let us know your thoughts. Regards, Tom
Hello Steve, nice set up. There is all kinds of set ups you can do, I see that you have Coal and in the train yard you have big logs on flat cars that repersents Red Wood Trees. Your wood trusses by the wall look great, just need some background view, maybe a beach, ocean or Bay or maybe the stream runs through some trees that good down a valley on a mountain side. The stream might even be between some building that you paint on the wall. The world is a canvas, like you said. It is your little world to get away. It is yours to do what you want.
SDG St.Petersburg Fl
I haven’t read any of the previous comments, so I don’t know if this has been suggested, but this is what I intend to do some day on my layout. After driving many, many miles for work, I’ve passed thru some very small towns that I would like to model. Several of them have details that I like and that I intend to incorporate into my layout, such as a large circular intersection to drive around vs a typical cross intersection. Also, large buildings at the beginning and/or end of each block, especially at the end with the circular intersection, such as 2-4 story banks or hotels, with the rest of the block being various 1-2 story businesses. For small towns, the blocks wouldn’t have to be very long. Also add a train station near the center of town, close to the circular intersection. Hope this helps !!
Hey steve I used the woodland scenics town kit.
Its amazing
Steve most of my N scale layout so far is Plastic kit bashed Buildings. I might suggest looking on the internet for types of buildings in and around Railroad towns. The period of time will figure a lot into what would look correct. As far as Ground cover and Landscaping your Layout, materials you have around where you live will help. Remember that this is living organics and will change with the location they are put in.
I have a unique understanding because I and my Family worked for the American Railroads for over 70 years combined. I for myself was 42 years. I watched the End of the Steam Era, and the Change to Diesel Electric. So many of my memories of Riding on the Train and Traveling all over the West and to the Deep South gives me a insight to Railroading. The Changes that happened to the Towns and cities gives me a real good Foundation to work from. Good Luck, and I look forward to seeing your layout again.
I do about the same thing you have been doing as far as you have used fore buildings but if you find one or two types of construction that work the easiest
fore your self to build then stick with it ! as long as you have fun with your hobby
George in Pa. USA and be well and stay safe !
Try the Metcalfe card models. I was skeptical until I built one and was astounded by the quality and stability. Now nearly all the buildings on my N gauge railway are Metcalfe.
With regard to track nails, I use 2 inch thick extruded foam for my layout base and use straight pins to hold the roadbed and track in place until they get glued down. I use a homemade jig guide to put an 0.025 inch hole in the sleepers where I want to pin the track. If I don’t like the alignment or my surveyor decides it’s really bad, I just pull the pins and start over again. I’m working in HO with Woodland Scenics foam roadbed. My prototype is the Age of Steam Roundhouse in Ohio and the modern era, although my museum director seems to have come up with steam engines out of nowhere. Ray
steve, think about making scenes, not buildings. Use alisters printed buildings, but make them more than one layer to outline doors. windows, etc. Make a base of thin plywood and put the building, fences, bushes people and trees to tell a story. IE 2 kids playing ball, bikes, gardening, workers. Assemble the scene at your desk then move it to the layout Add weathering. Get a set of building tools, sharp razor knives, metal rulers, a glue stand, a plastic cut board, etc. Add LED lights and wiring, add a fire pit. Make your scenes tell a story. After a while, you will have many scenes which make looking at your layout fun for you and guests.