“Hello Al,
This is Thomas from “The Just Another Damn Hole in the Ground Mining Company”. You might recognize the river. I am finally able to go up to the next level after my surgeries. YEAH.
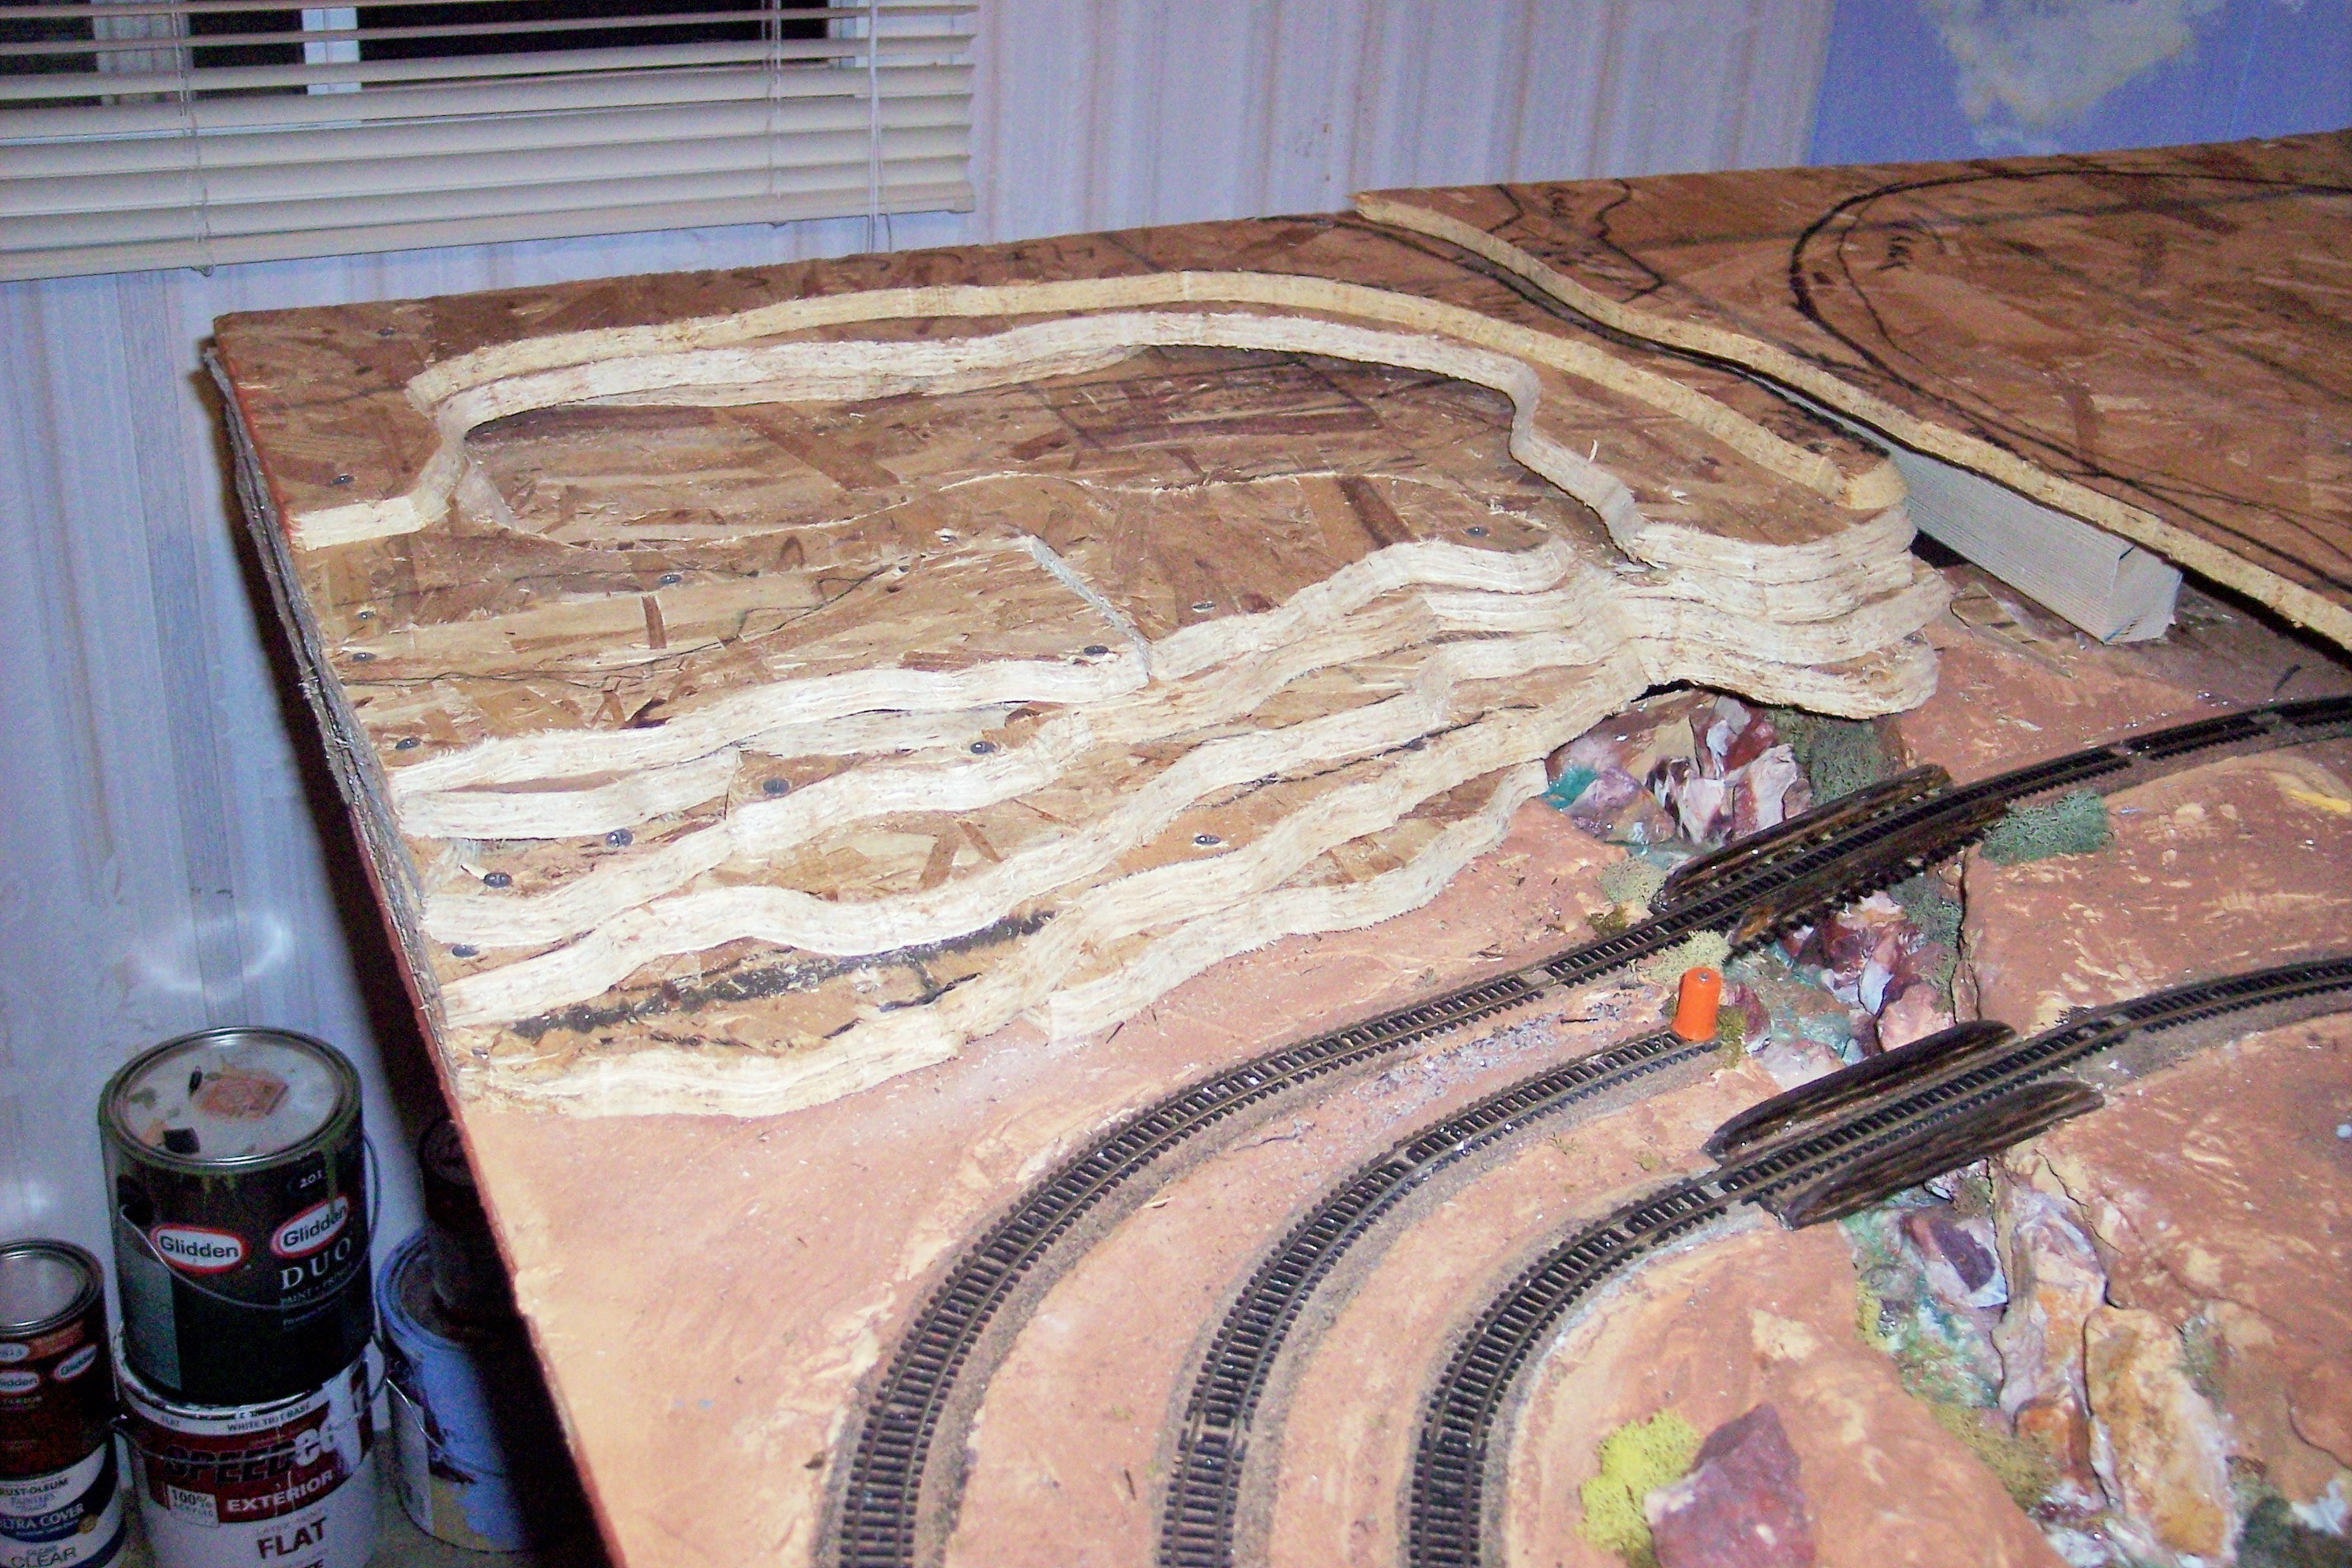
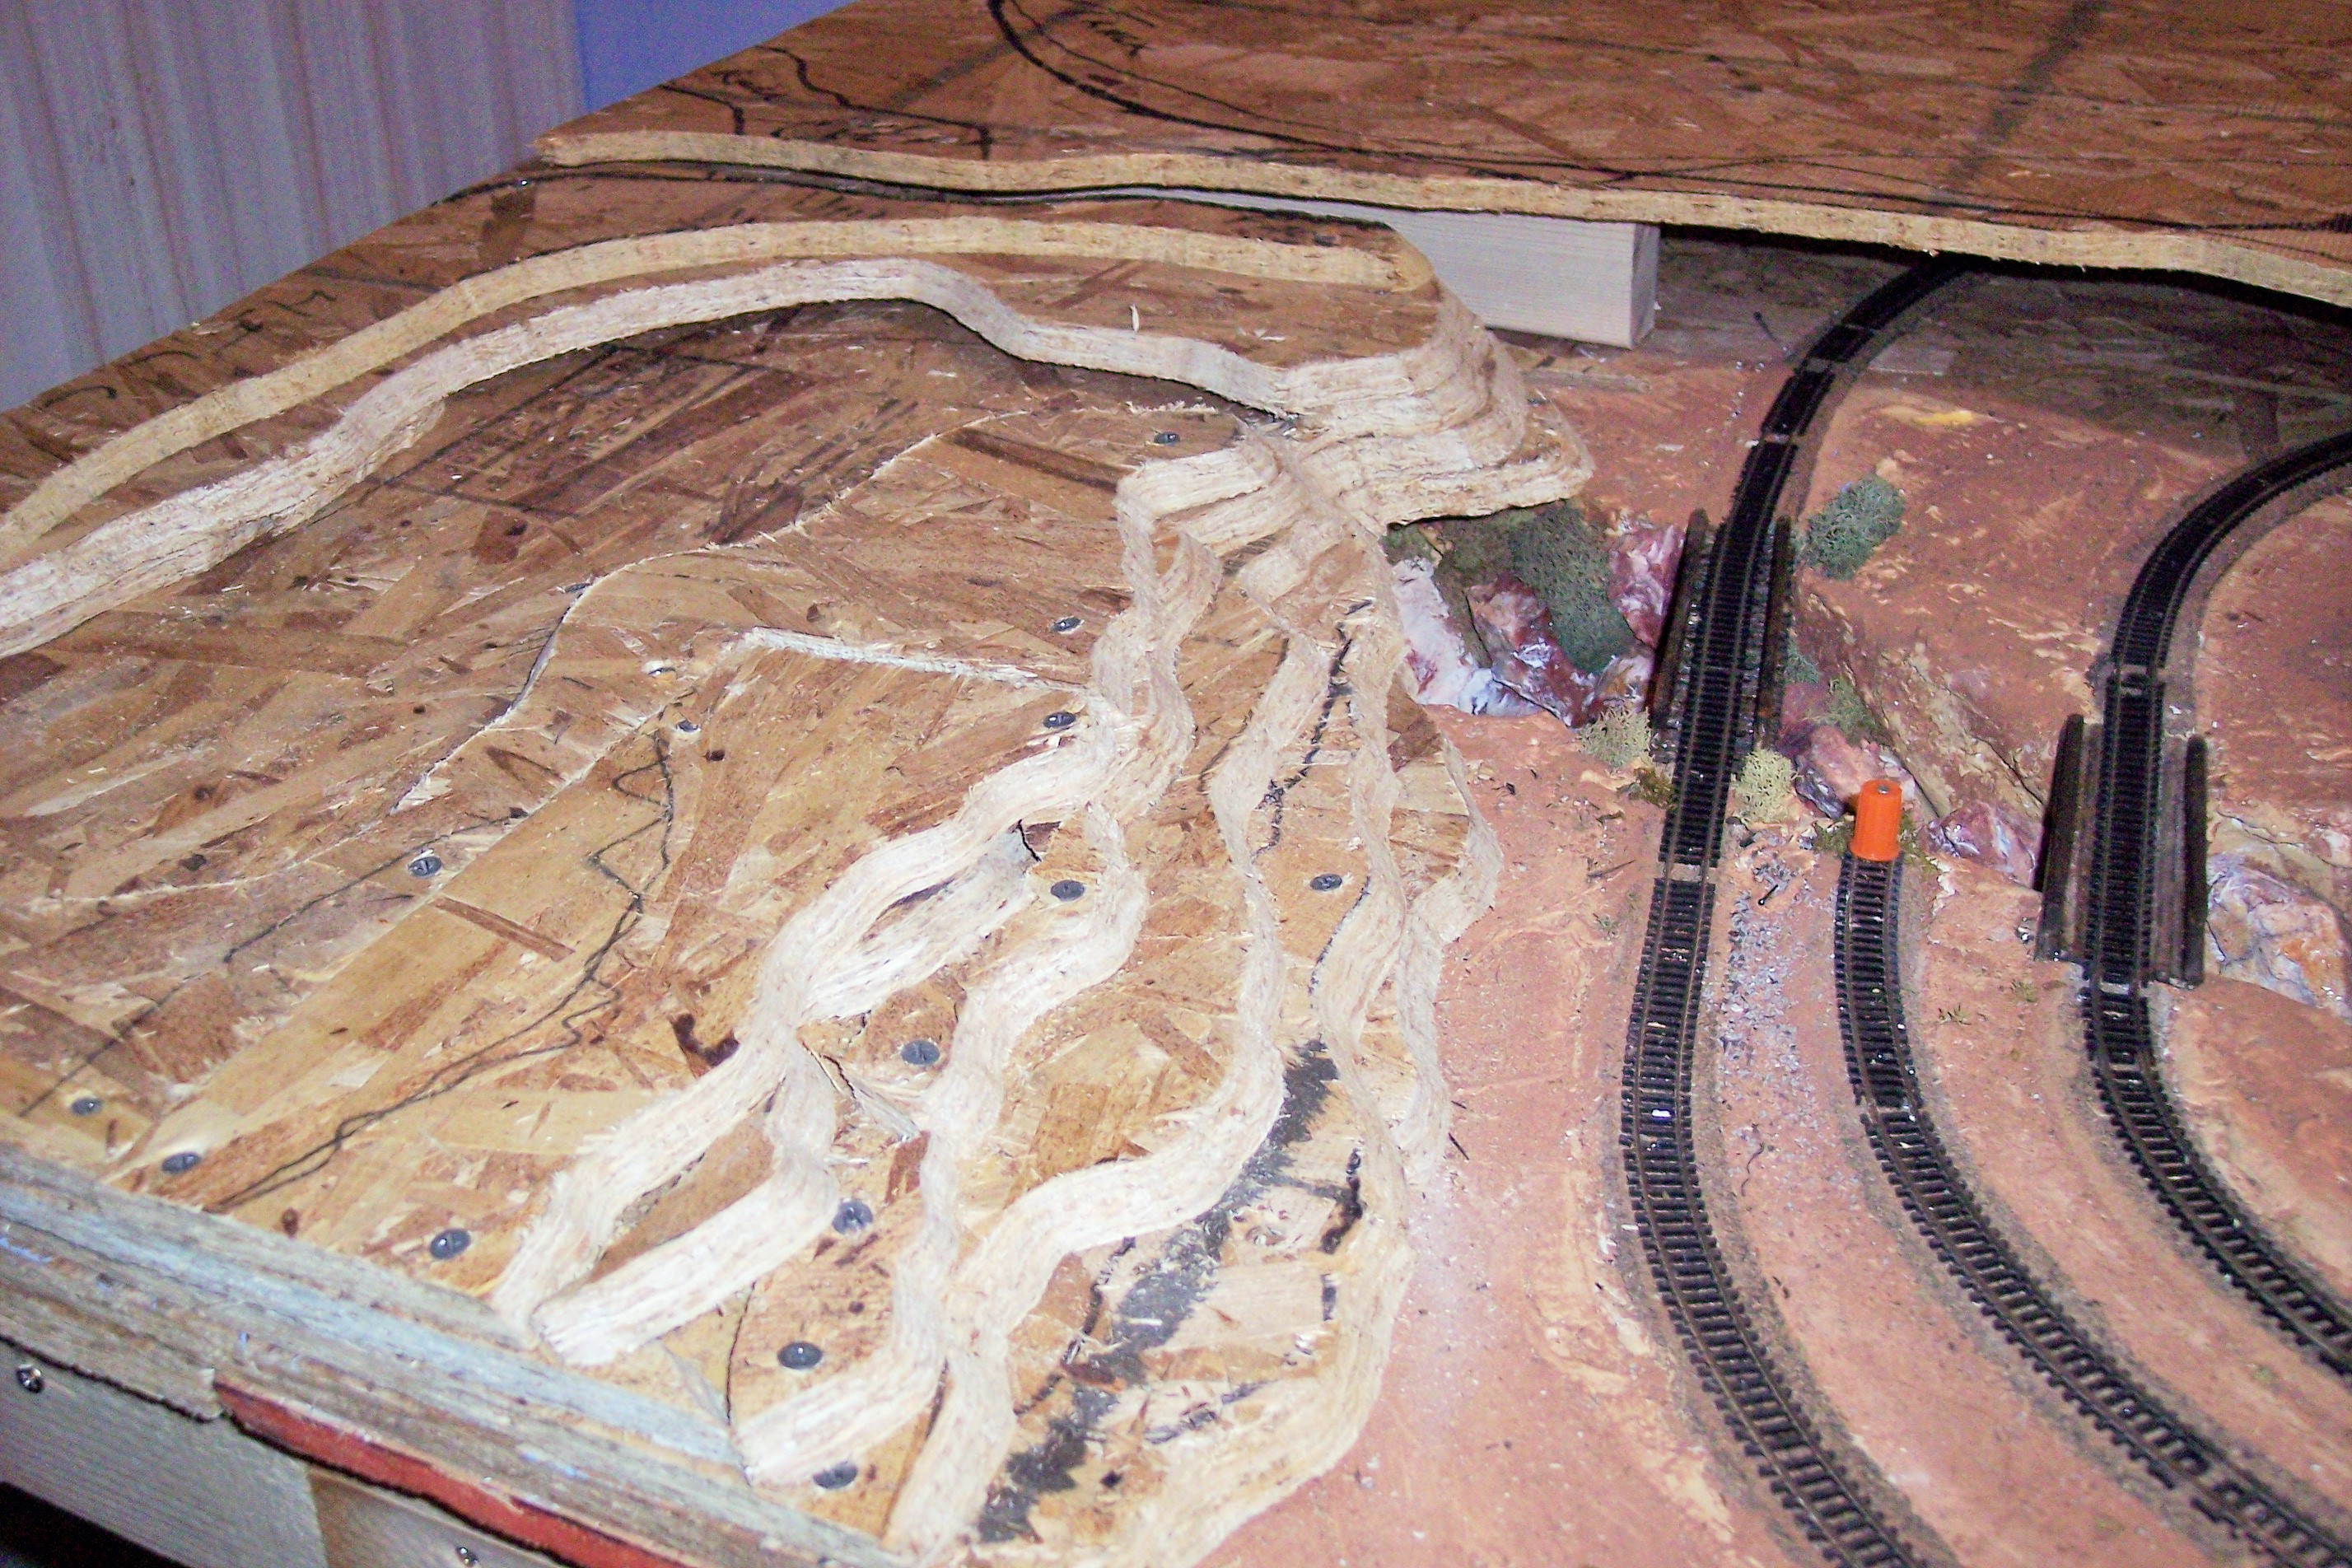
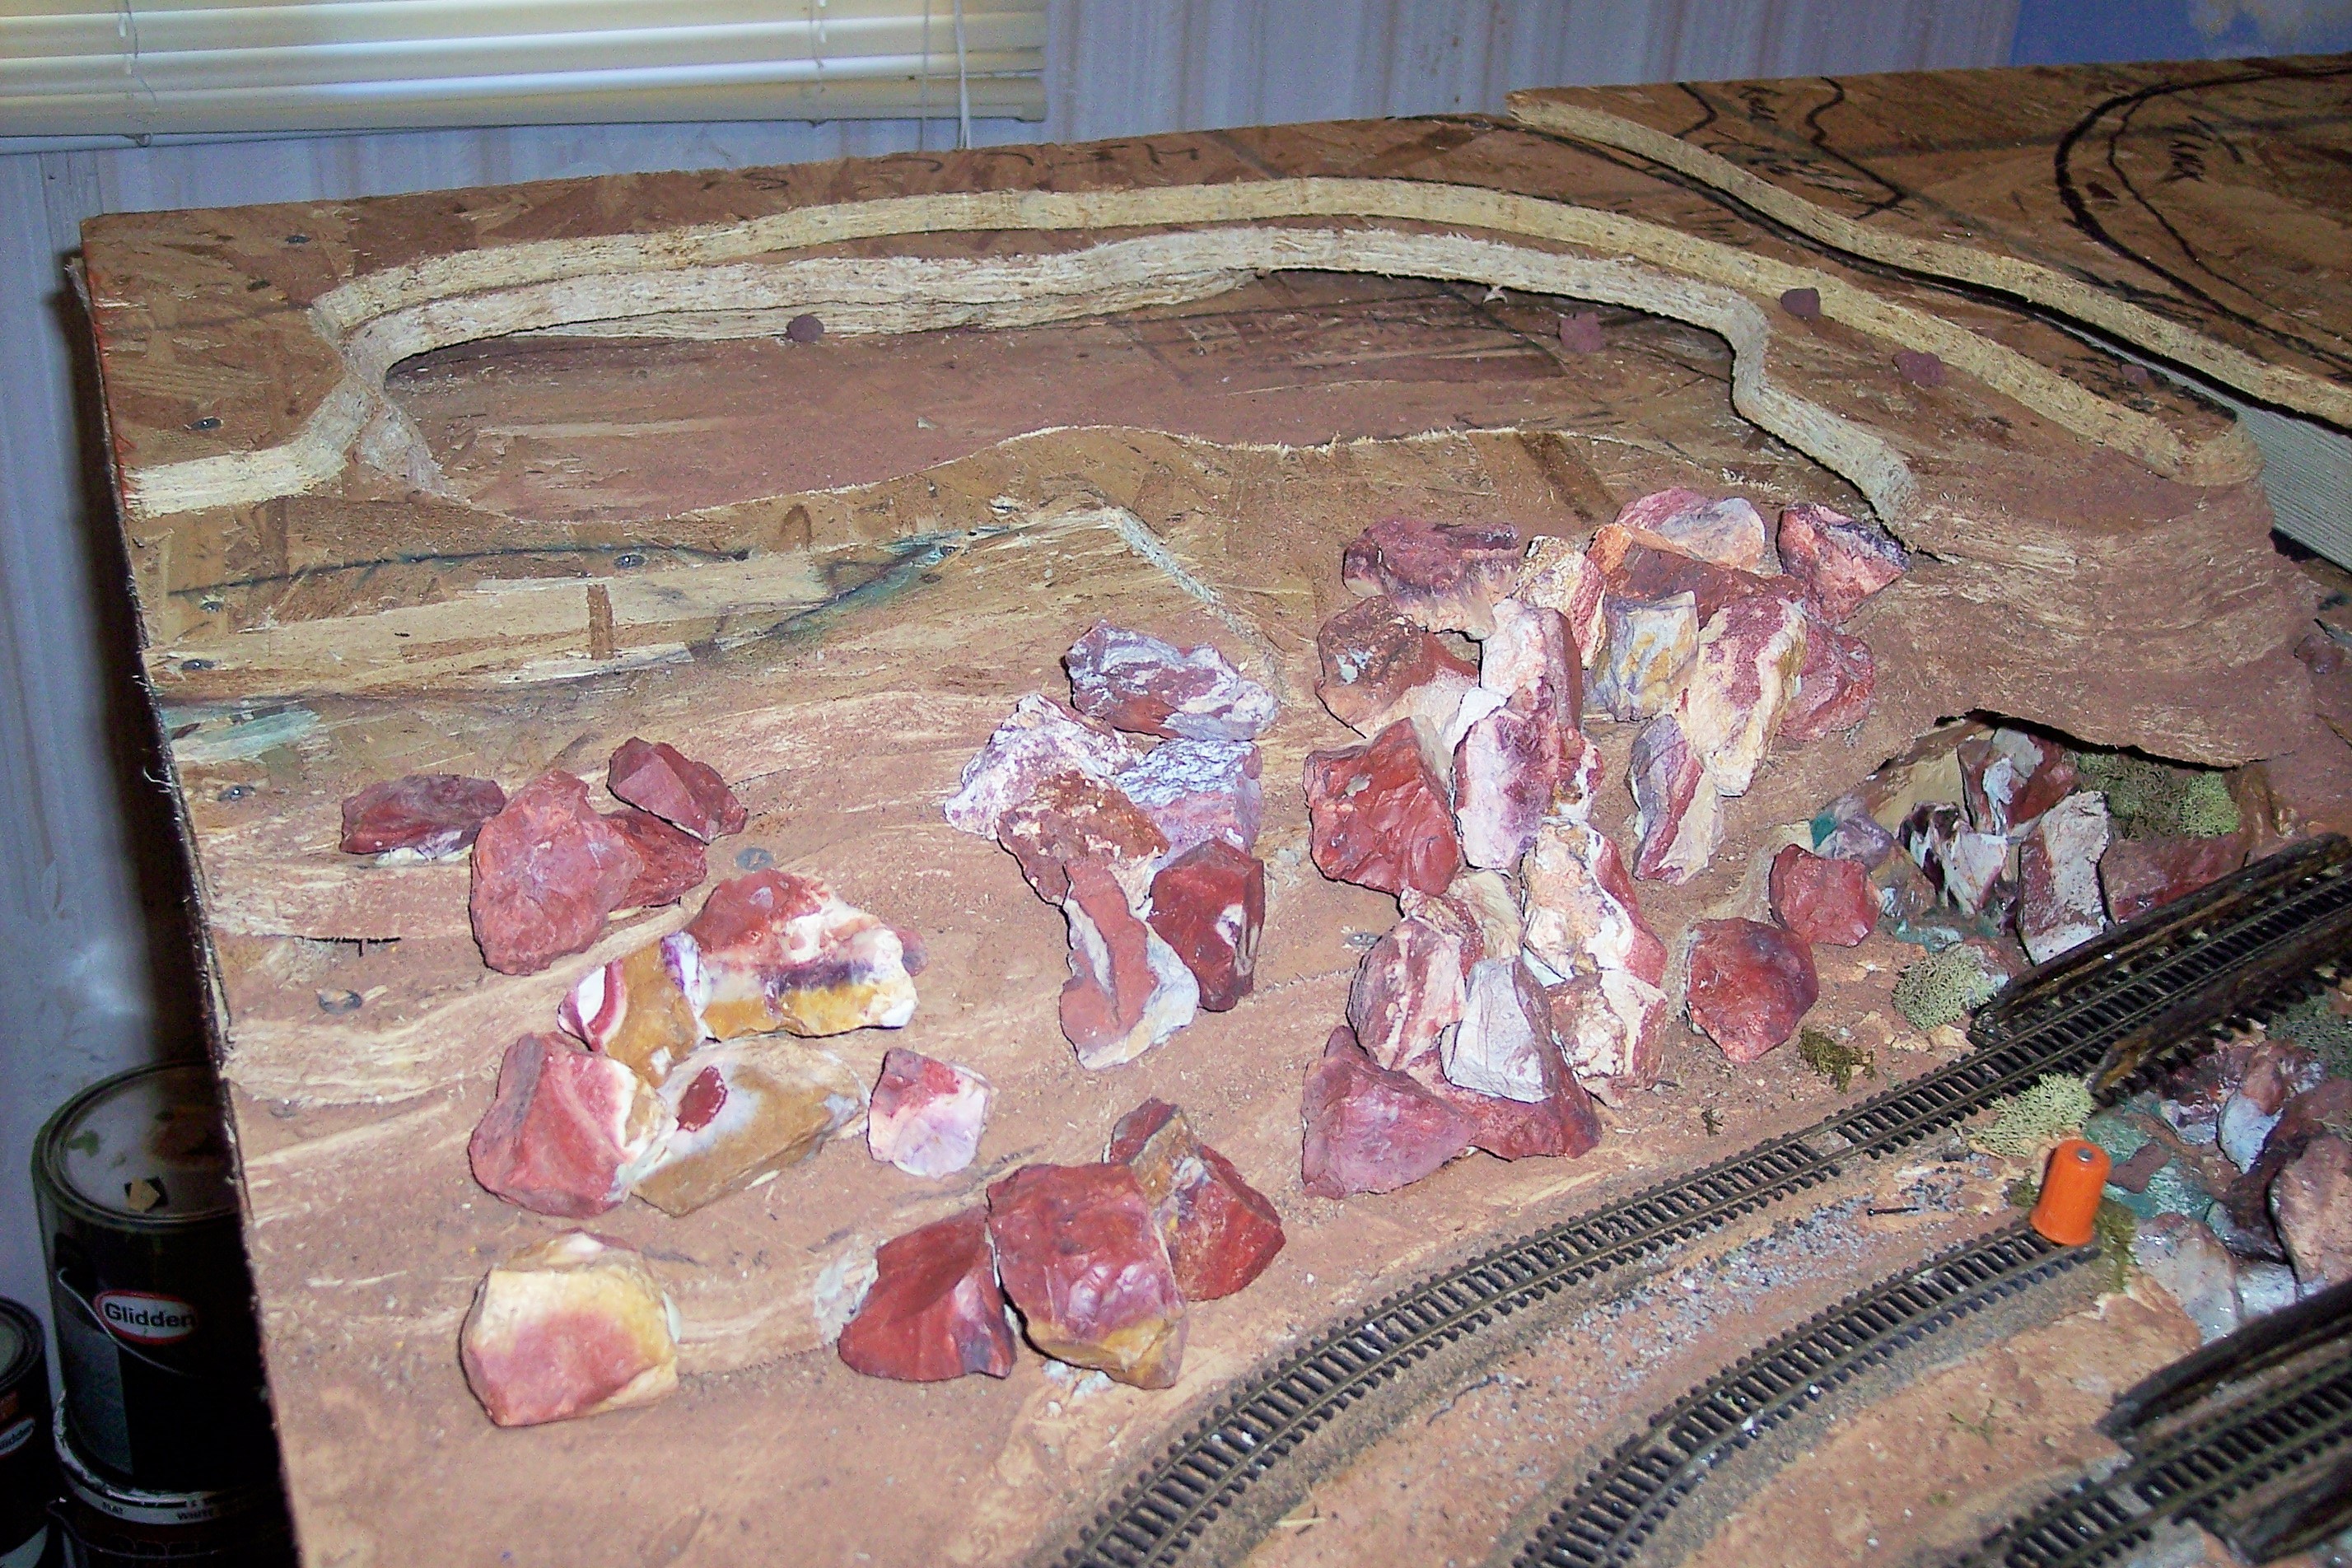
I have started with the rock ledge, with the lake and waterfall. I used OSB to build my layers as you can see in the first 2 pictures. Yes, I know I could have used foam, but I like wood and I get it for free from my local construction dumpsters. If it is in, or right by the dumpster you can take it. No this does not mean you stack up full lumber by the dumpster and take it. LOL. You can get really nice pieces of lumber FOR FREE.
I then spayed the layers with my wife’s hair spray {don’t tell her}, and sprinkled sifted dirt from my yard. Once again no cost to me. My wife had the hair spray anyway, and dirt was FREE. I re spayed the dirt with hair spray a couple more times to make it hard enough to glue to. The hairspray penetrates the dirt and re bonds to the wood.
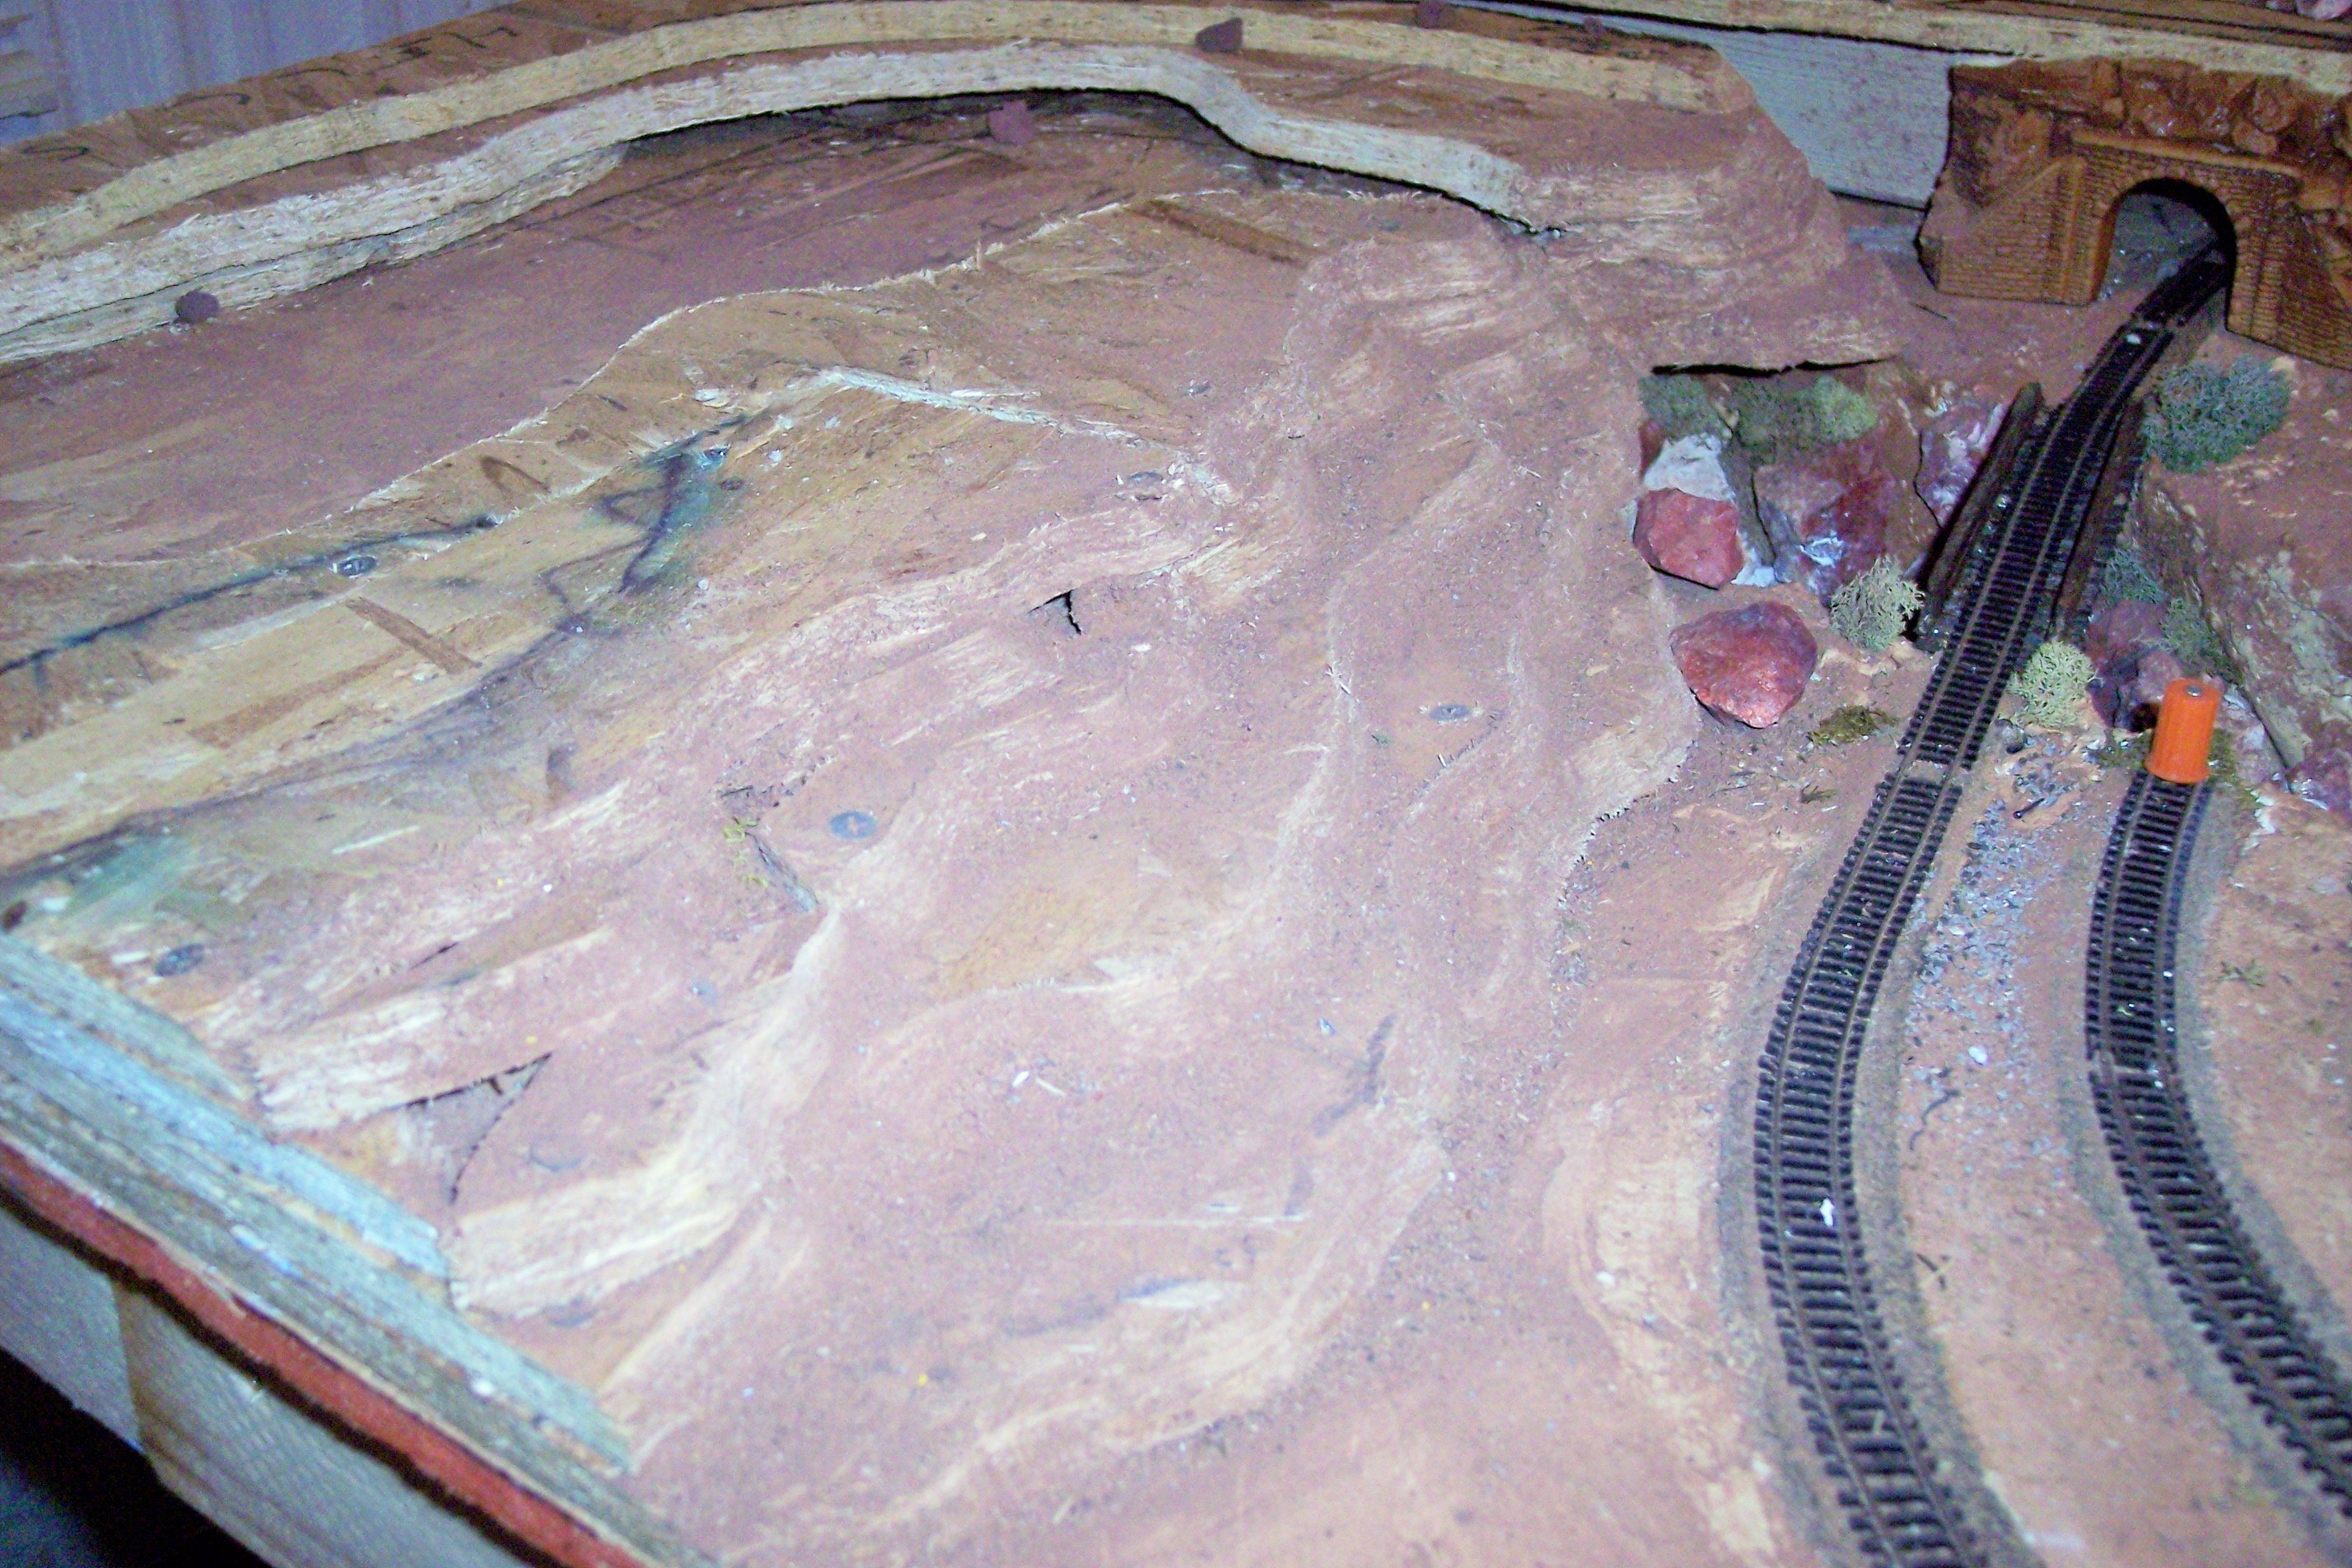
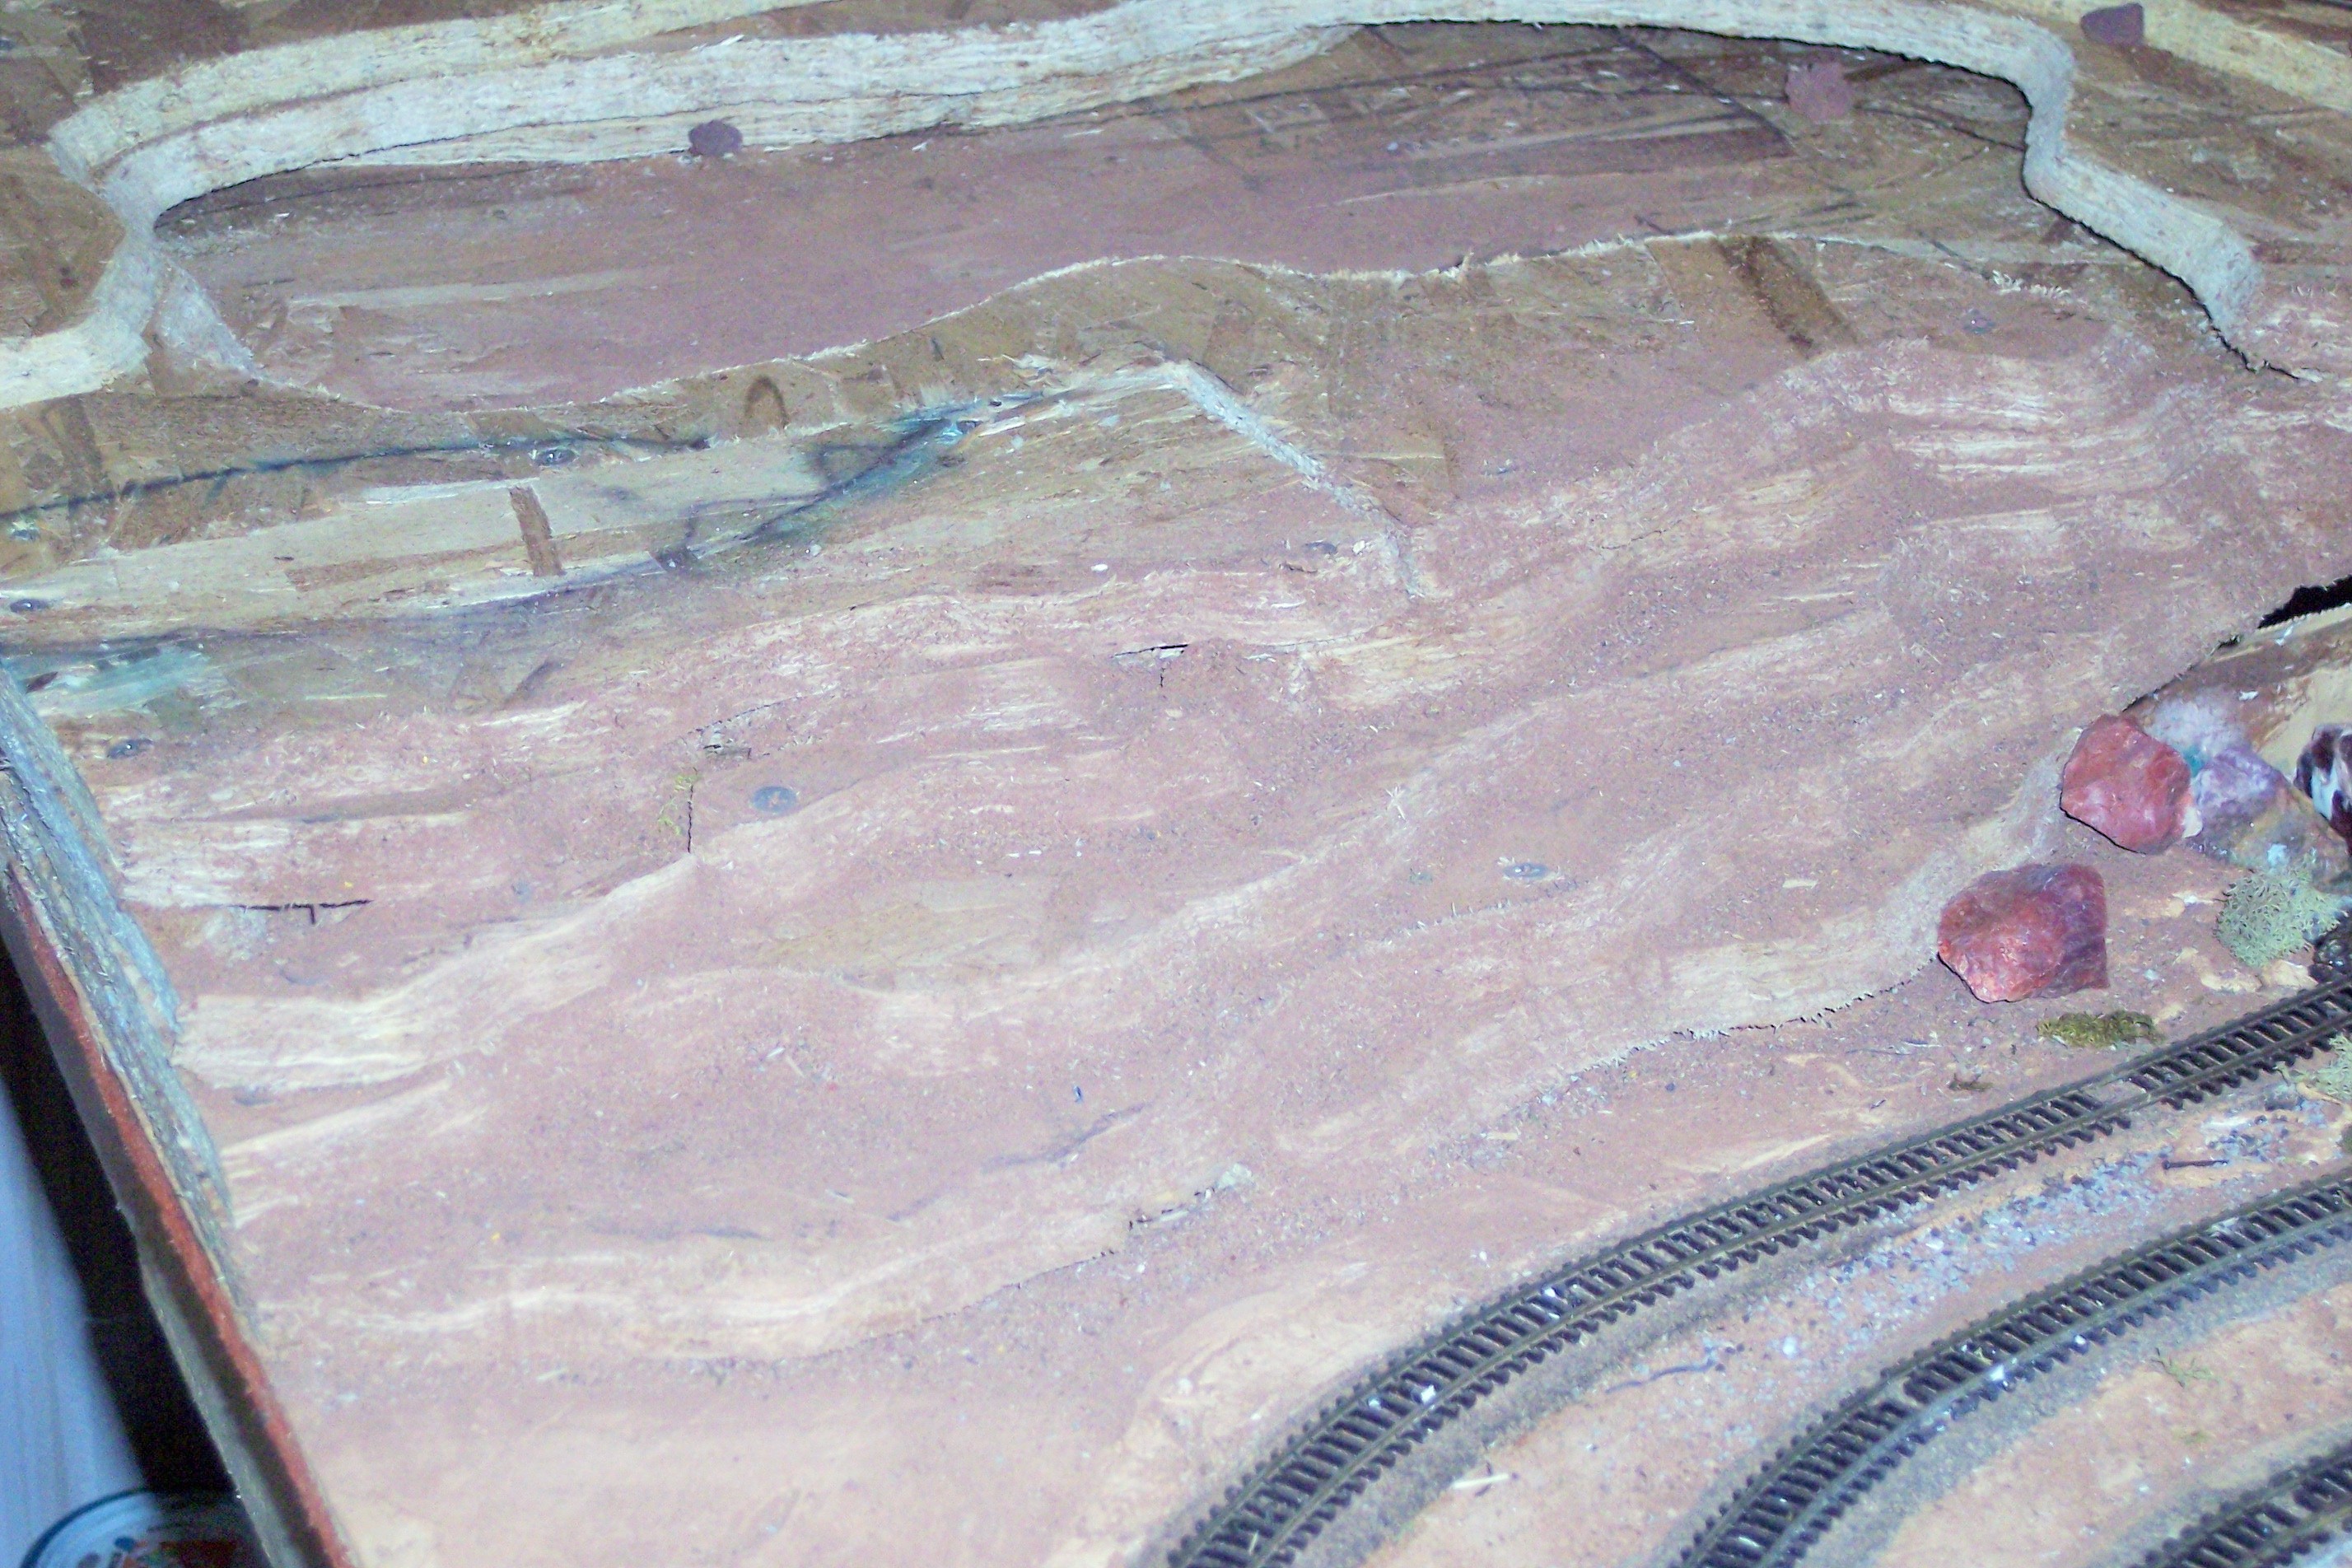
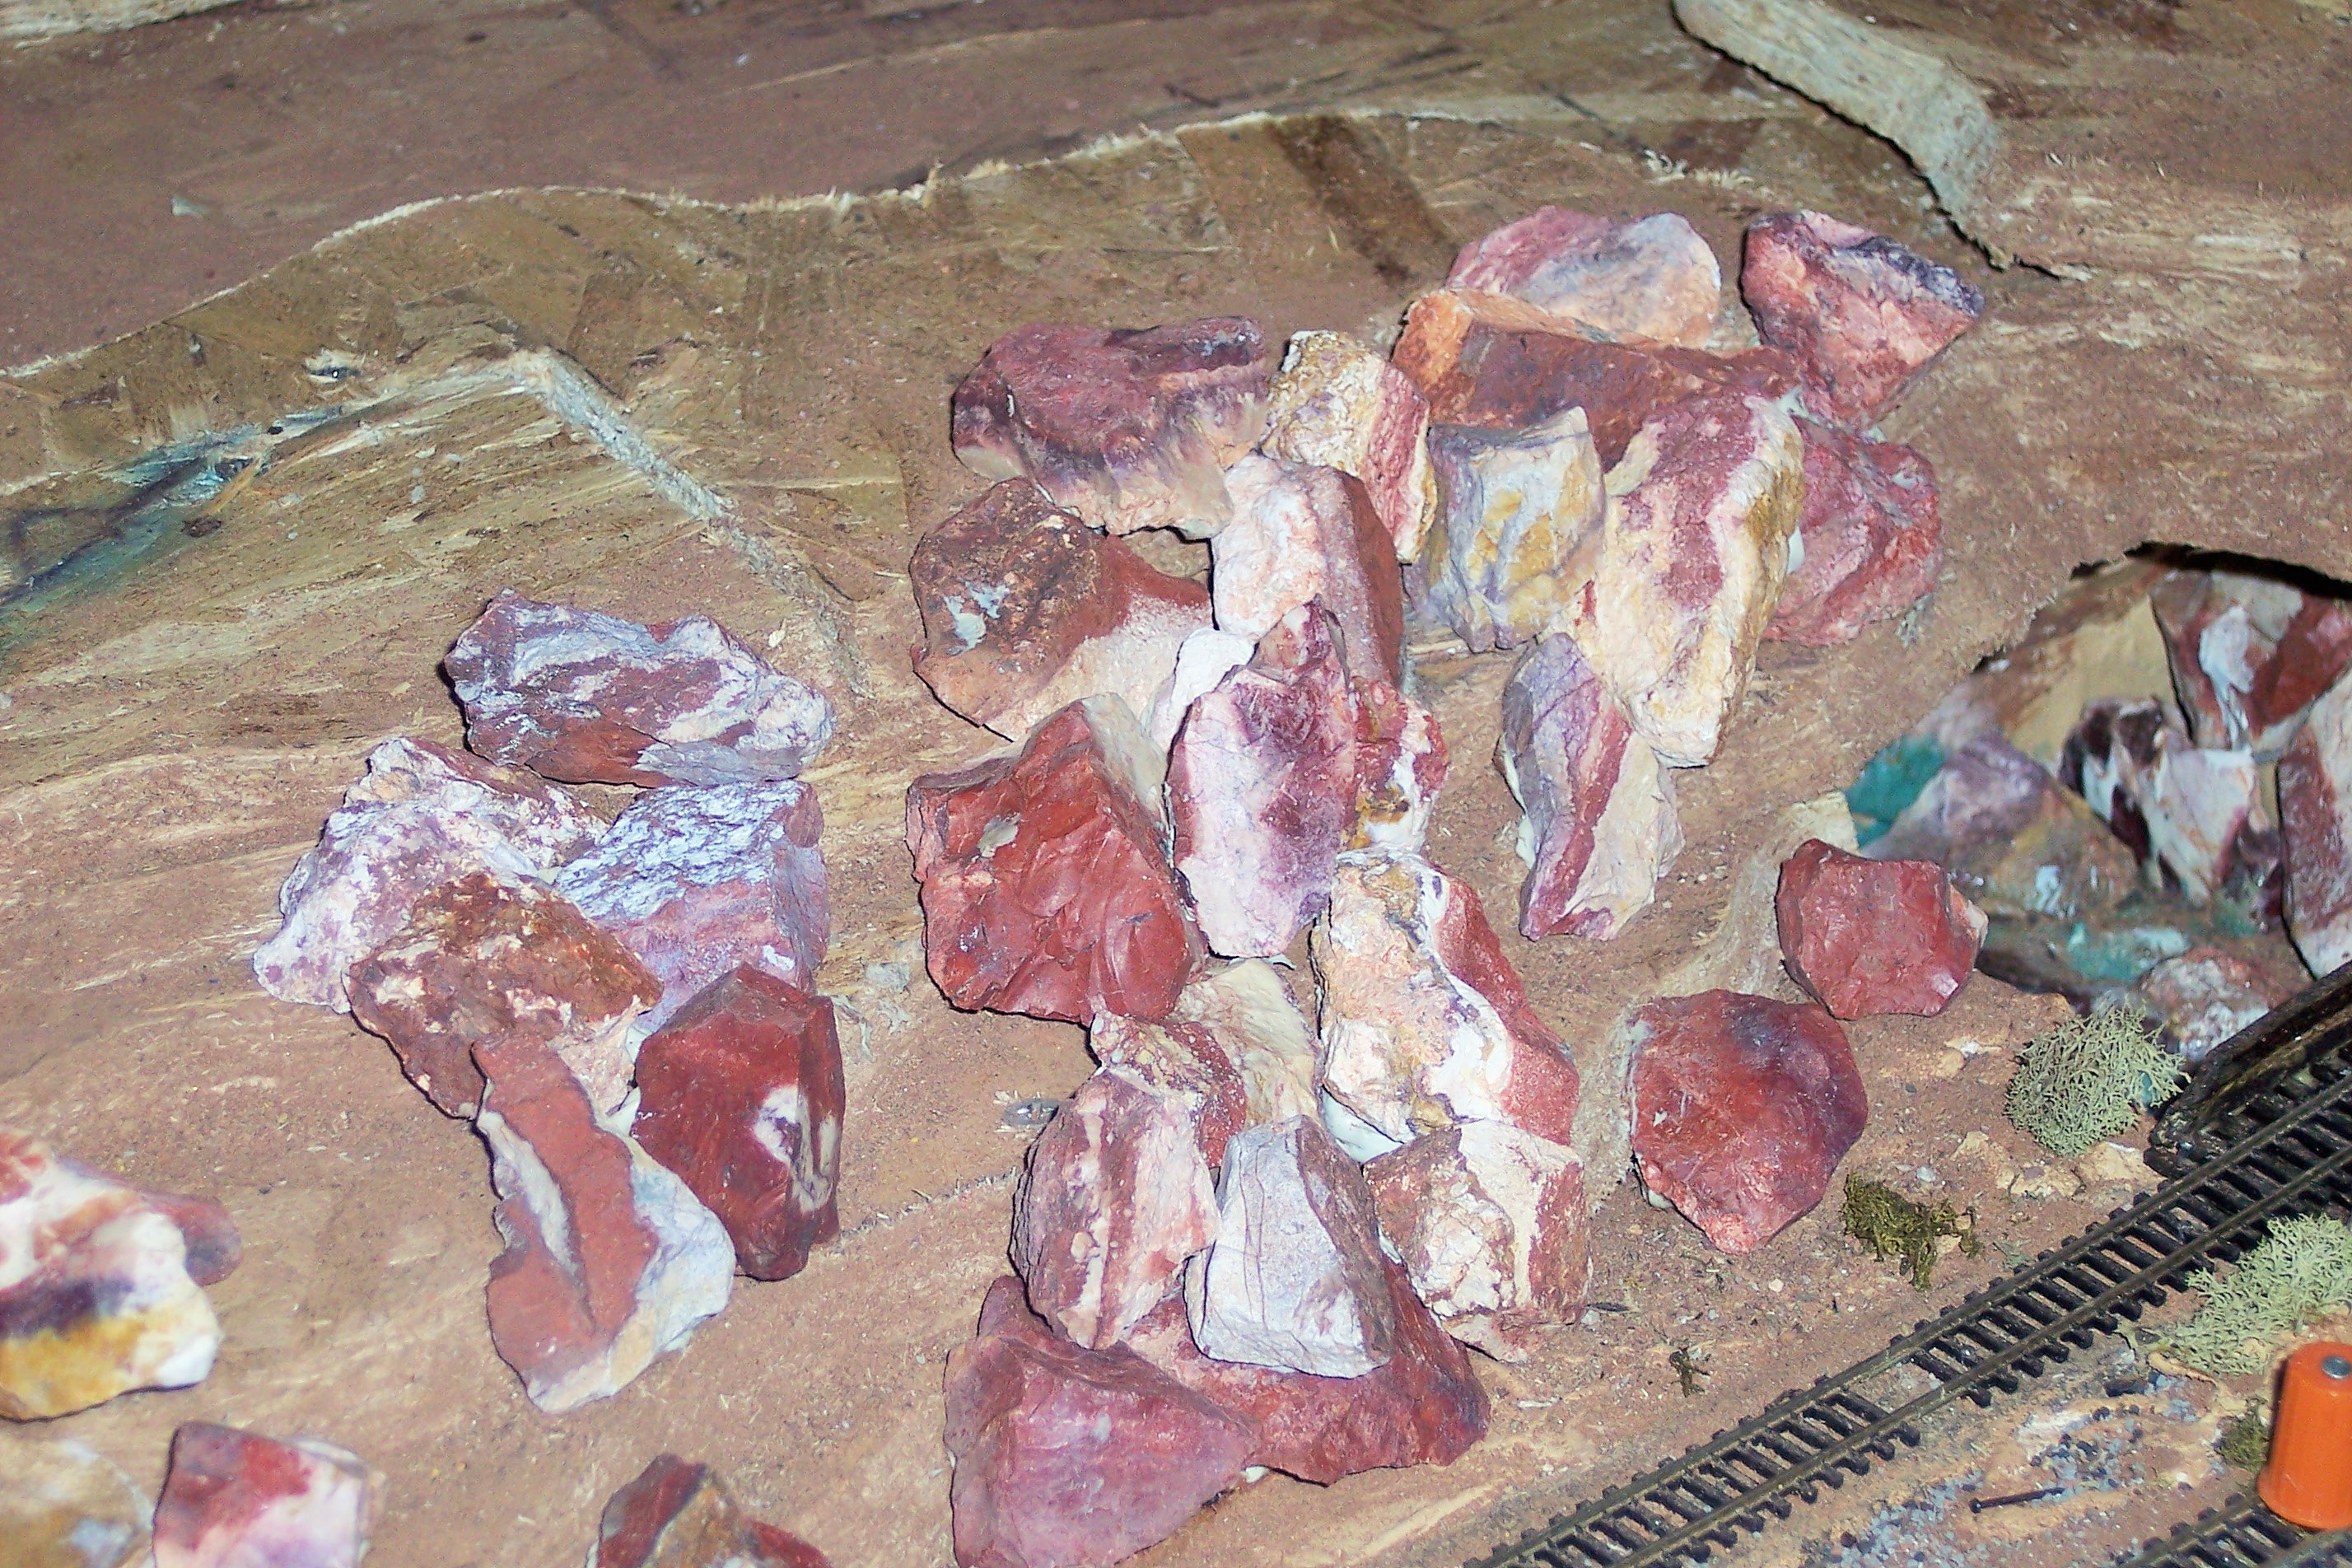
I have gone for walks to recover from surgery, and as I walked I picked up interesting rocks I found along the way that I felt might fit together and look natural for this ledge. Guess what they also were FREE. You can save a lot of $$$$ if you think about using as much natural things as you can find, I then used Liquid Nail to glue the rocks to the ledge. Yes I bought the Liquid Nail, I didn’t take it from my neighbor. I am not that cheap. LOL
So this whole ledge project cost about $ .50 of glue that I used from the tube. By the way every rock on my layout is natural you just have to go walks and look. It helps to carry a small bucket. Other than roadbed, track, the running stock and locomotives, my entire layout has cost be about $ 75.00 altogether so far. Not to shabby. It pays to think NATURAL.
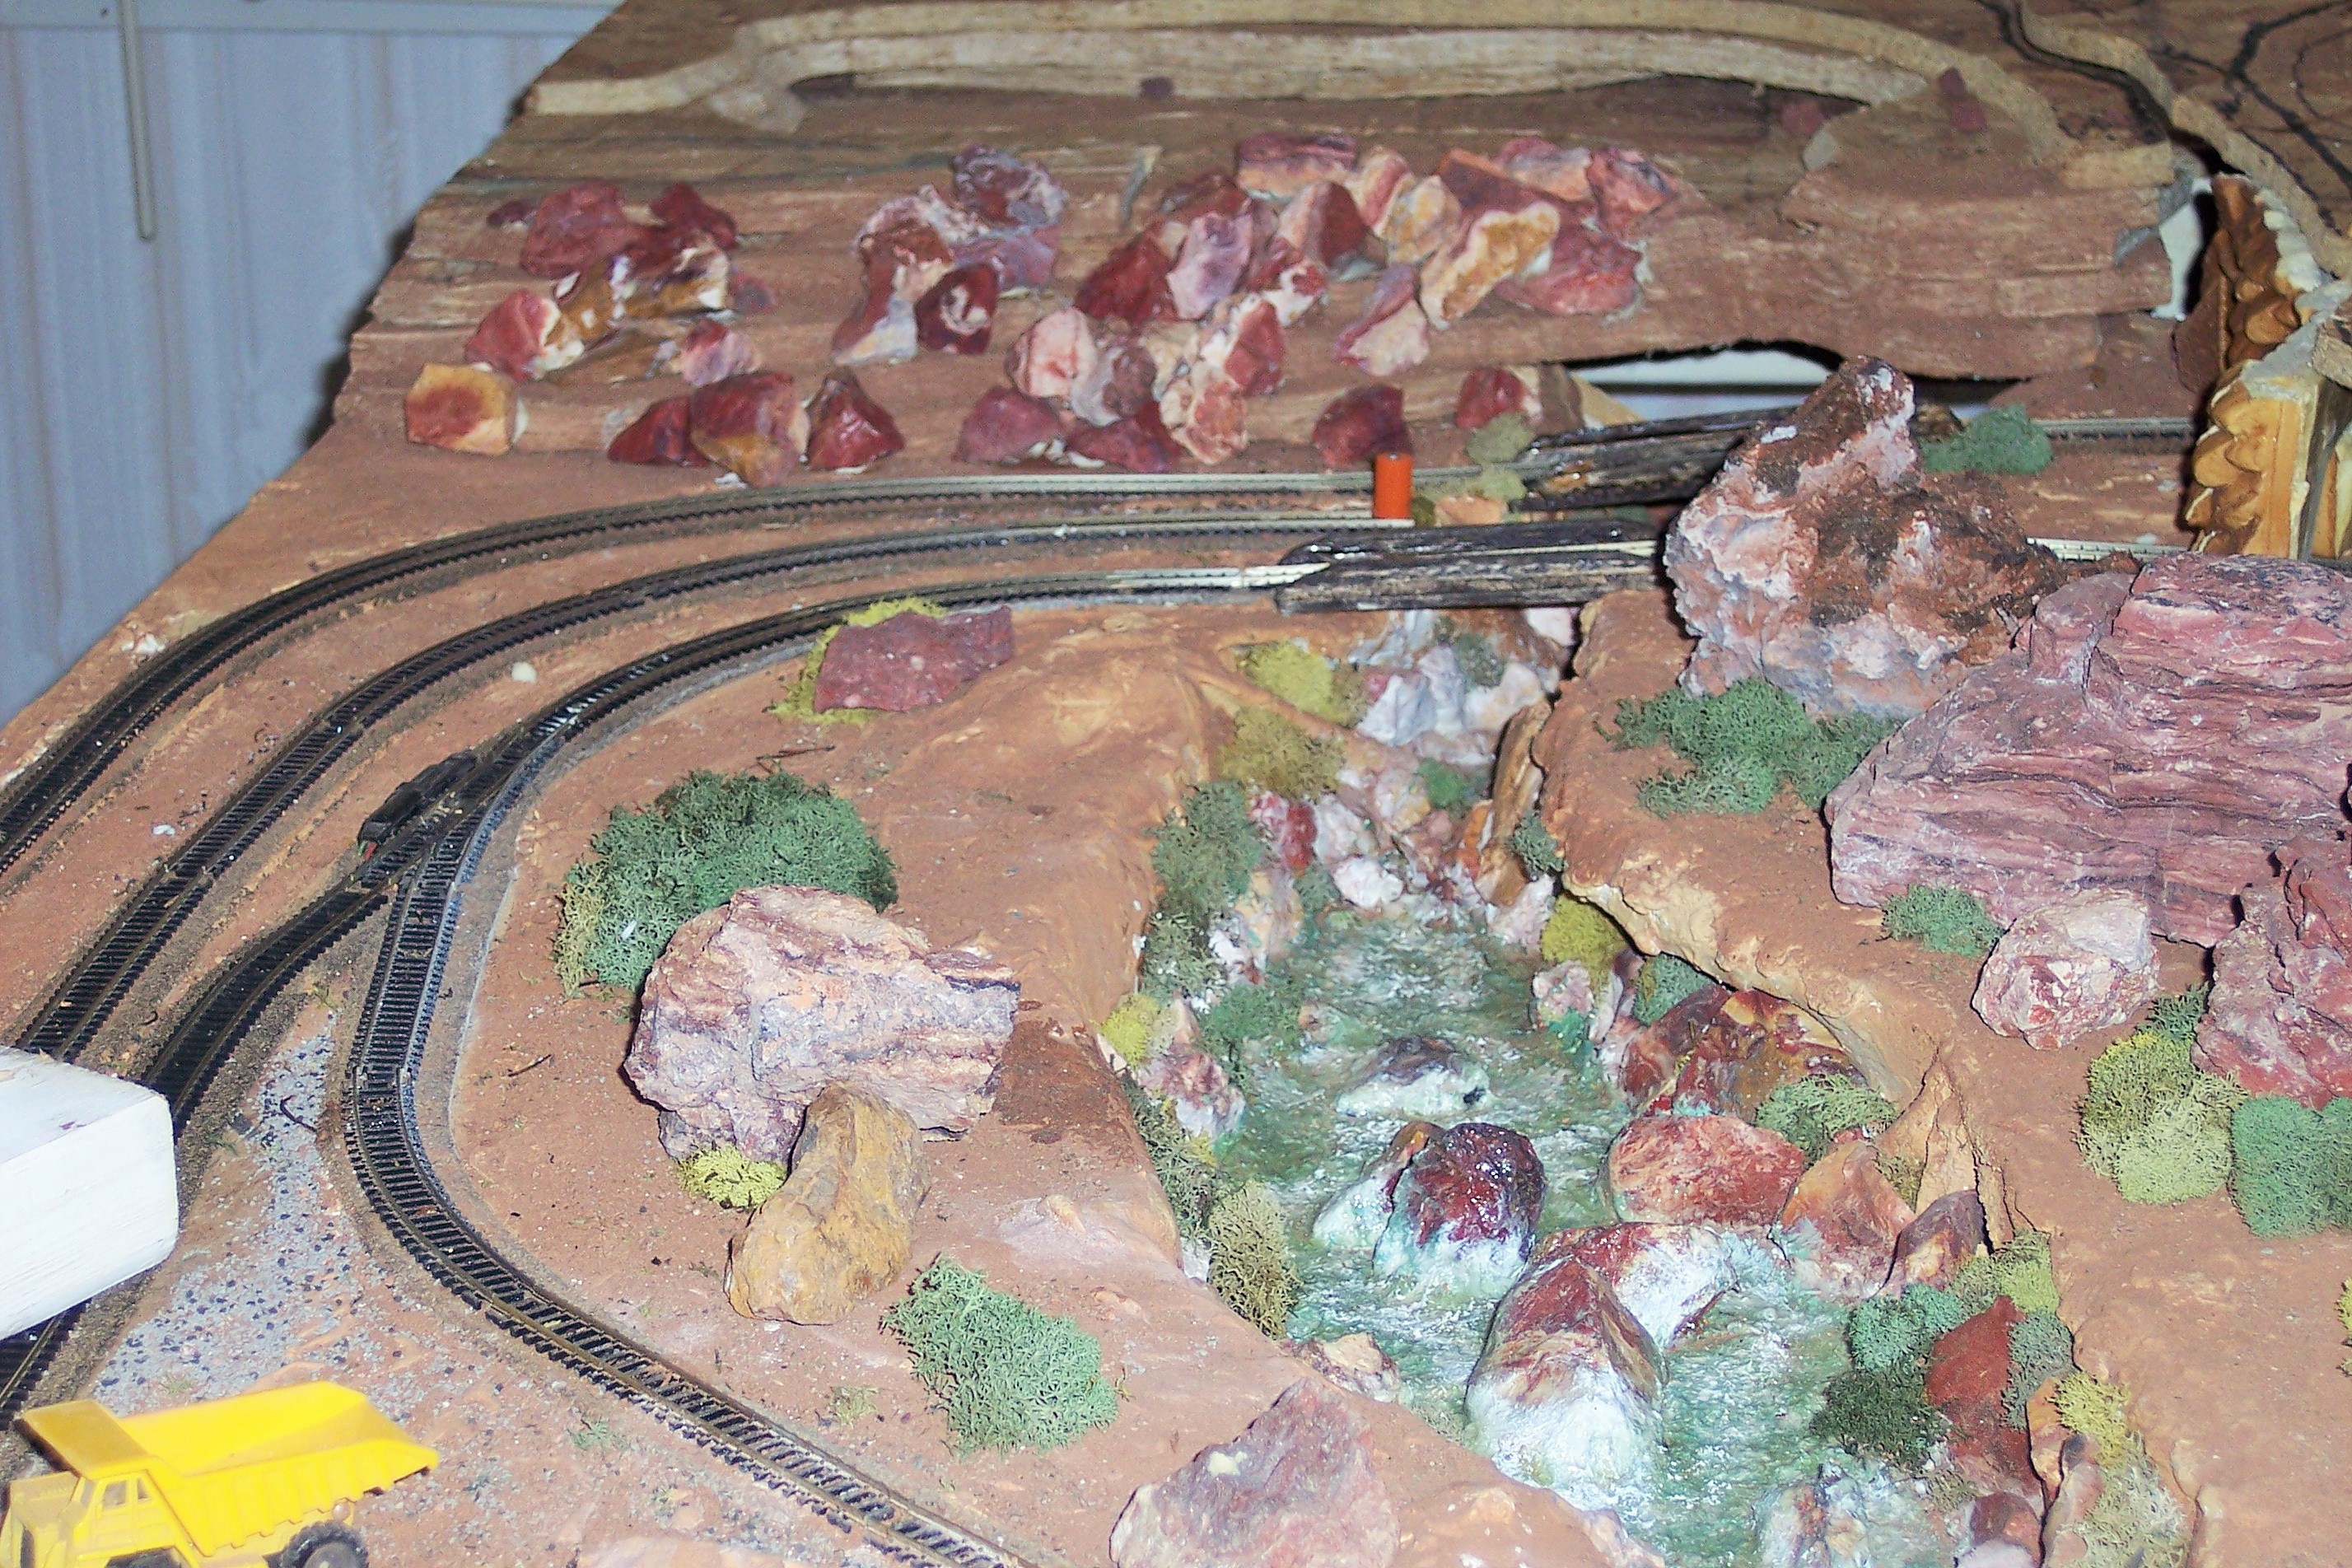
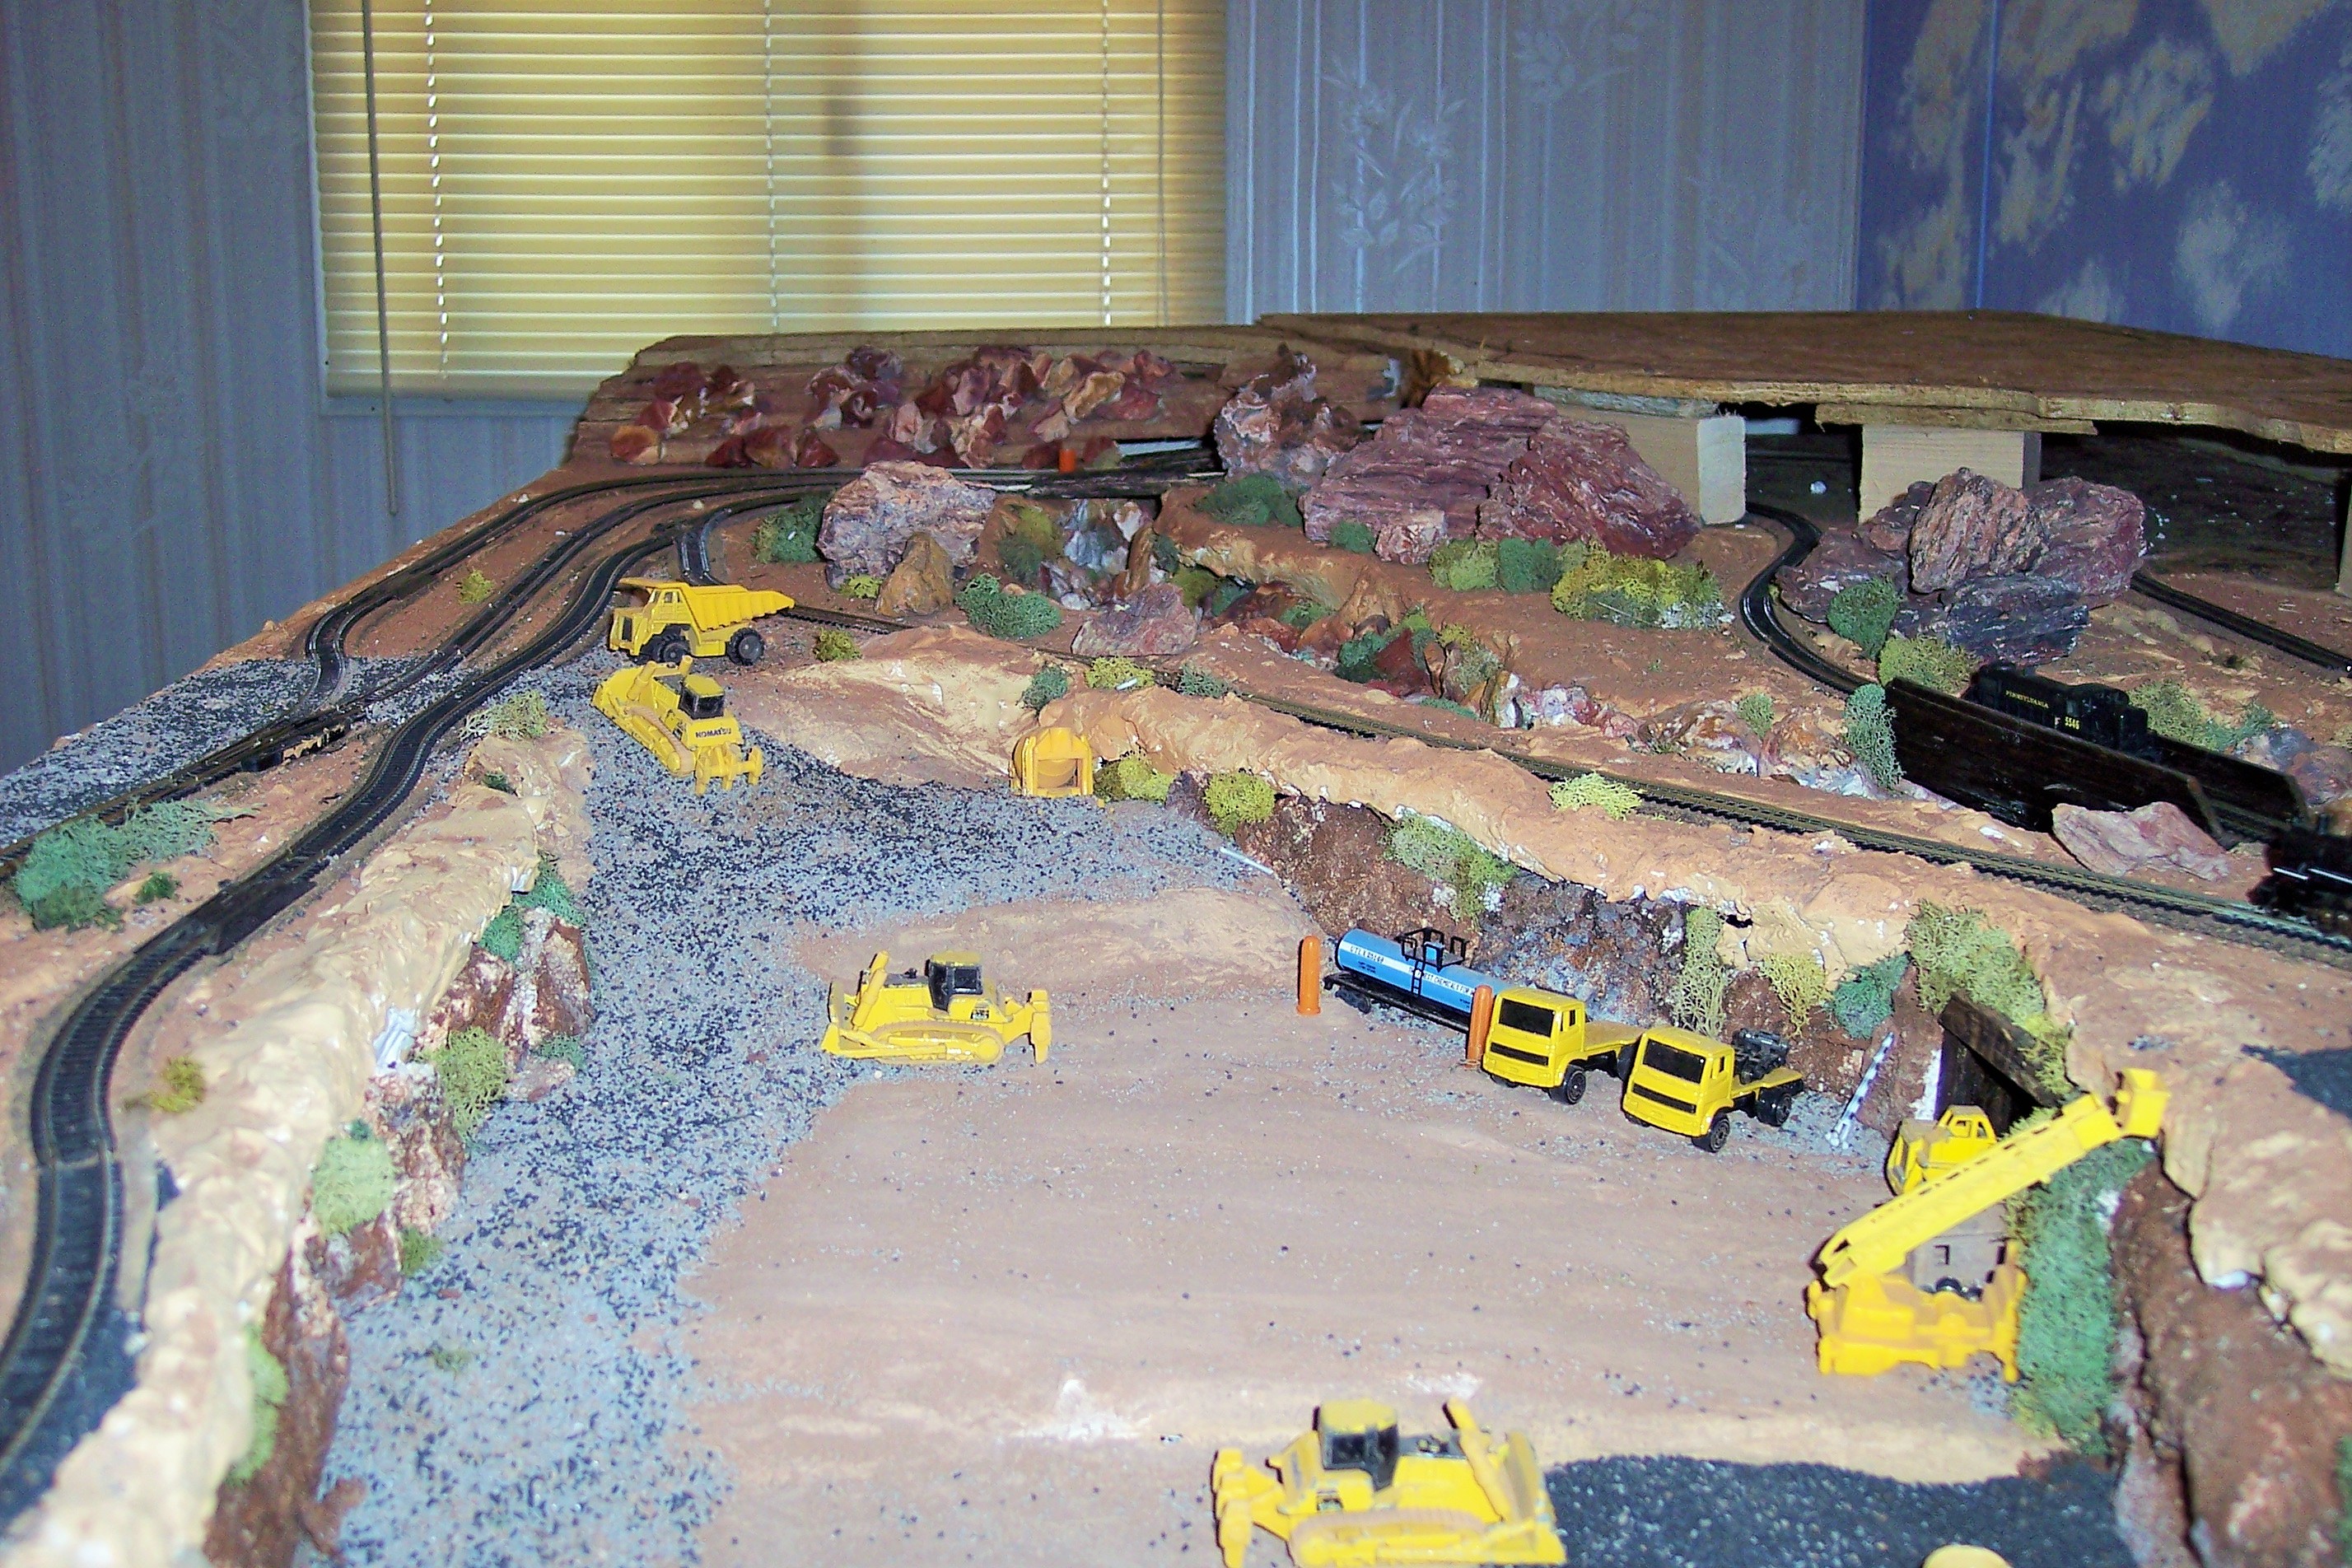
I am waiting to do the lake and waterfall, as well as put the foliage on the hill until I get the track laid on the next level. if you noticed in the first 2 pictures that the track level is higher than the lake. There is going to be a big camp ground with tents on the flat area, a boat unloading ramp and boat dock, boats, canoes, and kayakers in the lake. Maybe some idiot trying to go over the falls in a barrel.
Thank you for all the great trips and pics of layouts.
Thomas”
If anyone has made a layout cheaper than Thomas – please do get in touch!
That’s it for today’s missive
Please do keep ’em coming.
And don’t forget, the Beginner’s Guide is here if you want to get going on your layout.
Best
Al
PS Latest ebay cheat sheet is here.


Nifty job! I always keep any polystyrene packing from stuff bought which I then cut to any size I want, sticking the cut-out shapes together using PVA wood glue. Polystyrene is easy to cut into any shape using any cheap Polystyrene cutter or sharp scalpel blade. I always strive to keep the weight of any layouts I build to a minimum, making them easy to transport to shows, club-events, etc. Assuming one has a sharp blade the cost of such scenery work is NIL – as the Poli packing came into house free. All you have to shell out for would be the cost of whatever size Baseboard you chose, with the track, etc, obviously having to be paid for.
Love the layout, just don’t ring me when you want to move it. It looks like it might have a bit of weight
Good way to save costs , just need a lumber yard that has a dumpster nearby …well done
Great ideas! Isn’t the weight of the rocks a problem? I’ve found that you can go to Home Depot or Lowe’s (no relation-darn it) and they have a bin of scrap pieces you can pick through and get, either free or at a reduced cost. I’ve found quarter sheets of plywood ($1.00), warped 2×4’s (free) and short pieces of 1×4 (free).
They have a trash bin behind the store but it’s best to check with a lumber employee before you go through it.
Keep the tips coming. I’m sure there are many others that also learn from your experiences.
As you said, keep your eyes open and you’ll be amazed at what you can find.
Thomas,
Look’in good! What did you use for the greenery?
John
Some nice ideas there from Thomas although I agree that weight might be an issue. Another source of free material is to take wine corks and put them through a kitchen grater. I then use a kitchen sieve to grade the crumbs. It is good for sandy scree on rock faces and also cart tracks and footpaths. It’s amazing how much you get from just one cork. It also makes reasonable track ballast but painting to a realistic colour can be a pain.
way kool way to make scenery….using natural products…and verrry economical in these times….
way to go…!!
and like one of the guys said
“don’t call me when it’s time to move it”
hahahhaha
Other than roadbed, track,rolling stock and accessories…. leaving out all the expensive bits then! 😉
I’m afraid to ask where he will get the free water and waterfall!
Does anybody have a design or ideas to lift the whole model table when not in use to clear the room? I would verify and reinforce the rafters but how to hook up many pulleys to one lift?
Nice work
Hi Thomas. very nice work.You have some great idea’s there.I;m also one for looking at nature or around me to find a better cheaper way of making thing’s without breaking a bank.Saves the money to put towards more expensive stuff.Thomas if you like ask Al for my email address and I can send you a few idea;s ive come out with.Keep up the good work. and I have also learned from you as well thanks.
Yes, you can get polystyrene from packing and store to make the layout. In fact, I use a lot of them including scrap pieces of plywood and reapers. But it all depends on the classification of a layout.
To my mind layout has three parts:
1. The base board – This is the most expensive part I suppose.
2. The scenic build up – Mountains (including tunnels), landscape/terrain, waterfalls/lake etc. – This can also be done very cheap from scarp material.
3. The track laying, bridges, stations etc – this could be expensive if bought of shelf – but could be made inexpensive if the bridges and stations can be handcrafted using scrap material.
I would soon provide pictures of my layout explaining what I have done with scarp material.
I would love to see Thomas’ track plan and see where he uses the scavenged materials.
For the guy looking for a way to lift his layout, there was a video here on Alistair’s site not long back. Check back through, or ask Al if he can guide you.
The rocks looked like petrified wood. Don’t throw them out when you expand the layout!
That is really beautiful……. great job….I love the colors
I agree reusing other materials is the way to go so far I have $6.00 invested in my layout not counting trains. I watch online auctions an purchased an 8×6 layout with a lot of track switches power supply’s etc for a $1 and then purchased 3 cabinets with drawers for $5.00 everything else I pick up all over but nice job did enjoy the construction area
The stryrofoam I use to build up hills. . I invested 25 bucks into rock molds and for 10 bucks can buy 4 pounds of plaster from hobby lobby. Weighs a lot less simple and easy to use. Can use them all over the layout for hills, tunnel entrances, river embankments.
Do not get carried away with what I call “povertized thinking”. It is a killer. I like the chipboard idea but i would just use strips to try to keep it lighter to move.
Using styrofoam coolers from Walmart is another way of getting foam to use to build up surfaces. It will also make great tunnel entrances or exits.I have been hoarding this type of coolers for a while now to get ready to build. Quite often you might find them in the trash at parks and picnic areas.
Nice idea but I’d be concerned about the extra weight. How about sheets of insulation boards?
As a retired geologist, where did you get those rocks!
I loved the rocks as it adds to the details on your layout
Back to basics. When I first started out in model railroading, about 75 years ago, model railroading as we know it today was not user friendly. There were not a whole lot of kits on the market and those that were available were rather rudimentary. A kit was usually pieces of wood that had to be formed to make the part. There wasn’t too much available so one had to improvise with whatever materials were around. There was no sectional track; mostly 36″ long track by Atlas. Track was mostly rail that had to be spiked to wood ties. Even turnouts had to be home made as the only one available, I think was a #6 turnout and maybe a 90° crossover. Switch machines were not around then. We ran automotive choke cables to each turnout via bell cranks (also homemade). Power was many times (2) 6V lead acid batteries and a wire wound rheostat. O scale was more prevalent then than HO was. They were usually powered by outside third rail. We didn’t use a lot of plywood. It was usually open benchwork 1×2’s with 2×2 legs. Modelers today are so spoiled with all the stuff that is now available. Today I still subscribe to the old way of layout construction, not because I’m cheap, but because I see it as a challenge.
Thank you for a continued example of creative construction ideas. I also pick up “natures” rocks but to reduce weight for the larger ones, use them to make molds.
You turned rocks into boulders.