Peter’s been in touch with his impressive N scale rock cliffs:
Now on to Tom:
“In the 1950’s I grew up with a Lionel train table my dad built in the basement of our house in Berkley Michigan.
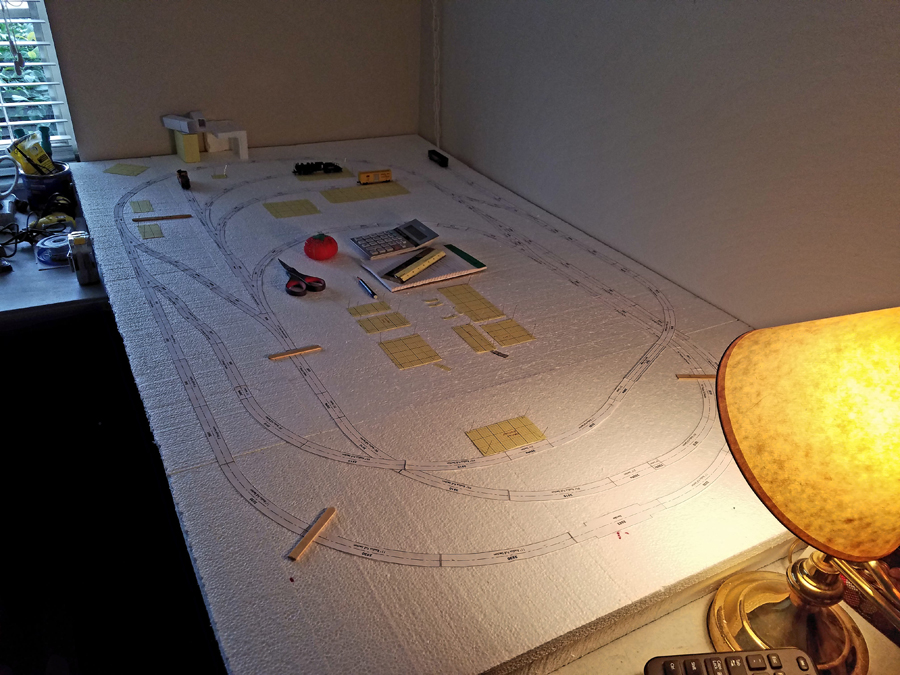
About a year ago I decided to build a N scale railroad in my house. I first had to do a lot of reading about the changes in model railroading from the 1950’s.
DCC – what a change from having to section off different areas of your layout.
Also what materials are now available for landscaping from card stock buildings to ground cover.
THE THEME:
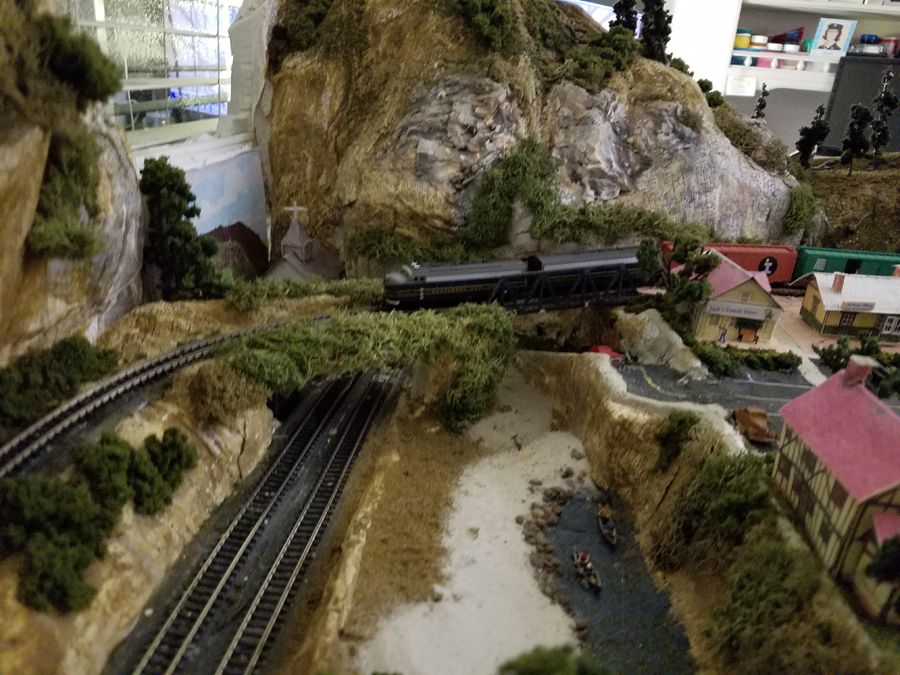
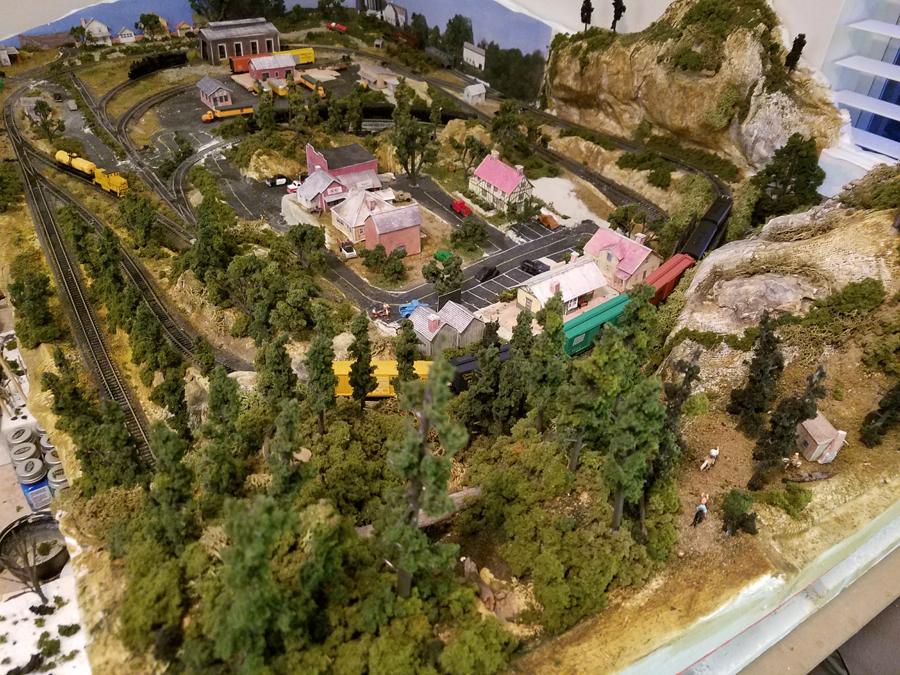
The theme of my railroad takes place in the early 1950’s on the Baltimore & Ohio rail line between Baltimore and Cincinnati. The village is in the mountains of West Virginia along Highway 50.
The main line along this route takes you through the mountains into the rolling farm lands of eastern Ohio. There are two spears one that will take you up into the village with a stop at the passenger depot. The second spear is to the local coal mines and trucking fright yard.
SPECIAL SCENES:
Forest with a fly fishing river
Cabin in the woods
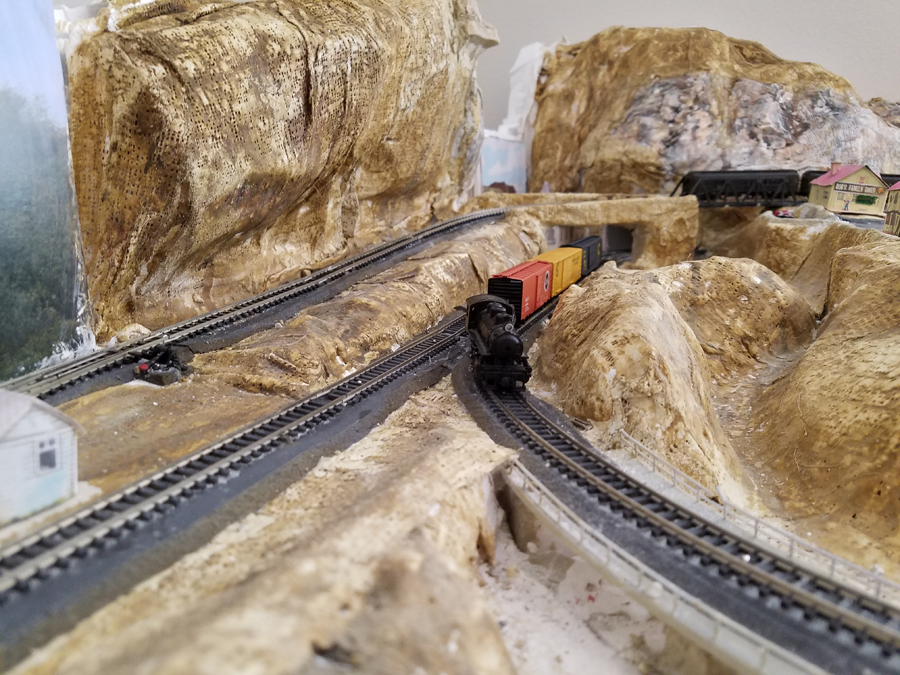
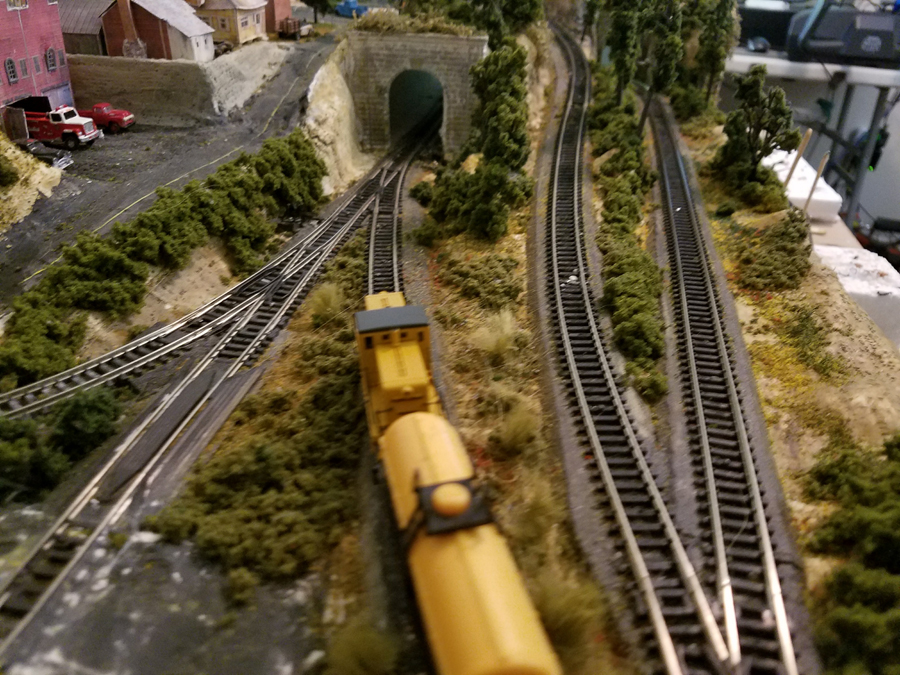
Tunnel through Mountains
Rock cliffs
Local park, swimming and picnicking area.
Canoeing on a lake
Rapids that end in a fishing lake with a viaduct running over the fishing lake.
Cave/wild animal den
Apple orchard
Farm with live stock
Wood frame Farm Houses
Local auto repair shop/gas station
Corn fields
Biker bar
Trucking depot
Engine house
Coal Mine
Village
Town Hall/Fire Station/Police station
Barber/Beauty shop
Bank
News Paper Stand
Train Depot/Post Office
Family restaurant
Doctor’s Office
Consignment clothing store/Bed and Breakfast
General Store
Trading Post/Auction House
Butcher Shop
Farmer’s Market/Produce Stand
Gas Station/mini mart
Church
Tom”
Now on to Peter:
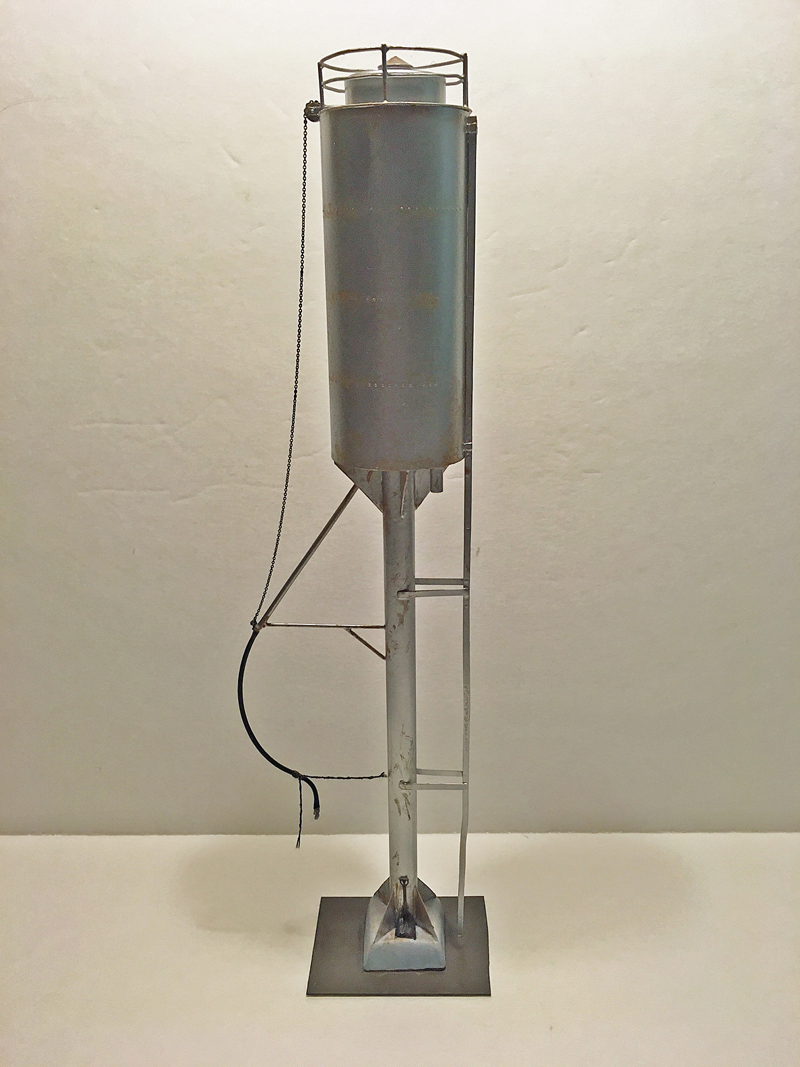
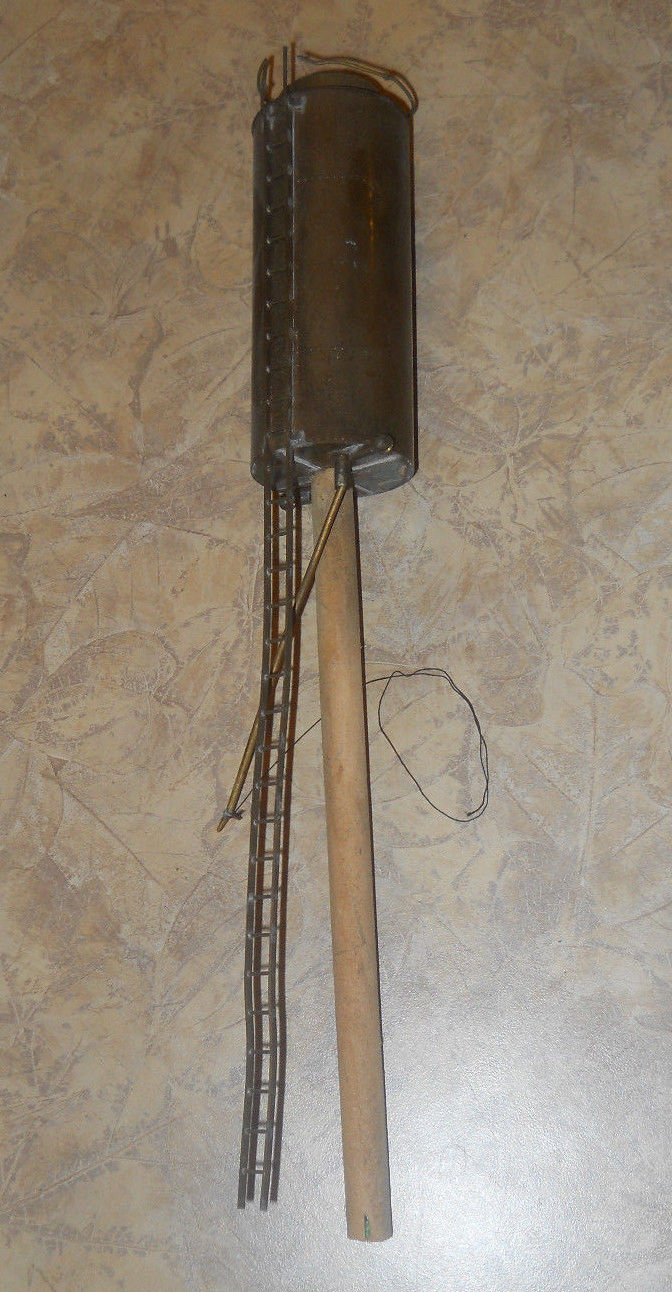
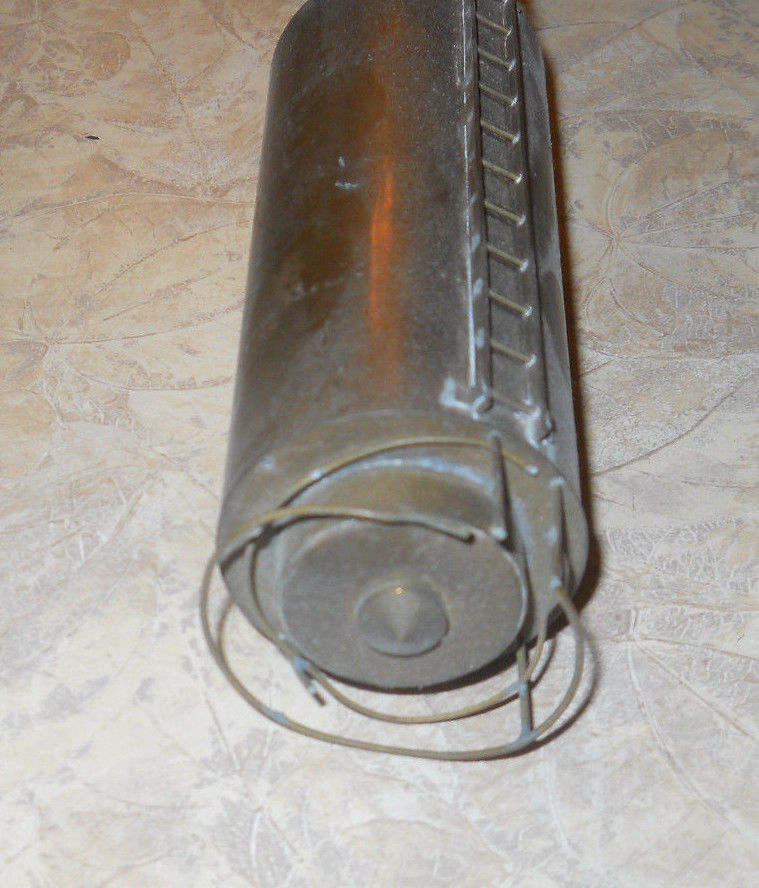
“Found this dilapidated sand tower on ebay and I made it all brass and a nice addition to an engine facility in O scale..
Peter”
A big thanks to Peter and Tom.
Loved what Peter did – he really did nurse it back to life.
And Tom’s N scale rock cliffs layout is a little stunner- not bad at all for a first effort!
Hope you enjoyed them as much as me.
That’s all for today.
Please do keep ’em coming.
Stay safe. Stay sane. Keep busy. The Beginner’s Guide is here.
Best
Al
PS More N scale layouts here if that’s your thing.


Nice layout you have built Tom , and Peter that sand tower is a beauty ..Dangerous Dave
Just building a new 009 layout and have used the polystyrene Woodland scenics risers to take the track up a level. I have then added Woodland scenics rubber trackbed to then lay the track. I have not yet started that bit.
I need help or advise from your many members, how do I cover all the holes in the risers? Do I need to fill them with something? If I just lay a plaster bandage over I think that they would be very noticeably still be dips where the gaps are.
Any Tips please?
A great layout with plenty of detail, Would be great to see a video of it running. Rossorail Tom
First effort? Iooked as well planned as I’ve seen. N scale can be very tricky. I’d like to see a vid. that would show the complete pike. And there are lots of additions to up-grade the topography, but the trackage looks to be excellent. Mountain and tunnel look great. Stand tall, young man. You are doing fine.
HI
Sand Tower is great. I think it looks better grey than stripped.
Colin Edinburgh
My hat goes off to Tom for going with N gauge. It is a beautiful layout with great scenery. I know I could never do what you did! HO is a great challenge for me. Cheers! NJ Mark
To Tom! You guys make such fine mountains and your artistry finding the perfect color and knowing how to apply never seizes to amaze me.
My down fall mountains and water scenes.
Wow. Looks really great!!! Nice job
If this Tom’s first, I can’t wait to see number 10!
Tom has a lot of talent and patience. And really pays attention to detail.
Great work, Tom. Keep posting as you journey through this hobby.
I’ll be waiting for your next episode.
great layout lots of hard work and thats a great tower
Tom,
As a fellow Michigander, raised in Alpena, I had a large Lionel layout in a large (store) room upstairs. Just a kid’s layout, so I didn’t know squat about the finer points of model railroading. Even at 81, I have fantasies of starting my HO layout.
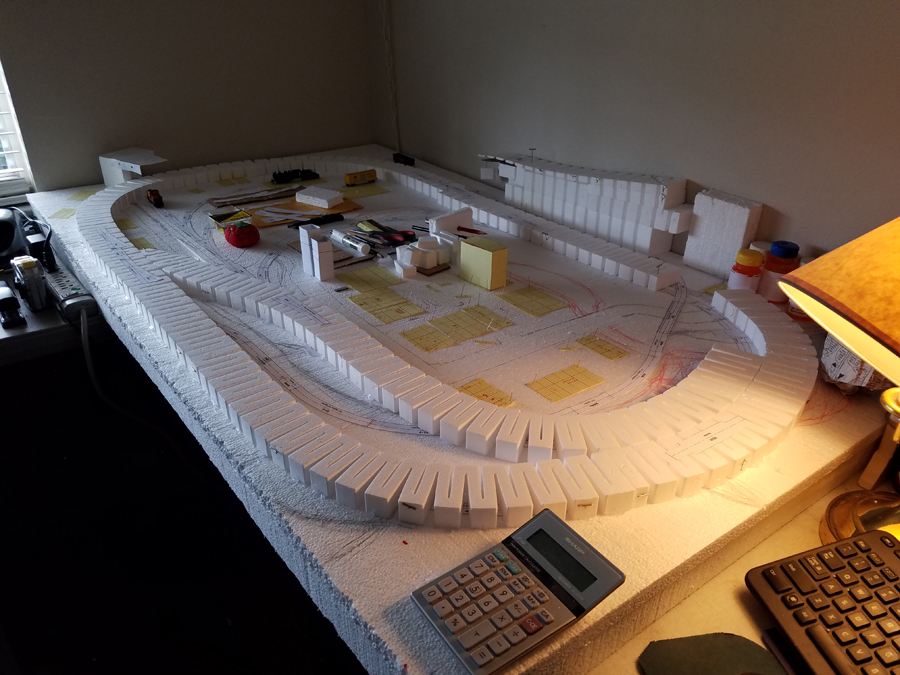
Question: what did you use for your risers?
Bob Belk (now living in Bethesda, MD)
Nice work on both projects…
The refurbished sand tower is very nice…
Taking an old abused structure and making it look new is hard work indeed.
Tom’s first layout is one of the best “firsts” that I have seen.
Tom’s layout also has a good lesson for everyone from beginner to the most seasoned and experienced… “Planning makes Perfect” — The better the plan, the better the result (generally).
Peter, great job on the sand tower…very realistic looking!
Tom, I think your mountain scenes are awesome. Pretty impressive for your first layout! As others have mentioned, I too would love to see a video.
I’m going back to take another look at my mountain scenes…..you’ve given me ideas on how to make them look better, thank you!
Nice work Peter and Tom. Bringing something back to life is always rewarding. Wonderfully done layout , Tom.
Martin, there lots of ways, but i placed runs of crumpled newspaper along the ramps, then draped plaster cloth over the ramp and down the sides. Build up as much as you want, then paint and add more scenery. Railbed and track come after ramps are secure.
First try? This layout is amazing. Great detail in the mountain and tunnel area. I started with HO, went to N, but eyesight and old age has me in G. Enjoy your first “attempt”.
You have a lot in a little space and it all fits together nicely. Well done.
Mr. woods I look at this site a lot and one of the people on here put wadded up paper along side of the riser then put down the plaster tape diped in a bowl of water started up along the track and rain it down over the paper that gave it shape and form
Wow…… fantastic scenery for a first timer……..impressive.
Gary M form Long Island
Hi To Martin Wood: If, as you said, rubber track liner should be sufficient. If you intend to ballast the track using the bare risers or you could cover it with masking or duct tape. What I did is cut and sculpt with a hot knife additional foam to put beside the risers and cover it with plaster cloth. Plaster cloth can also act as a sculpting tool by “pinching it” to look like rocks, etc. and it would cover your holes. Plaster cloth can be bought at Walmart in 5# bundles and is a lot cheaper than Woodland products small rolls. Hope this gives you some ideas
Ray
Martin check out Woodland Scenic’s how-to videos on their site & U-tube. I would think that two layers of plaster cloth stretched tight and placed at different angles would be sufficient to cover the gaps. Some of the larger gaps could be use as contour features in your side slopes or place foam packaging peanuts in the gaps under the cloth to give a rocky profile to the slopes. The peanuts also create rolling hills when clumped under ground cover mats or plaster cloth.
Tom, great layout. I would to see more pictures of all the things you described in your narrative. .
Tom, You’ve done a great job of planning and constructing your first layout. For your first attempt, this is outstanding work. I liked your list of features. Perhaps next time you could give us a photo showing how you completed each of those features. Keep us posted on your progress.
Hi Tom, Love what you’ve done. Berkley is near and dear; my Mom graduated Berkley HS in ’47. And I lived in southern Ohio for 27 years. So I liked all aspects of your layout.
Great looking layout! For Martin, I covered my risers with plaster cloth that was about an inch hangover on both sides. Then sprayed it down with lots of water. Finally, with latex glove on I ran my fingers over it. Made it like a cement highway but completely covers the cracks. No ballast will drop down now.
Beautiful water tower, too!!!
Both contributors had great things to show. Love that brass sanding tower. Always appreciate taking something old and making it new again. And a wonderful N Scale layout! Looks really good!
Very well made layout
What size board did you use to get all that in.
Fantastic Work
Regardless about this being your first layout, it is an excellent effort. Great detail
Very nice effect: compact, but not crowded. In your third photo, the cliff in the upper left quadrant is extremely well done, and I’ve never seen one like that on a model RR layout. Good job!