Tony’s been in touch – he’s added to the passenger train dioramas on the blog:
“I have been enjoying my daily email from Alastair for some time now and figured it was time to share a project of my own.
It is great to read about everyone’s experiences because there seem to be some very common threads- not enough time, not enough space and not enough money.
The first 2, in particular, have been my bane for many years. Having moved a lot over the years, I have built layouts in N, HO, OO and G but I have never really finished any of them before I moved again. And I’ve always had in mind that one big, final, perfect layout.
We moved 2 years ago to our retirement house but, not being retired yet, I ran into that other common theme- getting motivated to get started!
I have been reading Alistair’s wonderful newsletter for some time now (it’s the one email I get that I make sure to read every day) and there is always something motivational in it, so I am planning that final layout- an 18’X10’ OO layout of the Golden Valley area, around Chalford, Glos. (BR Western Region) in the mid-50s. I’m currently still in the planning stage, but well on the way.
At first, I was very disappointed that this new house had such a small area where I could put my trains (and all my books, memorabilia, work bench, etc) because I have always envisioned at least a 20’ X 30’ layout.
I almost gave up before I started, but reading so many positive comments from this group about working with what you have convinced me to press on. In the meantime, I wanted to share my progress a project I have been working on for some time.
My main interest in the hobby is scenery and, over the years, I have contented myself with building small passenger train dioramas. These are usually planned to fit somewhere in my final layout but they often wind up getting damaged in a move (or by the cat!) and none have survived. In any event, I always enjoy the process.
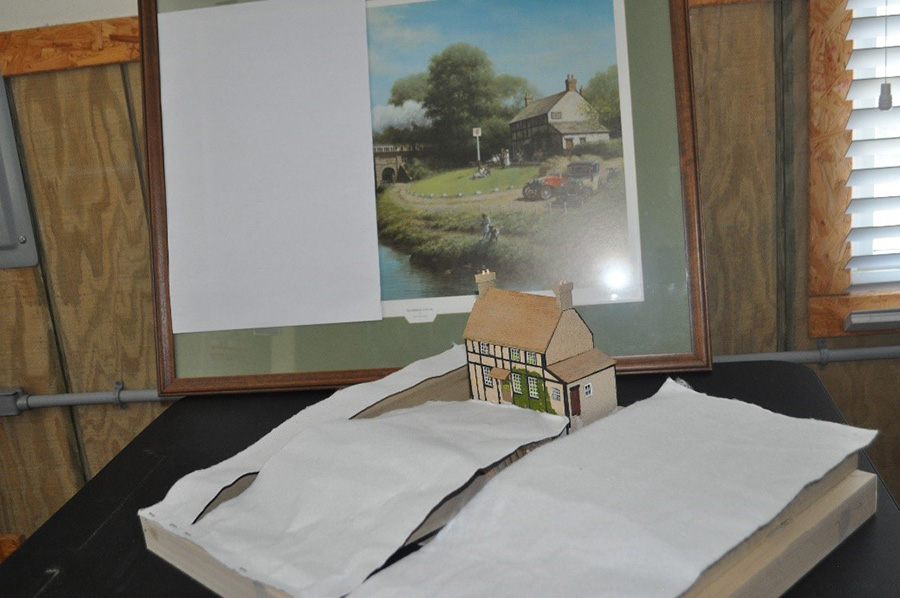
A few years ago, I was looking at my favorite railroad print, the wonderful “Riverside Local”, by Don Breckon. It occurred to me that it was a scene that might fit on my final layout so I decided to try to model it as a diorama.
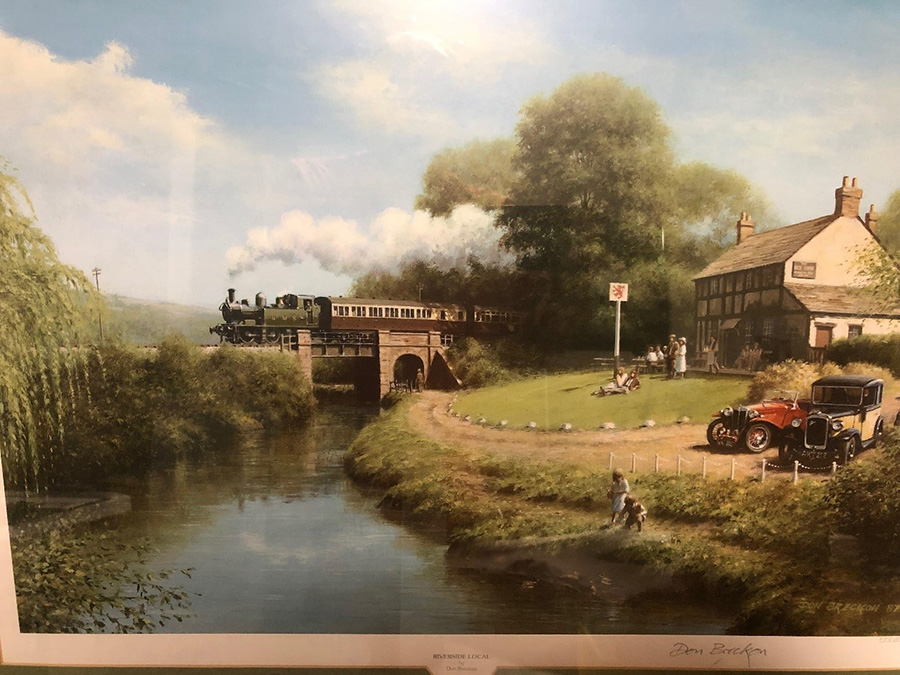
I started by building a 24” X 30” baseboard and laying it all out. It didn’t take long to realize that the perspective was going to be very difficult; translating the 2D to 3D wasn’t easy. The main problem was the river- I just couldn’t get it to look right.
I eventually abandoned the idea, but I had built the Inn and that looked OK, so I kept it and tossed the rest. When I unpacked the building recently, I decided to re- visit the idea. I figured that if the perspective of the river was the problem, why not just try to build the half that doesn’t have the river? That is the project I am currently working on.
My passenger train diorama about 1/3 complete and looking like it might work, so I thought it was a good time to share my progress.
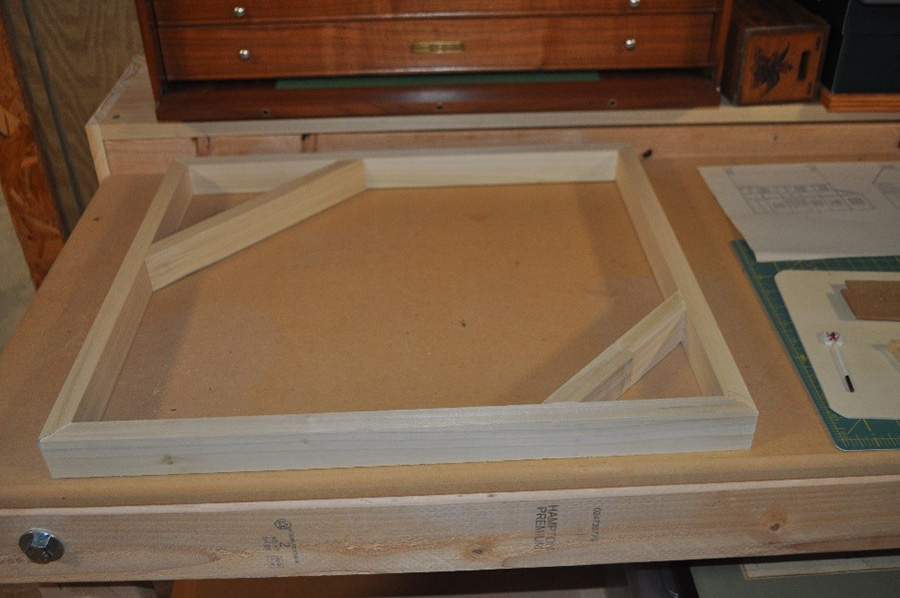
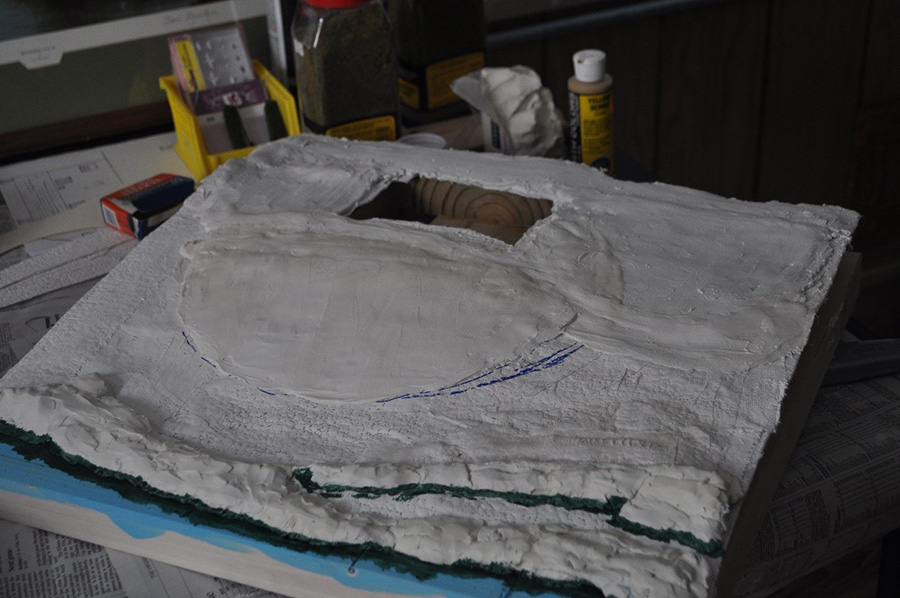
This time I built an 18” X 20” base. I usually just use simple plaster over chicken wire terrain, using 2” newspaper strips soaked in plaster. This is easy and cheap and I have found that it holds up well over time. In this case, however, I needed to match specific terrain contours and I would need to be more accurate than that method allows. I had some Woodland Scenics Shaper sheet rolls and Plaster rolls that I had bought at auction years ago and put away for future use. I had never used these products but I figured they would be good for this application.
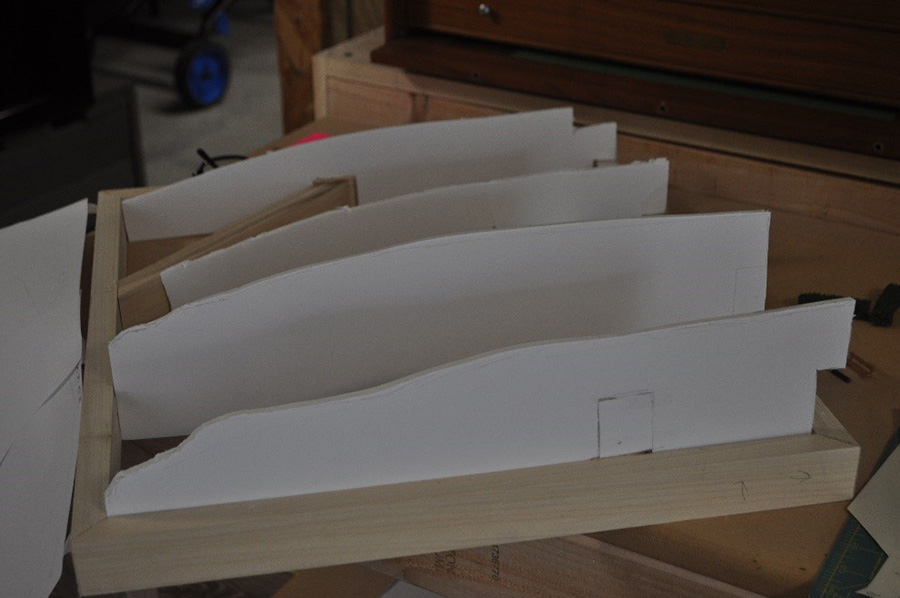
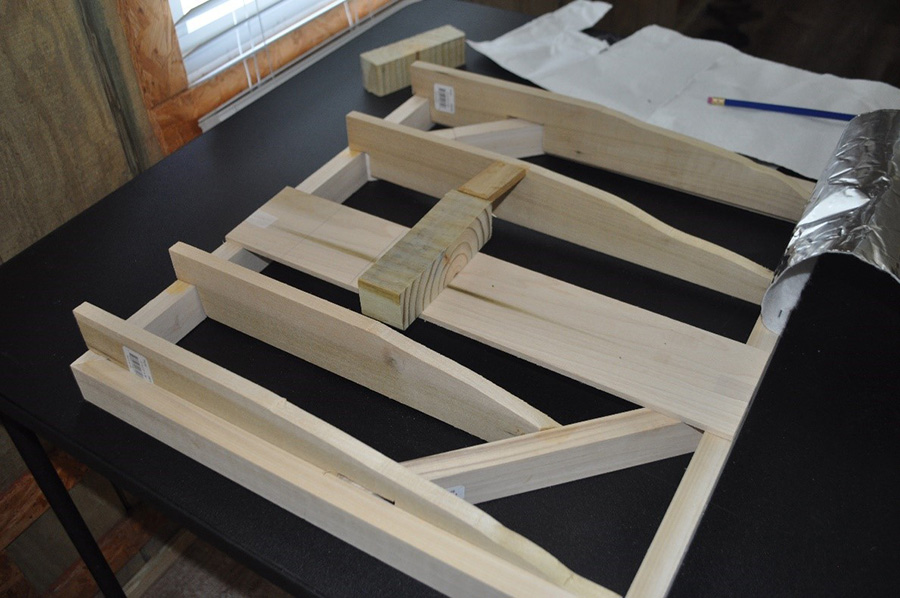
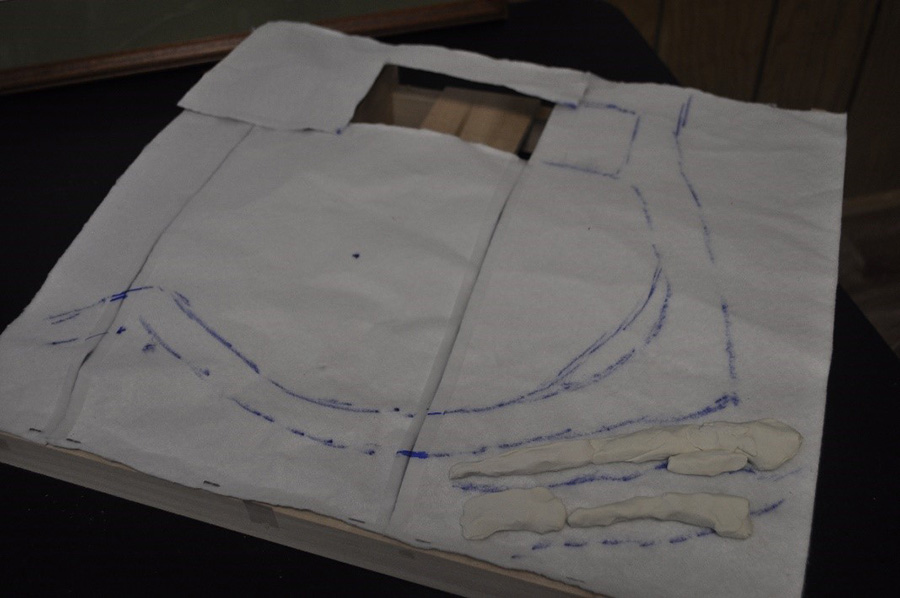
I started by cutting out some foam core strips as risers to approximate the contours that I needed. I wound up cutting 3 or 4 versions as I was back to the problem of trying to translate the 2D shapes in the painting into 3D. I finally got shapes I thought would work and then cut wood pieces to match the foam core risers.
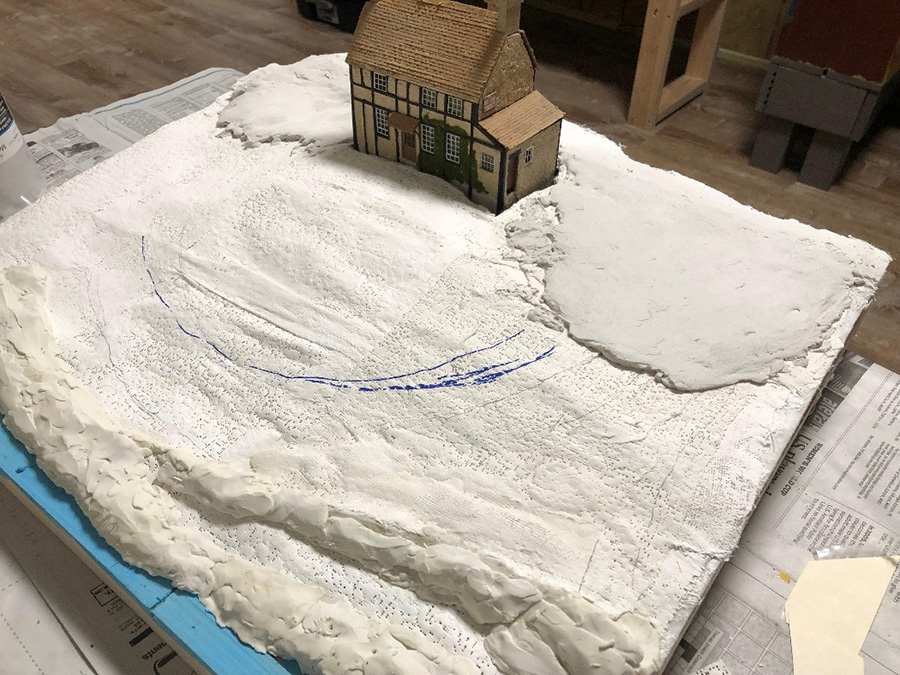
Using the shaper sheets was not as easy as I had hoped, I probably would have done just as well using chicken wire and plaster- but I was in now. I played with the contour sheets a bit and then pushed ahead with covering them with the plaster roll. This product was easy to use, but, again, plain old plaster would have worked fine, and been much cheaper.
Once I had the total board covered with the first layer of plaster, I realized that it was going to be difficult to get the contours going down to the river to look right so I got out some modelling clay and modelled the edge – which proved to be quite satisfactory.
At this point I was still struggling with the perspective and my wife jumped in with 2 very helpful suggestions. First, I covered up the half of the print that I wasn’t modelling and this helped a lot.
The other tip was that I turned the whole thing at an angle- basically looking at the model with the same view as the painting. Both ideas helped a lot. In general, I think this is a great tip.
Whether you are laying out a track plan, wiring, building scenery or whatever, have other people (including non-modelers) take a look at your progress- they will usually see something, or have an idea, that you have missed.
Once the first layer of plaster was on, I just started adding layers (plain old plaster after the first layer), working in small sections to get the contour I needed. This is pretty much where I am now- getting ready to lay down grass and other landscape materials.
I am going to model the edge of the river, but this will just be representative as I will have a full river if I eventually make this a part of my layout.
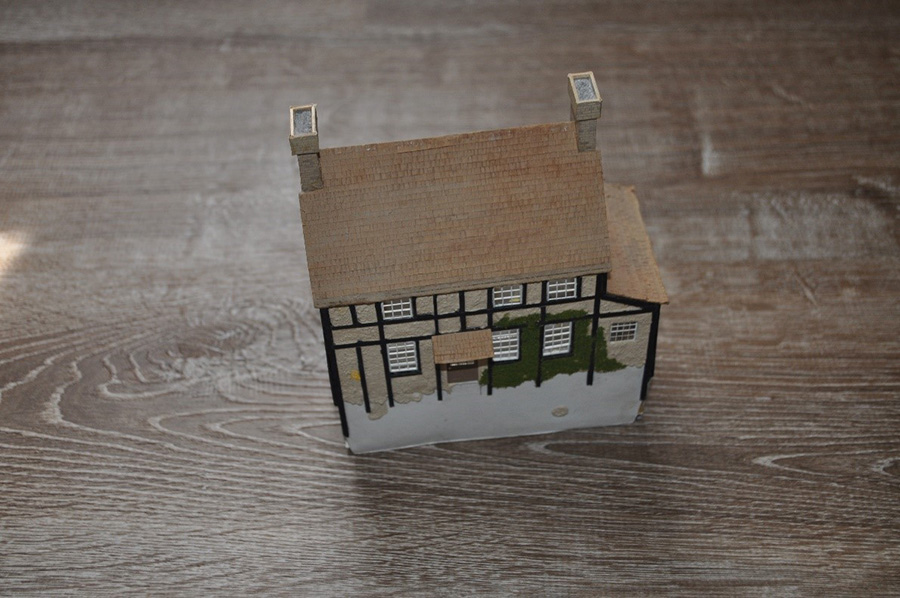
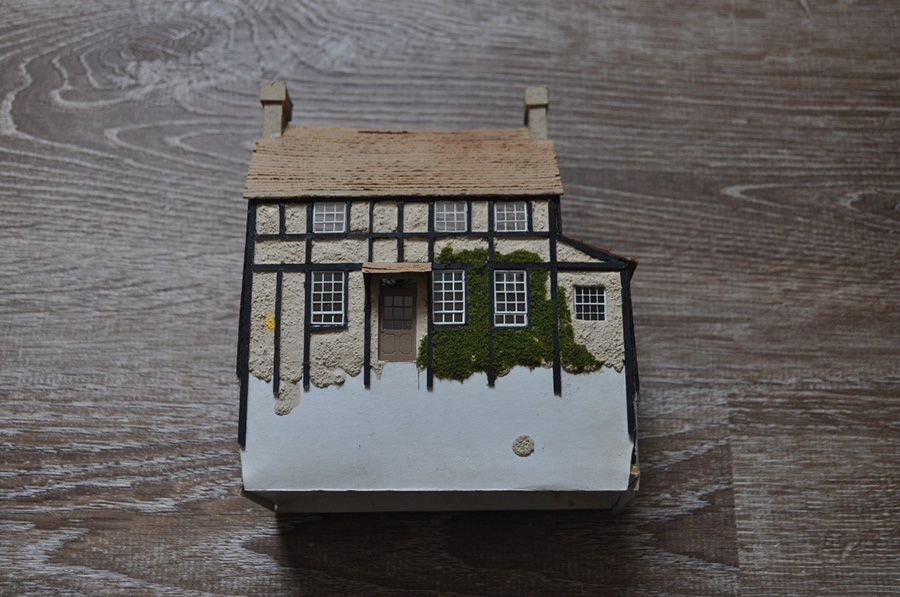
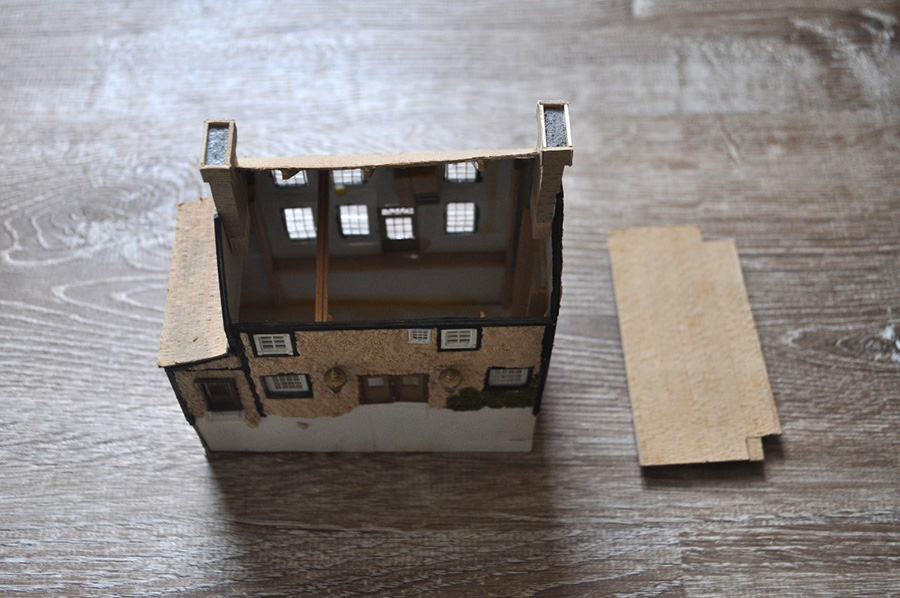
The Inn, by the way, is just a simple card stock and balsa construction. The window frames came from the parts bin and I used microscope slide covers for the glass- I like the reflective quality you get that way.
I usually model interiors of buildings and light them, but this is a daytime scene, so I didn’t bother with that. The walls are just patching plaster. This product comes in various colors and I just looked for one that would approximate the picture, without having to color it. The roof was made from card covered by a roll of roofing tiles and the chimneys were scratch built from balsa, covered with brick paper from the parts bin.
I need to finish this project before I can move on to building my main layout, so hopefully, I will be able to share more progress soon. That’s assuming I can get it all to look right!
Tony”
A huge thanks to Tony for adding to the passenger train dioramas on the site. I hope you enjoyed it as much as I did. It just goes to show lack of space is really just an excuse – anyone can have fun with this hobby.
I’m very much looking forward to hearing from Tony again. Wonderful stuff.
And if you have any advice for Tony, please do scroll down and leave a comment.
That’s all for today folks.
Please do keep ’em coming.
And if today is the day you get started on your layout, the Beginner’s Guide is here.
Best
Al
PS Latest ebay cheat sheet is here.


This is excellent, please post part 2 when you can. This is going to be an inspiration for many of us modeller.
Tony, great job. I look forward to seeing the finished project.
Jack in Pa
Tony
Go for it! I assume you have a master plan. To me the priority is the track layout first, then the master theme, then the dioramas in specific areas that are the blossom of the plant. You can always adjust the diorama both visually, scale wise or in content to fit the main theme. The tail must not wag the dog.
Patience and fortitude.
Keep us posted.
George from NY
very nice..……. hopefully you do not have to stray from the painting to much.
Alan’s right – if getting started is so hard, and it is for me, a “simple” diorama may be the way to finally break the ice and do something!
Very nice can’t wait to see finish
Tony,As a NMRA member and building diorama and seeing many dioramas as NMRA contests yours is one of best! Greg Gramlich
Thin section cover slips for windows-Brilliant!
I’m looking forward to seeing the end result. I too had put off for years. Taking care of family, mom and all excuses. Started reading this and now I’m finally working on a N scale layout of my own. Not much further than bench work yet but started laying track a few days ago. No pictures yet. You all have been a great inspiration just like Tony here today. Thanks to all, Chris
It never ceases to amaze me how creative and talented people are. First, the inspirational painting is wonderful! Second, the inn you’ve constructed is amazing. I really want to see the entire finished product. Cheers! NJ Mark
This is the inspirational direction that gives each of us the incentive to accomplish a wonderful scene.
Hello Me Lee
I’ve enjoyed your site for some time now.I’ve built a few layouts now
1 in z scale And 2 in n scale none of which looked very
realistic. I I’ve tried both woodland scenic and scratch built what am I doing wrong please somebody help me
To Edward, I work in N. Most common error I have found in my work is forgetting to do forced perspective with the foliage, trees and COLOR (ie. Gray out your colors going from front to back) . Also, blend your foundations into the ground. Lee
To Tony, Keep up the great work. Take a picture from ground level of your layout, then compare to the actual picture. Also works to help see problem areas on your layouts.
Very nice work on the inn…
Great ideas here…
When it comes time to build a layout may I suggest thinking small…
I got started with the “small idea” over 40 years ago… My father saw a timesaver shunting layout being run “after hours” at an NMRA convention — We built a copy together.
Later, when I got married… I built a couple of “diorama layouts” that fit on my desk. They were dioramas that I could run trains on a little but….
Then I went to college and built another timesaver variant layout — this one had a “connection” to the “real world” (a fiddle yard). It was great fun and lasted about 10 years before I broke it up…
Al shared my most recent endeavor last weekend…
With your vision and skills, I see a small terminus with a stone bridge, a “halt” type station with an inn nearby, a provender shed, a coal yard, and a goods shed. Track would be a fiddle yard, a passing loop, and a couple of spurs to shunt…