Here’s the latest from Barry:
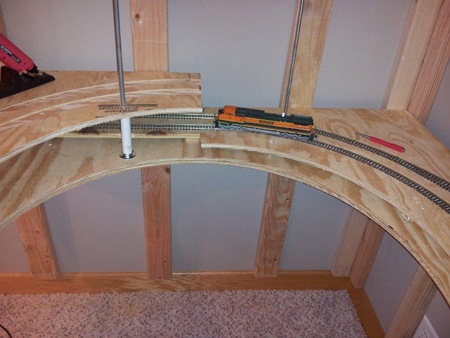
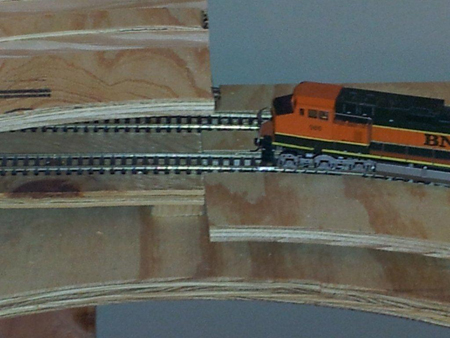
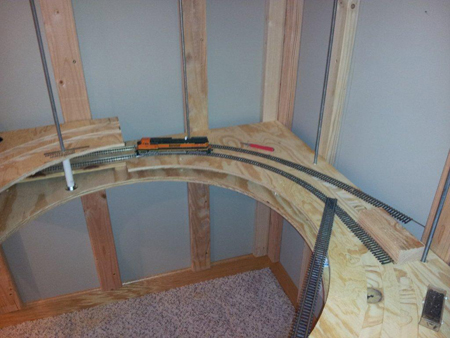
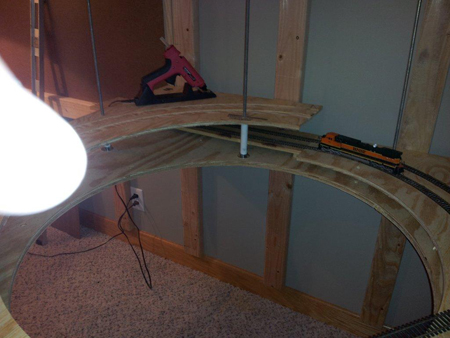
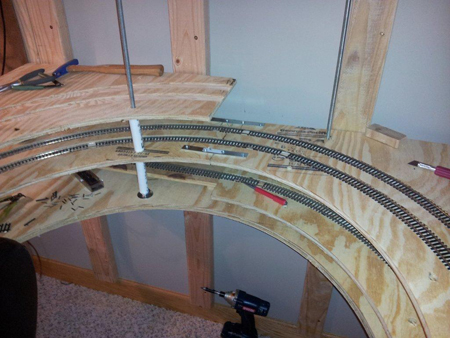
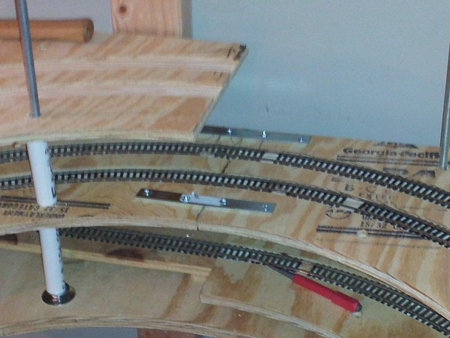
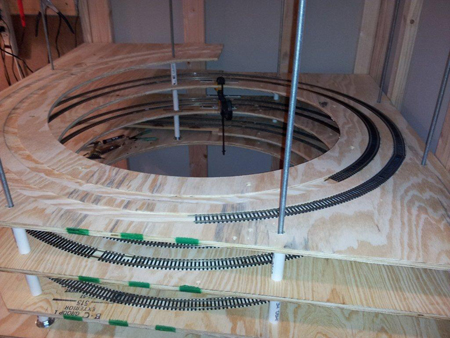
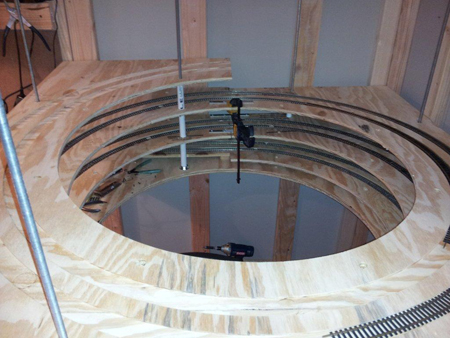
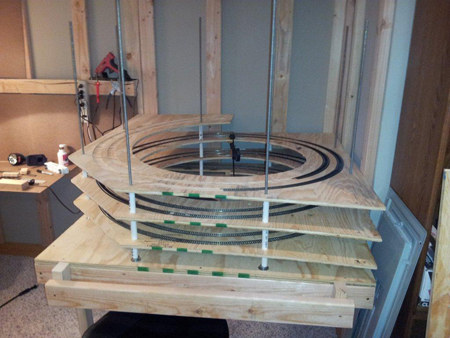
“With the routered groove in the helix it makes it relatively easy to attach the track initially with hotmelt glue and then occasionally nail just to make sure it stays down.
It is very time consuming to cut and trim the ties and then solder the rail joiners but then I seem to have an abundance of time.
I stagger the rail joints between inside rail and outside rail by about 2.50 inches to totally eliminate any kinks in the track and it makes a smooth transition.
Barry”
“Al
Something I found useful for shale rock is ceiling tile broken in small pieces turned upside down and glued with a glue gun. You can use different shades of gray and a little black to dress it up. I think it looks good at little cost.
Bill”
“Arm yourself with a hammer drill & 1/4 masonery bit & drill some holes in a concrete block or red house brick or coal & you will have plenty of fine dust for scatter material also for loading your trucks.
Arthur.”
That’s all for today folks.
Please do keep ’em coming.
And don’t forget the The Beginner’s Guide is here if today is the day you get thoughts together to get going on your very own layout.
Best
Al
PS Latest ebay cheat sheet is here.



A few days ago you posted a layout that said something like…”i added this building as my depot…”It was a 2 x24 as i recall and showed an over and under track that was drawn freehand. I’ve lost this and would like to read it again. Could you resend it to me? Thanks and keep the layouts coming…BB
That looks just great, what a wonderful model, certainly something to aspire to. Well done Dave and thanks, it’s supurb
Barry your Helix is certainly coming on really well, It’s going to be fantastic when it’s finished
I just need to say been following this build since i got the first email and read all the info given love to look at the way people build a layout as there are so many ways to do things in the world of modeling have to say barry 100% like it just wish i had the room to build the same this will look amazing when completed.
That’s a great how to for helix building. Well done.
Dave is quite the master train hobbiest. His work is really awesome and I’m glad he is so willing to share his talent.
All the night scenes need is cricket sounds and you wouldn’t
know if it were real or not. Keep sending those videos Dave,
they are very inspiring.
Absolutely incredible layout Dave. You must have the patience of Job to install all those lights! It’s always a treat to see real craftsmanship, even if it is from a bloke 🙂
Nice, nice work.
Nice video, Dave. I like that you follow one train around the layout – that provides great continuity. Love the night scenes. Lovely lighting effects.
Barry,
Good tip, staggering the rail joints. My first layout didn’t have staggered joints, and I often had derails on curves. Your 2.50 inches is also longer than even passenger trucks, so no truck can hit two rail joints at a time. That router groove in the plywood is also a great idea for track alignment. A bit of extra work now should avoid repairs later.
Another inspirational video– thank you. I have a couple questions: 1) how large is your layout. 2) How do you create the background scenes (wall paintings, etc.) Forgive me if you have answered these questions umpteen times for other newbies.
Thank you for sharing your work.
Barry you have a lot of patience ,takes some doing making a helix and getting it right , looks like you have got it .
Hey Barry — Layout benchwork is really shaping up. Has the potential for being a real eye-catcher and performer. Keep up the good work! — Arnie
wow great layout
When I see these videos, I am amazed, not only about the layouts but the high quality detail work. I also appreciate the time spent in making and posting these great videos. You guys provide a great deal of inspiration as well as knowledge. Thank You all very much!!
Hi Dave
Great sound .
How did you aquire the station sounds I would love to know
Cheers Kevin
How wonderfully ingenious. Incredibly impressive.
EXCELLENT BUILDING
thanks dave what a great layout love it welldone
JUST TO ANSWER A FEW , AND THANKS FOR YOU COMMENTS , THE LAYOUT IS 30 X 8 FT, AND THE SOUND WHERE ADDED BY HOWES MODEL RAILWAYS HERE IN THE UK , THEY DO EXPORT .
This gives new meaning to “and the train goes round & round” bravo nice stuff
Great job. Like the router groove idea, smart thinking ,accurate,saves time and alinement headache problems.stagered rail joints always best too. Congrats. Gary
Barry .. ive had the same plan for a layout like yours in my head for a couple years now but i was just going to use the bottom half for a switching yard and parking. i kind of thought about making it look like an undergroung mine kind of thing but i dont think that would be realistic. what my purpose for.the double deck layout was so that i could run three or four trains on one set of tracks and with so much time in the helix and on the bottom track after they dissappeared in the tunnels it would be realistic like they actually went somewhere. i wanted to run two tracks so that i could run opposite ways at the same time. Keep up the good work. looks beauriful
Barry, you can undo two or 3 clips that hold your main electric panel door on to the panel face. Better to have it metal faced w/o the door than hard to access, still just as fire safe much much better than with the whole panel face off.
Looking at your “helixes” reminds me of a story about a friend of mine here in Bristol,Va. He is now retired, about 78-79 yrs. old. He worked for Sprint Telephone for about 30 yrs and retired from there. He then got a job with NS (Norfolk Southern Railroad) somehow about 1991-92 he had his left arm severed while working with NS. He had a building, a 60′ x 24′ one, and in it he would build his model airplanes, the ones that you fly w/ a remote control and also a huge HO scale model railroad. He had two helixes on the back of it so as not having to bend over to get to the middle of the layout, understandable with only one goo arm. The only problem with the helixes he did not lay them out correctly, and had to buy about 30 sheets of plywood, about 12-15 more than originally bought. I told him “Jim why didn’t you call me to help you, you know I do sheetmetal layout work and this would have been just up my alley”. He is one of those who is stubborn and will not humble himself to ask for help even if it means costing him a bundle of money in the long run. He finally go them made tho but tore the whol layout up, I think his son who works for NS is building it now along with his brother. This is a fine example of my #1 motto, “IF THERE’S A HARDER WAY I’LL FIND IT’ EVEN THO IT HAS WHEELS I’LL STILL CARRY IT ” !!!
I must have missed on of Barry’s posts. Would it be possible to re-post (?) details of the routing for the helix, such as how wide & deep and what exactly is the purpose of the groove?
Like the idea of staggering the rail joins, make good sense to me. Looking forward to seeing the finished layout
Dave you have a real nack on what you can do this looks real neat,wish i could do something like this ,dont have the room for the main thing.
Great sound system. Wish they had one that would announce Trains leaving from North American Railroad Station. Ex. New York to Chicago, Pittsburgh to New York, Los Angeles to Chicago, Chicago to Atlanta…etc.
Hi Barry
It’s going to looking very good, wen it done.
Just one question, how wide is your Helix, and how long did it took to build it!
Good luck!!!
Is there a drawing of Dave’s railroad? If so, can you show this. Thank you.
Dave,
What can be said that hasn’t been already?
Simply awesome layout (again)! The sounds and the lighting, WOW!
William
Dave
May be a daft question but in real life would the driver’s cab of the Pullman be lit at night?
Not nit picking but have to find something to question on your brilliant layout.
Using router on helix is top idea – no issue with lining track up correctly or holding it – excellent idea
I was completed knocked out by the “Blue Pullman” layout. I used to live in Kettering, England would regularly trainspot on the headlands bridge. This bridge was adjacent to the Kettering South signal box. At around 11.00am and again at around 4.00 pm the ‘Midland Pullman’ would speed through. I believe it ran from St. Pancras to Sheffield and back in those days. The year would have been around 1961. Just as Beeching was going to decimate steam as we all new it. I also remember being on Kettering station when the first diesel came through. little did we know….. much later I used to commute to London on trains pulled by class 45 ‘ Peak’ diesels.
Regards Geoff
Barry how did you do the router work? was it free hand or did you use a guide or fixture of some kind? Great job I wish I had done that on my layout! Tom in AZ
Dave.
WOW, WOW, WOW!!! Absolutely amazing and inspiring.
Barry,
Great start. Very interesting. Keep up the good work.
Lovely sound Dave. Was that filmed on your old layout?
Regards
Dirty Dave!
What was overlooked by all….the plywood had absolutely NO KNOTS. Not cheap these days. Bravo!
That Helix looks GREAT!!!!! The routering work I bet does work great, but the question I have is, what did you use to guide the router with as you were doing it? The curvature looks spot on! -NICE WORK!!!!!!
I seem to think that I seen someone among us that did a freight car load that was done with Dawn dish soap liquid container caps, that made them into “motors anyone seem to know how I can recall that posting???? The idea was GREAT and I’m now in a place to make a couple for my own uses much the same way!v I just want to see how the person that did it, painted theirs to use as a guide for my own! -Thanks to anyone that can point me in the right direction! ~Hemi
WHY???? Helix. I do not understand.
Outstanding video along with Dave’s excellent craftsmanship. Really like the daylight to night and back relationship. Thanks Dave for your time to develop the video.
Sincerely,
Bob Leiby
I like the ideas you have in building a layout. Sometime in the near future, I will be finding the time to work on my H.O. layout. One problem I have run into is the transformers I have are not powerful enough to run the train on anything bigger than a 36 in. diameter circle. These are not the DCC operations, I have the Nickle snap track. What I would like to know, is what type of transformer I need? Also if I should forget the nickle snap track and go back to the copper track? I have a 4×13 ft.platform.
Keep up the good work Barry. Don’t loose patience. Question: When the train reaches the top, where does it go then? Is there another helix that goes down?
Bill – NW Chicago