John’s been in touch with his U shaped model train layout:
“AL,
Well, finally got started on my HO layout after 10 years of planning in my head, and some on paper.
The eventual layout will be “U” shaped and be 15′ X 11″ or so. I’ve started building it in sections in my shop, but the main portions will be built in place. It will be Appalachian mountain railroading, Virginia and Kentucky, in no particular time period. Coal mines in the mountains, and factories in the cities.
My goal is to have the railroad look like God made the landscape first, and then people built railroads instead of the other way around, with all the engineering problems the real railroad guys had.
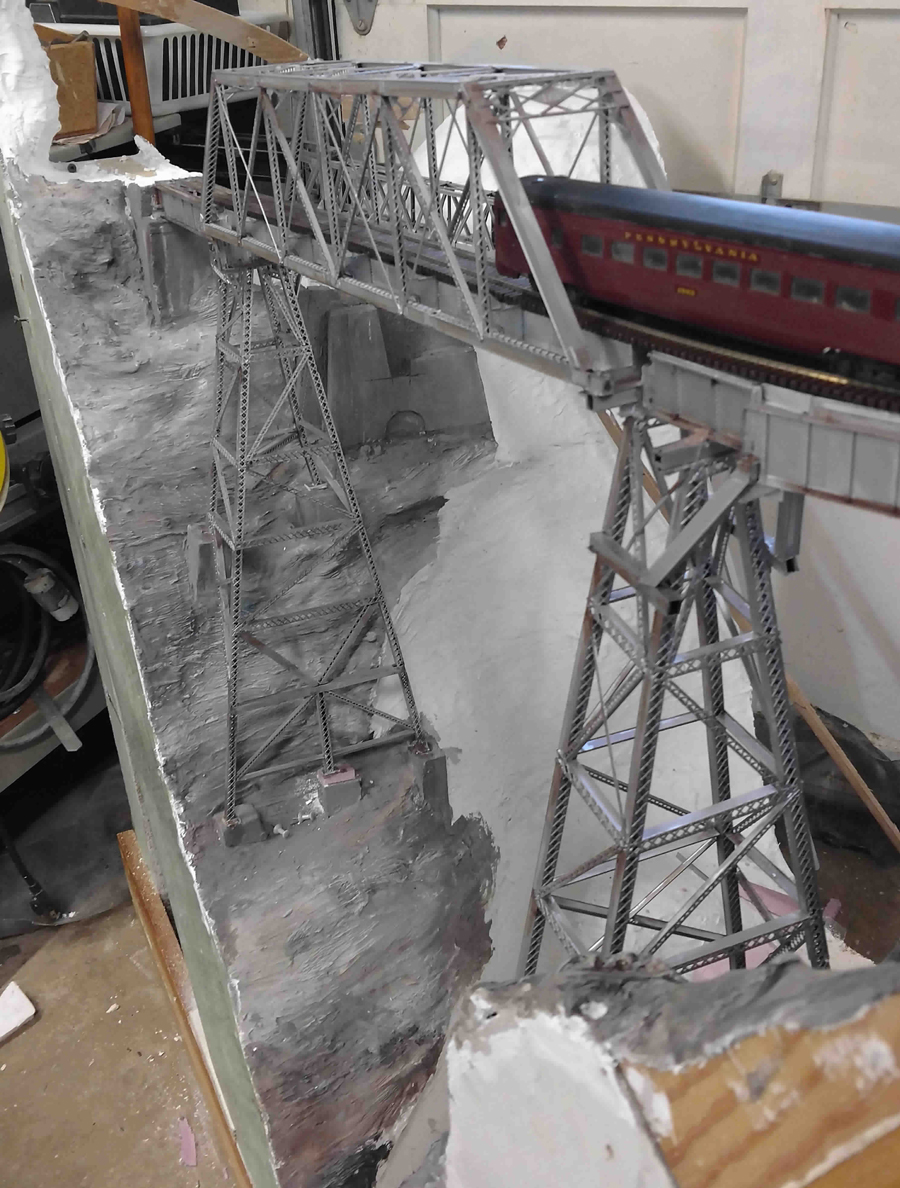
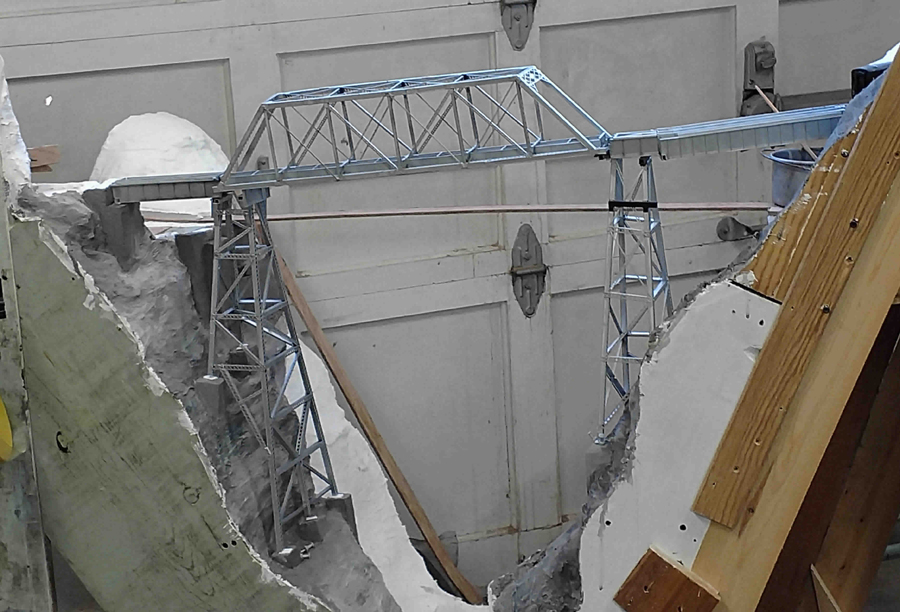
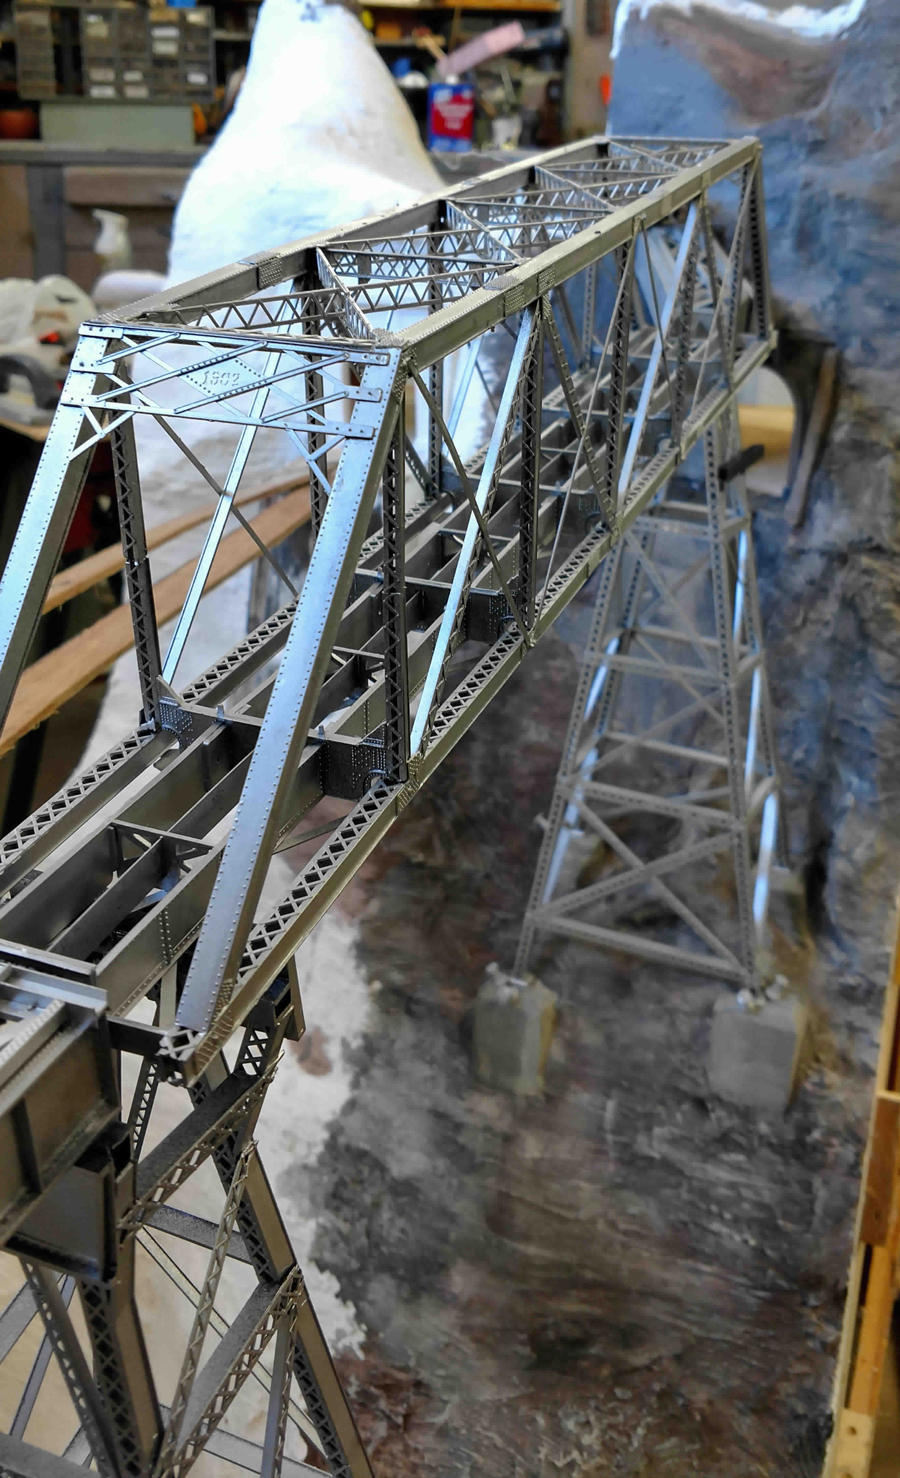
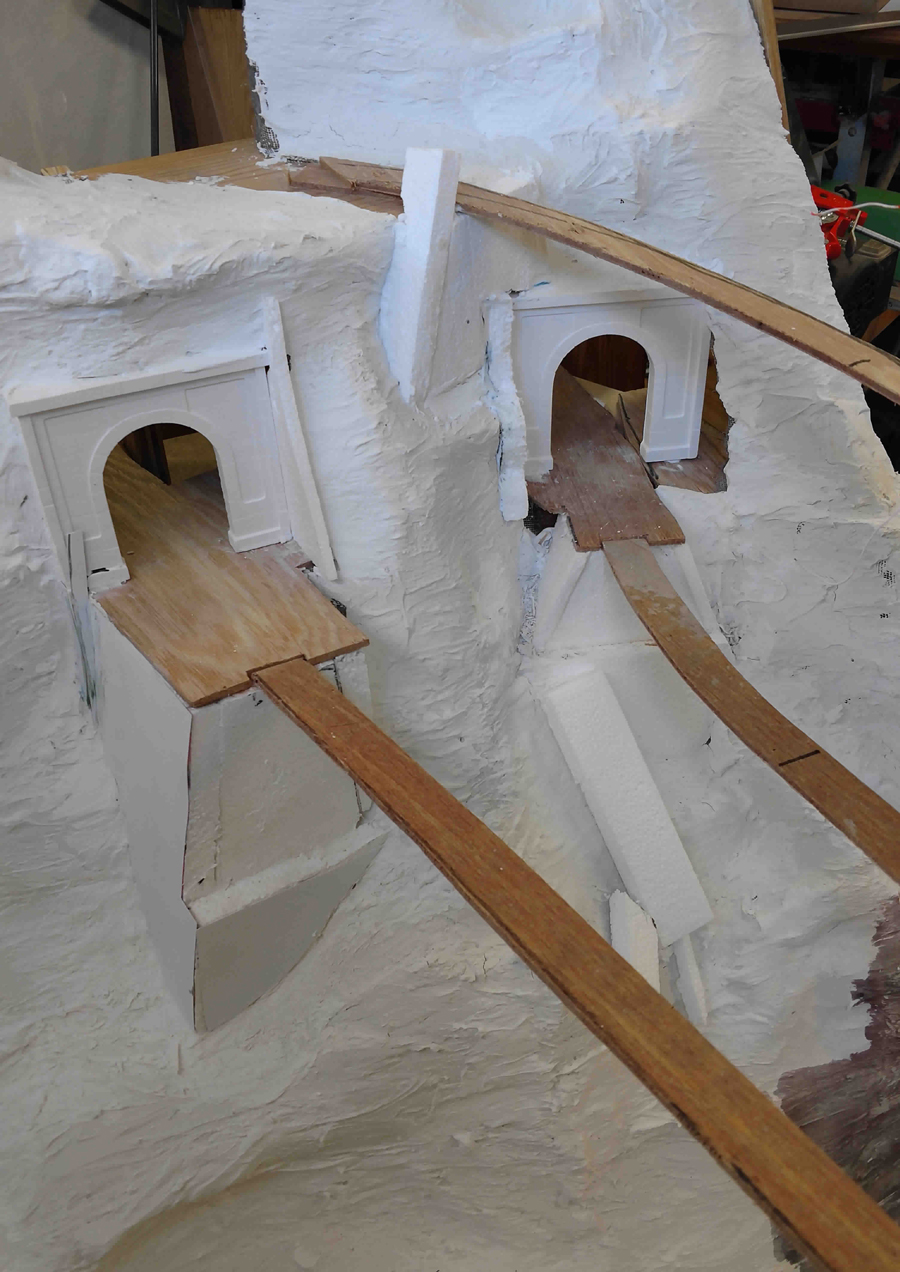
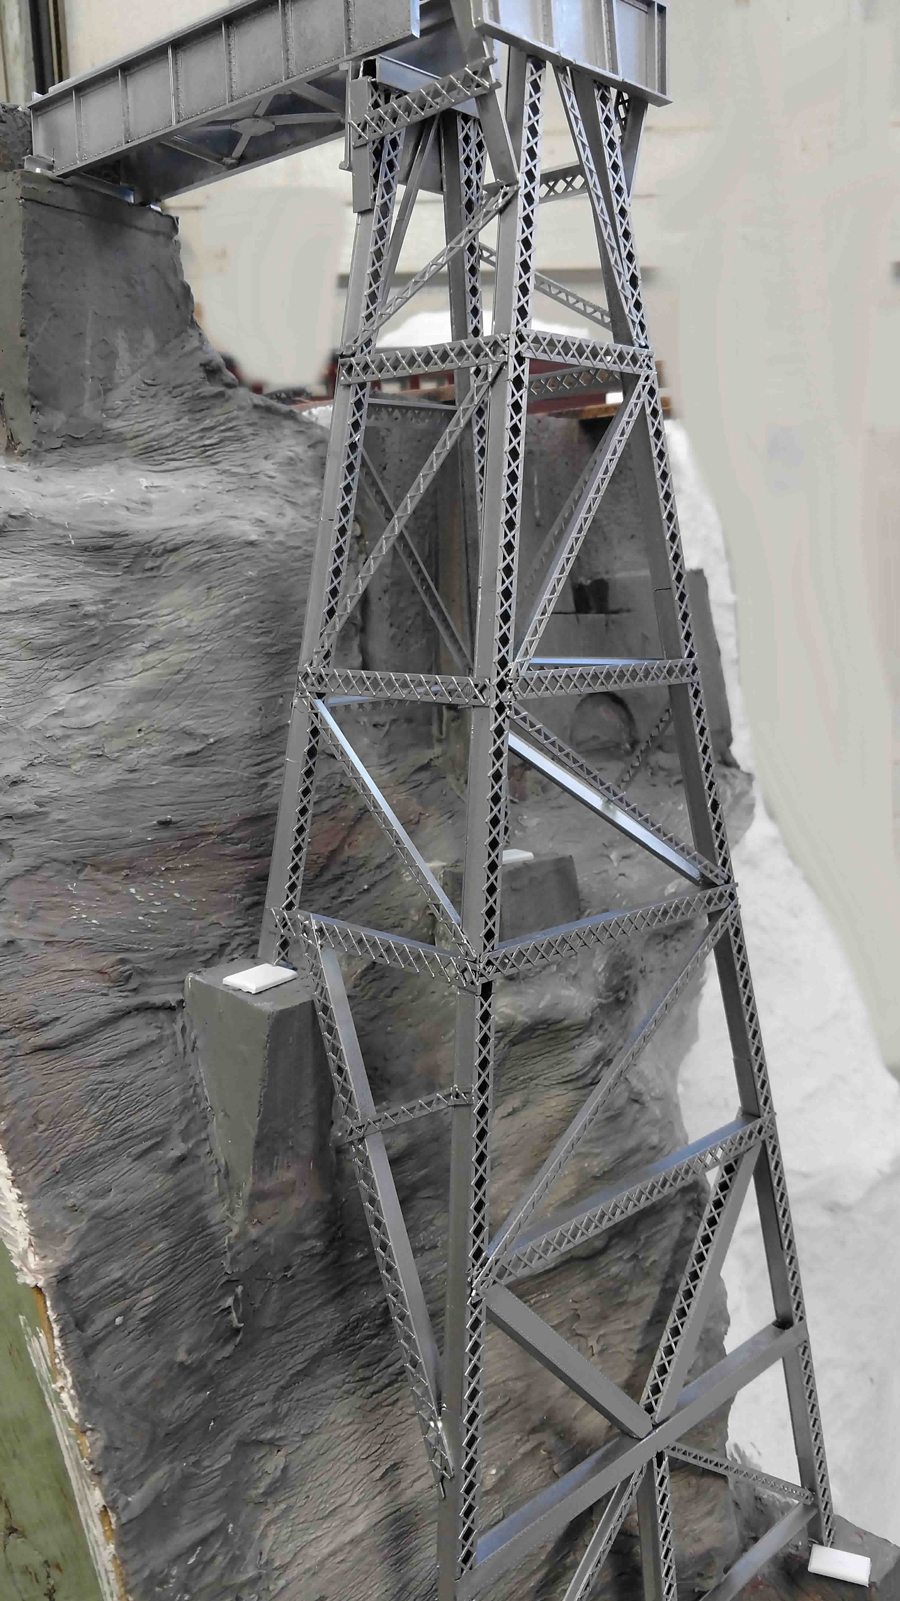
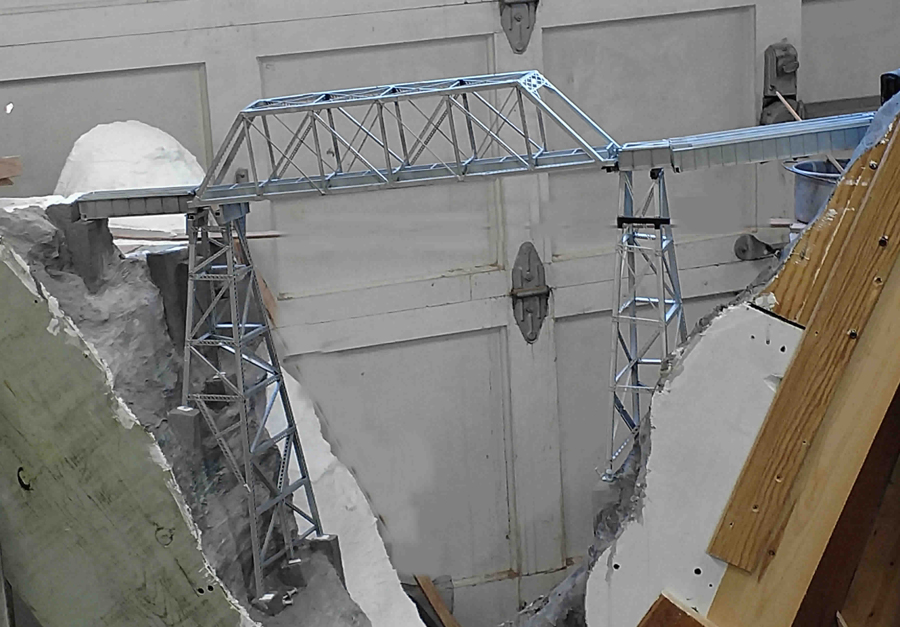
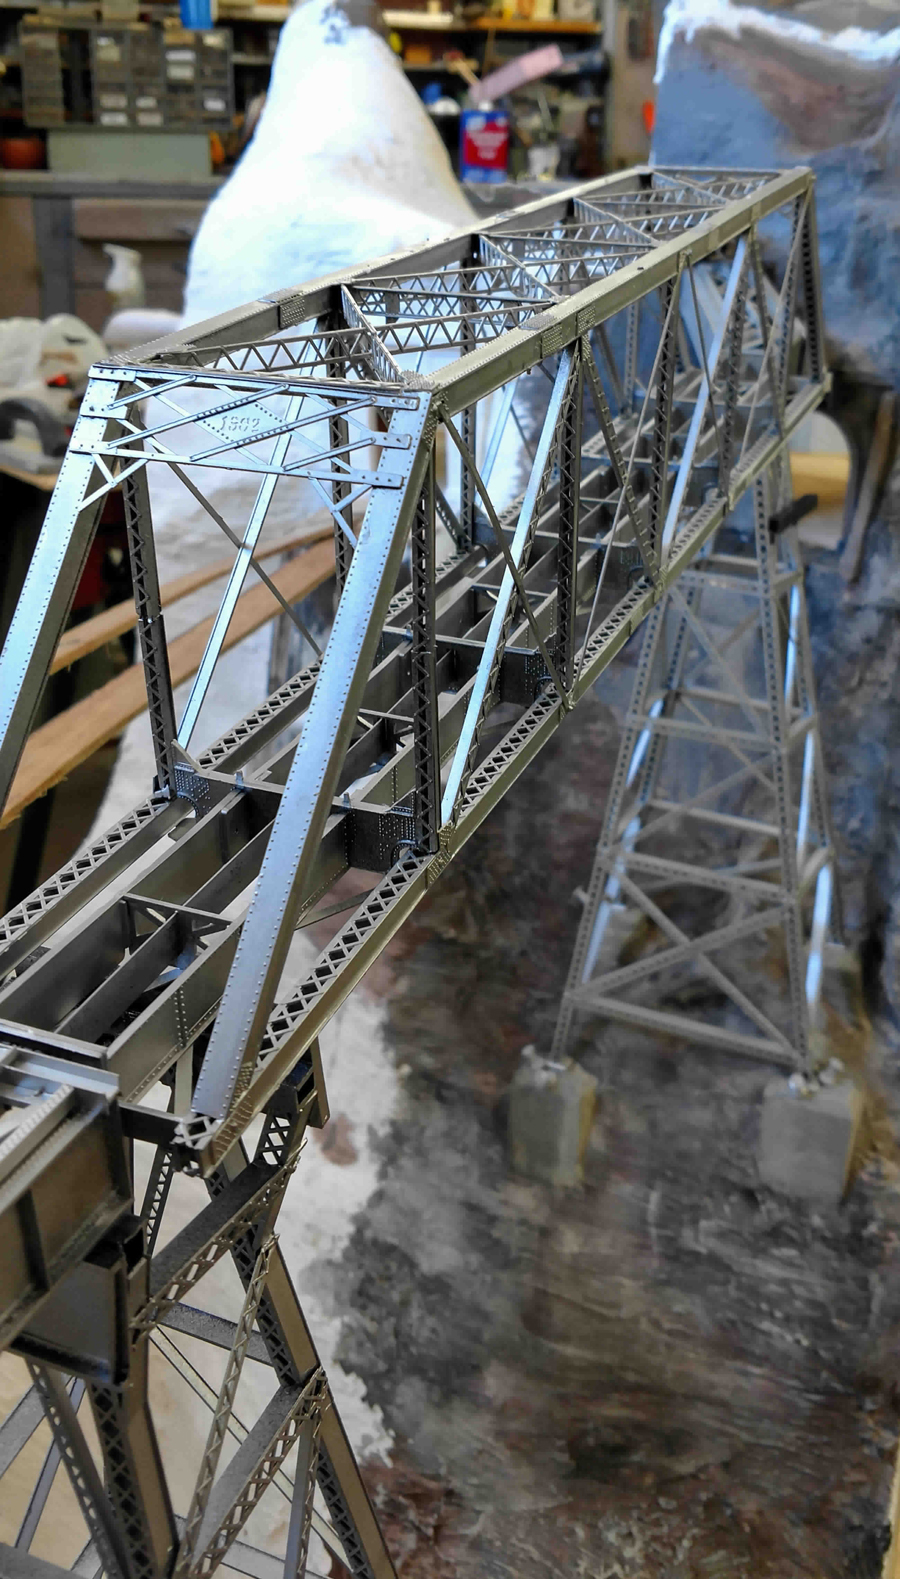
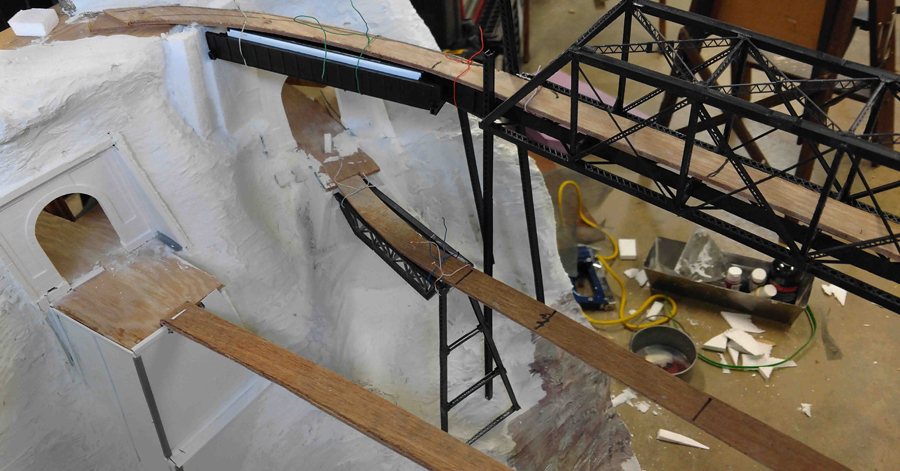
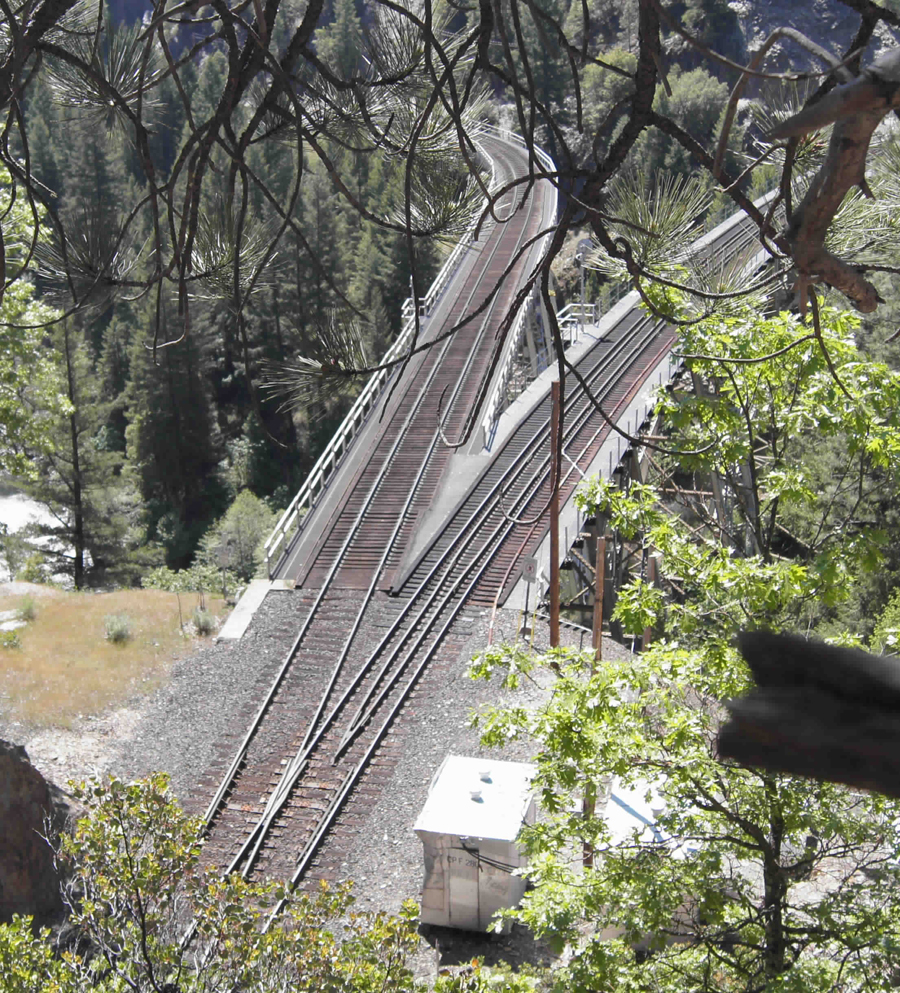
So far I have started on what I think will be a center-piece of the scenery, a valley which goes from 40″ high to nearly the floor, and three bridges which go across it. So far 1 bridge is 90% done. My inspiration for this first module is the American iconic railroad scene known as “the Keddie Y” in Keddie, California at the end of the beautiful Feather River canyon– a picture attached. I’ve been there a few times and it’s an engineering marvel.
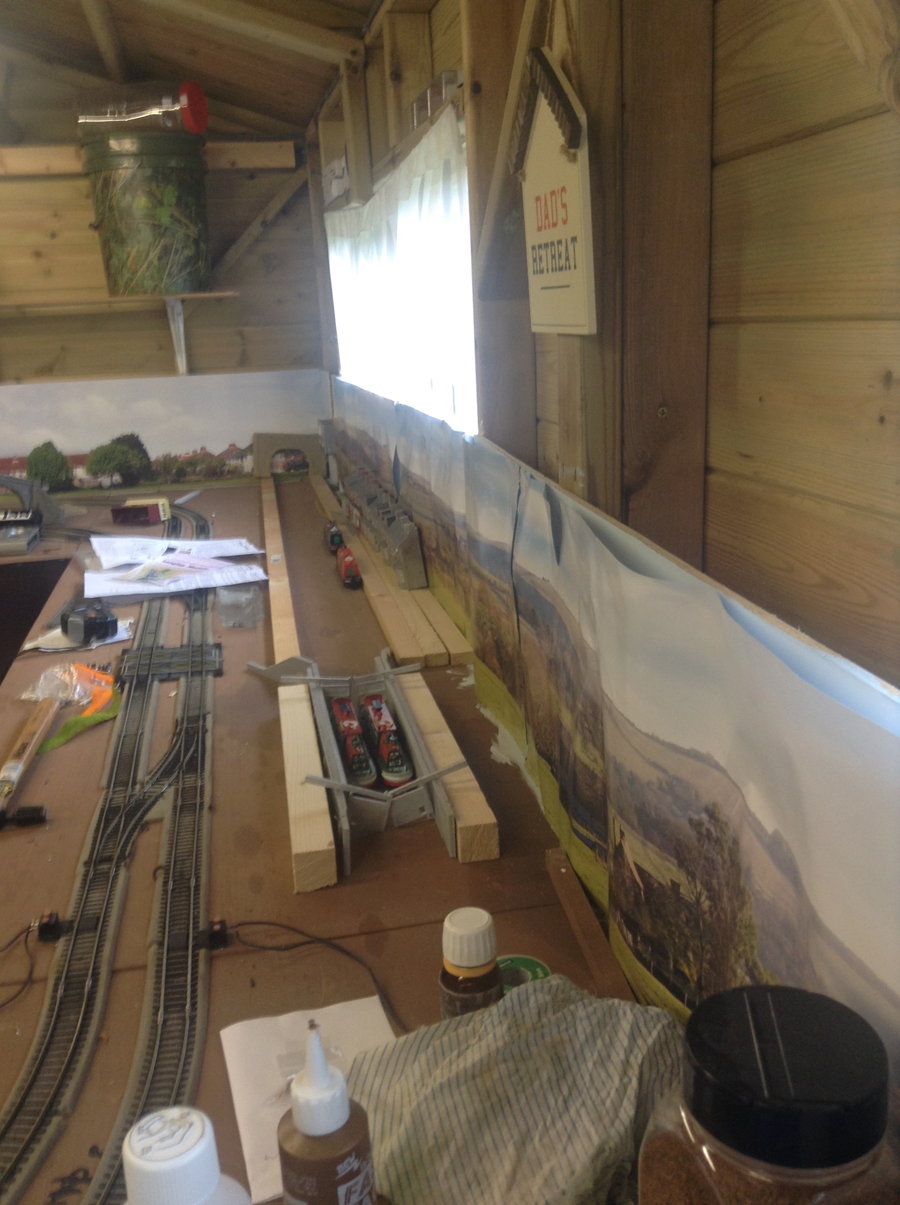
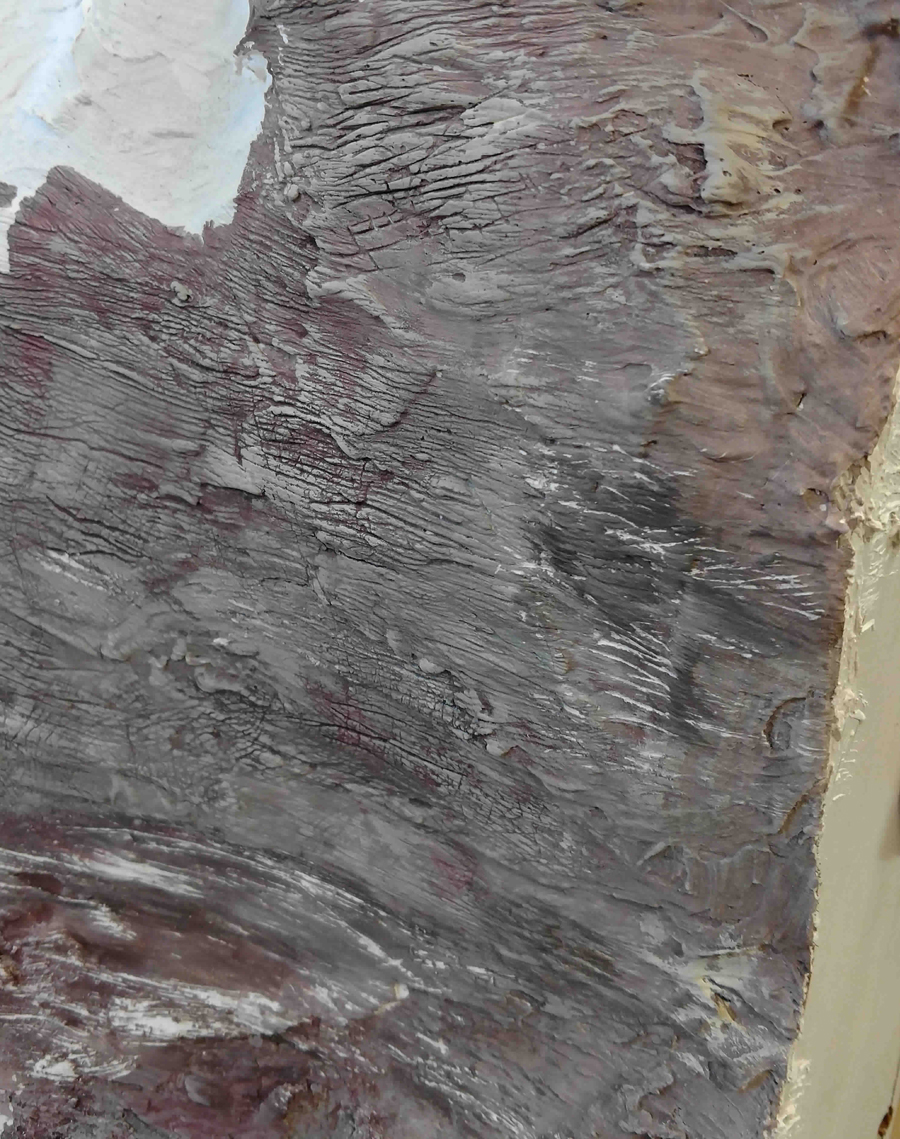
The tracks are nearly ready to be secured to bridge 1, but no landscaping, trees, bushes, dirt etc. is done yet. The scenery is hard-shell plaster, actually dry-wall compound, over “recycled” metal window screen
If you are interested, I’ll be sure to send you more as the module is completed, I’m on travel for a few months, so the updates may be slow in coming.
Regards,
John,
Baltimore, MD”

Now on to Bob:
“Hi Al
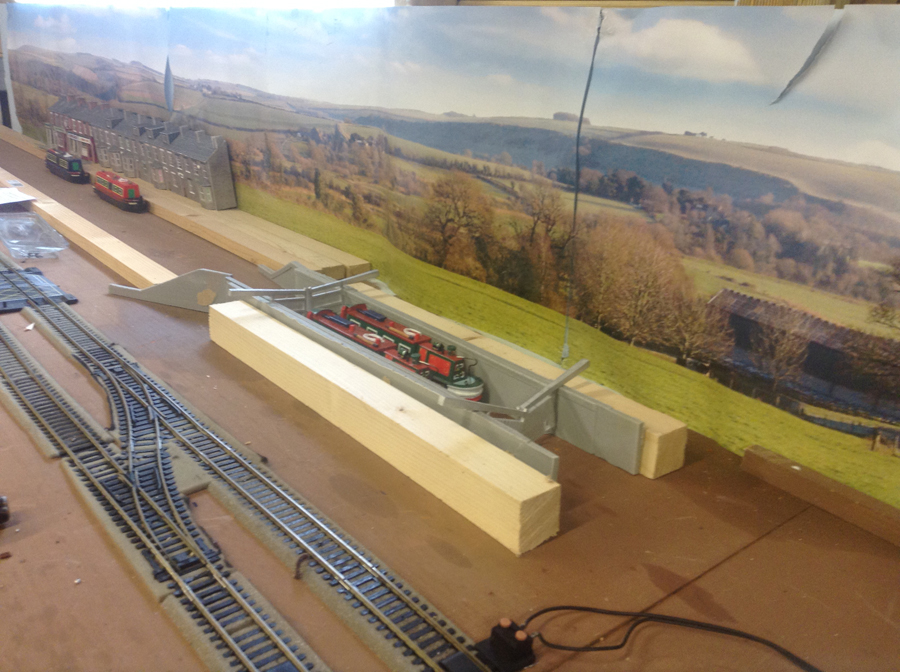
This is my first post. I have been building my first railway in Hornby 00 and am looking for ideas on how to build a canal scene with lock. I have purchased the lock walls with the double gates from Langley Models. However my imagination for model building is not good so I am looking for help from your readers.
Here are a couple of photos of where I’m at. It’s building the lock I’m struggling with. How to build around it to show the different levels. Hope someone can help.
regards
Bob”
A big thanks to Bob, Steve and to John for sharing his U shaped model train layout.
Loved the imagination behind John’s layout – can’t wait to see the updates.
That’s all for today folks. Keep ’em coming.
And don’t forget the Beginner’s Guide if you want to get going on your own layout.
Best
Al
PS Latest ebay cheat sheet is here.


Lock for canals are more than cuttings and bridges for railways. They happen where the hill gradient is so great, that the engineers had to change the levels. Often, they will have done the cutting/embankment thing before they get to the lock. But, of course, there can be no gradient (at all) on a canal, so the embankments are more common.
So, having stated the obvious, you will need a hill, but can have the hill localised to the canal if that helps with the shaping. The high end tends to be On an embankment , and the low end in a cutting, while the hill slowly conforms to the canal level.
Interesting problem, thanks for bringing it up.
Regards, Tom
Ps check the real world for examples, of course!
Bob, if you can get find the TV series “Canal Walks with Julia Bradbury”, you’ll get a lot of inspiration and examples of how the locks were built and used on the canals. As far as I can tell it was broadcast on BBC Four, but not being in Britain, I cannot watch them on the BBC site.
Fantastic! I wish I had the talent.
Bob, you seem to have your canal on one level. You need to raise the upper length and make an embankment down to the rail track. don’t forget to add a tow path on one side of the canal, best on top of the embankment. also, you appear to have you’re lock gates pointing in the wrong direction. The gates should open towards the upper level so the upper water pressure will hold the gates shut. The gates open into a recess in the side walls of the lock.
Hope this helps. regards, Frank
The Kennet & Avon Canal is above railway level near Monkton Combe (the bridge carrying the canal over the railway can be briefly seen in ‘The Titfield Thunderbolt’!) – you may find some inspiration there regarding appropriate scenic treatment. BTW – is the arch in the background a bridge or a tunnel? The arch looks too big for a tunnel, and I wouldn’t expect a down lock just before a canal enters a tunnel.
Nicely done!
I like the pictures of the small details. That is great and helpful. But you talked about the layout and I do not see a layout. That is the whole point. I would like to see one picture. I can appreciate that. Thank you for all of the helpful hints.
Really love that scary bridge. Even on Halloween I wouldn’t care to go over it in real life. ha ha.
VERY NICE…
would like to know where John got the material for the girders,etc. in his bridge. nothing like that available in Canada, and have not seen anything like it on the web. would appreciate an email from anyone that has that info. excellent bridge structure.
Know what you mean about all the planning. I’ve been playing with a “virtual” layout in AutoCAD while collecting bits and pieces. Love the high bridge! Planning a deck truss myself.
You might google the Soo Locks in Michigan on the St Mary’s River. There’s only a 20 foot difference so you might be able to work that in.
Thanks for the pics!
I like the fact your modeling the Keddie area as there is some very good modeling challenges especially the Y’ itself. looking forward to your follow ups and enjoy the travelling.
Hi Bob
As said in the other comments your canal is on ONE LEVEL to make it easy you could cut away the base board on the lower level on the shape of the canal, then fit the cutout back but about 1-2 inches lower than the actual baseboard, this will give you your two levels
Best of luck and love the bridge
Nice bridge
John, that bridge is a masterpiece. Credit to you and your skill.
Outstanging work John.
Great pictures All. John’s bridge and parts look similar to those available from Micro Engineering of Fenton, MO 63026.
Very nice. Can we see a layout diagram?
The lock gates are facing the right way, assuming the higher level will be in the foreground where the jar of ballast is sitting. Those sorts of gates with the aperture under the balance beam, are usually meant to act as backup weirs (although there’s usually a small weir in the canalside above the lock and a bywash channel running round it to the lower level) so this determines your maximum water height above the lock. I have used various things for water: perspex sheet painted watery colours underneath – looked too hard and shiny even for a canal; liquid resin – found its way out of the masking through the tiniest cracks, took weeks to set and smelled like rotting fish, but pretty good result as it was meant to be clear lake water; and hardboard painted and varnished and rippled and stippled as it was setting – too smooth for sea, the ripples all flattened out, but probably OK for a canal, also quite cheap and easy.
Rod
Thank you all for the responses regarding the canal issues. I liked the idea of cutting away the base board but unfortunately the board is attached to a work bench around three sides of the shed so not sure that works. However I’ll keep at it and send photos with an update.
Thank you all
Talk about a gorge great creativity. Love it!
Two things; 1. why do bridge supports HAVE TO be on land?
” I ran into problems with where the bridge tower legs would land (can’t be in the water!)”
2. your bridge shows it at steep incline ?
John, Noticed scenery. what are you using as a back support? and how is it attached to the benchwork? I am just starting out on this long adventure.
John
The Mississippi River has several locks and dams without the need for steep gradients. Check out google earth for alma Wisconsin for a real world example. Keep dreaming and model it!
Bob, seems like you need to lower the baseboard, but not too much. Maybe just cut away the tabletop base material. You could even cut away some of the crossbeam underneath. Just add a sister beam at a lower level. For a good picture of a smaller canal, google Illinois and Michigan canal. It has been abandoned for a looooong time, but is rehabbed as a bike trail. At Channahon, there is almost a complete lock with a lockhouse still standing. That should give you some ideas too. The I and M was a lot smaller than the Soo locks or those on lhe Mississippi, so you will get a different perspective. Good luck.
Bob, seems like you need to lower the baseboard, but not too much. Maybe just cut away the tabletop base material. You could even cut away some of the crossbeam underneath. Just add a sister beam at a lower level. For a good picture of a smaller canal, google Illinois and Michigan canal. It has been abandoned for a looooong time, but is rehabbed as a bike trail. At Channahon, there is almost a complete lock with a lockhouse still standing. That should give you some ideas too. The I and M was a lot smaller than the Soo locks or those on lhe Mississippi, so you will get a different perspective. Good luck.
Edit: just took another look at the pictures. If you are going to use the lumber for the canal banks, use higher pieces on the high side. (And raise the bottom of the canal) On the lower side cut the lumber to a lower height. That will fool the eyes into thinking that there was a change in elevation.
2 wonderful layouts! The wavy back drop was unique. It gives a more realistic look to the world. Columbus proved the world isn’t flat.
The the Feather River bridge is impressive. I have only seen a couple of railroads sculpt to the floor. Again more realistic than shallow canyons. This makes good use of dead space and keeps your eye on the train.
I don’t know how many Canel’s are in the world. You can go to (You Tube)
this is just one. Look up : The Worlds Shortcut; How The Panama Canel
Works. this should help on what you are doing.
Bob–You could replace those 2×2 wood pieces with a 2×3 or 2×4 that would be higher than the lock gates. Then run an n scale piece of track on top of the wood sloping down on the far end. (you would have to put a simple bridge over the lock gates to bridge the gap)This would look similar to the Panama Canal locks where a shutting engine pulls the ship through the locks. To get even trickier, put an engine on the rails with an automatic reverse at each end and you could have a moving unit as part of the canal scene.
As far as height & depth goes, if you can’t lower the base, raise the water portion before and after the lock
Bob…… I think you would be the first layout I’ve seen with a river lock. The only help I can give you is my experience on a business trip I made to England. We stayed at the hotel called the Compleat Angler in Marlow, Buckinghamshire. The hotel was on the River Thames. One of the days we were there we took an excursion on the River Thames and went through one of the many locks it had. What I recall were the difference in the levels of the river on each side of the lock. I think if you make one side of the lock higher than the other side, you will accomplish you scene. I remember going through the lock and depending on which way you were going, once the boat was in the lock and the lock closed, it either filled with water to raise the boat or deplete the water to lower the boat to bring it to the level of the side the boat was going to. Hope this helps.
John…. great bridge work and mountain scenery. Jealous of your space. Has the makings of a great layout.
Bob, may I ask where you got your background scenery; looks exactly what I need for about 10 feet of my background.
Joe
John, for an eastcoast guy, you picked one of the best westcoast drives to model. Feather River, loaded with old WPA bridges, tumbling falls, vegetation variation. Great choice and trestle work. I too am amazed at the detail. Where’d you get it? Can’t wait to see the rest. JimT, SoCal
@bob.
You could also use foam insulation board
To create the height difference.
It comes in various thicknesses and I would
Think that availability in UK is not a problem.
Bob. I would cut out the bottom and “sink” the river down an inch or so. Also make it a lot easier when you pour your water.
I take it that narrow boats will be using the canal for the drop at the locks you can use the hard foam insulation have it carved to the track level then after it level with the table a good series on you tube filmed in the UK is cruising the cut might give you some ideas and has many other videos of narrow boat living .
Answer to where I got the bridge beam parts – Central Valley Model Works – https://www.cvmw.com/ Thanks for the comments. More when I get the layout installed in it’s new room!
John from Baltimore
John, I enjoyed your photos of some serious mountain railroading. The bridge and trestle supports are impressive. I’ve always liked the Keddie wye too and watched several videos on Youtube of the real trains running there. It seems to me there was an article in Model Railroader a couple years ago of a fellow who’d built an N or HO scale model of the Keddie wye in a layout carved into the dirt under his home. He approached it the way you are doing — having the mountains there first and having to dig out the railroad path through them. Good luck and do keep us posted with your future progress.
Love it. Keep up the workmanship.
The Soo Locks have a tour you can take to actually experience how the locks work and to see first hand the architecture of the lock mechanism. Other locks around the world may have a similar tourist attraction.
Bob,
Scalescenes do a lock which I have used and it’s very easy, they also include a canal boat. Follow the instructions and you will get the upper and lower levels.