Rob’s been back in touch – but first a tip from Kim:
“Hi Al.
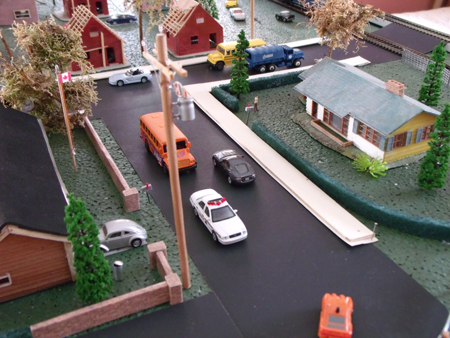
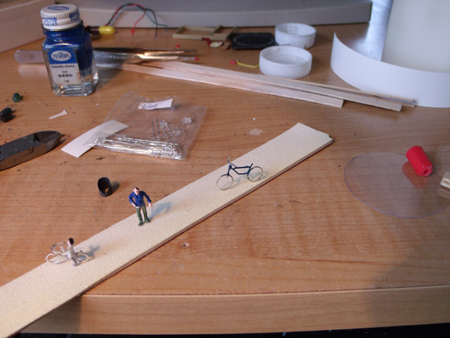
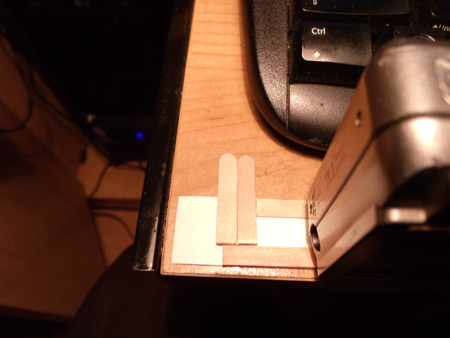
These are my sidewalks .They are not tacked down yet or painted yet.
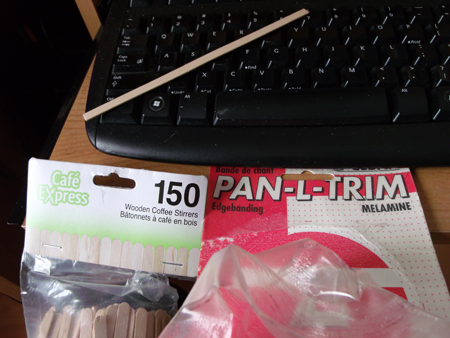
I used the shelf trim with the glue side up to walk on.
Then i used coffee stir sticks to stiffen it and to raise it up. When glueing the sticks, stagger them to keep it stiff.
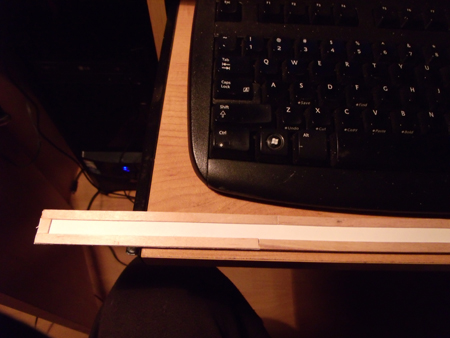
I added a strip onto the bottom and attached to the stir stick’s to act as water guttering (warning Al, don’t use white glue as it wont stick well). I use instant glue.
To turn left or right with the sidewalks, place sticks left or right as in photo.
When you finished a section, take fine sandpaper and run it along the road side of the sidewalks yo make it square and smooth. Then glue a small strip to make the guttering.
Now for the 1/100 scale or Ho scale bike. I used left over Led posts ya cut off. If you are really interested in how to make those bike’s i will send in a more informative way to make them. Was pretty easy. But i think you agree and use the word dang it’s small, honestly Al.
I think my bikes look more realistic than any plastic bike you can buy at this scale, if you can get them and i dont think ya can. Seat and peddles will be added later.
Im trying to make a sort of jig to follow how to make a mass amount. I could see a bike race on the road with these. I also attempted a kids bike. Now understand,this is my first tiny bike, so wont be perfect.
Tell me what ya think.
Can ya see a bunch in a bike rack in front of a store or something, or a bike shop?
Kim”
“i have a tip,i make a lot of stone walls,i first coat the screen or surface with plaster. after its dry i mix another batch with what’s called rainbow cement color (its cheep) comes in black or red,a little black makes gray.
i then coat the surface with almost smooth surface.let dry and take a small screw driver and drag across the surface to make bricks,the red really looks like brick.the screw driver goes through the red or gray layer and makes motor joints.
Mike”
“I use the plastic sprues left over from a model. I take them and use them for metal piping for oil refineries, gas stations, rooftop vents, etc. I also use them for scenery, pipe loads. I cut them down to the size of the load, I also drill out the ends, and then paint them whatever color you need to give it a more real appearance. I don’t have a pic handy, but I just made a fuel island for my truck stop. Hope someone can use this idea.
John”
Now on to Rob. (His last post is here).
“Hi Al,
I have been busy building the new Farland Howe.
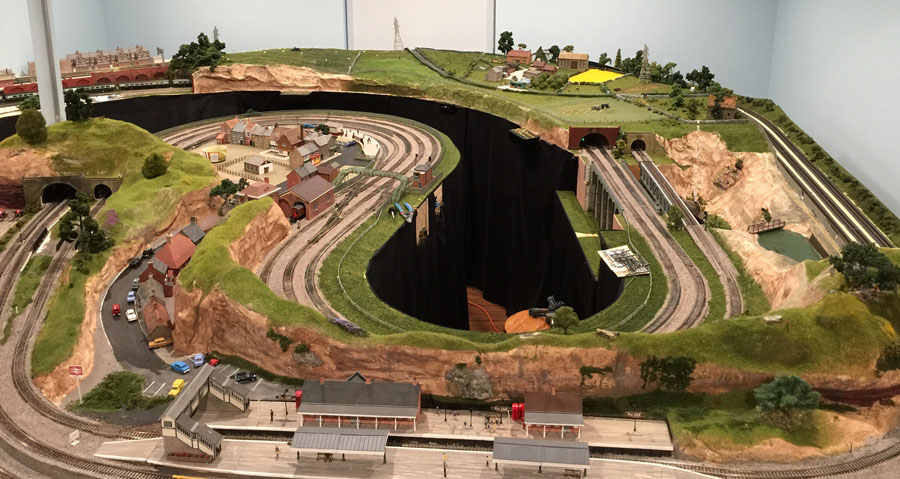
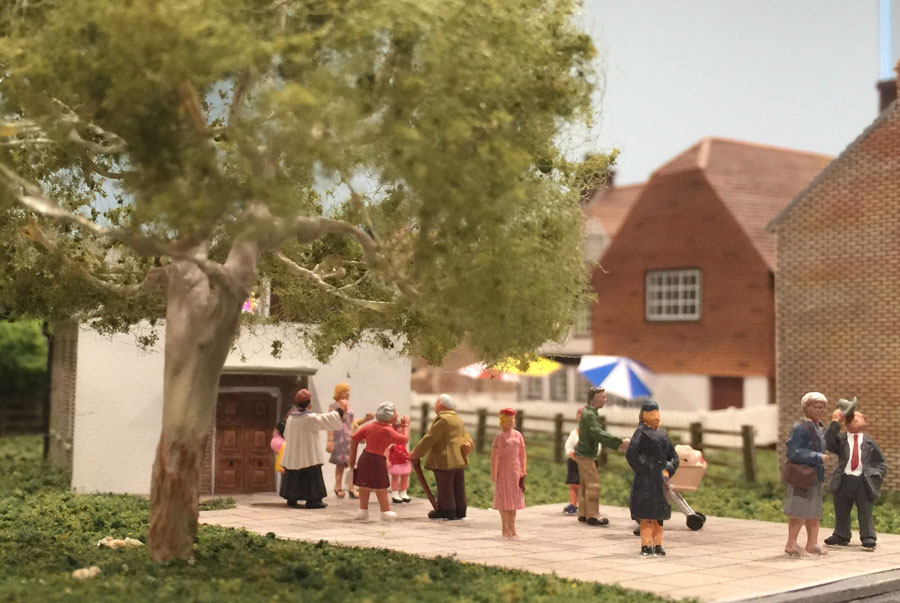
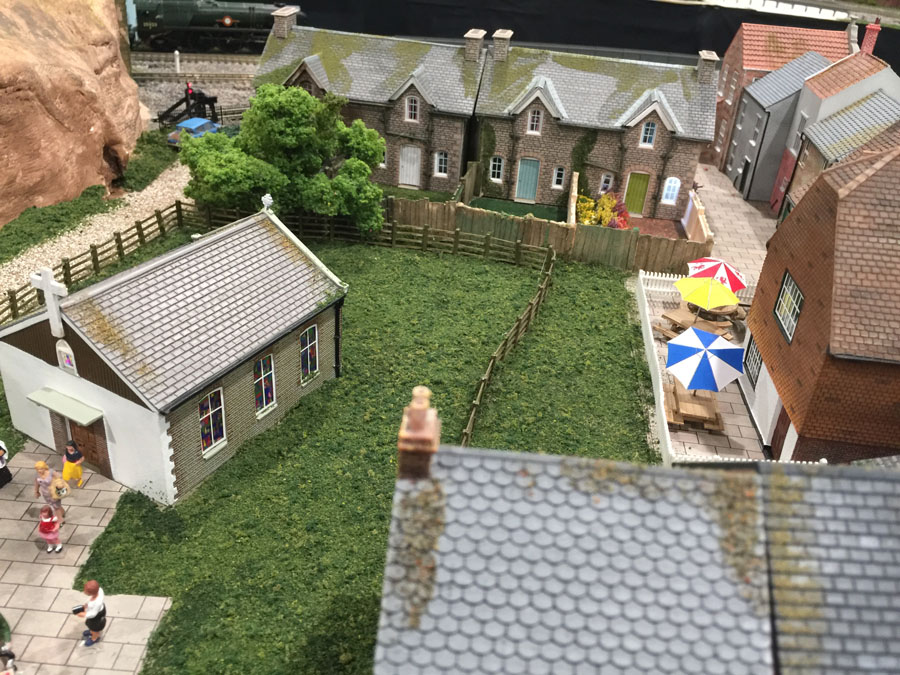
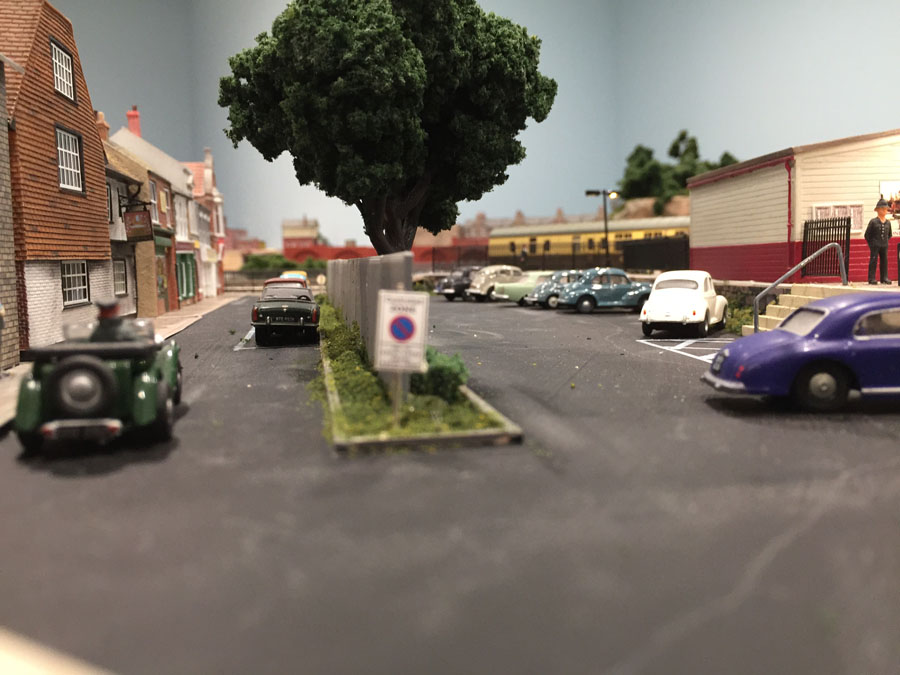
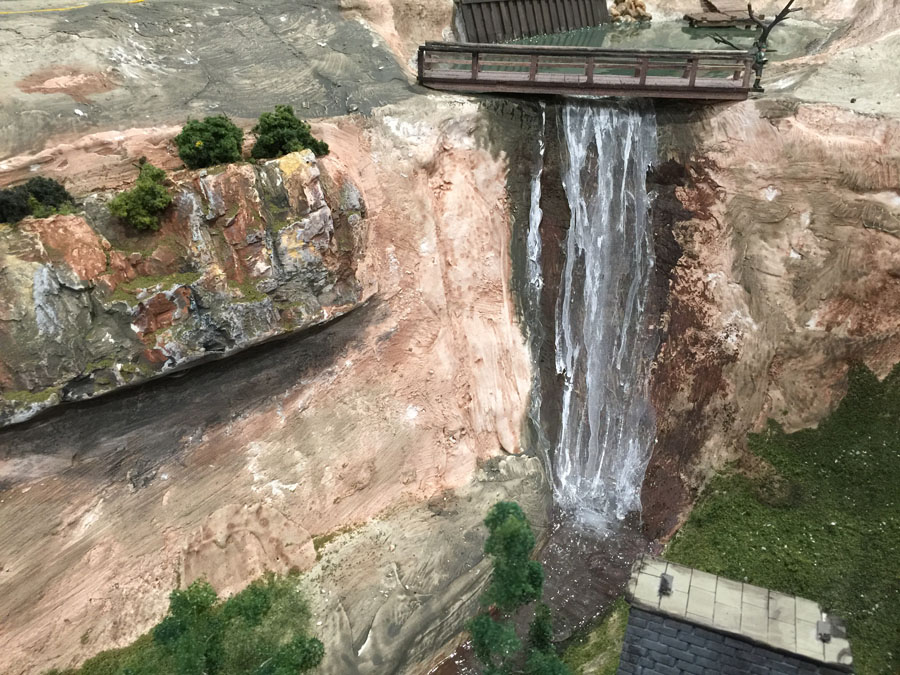
My village of Far Moor is about complete and I will be done with one side of the layout in the next few weeks. It will be time to start on the other side at that point. Here are a few still photos of what I have been doing.
I have also sent you a link to a video with the camera on the train so one can see things from the track. Sort of a view out the window of the train. Don’t worry about the bump in the tunnel, I had the camera too high and it bumped the side.
Rob”
Brand spanking new ebay cheat sheet is here.
A huge thanks to Rob – I do love his updates. You can see more of his stuff here.
And if he’s got you champing at the bit to start yours, the Beginner’s Guide is here.
That’s all this time folks.
Please do keep ’em coming.
Best
Al


Very impressive and appears to have been a lot of hard work putting it all together. Well done.
Looking very good Rob, especially like the waterfall but the whole lot looks great,coming along nicely.
Eric (Leeds) UK
I am a beginner and just love to see what everyone is doing, am am awe struck every day,what wonderful talent these modelers have got . thanks for all the tips and Ideas .
Impressive attention to detail!!! Very realistic….I kept waiting for the people to move!! Great job with weathering….looks so natural…..
very nice indeed !!!
Great scenery and detail. You are at the top!! Cheers! NJ Mark
Nice no excellent work no fun play. We don’t work at this we play at this and you are one of the best. You have that eye to pick up the little details that make the big detail work. Have fun and don’t even run out of passion for your play.
Steve from Toms River
Great videography work! You might try running the trains a little faster and editing with a touch of slo-mo to give the rolling stock more weight. You’d probably have to re-add the audio to keep the realistic timbre of the sound.
Well done!
Details, details, details!! WOW!! Ya nailed it! Weathering, people, scenery, all superb! Just a thought, green and red house before going under the overhead show bare windows through the houses. Could be a place to put different real estate company’s signs! Just thought! Enjoy the fruits of your labors as IT is fun!!! Ken
Ga/USA
Some of the best videos I have ever see come from the inside of the train. The movement of the train and the detail of the scenery does ‘show off’ not only the layout in detail but the precious time devoted to such a wonderful the hobby. Nice work Rob!
A splendid layout, are you modeling in OO guage?
Great layout Rob, your attention to detail is superb! Especially liked the smoke coming out the chimney- very clever. Hope your having fun with your incredible layout and hope we see more of your work in the future. Cary in KY
Excellent layout,your rails look a bit shiney and no rust. Bernie, YH USA
It looks very British and I felt as if I was there. Thank you. You did a very good job.
Great work Rob! I love your video section and it was so clear and detailed. Thanks so much for sharing your layout with us. Cheers Rossco. (Adelaide South Aust)
What a great looking lay-out. “Dangerous Dave has serious competition here.
The attention to detail is excellent. Is there a layout plan available to see.
Regards Jim
great looking layout. like the detail. some long hours have been put in. nice seeing trains moving around the layout. the pictures really give an idea of track plan.thanks for sharing.
Hi Rob, very nice. We don’t tend over here to do that thing of fencing between platform lines and fast lines, like you have at Far Moor (although I have seen it between platform tracks on some of the modern tramways), as it obstructs workers’ view of approaching trains and the clearance would rarely be enough to allow a place of safety from passing trains each side of the fence, also I guess our higher platforms used to deter the nip- acrossers, I say used to, nothing much seems to deter anyone after a few drinks nowadays.
Rod
Beautiful job Rob. Amazing attention to detail.
Any chance you could publish the track plan?
Steve
NJ, USA
Hi Rob , well a great job you have done , and yes Dangerous Dave sure has some competition , think Lakeside will have as well ? ..nice job all round , you put a lot of work in to this …Dave ..Dangerous !!
Very nice layout keep up the great work.
Rob
Not only impressed with your new layout but with the shadow boxes on your wall with the inventory of trains you have. I am into “G” Series trains that run outside as well as in my basement and I thought i had the train inventory. “Dangerous Dave” has some serious competition here. Very Impressive detail to all that you have done!! Keep up the great work
From the other side of the pond
Steve P
Suburbs of Chicago, IL
A Great Big WOW !!!!!!!!!!!!!
David in the Clemson, SC area, USA.
Love your layout Rob, I have followed you for a two or three years now, always impressed with your thorough approach to railway modelling. Everything so lifelike and uncluttered. I like your harbour scene as we went past the dock, how did you achieve the rails set in the road/dock area? I have to do the same thing some time on my layout and would appreciate a tip on that, thanks.👍
Great Layout! Congratulations!
good on a rob !!
As the train exited the tunnel approaching Far Moor station, I swear I could see the people moving on the platform. Pretty realistic dude! really nice job.
Kim
I was just having a hard time with my sidewalks and Boom you showed us the way. The bikes are outstanding and we need a very explicit instruction if you would be so kind.
Mike and John- Thanks
Master McCrain
Just unbelievable craftsmanship and detail. Awesome
very nice and enjoyable
Always enjoyable seeing the efforts of others.
Kim,
Thanks for sharing your sidewalk construction method. I think you could scribe some expansion joints every 8 to 10 scale feet for a more realistic appearance. Your bicycles look great! Please share your construction methods for them.
Rob,
I really like your new layout, especially the eye-level photos of the street scenes as well as those in the video. However, I fear for the long-term financial viability of your railway since all the passenger cars were all devoid of passengers. 🙂 Keep up the great work and thank you for sharing your progress with us.
Wow that is great workmanship? I hope mine comes out that good.
Waterfall is the bomb man. Keenly awaiting bicycle instructions 🙏🙏
Love the waterfall!
Great scenic detail.