Fred’s been back with his stunning model railroad LED lights:
“Hi Al –
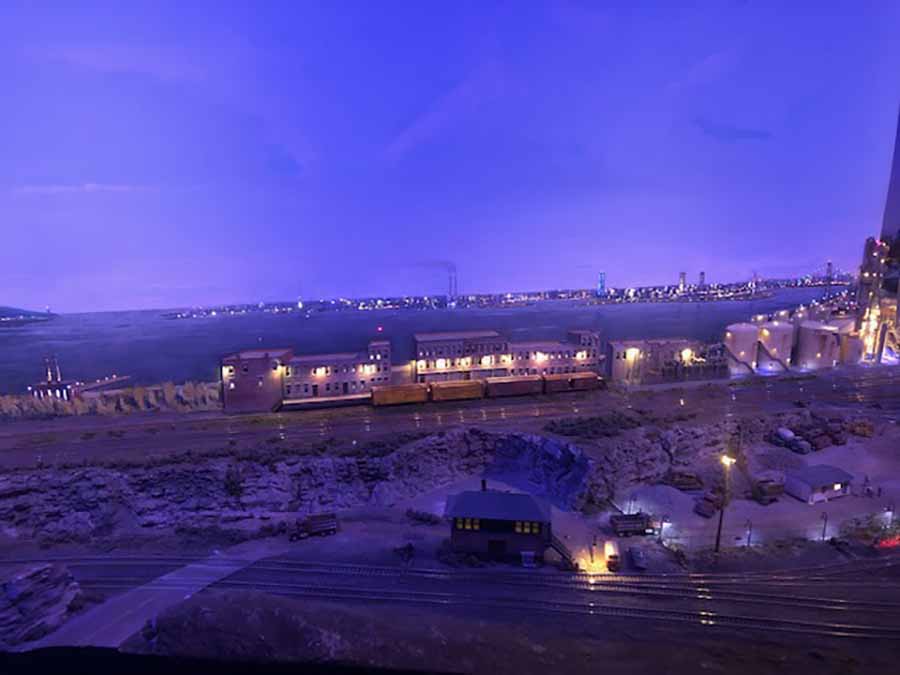
It’s been a while, but this latest backdrop – in the center of my layout has taken almost a year to prepare and install.
It’s another plexiglass backdrop – 10” by 6’ which received a coat of black paint on the front side, then white gesso, in preparation for painting of water, city, and coastline mountains in acrylic.
I back lit it, in varying degrees of specificity, with most lights placed after I had painted it and could tell where to place lights.
Thus backlit, it was suitable for scratching out the building fenestration with tip of xacto knife to display lit windows.
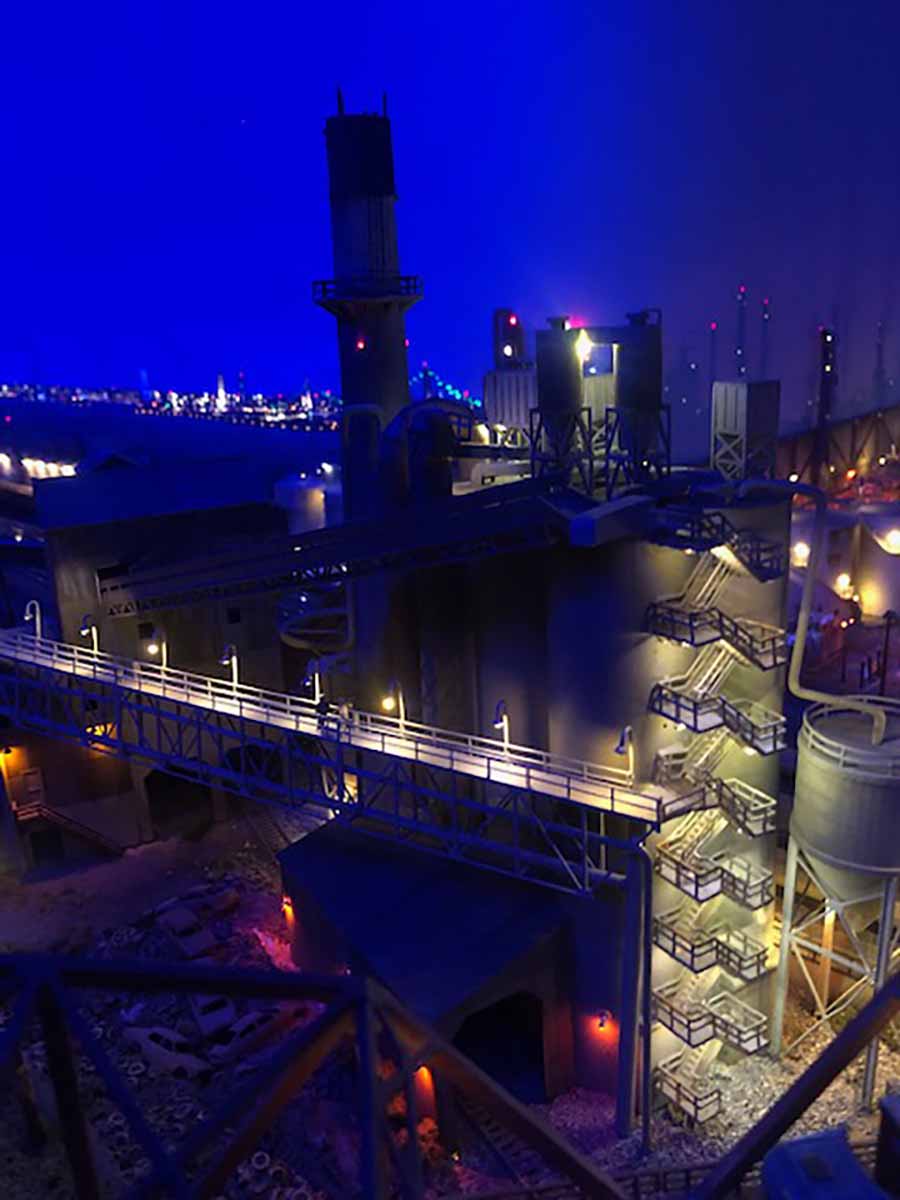
The traffic lights, anti-collision lights, rooftop lights, bell buoys, auto headlights, factory strobe lights, coastal village lights are all fashioned from Evans Designs’ (Oregon) Pico or “Z” scale micro LEDs.
These are .65 mm wide, by .4mm high. Tiny but very bright. The 14” leads are no thicker than human hair, and difficult to work with or solder.
Then I glue with Cyoacrilinate (Sp?) glue a suitable segment of fiber optic thread (ranging from .25mm to .7mm depending on the effect) to poke through holes drilled where I wanted lights in the plexi backdrop.
Making these light sources takes forever, but like all things is much quicker when you manufacture a bunch at once. I would typically sit down with three dozen LEDs, a bunch of precut fibre optic threads about 3/4 inch long, a tiny cup with some fresh crazy glue in the bottom, and a can of spray accelerator beside me.
Taking a new LED in one hand, isolate the proper side of the light (back side, if you can see it, is slightly blue, and shows the solder connections.) give a quick spray on the light, then with other hand dunk the fibre thread in glue.
Then, channeling all of your remaining possible vision, stick the end of the thread to face of the light. Don’t breathe! Wait a good five seconds and start to relax your thread holding fingers to see if it’s fast. If it is, you’re almost there…
Now taking a glue detailer wire that I forgot to describe, just dive into the cup again and fetch a tiny drop to circumscribe the junction of the FO thread and the face of the LED.
Spray it again and you have one of Fred’s unpatented “LED/Fibreoptic mosquito lights” for your train layout.
When you have a bunch made, twist them together for convenience at spraying with black paint and for visual location on your bench.
If you can’t get this to work for you, no one will hold it against you if you throw your favorite anvil through the shop wall. I’ve come close!
(I used .060 inch plexi this time, but discovered to my frustration that to properly backlight a reasonable string of buildings, I needed to glue thicker plexi to the back, sanded on both sides to diffuse light.
I have found that I can get away (despite all the advice) without resistors, as long as I run them off Woodland Scenics “Just Plug” hub and four dimmer switch distribution modules. (Other areas of the layout have been working fine for over seven years now.
The only thing is that you have to segregate the circuits by color, or weird things happen. This makes for wiring problems – you should put all the static red A/C lights on one circuit, but if there are towers, smokestack lights, hi-rise buildings, etc. across the six foot width of the panel, then you wind up having to string these lights from four or five modules.
By ganging up similar lights ( usually white lights can be “ganged” up to a dozen or more this way before the brightness is compromised. Be careful with insulation – one short will trip the breaker on that “Just Plug” dimmer circuit, killing them all, (or worse yet, blinking!)
When placing different colored lights through some backlit plexi, first I paint the inside of the holes, and especially the lights – with their short little fiber optic noses (they wind up looking like big mosquitos before installation) with black spray paint. THIS IS VERY IMPORTANT, otherwise different color light will spill into adjacent parts of the backdrop.
Threading the light through the hole, I put a drop of crazy glue on the backside, pulling it quickly with the fibre optic thread, gently, until it’s snug against the back of panel, and then I give it a brief spray of glue accelerator. With my light in place, I snip off the thread on the finish side of the backdrop. LIGHT WILL ONLY EMIT FROM THE TIP OF THE THREAD.
That the fibre optic thread might protrude a fraction of a mm beyond the face of the backdrop actually turns out to be a help, because after painting or touching up a bit you can still spot where the light is.
When you’re all done, you can either snip a little closer, or carefully sand off the tip. I use women’s fingernail emery boards.
To adjust the light level in each light, you can either dim it from the module, or taking a tiny piece of wire, dip the tip in black paint and juuussst touch the end of the fibre optic thread. (Takes hours!)
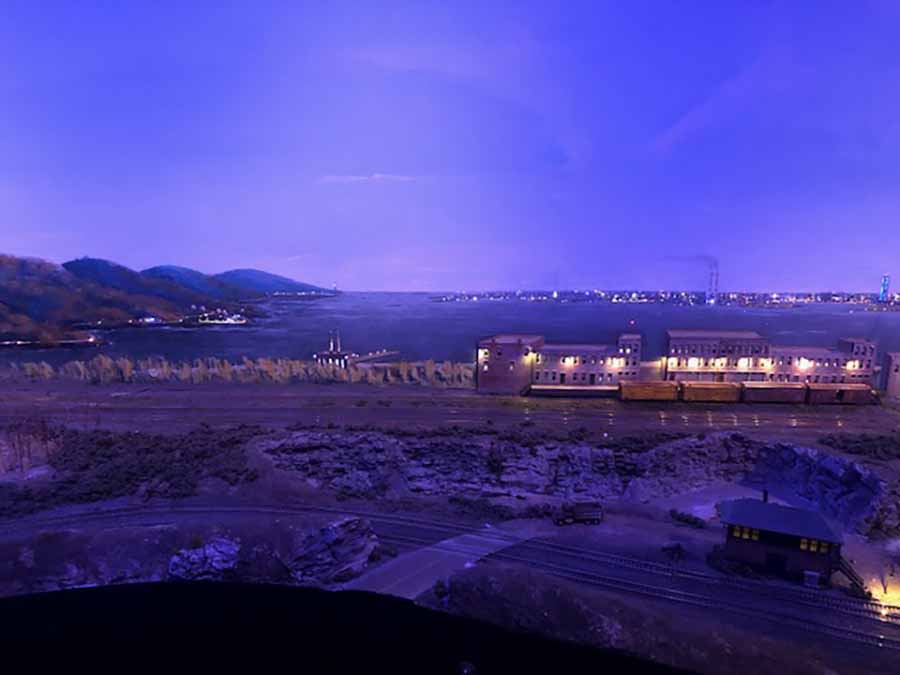
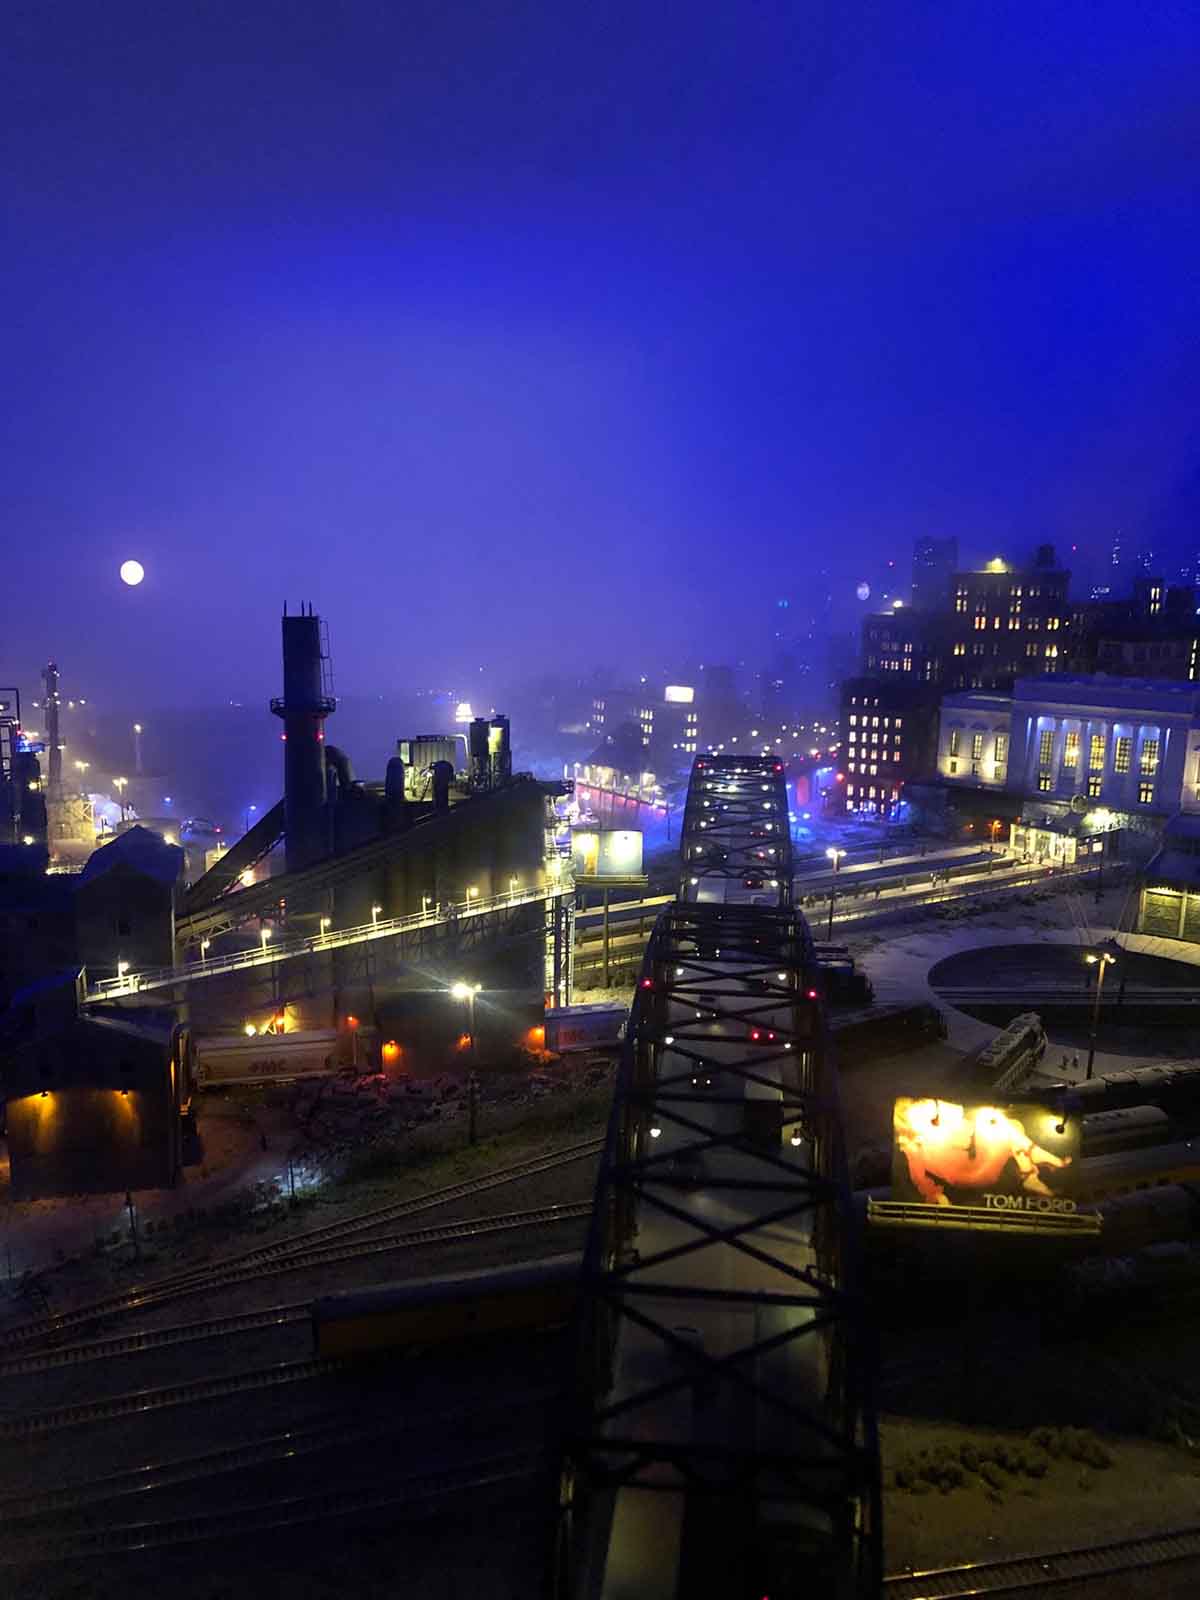
Anyhow, using this technique, (and maybe five or six hundred LED micro lights and thirty lighting modules for this part only, I have built a model railroad LED lights backdrop that looks a lot like the Hudson or East River in NYC, I think. I still have a lot of finish painting to do, but now I’m going to make a cold martini and admire my new urban microworld.
Sorry for the “stream of consciousness” writing style, but I’m hoping some of your readers will be able to figure out enough to try it and maybe even tell me some things I haven’t learned the hard way!
Fred”
A huge thanks to Fred for sharing his latest pics, and how he makes his stunning lighting.
His model railroad LED lights really do have to be seen to be believed.
If you missed his last post, this pic goes to it:
Fred’s N scale factory.
There’s this one too which is just as stunning:
Please do leave a comment below – I’d love to know your thoughts on this one.
One last thing, Dale has asked about a track short, can anyone help?
That’s all for today folks.
Please do keep ’em coming.
No really, please do send something in – otherwise I’ll have to put my feet up for a bit!
And if today is the day you stop dreaming and start doing, the Beginner’s Guide is here.
Best
Al
PS Latest ebay cheat sheet is here.
PPS More N scale layouts here if that’s your thing.


Wow, absolutely brilliant and the patience required to put it all together is phenomenal.
Incredible! And the sound on the video is great!
What a magnificent lighting effect. I would say it has been worth every bit of trouble you went to producing it.
Incredible!!!! Absolutely stunning, well worth the effort put in. Well done.
Drool!! Not only brilliant, but the vision to put together such a phenomenal landscape is amazing. I would guess his leadership and innovation in lighting will be a model for many of us for years to come!!
My 78 year old hands are making it difficult to physically follow his example so I’m in the process of designing jigs to help me. Many thanks for continuing to publish such inspirational material for us!
Outstanding, how you have the patience and small motor skills to do the vast amounts of lights is beyond me. Glad I picked a rural setting for my railway! The effect, looking at the photos, is tremendous and so life like. Well done.
You have created a new art form. Ravishingly beautiful.
Outstanding!
Absolutely brilliant. Please do a step-by-step instruction video (even if you make a small charge for it!)
One word: Spectacular!
A stunning effect. Brilliant and inventive.
Rob McCrain
This is a great idea and the description makes it something that I’m definitely going to try, although not on as grand a scale. Thanks,
John From Baltimore
Wow!
I stop reading and looked at the video. Fabulous, unbelievable, great. Looks like a real place.NOW I WILL I READ THE INFORMATION AT LEAST THREE MORE TIMES…..
This guy is quite an artist. HIs backdrop has dimension, his lighting is almost beyond belief, and he’s no fool with a camera. This is a layout you could spend hours looking at.
Fred
If I am not mistaken you are an Architect who presented us with an OMG moment before with your out of this world LED and fiber optic brilliance. Your diligence and incredible patience and of course your trained eye make your work beyond outstanding and we commend you.
I would not have the skills or the patience to do this absolutely fantastic!
Brilliant, both literally and figuratively. Thanks for the inspiration.
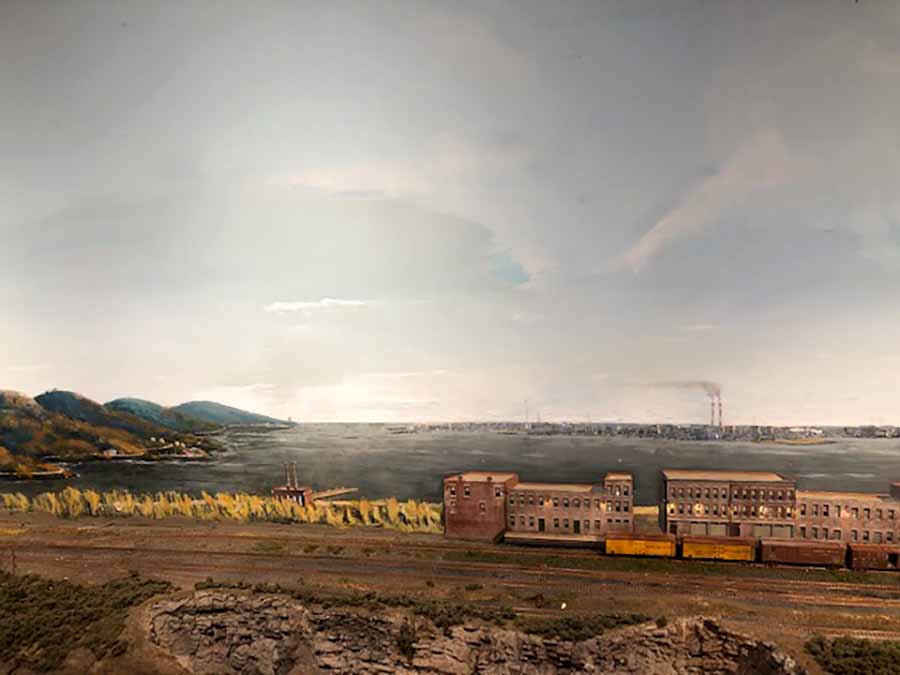
The background mural is beautiful! Love the clouds, the steam from the stacks.
What a world you’ve created!!! Fantastic realism!!
Thanks, Fellas, your compliments will propel me through the next phase of my project. I promise to get you all a written description with pictures of light making. And for the person who liked “the sounds in the video, these are actually sounds from the layout. More on that later.
Fred
GREAT job. Looks FANTASTIC. You’ve found your calling.
Everything is brilliant, and so far ahead of my capabilities that I will just admire it and not try anything similar. I took some art classes in college, and found that I have color deficiencies with my eyes and also zero talent for drawing/sketching. It still amazes me what people can do…
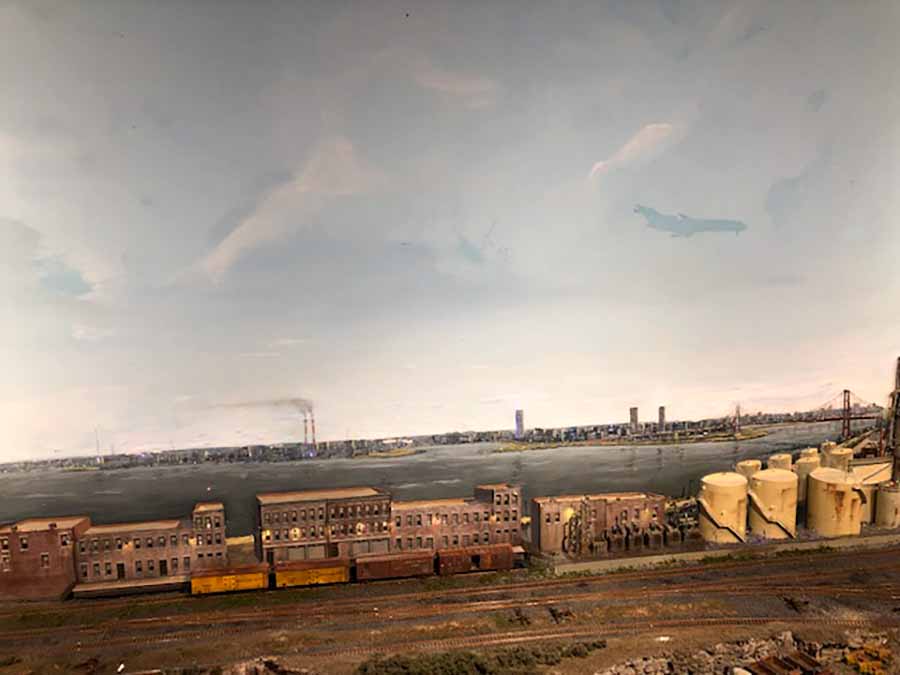
Fred, in the second photo I notice the faint shadow of an airliner in the landing configuration. How’d you do that?
OUTSTANDING…. great lighting effects….. and the perception of depth between the foreground and the background is superb….. so real…
Bill-
The airplane silhouette was painted by hand before I did this backdrop, which has been plastered in and the sky repainted. Aircraft lights were added by drilling holes through the old backdrop and threading in fibre optic lines. I may replace this old bird – ‘twould be a cinch at this point. I’d take a 1”x 3” piece of 1/4” plexi, and after treating it like my bigger backdrop with light blocking paint, paint a new aircraft (maybe not a hazy silhouette) equip it with ALL the lights – cabin lights, strobes, nav lights, landing lights, and plaster it in flush with the current backdrop, which (above the city skyline is still made of Masonite.
Fred
Oh boy this is just totally incredible.
Thank you so much for sharing your wonderful works.
Oh to have this type of backdrop on my N scale California Zephyr Route
would be astoundingly breathtaking. And the sounds with this is perfect.
Wow wow wow.
Thanks a million to Al and Fred for this post. Truly a work of art. Just when I think I have seen it all, some one like Fred blows me away with his imagination, skills and talent.
I am continually amazed at the work of all my fellow modelers.
Great work but there’s an easier way: Just copy Fred’s picture, crop out everything from the buildings down, print it out and paste it on the wall.
HAHAHA–just kidding and I wish I had the skills and patience, (not to mention the martini’s) that Fred has.
Terry/ Idaho/USA
WOW really nice work so intricate to assemble I save all of those 5 volt wall warts from old phones and defective charging cables 9 out of 10 times the problem with them is the phone end cut it off and solder fine wire and use them to power LEDs note the polarity of them .
Wow!! The result is amazing!
I would not have the skill, artistic ability, patience, or dexterity to accomplish such a beautiful and realistic result.
Truly incredible…
Wow! Awesome work
Andrew in Oz
Fred should produce a book on how to build his lighting effects! MAGNIFICENT! I’ buy it!
Stunning absolutely stunning!
While everything I see is innovative and done with excellence, the most impressive thing that jumps out at me is the atmospheric effects. Is that done with the camera, or have you found a way to give that misty, hazy look to your lighting?
Jimmy –
The Atmospherics are courtesy of a small smoke machine that squirts “fog” over the outer harbor next to the airport. Eventually it works its way into the front of the layout where it smells so bitter that it drives everyone out of my basement, so I try to limit my use of it to photo sessions only!
Fred
outstanding work
Wow! Masterclass!!!!
Best to all.
Brian, Wokingham, UK
Another comment with this, can’t show or see enough it seems. Fred is an artist and his world is positively better than actual these days. Noted many well thought out returns and some not. And with Fred answering a few questions really brings the reality and things to life.
Would not change a thing here of coarse or other. Yet all has changed, better and yet wonder about yesteryear still, it’s like “where have all the flowers gone”. A few of these RR’s are a way of life and habit/hobby seemingly, you do it because you want to and you can. Do hope this work does last into posterity.
And Regards, R
Wait! What about a big block of dry ice for fog and ground mist. It’s nifty, boils when thrown in pool, hot weather of coarse… just thought of out of blue?
Oh! Wow! What an incredible idea!
Lots patience and love for a brilliant result.
Fred………MAGNIFICENT!!!!!!……
Truly amazing, Well done Fred. Such skill, artistry, patience… I could go on. Thanks for sharing.
Question for Welder Dave, do you run the power from those “wall warts” into a distribution block, through a transformer or directly to the LED lights?
WOW !!!!! really awesome, nice work !!!!!
I thought I was looking at the real thing, outstanding.
really nice work, the time and hard work shows.
OMG what a stunning layout!
Speechless, incredible effectiveness on this , WOW