“HI – Al,
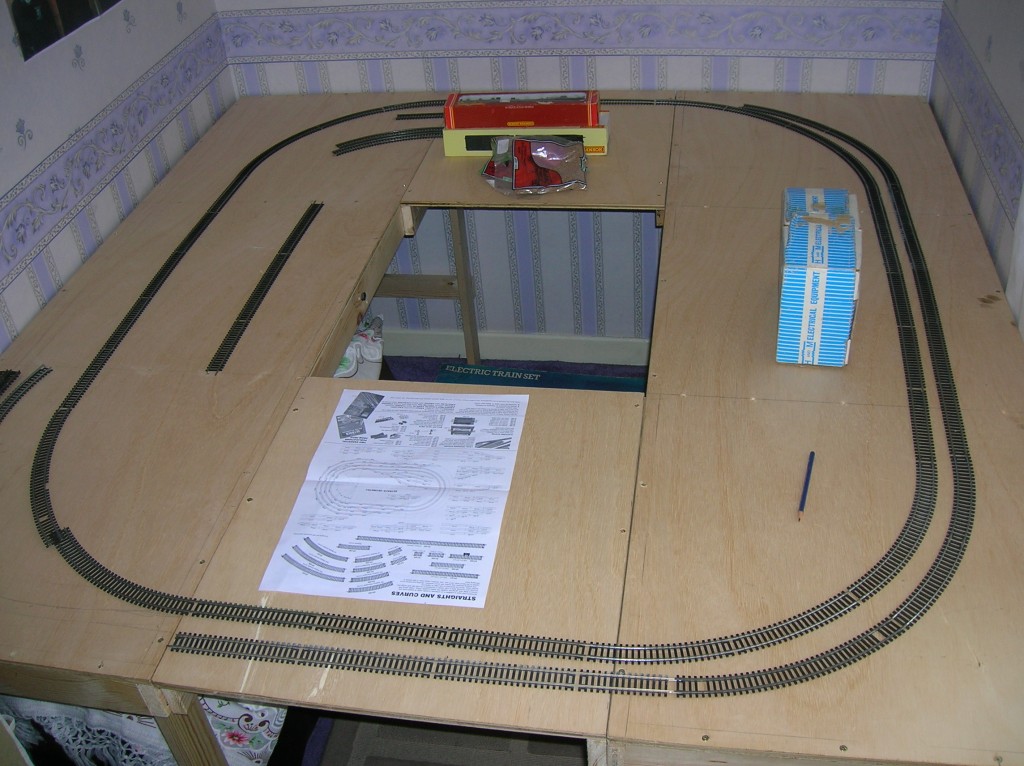
I have started a model train layout on a table 6ft square with a 2ft square hole in the middle, i have put 2 tracks around the outside & a 2 rail goods yard & that is it i do have a station.
Also couple of biuldings & a station canapy & i am going to put a station on the right side of table but i dont know wat to do with the rest of the space i have, perhaps some of the modelers on her could give me some ideas.
Regards
derek; this is a photo of the set-up so far;”
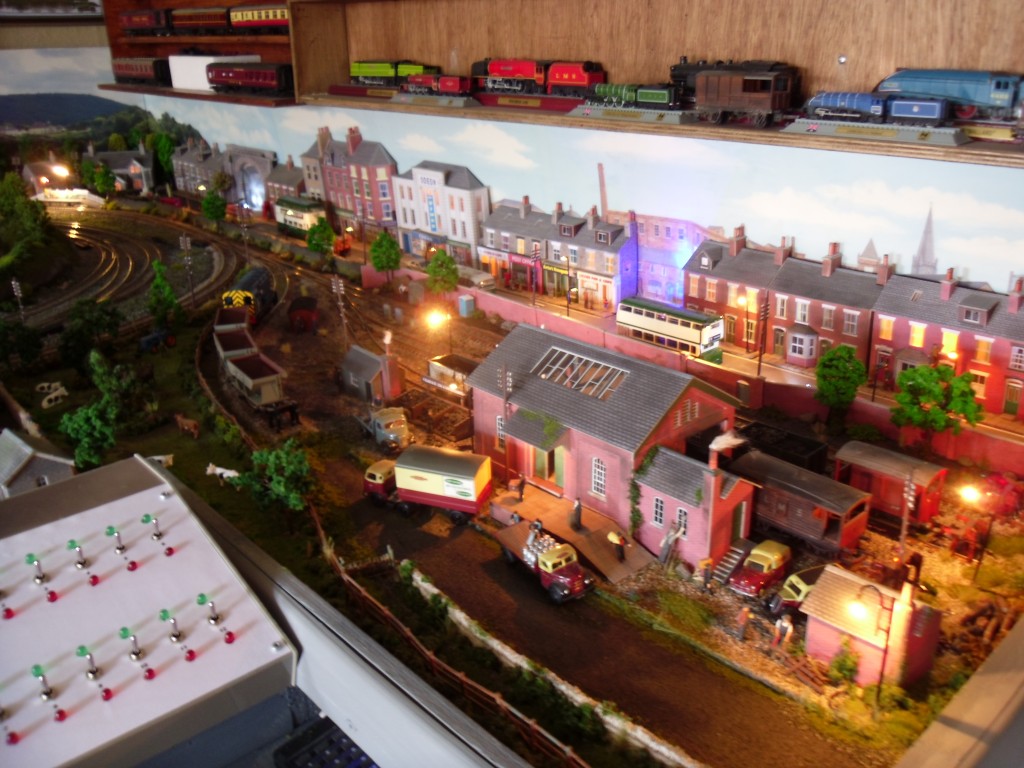
“hi alastair,
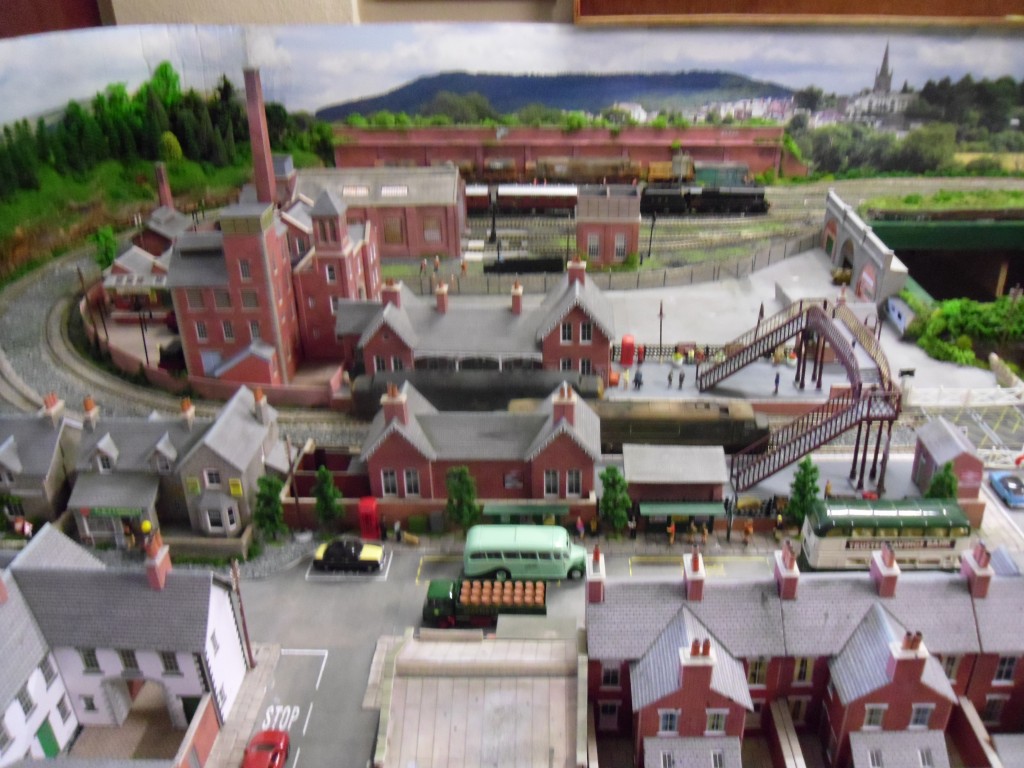
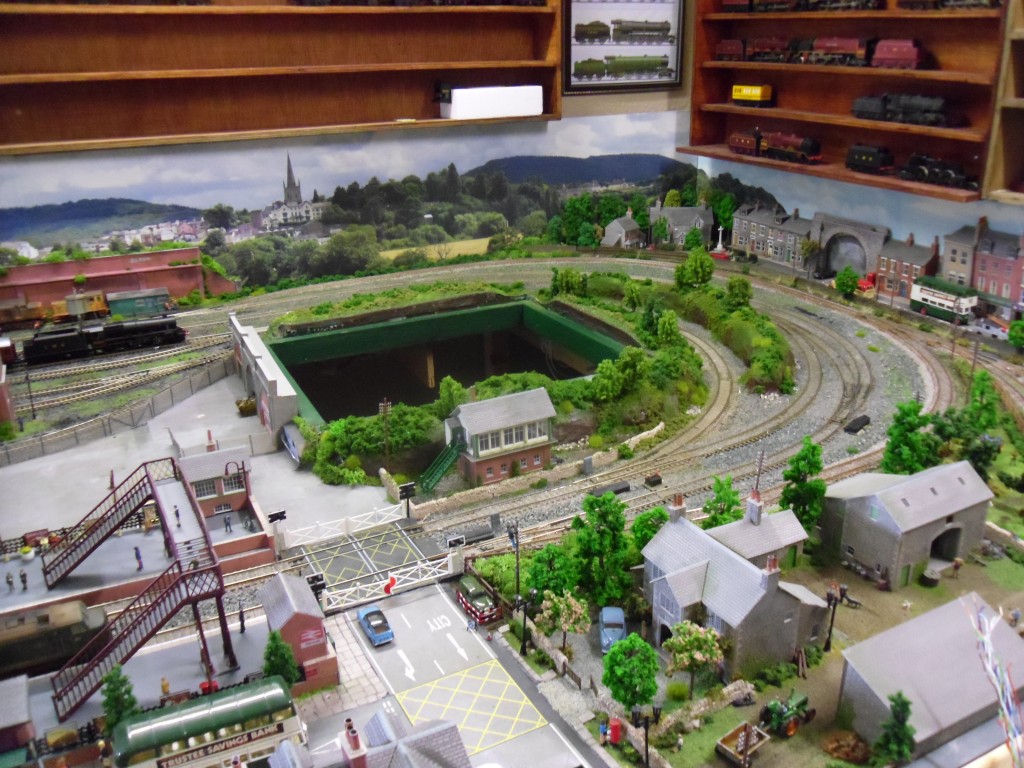
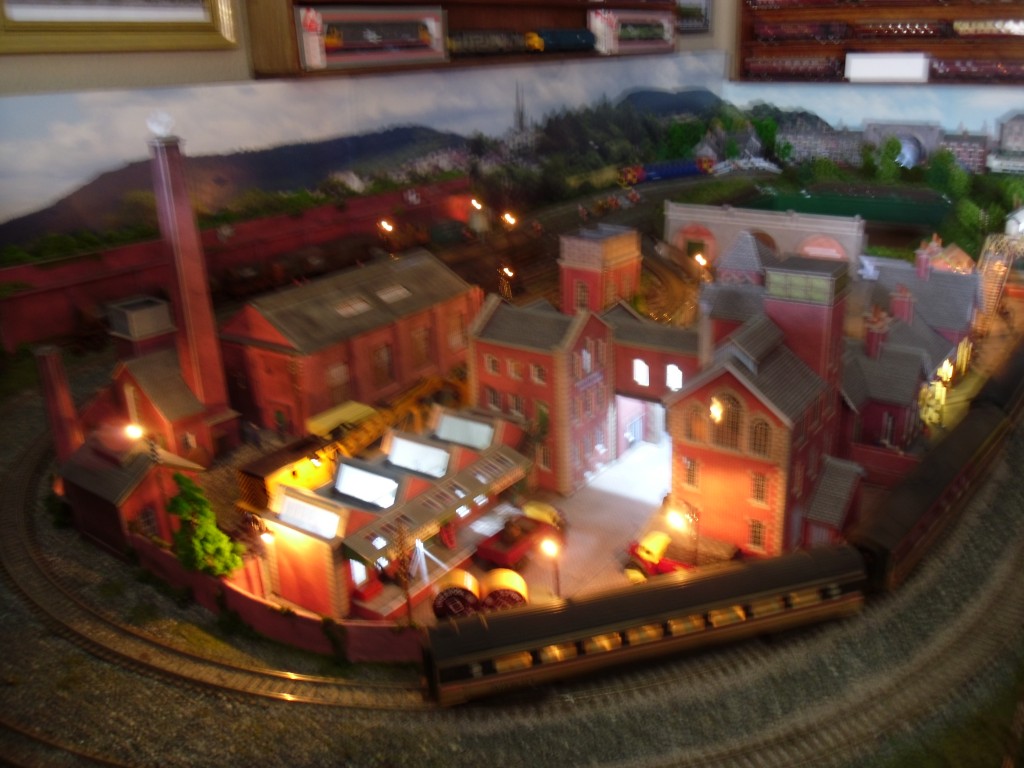
9 months work and still going.
never did any railway modelling before this.
regards peter.”
“Well being that I am new to the model train hobby, I have what NOT to do tips.
1. Do not use flexi-track unless you have a PHD in math.
2. This stuff called AMI instant Roadbed do not lay your tracks on it unless you have a crowbar to remove your track from it when you make a mistake.
3. Make sure your switching tracks actually work when you throw the switch, To not check it and have your track all nailed in and find out is broken… sucks……..
4 lastly do not lay your track so close to the edge of the wood that when it is traveling it falls over and drops about 3 feet to the floor.
Hope that helps
Dougan :):)”
“Hello again Al.
Here are the original pics from many years ago.
I’ll go through the ones I have and pick out some more that look OK. Because of the size of everything its really hard to get much in focus with my point and shoot digital camera. I’ve heard them referred to as Phd cameras. “Press Here D…head” .
I’m not sure which country you’re from and whether that’s a term you’d be familiar with but here in Australia it’s a common term for someone not so bright.
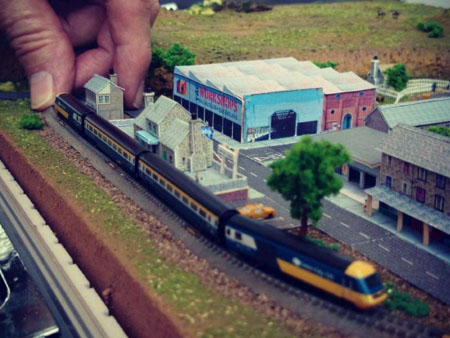
I can get nice and close with the macro setting. But then the depth of the field is minimal. Just to give you an idea of size, the phone box is 5mm tall by 2×2.5mm and the petrol pumps are 4mm tall. The little tractor which I had to make, fits on my little fingernail with room to spare.
Ken”
Thanks to Ken – a remarkable layout. So small!
Please keep ’em coming. Just hit reply to any of my mails to get in touch.
That’s all for today folks.
And if today is the day you bite the bullet, the Beginner’s Guide is here.
Best
Al
PS Latest ebay cheat sheet is here.




Well done both Dougan and Ken …good tips there Dougan better warned before than after ..
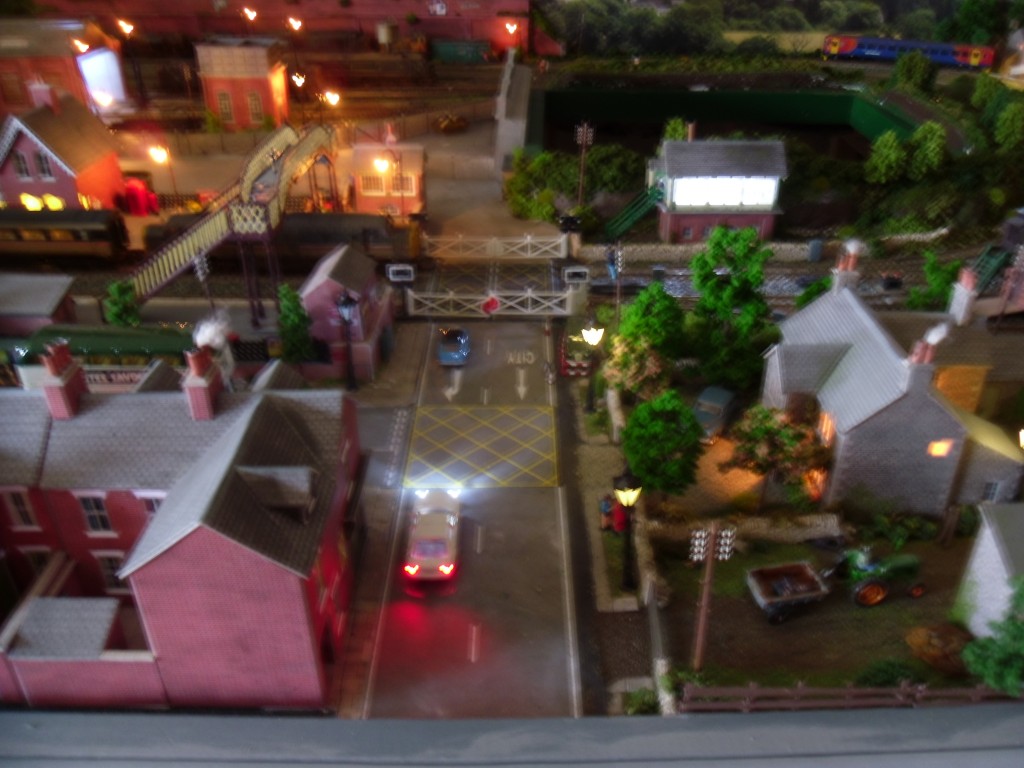
Hi Derek — small layout looks fantastic: Very nicely scenicked and has great visual appeal despite its small size. Very well thought out structural and terrain placements and nice lighting.
Nice Job!
Arnie
Hi Ken – Your ultra-mini world is very impressive. Smaller than Z scale! Very nicely scenicked and contoured terrain. Beautiful job! You should consider submitting your photos and a video to Model Railroader magazine. User videos (from Youtube upload) can be submitted for free publication online at Modelrailroader.com; photos can be submitted to Model Railroader magazine for publication in their Trackside Photos section of the hardcopy magazine. And they pay for pictures that are published.
Arnie
Excellent detail and good tips all.
derek; perhaps some homes with a nice back drop.
Wow Ken that is very small and impressive. I don’t know how you do it. I struggle with OO Gauge. Denis
Great! You used Z scale for your breifcase layout. Would have been nice to have your track “super elevated” tho. I model in Z scale also and have a small layout, 37″ x 27″ x 10″.
Z Scale…
minimum in siZe,
Maximum in enjoyment!!!
HELP !! I an a child trapped in a Seniors body. Never had trains until my matured years, and i am a novice. Need info on when and how to clean my N scale wheels and tracks. will alcohol swabs do ? do you clean in side of track as well as topside? oiling? cannot get info from sales clerks who can only give prices..need hobbiest with good experience to HELP – please! shelly bars
Remarkable. I have enough trouble working in HO due to poor eyesight!
that is just to cool
Derek- You are off to a good start. On my initial effort that I am currently struggling with, I am finding that as I add a building here, some landscape there, ideas begin to present themselves. Try some landscaping (simple stuff to start) and then check out all the websites available or mags available or catalogs and just go through and see what you like.
Peter- I am a year into my own first effort and not even close to what you have. Great job.
Dougan– I enjoyed your tips, particularly about flex-track.
Ken– Very nicely done, and BTW, Here in Wyo, USA, I know a bunch of D…heads (if I am interpreting your meaning correctly) and not all of them are dumb– but all of them are really annoying!!! 🙂
best to all– thanks for all the tips and inspiration!
Am here in the US, and see so many great layouts, mostly in the UK, on your site. I am amazed at how much talent there is out there. I have a loft with an O gauge 5′ X 24′ layout and am readying to build a simple modular HO layout. Al, many of your website transmissions have given me the urge for more. What a great hobby we have.
Thank you for administering this terrific website.
THAT SUITCASE LAYOUT SURE IS BEAUTIFUL. TAKES A LOT OF WORK TO PUT A TRAIN IN A SMALL SPACE.
G’day Leo. My “Briefleigh” layout is in “T” Gauge, not Z. T is 1:450 so its roughly half the size of Z. Its called “T” because the track is Three mm wide.
Fantastic!
Unbelievable what can be done if you put your mind to it but it would not do for me at my age as 00 is small enought when building the models.
As regards size it is easy to judge by the giant hand in the sky in one pic. 🙂
Hello Thomas. The little layout s actually in a briefcase, not a suitcase. The actual size is 17″ x 12″ or 43cm x 30cm. And yes, it was a lot of work. I’m in my late 60’s and although my hands are quite steady, they eyes aren’t what they used to be so there’s a lot of time involved as well. The little station building took me just over 3 hours to make.
I agree with Arnie: You should show that outstanding briefcase layout to the whole world by having it published!
I too model T gauge also z scale just did 4days modeling display in metro Detroit inc. my puzzle T gauge lay out with Z scale double helix with figure eight running under it by far you doing lots finer work than I guess id have hide behind my age almost 75yrs but my work well liked by children and adults. rivet counters I never worry about we model for handi cap and children that’s are award
The pictures are great.
Dougan, thank you for the information. You are farther ahead than me on the learning curve.
Ken, your layout is one of a kind – Great.
Thanks,
Roland – Nashville, TN
well done and thank for insight doug I’m about to start laying track too and started with foam trackbed but the pins don’t go far enough thru to nail and I don’t like glue for the same reason its a bit permanent if you want / need to change it any tips guys would be happy for your thoughts as I may not have my final plan yet and am thinking of changing to cork trackbed
Hi all,
Got a suggestion for track laying glue. I’m laying track on foam, and know pins or nails don’t hold. But I did find something that works and is Removable. Try Woodland Scenics: Foam Tack Glue. Believe me it WORKS. After you have a lay out of where you want the track to go, spread the glue and lay the track. Pins will hold it in place, long enough for the glue to set up. Add some weight to the track and 10-15 minutes it’s solid. How do I know it’s removable? After finishing laying a 6 track yard, about two weeks later I realized the middle switch was the wrong type. It had to come out and be replaced. The solution not difficult at all. All you, ( I ) had to do is, (as per the directions) wet the track with Warm water, give it a few minutes, and Gently lift the track. Wiggling it helps. I work in N scale and the tie plates are fragile. It doesn’t take much force to pull the rails out of the ties. I was able to remove 3 tracks and 4 switches, using this method. Side note for beginners, don’t glue down your switches. Let them float. Glue in the works and your switches won’t throw properly.. or at all. Thanks, Harold
Dougan, no need for a Phd to use flexible track, what you need is a pair of what I think are called Xuron rail cutters, which have very hard, sharp, angled blades and leave a clean, square end. My first efforts at trying to cut flex to length with a junior hacksaw would have made grown men weep.
Shelly, with oiling, really tiny amounts are needed, delivered only to bearings, using something like a pin-point with a tiny drip on it. Over-oiling will result in it getting where it shouldn’t, such as on motor brushes and electrical pickups, and collecting fluff and dirt. Cleaning with something like surgical spirit on a cotton bud should do for wheels and rails – not too fluffy though, don’t want fibres getting into the mechs.
Rod
love that idea train in a brietcase go to work plug in case place with train now thats a thing to do i could see myself doing it more likely would not last long if i did in my job as a forman over about 20 elecrician for starters we do not us briefases its blueprints and there 36 iches square and rolled up just the crew gets small sections of the prints to work from but if he knows his job he works ahead of his area just so no mistakes well be made as i donot like f-ups for men or work it was alway do it right the first time or i’ll see to it is done right i was miserable to work for tooi but got the job done on time and right to the print and if elevation was wrong i would change it and tell the engineers nothingt except you own a tape measure use it i aint doing there job twice i did it once changing it getting back to the briefcase set it must of been frustrating to build it in such a small area have you thought about adding on to what you started in more briefcase sets that you can join together with tracks just a thought lol have fun i know its lots of work but lots of playing after with the grand kids take care as getting late here must hit the sack god bless and keep on train buiding
Shelly, for cleaning tracks the best thing is a pink eraser that you used to use in school, they clean all the grime off your tracks and don’t harm them . as far as oiling wheels I wouldn’t suggest it unless your running your engines no stop for long period of time , the manufacture puts enough grease on the bearings to last a long time , you clean wheels several ways , they sell a brass wire brush that has two wires on it to hook to your tracks so you can run engines on the brush with light pressure which is what I use it works good and you don’t get cotton fibers in your gears
Many thanks for the 6 x6 layout. I ma struggling with a 6×6 L shaped area and this gives me some new ideas. I really appreciate your daily mail’s.
Mike from Tucson Arizona
Pretty damn cool
Dougan. Love the layout.If you’d like to make a little more expansion,may I suggest you build a diorama that fits in that 2 x 2 cutout.make sure its attached WELL.That way you can still push it up to get to the center on a de-rail or to work on other things,but when you are not the drop in 2 x 2 diorama will add a little more to your scenery.Nice job with little space.You can make that dio on a foam base to it pushes up easily.I would build a 1 x 1.5 frame to fit underneath allowing a lip to hold the drop in dio
Checked your photos again and I can see a lip with 2 x 4’s is already in place.This is as easy as making a dio OFF the layout and dropping it in place
Ken, You Are Micro Man! You must have keen eyesight and a surgeon’s hand…
I have been following your posts for a year or more. It iis like Model Rail Road magazine, but more current and best it’s free. Please keep up the incredible work and thanks from a true fan. 2 dreams of mine, to build a layout and visit the UK.
Derek –
You have a fantastic eye for detail. Both the urban and rural areas are totally believable – and a damp good advertisement for Metcalfe kits ! Inspirational.
Derek, Well, you’ve made a start and that’s the most important thing. I would suggest maybe adding some grass sheet and cork roadbed as s start to some scenery. You can add roads on top of the grass sheet later. Perhaps a tunnel with some hills in one corner could be built with foam board or just newspapers and plaster cloth.
Peter, Very impressive layout for just nine months of work. I really like the detail of your roads and all the people that bring the scenes to life.
Dougan, All good advice. I find that switching to code 83 or code 70 rail flex track and using a Xuron or Micro-Mark rail nipper makes flex track laying much easier. As far as I know, AMI Instant Roadbed is no longer available. I had a couple of rolls of it that I used as roadbed in my train display cases where it worked well for holding tracks in place on clear plexiglass shelves.
Ken, Absolutely amazing! I had never heard of T scale before your post. I had trouble just working with N scale so I can appreciate how much skill and patience you must have to build your fabulous briefcase layout. Where do you find the T-scale figures? I agree with the others, you should submit your photos to Model Railroader magazine or other national / international publications.
First time I’ve seen a working TT scale layout, really good job! Who makes TT track and trains, I’d like to use some on my N scale layout for mine track and ore cars.
Ken, I absolutely agree that your T-Gauge layout is worthy of publication. In many years of subscribing to Model RRer and membership in the NMRA, I have never seen an article published about either Z scale or T. The NMRA publishes a calendar and never includes photos of even award-winning Z scale layouts. I have T, but have trouble getting it to run reliably. T could also be used for forced perspective on a layout, just as Z could be used that way on an HO layout.
Ken,
This would be a good time to train some fleas to run your railroad. You can have an updated flea circus.
I like the N train layouts, to. Lately I am finding it harder to work on my N’s, and am getting ready to start a Marklin HO project. It will be very different for me. I’ve learned what not to do with N trains, and I hope that most of it carries over to HO.
Derek……. great start…… send pics as you progress.
Peter….. working on your layout will never end……. you will change things, add things, replace things as time goes by……even dismantle the layout and start all over……..but its fun
Dougan……some more DO NOT Do’s:
– do not solder under the layout
– do not start on scenery until all your trackwork is 100% free of derailments
– do not start your layout unless you have a plan
Ken….. really small…… really small….I am thinking of going to N guage because of space requirements but I am afraid I will find it hard to work with something that small.