Gary’s been back in touch. This time he’s been busy making some HO scale guardrails:
“I am working through my layout on Sunnyside yard, I have done a lot of things from scratch and after reading what the other modelers send, I thought that I should do the same and maybe it would help someone.
So I am sending you two tips….the first on creating Highway Guardrails and the second on a real simple way for creating hedges.
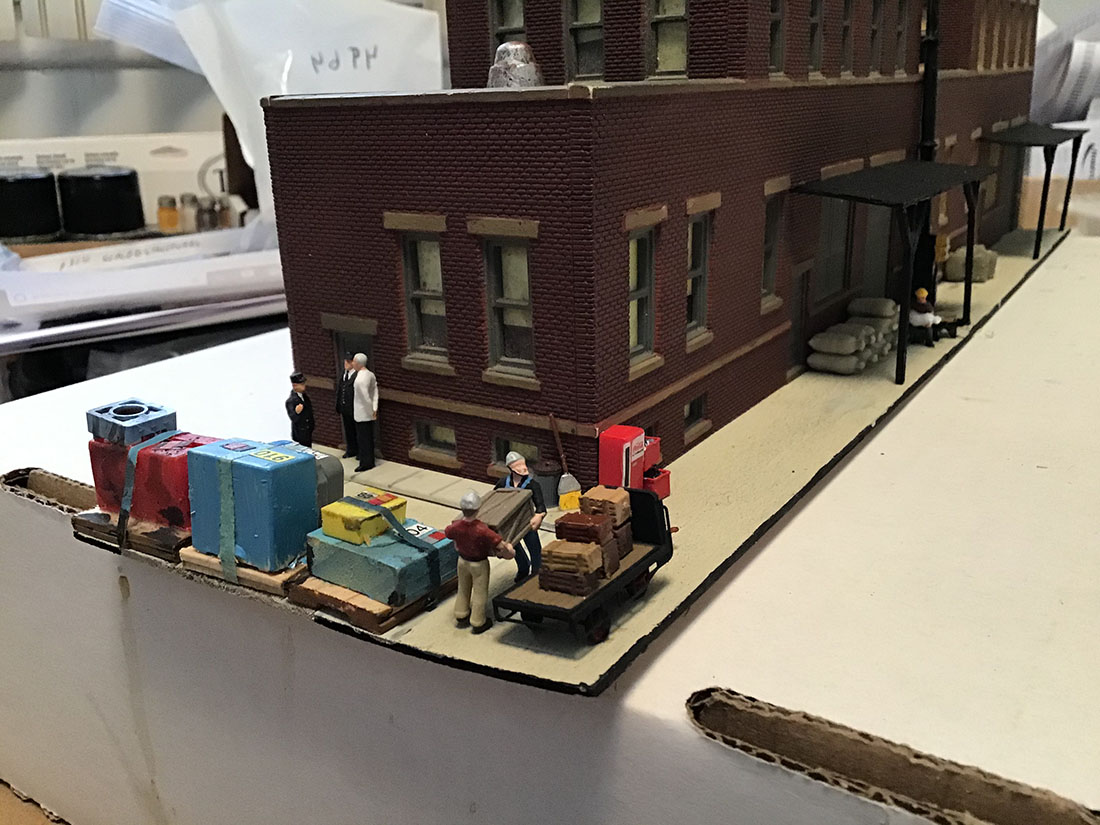
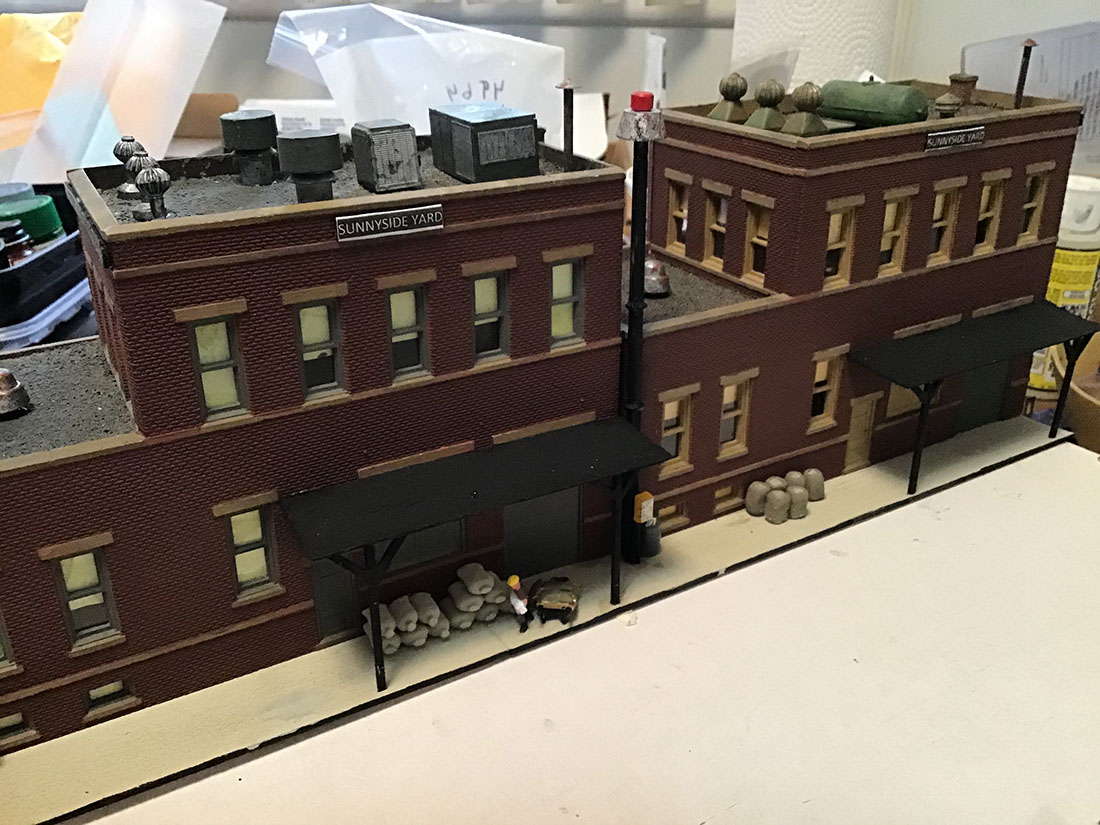
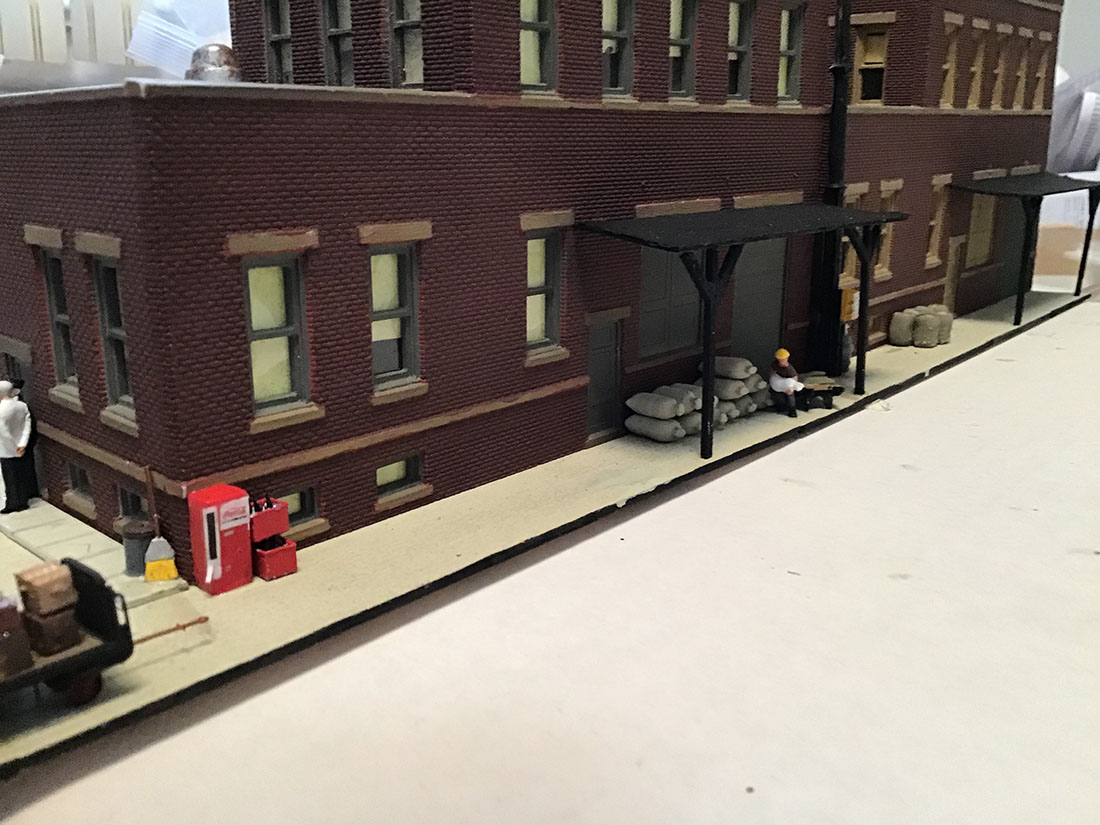
I also have started working on the Commissary Building for Sunnyside Yards and thought I would share that also.
How to make highway guardrails easily and cheaply:
I wanted to add a track to display some other engines that I have but I had already put up the fence between the engine yard and what would be the Commissary Building area. So I decided to put a rail towards the center of the layout for the engines but needed to blend it in with the layout and also needed it to be separate from the commissary buildings.
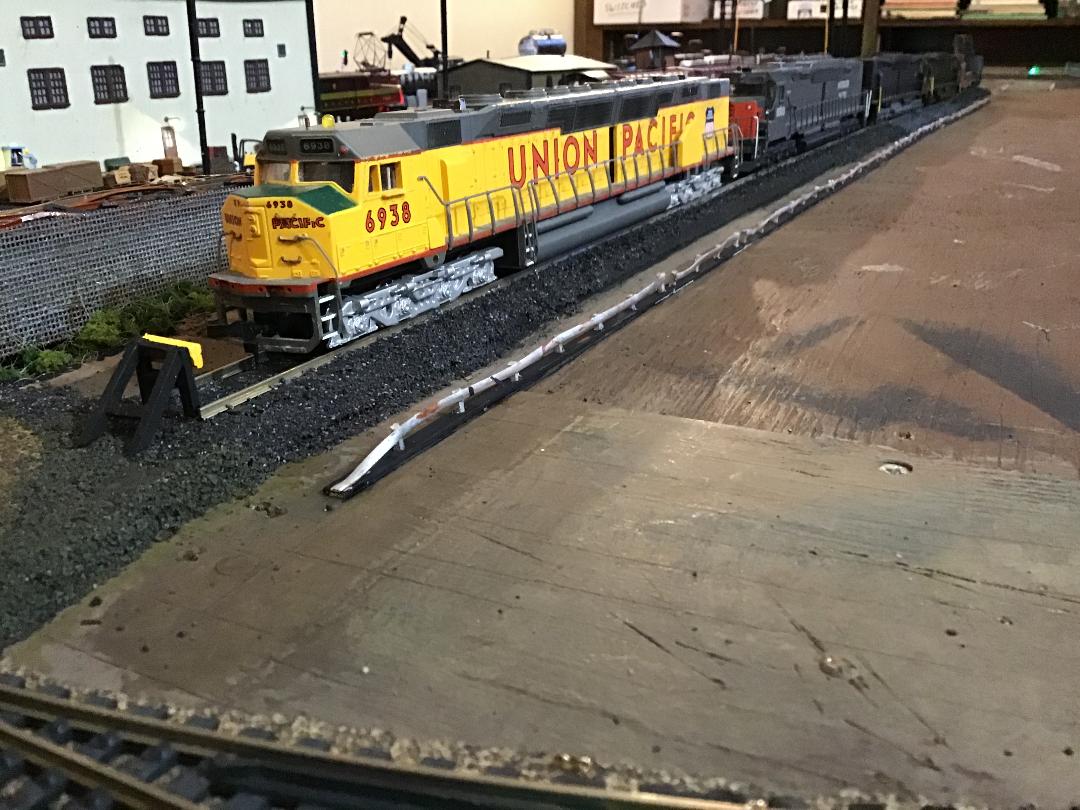
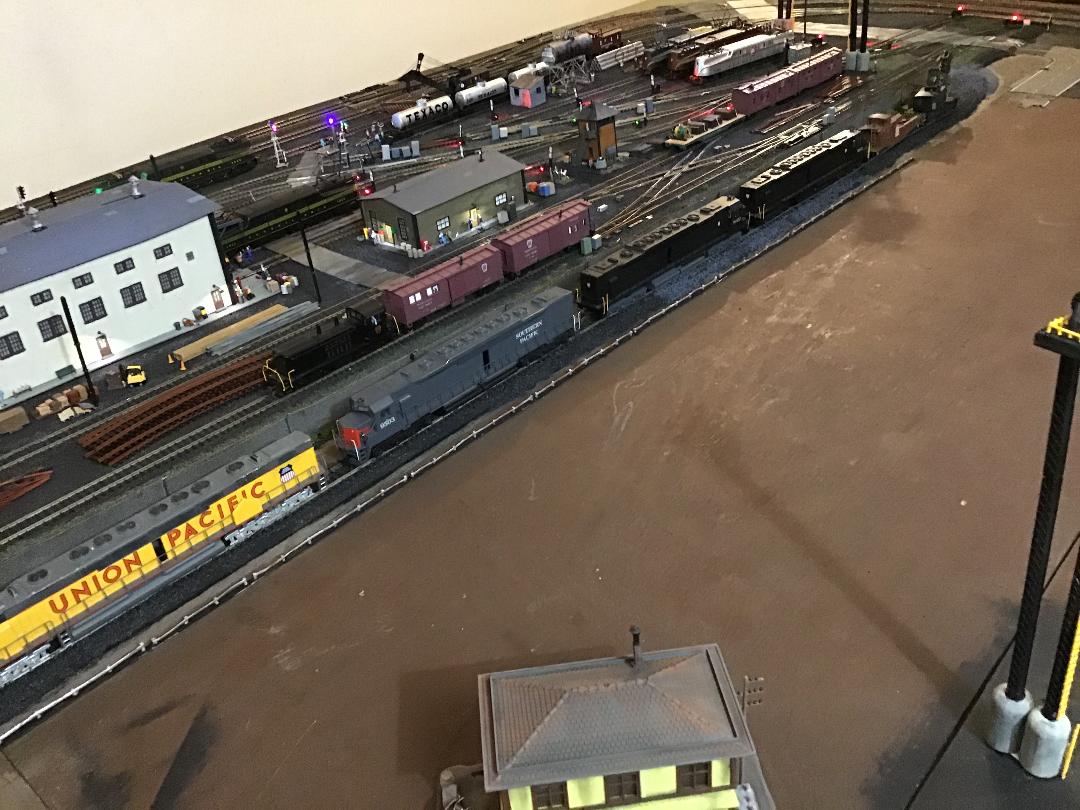
The main road coming into the actual Sunnyside Yards comes down a ramp behind the buildings. My main road is coming into the yard also behind the buildings, but no ramp and I decided to separate the road from the display rail with highway guardrails.
I found them to be too expensive for the 4 feet of rail that I needed so I decided to go from scratch.
As it turned out it only cost me $1.03 for the material and my time. The pictures below will show how I made them and what I used.
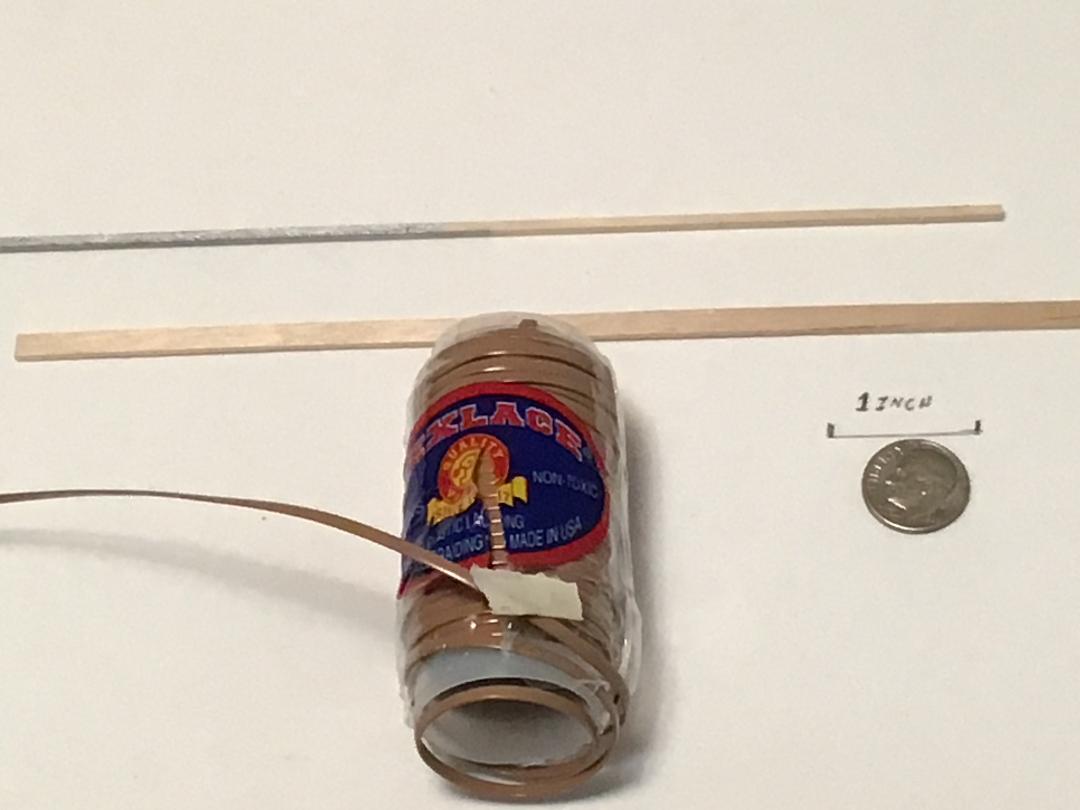
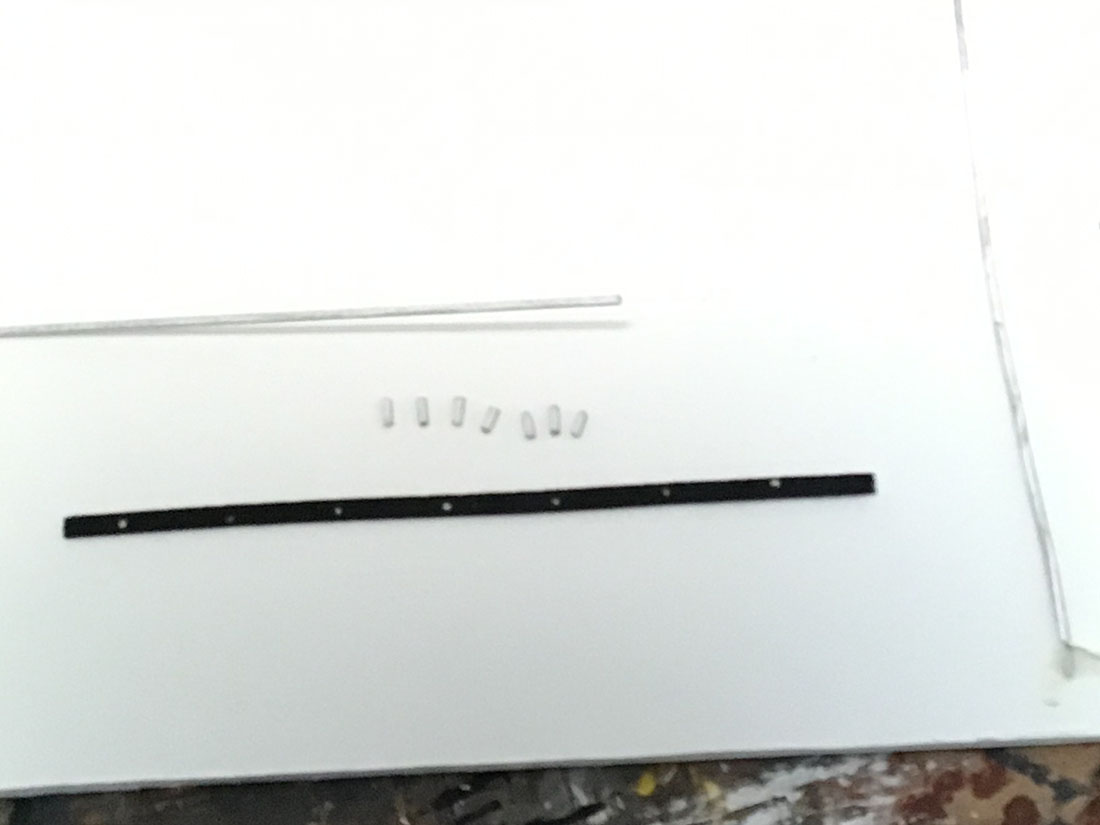
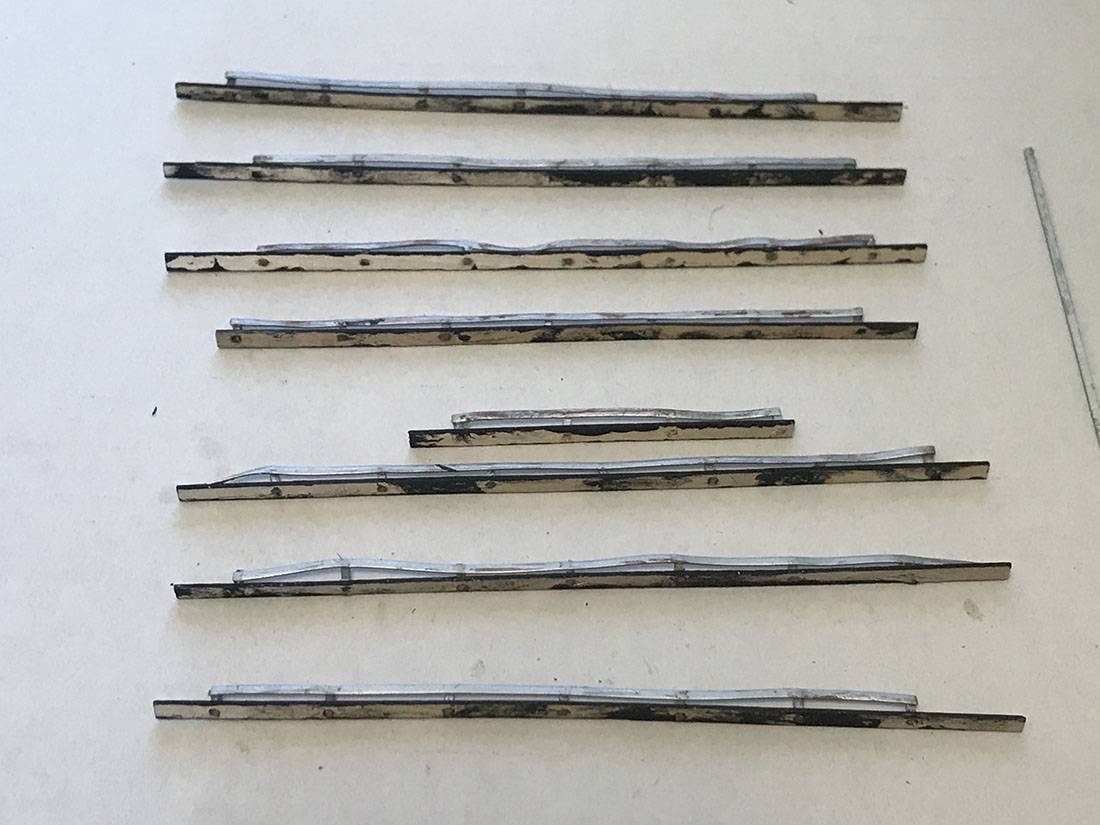
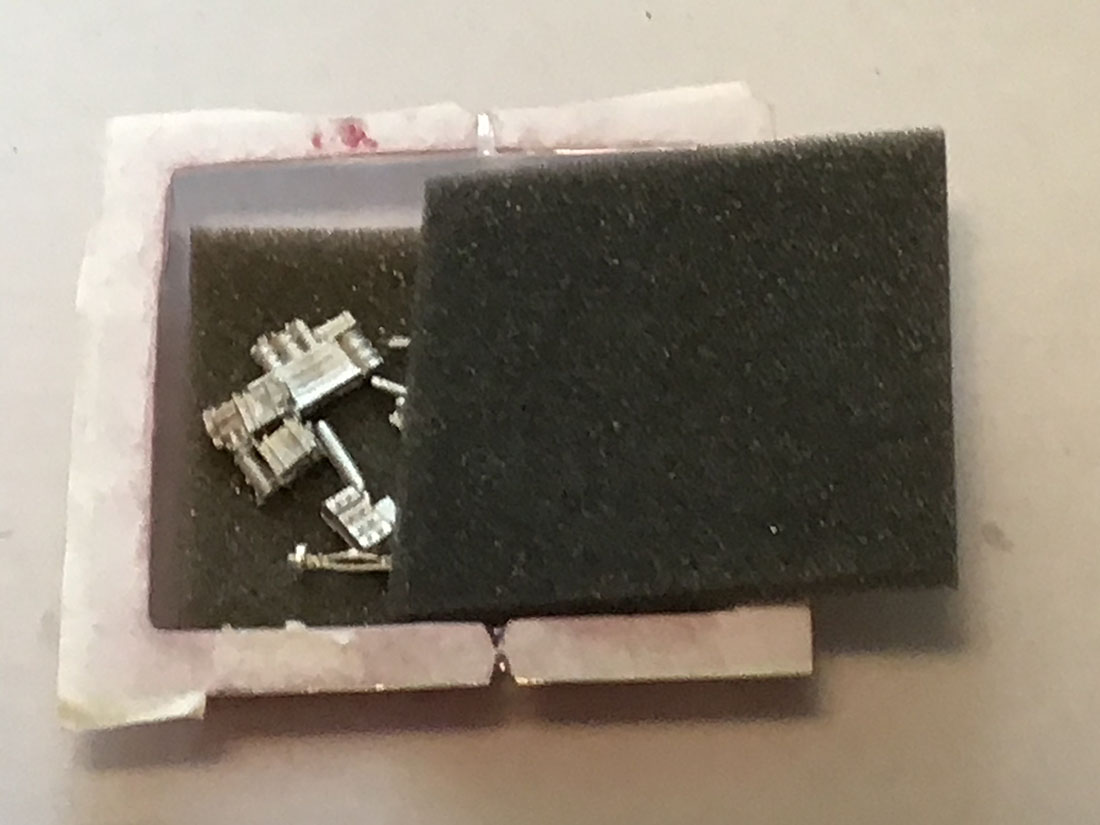
Picture 1: Material – in picture one you will see three items for my HO scale guardrails.
The top item is a 4 foot strip of wood 1/8 inch thick used for the guardrail stakes, cost .24 cents.
The middle item is a wooden coffee stirrer; no cost, I took a handful from to local coffee shop.
The third item is thin plastic to be used for the guardrails. The product is called RexLace and cost .79 cents. I found it in an Arts & Craft store; but you can use anything that would resemble the guardrail.
The dime is just to show reference for size.
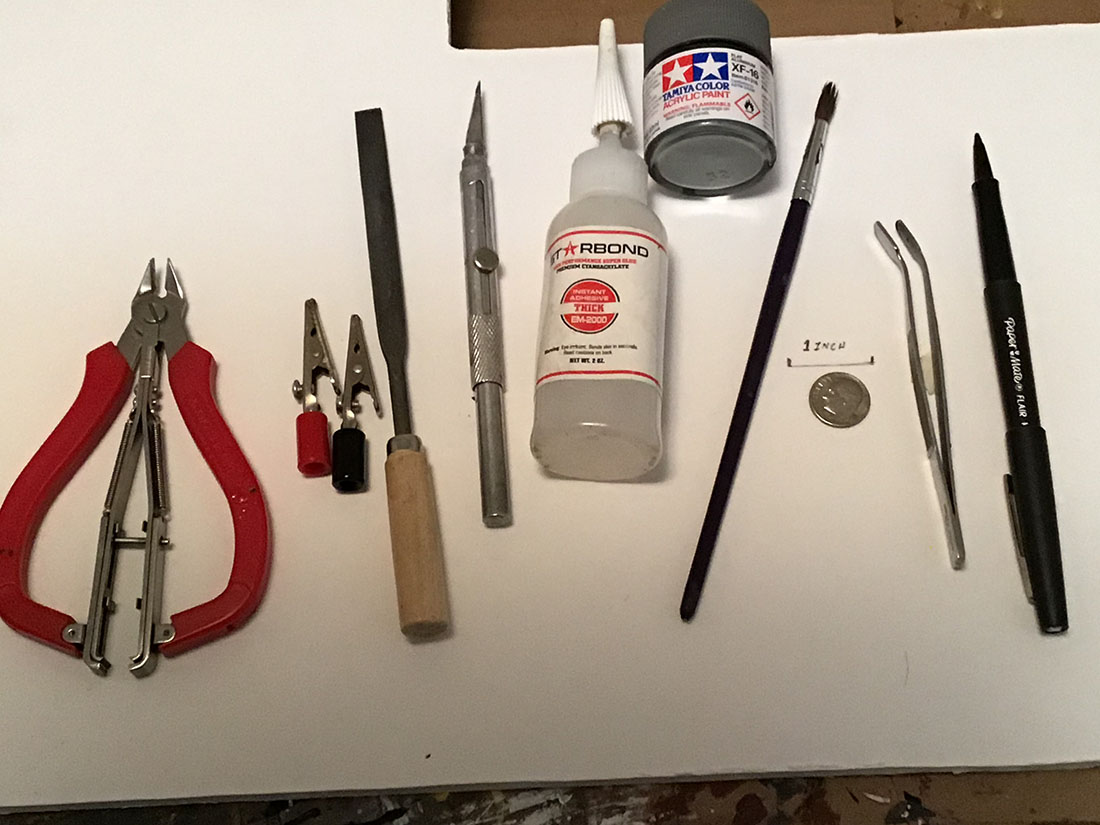
Pictures 2 & 3: Tools – I am sure that every modeler would have most if not all of these tools. I left a piece of charcoal colored chalk for weather out of the picture by mistake.
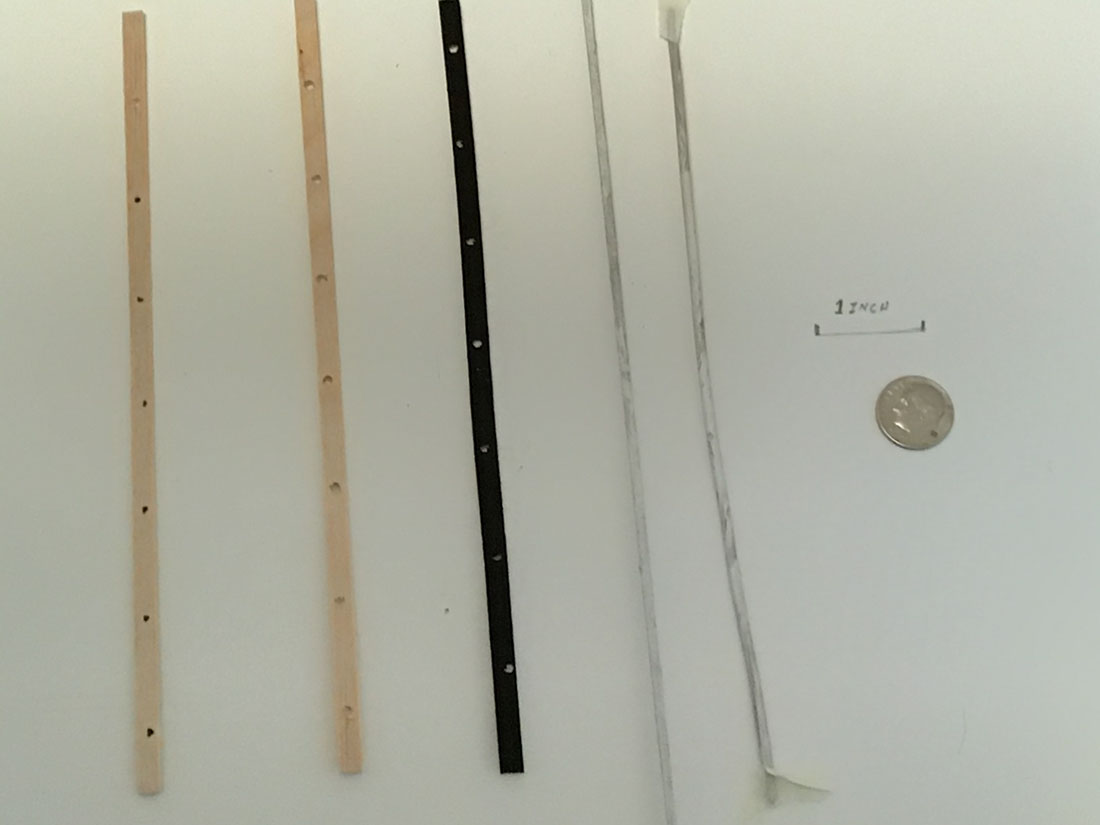
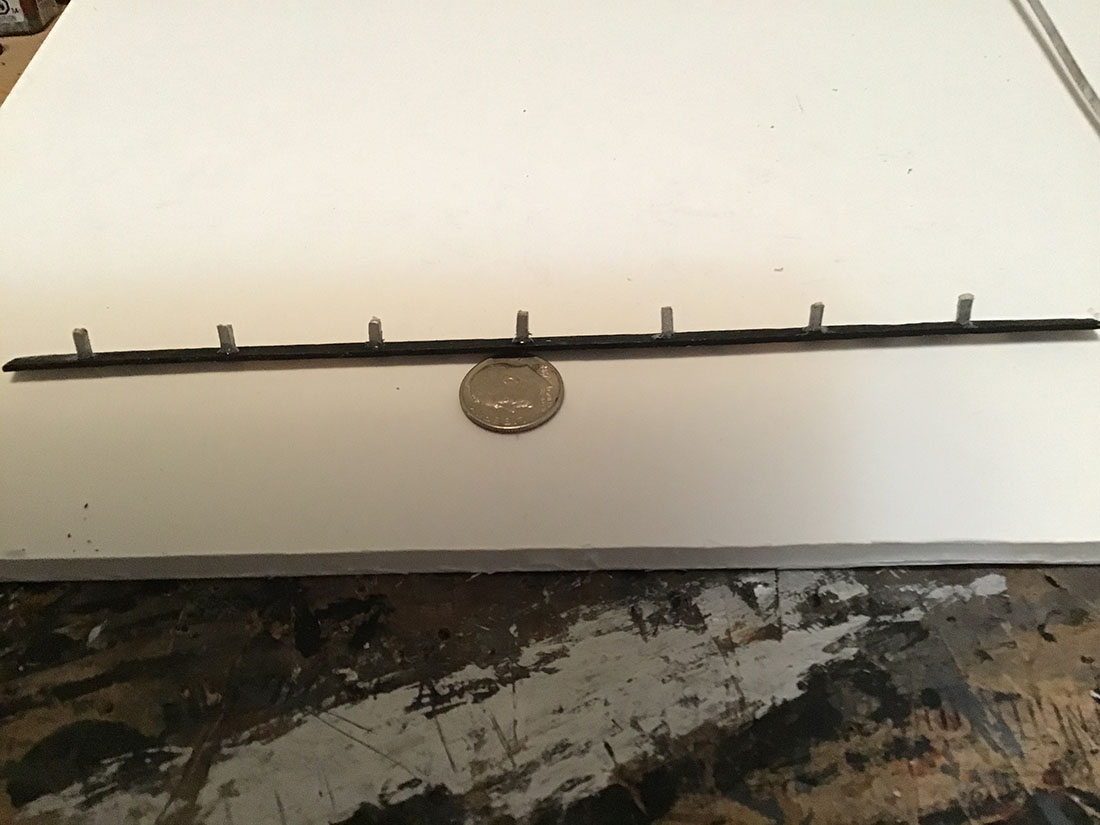
Picture 4: Prepare the pieces – As you can see in picture 4 the first piece on the left is the coffee stirrer marked with seven dot for drilling one inch apart; then drill a hole at each dot
The second piece from the left is the stirrer with the holes drilled.
The third piece from the left is the stirrer painted. You can paint it whatever color you desire (I probably should have used a more earth tone color).
The next piece is the strip of wood to be used for the stakes painted aluminum; this will be cut up into 1/4 inch pieces. The last piece is the guardrail also painted aluminum. I found it easier to have everything painted before assembling.
I also found that working with a 7 inch strip was a lot easier. You can make the lengths anything you want.
Picture 5 & 6: – Make the stakes – for the number of holes you make in the base, cut 1/4 inch length for each stake from the thin strip of wood.
These should then be glued into the holes in the base.
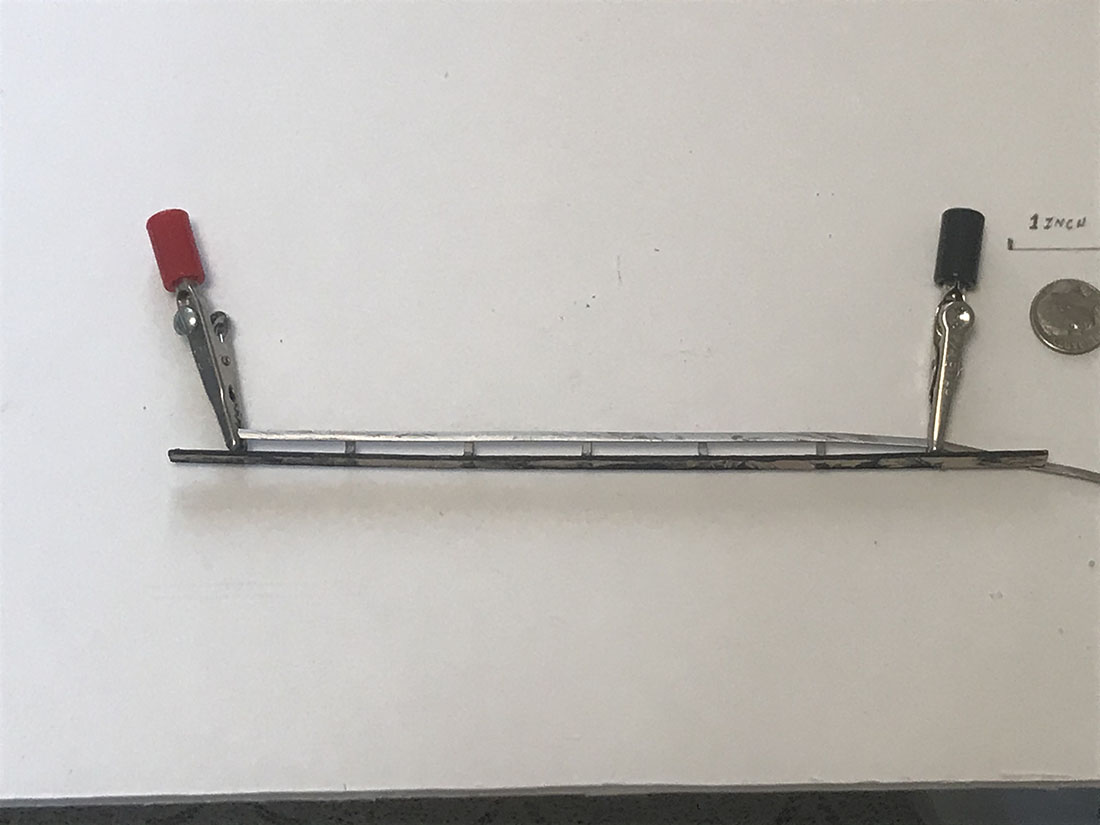
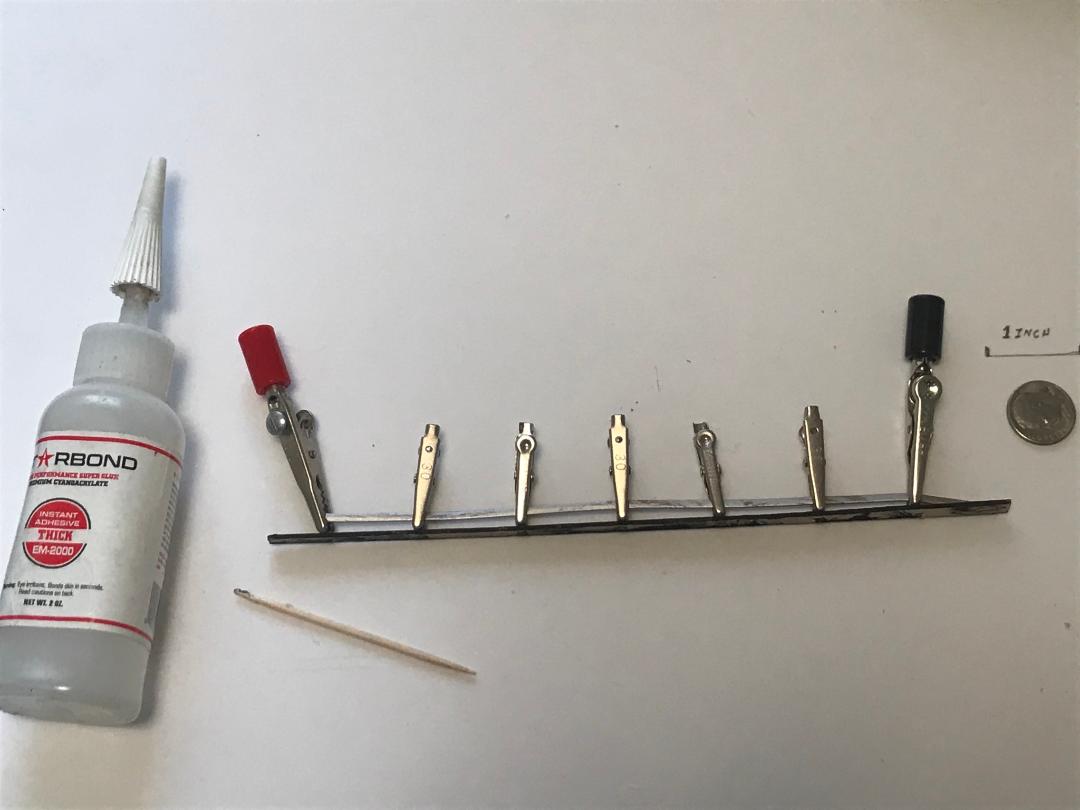
Picture 7 & 8: Glue the guardrail onto the two end pieces and let dry so that they stay in place. I used CA glue and left overnight. Then glue the remaining stakes. Again, I let it sit overnight; they are sturdier to handle.
Picture 9: Touch Up and Weathering – When the glue has dried, take your paint and do whatever touchup is needed. I then took some rust color paint and dabbed some rust spots around railings and also used some charcoal to dirty up some spots.
Picture 10 shows what HO scale guardrails looked like when I was done. They are now ready to be placed on the layout.

Pictures 11, 12, 13 & 14 show what they look like in my layout. The large brown area in the pictures is where the road coming into the yard will be along with the Commissary Building, Power Plant, Yard Master Towers and Power Station.


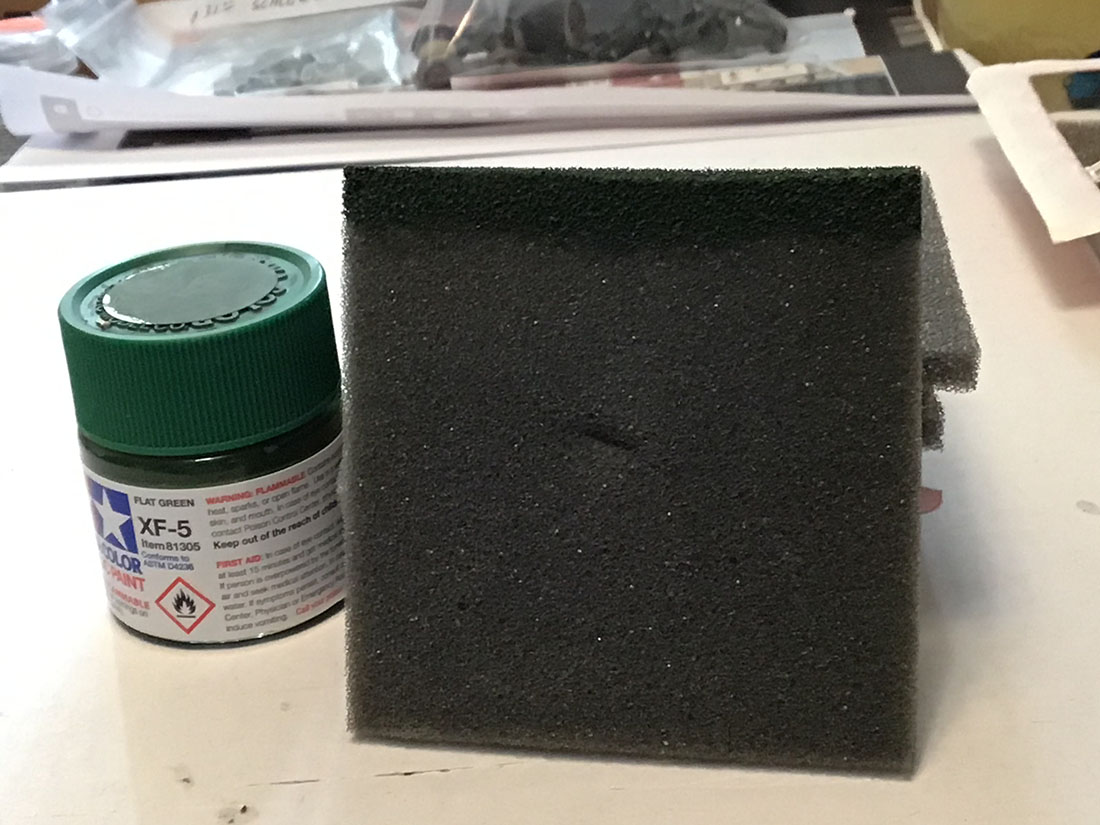
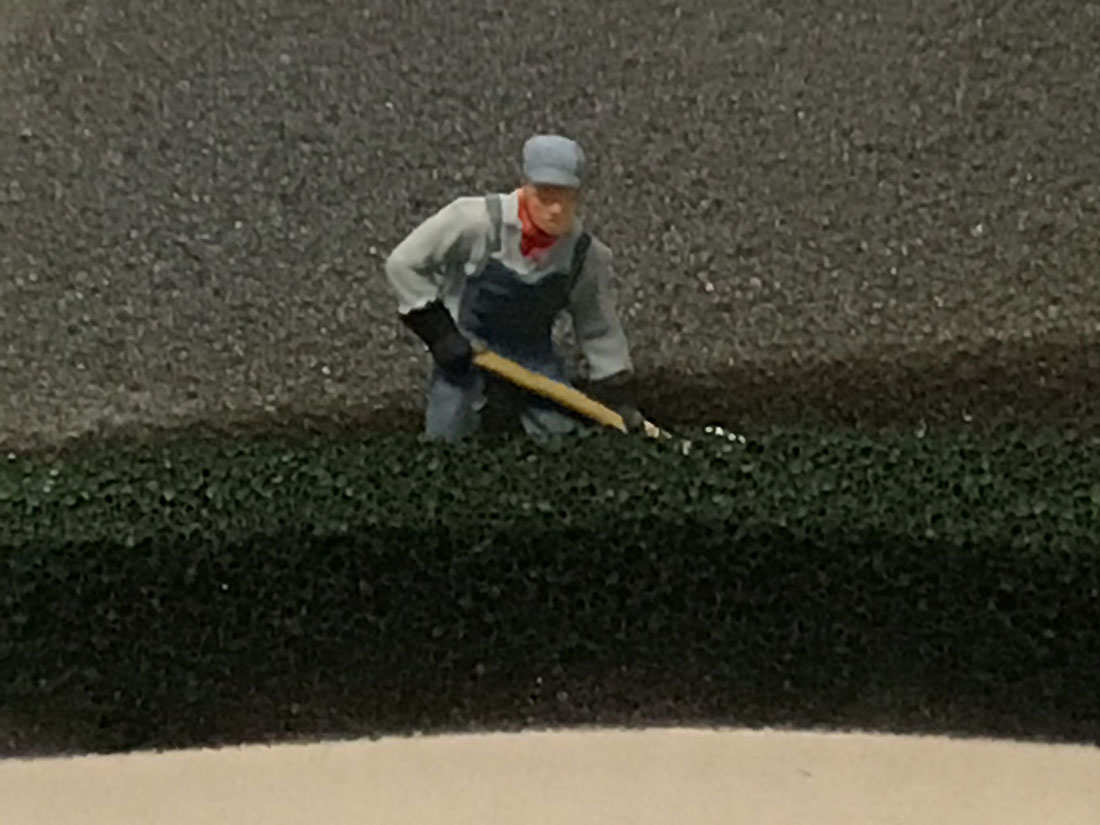
Making Hedges – EASY
We have all bought scenery items for our layouts. I wanted to add some hedges to my layout around some of the buildings. I went to the hobby store and the person in front of me bought the last two items. I asked to see what they looked like; they looked just like a sponge.
When I go home I found a scenery package that was opened and in it were square sponge like packing. I painted them green and cut off a strip and they looked just like hedges. See the pictures below.
You can paint them any color and you can cut them up to make them look more natural.
Commissary Building (unfinished): Now that I am 99% finished with the engine yard, I started on the building for the Commissary Yard.
Below are pictures of the model I am building. It is not yet completed but I think it looks pretty good and I thought I would add to this blog.
Well, thank you for watching and reading.
Hope you enjoyed it and if I hope I gave someone ideas about their layout like you guys have given me.
Gary M.”
A huge thank you to Gary for sharing his HO scale guardrails step-by-step. What an update!
If you missed Gary’s last update, it’s here.
That’s all for today folks. Please do keep ’em coming.
And if you’re anything like me and want to avoid just looking out of the window, the Beginner’s Guide is here.
Best
Al
PS Latest ebay cheat sheet is here.
PPS More HO scale layouts here if that’s your thing.


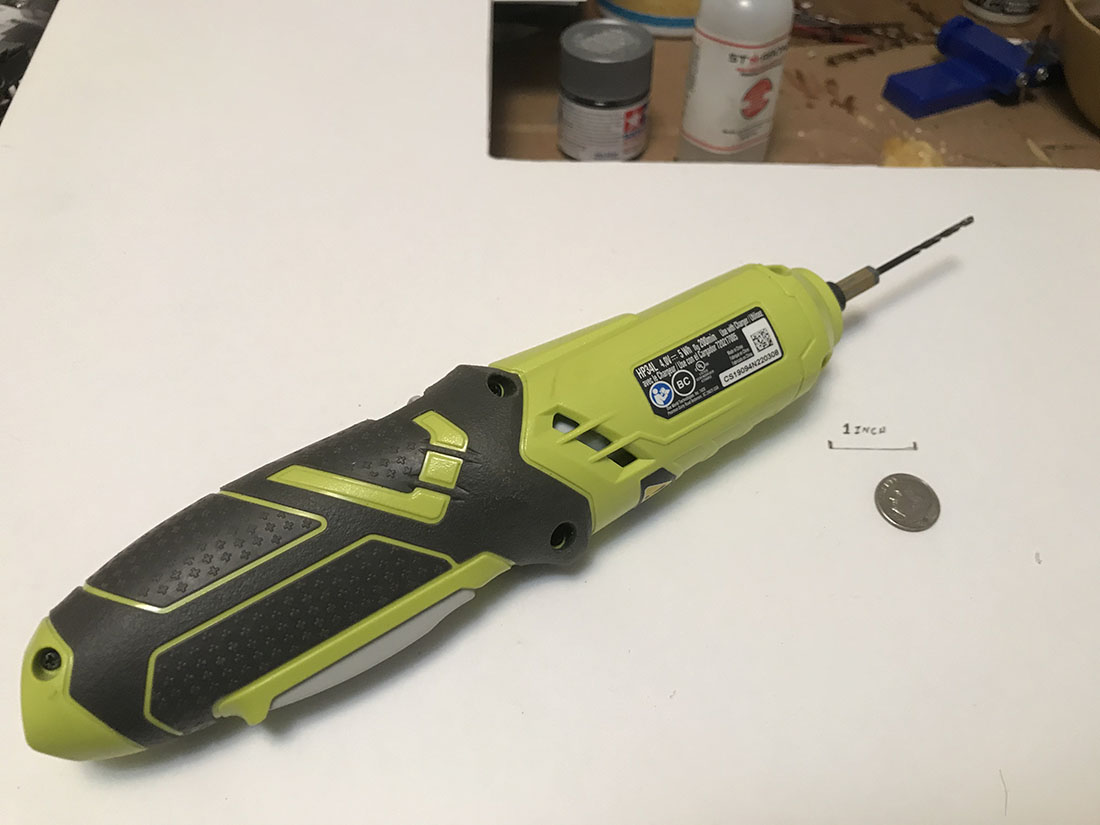
where did you find the drill.adapter?
Many thanks Gary. I so appreciate the many hints and creative ideas. When I was commuting we went thru the “Yards” and it was fascinating to see what was going on and now in my recliner can see what fascinating goings on are on your layout.
They were always changing something so I guess you must too for all our benefit.
All the best- Be safe.
George from NY
Very nice work, and also ingenious. All you do helps bring life to Sunnyside. Congrats, Gary!
Gary living walking distance from the yard at one time. I remember the ramps and the bridges over the yard. Friends and relatives work there in the 60.
To Mel Perry…. The drill bit you saw in the picture was from drill bit set you can find on EBAY for $4.99. Get the set called CRAFTSMAN PROFESSIONAL DRILL BIT SET. It cost $4.99 plus $7.75 shipping and has the proper size shaft that will fit into a 1/4″ inch hand drill (the one in the picture is from Home Depot).
Also, and you might like this better….. on EBAY search for a 1/4″ inch KEYLESS DRILL BIT CHUCK CHANGE ADAPTER CONVERTER SHANK. Get the one for $5.89 and free shipping. With this chuck you can use very fine drill bits.
I have both and use both for various projects.
Gary M from Long Island, NY
Gary, Thhanks for sharing your creative and money-saving ideas with us. I’m very impressed by your modeling of the Sunnyside Yard even though I’ve never seen the prototype. Your new commisary building is wonderful with all the little details you’ve added to make it come to life.
One thing I noticed is that you’re using regular cardboard as the base for the building. I would suggest that foamcore would be a more environmentally stable base for your buildings. It’s available in sheets that are 3/16 to 1/4 inch thick at Hobby Lobby for a few $ per sheet. Also, Dollar Tree carries it in 20 x 26 x 3/16 inch sheets for a dollar per sheet, so it’s not expensive.
To William in NM – if you go on line and search for “pictures of Sunnyside Yard queens NY” you will see some great pictures of Sunnyside Yard. My layout is just the basics of the yard…..the passenger yard, the commissary buildings and the engine yard. I did not have enough room to add the two Long Island Railroad yards that were part of the complex and the south east staging yard where the postal service was. Just to correct one thing you mentioned, the bases for my buildings is not cardboard but thin balsa modeling wood. But I will that a look at that foamcore that you mentioned. Thanks for your remarks and stay healthy and safe during these times.
Gary M from Long Island
I use sanding pads that are a very wirey sponge shaped item found at my local home depot. I pull it apart, spray paint it different shades of green and brown and adhere it to my outdoor sceenery with silicon sealer. Looks just like desert sage brush. And it’s cheap.
nice building I like the coke machine
To Carl Angdahl….. Than you for that idea……I have some areas around my layout that could use some filled in scenery like dead grass…….. I am going to try that.
Thank You,
Gary M from Long Island
Another ground cover/ foliage tip: We have a relative that sends us floral displays several times a year. After the live flowers die, I recycle what I can save for future use. I clean all the dead bits and piece from the green floral foam and let it air dry completely. Since the foam is very messy, I then place it into large heavy duty resealable plastic bag and break or cut it up into chunks that can then be crushed inside the bag into either smaller pieces or to a fine powder depending on its future use.
After watching Virtual Railfan Live for a few years from here in the UK, what a wonderful representation the layout is, with so many tips as well, look forward to seeing more.
Cheers Phil.