Tony’s been back in touch with his excellent model train diorama.
If you missed his last post, it’s here. Have a look at what he’s been busy with:
“Hi Alistair-
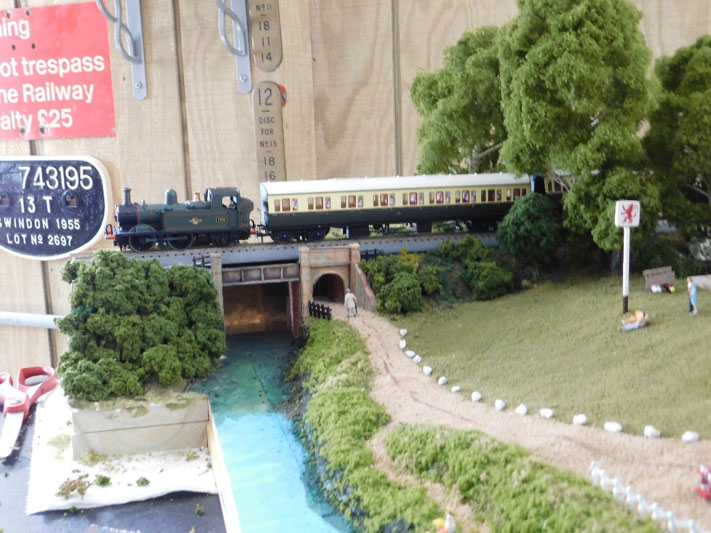
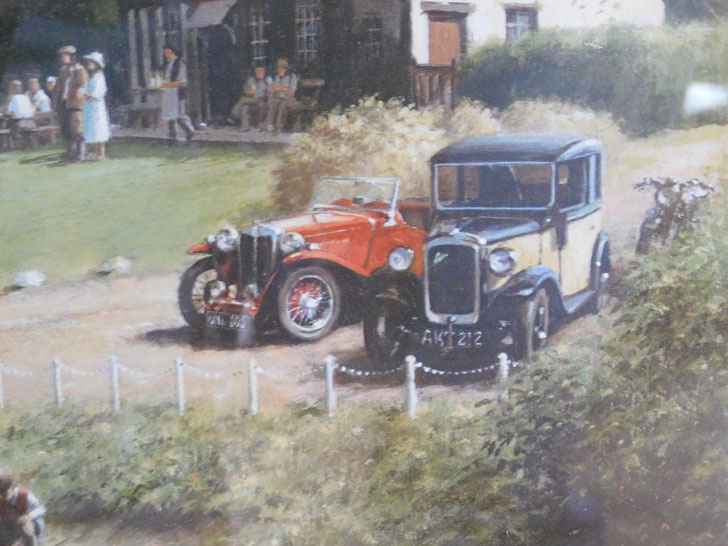
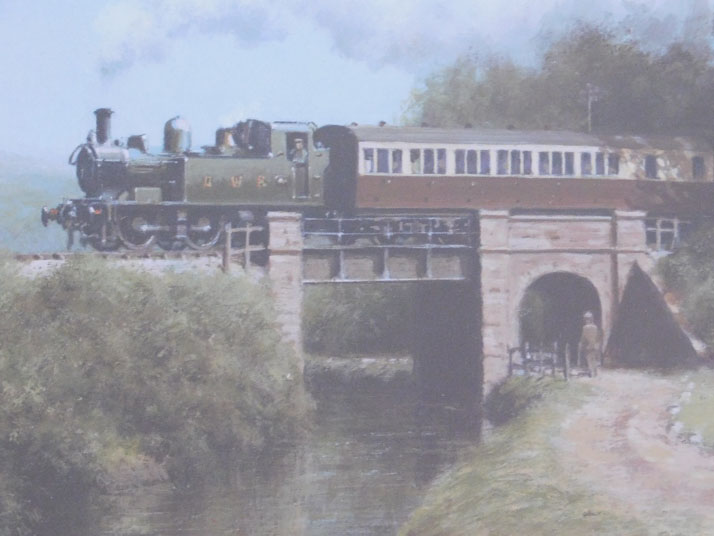
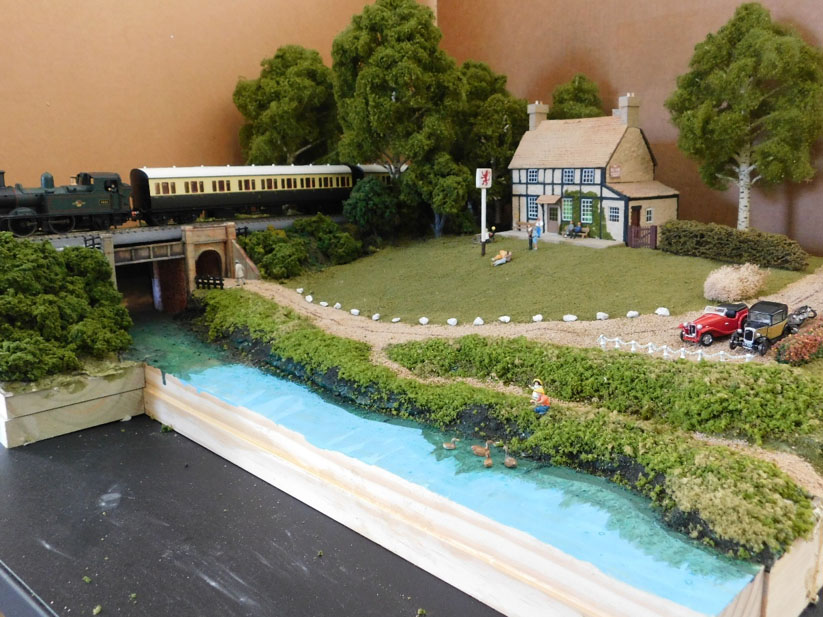
Here is the final segment of my diorama based on “The Riverside Local” by Don Breckon.
Just a quick review of the first two segments. I decided to build a diorama of this great painting as a modelling exercise, but also with plans to incorporate it in my future OO layout.
My original attempt to model the entire scene was abandoned after not being able to get the perspective right.
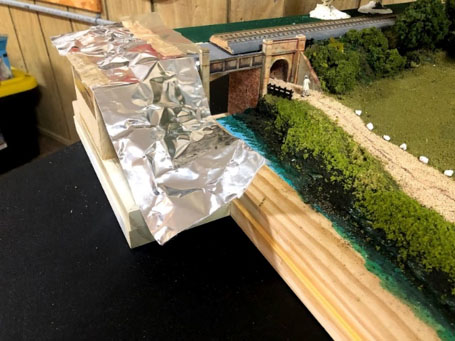
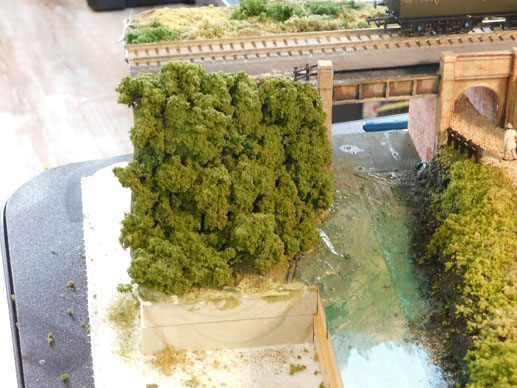
I decided to try again, modelling just the right side- to the river bank and this worked out better. Here is where I left off in the first post-
And here is where I left it at the second post-
All the final little details, of course, took a lot of time. That’s the fun with a model train diorama.
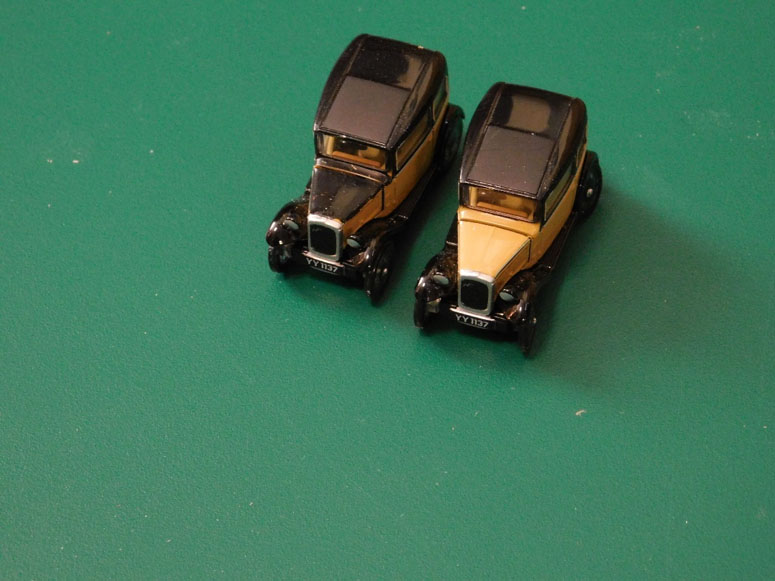
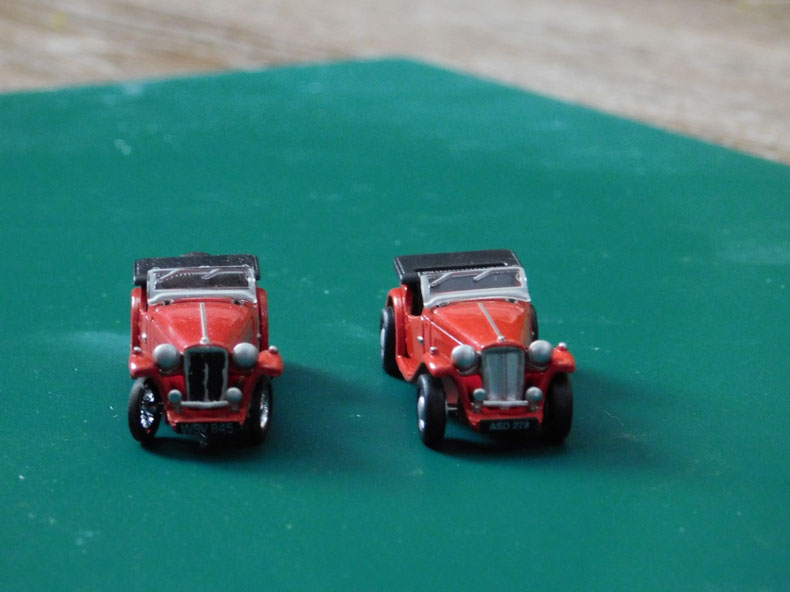
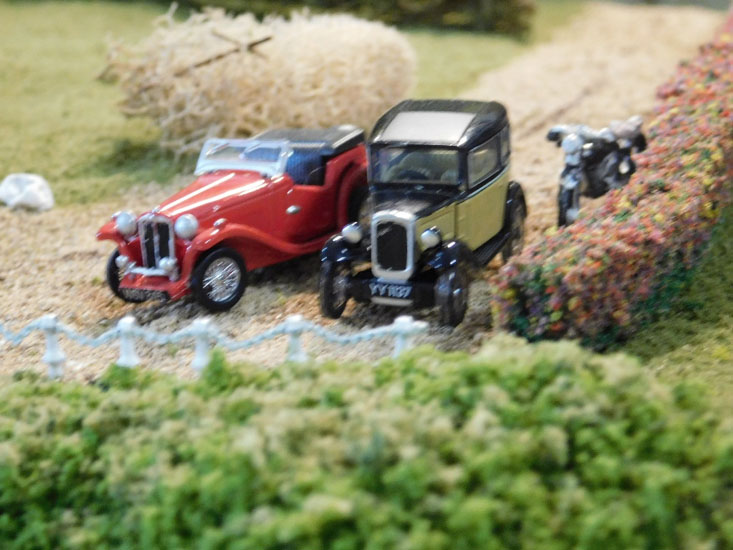
Starting with the two vehicles, I was lucky to find that the excellent Oxford range of vehicles has a OO model of an Austin 7 and MG TC in the same colors as the painting. There were just a couple of modifications needed.
The bonnet (hood to us colonists) of the Austin 7 is black in the painting- a simple fix.
The TC needed a couple of changes. Painting the grill black, as in the painting, was easy and, I think, improves the look of the model.
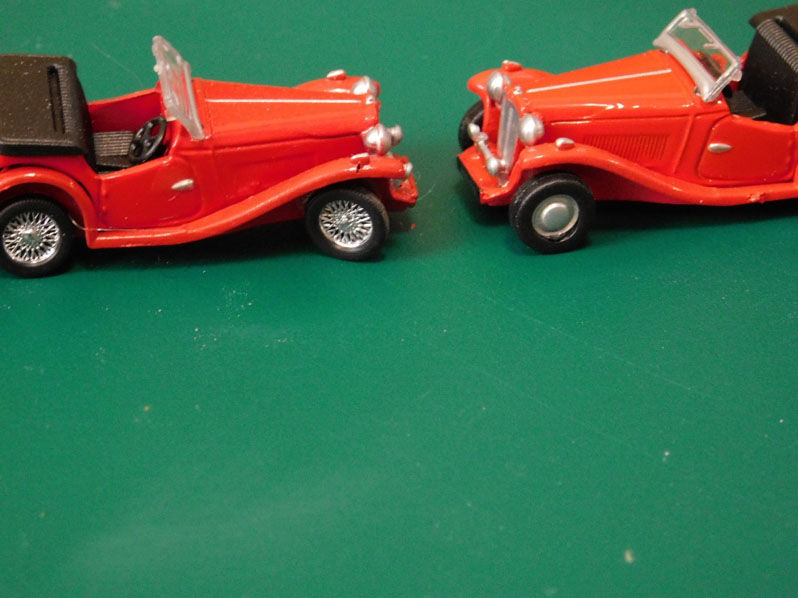
The second change I found a bit annoying. Having owned a TC for 35 years, I am sure that no TCs were built with disc wheels, as in the model. They all had 19” wire wheels, unlike the later TD which had 15” disc wheels- which seems to be the inspiration for this model.
For such an excellent range of vehicles, this is a disappointing oversight. Luckily, I had a model of a TC in HO that had the correct wheels. The model itself was too small to use, but the wheels, although slightly under-sized, look fine.
Swapping the wheels also gave me the opportunity to ‘turn’ the front wheels to the right. This matches the painting, but it is a modification I often make to vehicles, adding a touch of realism.
These 2 cars are parked, but I always add drivers and passengers to vehicles that are on the road (perhaps the subject of a future post). The motorbike that is only partly in sight behind a hedge is not recognizable as to manufacturer (at least not to me). I had an old white metal kit around that did the trick.
I also had a white metal fence kit that nicely matches the painting. White metal, of course, is a misnomer, as the metal is silver.
After painting the fence poles and chain, the chain would not fit through the holes in the poles. Drilling out the holes was a little tricky but I had some good luck. The kit contained 10 poles. One broke during the drilling process, but the painting has just 9 poles. It doesn’t usually work out that way!
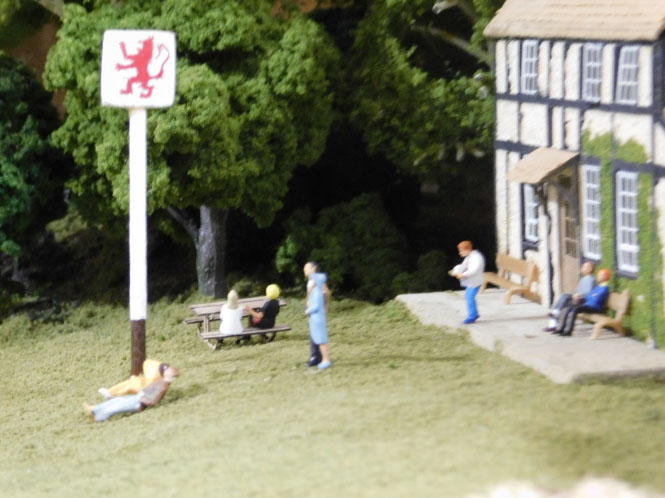
There are 13 figures in the painting and trying to match them to my model train diorama was quite a challenge. So as not to be too obsessive, I finally gave up looking for exact matches of poses and settled for close approximations.
I also ran into the perspective problem again. The model people (whether HO or OO) look smaller than in the painting. Looking at the diorama apart from the picture, the figures look fine, although they are placed in somewhat odd positions on the lawn (the positions work for the 2D painting).
I will probably change the positioning when I eventually install this in my layout. Please forgive some of these photos- it’s tough to accurately match angles!
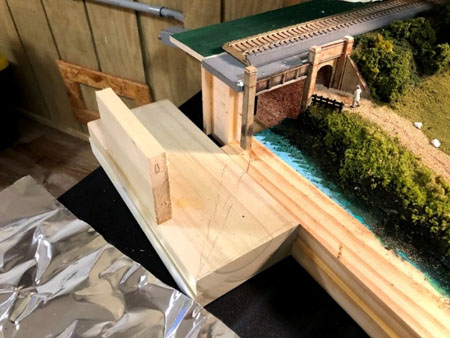
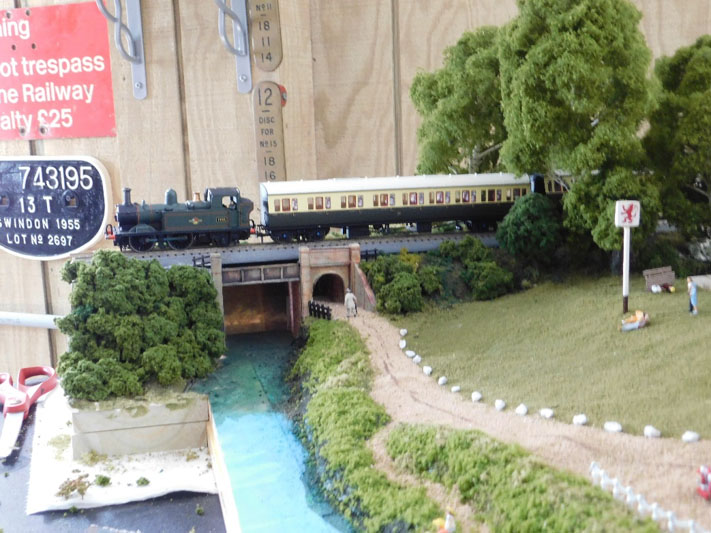
I wasn’t planning on detailing the bridge as this will clearly change when installed in my layout, but the loco is across the bridge in the painting and I wanted to match that, so I had to add a portion of the bank on the other side of the river. This was not too much work, and I think it did the trick.
I knew the ’back’ of the scene was going to present the biggest perspective problem and I originally planned to look for a TT scale loco and carriages to address this issue.
I finally decided this would be a waste of time and money, so I just used OO. This looks fine on its own, but compared to the painting, the models look a little big. You can see that the coach sits much further to the right on the model than the painting. TT scale would probably have been about right.
The final issue was the river. I originally planned to model the water (in part) but I would have to rip it out later so I decided to just lay down some paint for now as a rough representation. I think it looks OK- and this way I got to include the children feeding the ducks (more white metal).
This whole exercise was fun and gave me some things to think about when modelling scenery. Other than an outdoor G-scale, I haven’t modelled trains for many years and this was a good brush-up of skills and techniques before starting on my new layout. And I expect most of us see old photos of scenes that we would like our layout to look like, and I think this shows that copying a scene is not a bad idea.
Just a quick tip that I came up with recently. When scratch building, I am always looking for the right size and shape of balsa strips. I had balsa sitting around in various places, and I often didn’t find what I needed.
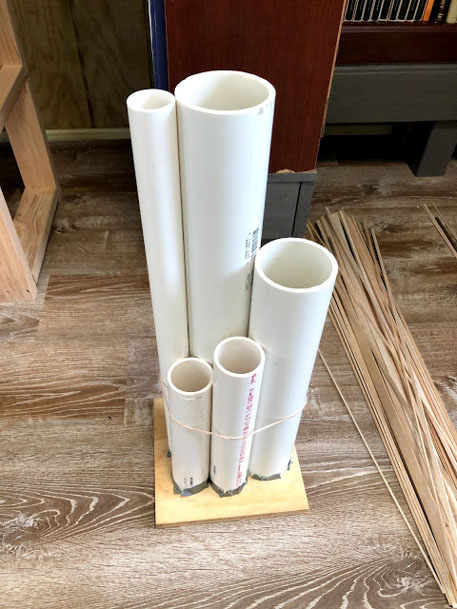
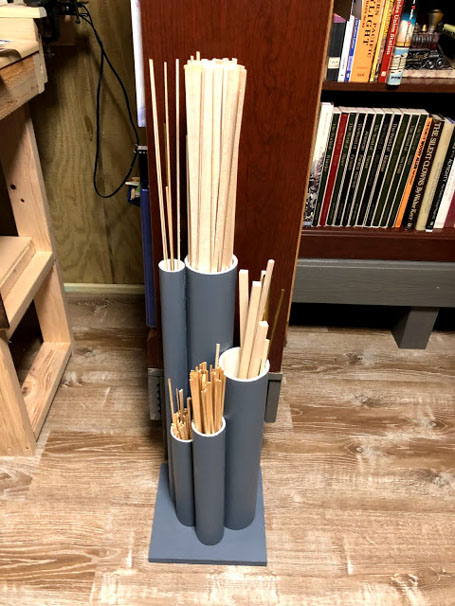
I decided to make a start on getting my work area organized by organizing the balsa. I gathered some scraps of PCV pipe- 1 ½, 2 ½ and 3 ½” diameters (sorry, don’t know the mm equivalents).
I collected all my strips of balsa and laid them out according to size. I then cut the pipe to various lengths and glued them to each other. I made a wood base- finishing it all off with some grey paint. There is room to add another pipe or 2 if needed. A box with all the smaller scraps completed my organization.
As always, thanks Alastair- keep up the great work!
Tony
Kitty Hawk, North Carolina”
A huge thanks to Tony for sharing his model train diorama – and a small apology – he mailed me this upate but it fell through the cracks. I missed it. Fortunately though he got back in touch and I’m pleased to be posting this instalment.
That’s all for this time, folks.
Please do keep ’em coming, because we need these update more than ever right now.
Stay sane. Keep busy. The Beginner’s Guide is here.
Best
Al
PS Latest ebay cheat sheet is here.
PPS More HO scale trains here if that’s your thing.






What a delight to watch a photo come to “life”! Thanks for sharing them all.
My grandfather worked for the PA. RR and prior to complete conversion to steam, I was given the great opportunity to ride in the cab of a streamer headed up from the Altoona yards to the round table, turning around and back to the shops. So many memories of years ago triggered by your photos.
Also, I had an MG A model and while it did not have the class in my mind of a TC or TD, it was a pretty cool car to have while going to school. Always kept a ball pean hammer back of the passenger seat to give the SU fuel pump a rap when it quit and away we went again.
Needless to say, impressed with your modeling abilities.
David Rines, Clemson University area of the SC upstate.
I’ve been following Tony’s 3-D rendering of a charming 2-D scene, and just have to say that the end result is absolutely wonderful. Many people say “I wish I could turn myself into miniature scale and visit/partake of this world”, and this pleasant, peaceful scene certainly inspires such sentiments. Magnificent job mate!
Tony, absolutely superb modelling
What a beautiful job, and masterful modeling. Thank you for sharing. Why is it that we are so critical of our own work?
great job
Tony
Great job. A man with your talents should attack a layout with your artistic mind painting the canvas. As with many of the Artists in Big Al’s group we, the fan base, cannot wait to see what the next “Show” will be.
Love Kitty Hawk. A toast of Kill devil to you!
Be safe
George from NY
FANTASTIC!
Great scene. I don’t think I would have the patience to recreate a scene in such detail. You’ve done a great job.
Jack in Pa.
Fabulous detail. I just loved the automobiles. Amazing epoch details.
A beautiful recreation of a lovely painted scene. Have enjoyed watching your diorama take shape. Thank you very much for sharing the process with us.
Really liked the pipe idea to store the balsa. Why didn’t I think of that? Very meticulas details. Nice!
Tony…..that is a fantastic piece of work.
Gary M from Long Island
I am a big fan of Don Breckon, to see that painting in 3d is brilliant. Plenty more paintings in the book to inspire 3d rendering!
Tony… GREAT job in bringing that photo to life.
I loved reading about your recreation of the painting.
From a TD owner, and a student of Morris Garage models, I agree 100% with all you’ve said on the TC v. the TD details.
Looks great
Wow, that is some excellent work.
What an amazingly creative thought — and execution! Congratulations!
Absolutely marvelous. Fantastic attention to detail.
That a beautiful module you have. Your attention to detail to bring the painting to life is impressive !! Can’t wait to see everything pulled together
Tony,
Breckton would be quite pleased with your tribute to this talents. As to the problem of perspective, why not position a replica of the frame on a stand of some sort, and invite your visitors to look through the frame to get the right perspective.
Bravo for your painstaking effort and thanks for sharing it with us.
George
Tony, wow, your work is awesome! Thank you for sharing!
Tony, absolutely fantastic. I wish I had that kind of patience. The motorcycle in the picture appears to be an Indian judging from the size of the headlight.
Jerry, Shingletown California.
ABSOLUTELY WOW, WOW, WOW!!! Such detail is incredible. Congratulations on having the keen eyes to do this diorama
Ha, Ha – The painting needs cleaning to bring it up to the standard of the model – LOL Andrew
Love your idea of organizing the balsa with PVC pipe. Going to use that concept to improve my work area. Many thanks for your “thinking – out – of – the – box!”
TONY: Man, what patients! And beautiful work. I also organized my strip wood and Evergreen. I used to work in an auto parts store, and was able to get tubes used to hold break line tubing. BUD
Excellent job Tony..very well done. I know the painting and you have captured the setting well. I enjoyed the discourse on the TC as I too own one and indeed have the Oxford Models version. Yes the sold wheels are incorrect and your conversion is very neat. I thought your storage system was handy and I may well follow that. The TC (the real one!) that we own shares the garage with the railway which is under construction. I work in EM which is a fiddle with track conversion and wheel widening etc. i may well make a posting some time in the future!
I think this is the best water I’ve ever seen! It’s such a gorgeous blue. Can he tell us how he created it and what he used to achieve such a spectacular color?? Thanks so much.
I am currently working on a similar project. My picture is off of and old 2017 Calander that I found while looking for the new one. Fortunately, for me. it is not as complex as yours is. I am abought halfway from finishing. To many other things going on right now. After seeing this post I may need to add a couple things to my project to improve it.
Hat
Brilliant work. Captured the scene and mood beautifully.
Well done.
Tony,
Brilliant! Museum Quality! It is very good to see that someone is employing their “HI” instead of “AI” !
Tony, you did a “bang up” job on your diarama. Just fantastic! There’s no question of what you were trying to represent. When I started my layout I imagined having a diarama but I wanted my diarama to be my complete 11’x18’ layout. People have jeered me for placing so much emphasis on the scenes and detail and not focusing on train operations. To me, the joy in this hobby is creating the scenes. Again, great job. I can’t wait to see your “diarama train layout”. To really aggravate people, make it HUGE and realistic! LOL
Tony,
This is amazing and what a wonderful idea to model a scenic painting! Even if it just stays at a diorama it is beautiful and a great way to model for a small space!
Wonderful for the bookshelf and office. We colonists call diorama’s “scratch scenes.”
This is an amazing piece.
I love how you have taken inspiration and turned one art into another. Well done.
old cars, old trains, gotta love em.
I used those tubes used to keep golf clubs in in golf bags.