Here’s how to make model railroad scenery – Arnie does a stunning job of it.
“Hi Al,
Thanks for posting my response to readers questions about my SV&GS layout video. Apparently, since my response posted, a number of readers asked about a “How-To” on the mountains and tunnels on my layout.
Since I am not doing any new mountain or tunnel construction, I don’t have a video I can produce on this. However, I found some old photos of very early construction of the layout dating back about 10 years that I thought would be helpful regarding how the mountains and tunnels were made.
Since a picture is worth a thousand words, I decided to do a sort of “Before-and-After” image sequence accompanied by some step-by-step commentary. I’ve also placed text on the photos that is helpful. However, since the photos when posted are rather small, it may be hard to read what is on the photos. But I think the accompanying text should be sufficient.
I picked a Before & After sequence of 3 photos of a waterfall on the mountain rock face for the How-To. The same general construction principles apply to all the rock face mountain and cliff surfaces on my layout. And the example using a waterfall also explains a bit about creating water scenes. Additionally, the same painting and weathering principles are applied to creation of the tunnel portals.
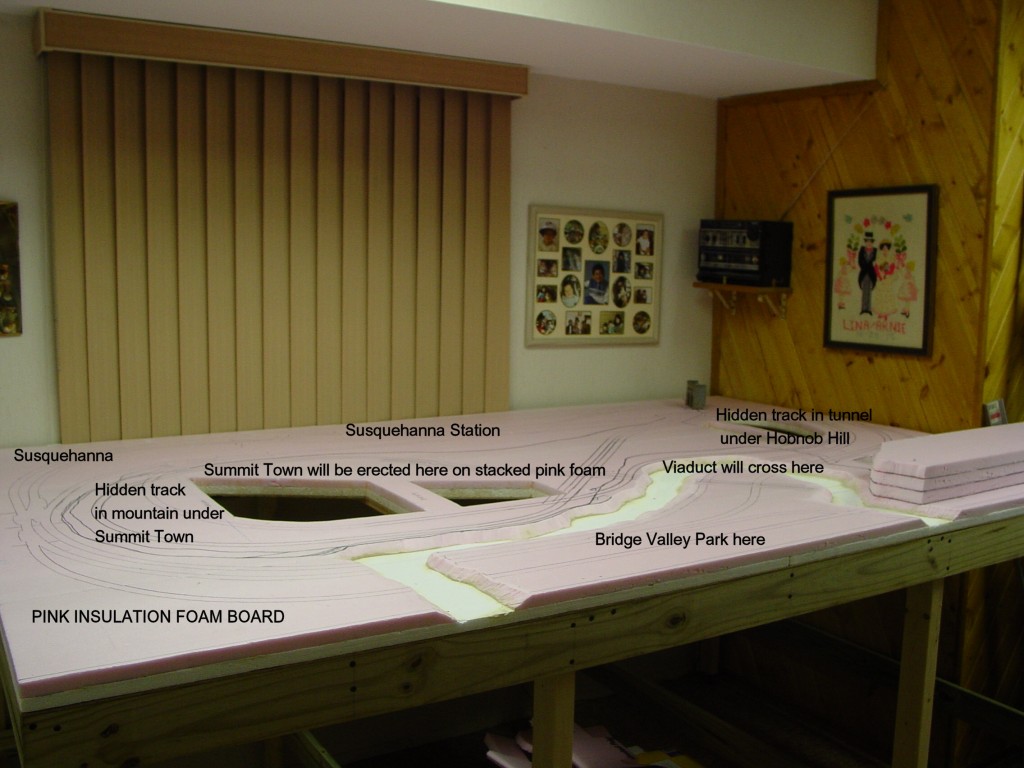
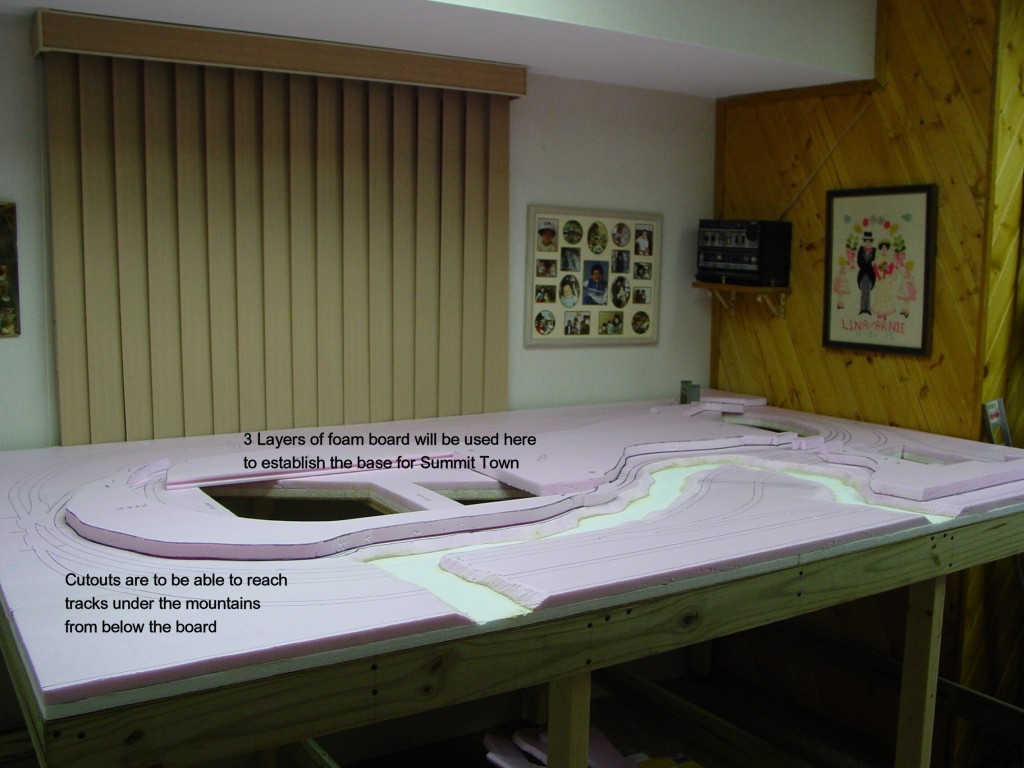
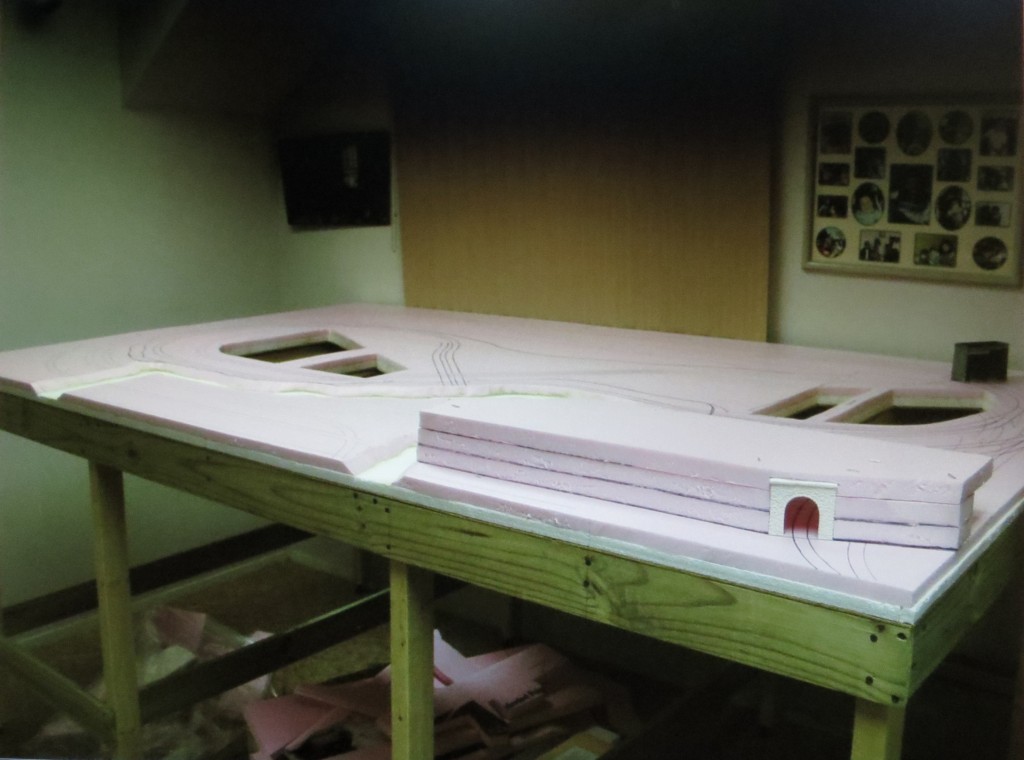
Let me start by saying that I tried to create my layout to be as light as possible. So instead of using the traditional “hard shell” technique which uses a heavier substructure of wood and a lot of wood bracing covered with plaster cloth…I chose to use light weight pink extruded foam board for the substructure that underlies all elevated areas (i.e., mountains & hills) and general terrain surfaces (e.g., roadways). So that’s the technique on which the How-To is based.
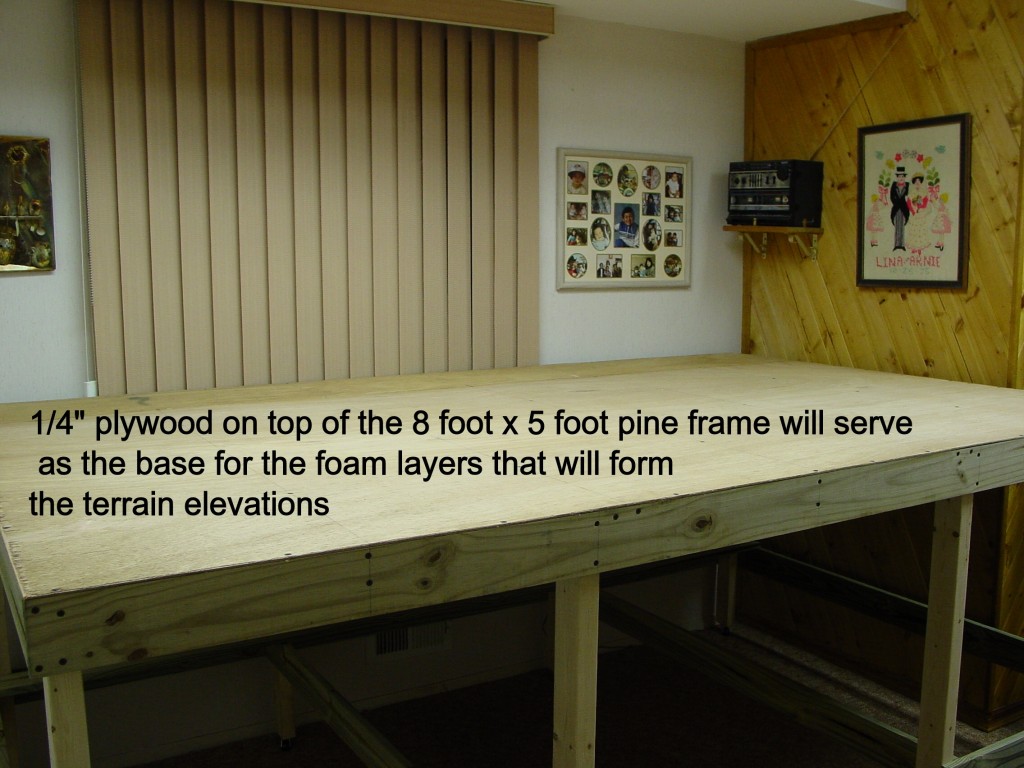
The first few photos are just Before & After views of the entire layout to show my model railroad scenery. They show the rectangular plywood benchwork that serves as the substructure for the foam board based terrain. Then there are photos of the initial foam board placement. Layers are stacked like layers of a cake and carved as needed until the desired heights are obtained.
Now for the How-To:
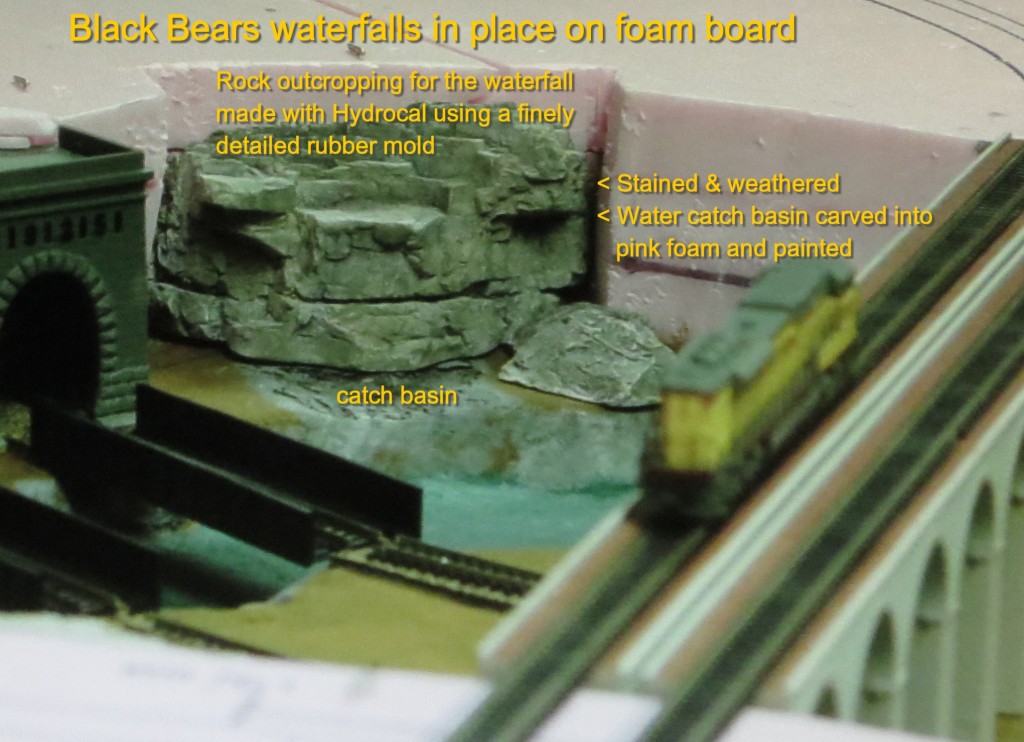
• All finely detailed rock faces were made from rubber molds using Hydrocal. This is an extremely fine plaster powder for modeling. Because of its extremely fine nature, it takes on super detail when mixed and poured into the highly detailed rock molds. It also dries to form a casting that is very dense and much harder than conventional plaster. So it won’t break or chip easily.
• When thoroughly dried, the castings are then ‘painted’ with various diluted blackish and gray shades of washes of stain and acrylic paints. (Or use other colors as appropriate to the terrain regions being modeled.)
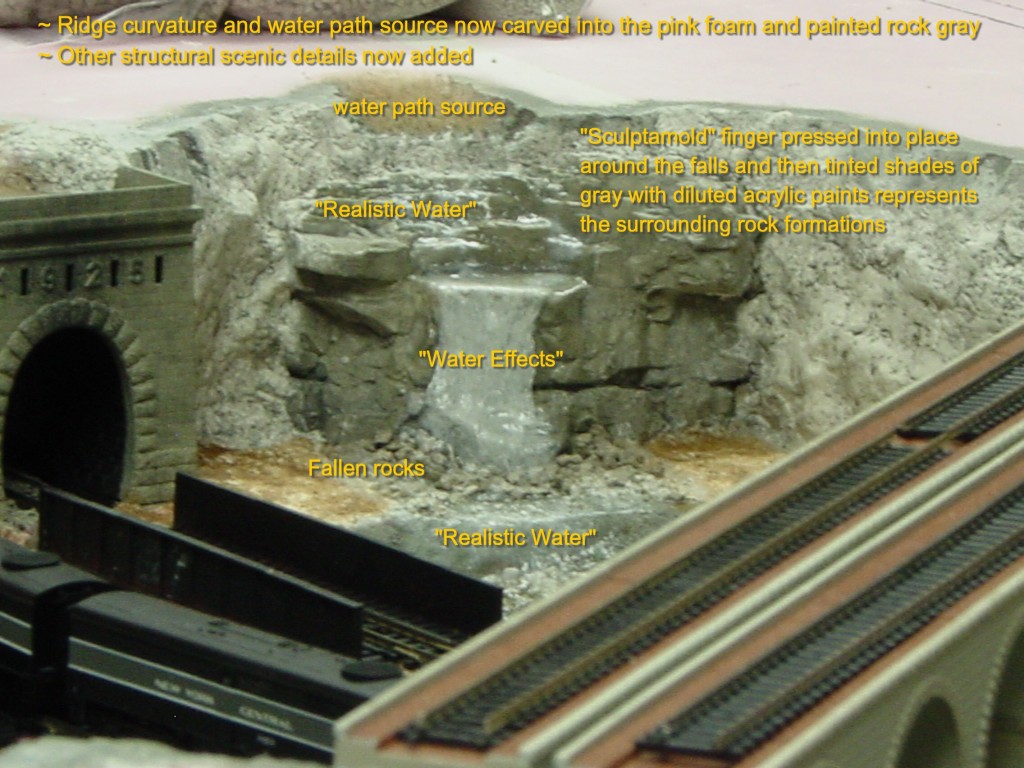
• The dried castings are then glued against the supporting pink extruded foam surfaces to create rock outcroppings and cliff walls. The foam board can be carved and painted where needed to blend into the rock formations. (See photos 1 and 2 of the waterfall.) Placing a string of such rock castings in line next to each other is the basis for creating a length of cliff or a rocky- faced mountain side. To provide a continuous, uninterrupted wall of rock, the spaces between the castings are filled with Sculptamold (by Scenic Express). This is a paper mache-like product of plaster powder and paper fibers. When wet, it forms a putty-like mass that is then pressed into the areas around the rock castings. When dry, the Sculptamold can be stained in the same way as the Hydrocal castings.
• Pieces of small fallen rocks and gravel of the same color are then placed on larger horizontal rock surfaces and at the base of mountains/hills and glued into place. (See photo 2 of the waterfall.)
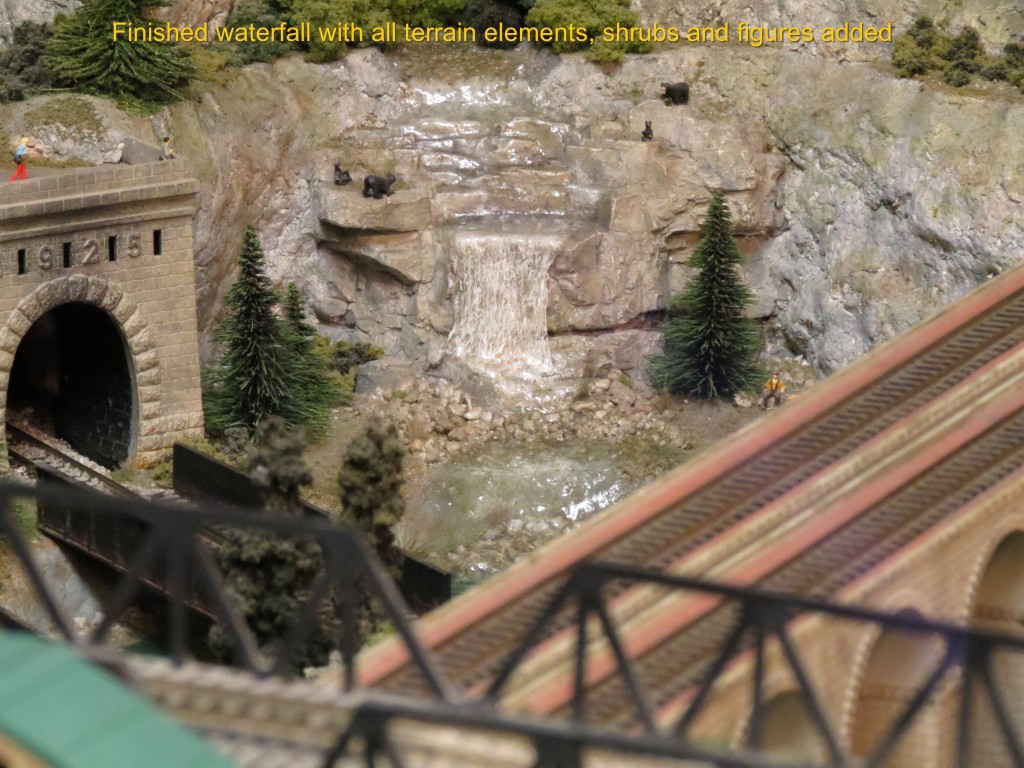
• Then to create a weathered look with natural color variations in the stone, ‘dry brushing’ with acrylic paints is used. This means you dip the tip of a paint brush of the desired width into the desired color of paint and then vertically tap the tip of the brush onto a surface (e.g., a piece of foam board or paper towel) until the tip is almost dry. Then you lightly brush that color over the rocky surfaces. I used browns and greens to simulate soil, earth and moss on the rocks. (See photo 3 of the completed waterfall.)
• The water on the horizontal surfaces of the waterfall is created using “Realistic Water.” It’s brushed on the surfaces of the water path of the falls. Additional coats are added to create more depth and sheen. The product “Water Effects” is used to create the falling water. The falling water is made off the waterfall and when dried is placed on the falls and glued in place using a coat of “Realistic Water” at the contact points of the ledge and catch basin on the ground. The srugace of the falling water is then lightly dry brushed with white paint to create the illusion of moving aerated water. (See photo 3 of the completed waterfall.)
• Then turf (finely ground foam rubber of various colors) is sprinkled and glued to the ground and between the base rocks at the falls. I used earth, soil and mossy turf colors to finish the ground cover. Add foliage and figures and you have a very realistic scene.
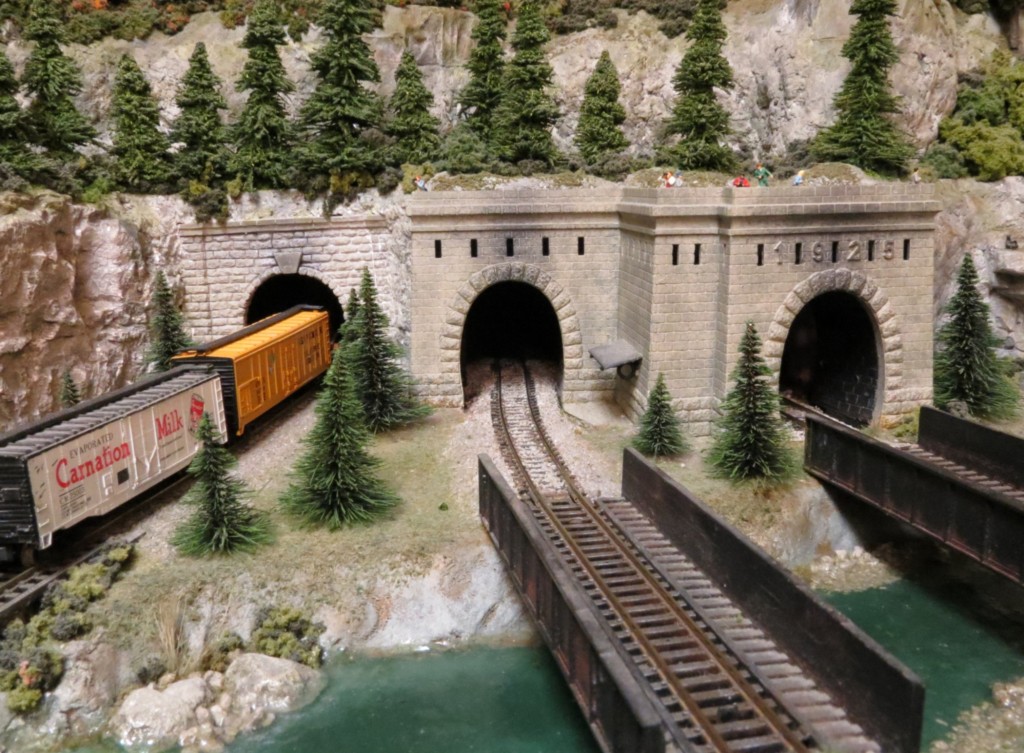
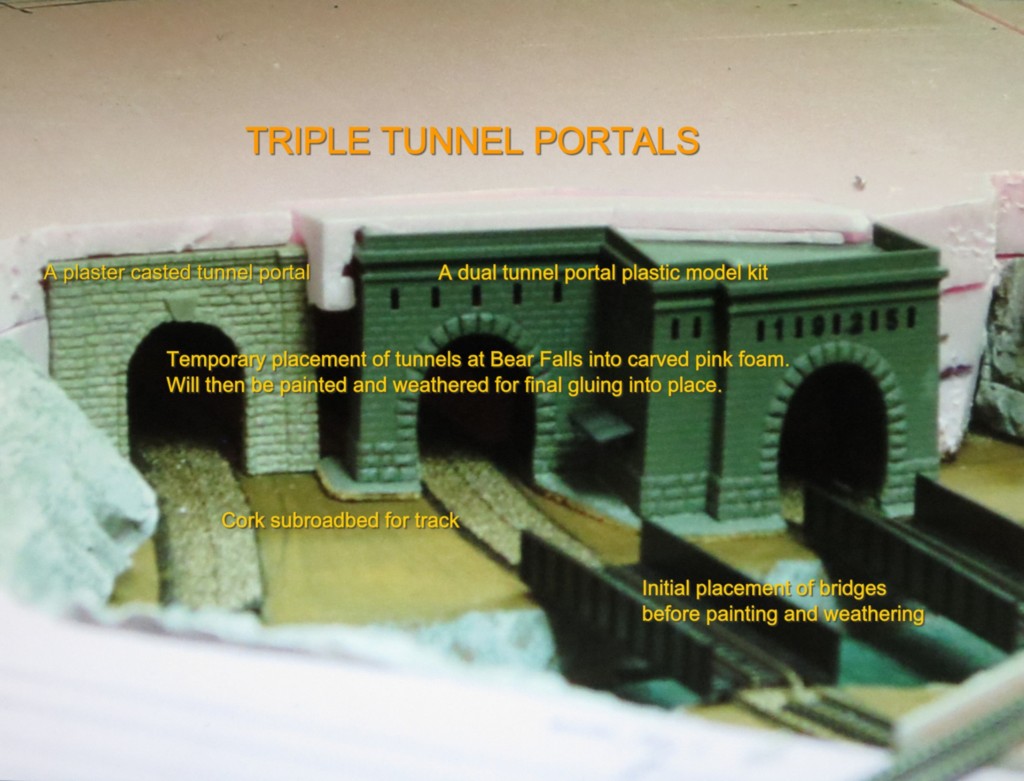
The same staining and dry brushing techniques were also used on plaster castings of tunnel portals (made by Chooch). (See the photo of the finished triple tunnel portals.)
Painting with acrylic paints and dry brushing were also used on plastic tunnel portals and other structures (e.g., bridges and buildings) wherever aging and weathering effects were wanted for the model railroad scenery.
I hope this serves to take the mystery out of creating scenery of this type.
Regards,
Arnie”
(The below images are clickable)
A huge, big, thank you to Arnie. An excellent ‘how to’ on making model railroad scenery.
Here’s another one on making tunnels.
And here’s one on inclines to make those mountains come alive.
Remember, you can click on the above images to make them bigger.
I look forward to all the scenery pics this is going to inspire!
And of course, there’s here too.
Best
Al
PS Looking for some of the print out scenery? It’s here.


Looks like another great how to thanks Arnie.
Very nice. Great information.
Some really great information here keep up the good work, Donovan
I was keen to know how Arnie made such great scenery and what he has shown us here has helped me enormously.
Thanks a lot Arnie.
Great information. Thanks for taking the time to put it together for all of us. Rob
Great information Arnie thanks for sharing.
Thanks Al,
regards,
Tom
Man that’s a great how to and thanks for providing it.
Thanks for shareing your expertise in this method of landscapping as it’s been very helpful, so please continue to share with us all as we never cease to learn newer and easier way’s of doing things, so again Thank You Arnie!!!
Great scenery Arnie thanks for sharing the info with us
BLACK BEARS WATERFALL AND THREE TUNNELS ARE VERY BEAUTIFUL.
Yo Arnie I think I just saw a kid through a rock of the top of the tunnel. Great job and goodmmotivation for me.
The waterfall looks great, what did you use to make the water?
Your work is completely inspiring Arnie! Thank you sooo much for sharing with us your talents! By any chance can you share or create videos or a slideshow of all your before and after pictures of the project coming together? What you shared here is a tease B-)
What is the best technique for retrieving rolling stock that derails inside a tunnel?
“Arnie shows how he makes his scenery” I’m curious as to why all the photos published are always so small which makes it impossible to see any detail from the web page. I have tried 3 top web browsers and still get the same photo resolution. This is disappointing as the amount of time “Arnie” took to detail each photo is lost because the photo is scaled down so far in size. Is there anyway to display and keep the original photo resolution on the web page.
Thanks,
Great work of Art and presentation. Did you do it all yourself or had assistance?
How long did it take to do this wonderful master piece?
I have admired this layout in the Atlas book for sometime now. I just tore down my third layout and ready to start again and it was a toss up between this and an N scale version of the Central Midland (Atlas HO layout). My space is 12’x6′ and I think it will be the Gulf Summit plan. Thanks Arnie for giving me the inspiration to build her.
Rich
Pink Foam vs. Woodland Scenics style (what starting at 1/2 inch thick)…
I have always used the latter, but want to know about advantages of the former…For me weight is a big issue as this layour needs to be easibly transported [2 – 2×4 modules and 1 – 3×4 to make “almost” a 4×8 (with one corner missing)]
SUPERB scenery. The water effect is absolutely PERFECT… along with the tunnels, landscaping et al. OUTSTANDING….. love seeing the detail of these layouts.
Thanks
Jim
What a great way for an amateur model railroader to learn how to start a layout. Thank’s Arnie. Keep up the good work. That was a great help. Rocco from northern new jersey
If you need to make the pictures bigger, just click on the picture in Google and a drop down menu will appear. Select “open image in new tab” that will give you an enlarged copy of the picture.
Arne is a champ! Wonderful work and photos. I’ve been viewing these e-mails for a while now and have garnered a wealth of invaluable information .
Thanks for the great job Al !!!
Simply outstanding!!!!!The talent just seems to flow from your fingers to the layout!!!
It must be nice to have a vivid imagination and to be able to transfer to layout.It seems to come quite naturally,are you an artist????
You did a great job on that plan. I am an old bugger and getting back into RR’ing with ‘N’. I wondered what you are using for train control because I seem to have created a fairly complex layout and need ideas as to multi train control of it. The choices I see are JMRI, Railroad.com and straight manual.
Again-great job and terrific scenery!
BIG thank you Arnie. wonderfully presented.
You are a man of many talents
George from NY
Arnie’s work is “master class,” as advertised.
Also, let’s not overlook the efforts of Al, for rooting around his archives to re-run Arnie’s workmanship.
Is Hyrocal available in the UK
As always, thank you Arnie, great stuff!!!
Thank you! Displaying your work and showing us how-to create one of our own is a great help to the Model Train community. You are Awesome!
Jerry Kaminsky
This is a super great detailed work on the layout.
Thanks Arnie…..See you at my house for a real lesson on how to. Ha Ha Beautiful scenery as always. Paul Ohio USA
Nice. It’s all in the detail. But it starts with a thoughtful plan. And Arnie has combined both to provide a masterpiece of model railroading. His talents and techniques are truly remarkable and inspirational.
Jim AZ
Hi All: Some tips: At least in my case in google Chrome a double click on the photo gives me an enlarged version of the photo. Hydrocal is available from Woodland Scenics. Foam insulation is also available in 2″ versions which makes building and sculpting hills easier than putting several layers together It is also strong. I use it as a base instead of plywood on my layouts Hyrocal can also be mixed in a small container and used to fill in around the moulded glued in rocks Saves buying another product. Ordinary paper towels can be dipped in a Hyrocal solution and used like plaster cloth. A lot cheaper.
I would love to see a track plan of thus railway, or a video of it.
That is what all of us newbies need, a step by step approach to building the basics, thank you a
Arnie, this is one email I will keep for reference.
Absolutely gorgeous.
Arnie is that frame constructed or pressure treated 2×4’s ? pressure treated is for outdoors Fumes could be toxic if still moist.Whit pine would have been better all around.
Hi Al,
Hope all is well with you during these trying times. And thanks again for re-posting my work. I’m always glad to lend a hand and provide helpful info to anyone who asks.
Arnie
Staten Island, NY
Kurt and others,
If a photo is too small, left click on it, then save. Then open a new Windows “window” and paste the photo into it. Then enlarge the photo by clicking on it and expand its size by dragging one of the four tiny corner circles out until the photo is a size that you can read. Boy, does his work pop out!
Another great set of photos and info from Arnie. I’m curious about who makes the double tunnel portal with all that fancy brickwork? Also, is it available in HO scale? It reminds me a little of the Moffat tunnel entrance in Colorado.
Kurt, in the Chrome web browser, I just double click on the photo which opens it in a new window. Within that window is a small circle with a plus (+) sign in the middle. Clicking on the plus sign brings up an image at maximum size and resolution where very fine details are easily viewed. Not all photos behave this way if the original is of limited resolution, the new window will not make it larger. Arnie’s photos are usually very high resolution.
WOW! Really nice.
I used to ask people if they had Hydrocal and nobody EVER knew what it was…but almost every other person used it for modelling mountains and terrain features. Nice to hear about it…makes me nostalgic for when I got interested in model railroading.
Frank in Orlando
Look great.!!!! Would like some more of it. Hope mine comes out that good.
Great work Arnie. I appreciate the window behind the layout…always have to work around something.
Bill
Arnie, wonderful work and you have given me some good ideas for a waterfall. Have you ever tried mixing a pigment with your hydrocal? It works pretty well and gives you a little heads up in the landscaping routine.
We are now part of a new Arnies Army. Golfers will know what I mean.
Mn Dan
Thanks again.
If I may say a few words. Arnie great info. I would lie to address all of us. In making a build what do you remember from years past or present? Small city life? the diner lined with trucks in the A.M ? maybe that rolling road from a mountain scape down into a town? The switch yards? those giant service bldgs or the electric trains of a gone by era? WE had viaducts the roads were under tracks back in my day. Electric trains from plant to plant as the plants used go generation to power the lines. Incorporate your layout into what you remember, if you had lined streets with mighty elms build it, show your past. JUst a word of advice, red
very nice especially the waterfall
Real kewl !!! 😎
I always marvel at how one creates scenery that looks so realistic, and your creation is an example of a well planned and completed design. You can be proud of your work, it is very good!