Bill’s been in touch – he’s very kindly shared how to make trees for model train layout:
“Great Day to you Al and fellow modelers
I’ve been taking a bit of a forced break from doing too much on my layouts lately due to continuing back issues.
Nothing a little surgery won’t fix here in the near future. While I can’t bend or twist much I have been turning attention to scratch building some trees that I intend to use on a new On30 logging layout I’ll add to the HO snd N scale layouts I have in the garage. No cars allowed anymore in there lol
The construction is straightforward for trees that really look good and cost much less than purchased trees.
Each tree averages around one dollar US in materials. There is upfront costs for materials with Rustic Wire being the largest cost but I e been averaging over 30 trees per spool so not bad.
I’ve made this a two part submission with the first part covering construction related to HO, S and O gauge trees and the second part to cover painting, foliage and trimming plus a short how to on N Scale trees using the same materials.
On to the fun 😃
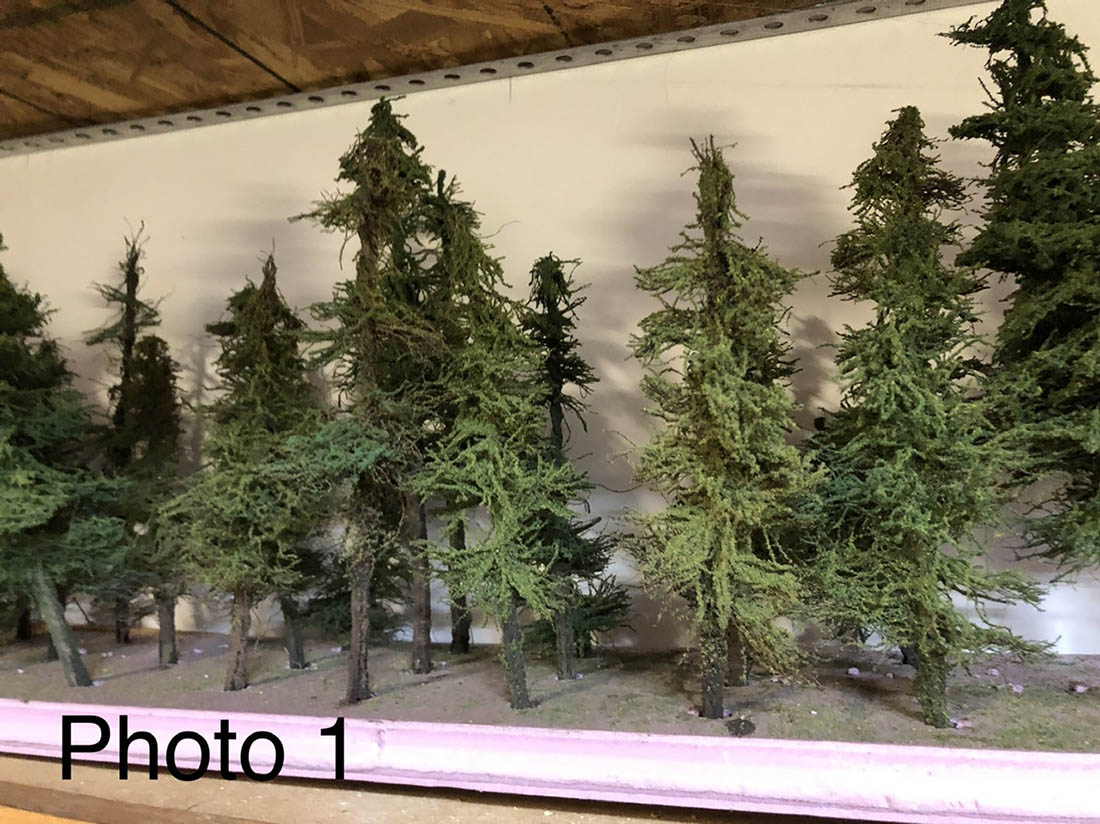
Photo 1 shows a collection of trees from my first construction lot. Trees shown are from 6 to 13 inches in height snd represent different styles of pine trees.

Photo 2 shows the basic materials needed for construction. I use wood glue, white glue and super glue. A few basic hand tools. Corseted fiber rope for the branches and Rustic Wire. The nearly used spool I got from a seller in England and the other I was able to find locally. The wrap on the wire makes it look like bark.
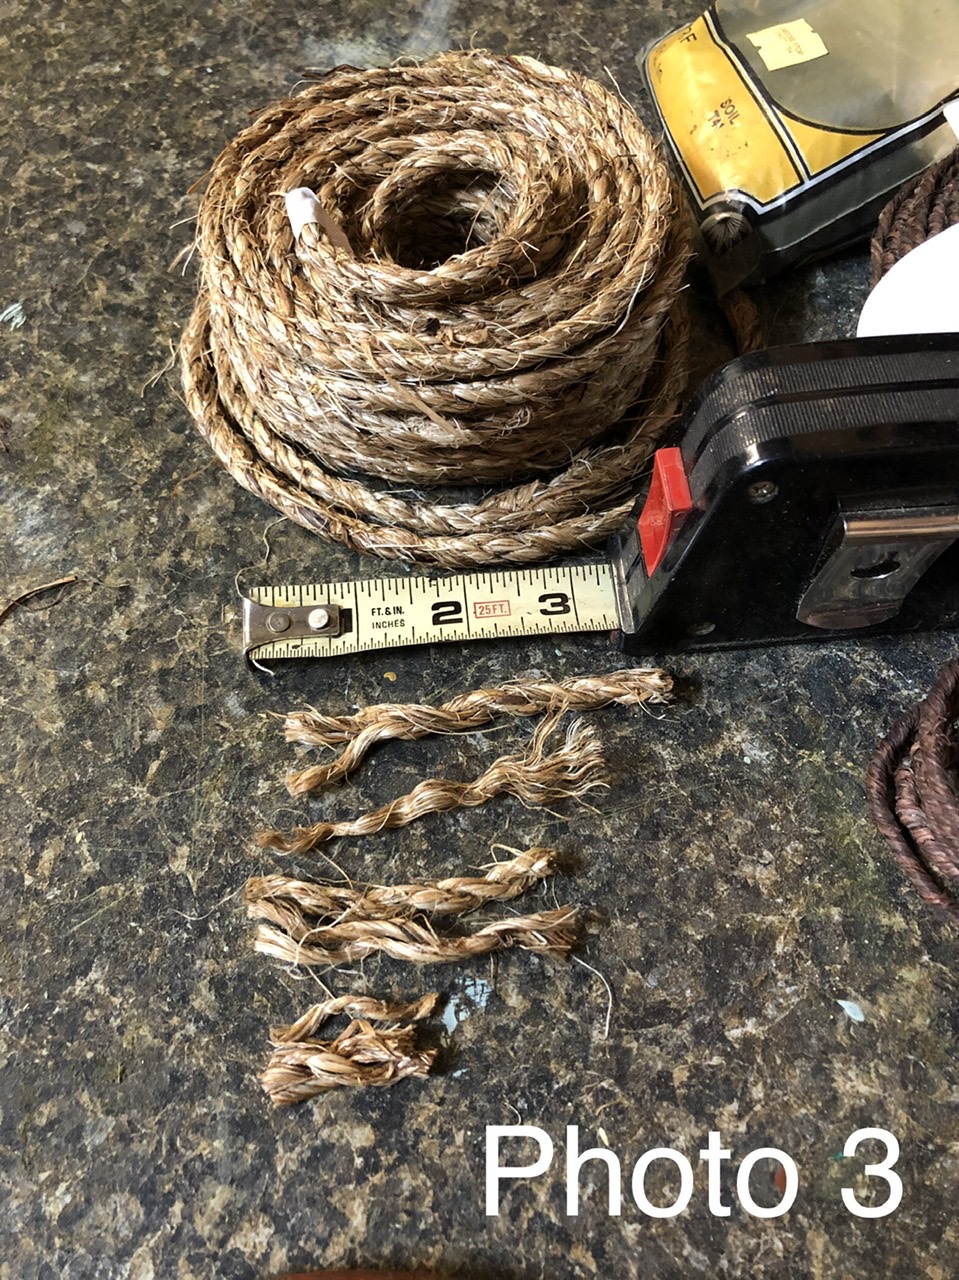
Photo 3 shows the lengths I generally use to make branches from the fiber rope. I tend to use three lengths 1-2-3 inches.
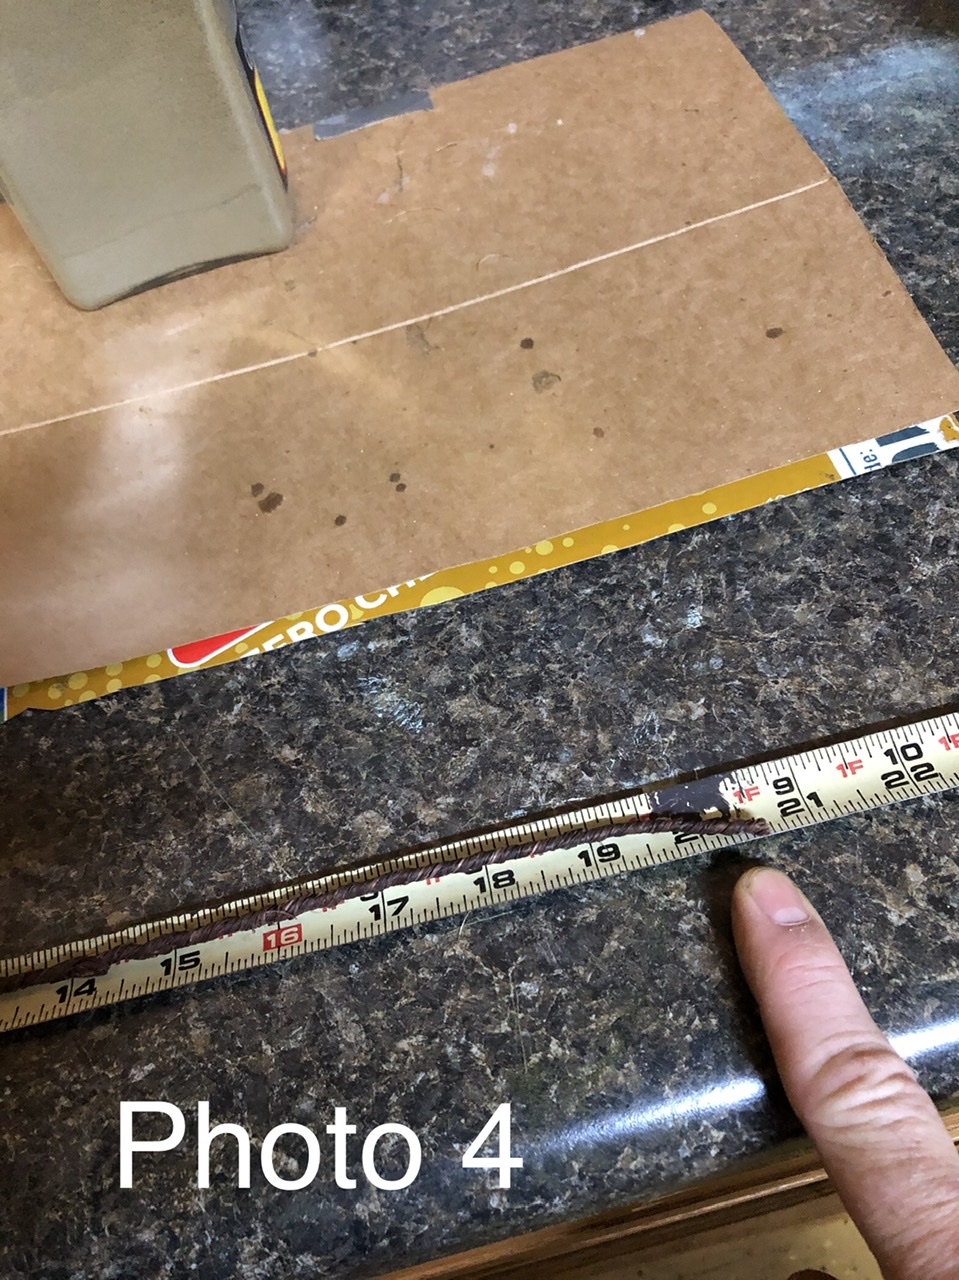
Photo 4 shows that for a 10 inch tall tree you want to use a 20 inch length of Rustic Wire. This will then be bent in the middle into a V shape for the next step.
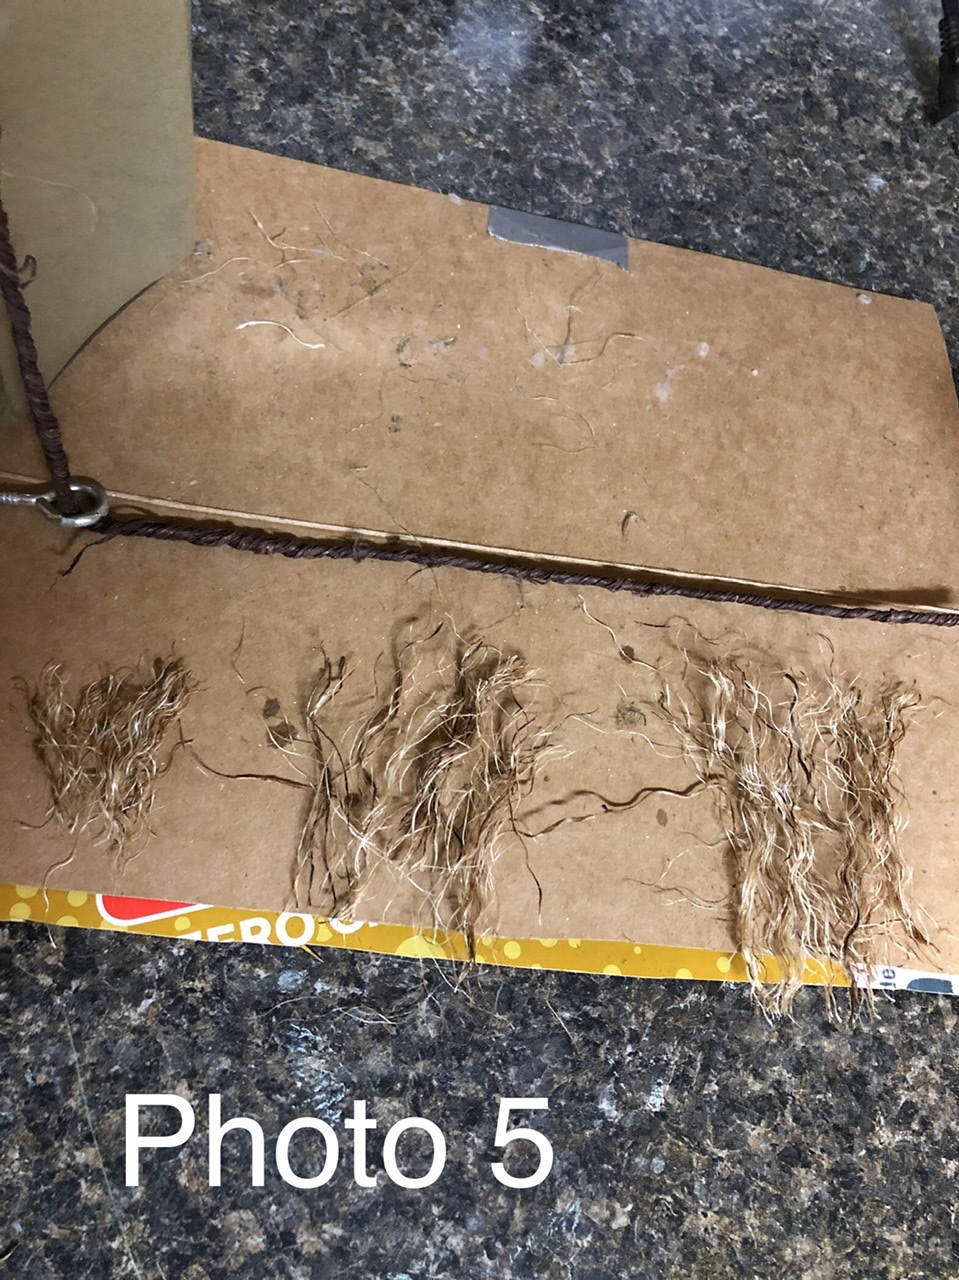
Photo 5 shows the Rustic Wire layer on a cardboard work mat with the cut and pulled apart rope layer nearby. Note that I have an eye screw located the the notch of the V. You need this as a little later this will be your anchor point as you hand twist the tree. You can make a stationary block with the eye screw permanently in place or as I do I chuck the eye screw into a drill presses I hand soil the tree. More on that later.
Photo 6 shows I lay a bead of white glue on the wire for where I want to add in branches. I do not glue where the truck of the tree will be.
Photo 7 shows the rope fibers laid on the bead of white glue. These are gentility pressed in place. A little more white glue is added on top of the rope fibers at this point.
Photo 8 shows the other half of the Rustic Wire is not pressed onto the rope fibers. It will take a little pressure at the eye screw to get the wire in place and set so the wire lays flat.
Photo 9 shows the assembly chucked into my drill press. The glue holds the fibers in place for this step and secured them as it drys later on.
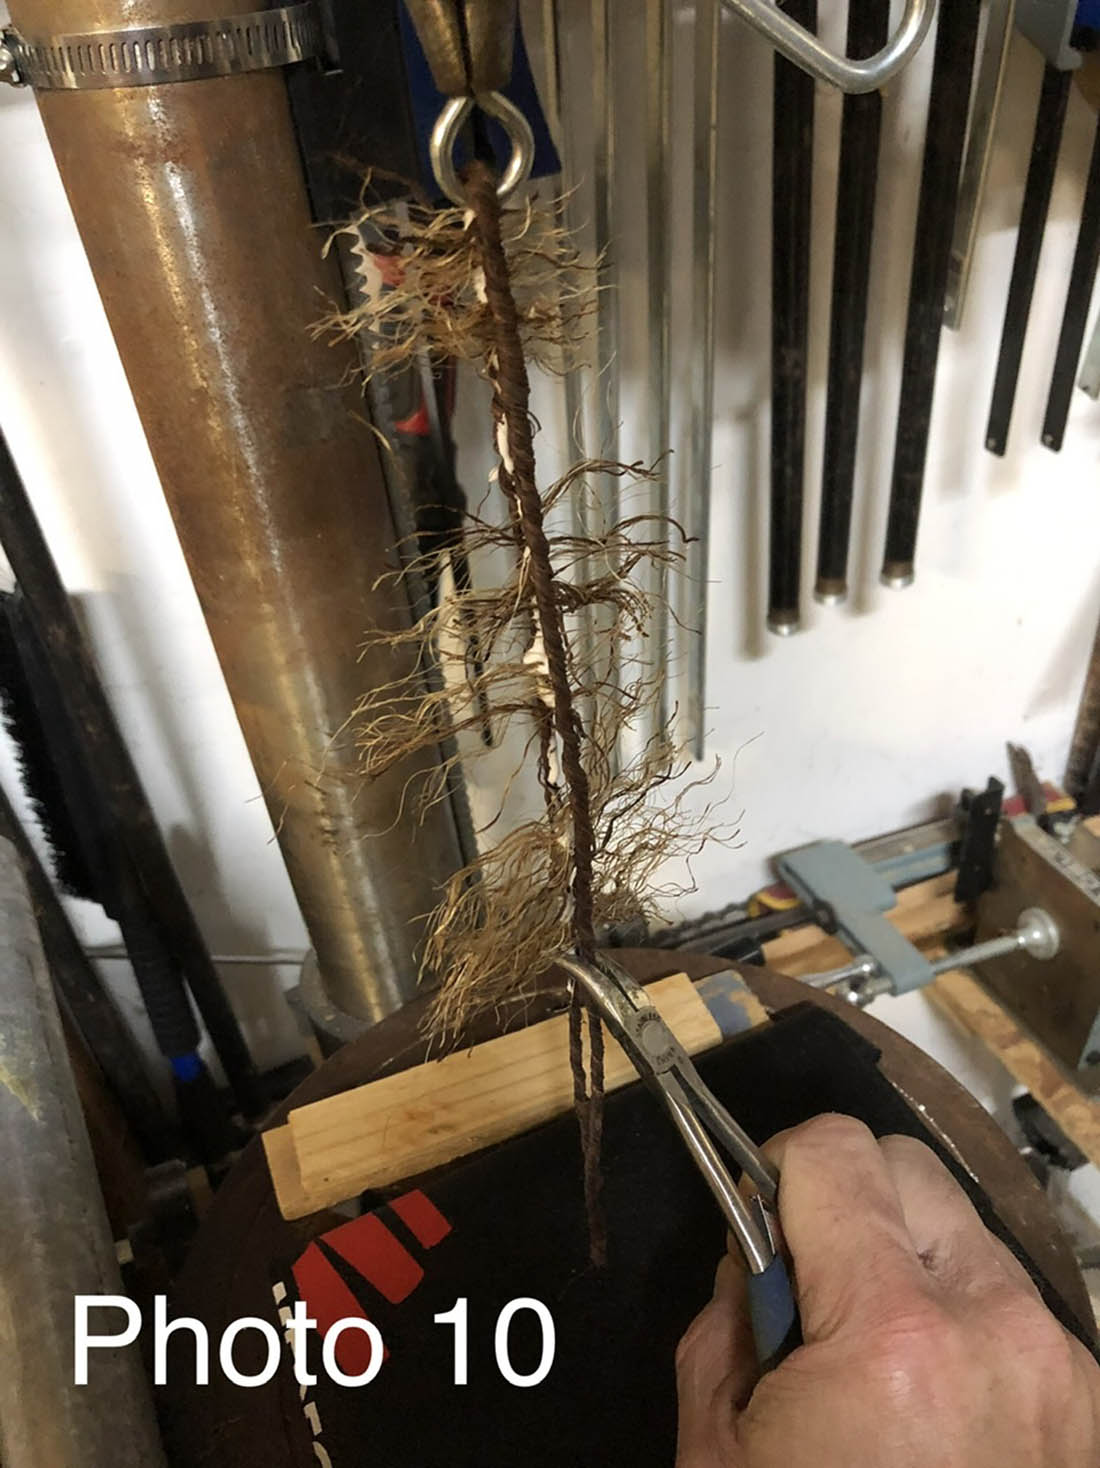
Photo 10 using any pliers grab both ends of the wire immediately below the lowest glued branches. This is where you will start the spin the wires and leave the lower wires untwisted. The number of turns will very but you will want to get turns so it’s fairly tight at the screw eye and the rope fibers have been spun out. It takes a little practice so you may need to do a few trees to get the hang of it.
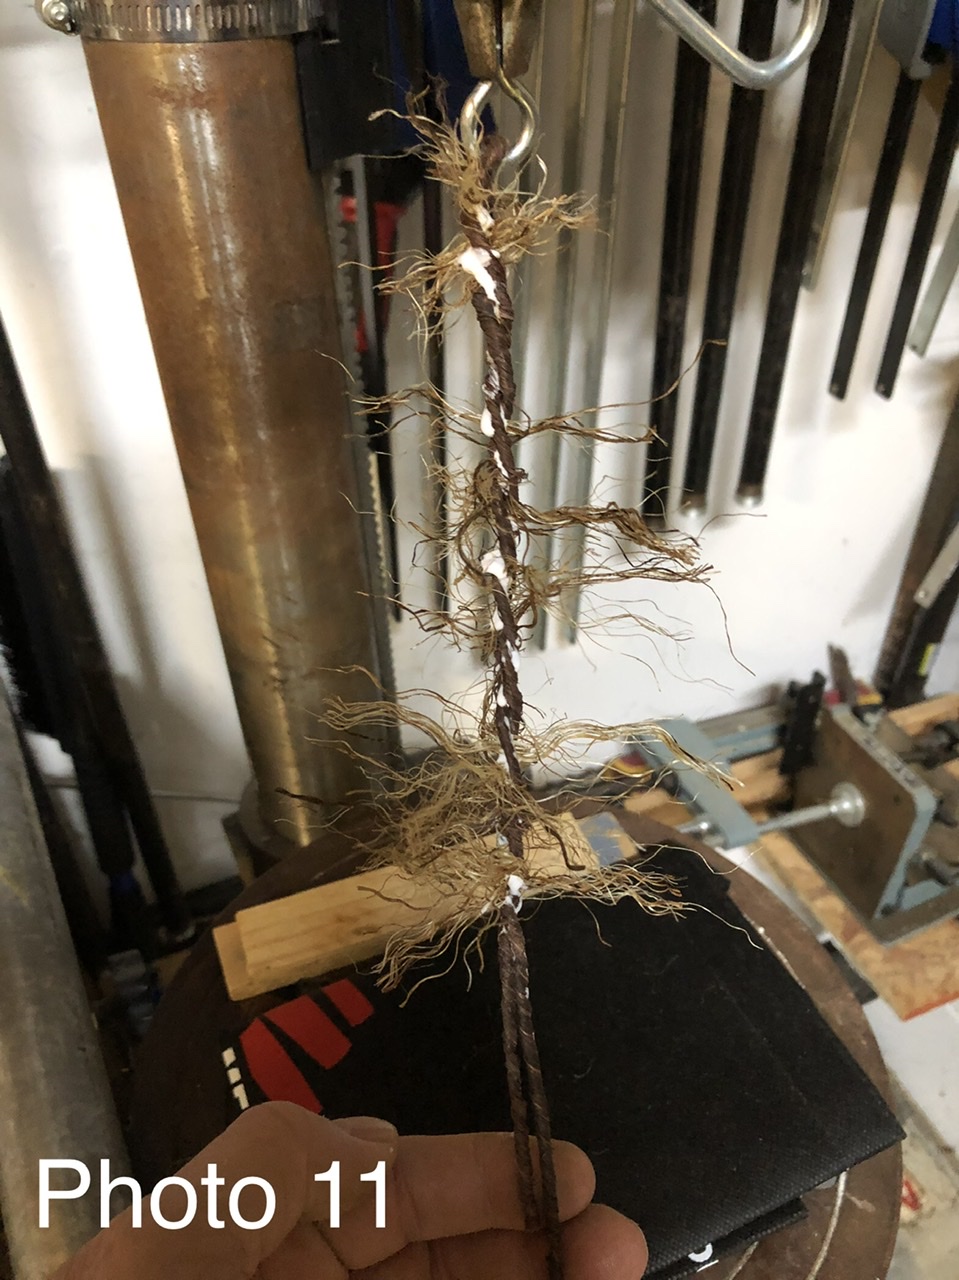
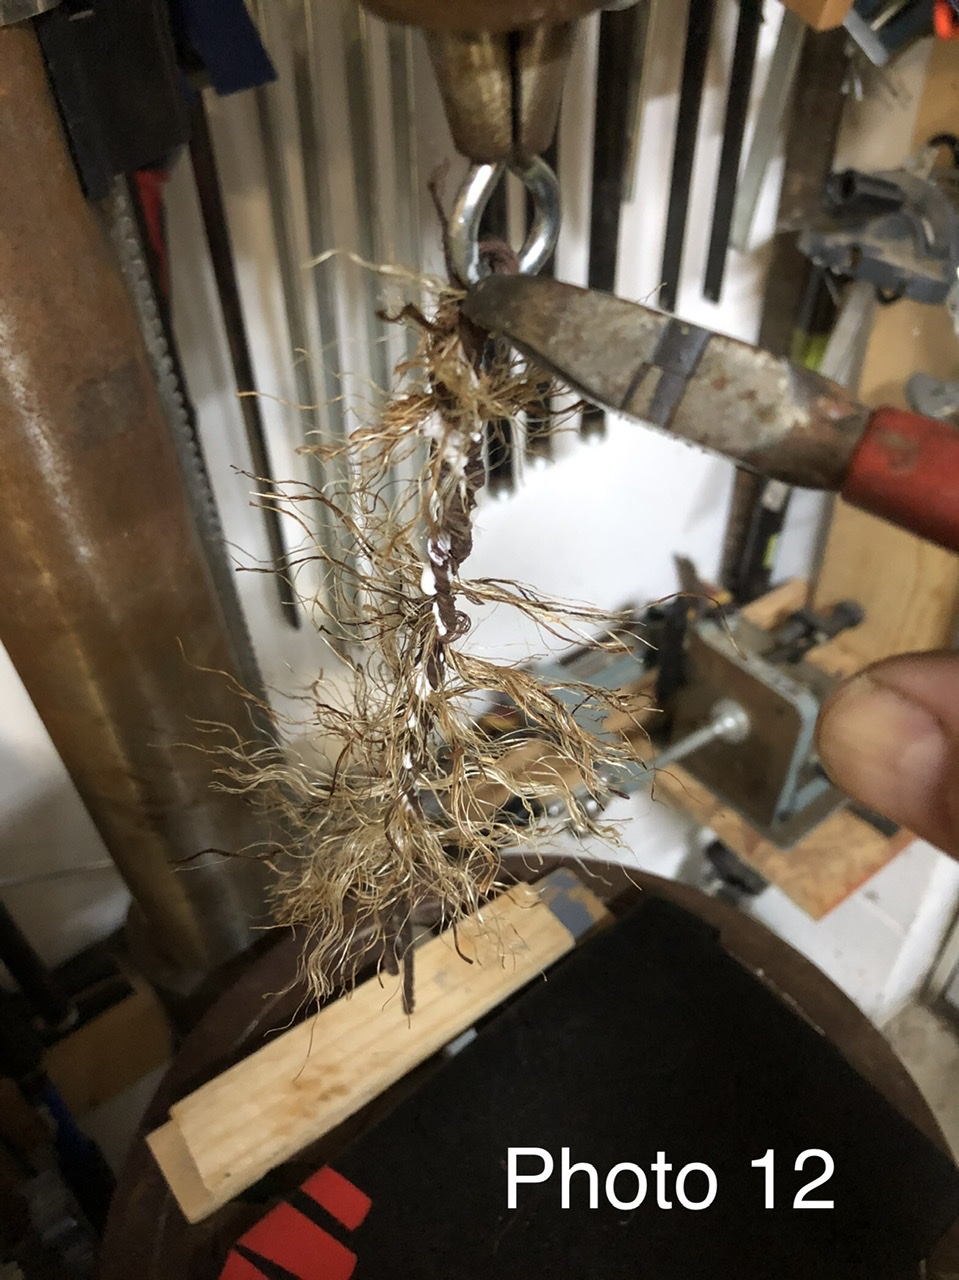
Photo 11 and 12 show a spun tree and then using a nipper to cut the wire free of the eye screw
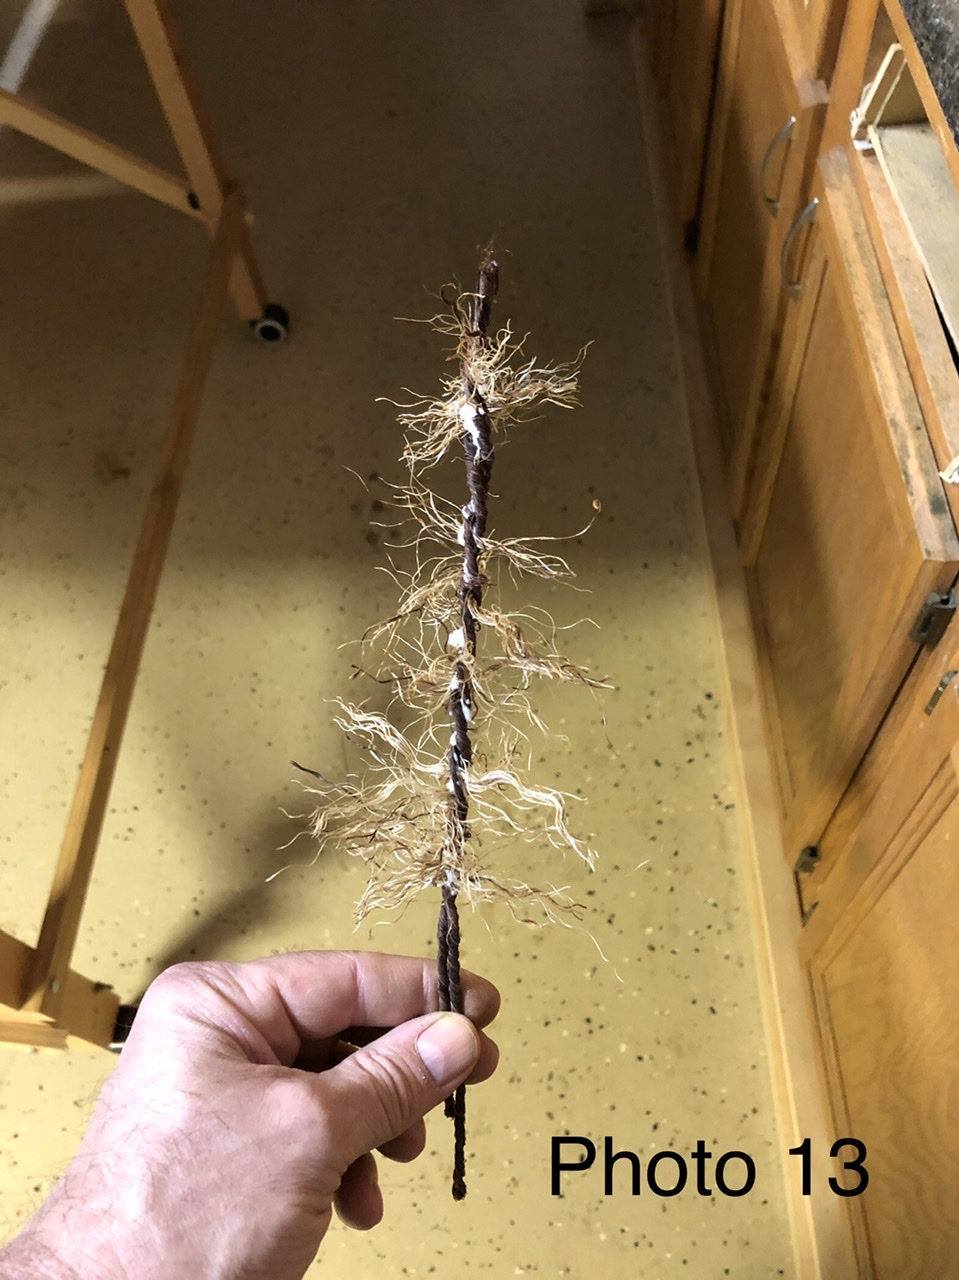
Photo 13 shows your tree at this point snd it’s ready for the next steps.
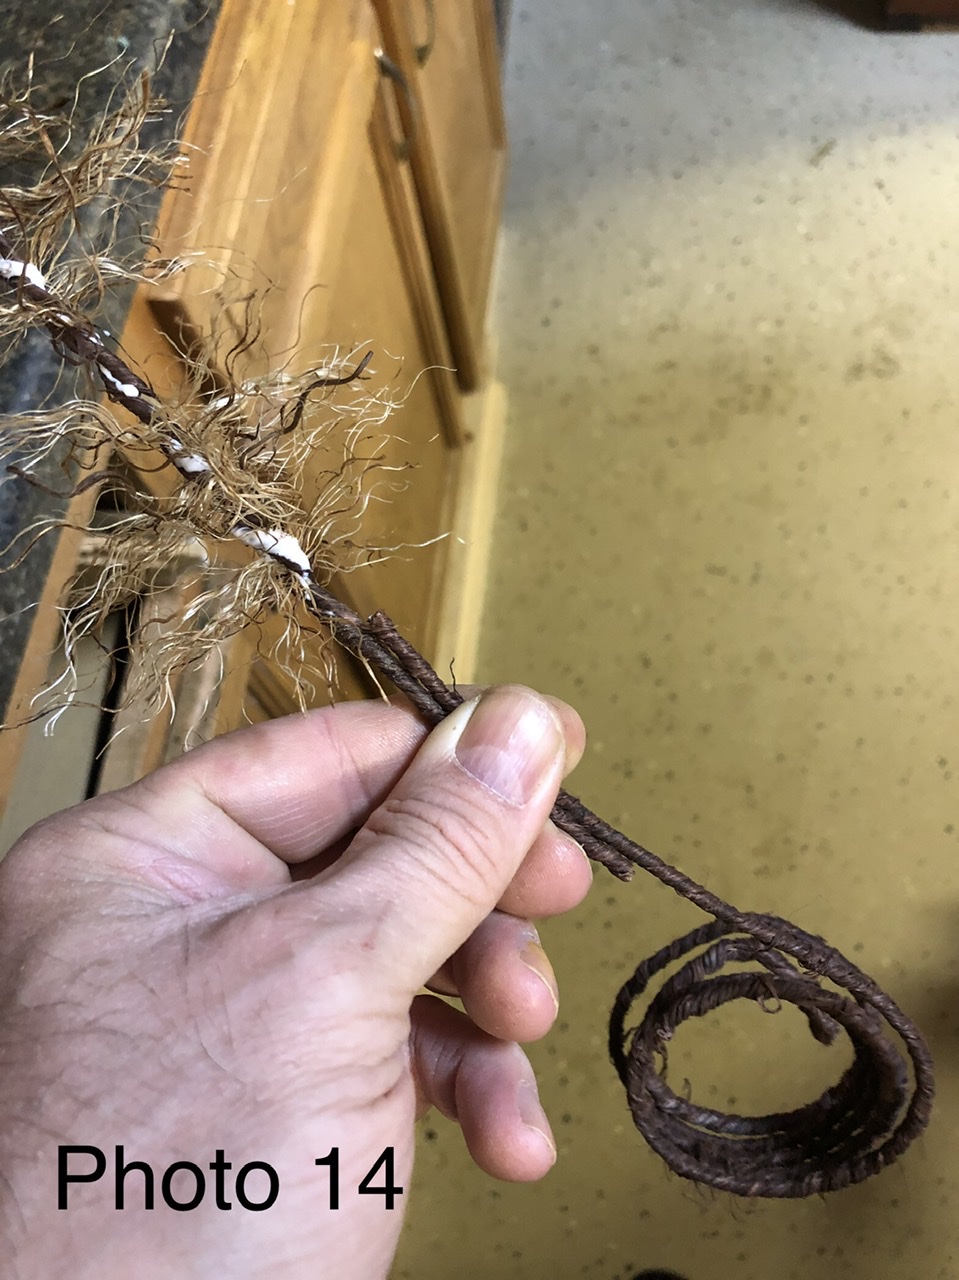
Photo 14 shows that you now take the Rustic Wire snd cut a small piece off that you will then super glue to the two wires forming the trunk. This will add thickness and give the trunk a rounder appearance.
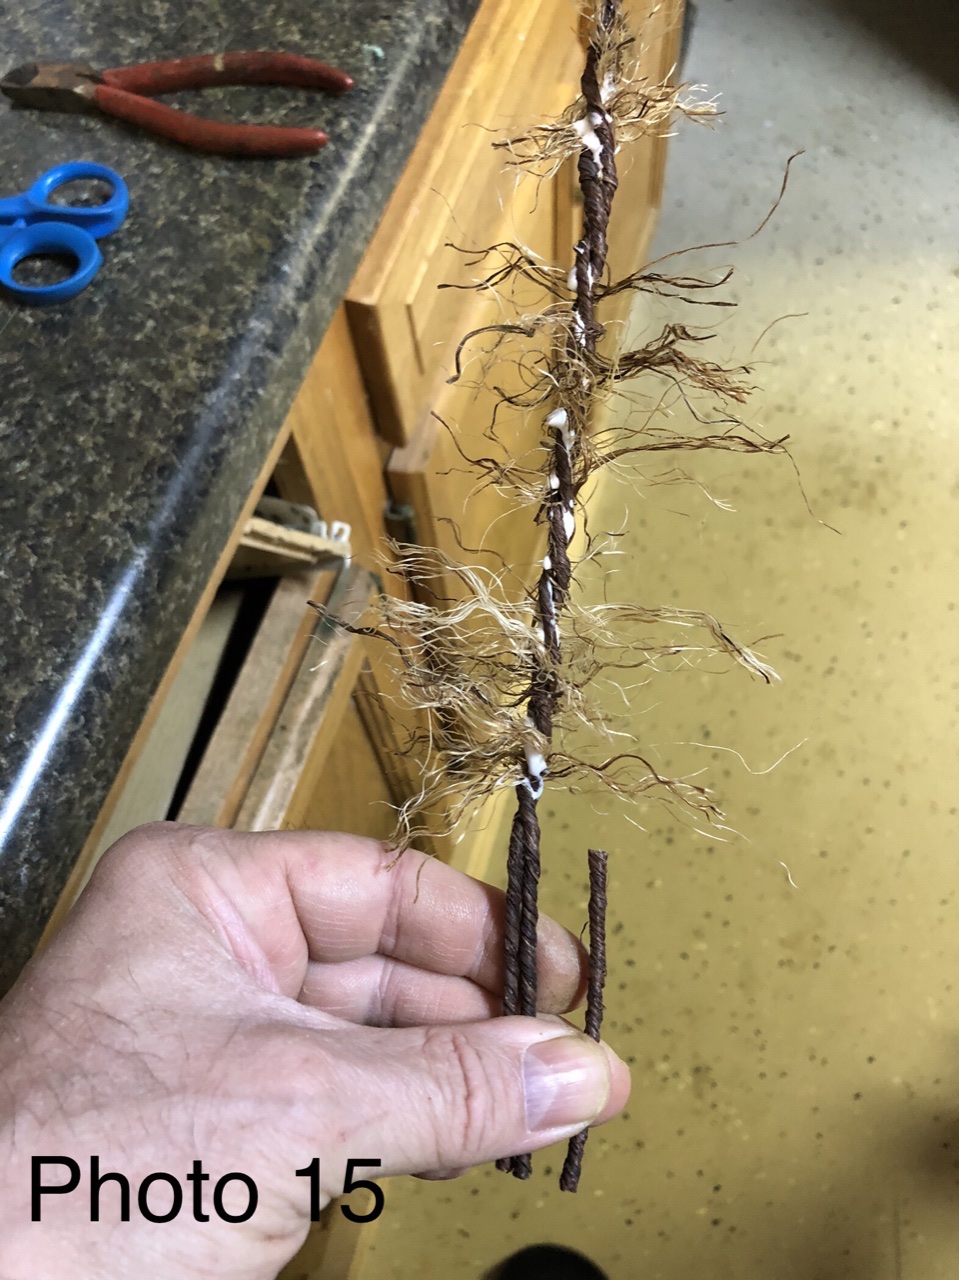
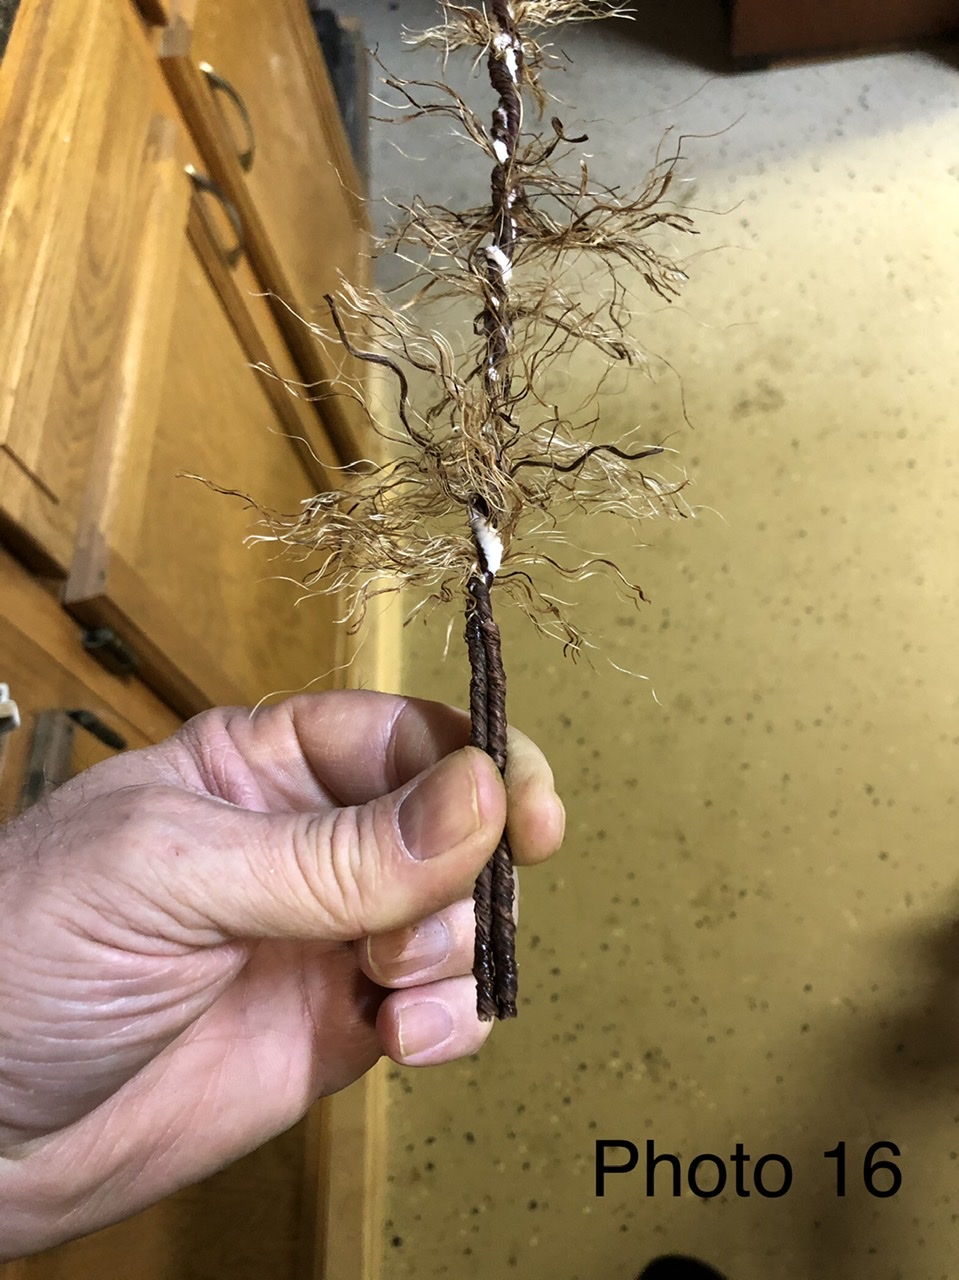
Photo 15 and 16 show the cut wire and then after it’s been glued in place. At this stage you can start to trim the branches to what you’d like and give them a better taper and overall shape to look more natural.
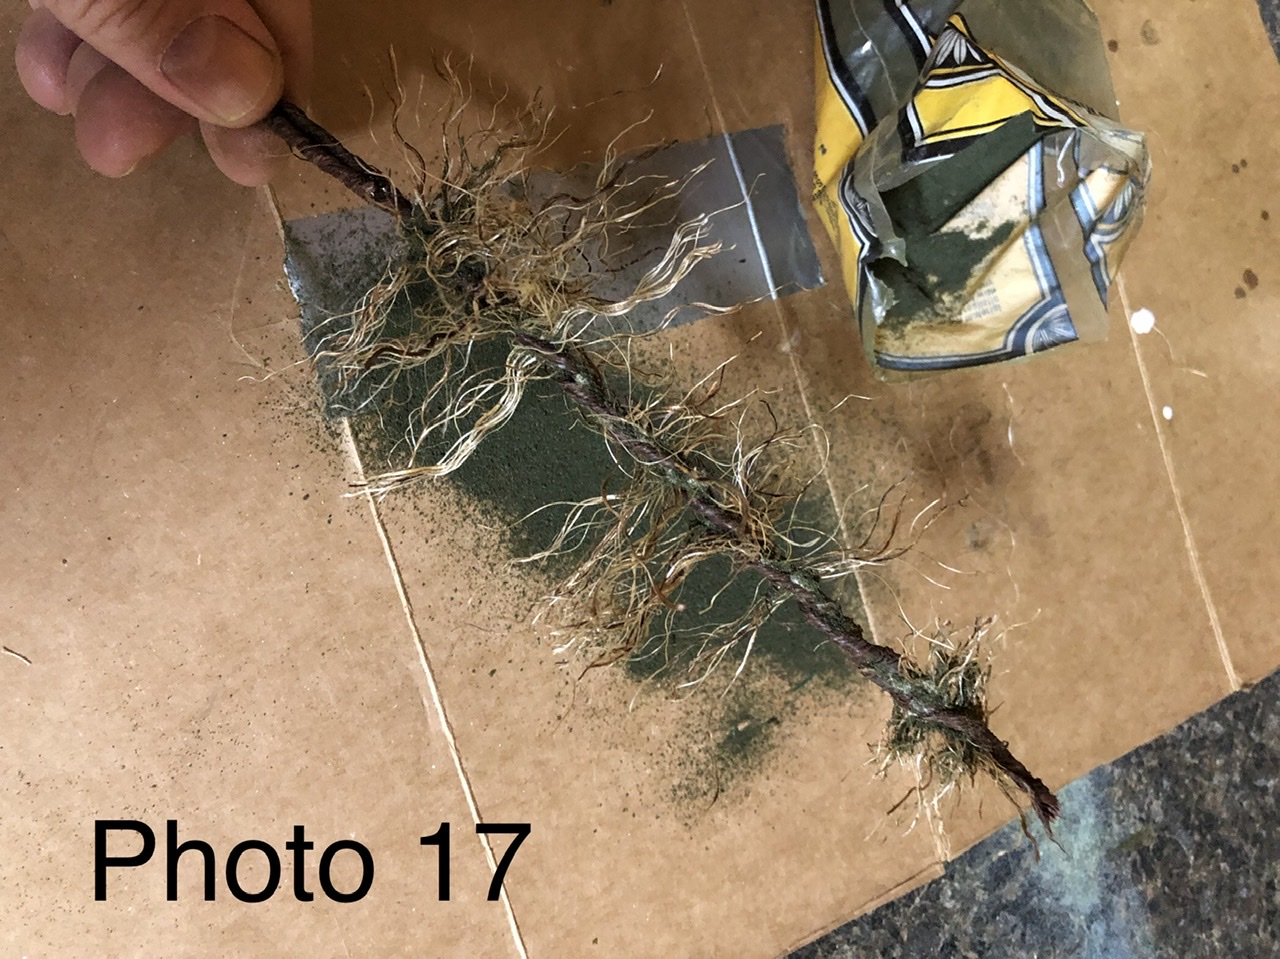
Photo 17 shows the next step which is to sprinkle ground cover on the tree trunk where you have exposed white glue. This helps add texture and also reduces some of the visible spin on the trunk. Any color of ground cover works as all will be painted later on.
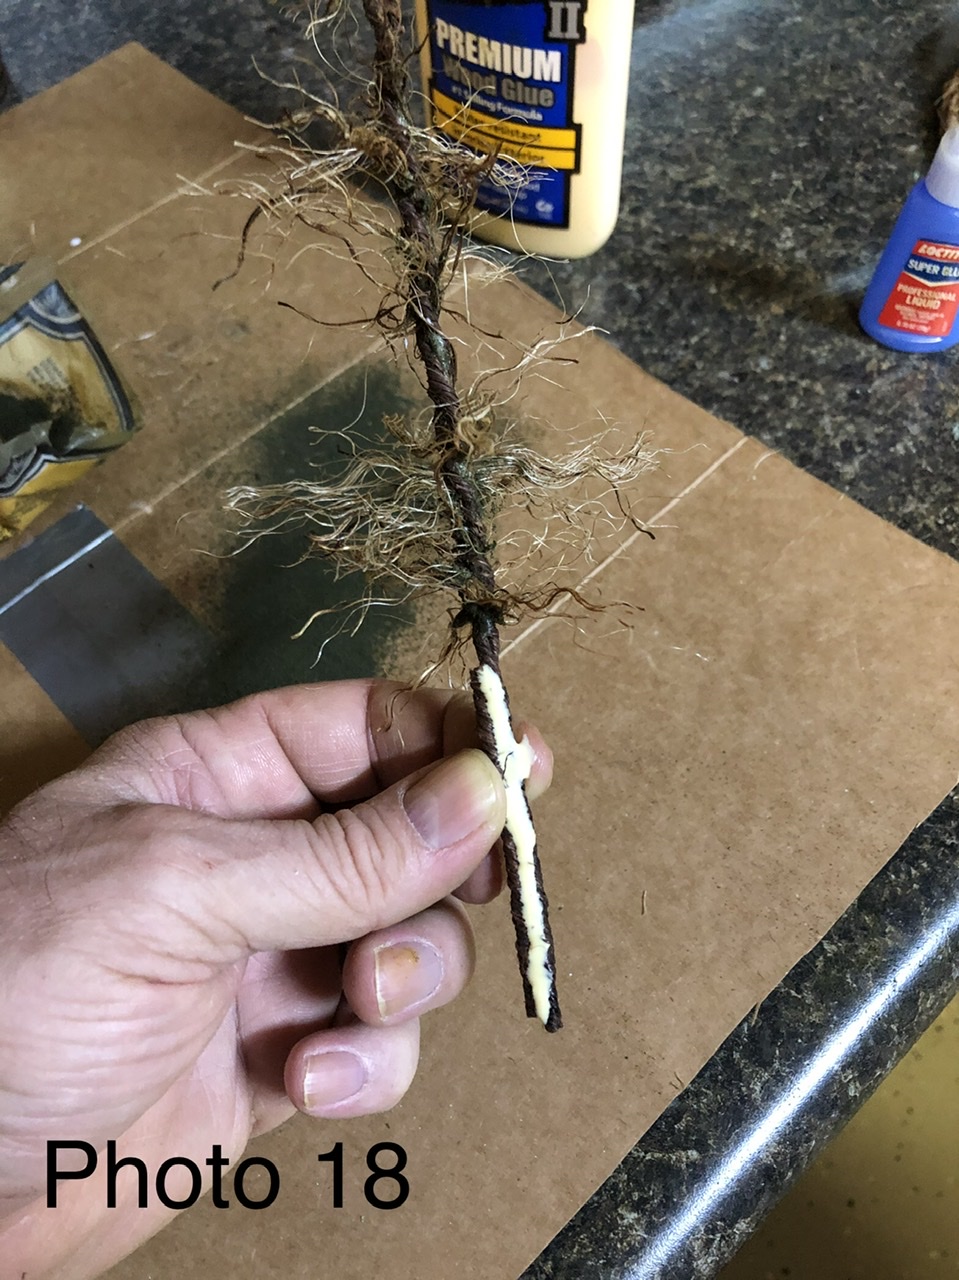
Photo 18 shows that the next step is to add wood glue to the gaps between wires on the main trunk of the base. I use wood glue as it is thicker and does run as much for this part of the process. Only do one of the gaps at a time as it’s easier to manipulate. Do not use too much glue. Just enough to fill the gap is all it takes.
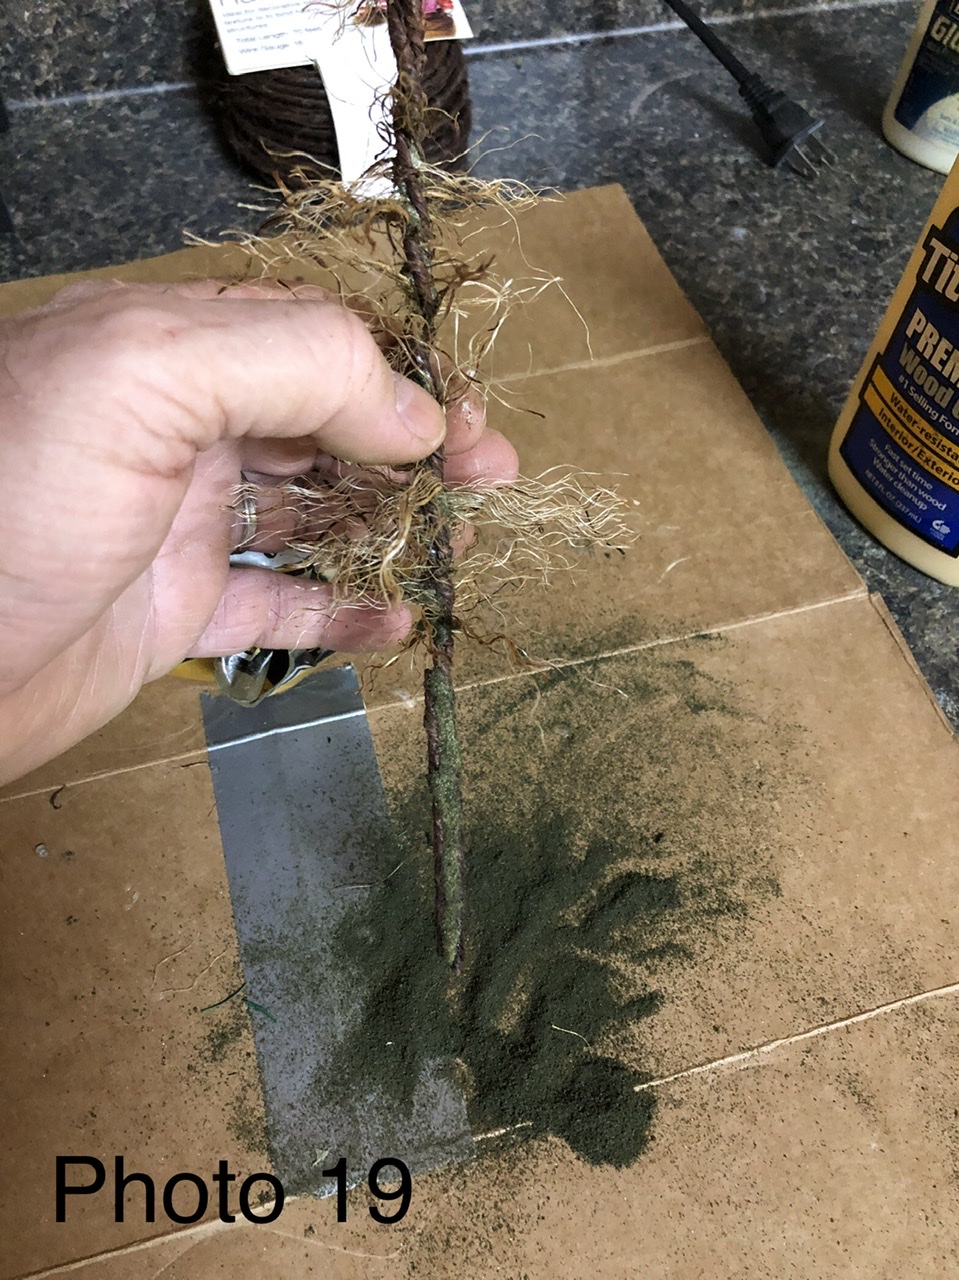
Photo 19 shows the wood glue now covered by ground cover. Some of the original texture of the wire cover will still be visible in places as well. You may need to go back and add a little more glue in places after this dries and repeat a ground cover application as some glue will soak into the wire cover.
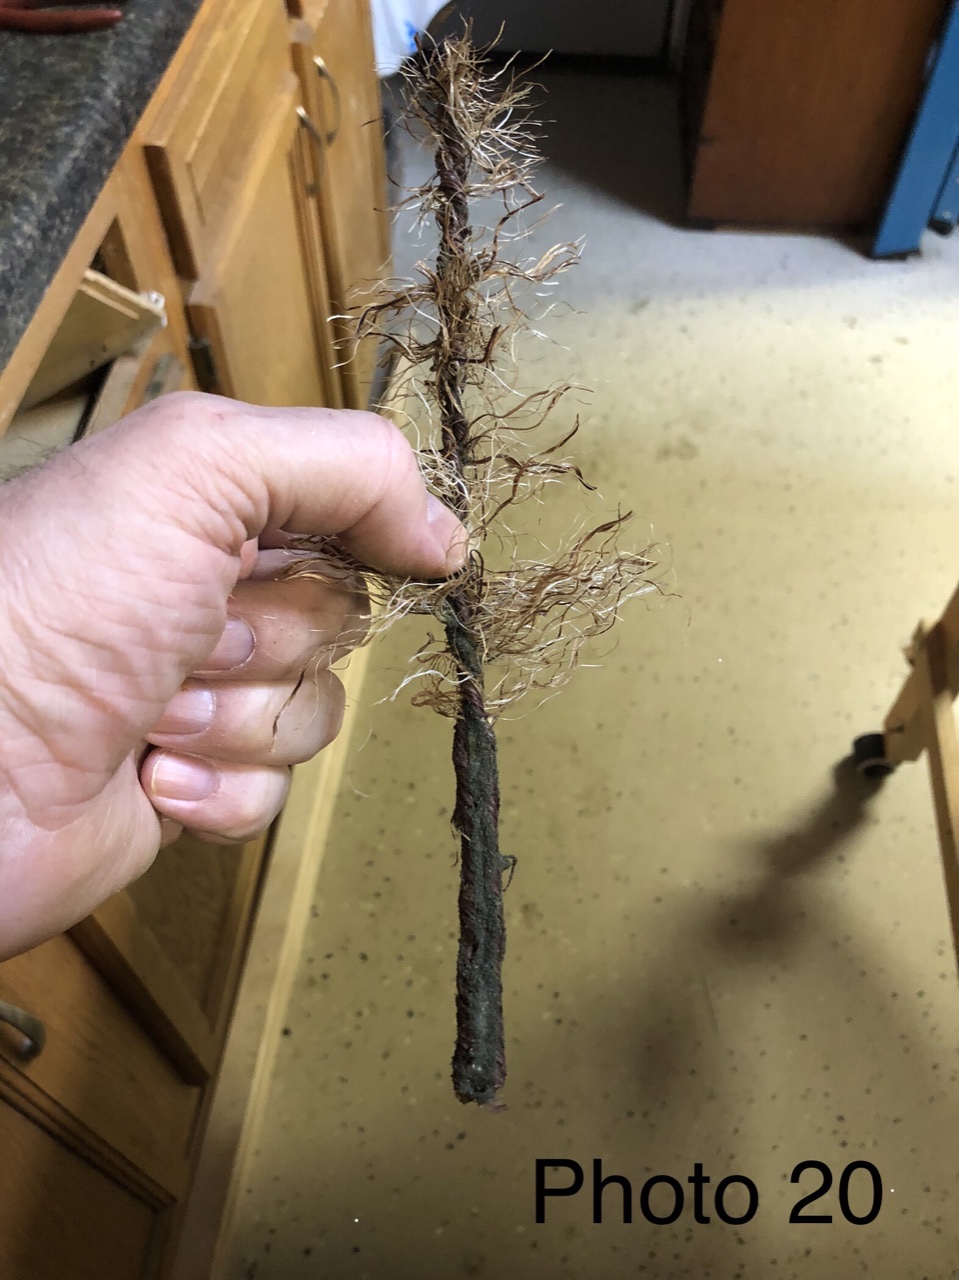
Photo 20 shows a basic finished tree prior to painting and adding foliage.
Part 2 will cover those next steps 😃
Bill in Virginia”
A big thanks to Bill for sharing how to make model trees look so realistic – his ‘how to’ concludes tomorrow!
That’s all for this time folks.
Please do keep ’em coming.
And don’t forget the Beginner’s Guide is here if you want to stop dreaming and start doing.
Best
Al
PS Latest ebay cheat sheet is here.


Just like I make fishing flies, it has a niece effect especially for near the tree line, post holocaust fire, or just stressed area. These aren’t Christmas trees for the Whitehouse front lawn. And I just bought 3 rolls of manila rope.
Bill
Much thanks for the tree lesson.
Nothing worse than a Bum back.
Be well
George from LI, NY
Pretty neat clever. I going to have to try that.
Very nice. I can hardly wait for part two. Using rope fibers is a great way of making branches.
Okay, cool project. Good thing is this is a technique that can be attempted with other types of wire and “fluffy” materials.
Frank in Orlando
Great how to. I have an area on my “G” scale outdoor layout to try this on. Will try water proof glue (Titebond III). Never thought to try rope fiber. Looking forward to part 2.
Great looking trees. I’ve got about 400 woodland scenics trees on mine but am definitely going to add a few dozen of these for some variety. Can’t wait for part two.
Really good, well thought tree technique here, Bill! Thanks for sharing this with us. 🚂
What gauge is the Rustic Wire ?
Thank you Bill for sharing this procedure it looks like an excellent way to do trees
Steve from Michigan (USA)
Thank you Bill for Sharing. When I run out of trees, This will be a very Good Technique to mak more.
Thanks Bill,
I think that I will never see , a poem as lovely as a tree. Nothing more satisfying that constructing trees. Beyond saving a bundle of cash, they make the layout.
You’ve shown me another tree species to mix with my Northern coniferous forest.
Thanks for your clever modeling insight.
What exactly is rustic wire. Is there a source in the US?
Nice tutorial
Could you please tell me what rustic wire is, I never heard of it.
Thank you.. The trees look great and I would like to try that.
Hi Bill in Virginia here. Rustic wire is a 20 gage wire that is wrapped in a fibrous material to give it a roughly 10 gage overall size. It’s located in the floral supply area of many craft stores. I buy off EBay but have also found rolls of it at places like Hobby Lobby.
Hope folks will give it a try and have some fun making trees