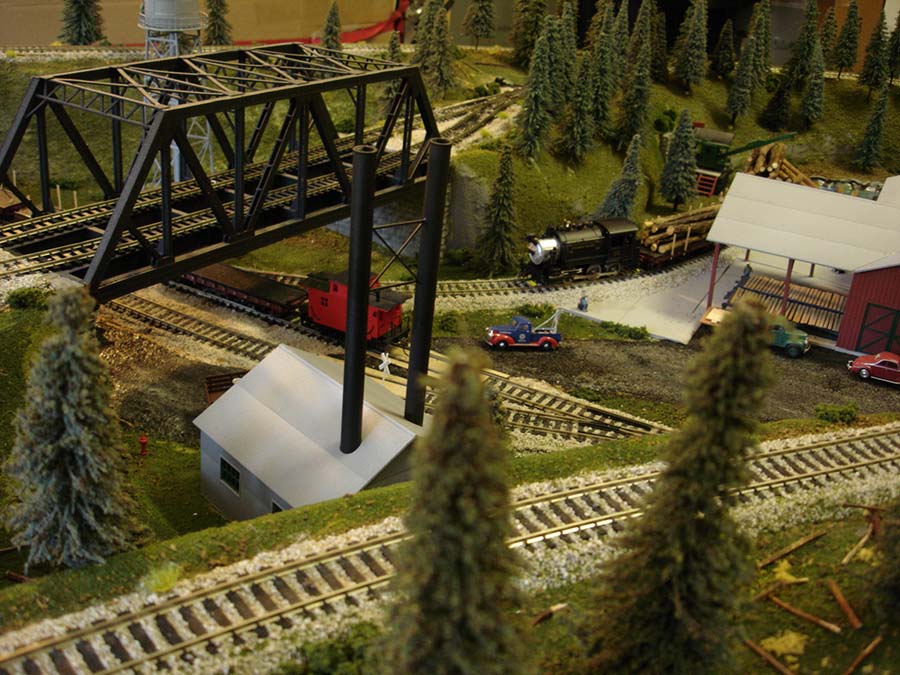
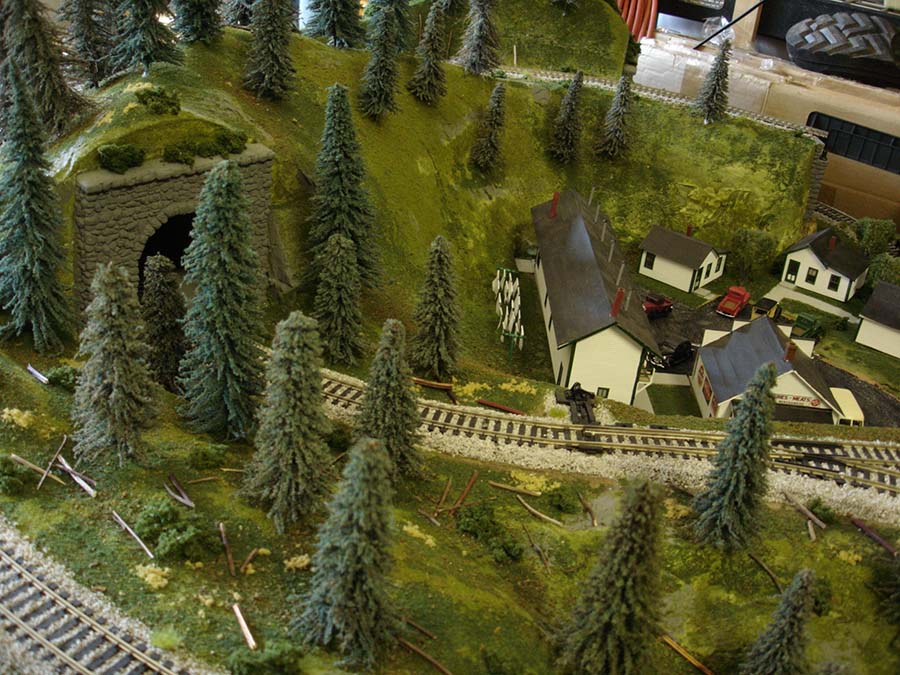
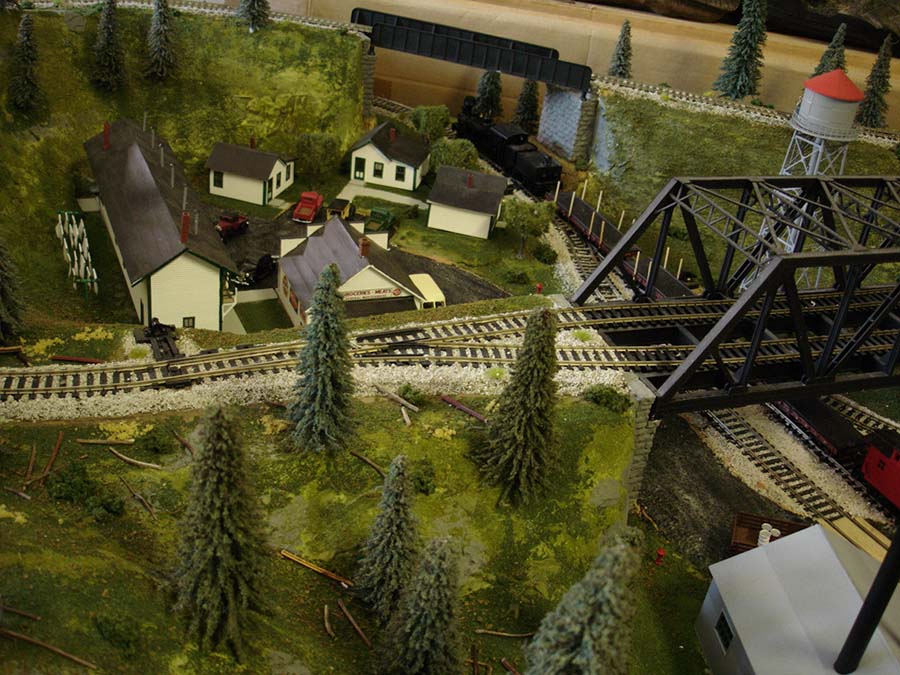
Al has been in touch with his HO scale logging railroad:
“Attached are some photos of my 4′ x 8′ layout for you to post if you desire. I am 73 years old and retired from a career in commercial fire protection.
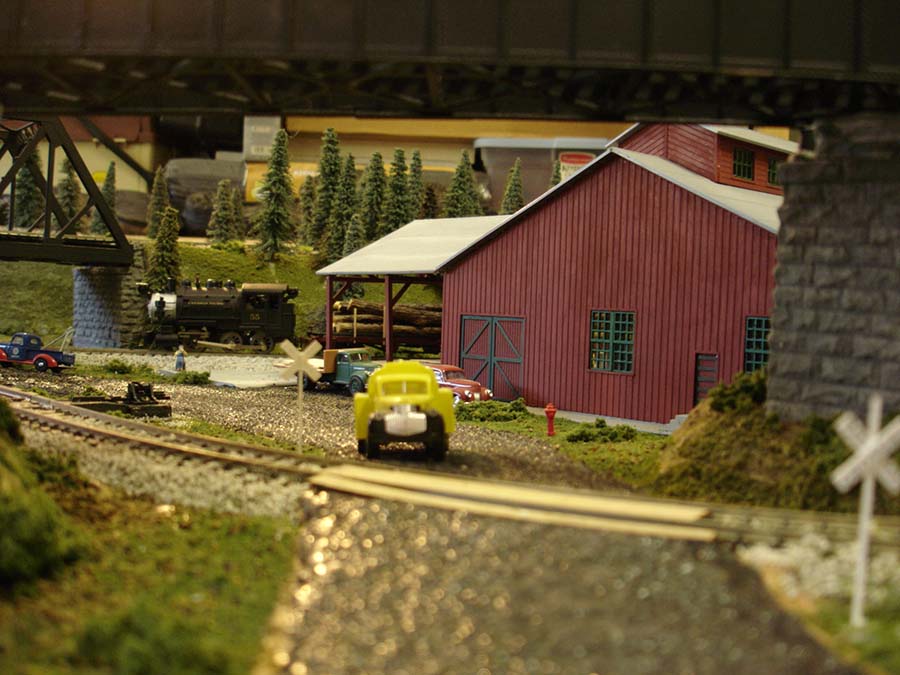
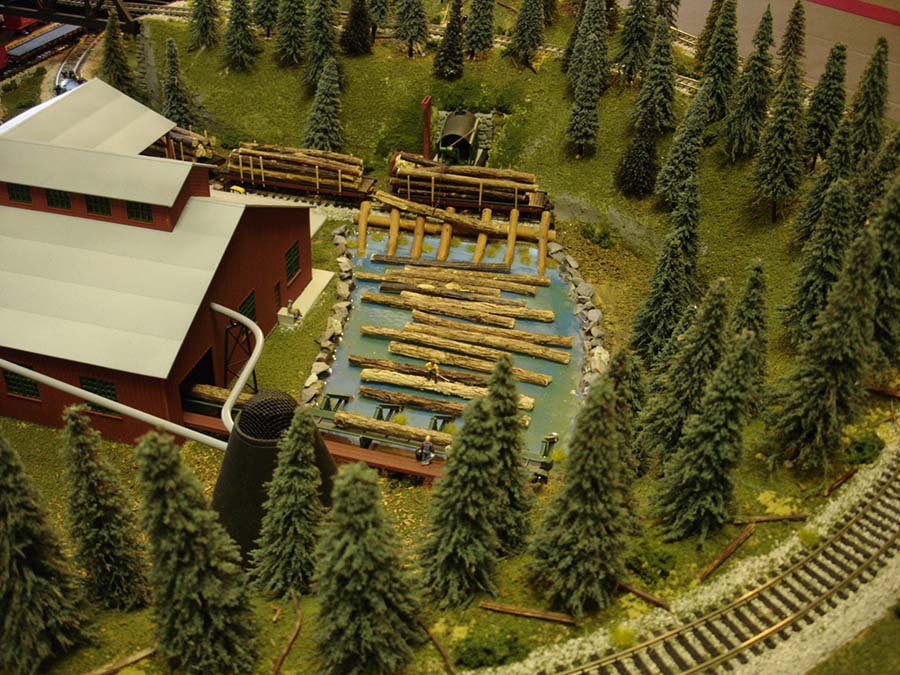
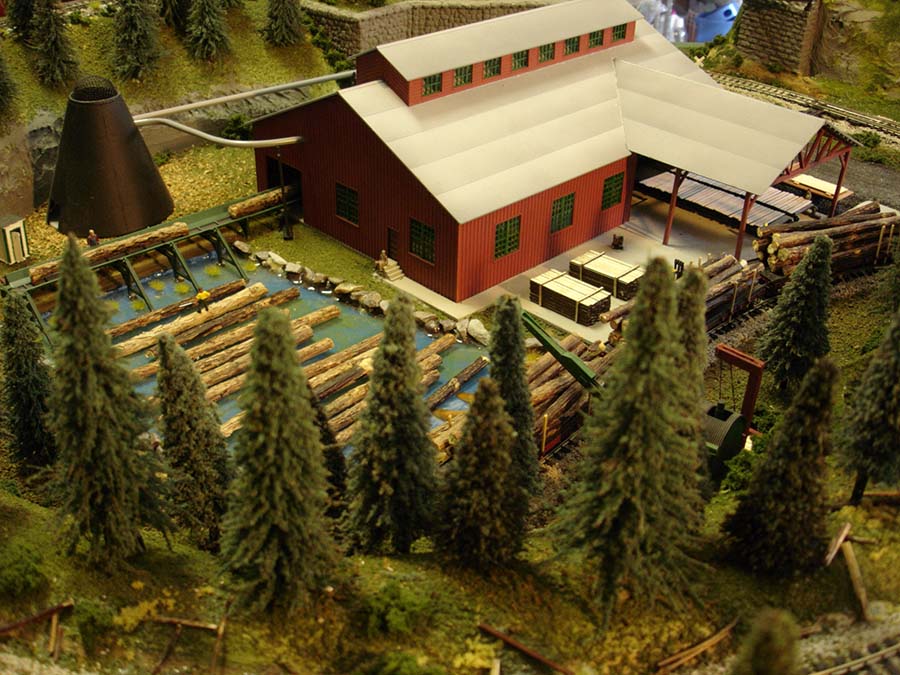
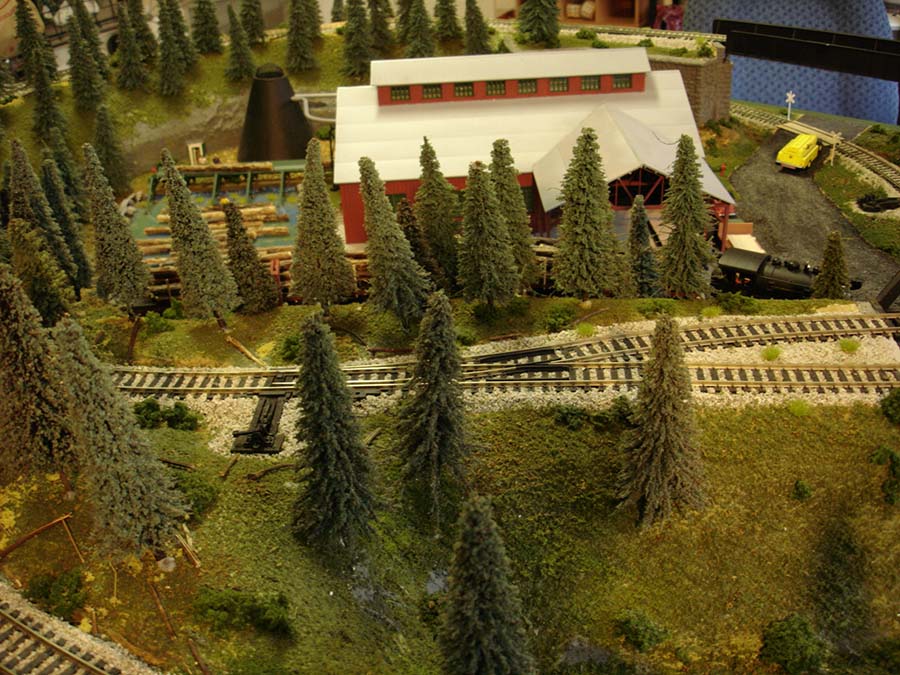
My layout is set in the northwest United States in the early 1940’s. The buildings are all wooden kits with the exception of the saw mill and power house which are plastic.
I have two DCC steam engines with sound, a 3 truck shay and a 0-6-0 tank engine. All of the buildings are lighted and I am going to install some street lights in the near future. The mountains are made of rigid foam which was shaped with a wood burning tool, knife and rasp.
I enjoy your posts and have gotten many good ideas from them.
I read your email every time I get one. I enjoy them so very much. I’m not exactly a newbie as I have made at least 10 layouts since I bought my first train set as an adult in December 1963 for my two sons, then ages 3 & 4. I have made or helped make layouts in O gauge, HO gauge and N gauge and have had fun with all of them. I’m current in HO gauge and probably remain there for the rest of my life.
I don’t know what category in which to put this, but I’m a number cruncher in real life (accountant) and here are formulas for calculating speed of HO/OO gauge trains.
actual feet/time in seconds * 59.386 will give scale mph
actual meters/time in seconds *313.493 will give kph
I will derive the formulas for O gauge and N gauge in the near future.
Lester in Georgia, USA”
“Beware of paralysis by analysis. It’s easy to use up too much time planning so that you don’t get on with construction.
Make a start and then you can make corrections as you go. (Some basic plan is of course required.)
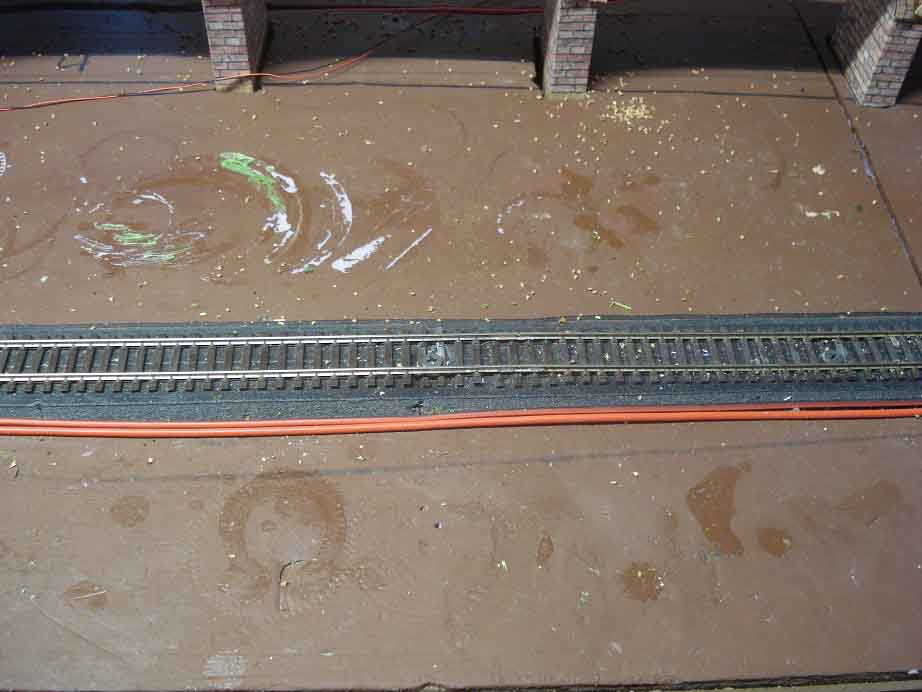
Clambering around underneath a layout is an issue for some, so at first glance, this seems like a good way around it.
But it’s not. Sadly, it’s a great idea in principle, but not in practice, because of the fire risk.
So one to look out for. If you wondered why folk don’t do it this way, now you know.
“Hi Al
Thank you for all the work you do for us ‘Train Nuts’.
I have a hint for wiring the layout without ever going underneath the layout.
This works for people that build the layout and lay a sheet of plywood on the top of the framework. And then lay a one inch sheet of foam board insulation on top of that.
Initial Prep – I put down all my track first off and run the wires (16AWG stranded) on top of the foam board next to the track.
Feeder wires are 28 AWG. After that I run the trains for many hours over a weeks’ time, taking care of all and any problems.
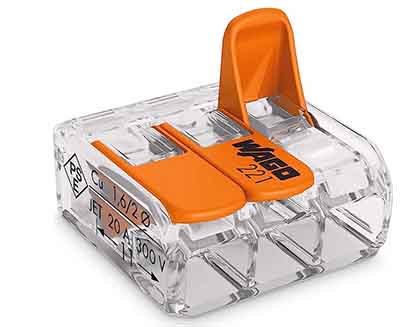
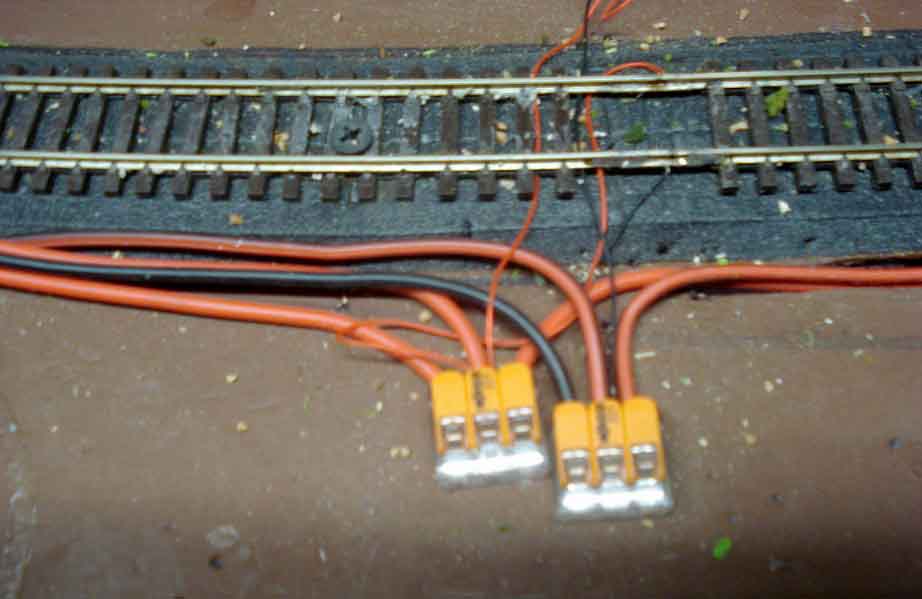
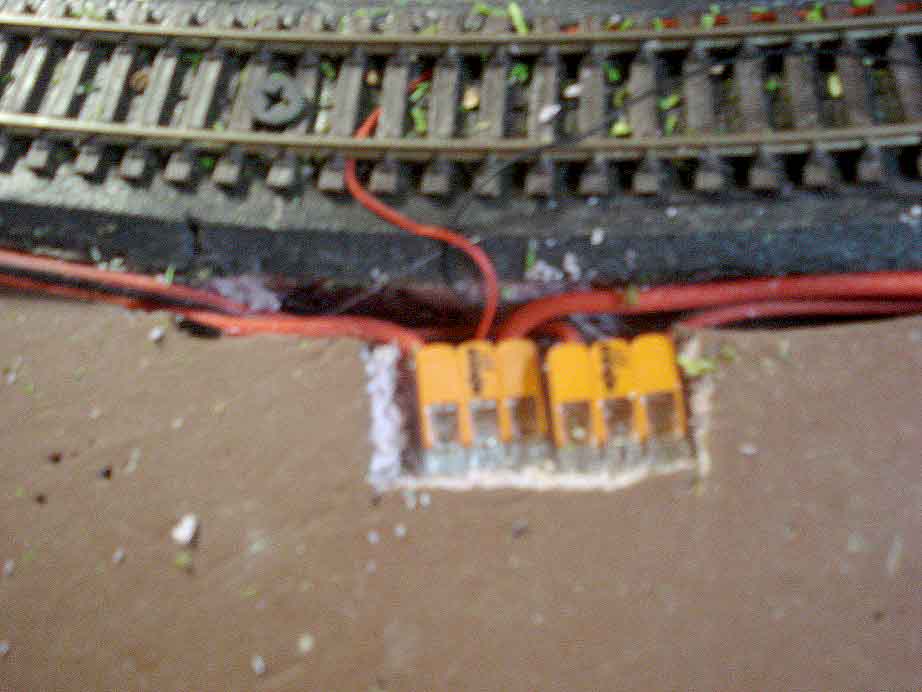
Once all the trains (engines + multiple types of rolling stock) run the complete layout with no more problems multiple times, it is time to hide the wiring. Also ordered something to connect wire junctions (every time I needed feeder wires connected) – Lever-Nuts
Start hiding – The second picture shows the wiring in place next to the track. Once the wiring is correct never mess with it. What is the saying ‘don’t fix something that works’.
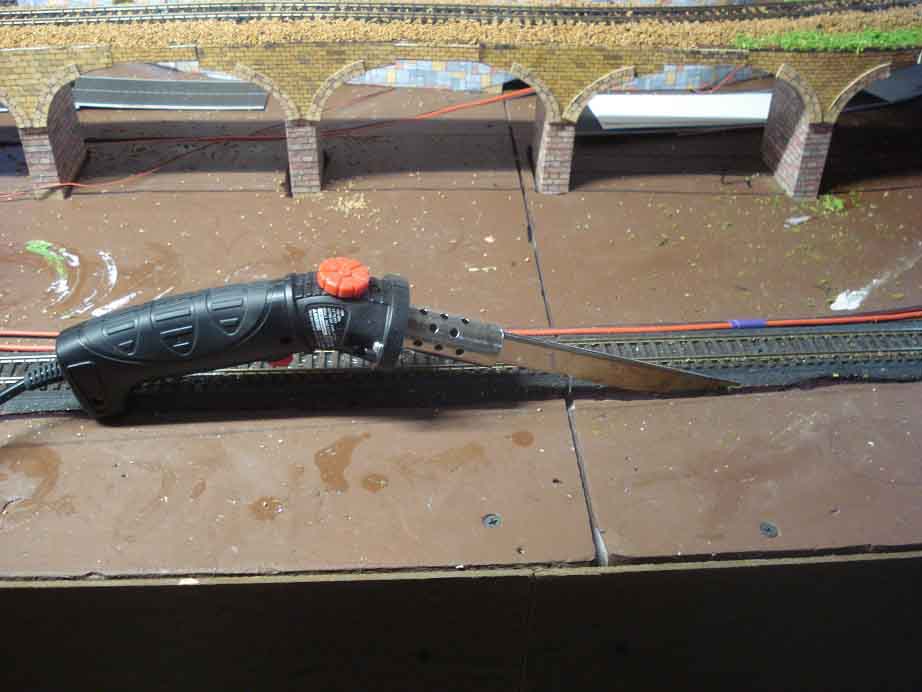
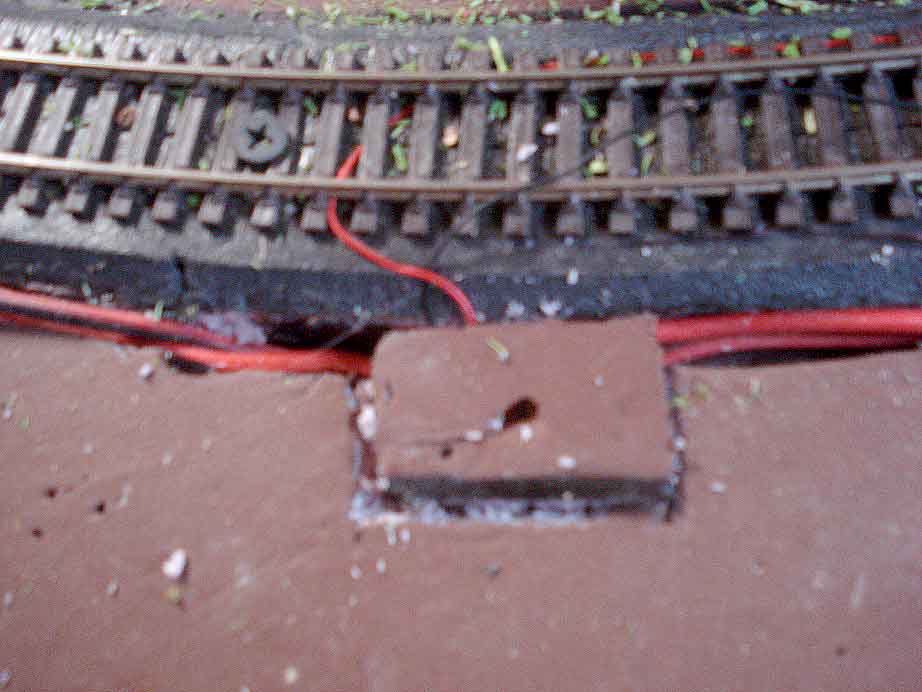
Followed by the Hot Foam Iron used to cut a trench next to the track. Wear a mask and glasses when doing this because it smokes, stinks, and not healthy. Well ventilated place also.
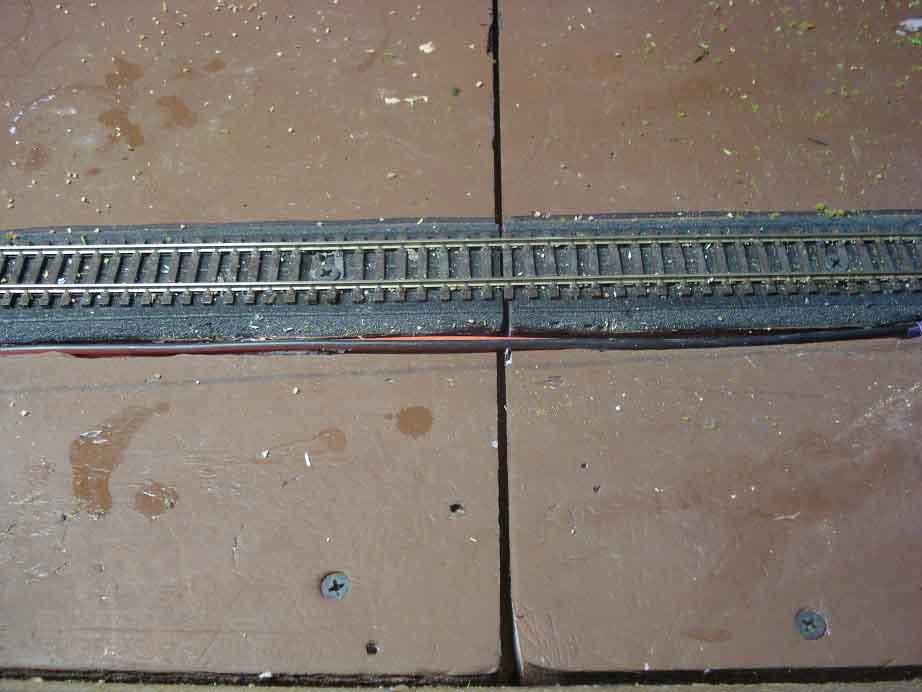
The next picture shows the wire placed into the trench. In some places multiple wires ended up in the same trench, for track and for lighting.
The next picture shows the Lever Nuts. One Nut for one side of the track. The other Nut is for the other side of the track. Using wire that is all red for one side of the track and one that is black or has a black stripe makes is easy to keep the wiring correct.
I have added two of the 16 AWG wire together and inserted in one section of the Lever-Nut when needed (the wire will fit but the insulation from the two wires will not).
To ensure good contact for the 28 AWG wire I cut the coating back three times as long and folded the wire in thirds (paper clip style) to give more contact points.
Putting the wire in a trench, the same needs to be accomplished for the Lever-Nuts. This is easy using a knife, just cut a square hole into the foam board. Next two pictures. Lower the Nuts into the hole. Take the top one eight of the foam square that was cut out and use it to cover the Nuts.
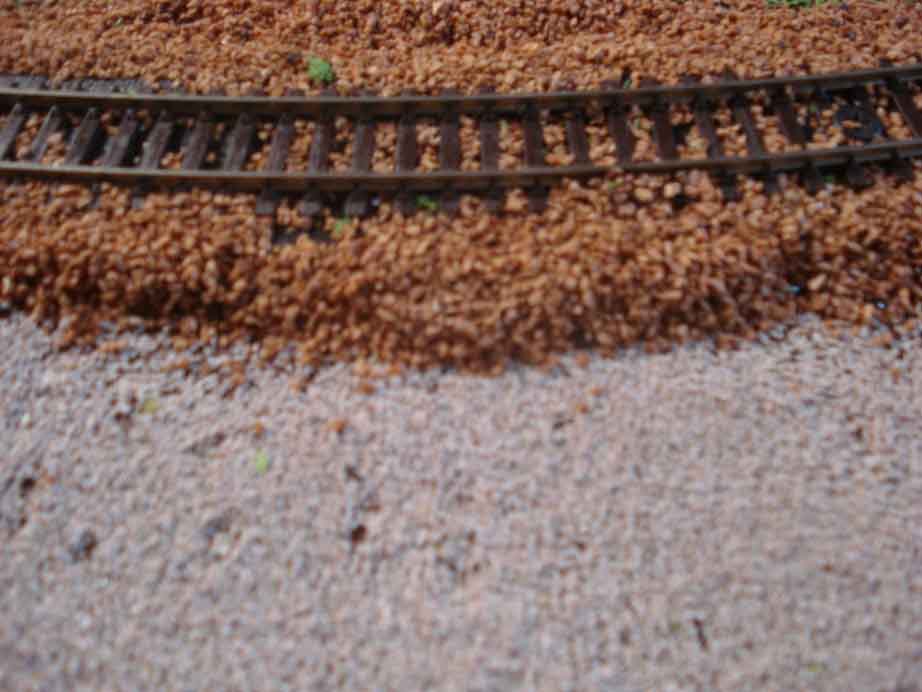
Finally ballast and ground cover as per normal.
The ballast I use is ground walnut shell I get from Harbor Freight for $30. It filled 25 of the standard ballast containers I would pay $14 for each. Do this in sections to make sure you did not break any connections. My sections are anywhere from three feet to nine feet as is convenient for the layout. Run the trains after each section is done to ensure you did not create a problem.
I have done this without any problems. Remember I ran the trains many times before the final modifications. And I am running the trains again and again with no more problems – well except cleaning dirty track rails first time around on each section.
Elevated sections – Run the wiring in trenches next to the elevation structure. Run feeder wires up the structure as needed. Hide the feeder wires to the rear and tack in place with hot glue. Or cover the upright (over the wires) with brick work paper or concrete paper from Al’s download files.
Now in the process of adding scenery and never once climbed under or passed wires under the layout. I am using the same techniques for all the wiring for lights in the buildings. This wiring is accomplished after the buildings are given a home and before associated scenery is installed.
Save the pain and strain on the back and neck, And only work on the wiring at the same level you lay track. Enjoy.
Lawrence”
Have a look at the comments below and you’ll see all about the fire risk, which is why I say, it’s a good idea in principle, but not in practice.
One comment stood out for me – Bob’s. So I asked him:
“If someone was determined to wire above the table / bench, how do you recommend they do it safely?”
And here’s Bob’s reply:
“Hi Al – I don’t have an answer, other than to leave it exposed. There are many methods to protect surface mounted wires in the construction world but none would work for our layouts. I don’t often criticize others’ work, I’m a “your railroad, your rules” modeler.
But electrical and fire safety are important so I felt I should comment.
Thanks,
Bob”
I want to thank Bob for taking the time to reply, and to all the others that have commented on this.
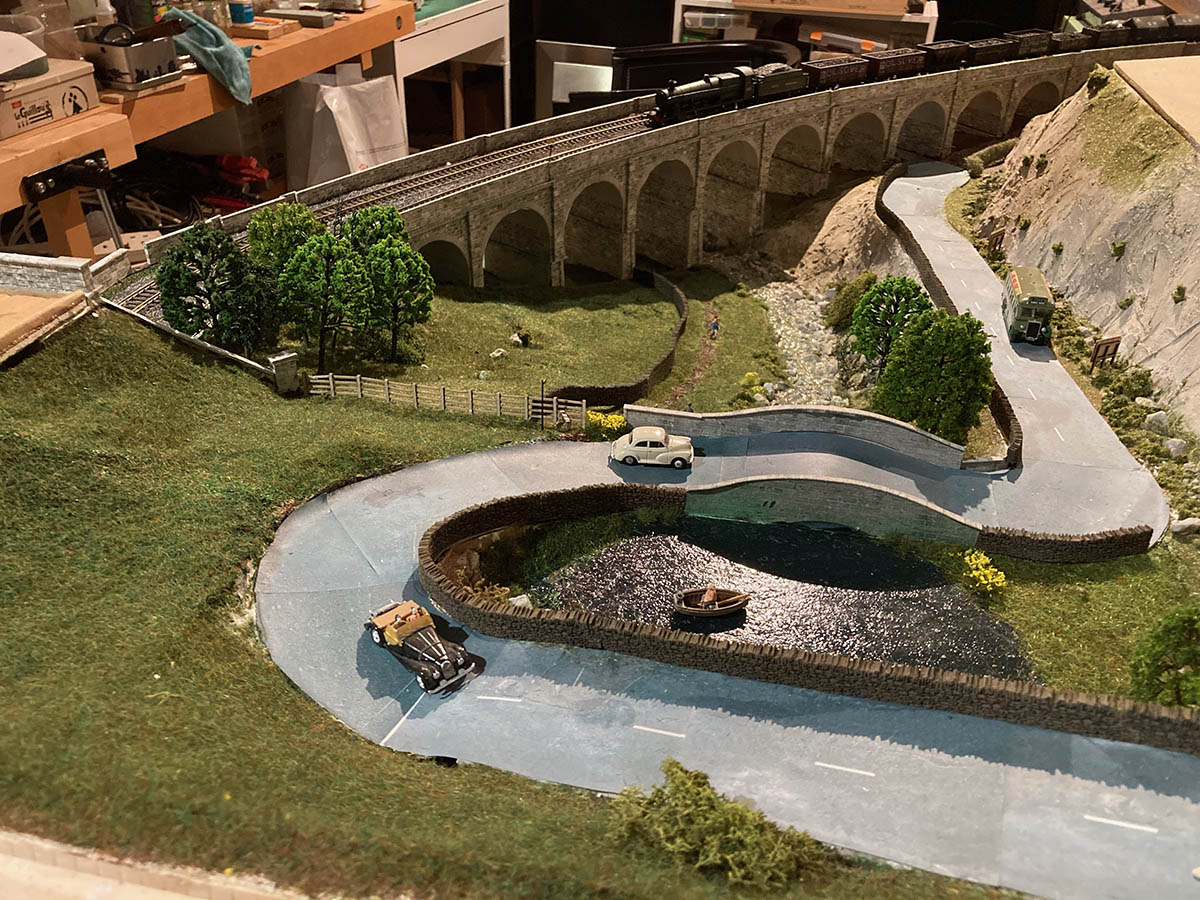
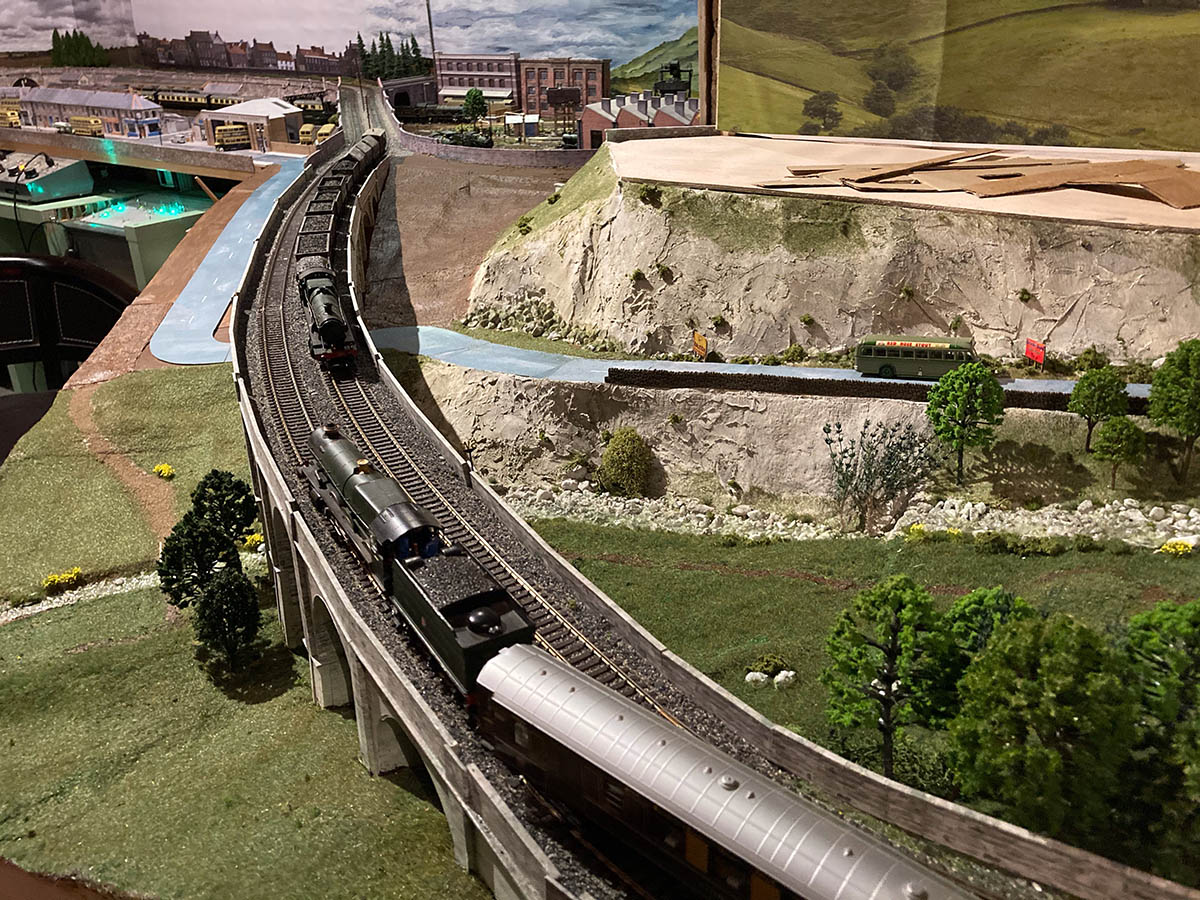
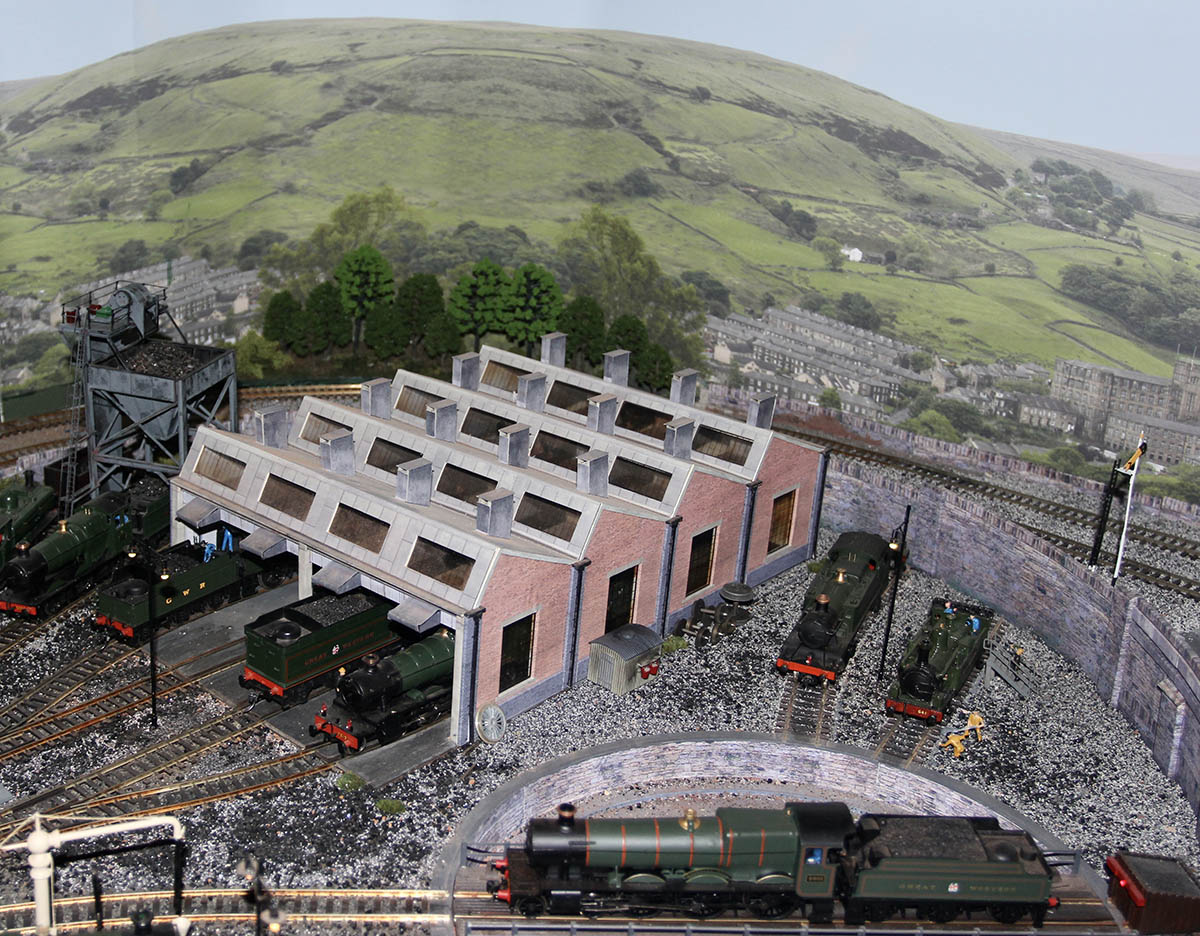
And now on to Peter who is making good use of his retirement:
“I have been enjoying your posts for a while and decided it was time for me share my efforts with you.
I rekindled my interest in railways when I retired 5 years ago and having a reasonable space in the garage dug out all my old models from 50 years ago and bought some new track.
Needless to say I still have lots to do but here are a few photos.
Peter”
A big thanks to Peter and Lawrence.
That’s all for today folks.
Please do keep ’em coming. It’s jolly quiet this end.
“Hi Al … just wanted to add some further comments on my Dog-bone layout … it was constructed of 2 x 4 wood framing with 3/8″ plywood table top surface …
the entire surface was covered with 3/16 ‘ cork (roadbed material) and painted green …
all Gargraves track was used with 054 and 042 curves … all switches are 042 …
the layout not highly detailed but meant to give the visual illusion of detail …
refined detailing can be added but right now I am just into running the trains …
the most complete layout I have ever had and still a work in progress …
will further advise on this layout and follow up on a layout I started a few years ago but had to temporarily abandon to finish off some attic space …
Bob … German TN … USA”
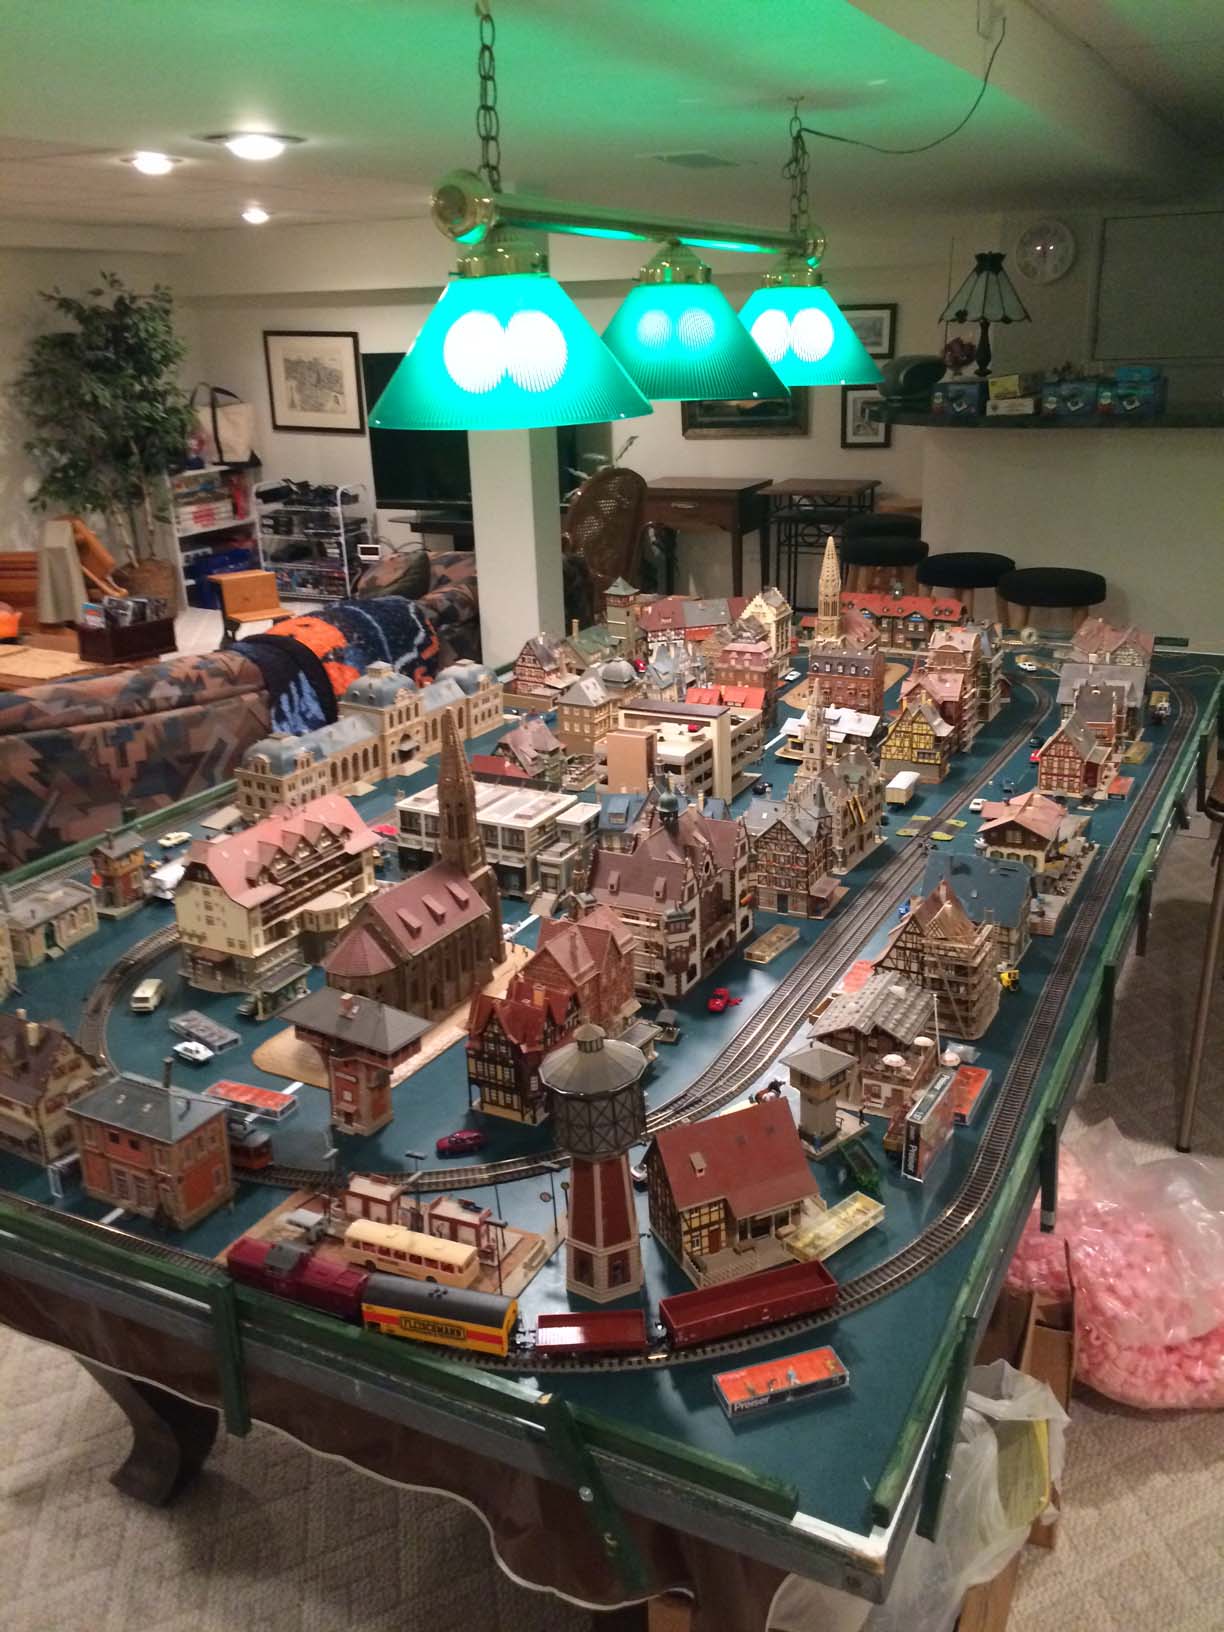
“Hello Al,
I appreciate your emails and all the information.
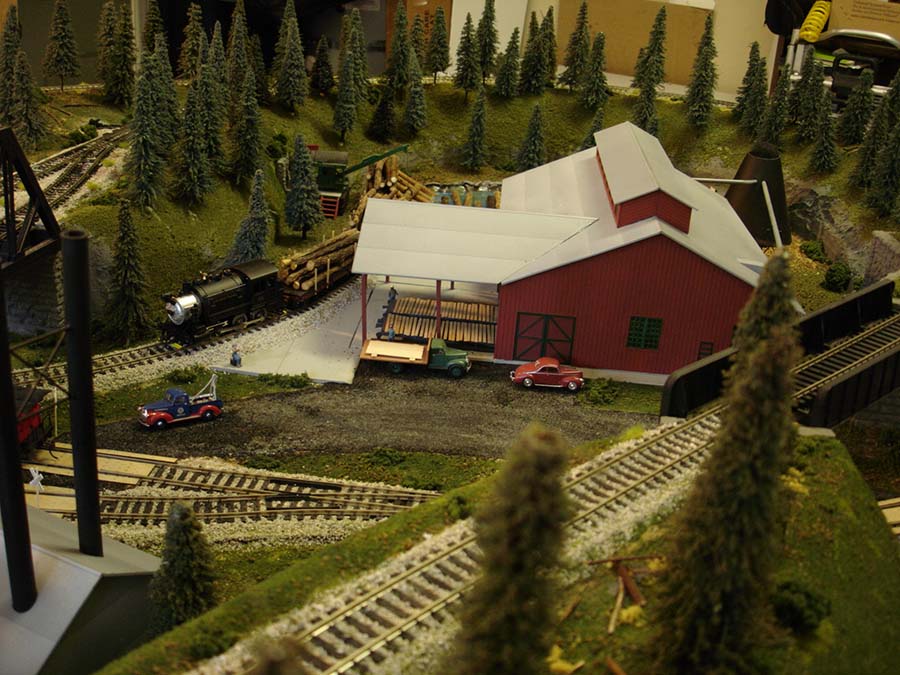
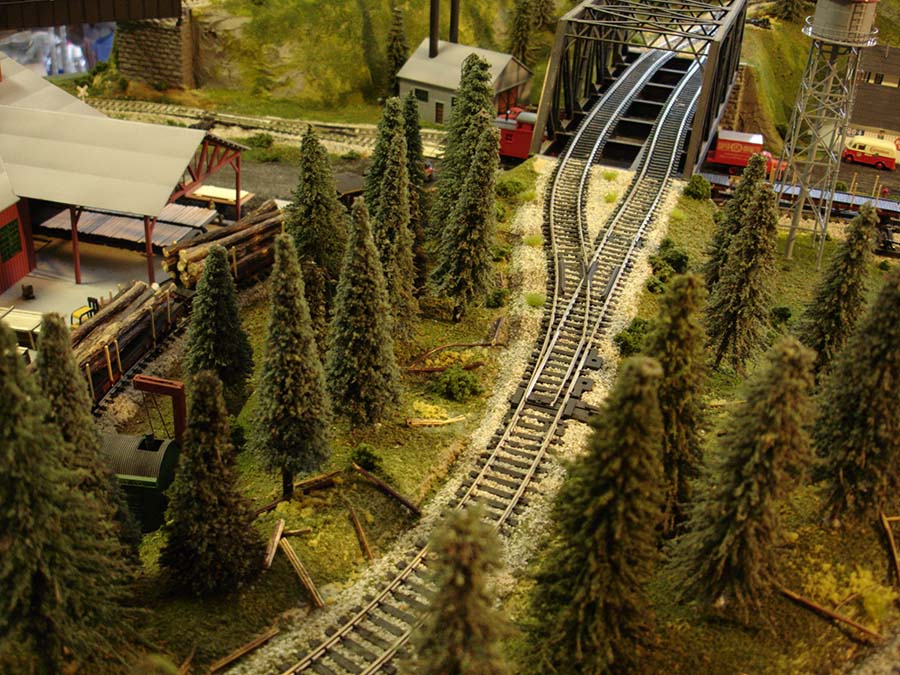
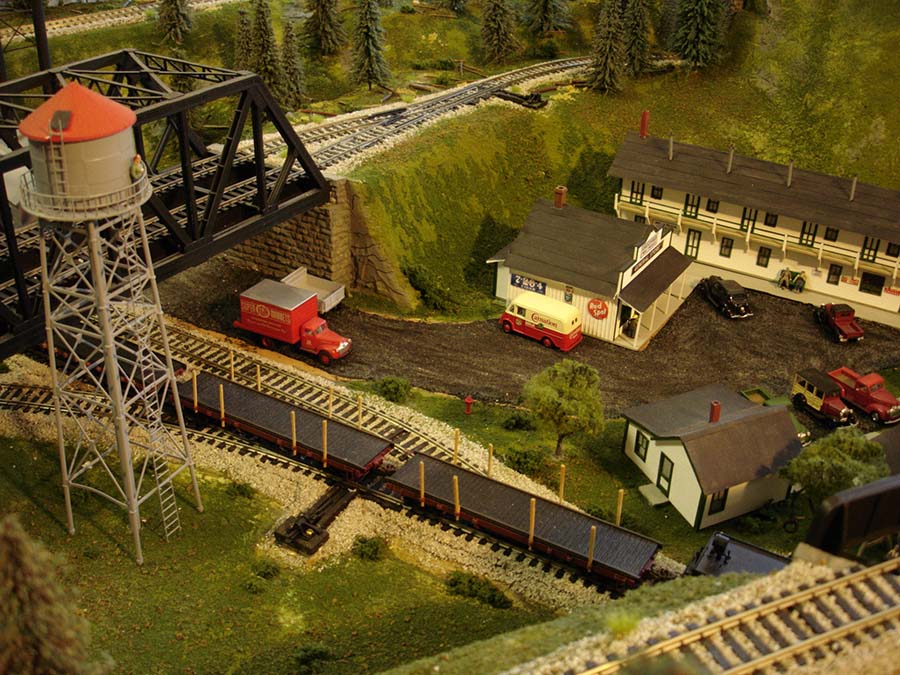
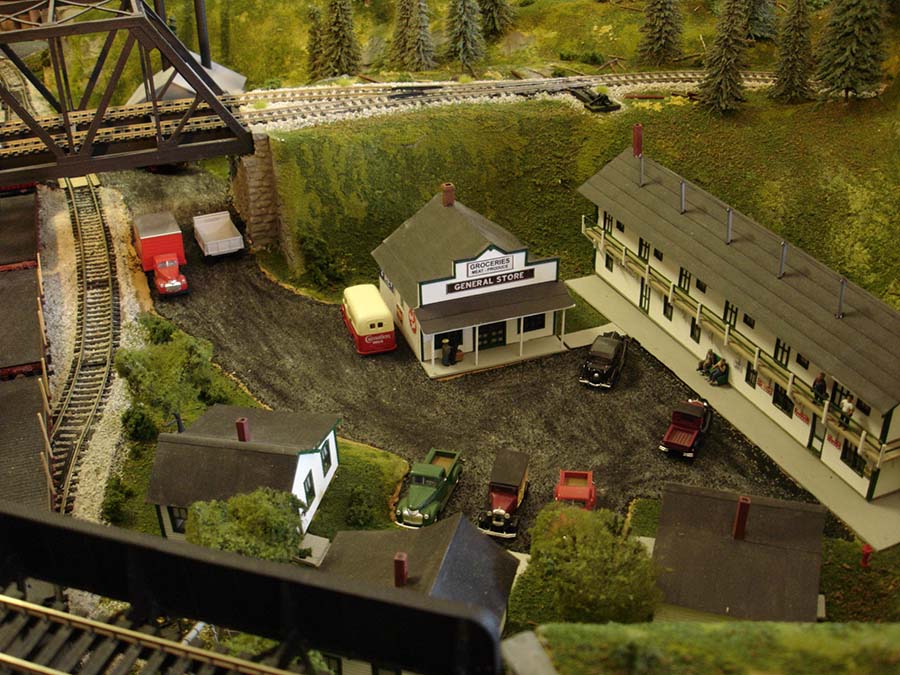
Over the past 35 years I have built almost 100 of these Buildings & accessories…..about 60 in this 4 x 8 layout.
Someday I hope to do a more detailed layout.
Best Regards
John”
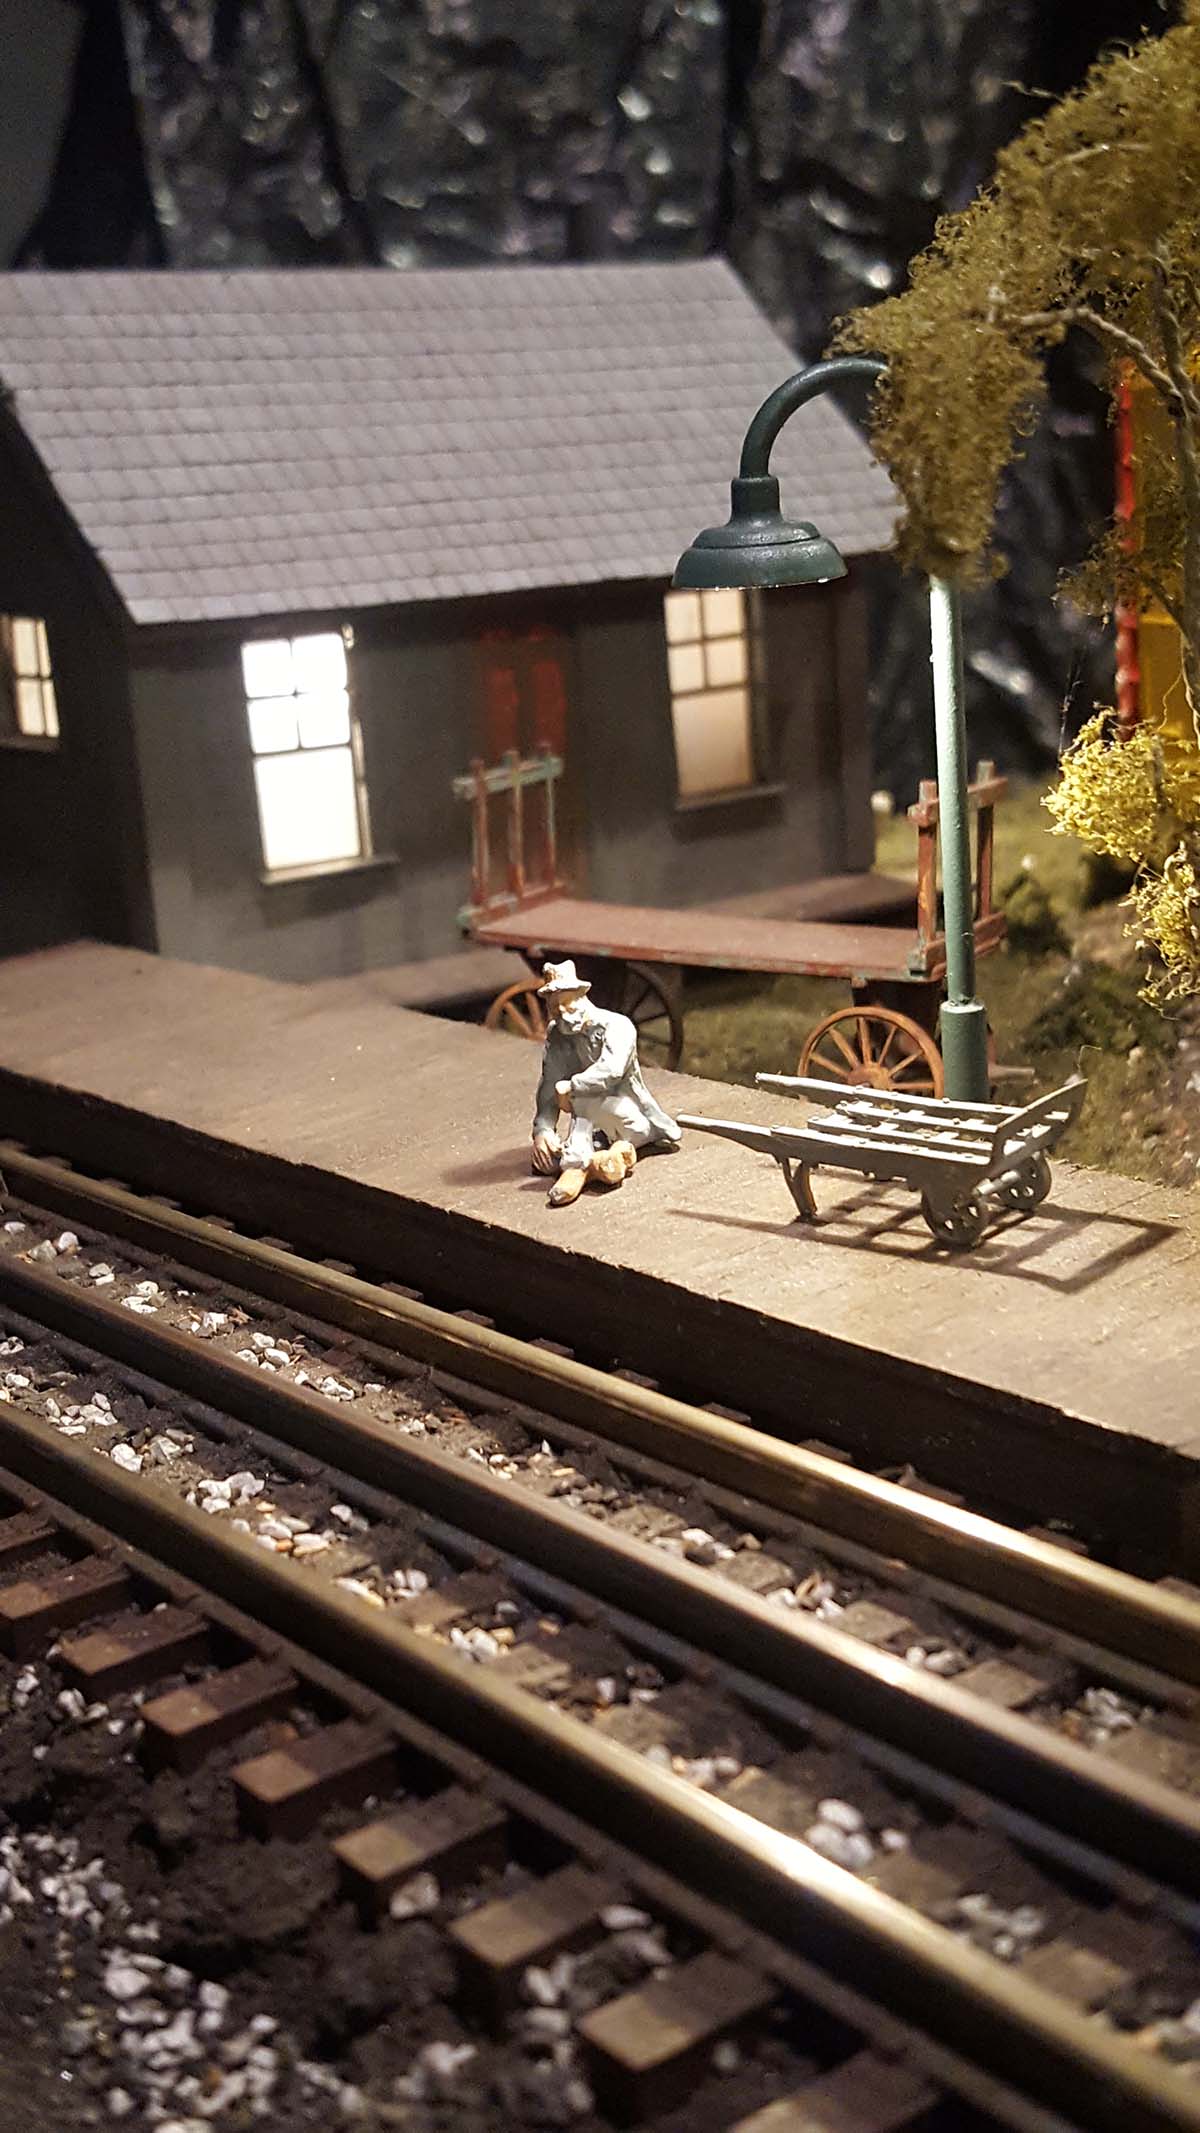
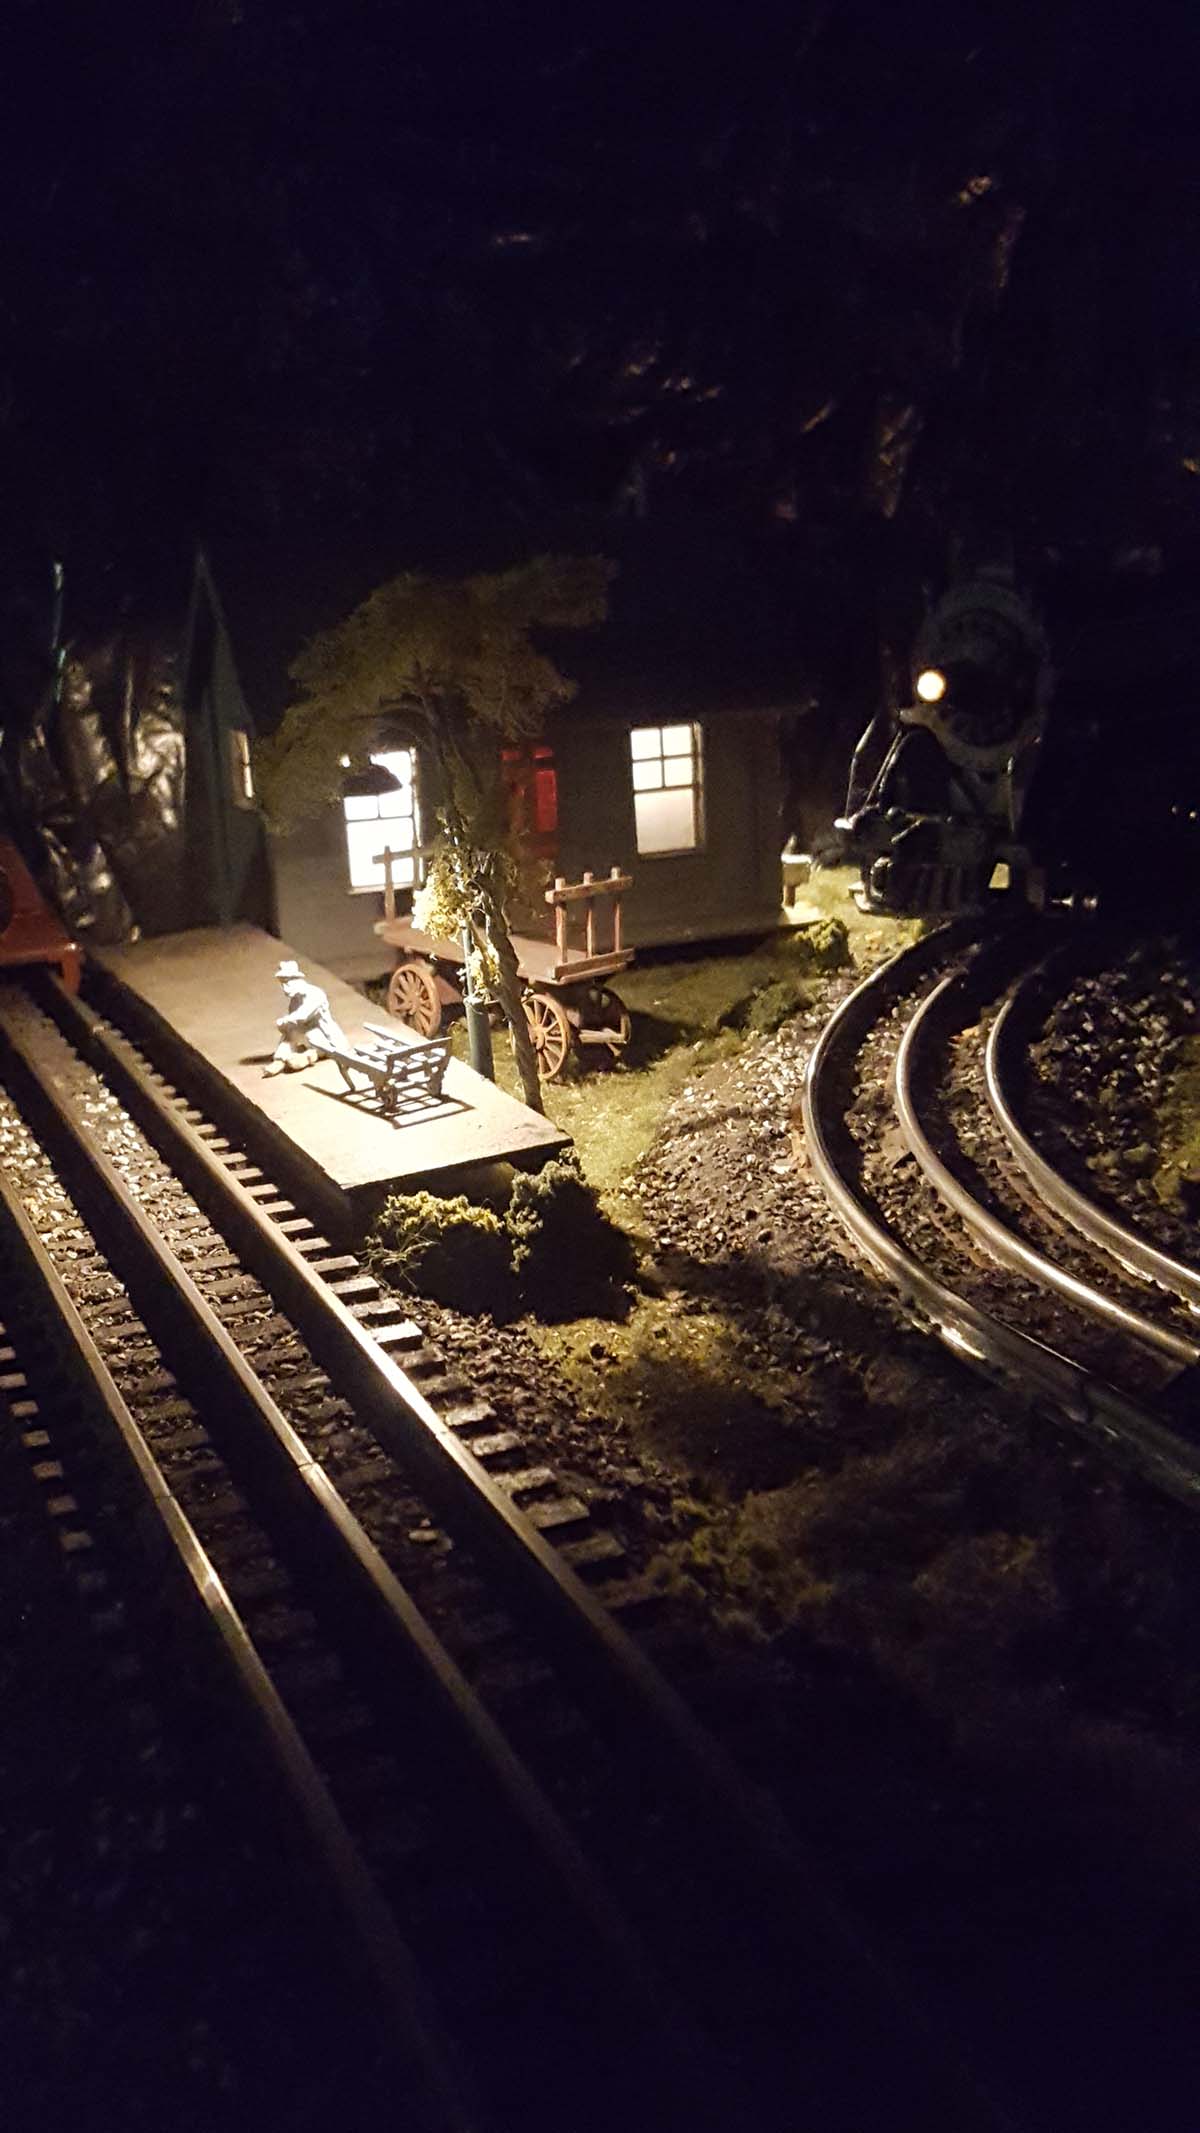
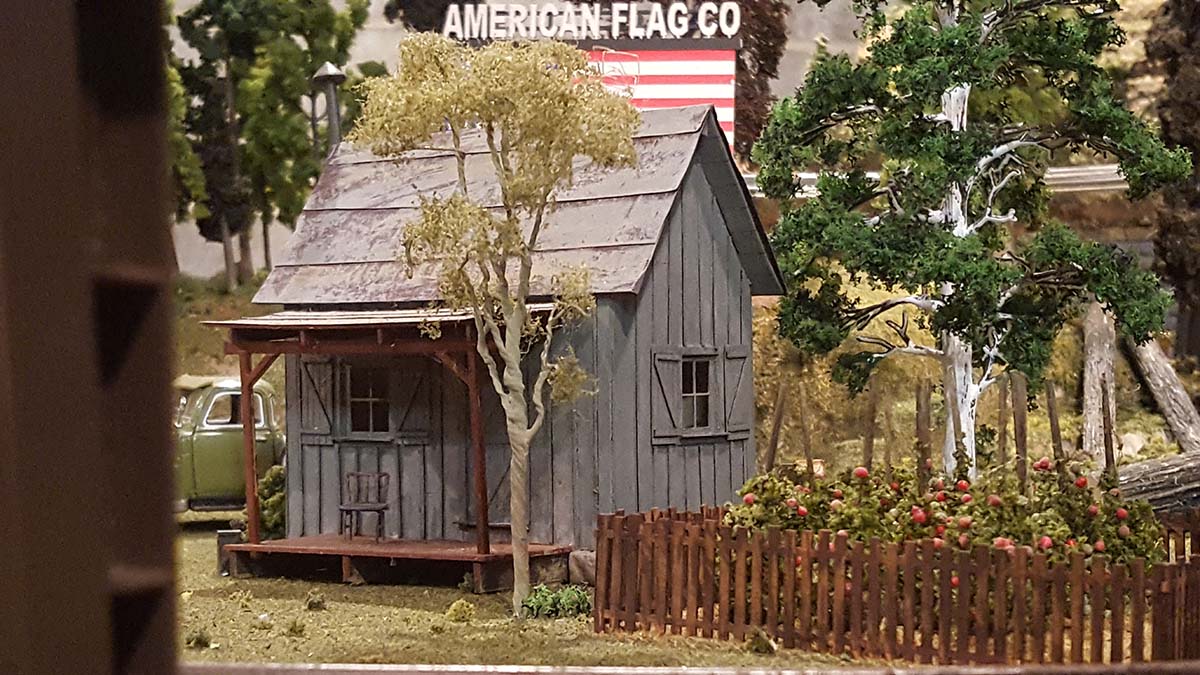
“All some very simple images.
The partial American flag image was from the American Flag Company that was destroyed when a pipe burst right over the layout.
I scratch built the depot station building as well as the loading dock. The cars and barrels have been rusted out.
Enjoy
George”
Now on to Dave:
“Hi Al,
just uploaded this video showing new sidings added to my layout (which is something we always need) but also showing a couple of good tips.
One is some wire connectors, found cheap on Facebook, but no screws so very easy to use, also becasuse my old soldering station broke, I purchased a new cheap one and found it did a very good job.
It has all the bells and whistles, on off switches and temperature gauge, came in a bag with soldering wire, electrical wire and few extras, all for about £16 ($20), nice to find a bargain these days.
Regards
Dave”
A big thanks to Bob, John, George and Dave.
That’s all for today folks, please do keep em coming because it is jolly quiet this end.